Field Masking Display
When your worksheet contains a large volume of contact information, this data can be crucial for enabling data-driven business optimization. At the same time, it is equally important to protect the privacy and security of personal information.
Field masking allows certain fields to be displayed in an encrypted form—either fully masked or partially masked based on custom rules. Users with appropriate permissions can decode the masked content while viewing or editing records.
Enable Field Masking
To enable masking (using a mobile number as an example), select the field and check "Mask Display" in the field properties panel on the right.
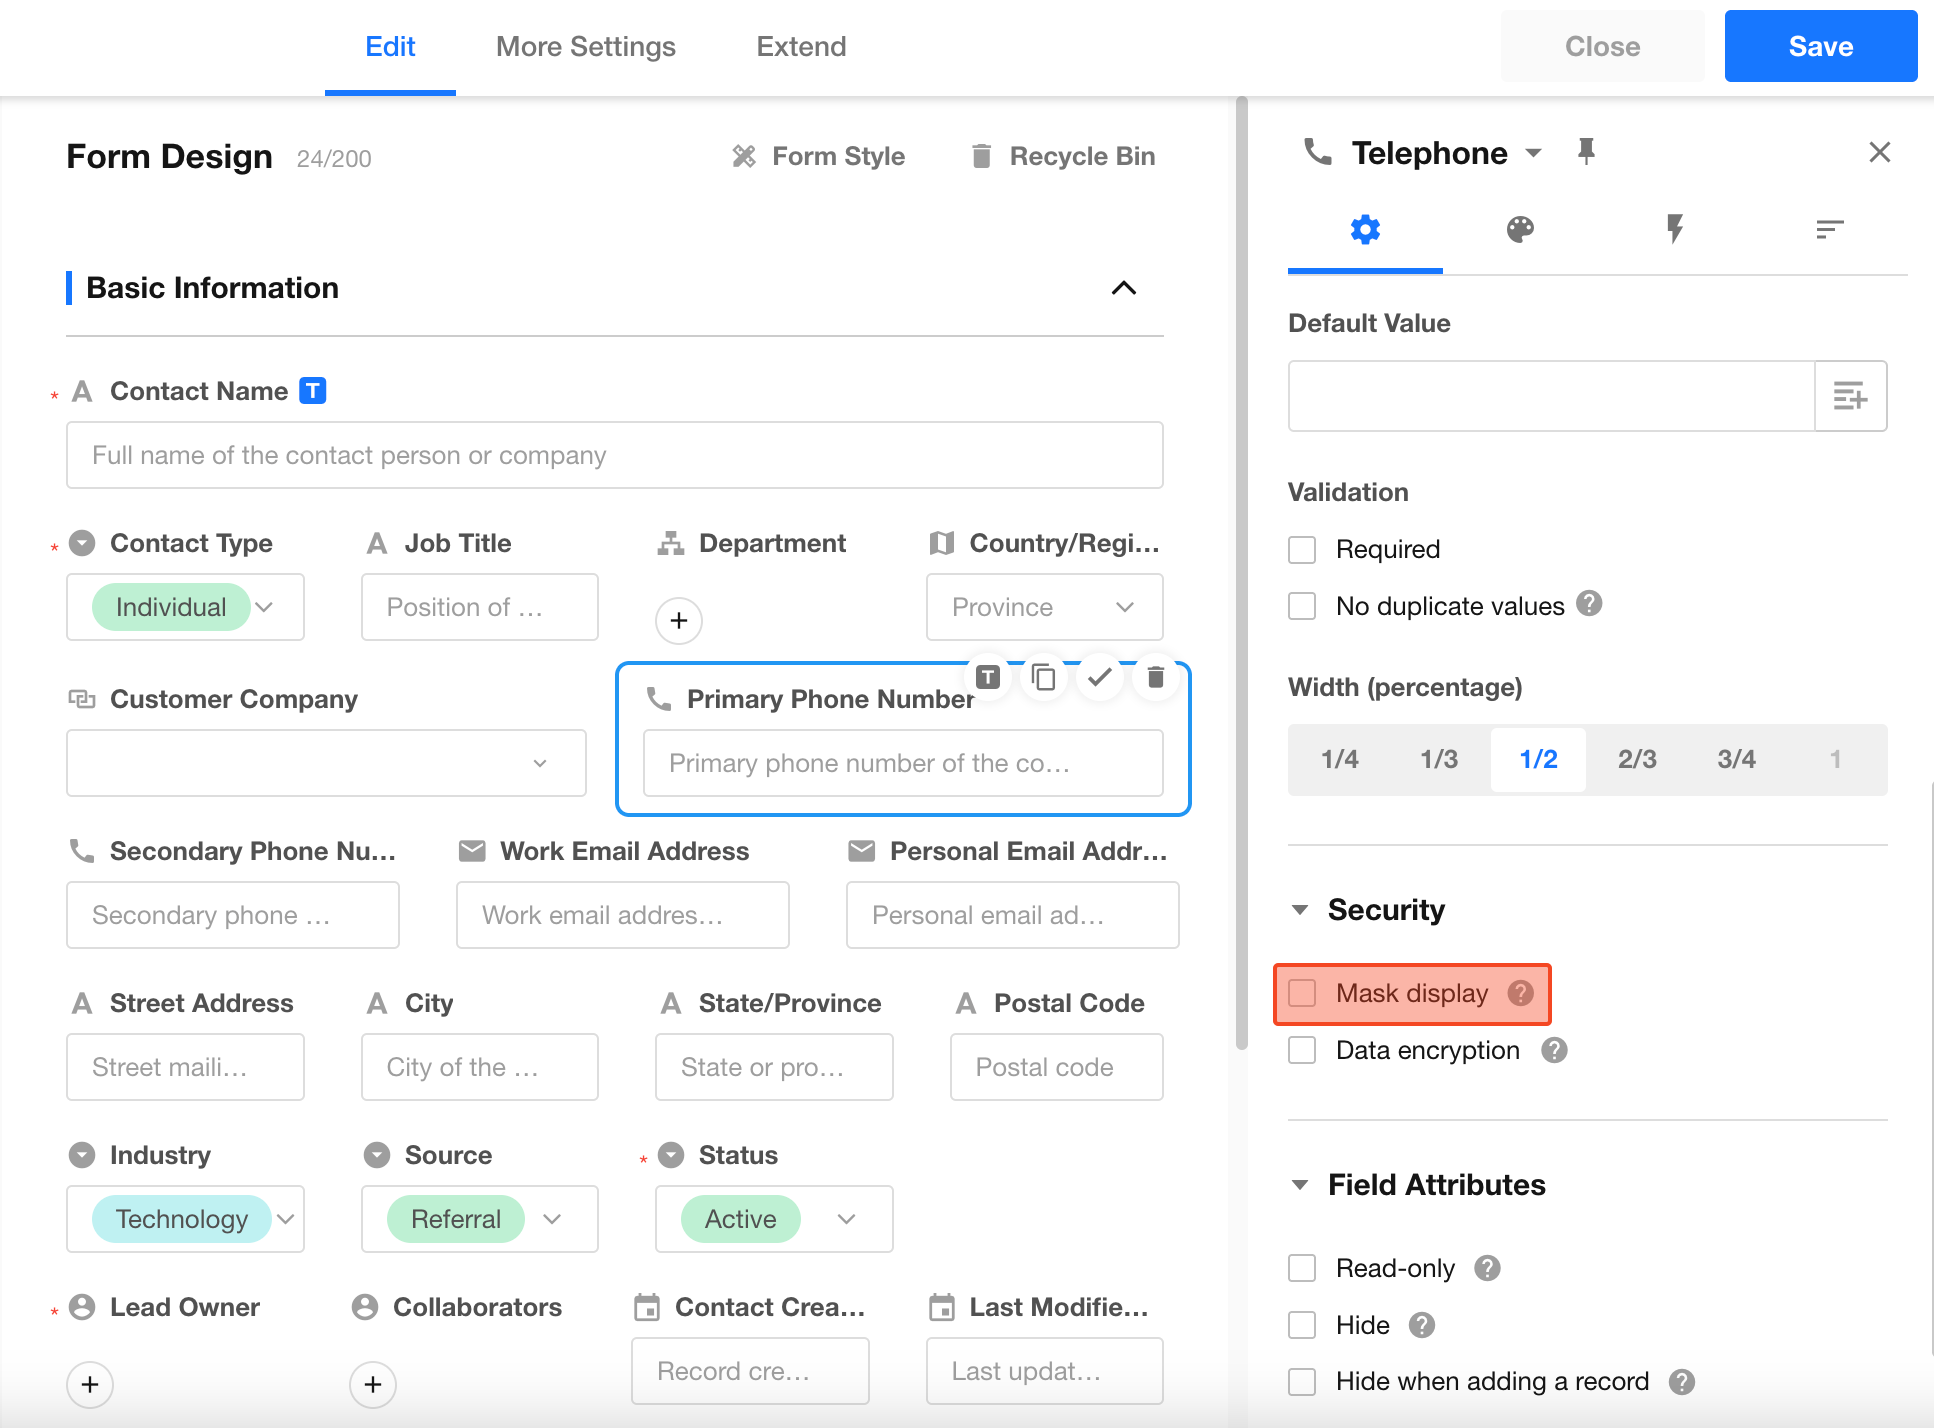
Supported field types for masking include:
- Single-line Text
- Number
- Currency
- Mobile/Landline
- ID Number
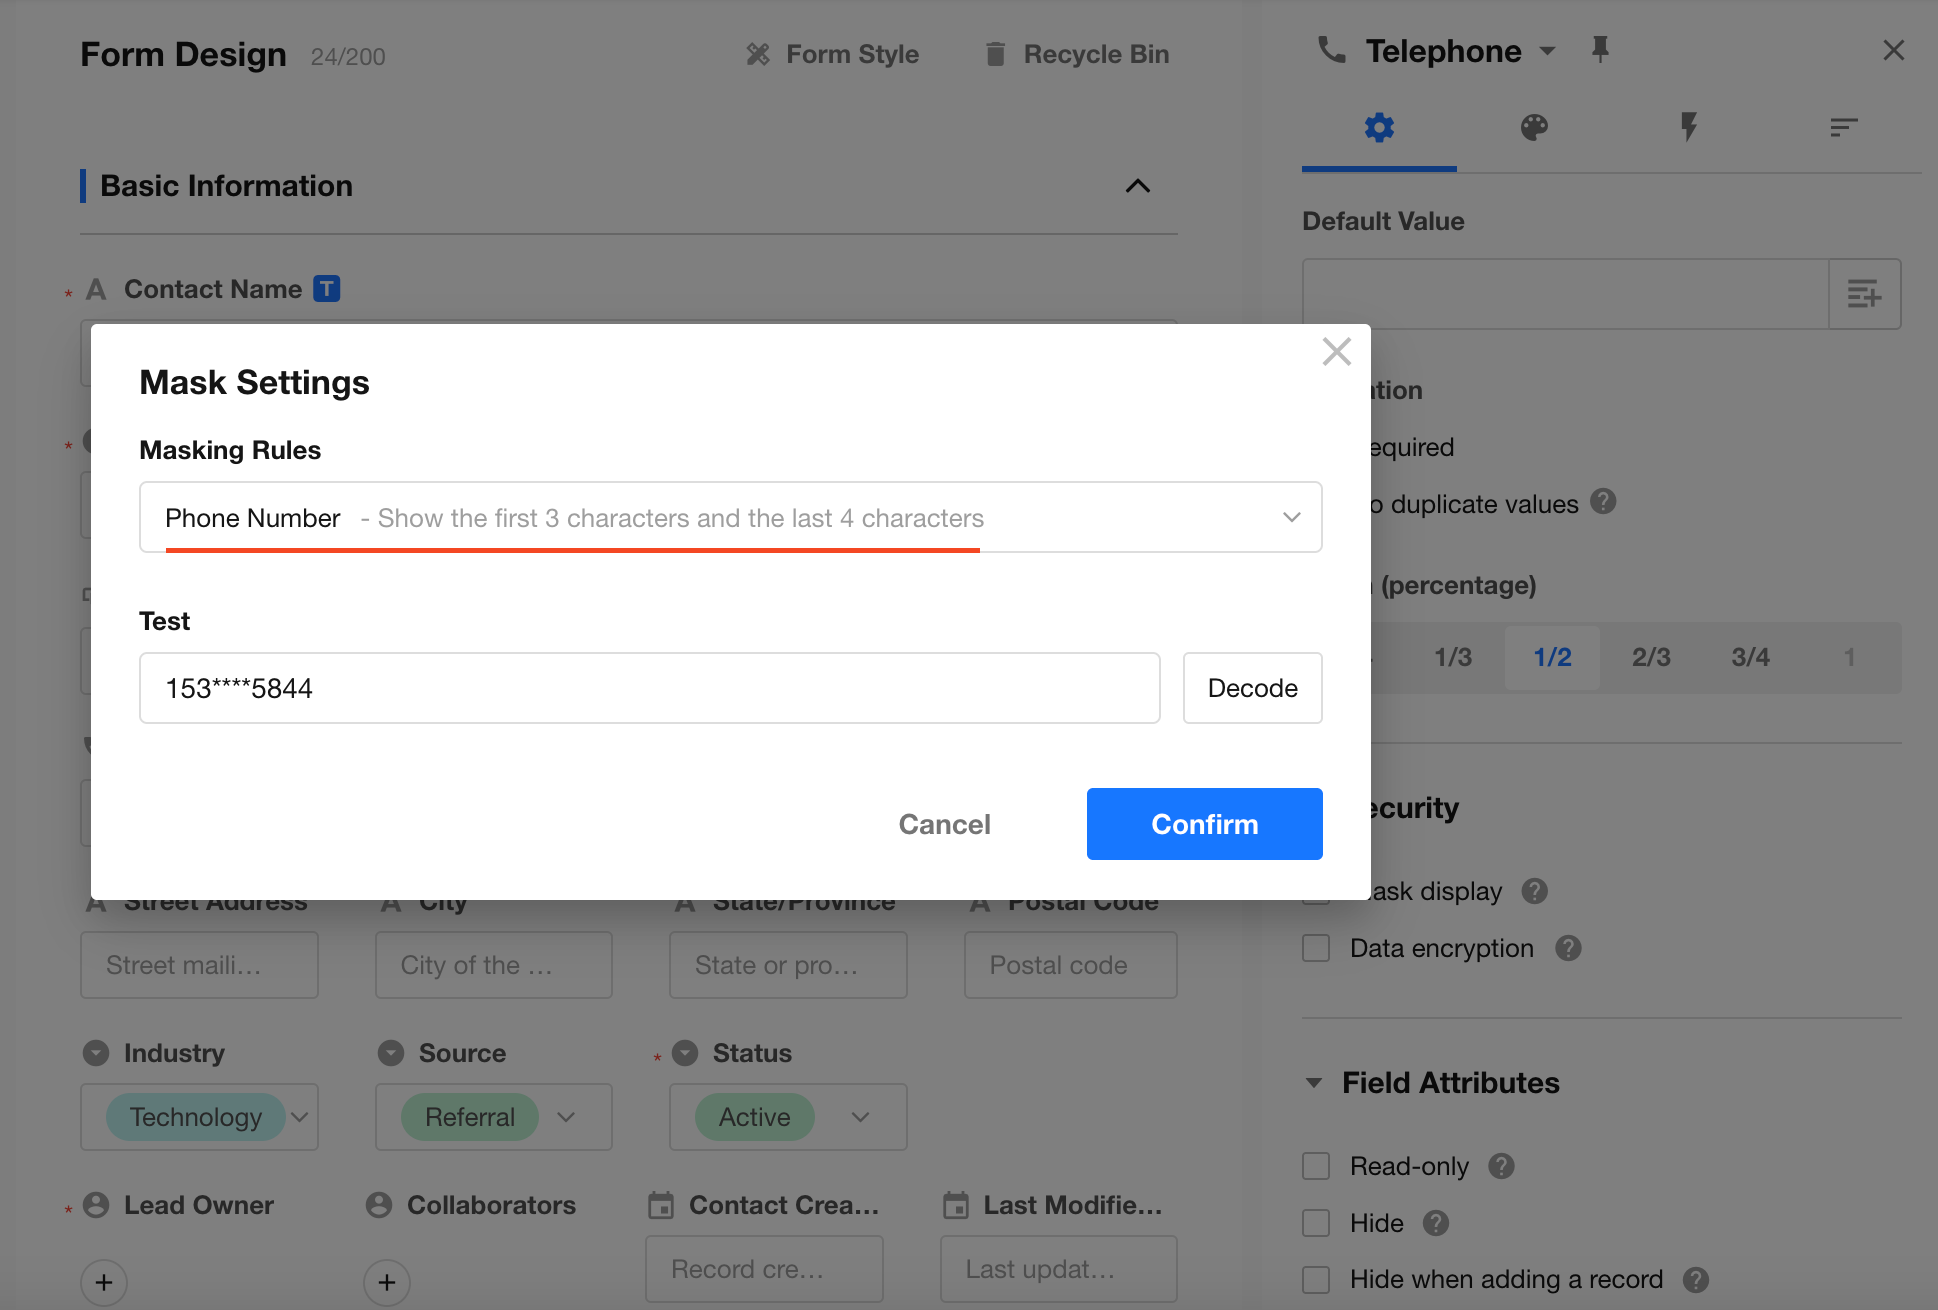
Configure Masking Rules
You can choose the masking rule that fits your business needs. The supported options are:
- Fully Masked
- Preset Masking Rule
- Custom Masking Rule
Once you've selected a rule, enter a test string and click the "Mask" button to preview the effect. If the result looks correct, click Confirm to save the configuration.
Custom Masking Rules
If the built-in masking rules do not meet your business requirements, you can define custom masking rules.
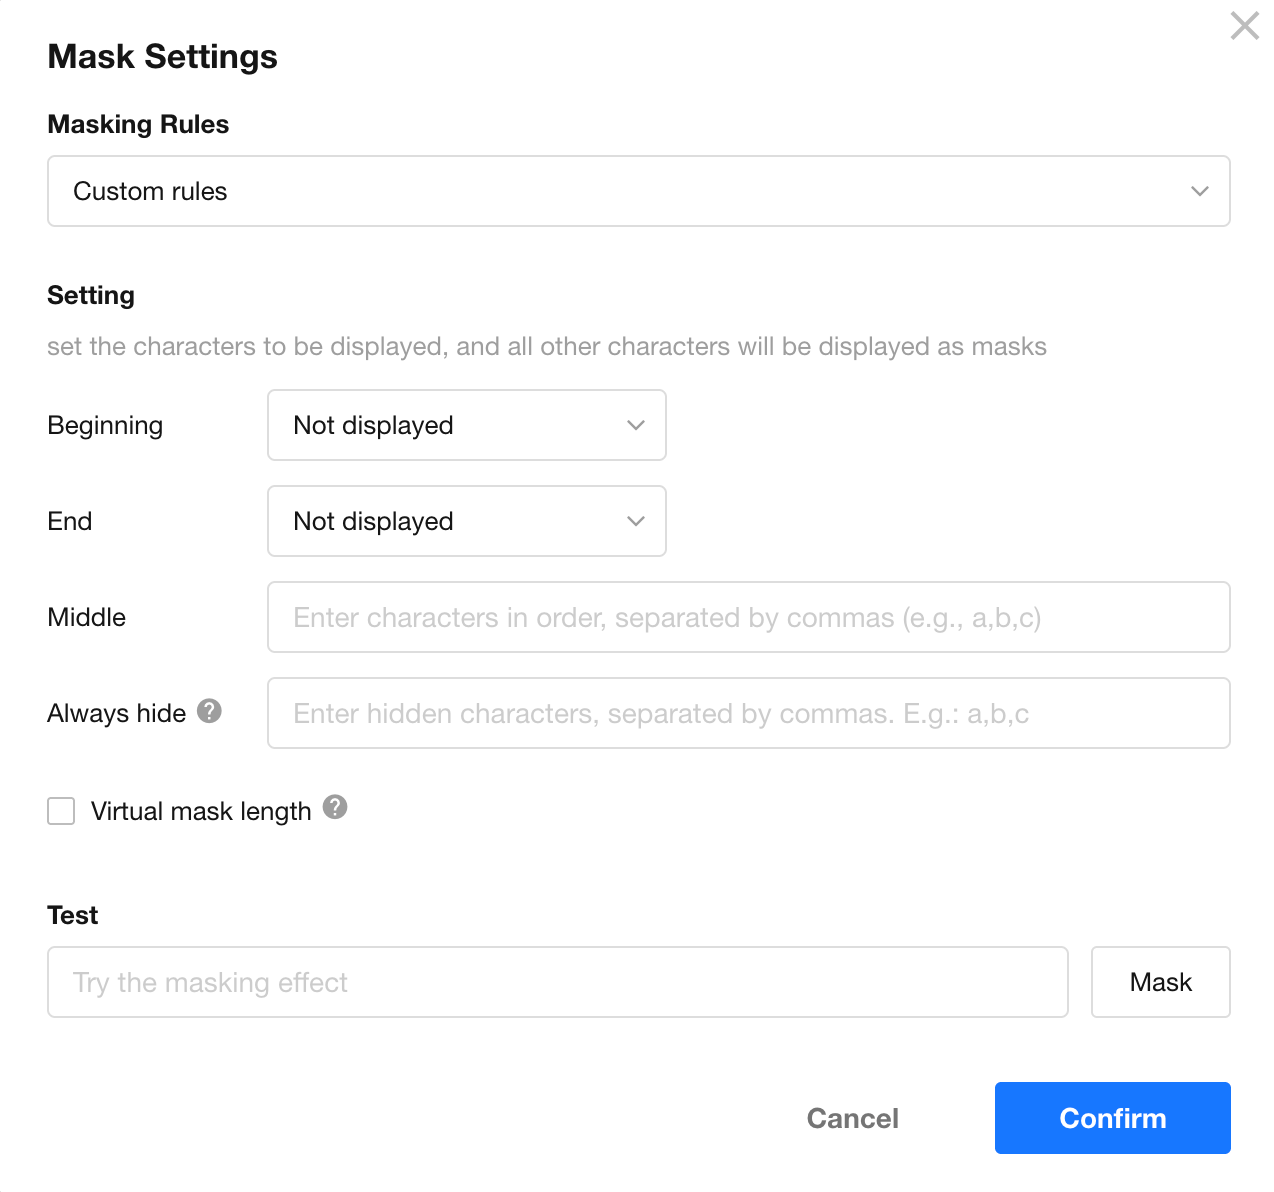
A custom masking rule consists of four components:
- Start Characters to Display
- End Characters to Display
- Middle Characters to Display
- Always-Masked Keywords
Priority Rule:
Always-Masked > Start Display > End Display > Middle Display
Middle Characters to Display
In addition to start and end characters, you can specify extra characters to reveal in the middle of the value.
Example:
Virtual Mask Length
To prevent revealing the actual length of a value, you can enable virtual length masking. This forces the mask (*) to appear in a fixed number of characters.
Example:
Original text: 1a22b333c
With virtual length set to 2 characters:
Masked result: **

Always Mask
App admins can define specific keywords that should always be masked, offering a finer level of control over sensitive information.
-
Priority Rules:
- Keywords masking takes precedence over all other display rules (start display, middle display, and end display).
- Even if the keyword appears within visible start or end characters, it will still be masked.
-
Multiple Keywords Supported:
- Use English commas
,to separate multiple keywords.
- Use English commas
-
Matching Logic:
- Exact match required. Only values that match the keyword exactly will be masked.
- Case-sensitive; fuzzy or partial matches are not supported.
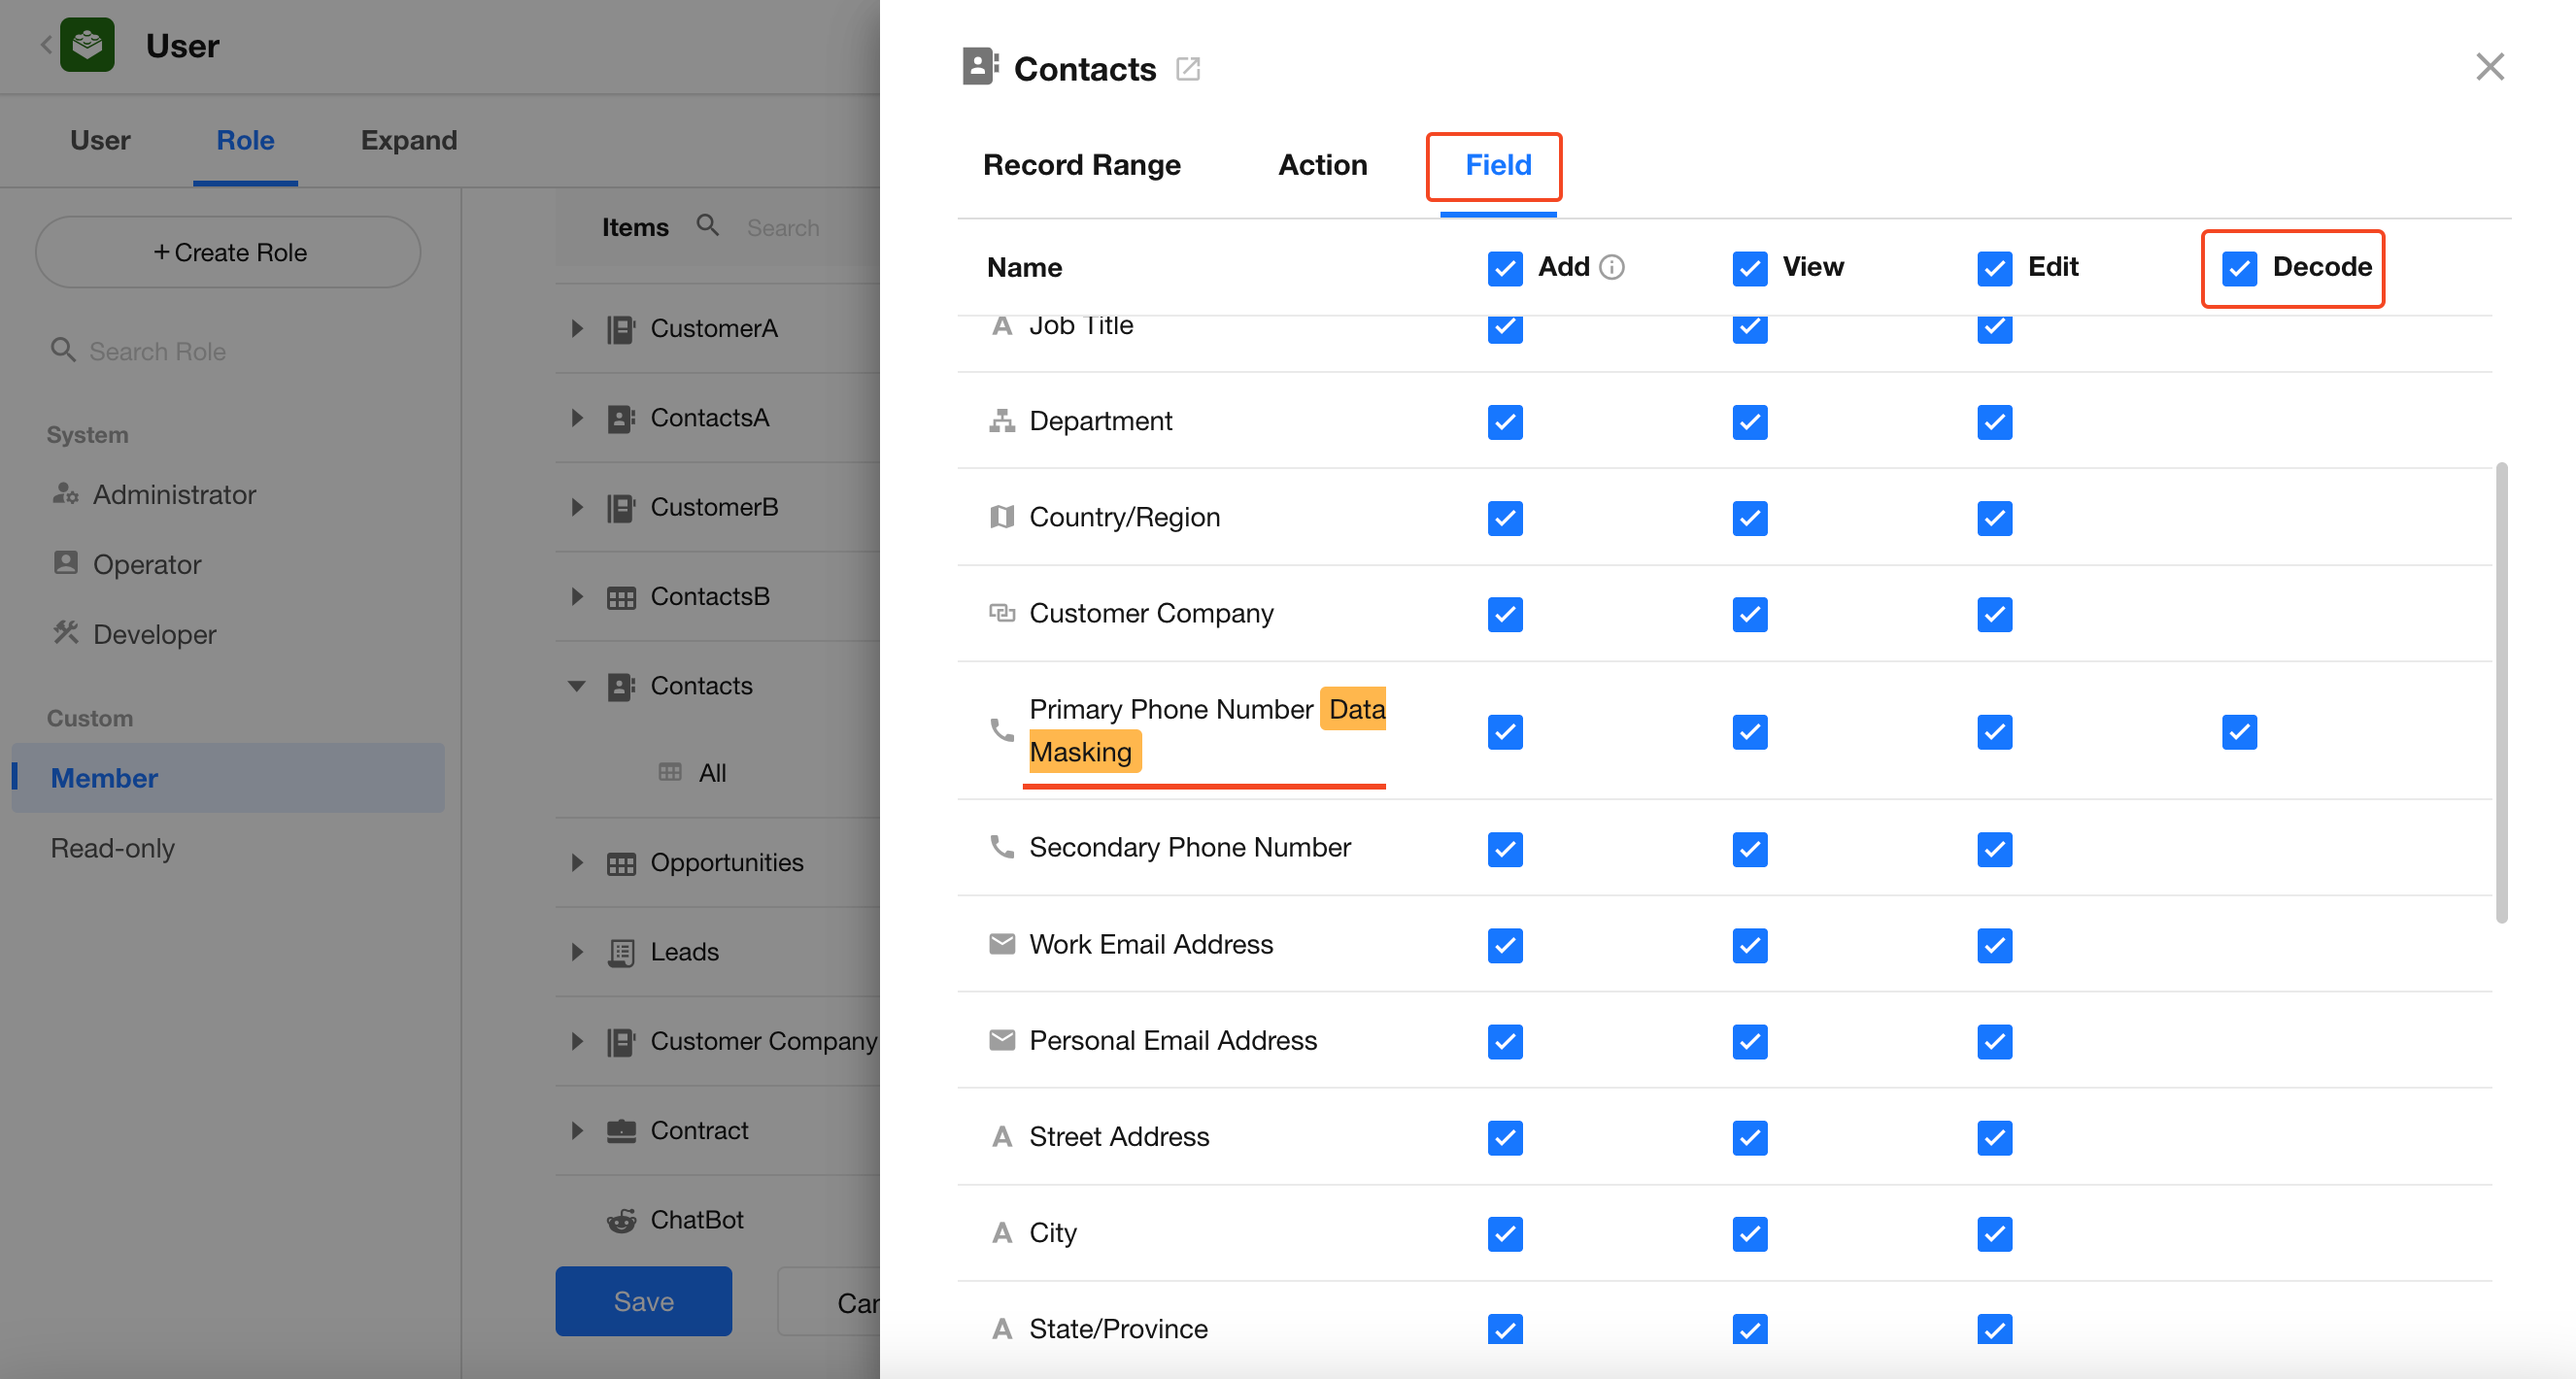
Decode Permissions
-
App admins can always decode masked fields.
-
Regular users follow permission configurations.
If a field in a worksheet has masking enabled, the field-level permissions panel will show a masking settings section.
Decoding Behavior
- Users with decode permission can click on the masked text to reveal it (including in custom actions (fill in), or in approval/fill in workflow nodes).
- Users with edit access to the field will see the original value when entering edit mode, regardless of decode permission.
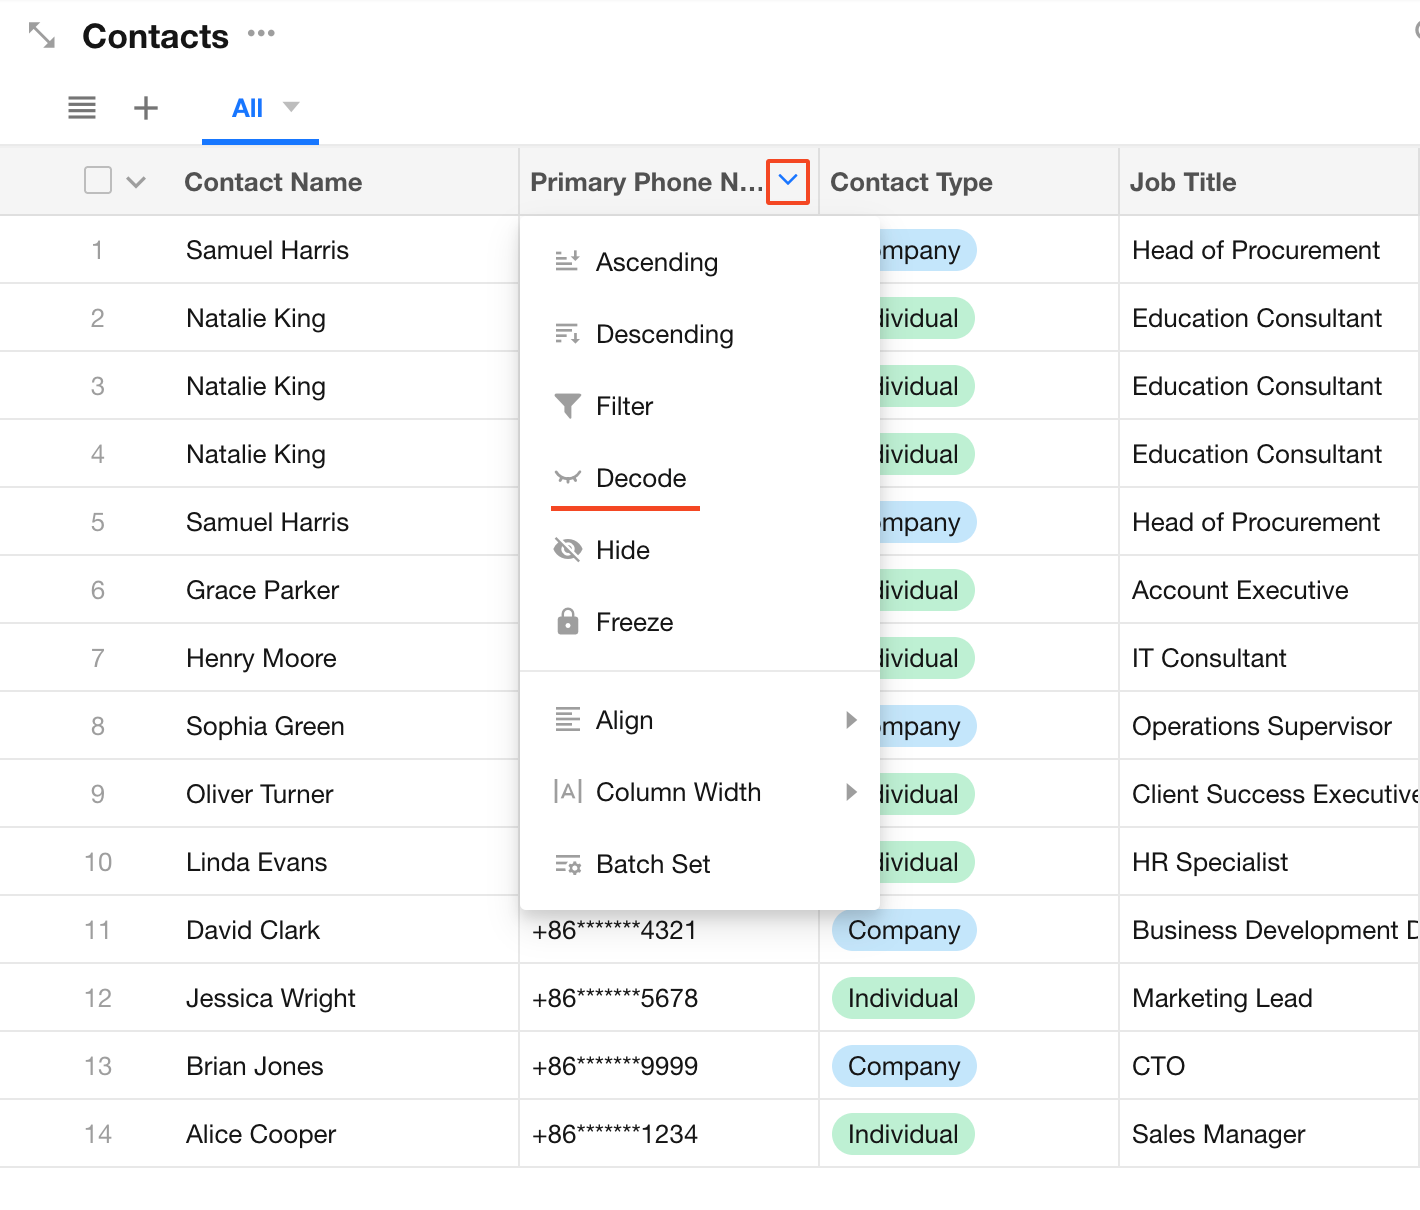
- In the table view, users can decode by clicking the column operation menu.
Always-Visible Values
In certain scenarios, the original (unmasked) values are always shown to maintain data integrity and accuracy:
- Data exports
- Word/Excel template print
- API calls
- Data synchronization
When Decoding Is Not Supported
-
When users lack decode permissions, or in public sharing/fill-in scenarios such as:
- Public forms
- View sharing
- Record sharing
- Public queries
- Workflow “Get Link” node
-
During system printing, if the value is displayed as masked, decoding is not supported.
-
In statistics charts, masked values cannot be decoded.
-
In dropdown menus showing related records, decoding is not available for masked values in display and selection lists.
-
In calendar or Gantt views, masked title fields are not decodable.
Was this document helpful?