Basic Operations on Worksheets
After creating a worksheet, the following common operations are available:
- Redesign the worksheet
- Modify the worksheet name, icon, and description
- Customize the record name
- Duplicate, delete, and restore the worksheet
- Move the worksheet to a group
- Reorder and hide the worksheet
- Manage worksheet groups
- Collapse or hide the left-side worksheet navigation
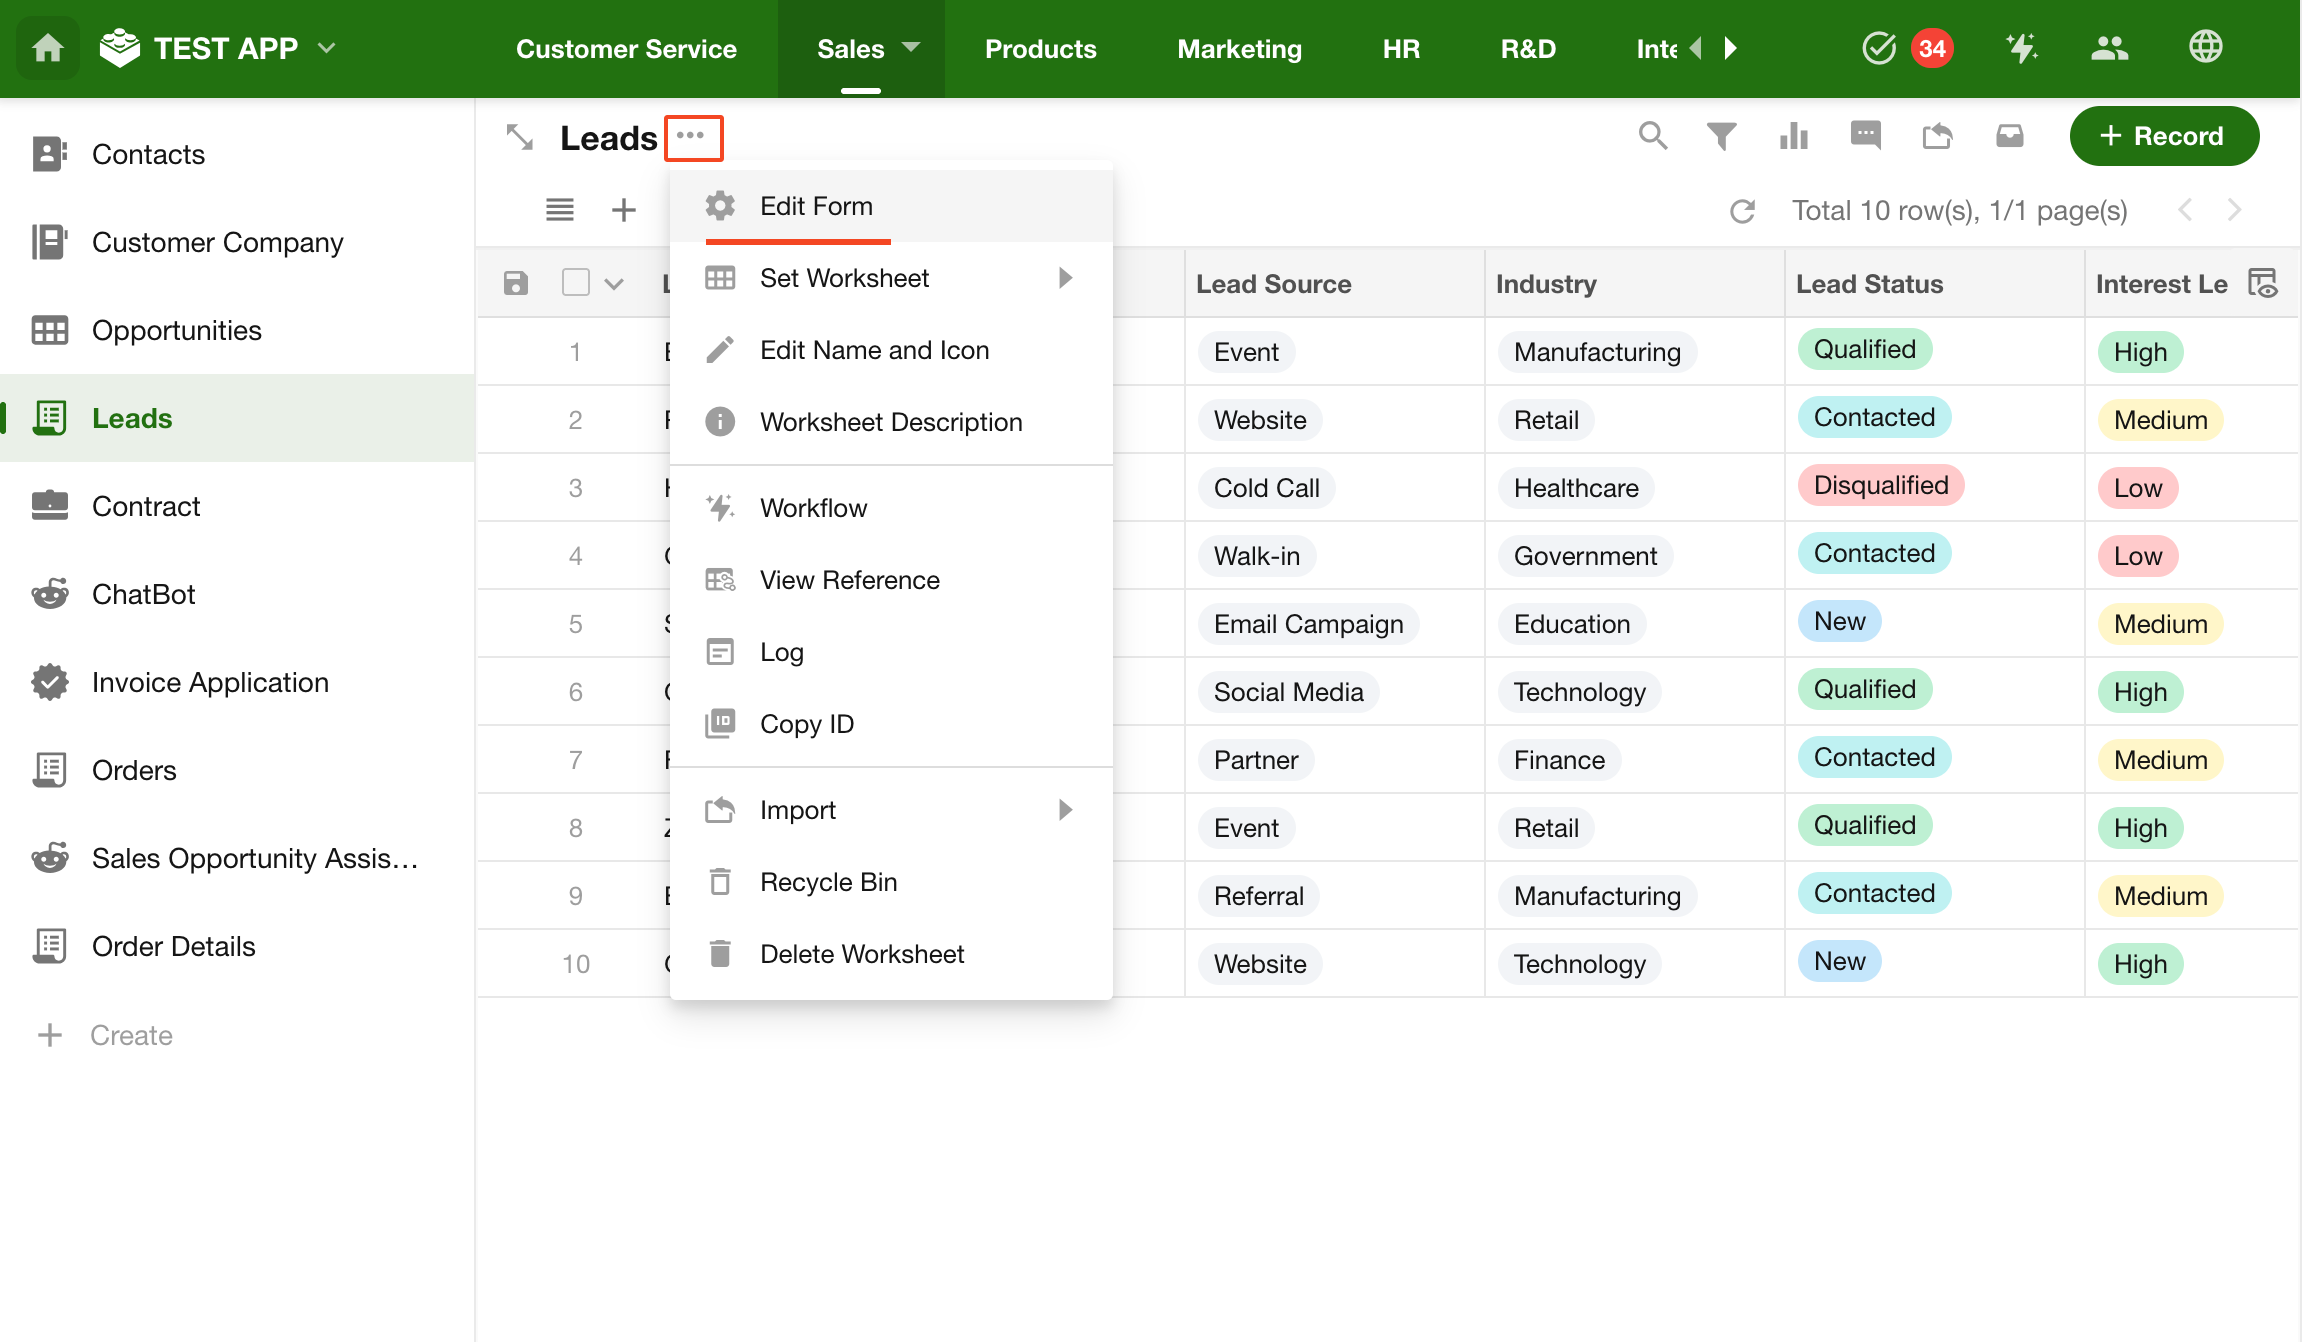
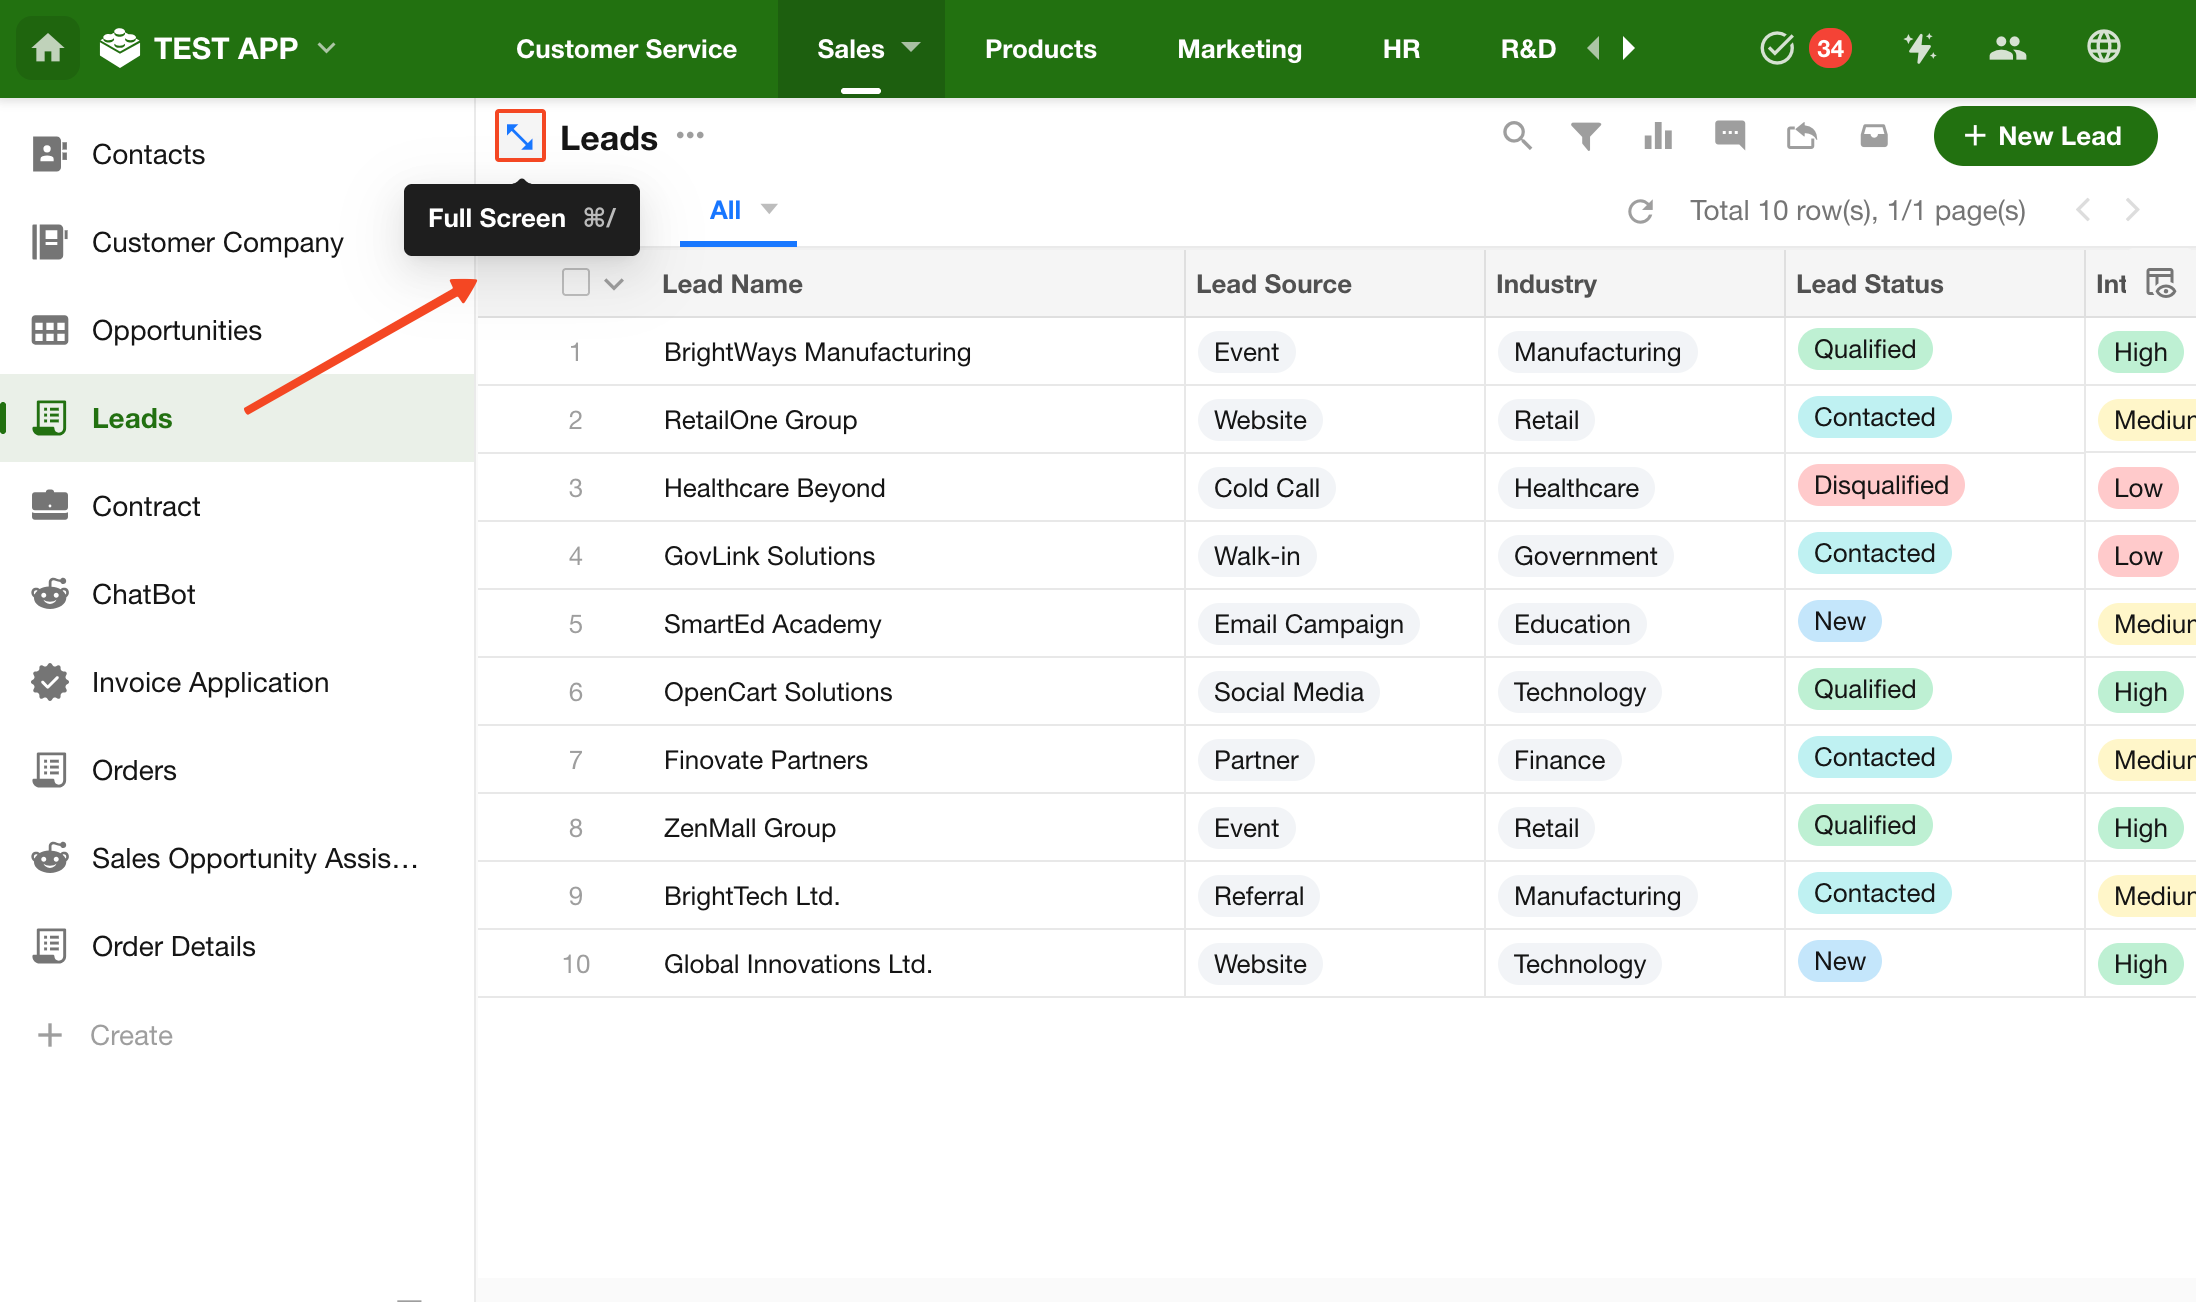
1. Redesign the Worksheet
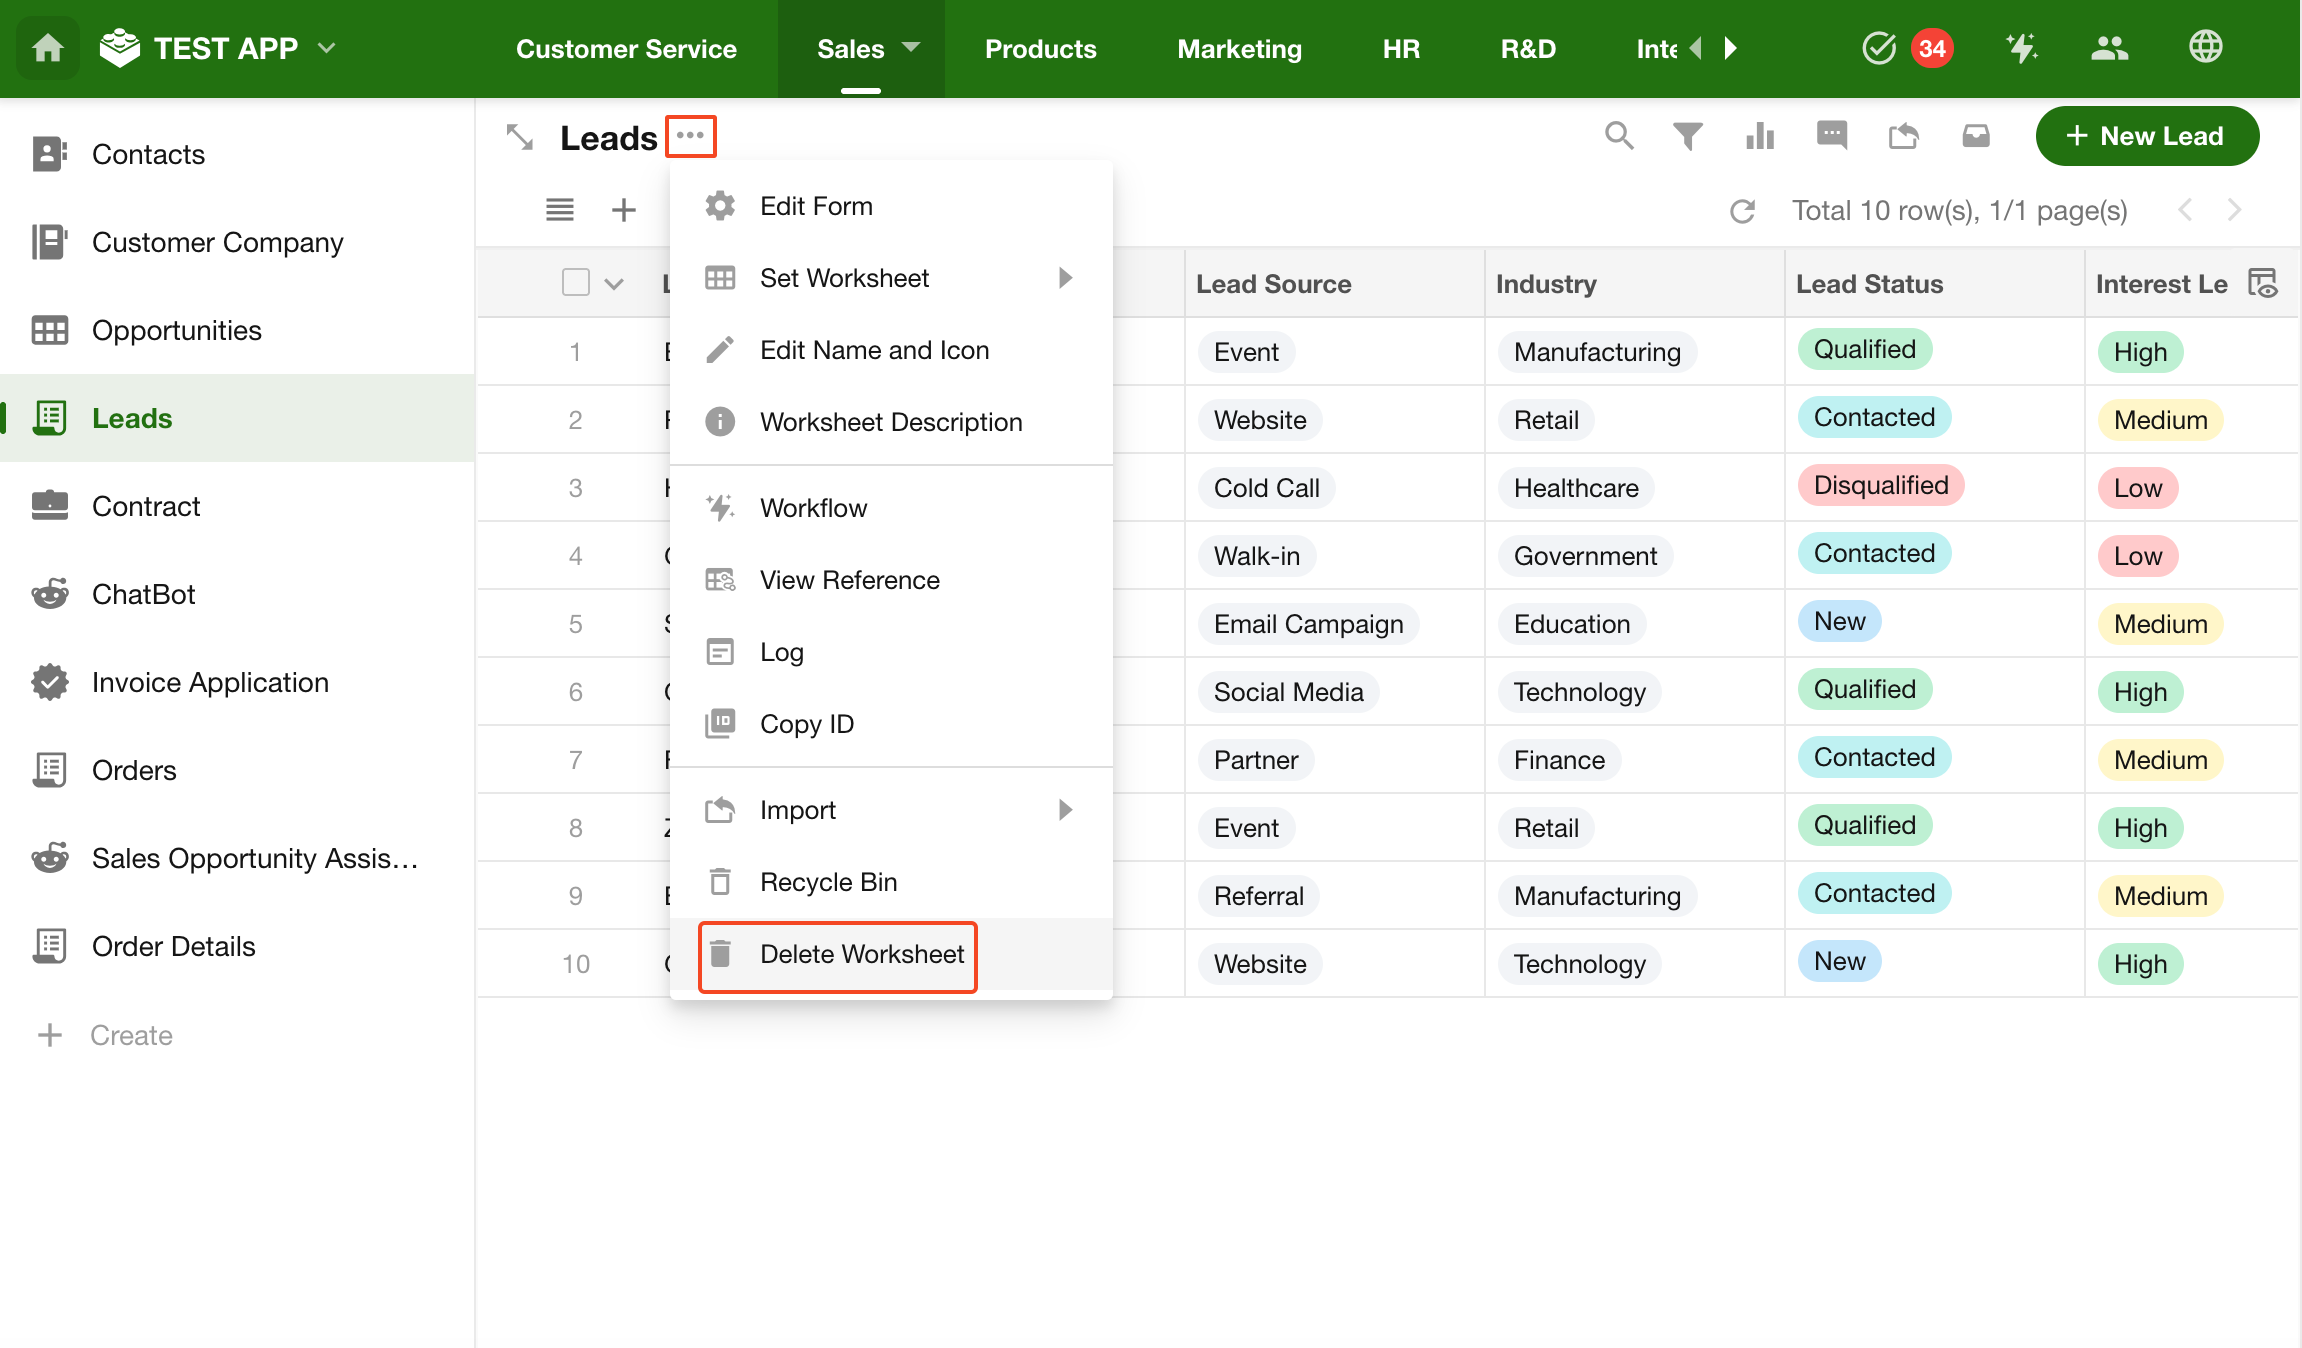
Click the More button next to the worksheet name and select Edit Form to enter the design page.
Learn more about designing worksheets
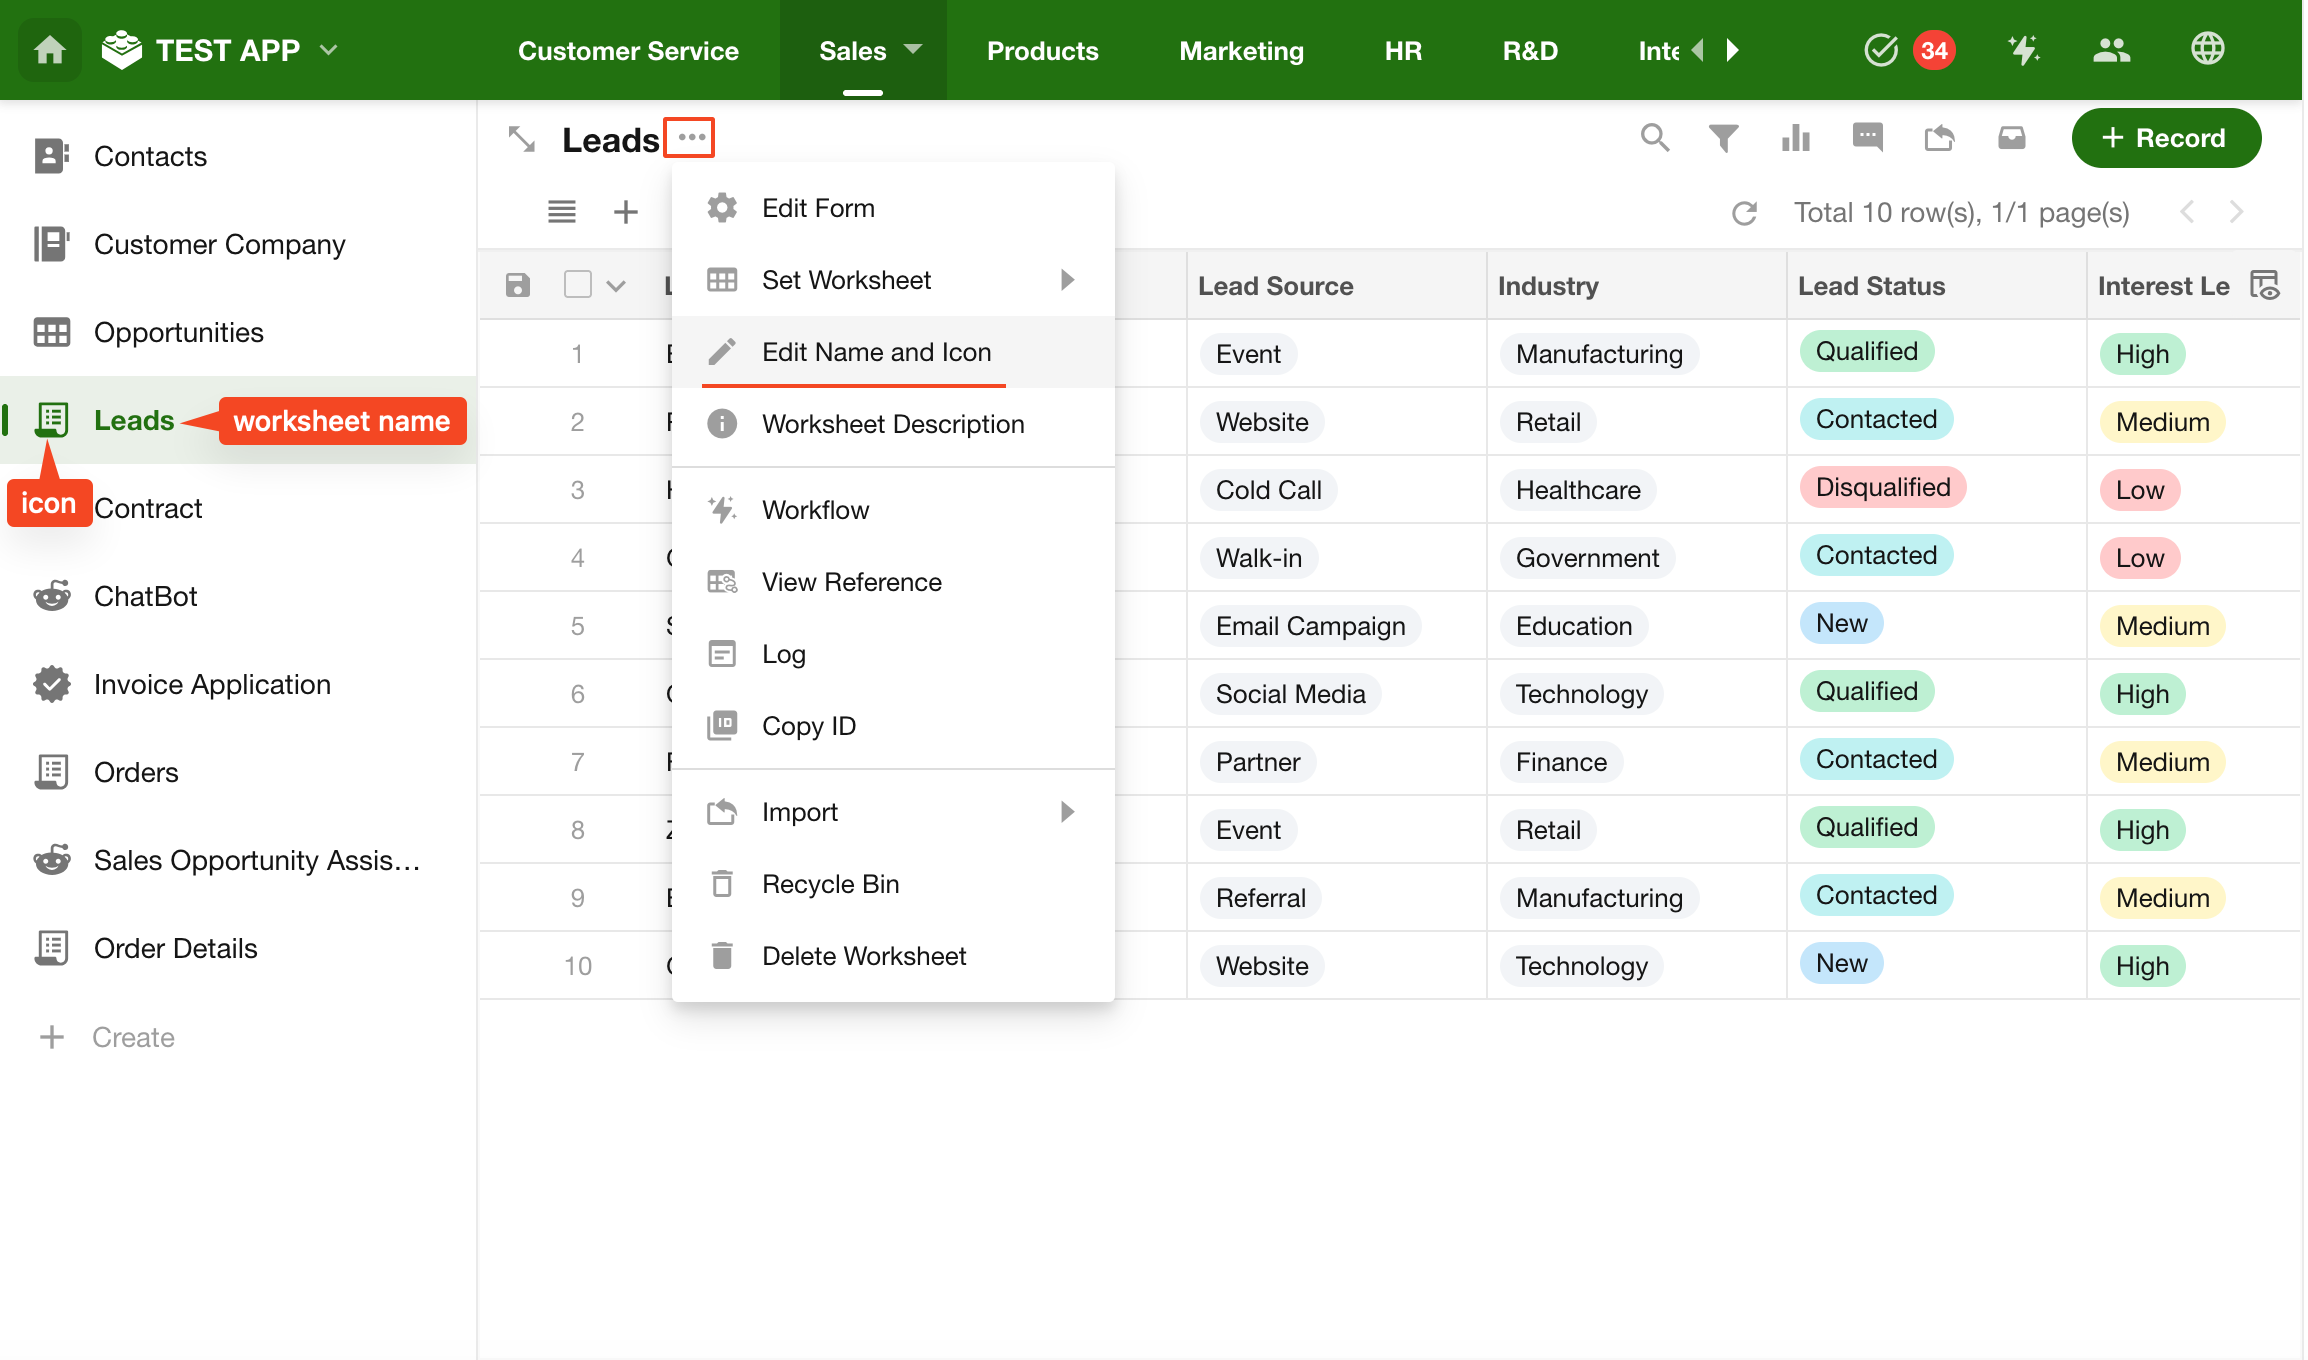
2. Modify Worksheet Name and Icon
Click the More button next to the worksheet name and select Edit Name and Icon.
3. Modify Worksheet Description
The worksheet description provides a brief explanation of its purpose and content to help users understand and use it.
Click the More button next to the worksheet name and select Worksheet Description.
Two description display modes are supported:
- Icon: Click the icon to view the description
- Text: Always displayed below the worksheet name

4. Customize Record Name
By default, each row is named “Record”. You can customize this based on your business context.
For example, in a Leads worksheet, each record represents a lead, so creating a record means creating a lead.
Go to Edit Form > Data Name to modify the record name.
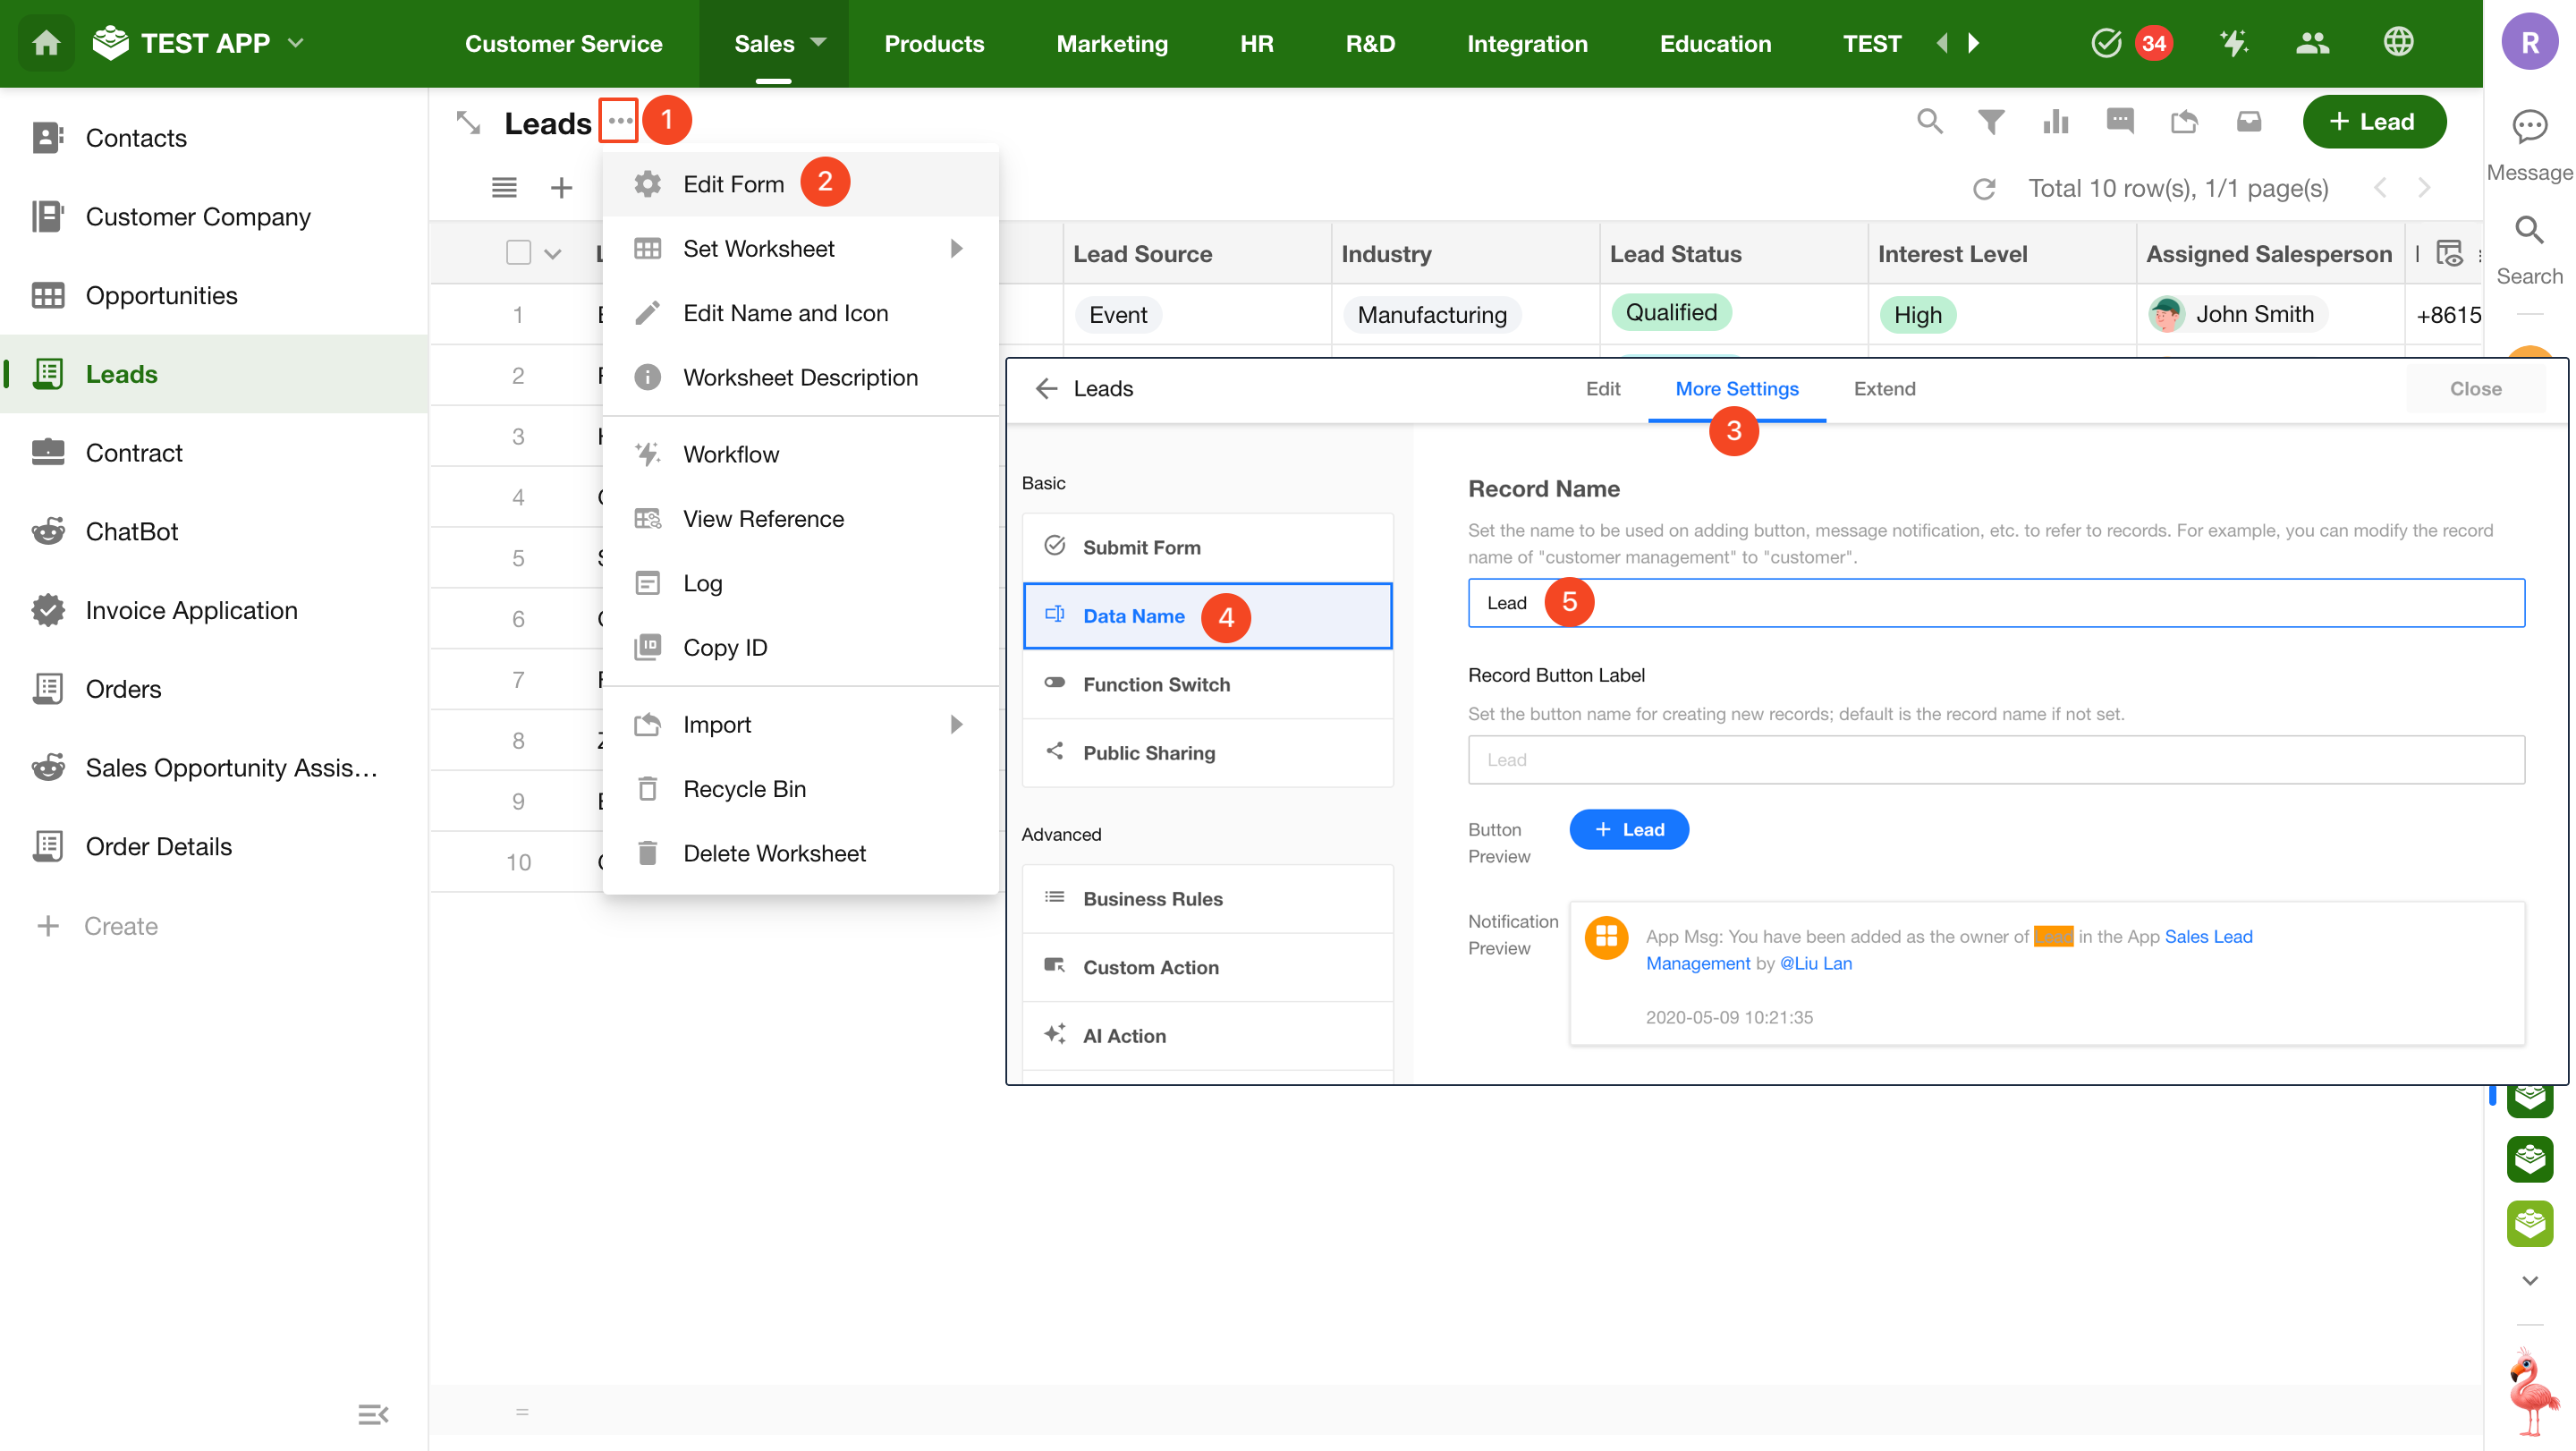
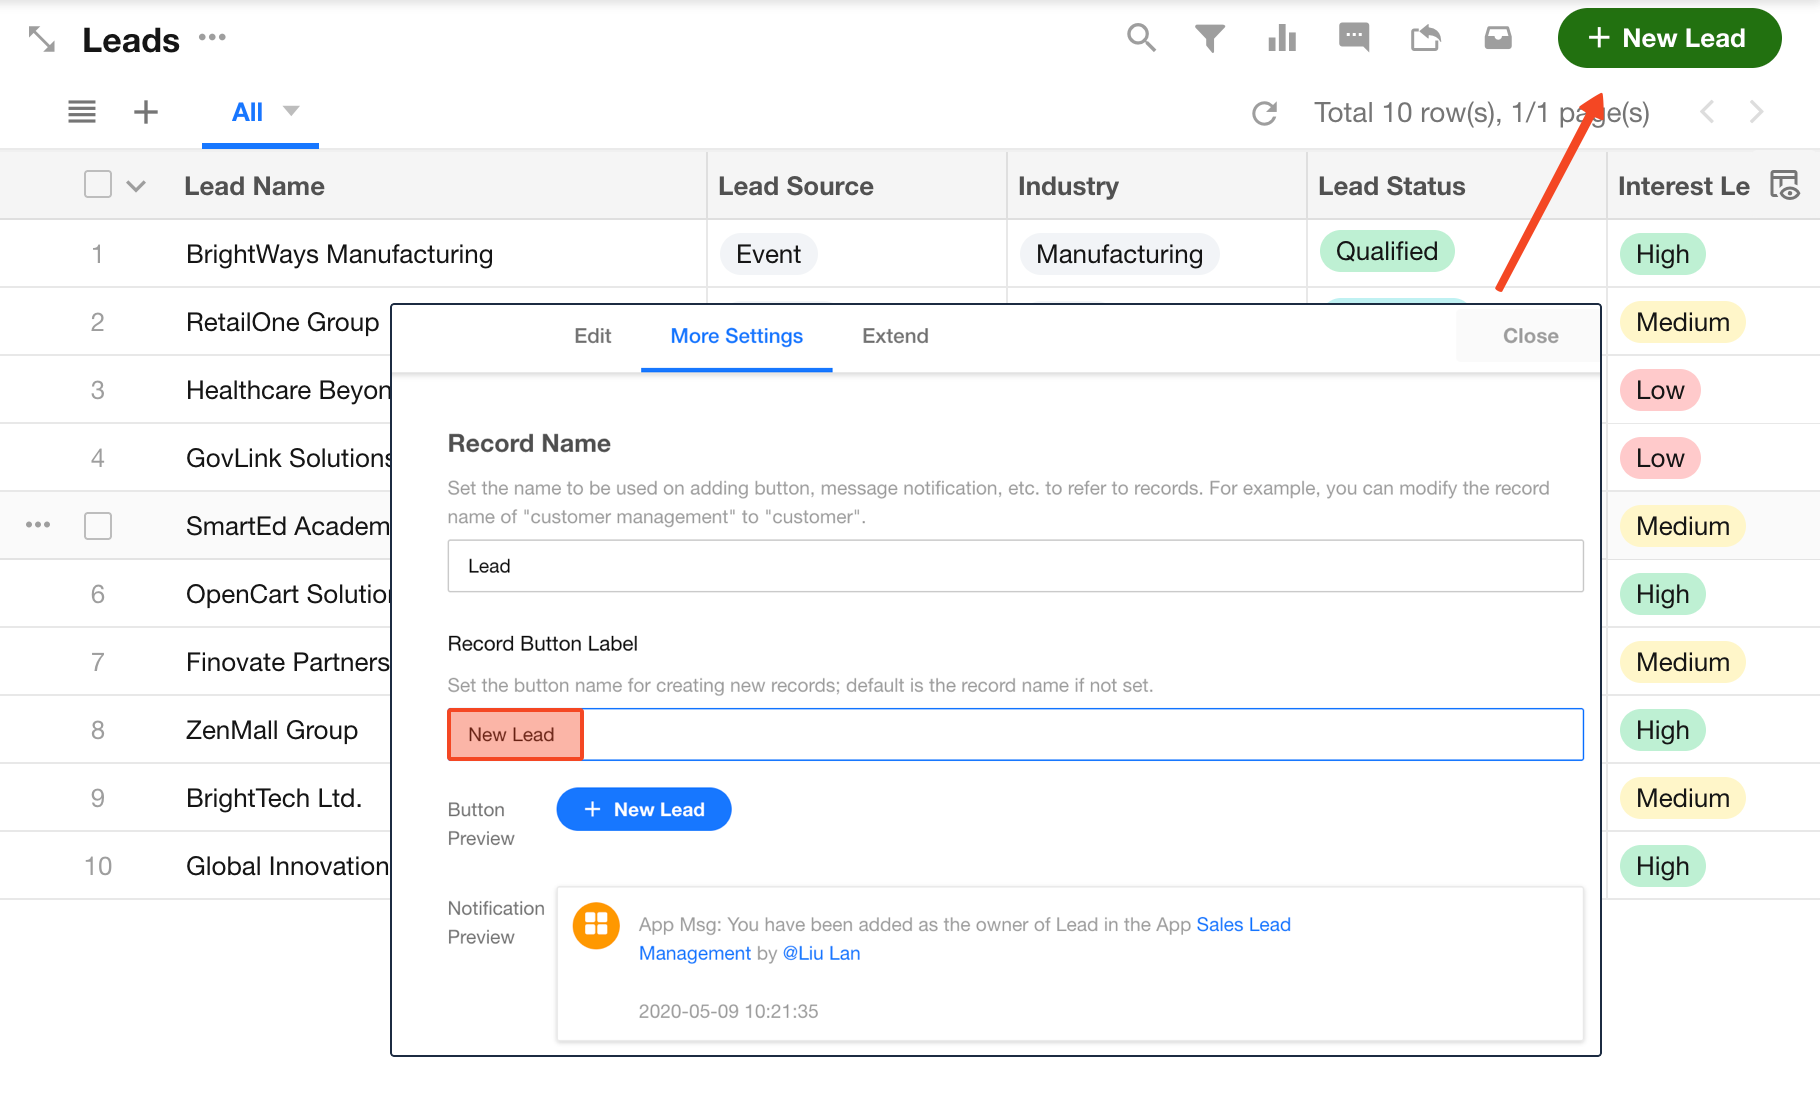
Create Record Button Name
The default button label follows the record name. You can customize it separately.
For example, if the record name is “Lead”, the default button shows “+Lead”. You can change it to “+New Lead”.
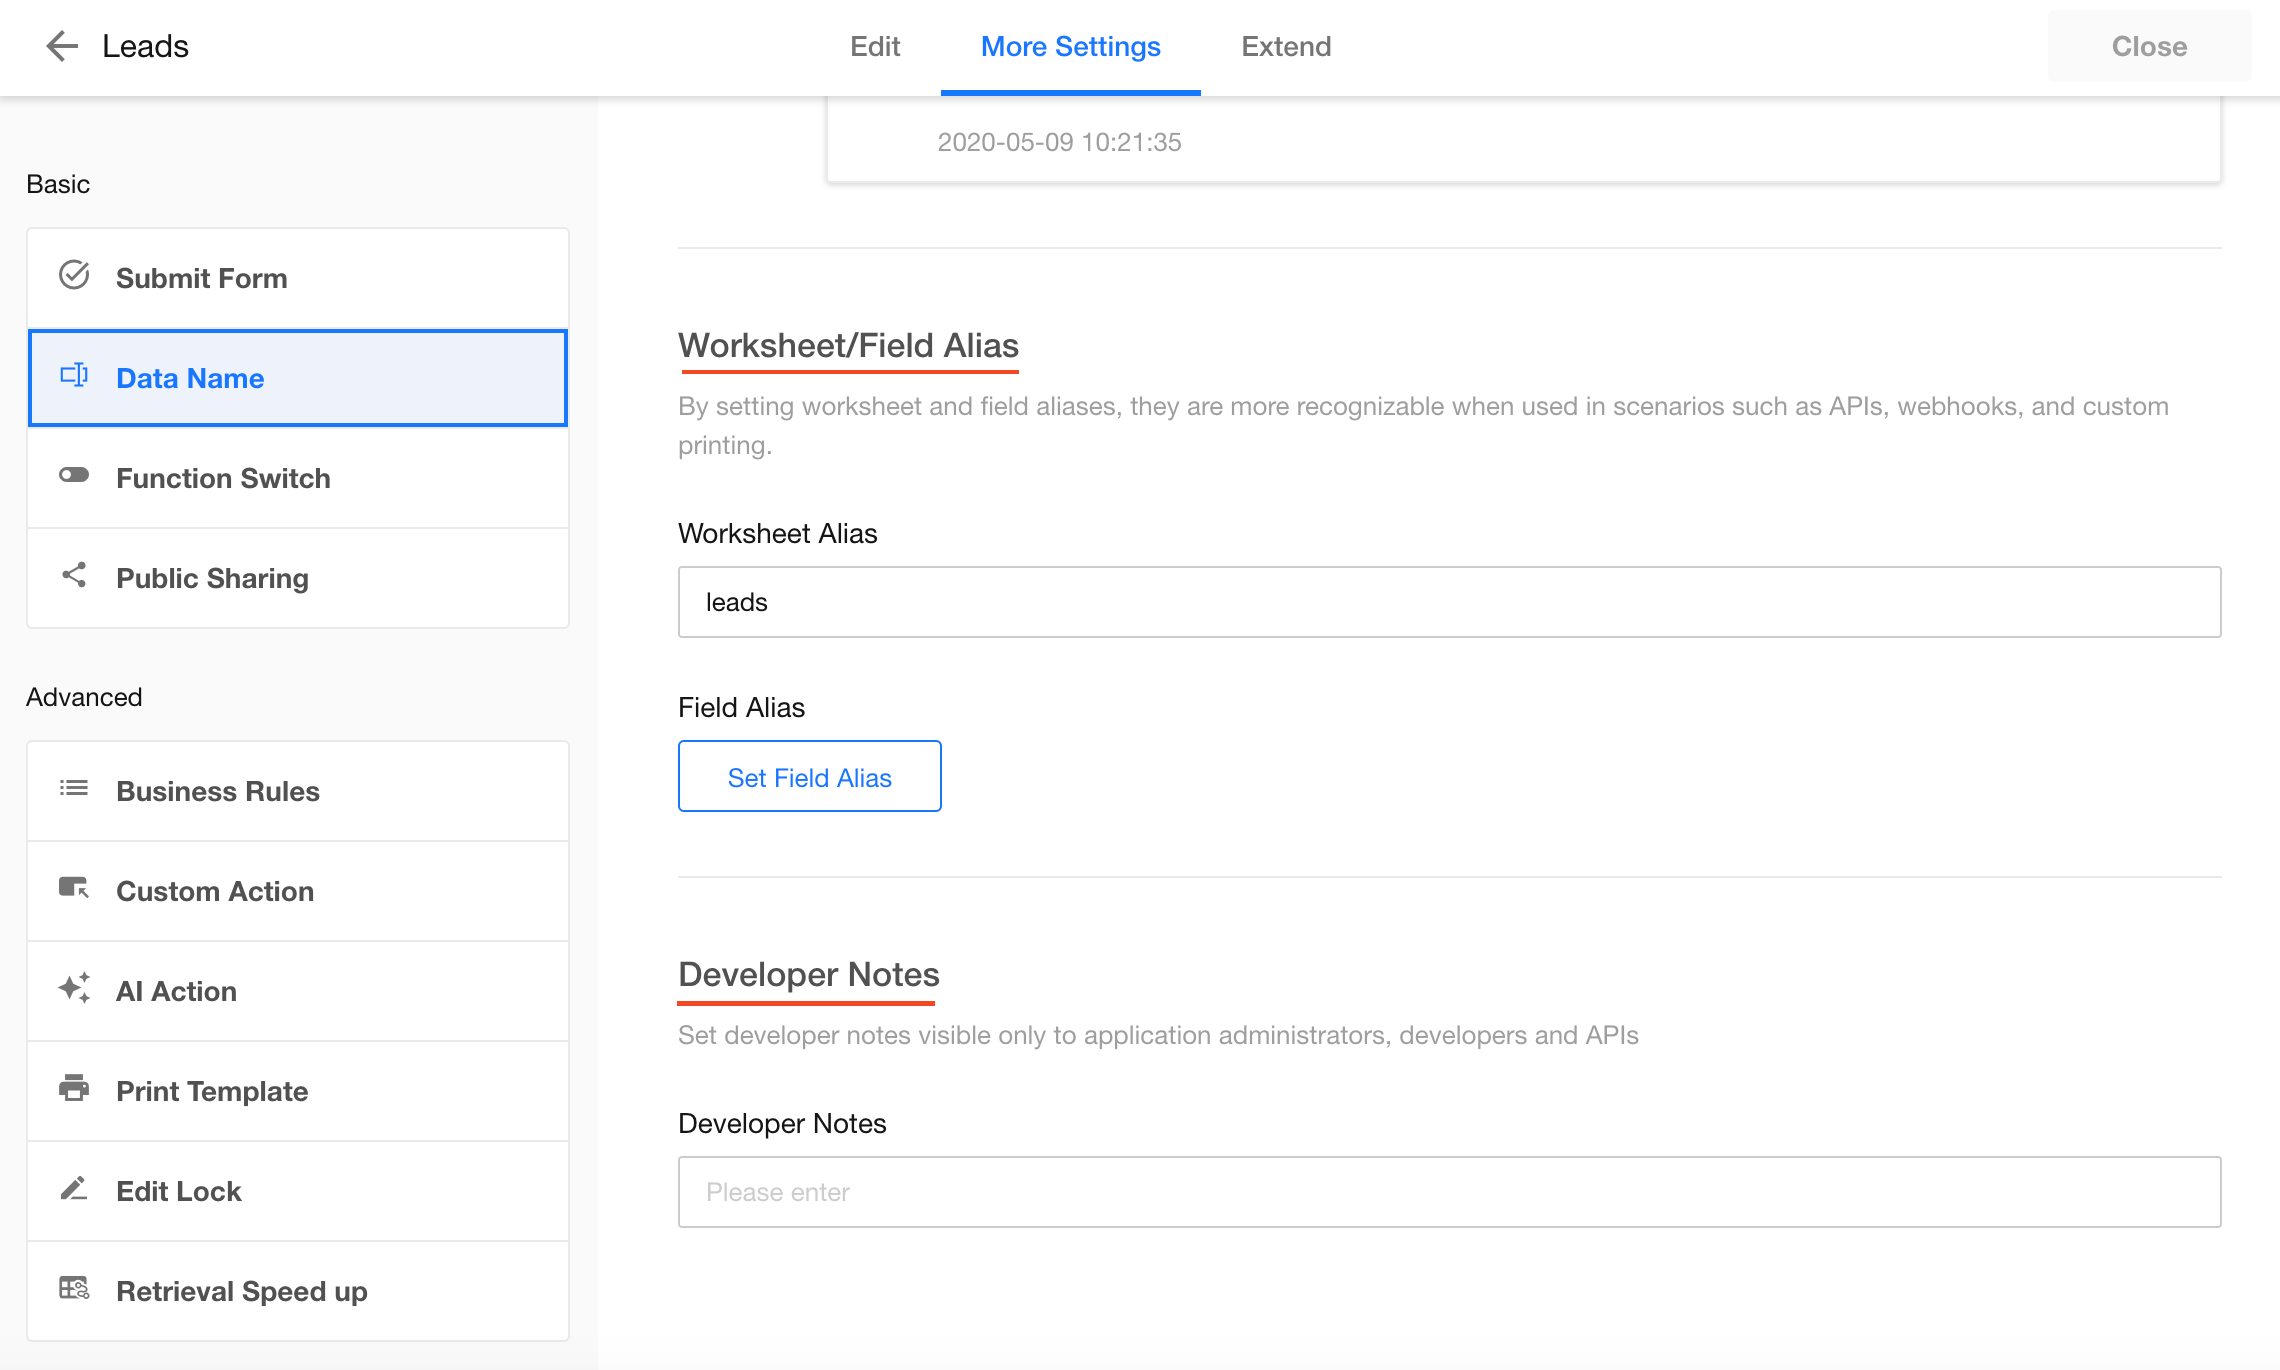
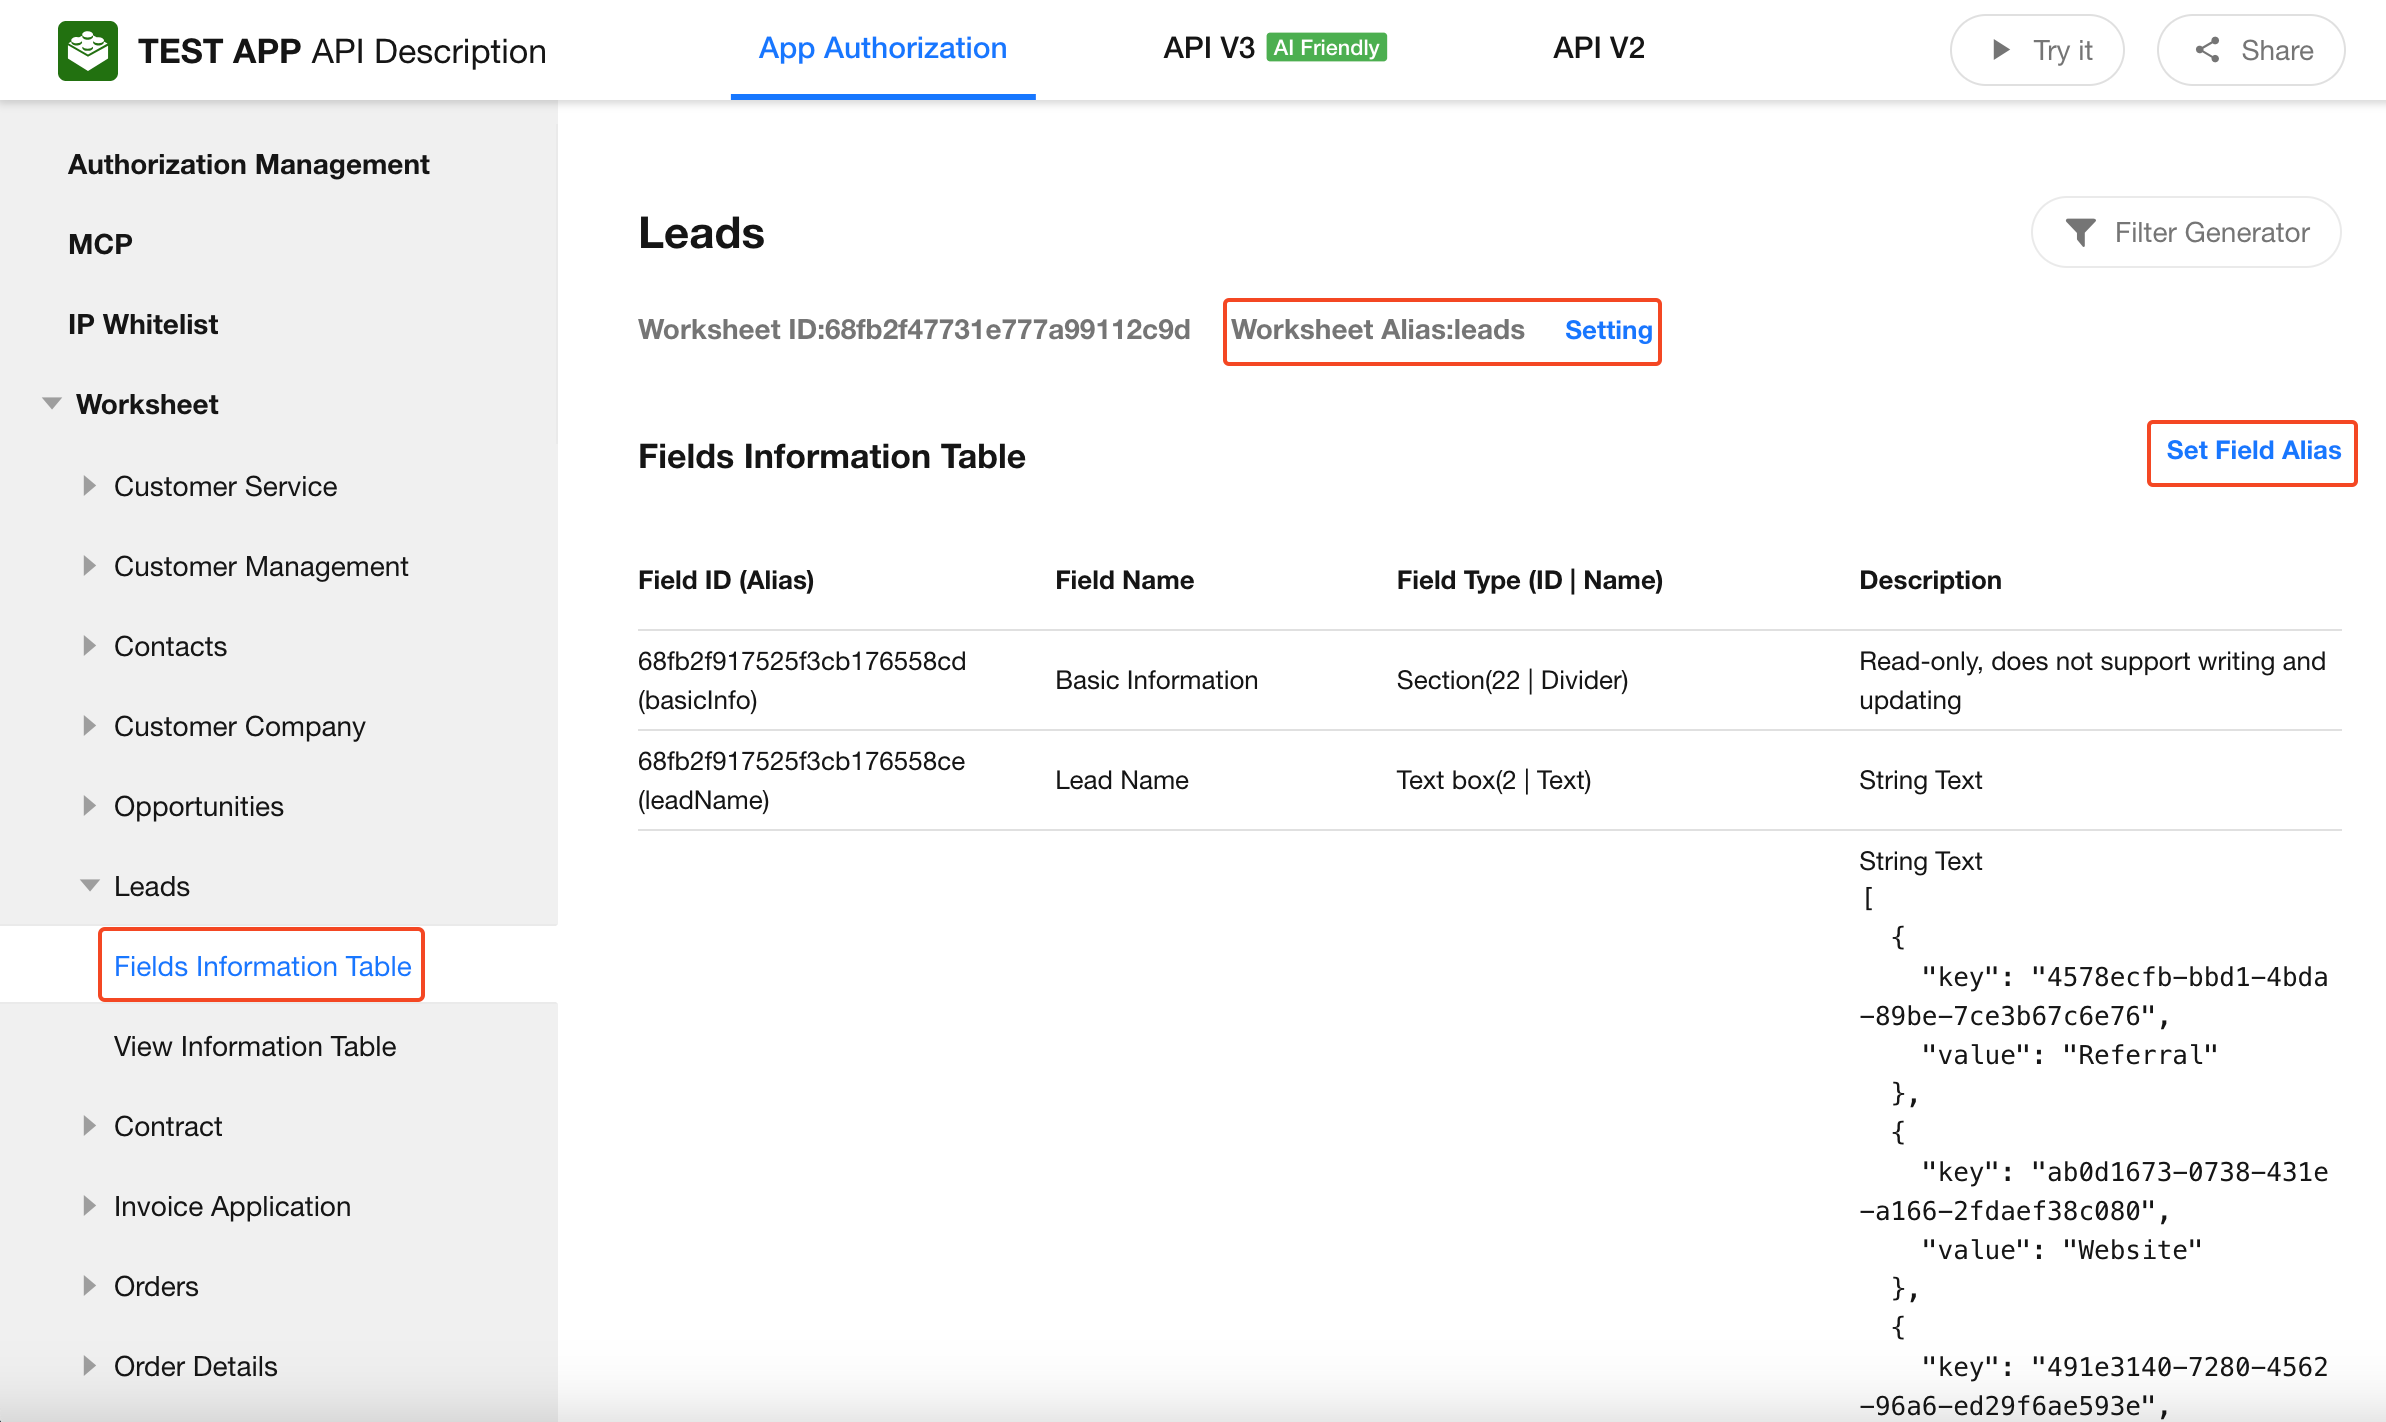
5. Worksheet Alias, Field Alias, and Developer Notes
When working with printing, APIs, or Webhooks, using aliases instead of field IDs or names improves readability.
In Edit Form > Data Name, you can configure:
- Worksheet alias
- Field alias
- Developer notes
-
Worksheet and field aliases can also be managed in API documentation
-
Developer Notes
Only application administrators and developers can manage this.
It is returned asnotesin the Get App Info API.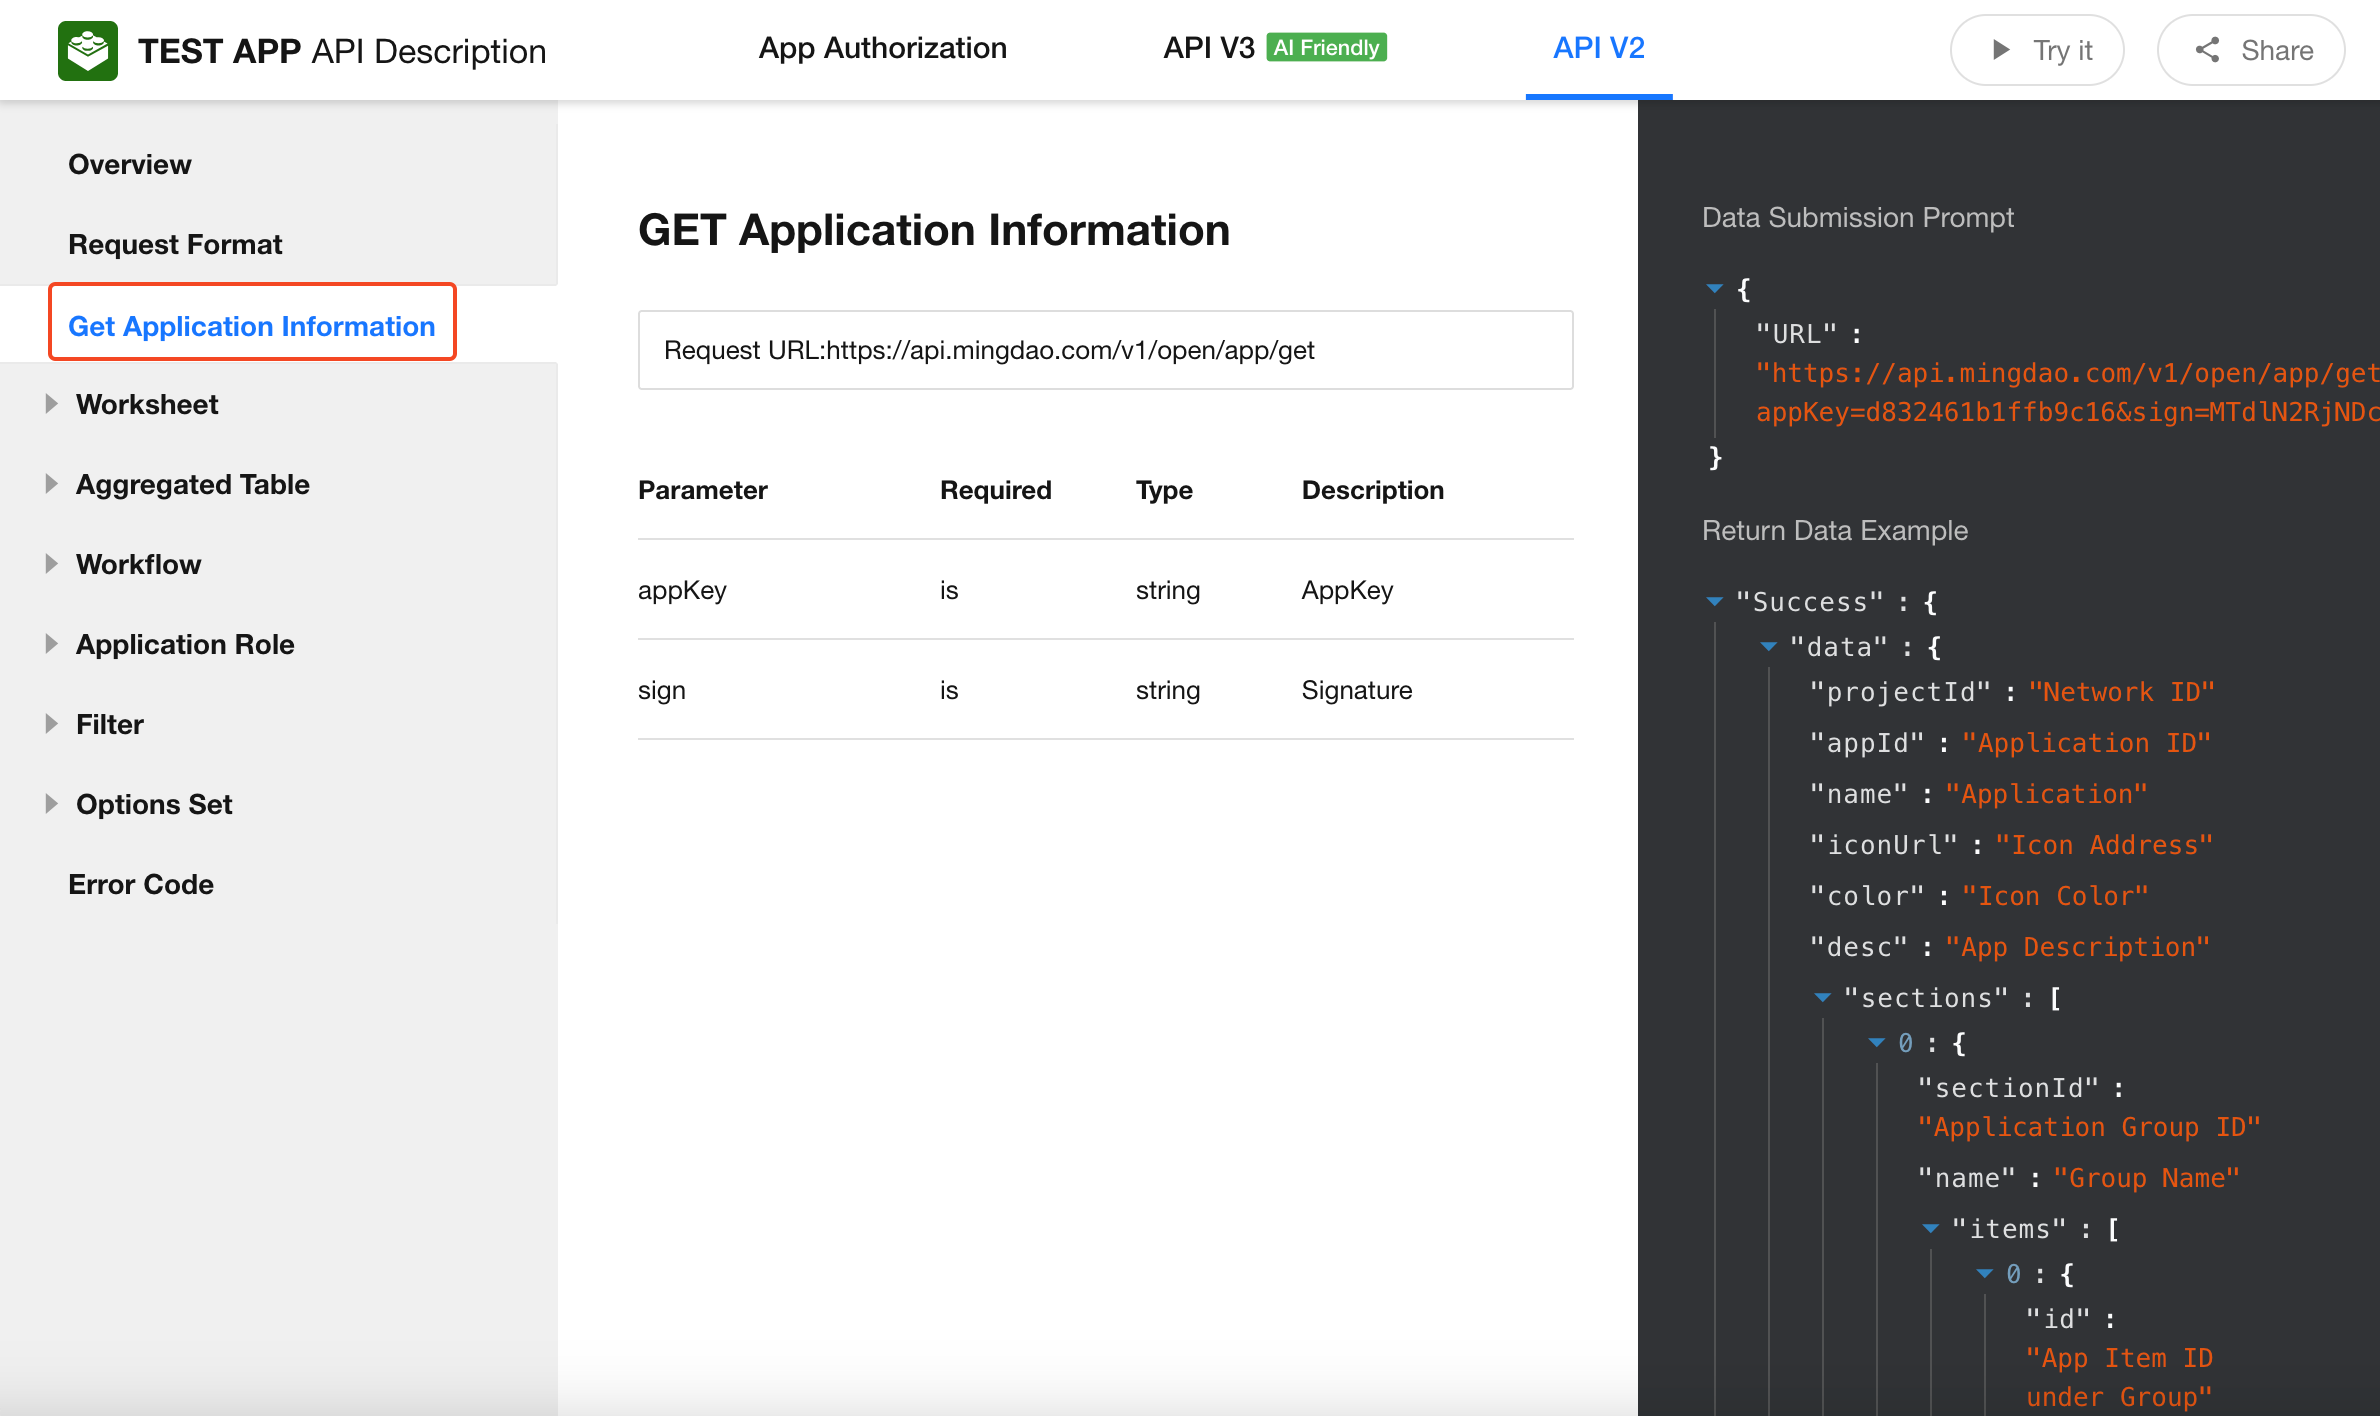
6. Duplicate, Delete, and Restore Worksheet
Duplicate Worksheet
-
Operation path:
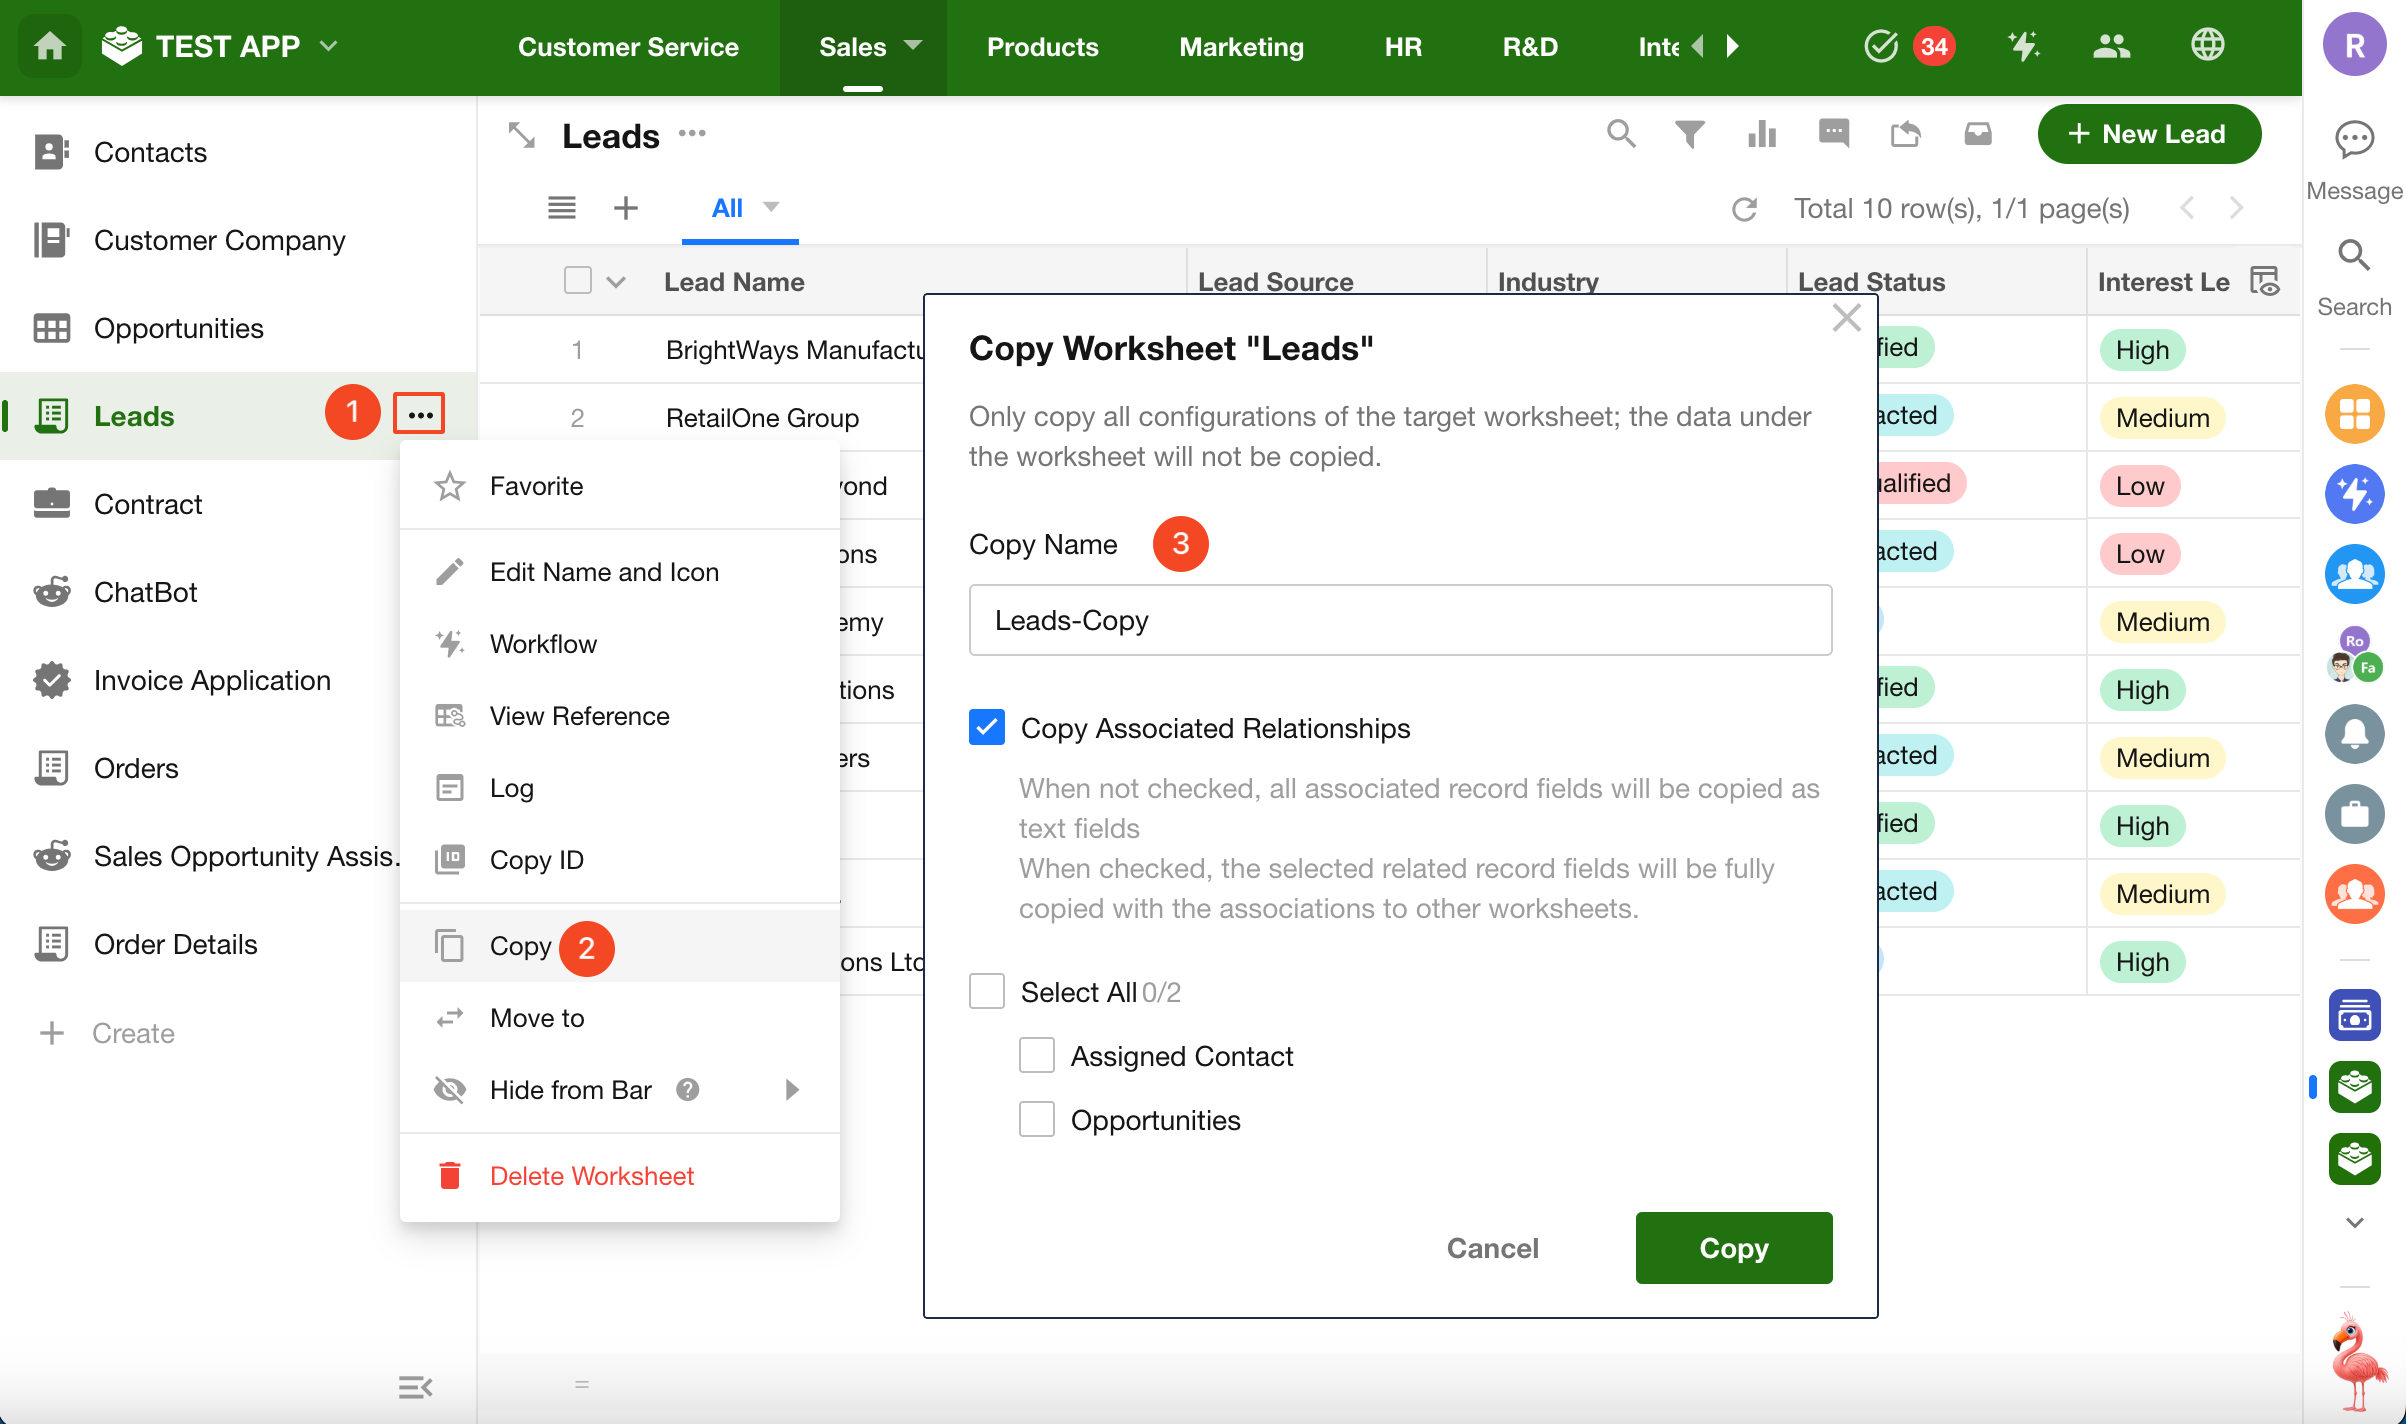
If the worksheet contains relationships with other worksheets, you can choose which relationship fields to copy.
Not included in duplication:
- Record data
- Discussions and activity logs
Delete / Restore Worksheet
Only application administrators can delete or restore worksheets.
-
Delete Worksheet
-
Restore Worksheet
-
Permanently deleted worksheets cannot be restored
-
Worksheets deleted within 60 days can be restored; after 60 days they are permanently deleted
-
Restored worksheets retain their structure, including relationships with other worksheets
-
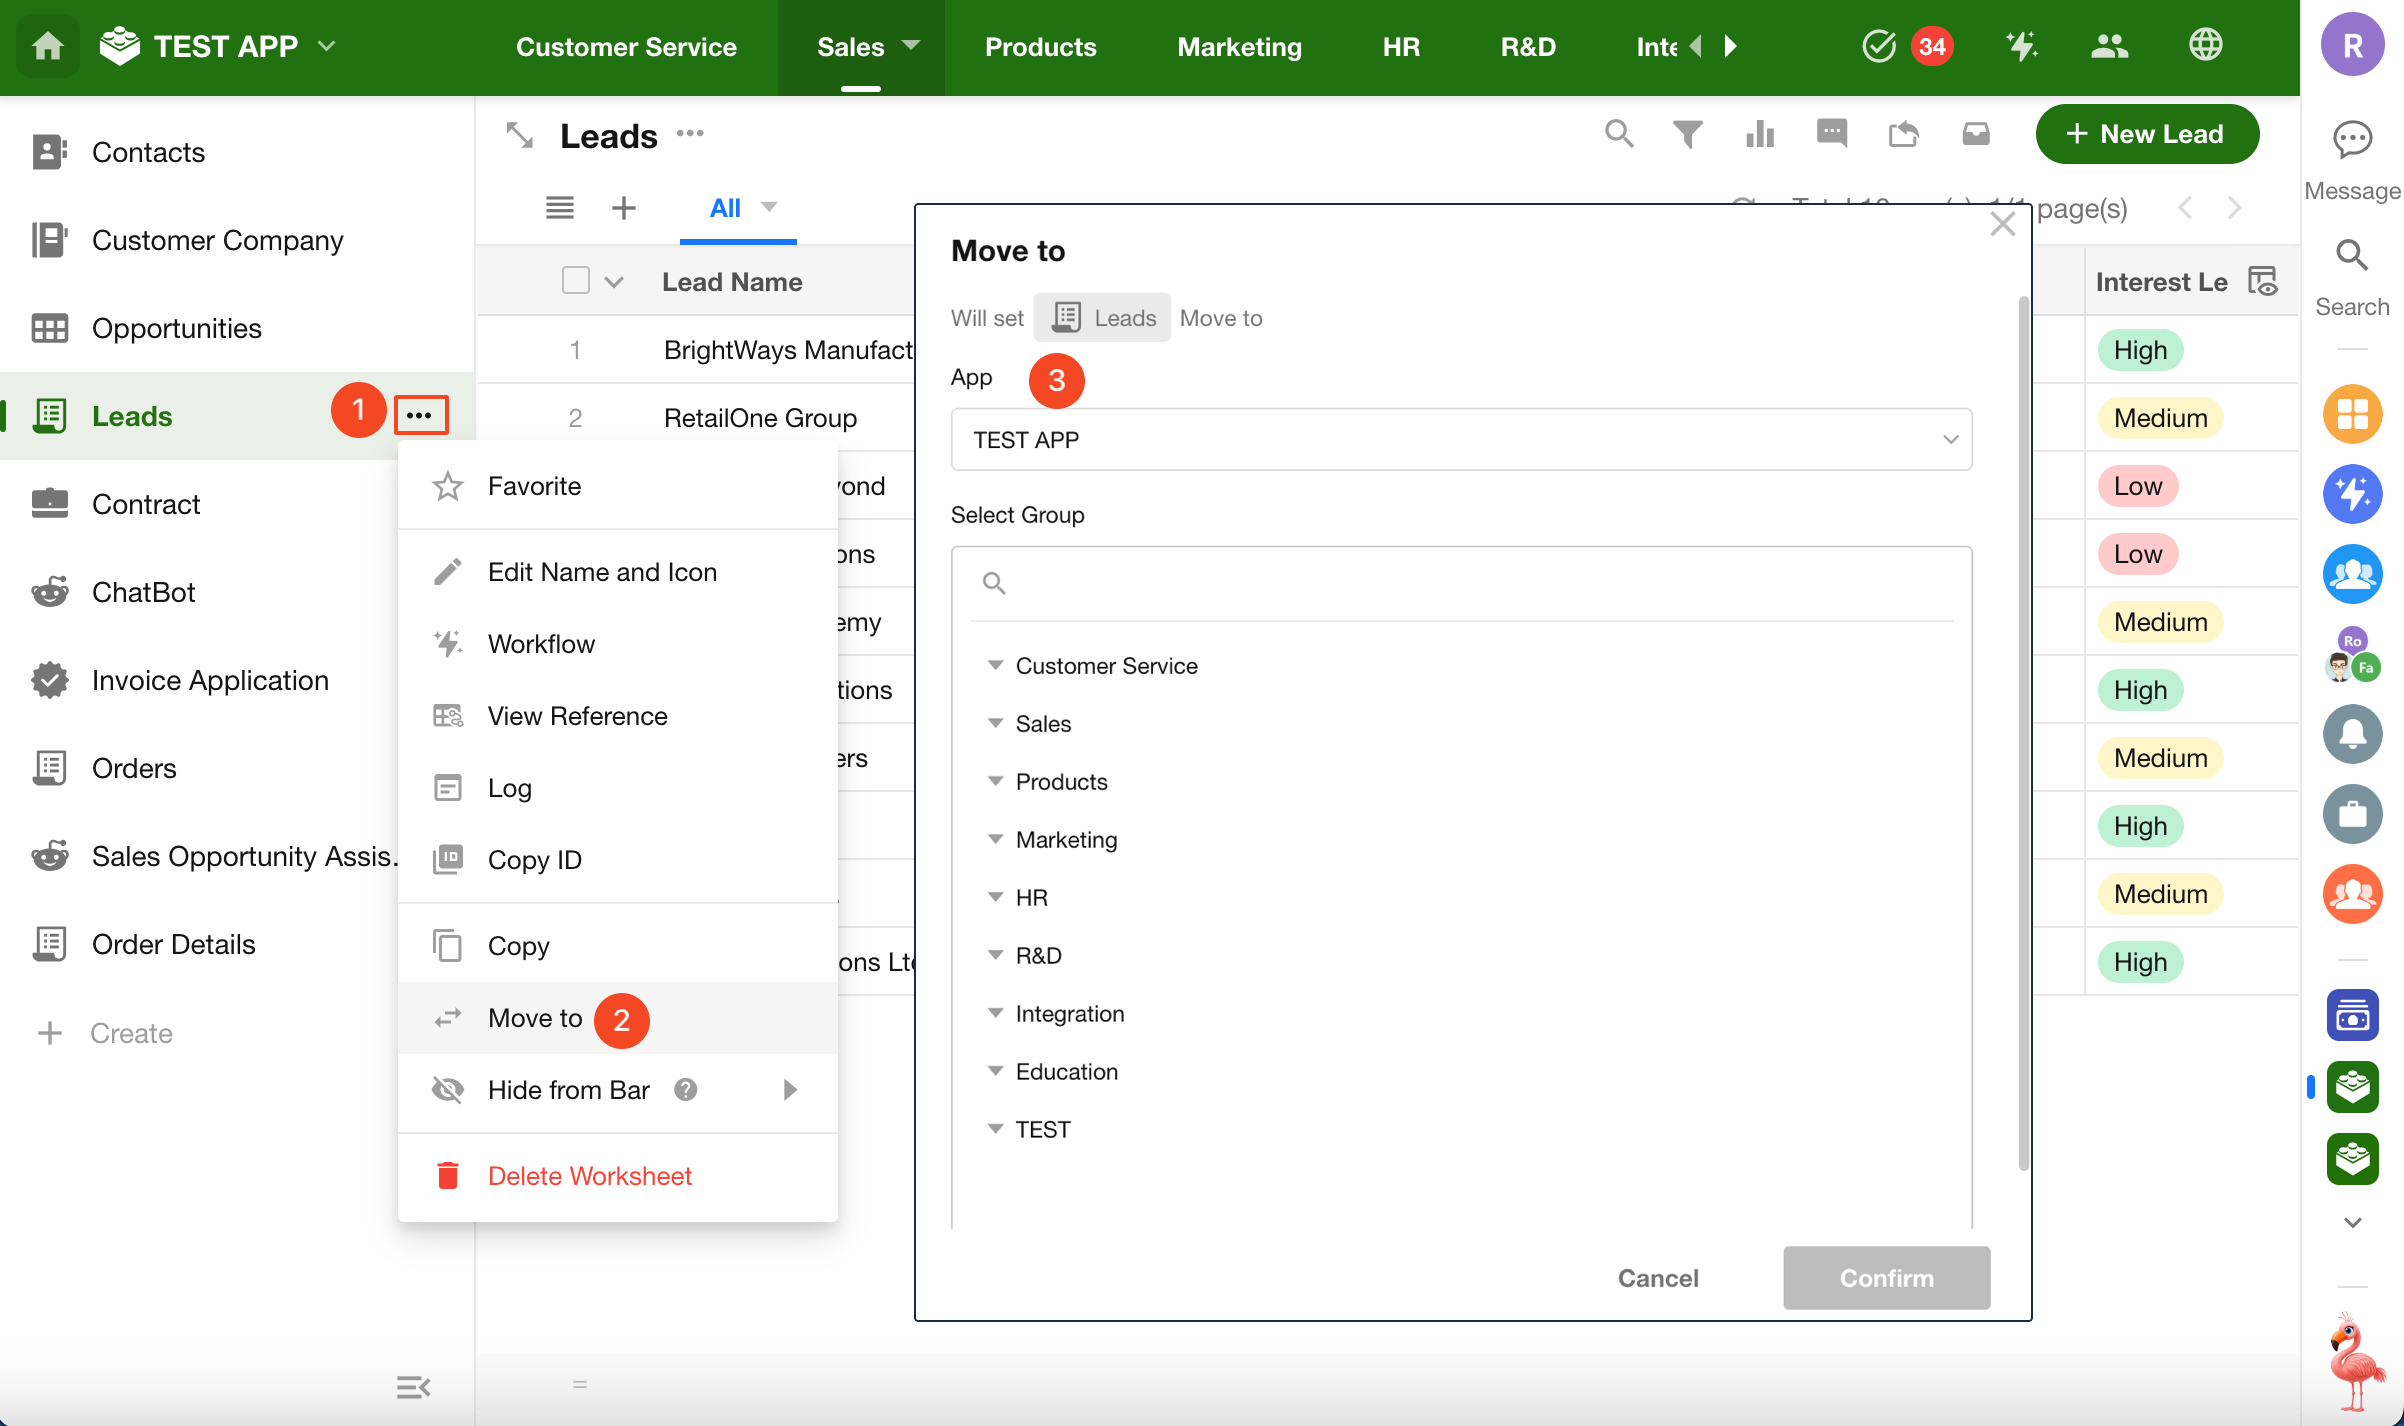
7. Move Worksheet to a Group
You can move a worksheet to another group within the same application, or to another application (cross-organization moves are not supported).
To move a worksheet to another application, you must be an application administrator or developer in the target application.
In the left-side navigation, click the button next to the worksheet and select Move To.
8. Reorder and Hide Worksheets
-
Reorder Worksheets
Drag and drop worksheets in the navigation to change their order.
-
Hide Worksheet (in navigation)
Click the More button next to the worksheet name and select Hide from Bar.
You can choose to hide it on desktop, mobile, or all platforms.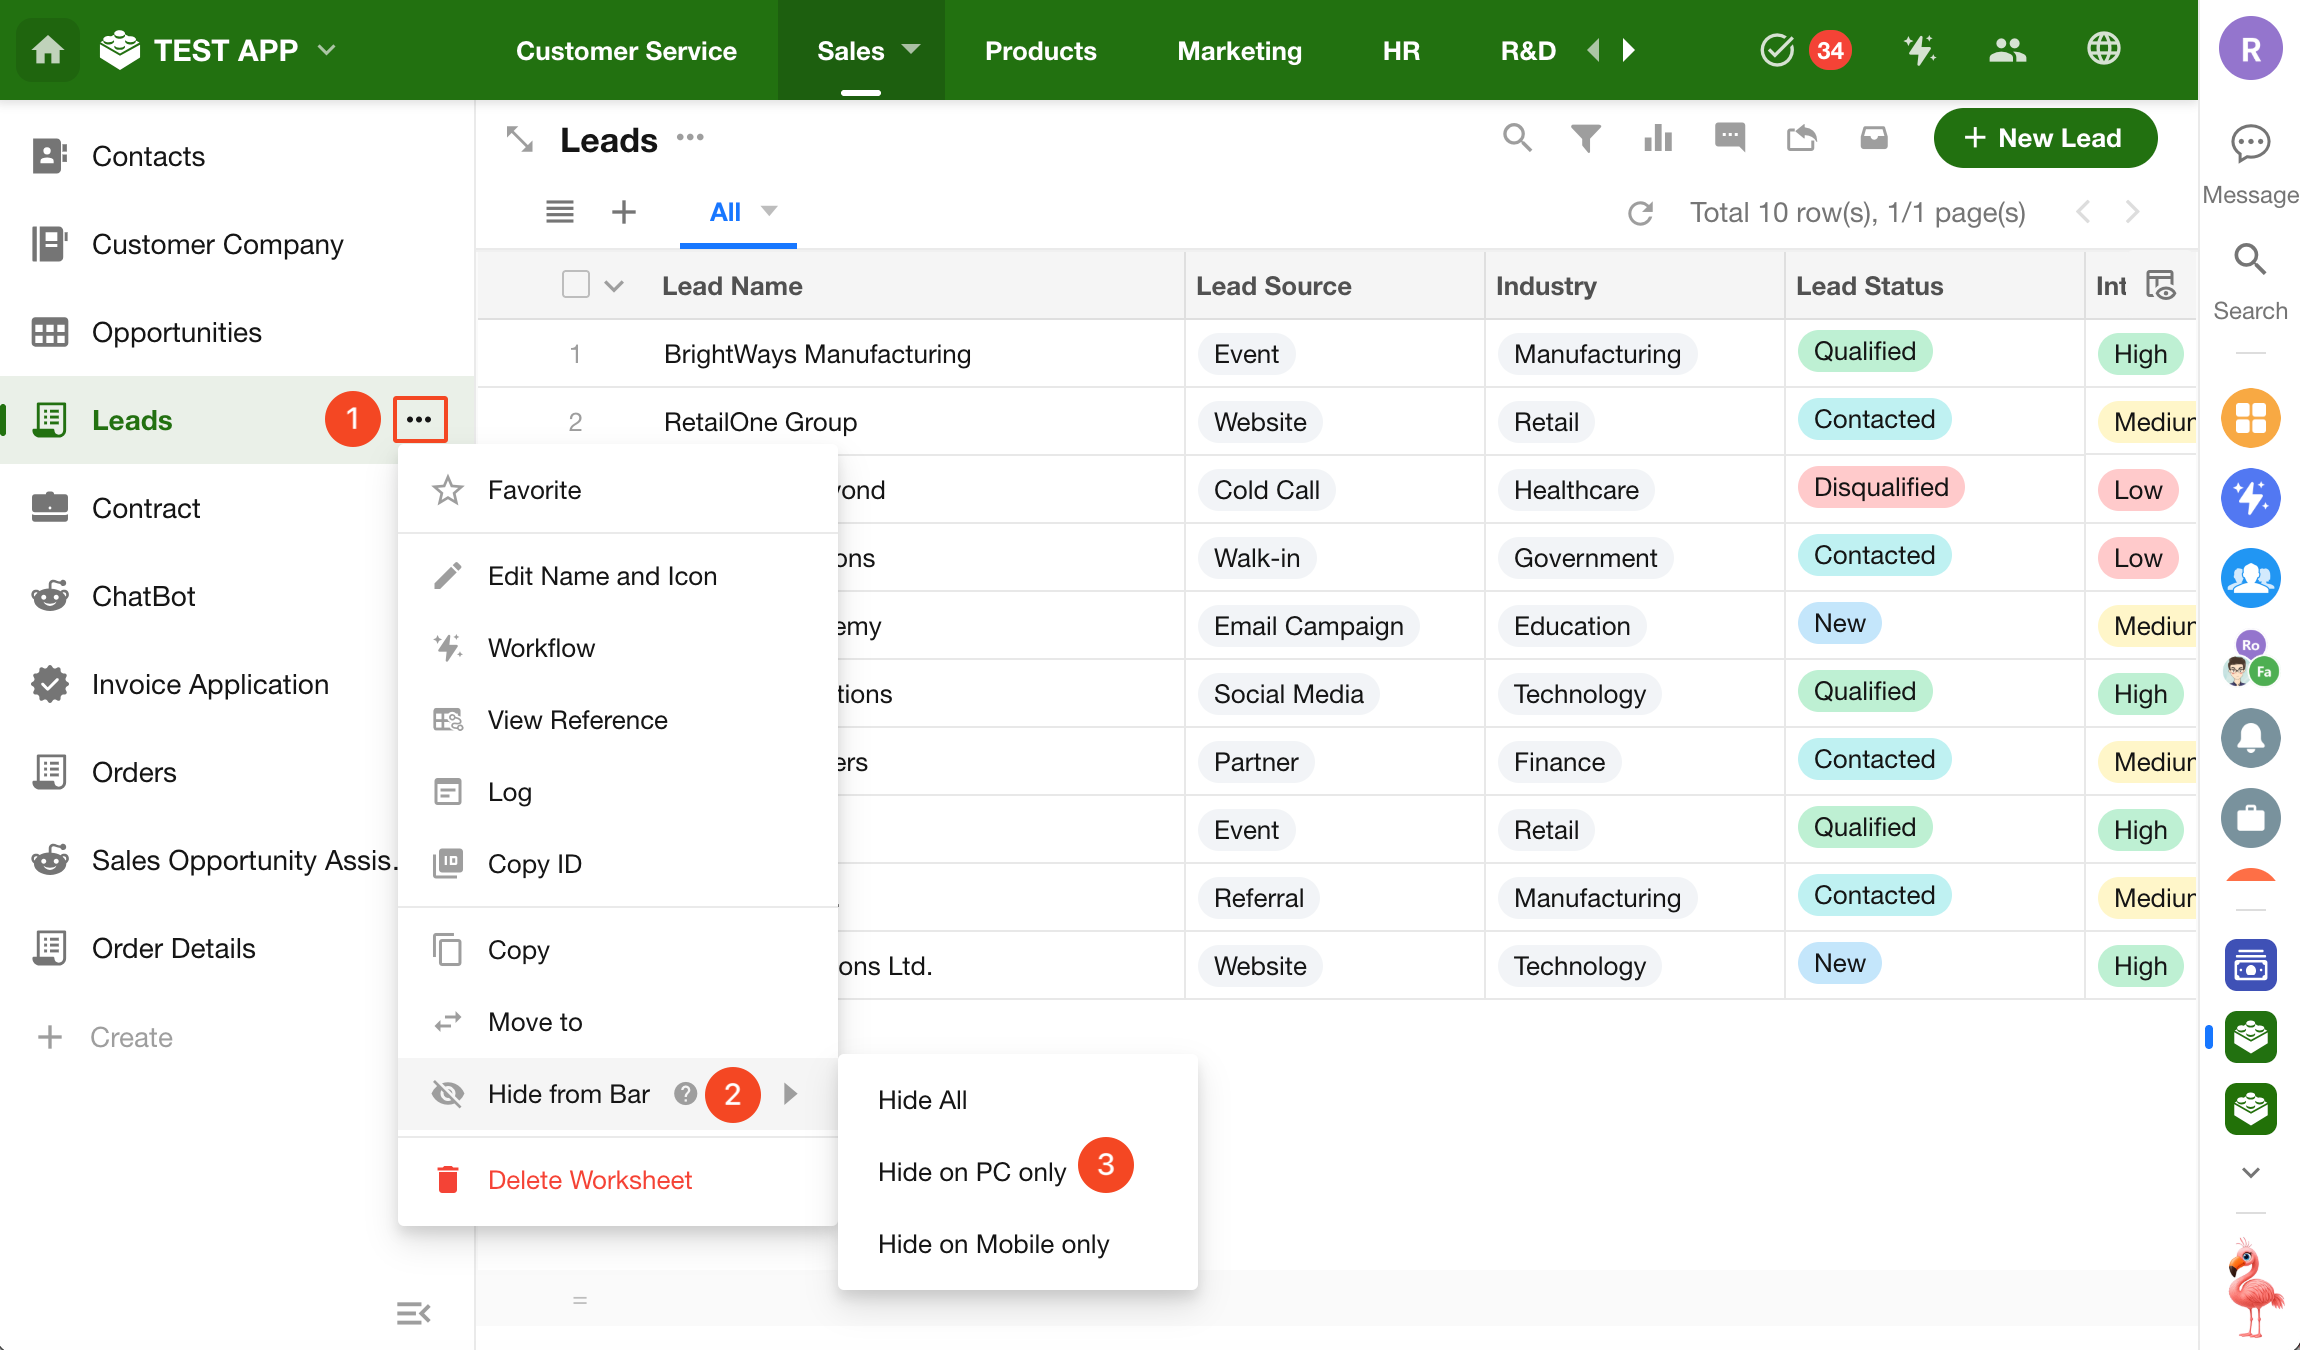
After hiding:
- Regular users will not see the worksheet in navigation
- System roles (application administrators and developers) can still see it
- Access permissions remain unchanged—users with access can still open the worksheet via direct link
If system roles should also not see hidden worksheets, disable View Hidden Items in navigation settings.
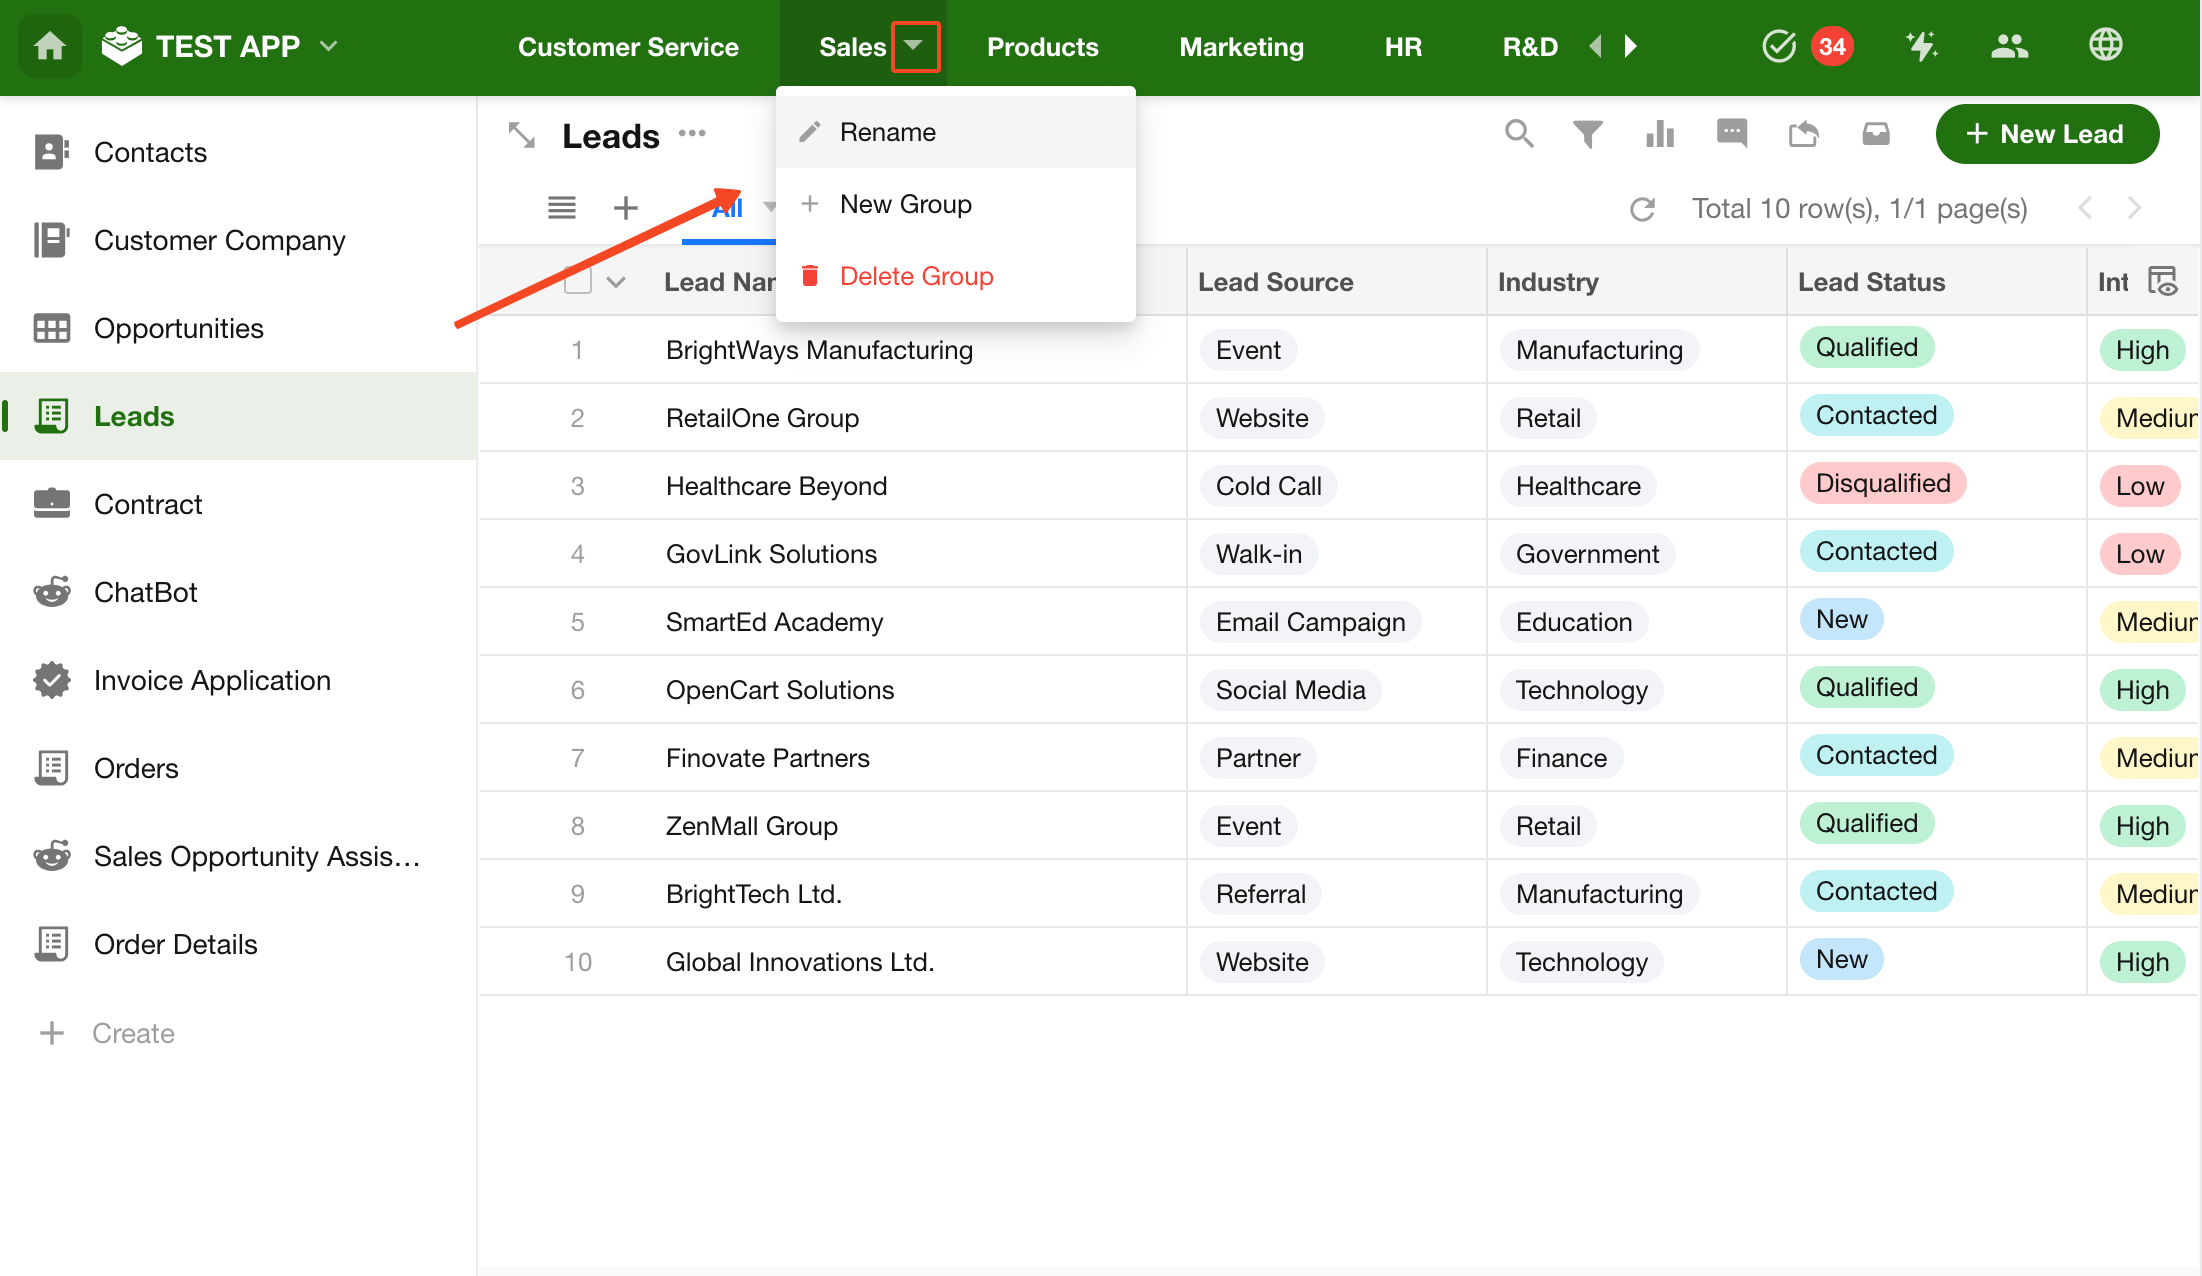
9. Manage Worksheet Groups
When an application contains many worksheets, you can create groups to organize them.
Groups appear in the top navigation, making it easier to switch between different categories.
Learn more about worksheet grouping
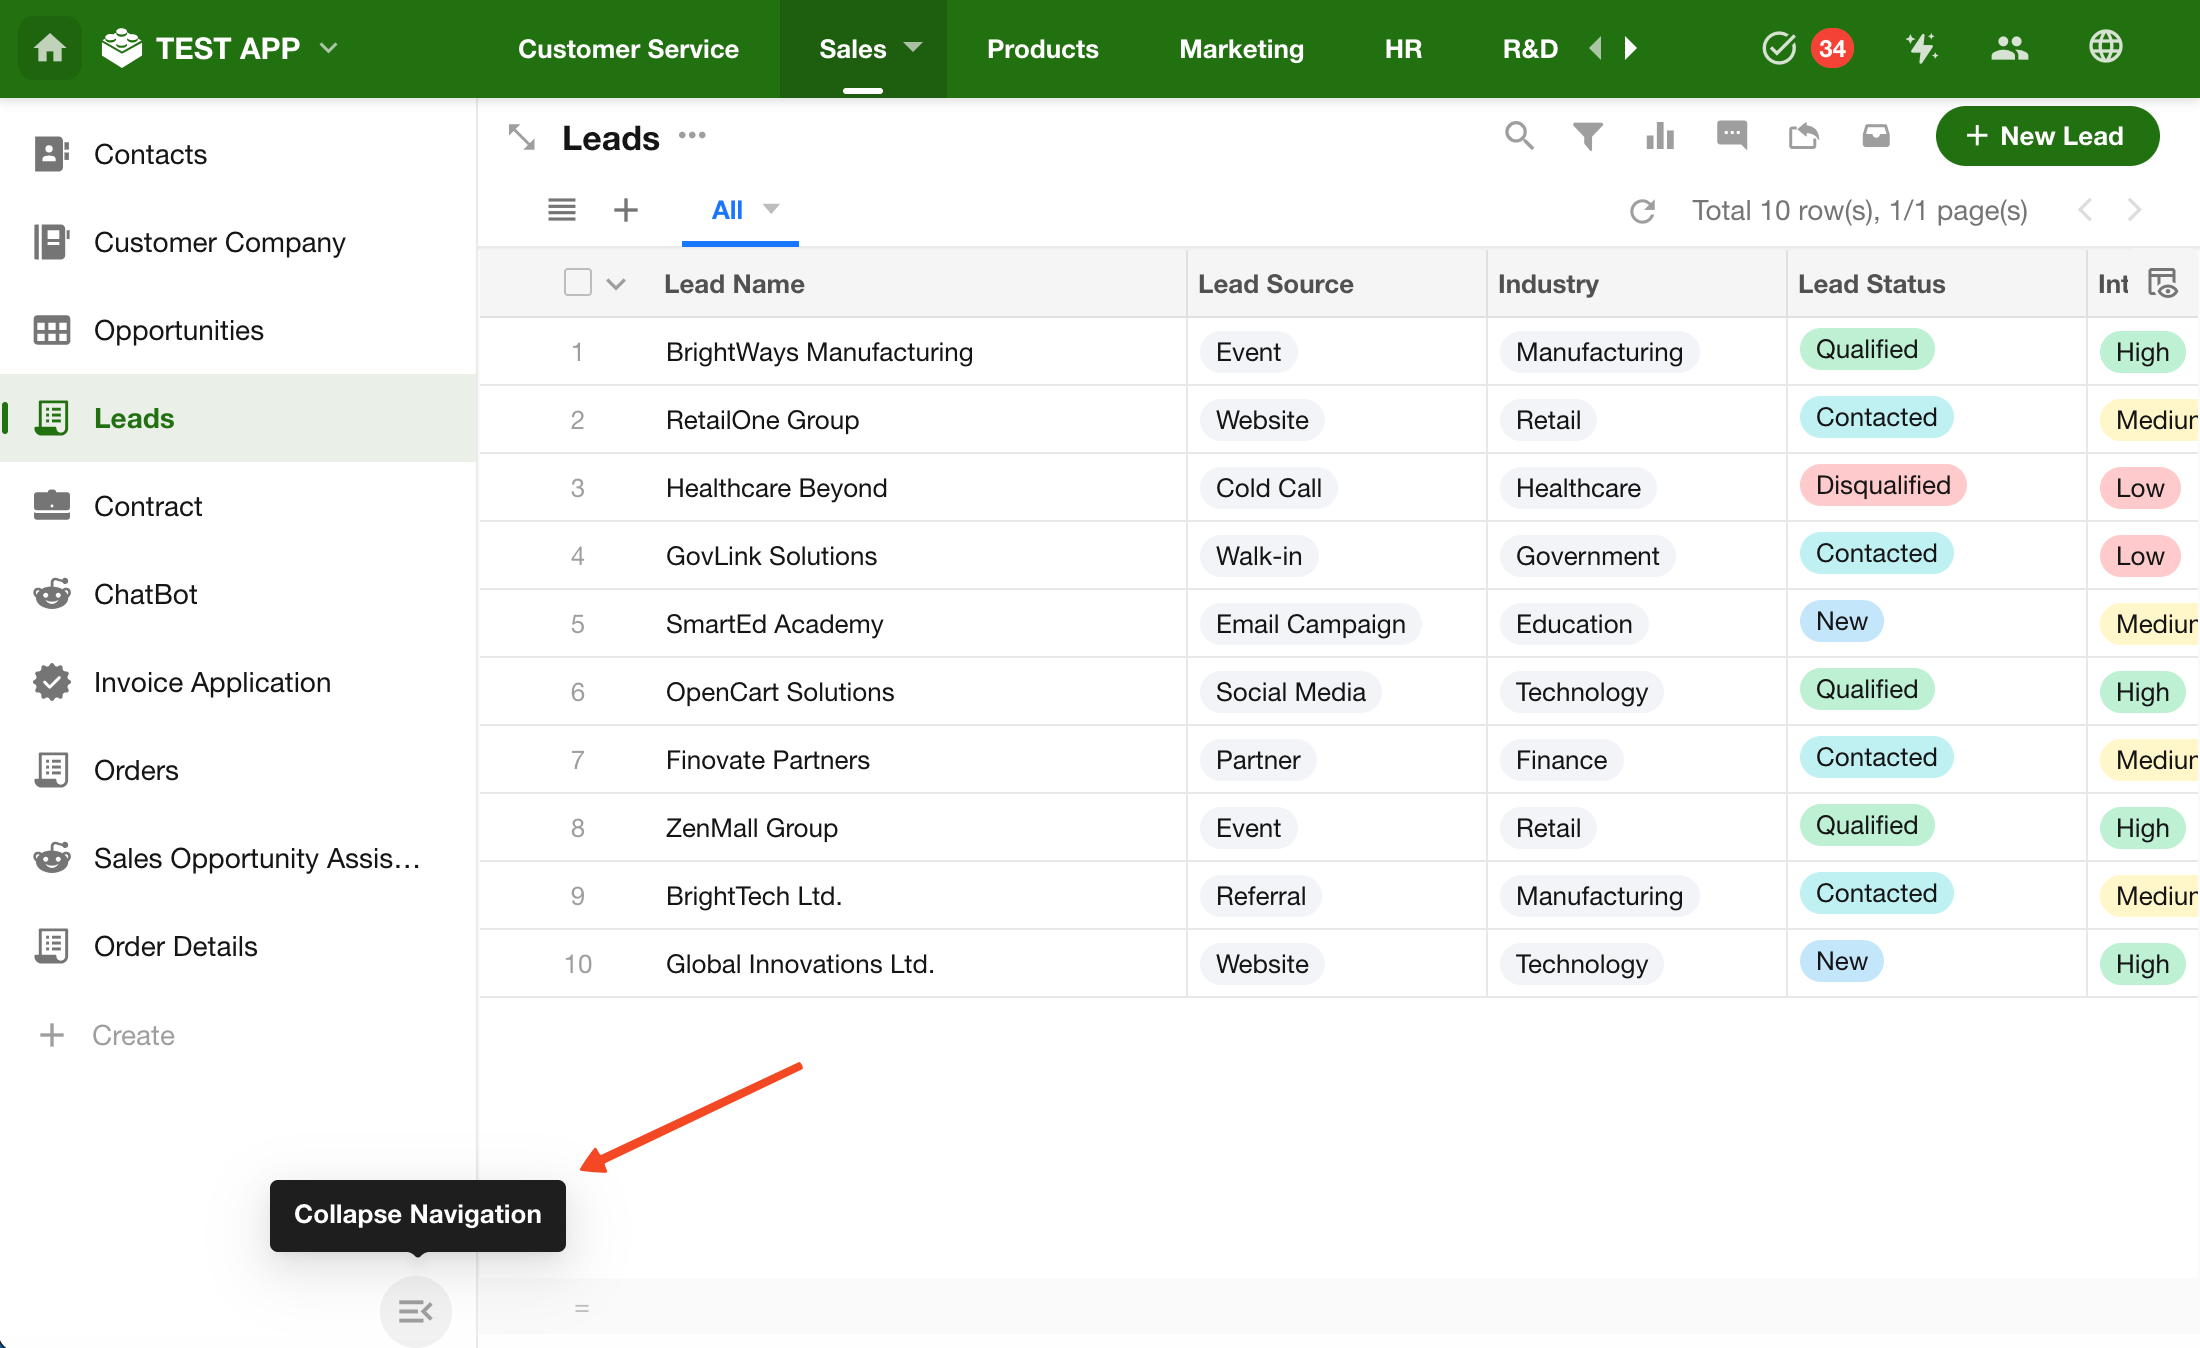
10. Collapse or Hide Navigation
-
Collapse / Expand Navigation
-
Hide / Show Navigation
Was this document helpful?