Create/Edit Worksheet
To create a worksheet:
- Create a worksheet
- Add fields (add/copy/delete)
- Set fields (name/type/required or not)
- Set form style
- Save
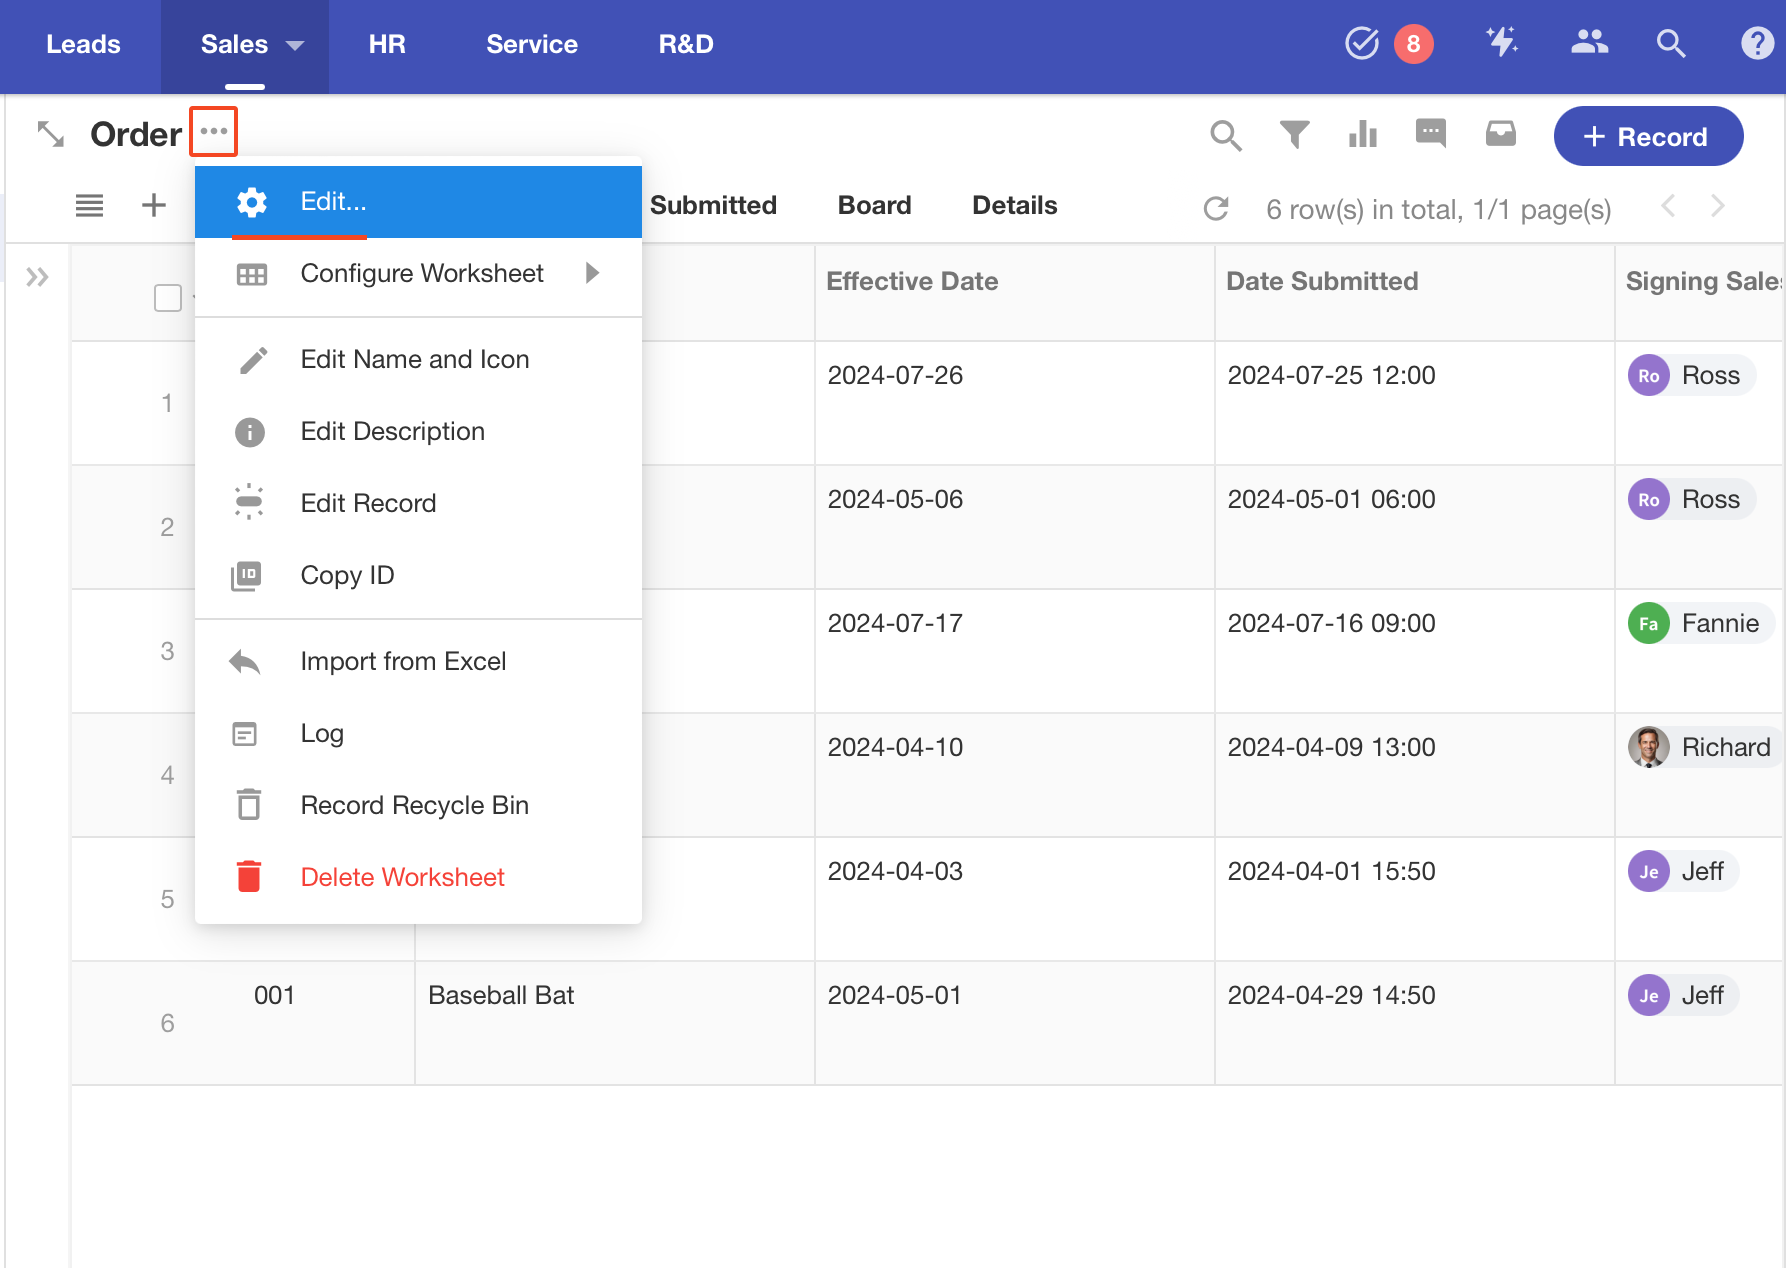
- Edit a worksheet
- Further configuration
Create/Edit Worksheet
Creating a new worksheet is the same as editing a worksheet, except that the operation entrance is different.
-
Create a worksheet
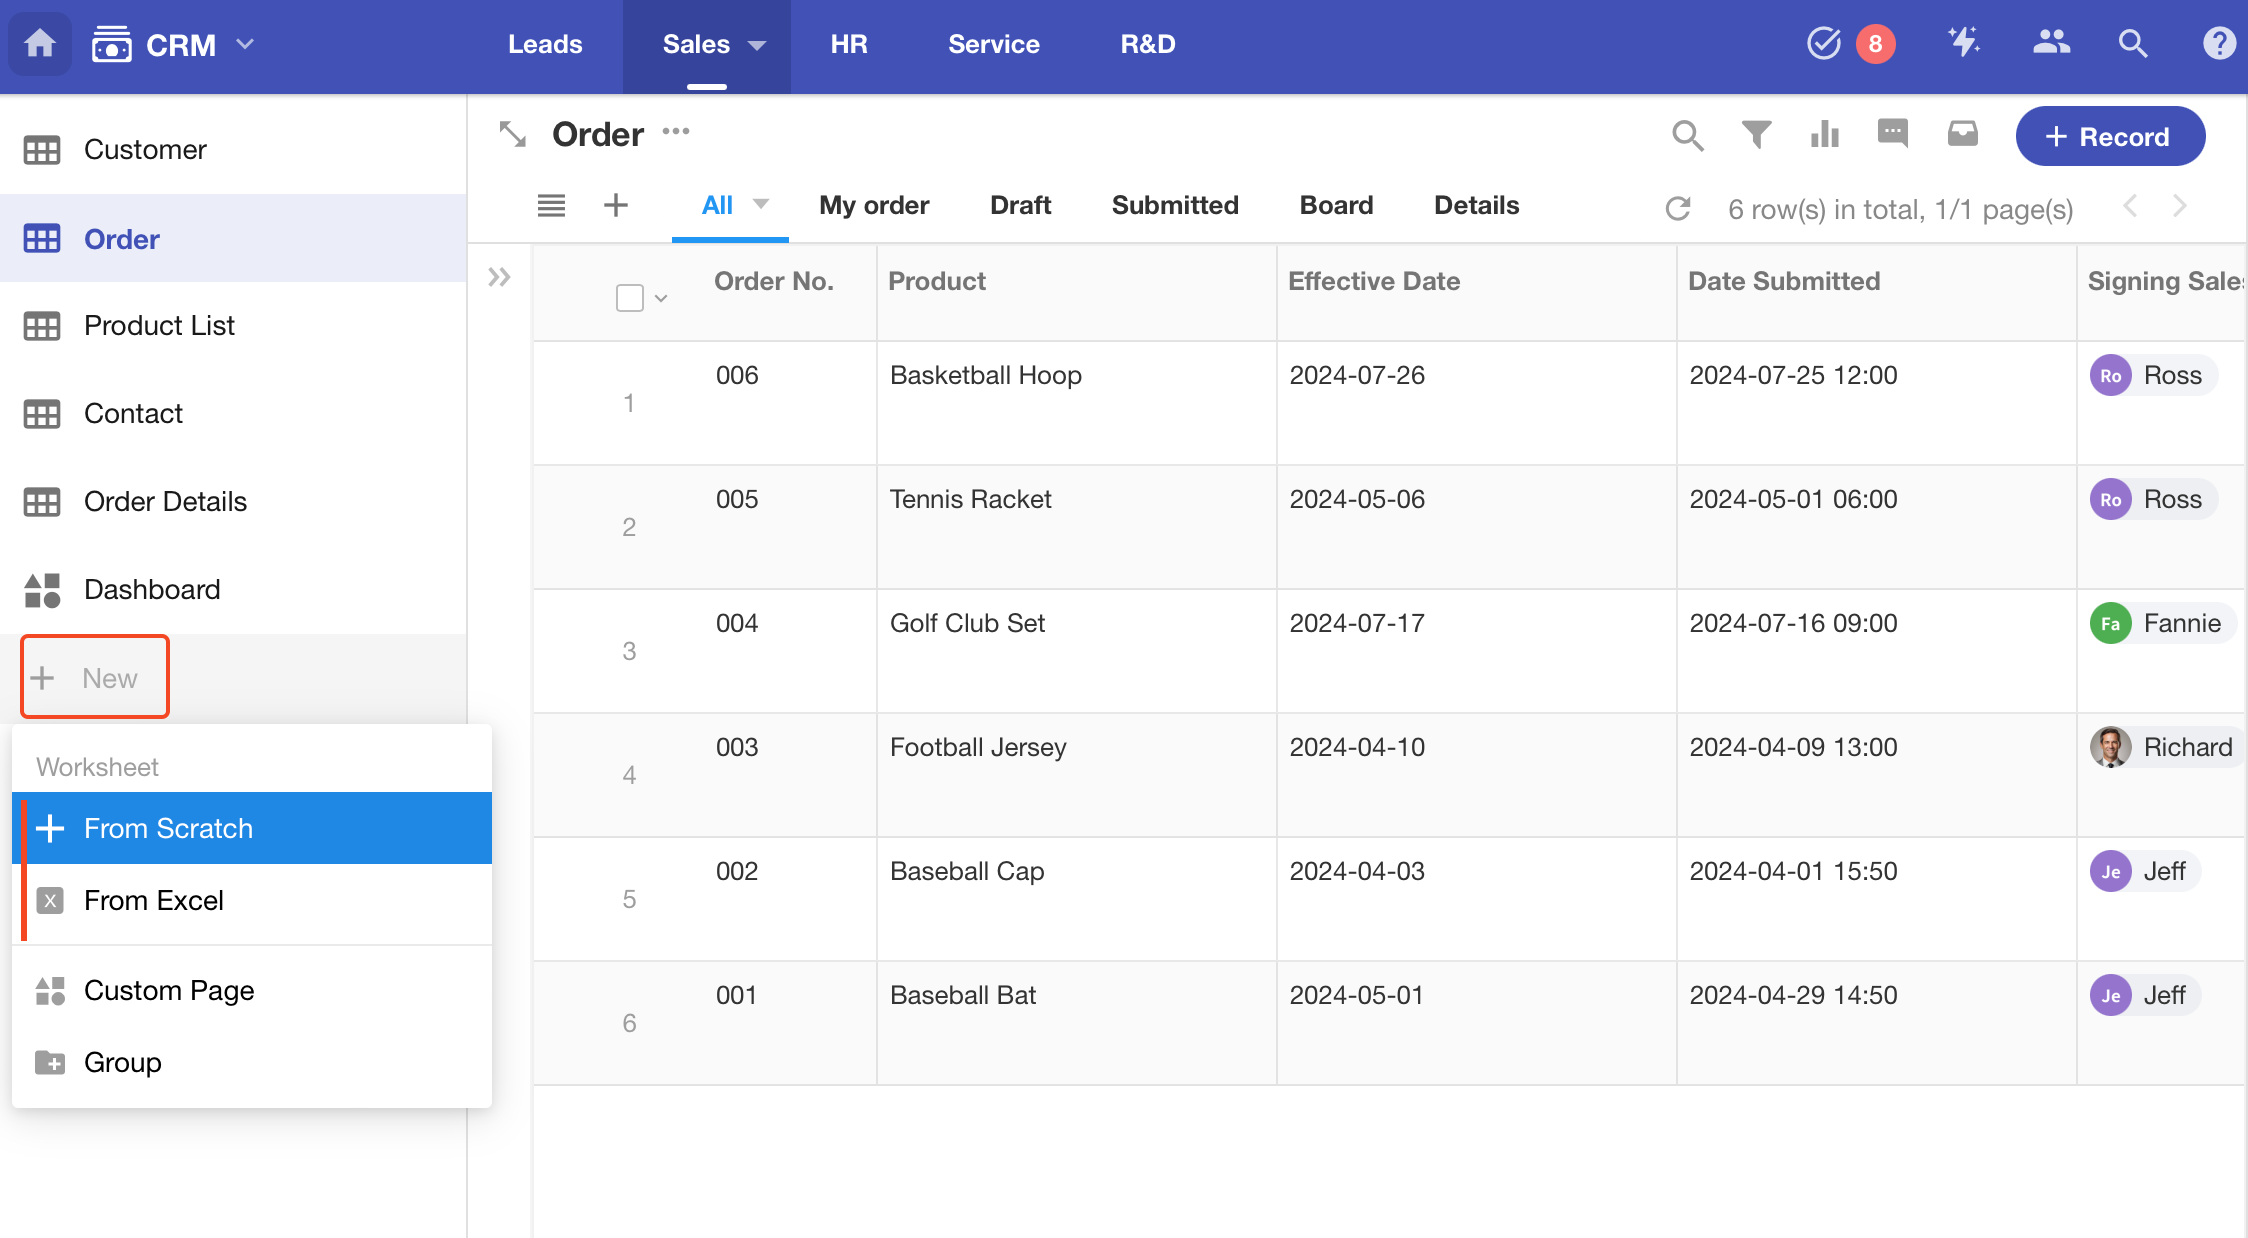
-
Edit a worksheet
Add Fields
Fields in the worksheet are equivalent to columns in the Excel sheets, except that there are different types of fields that help you better store data in each record.
For example, a row of record can contain fields such as rich text, multi-select, single-select, attachment, etc.
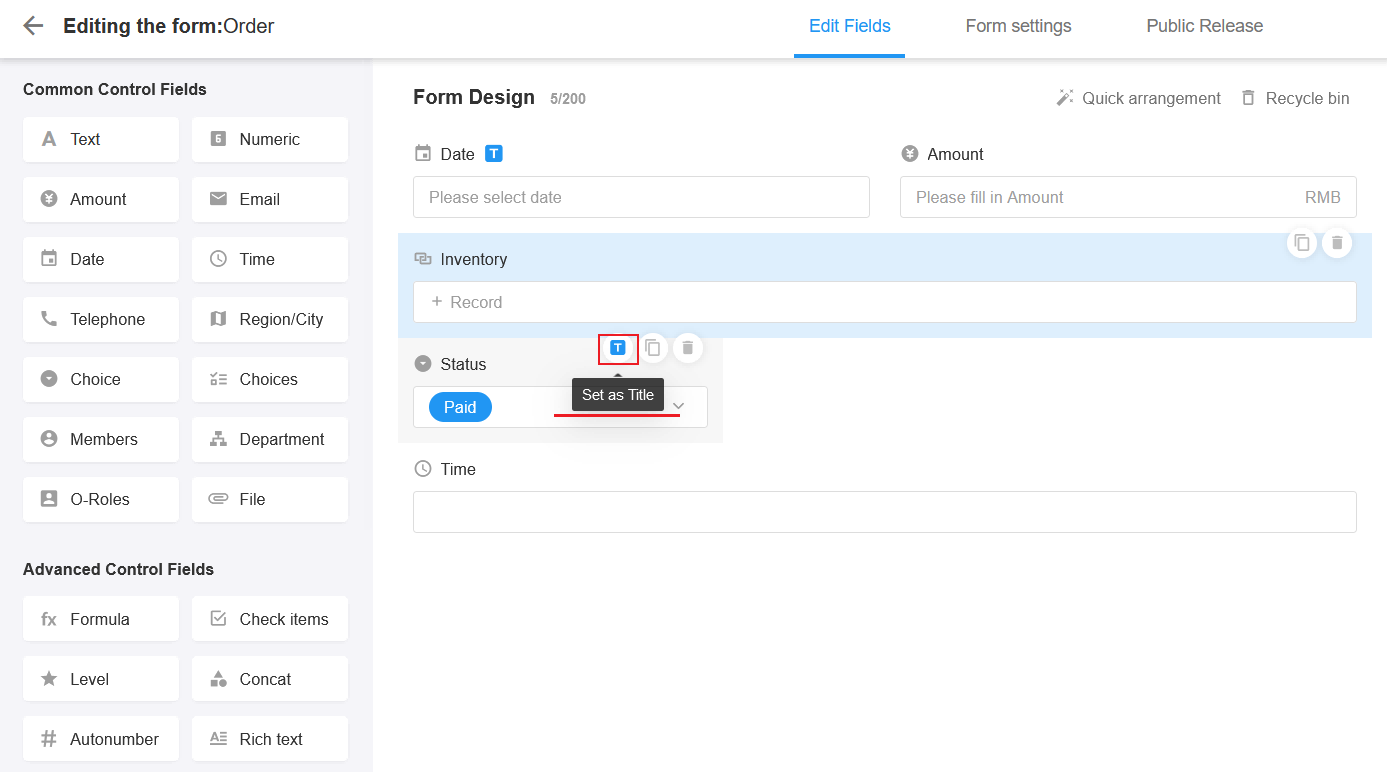
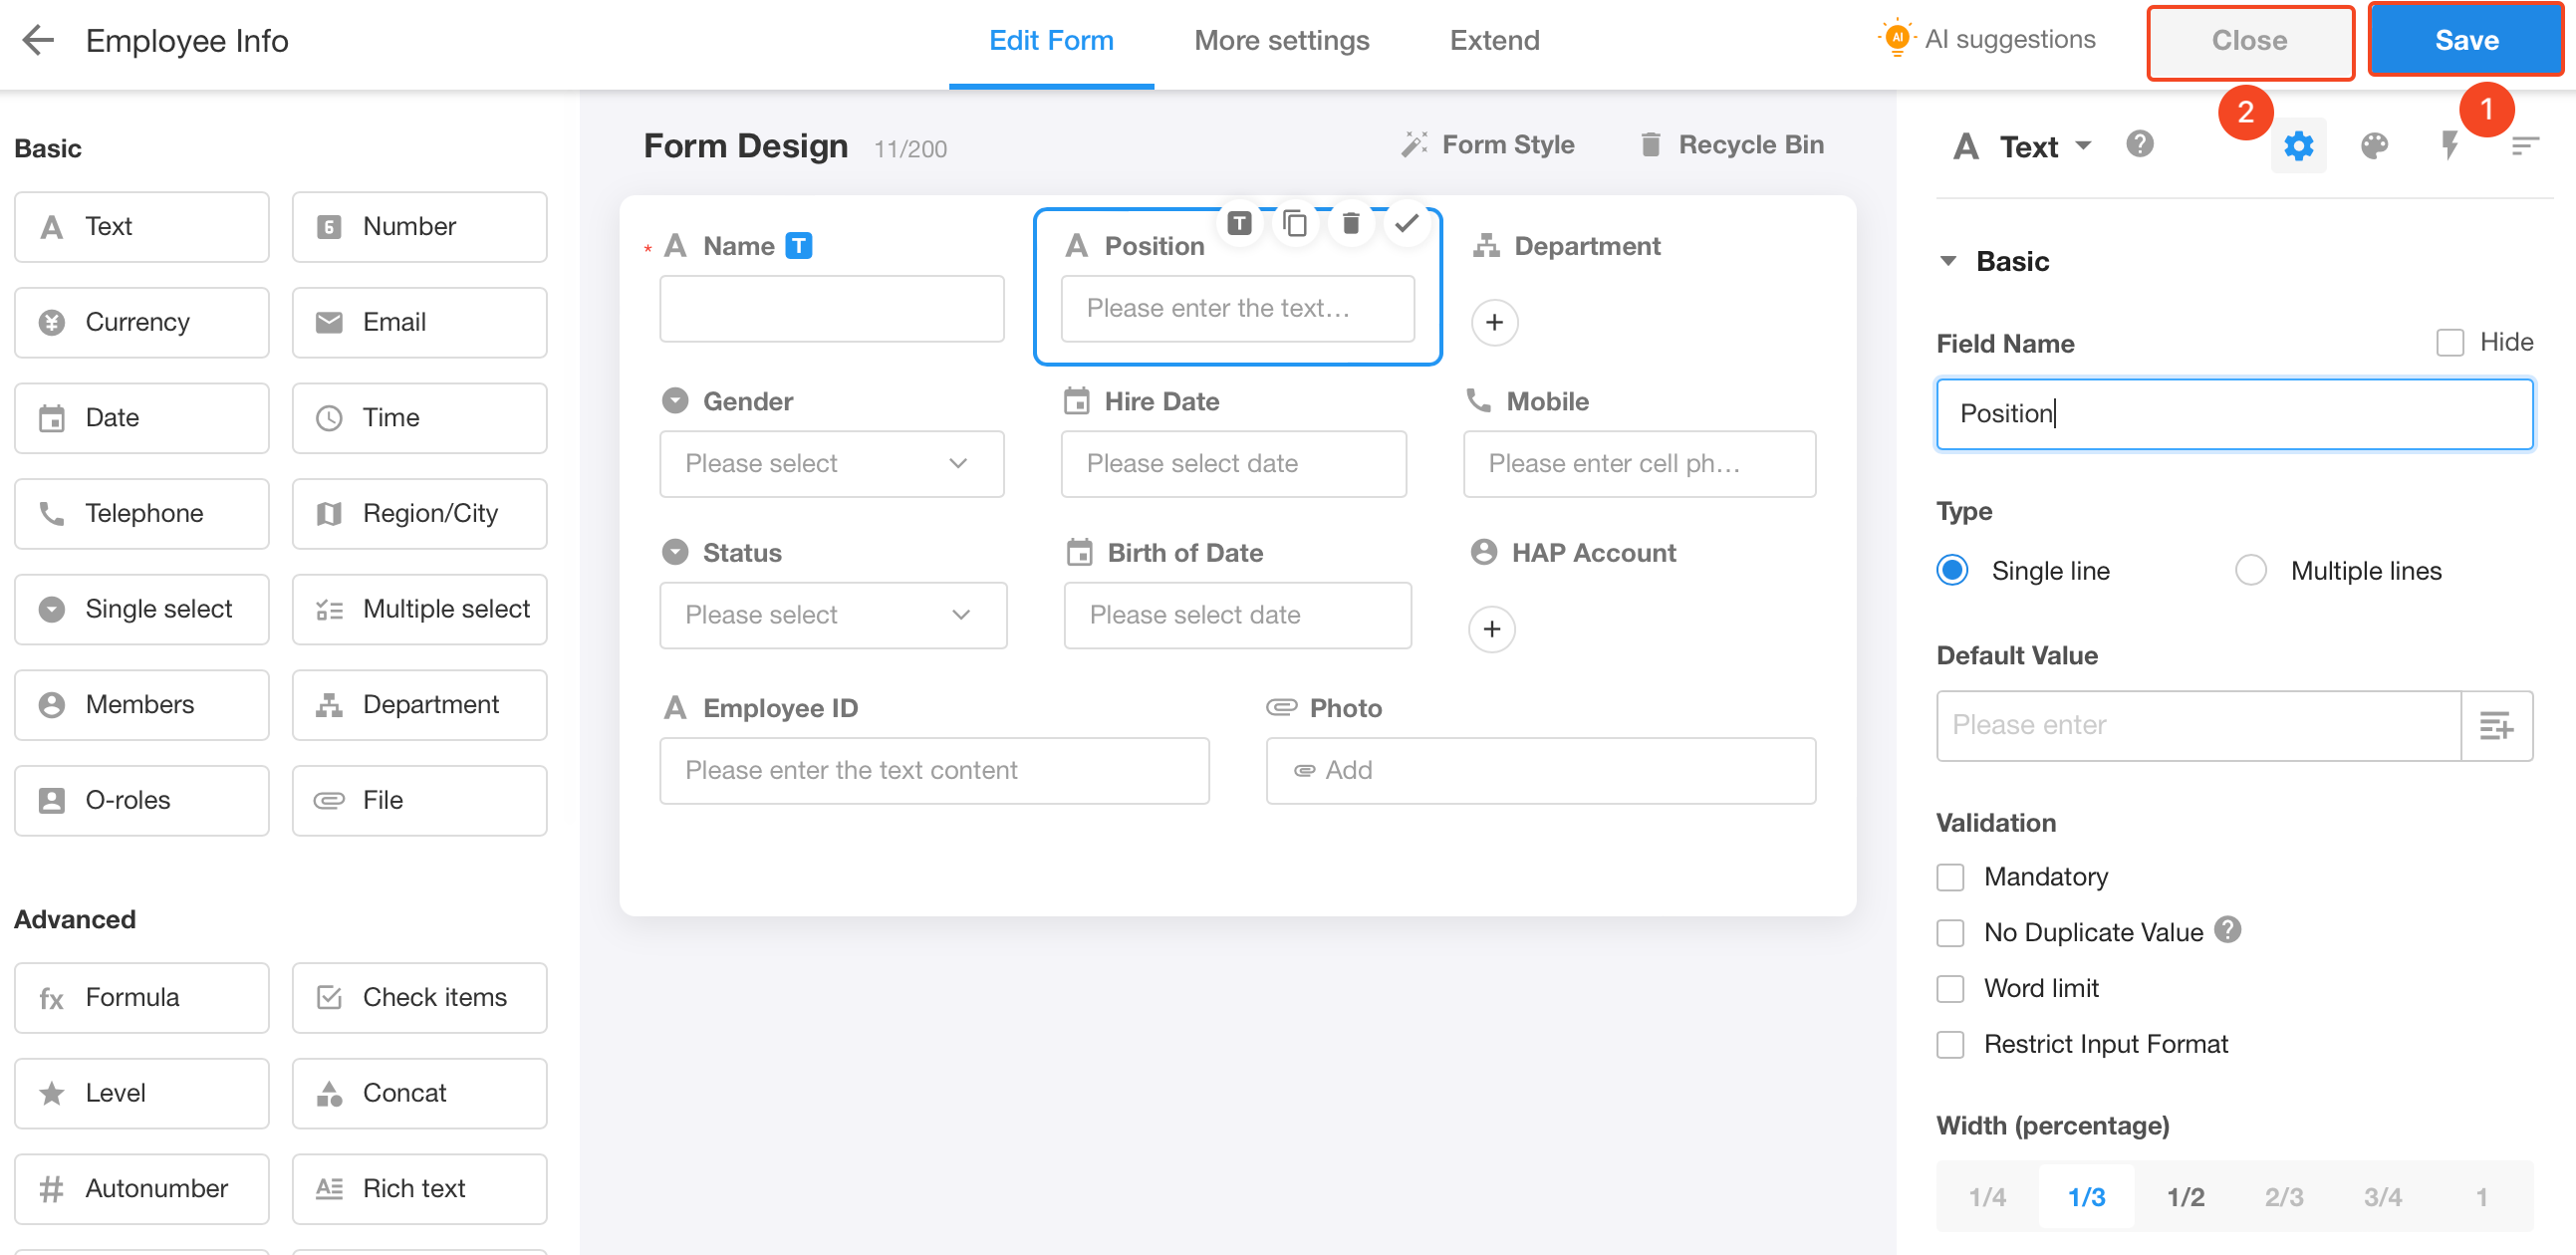
1. Add Field
In the left control area, you can click on a control to add or drag it to the middle editing area.

Note: Add up to 200 fields to a worksheet; [Segment] and [Remarks] do not count.
2. Title Field
The title field is usually identifiable and unique, identifying the main content. For example, in a Contact worksheet, name should be set as title field.
Mouse over the field and you can see [Set as title] icon.
More details about title field
3. Adjust Field Position
Click on the field and drag it to the desired place.
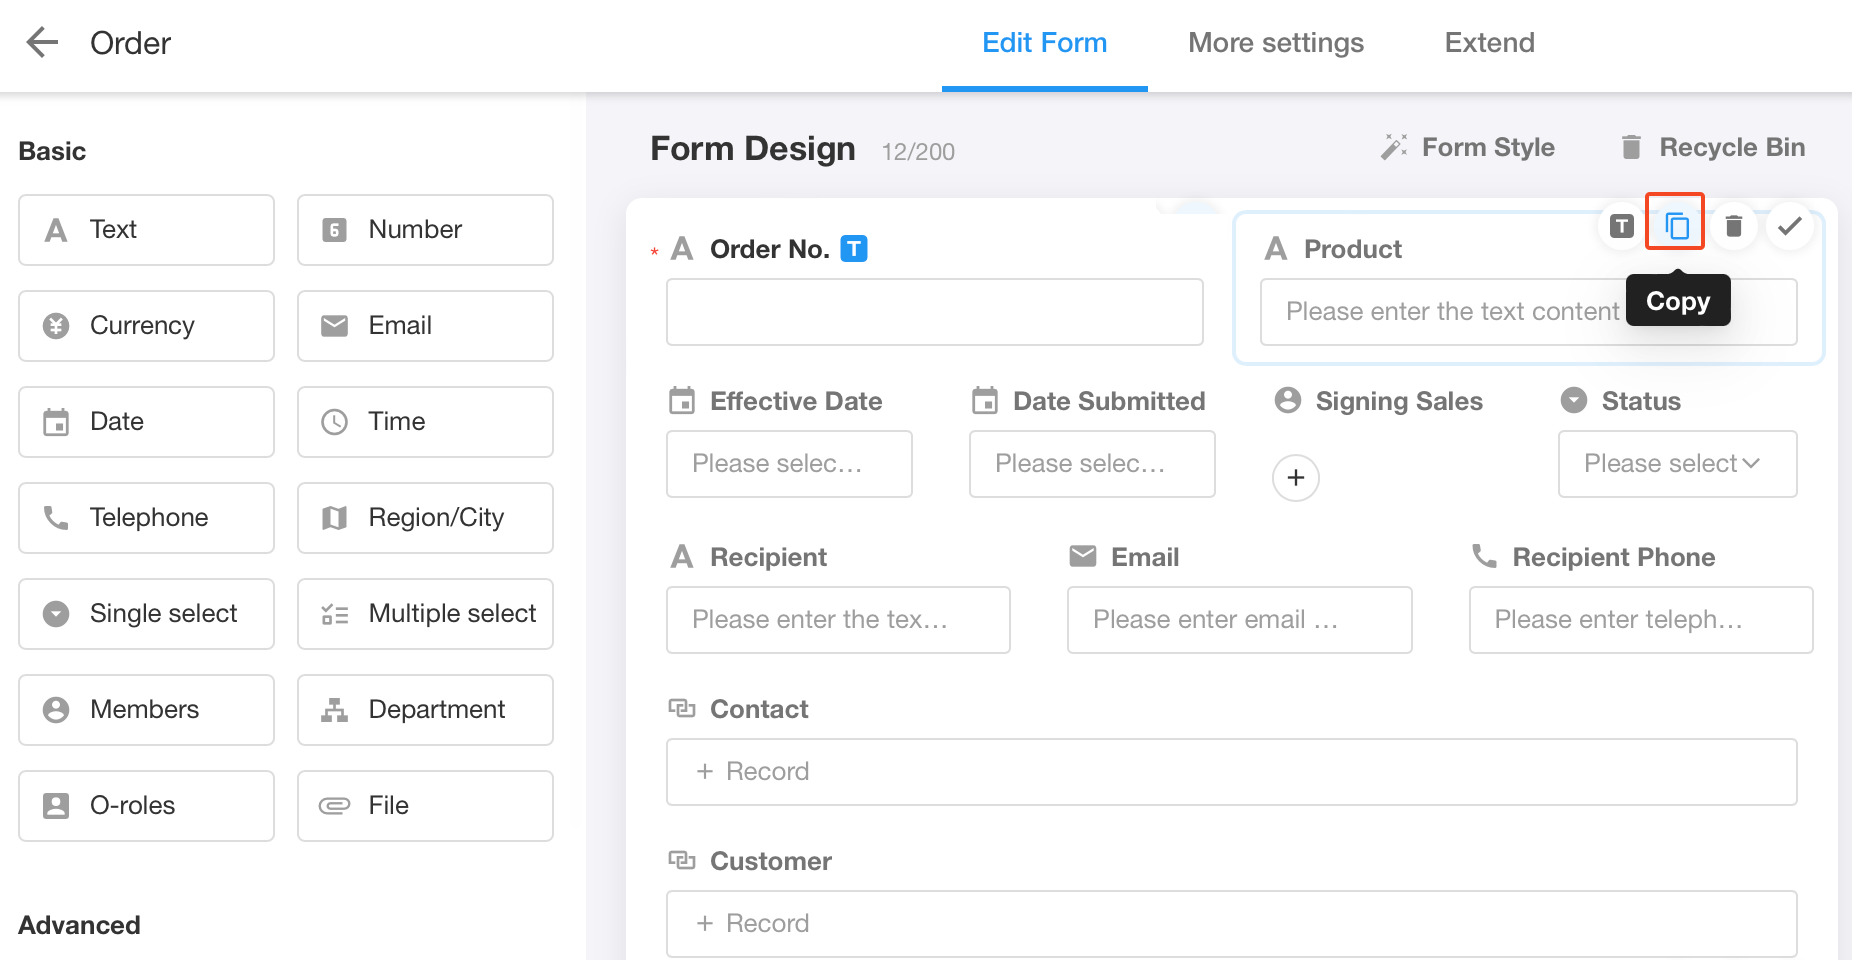
4. Copy Field
Sometimes there are same configurations in two fields, in this case, you can click to [Copy control] and modify.
5. Delete/Restore Field
Mouse over the field and you can see the delete icon.
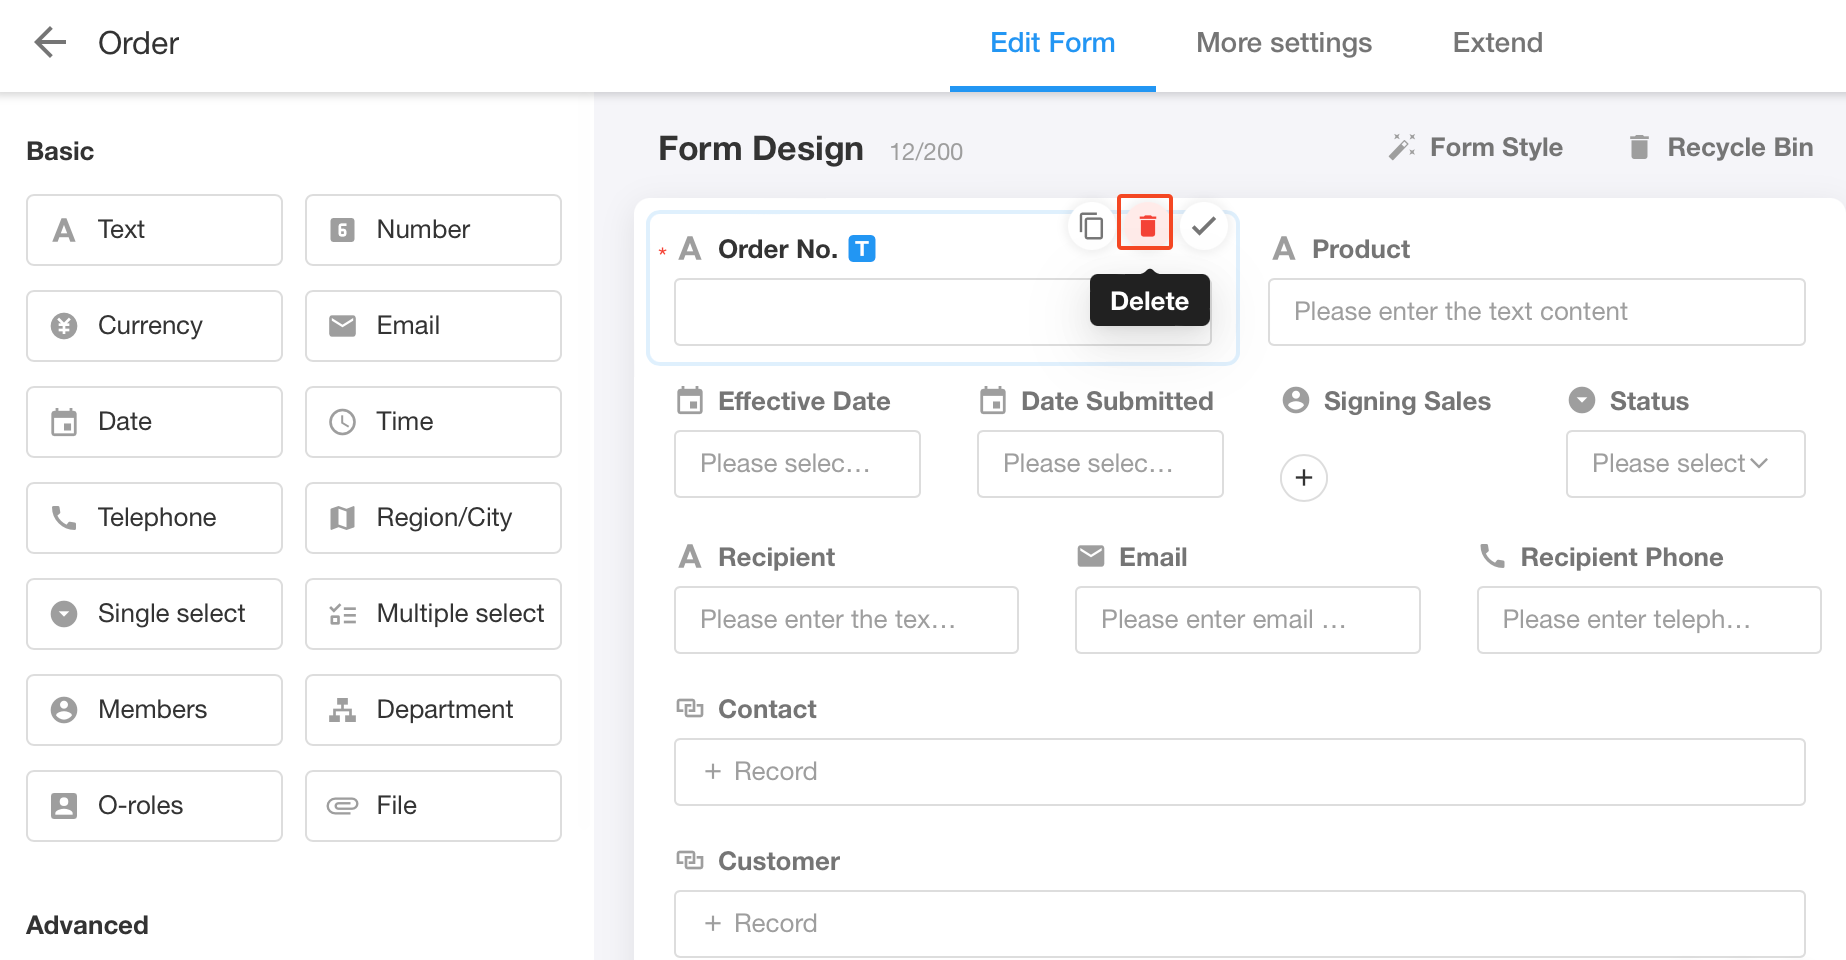
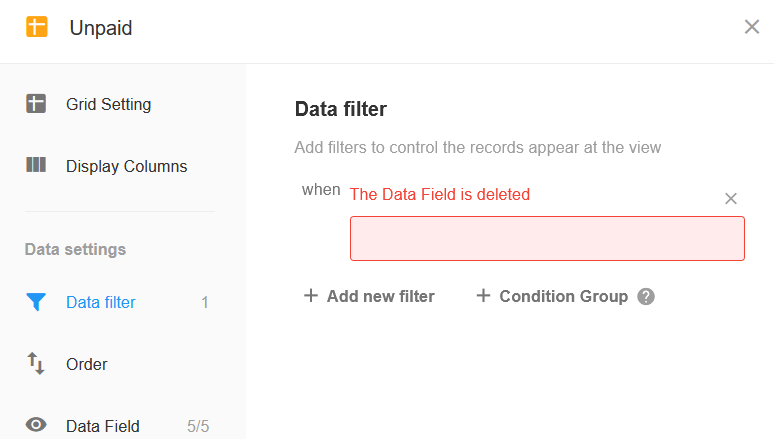
After deleting a field, if it is a data filter for a view or involved in workflows, there will show you “The data field is deleted”.
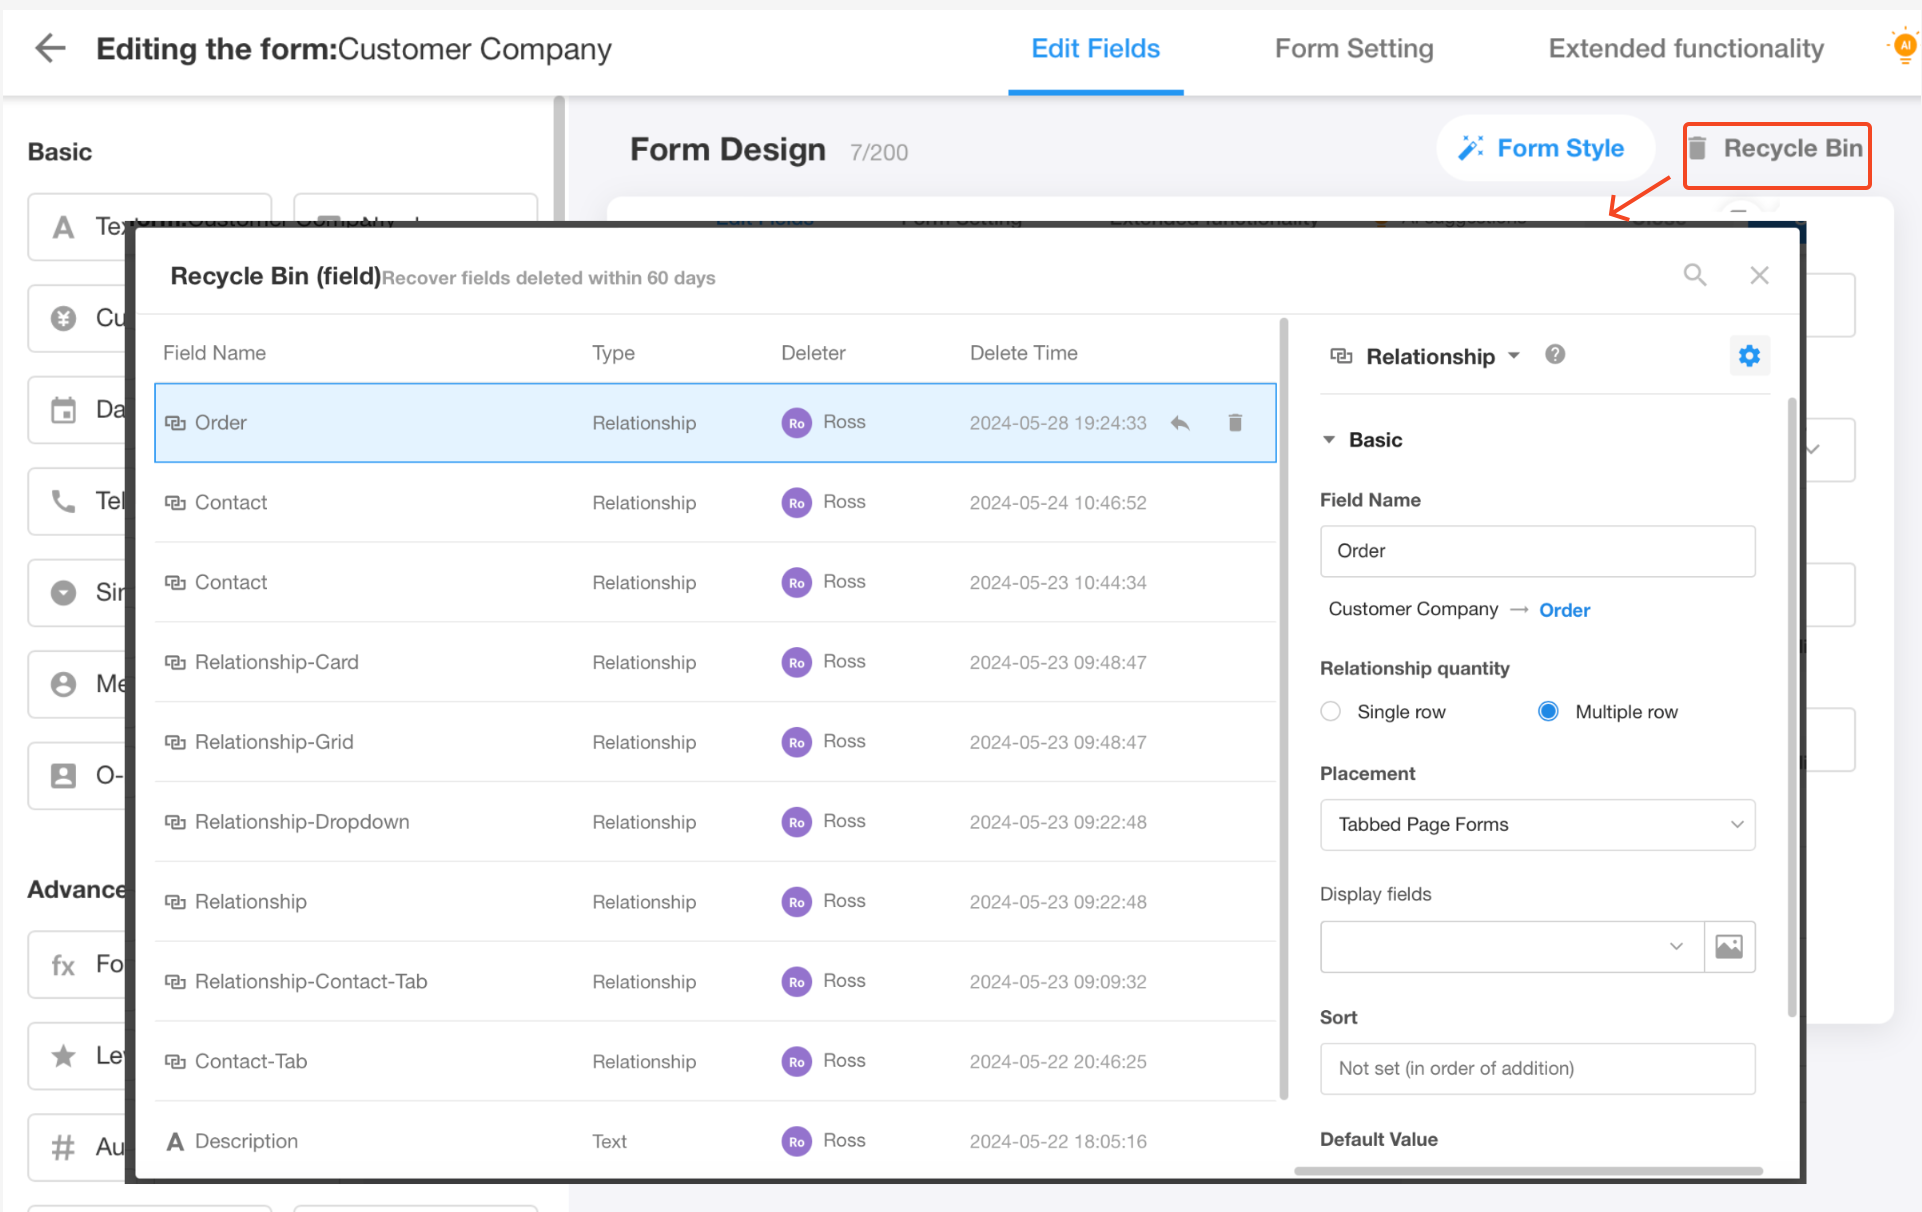
Restore Field
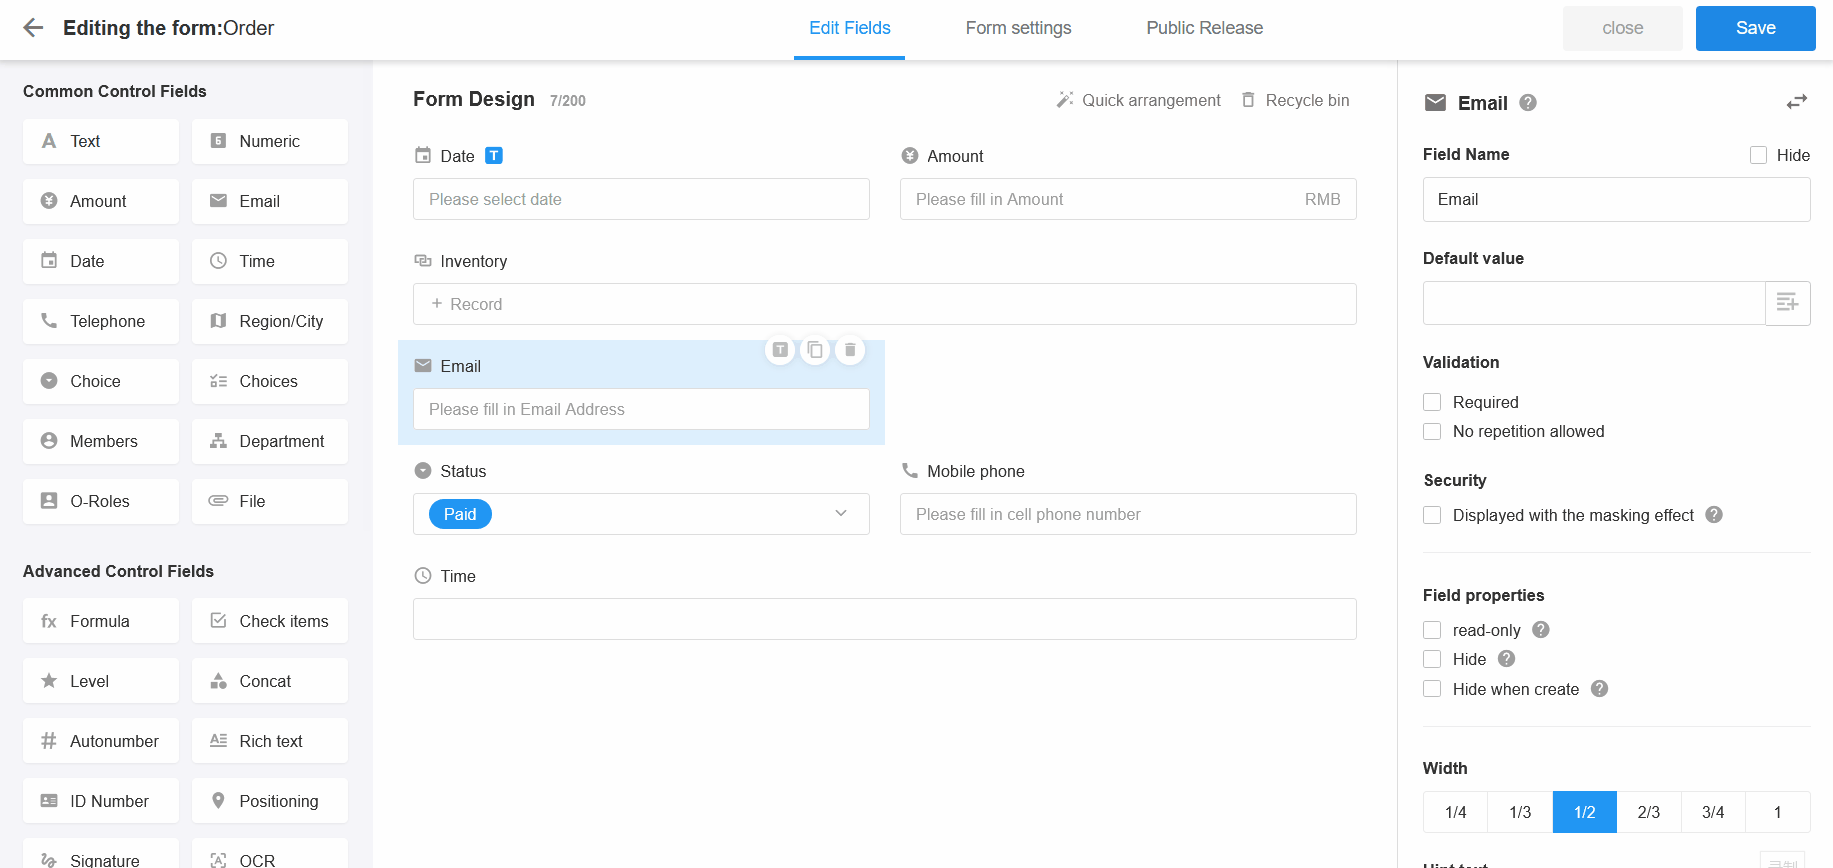
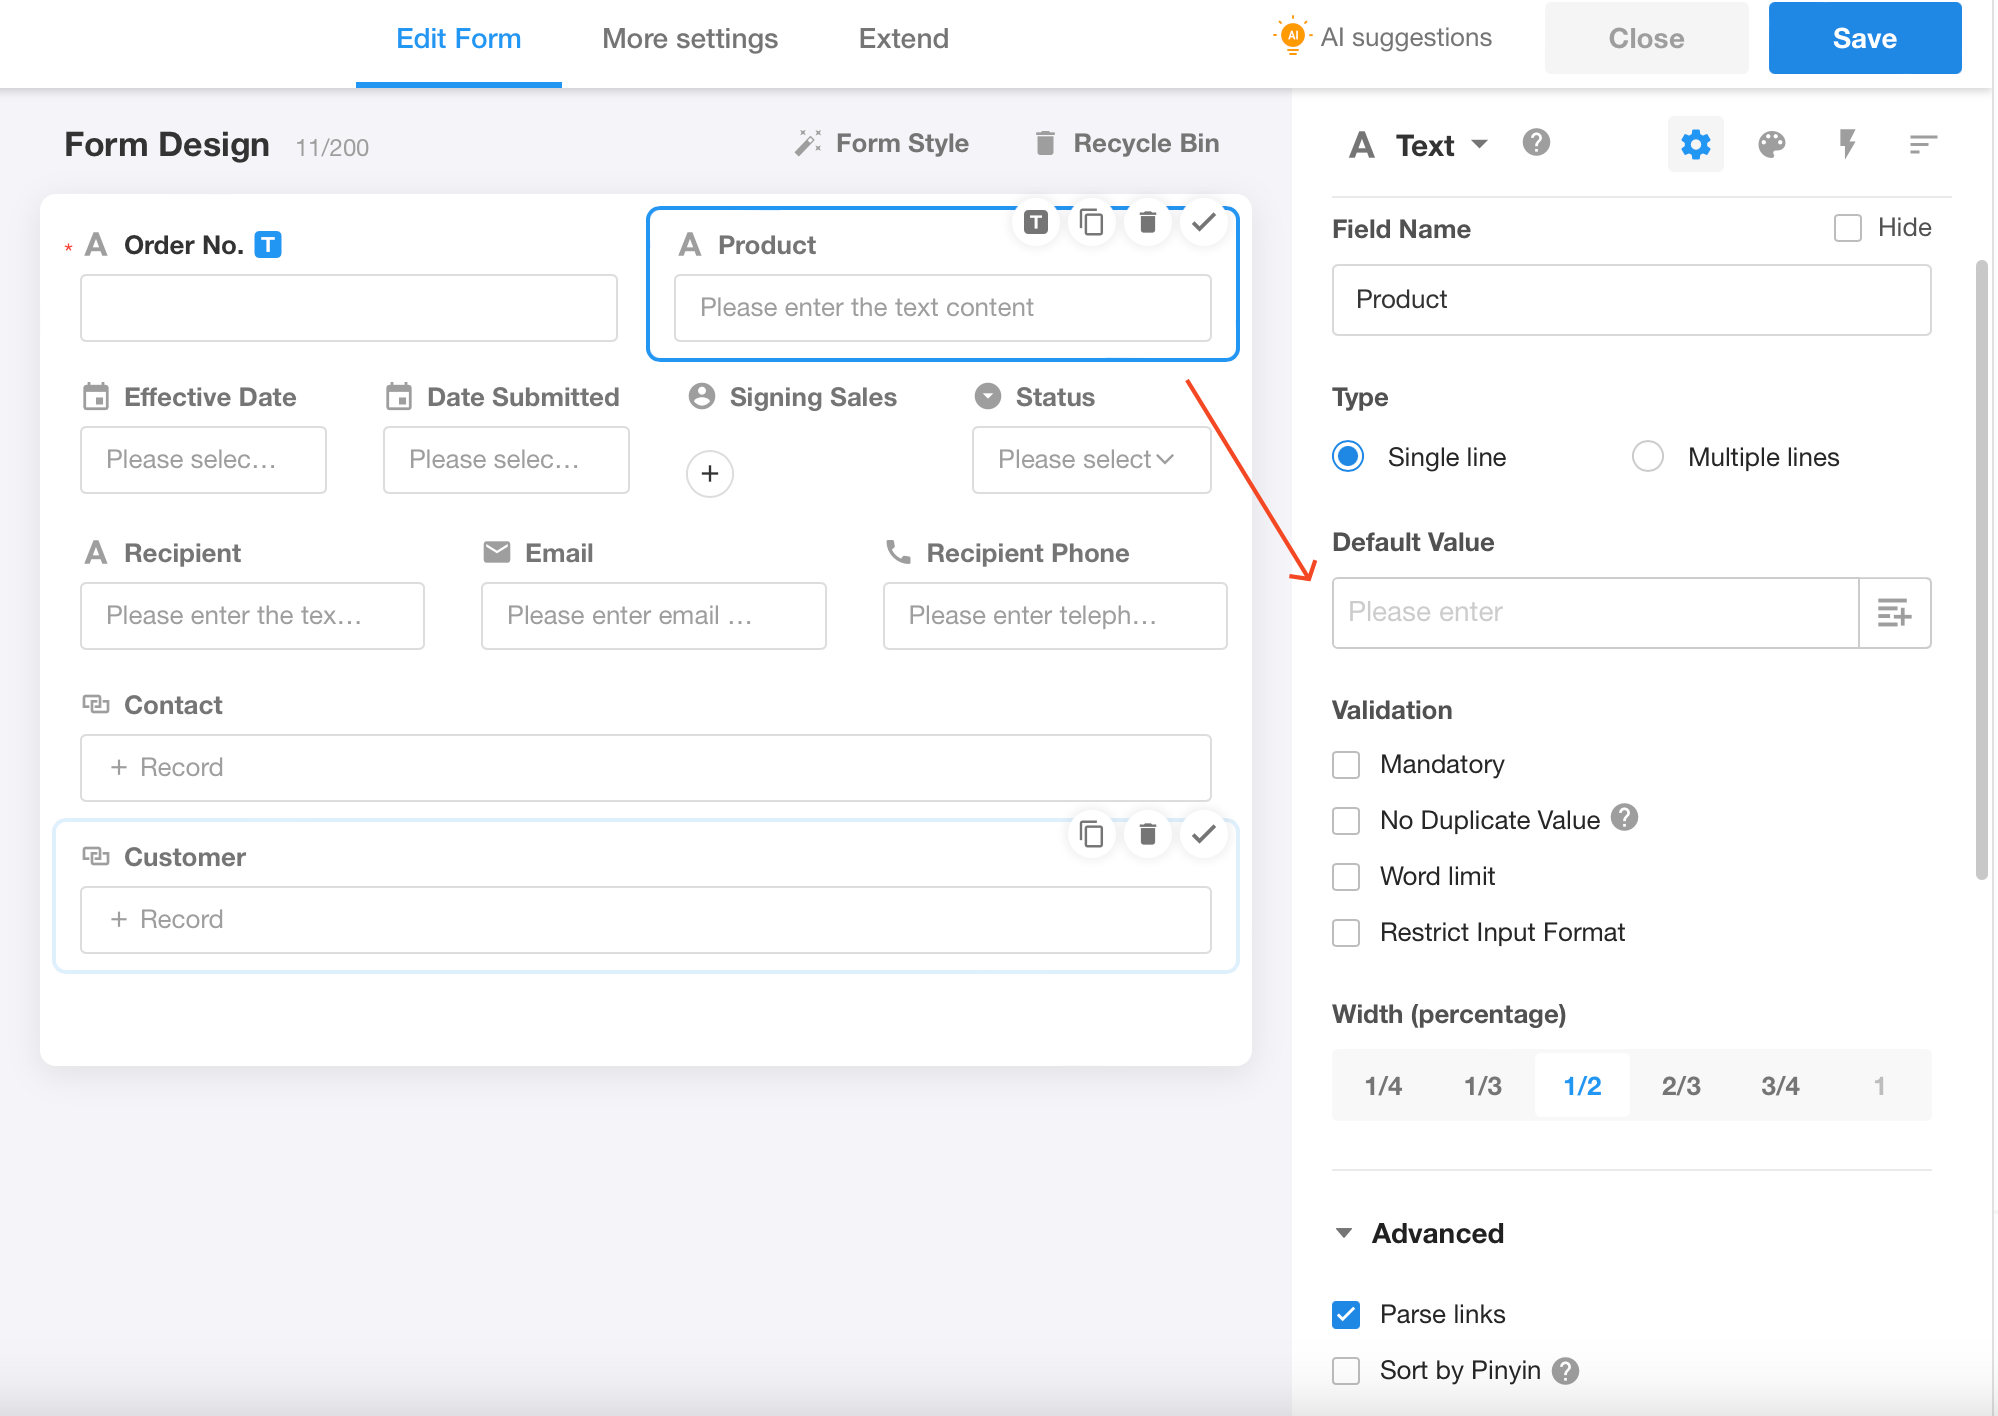
Set Fields
The properties of the field include fixed properties such as name, required or not, default value, width, etc., as well as additional properties, for example, for the currency control, you can set unit or decimal place.
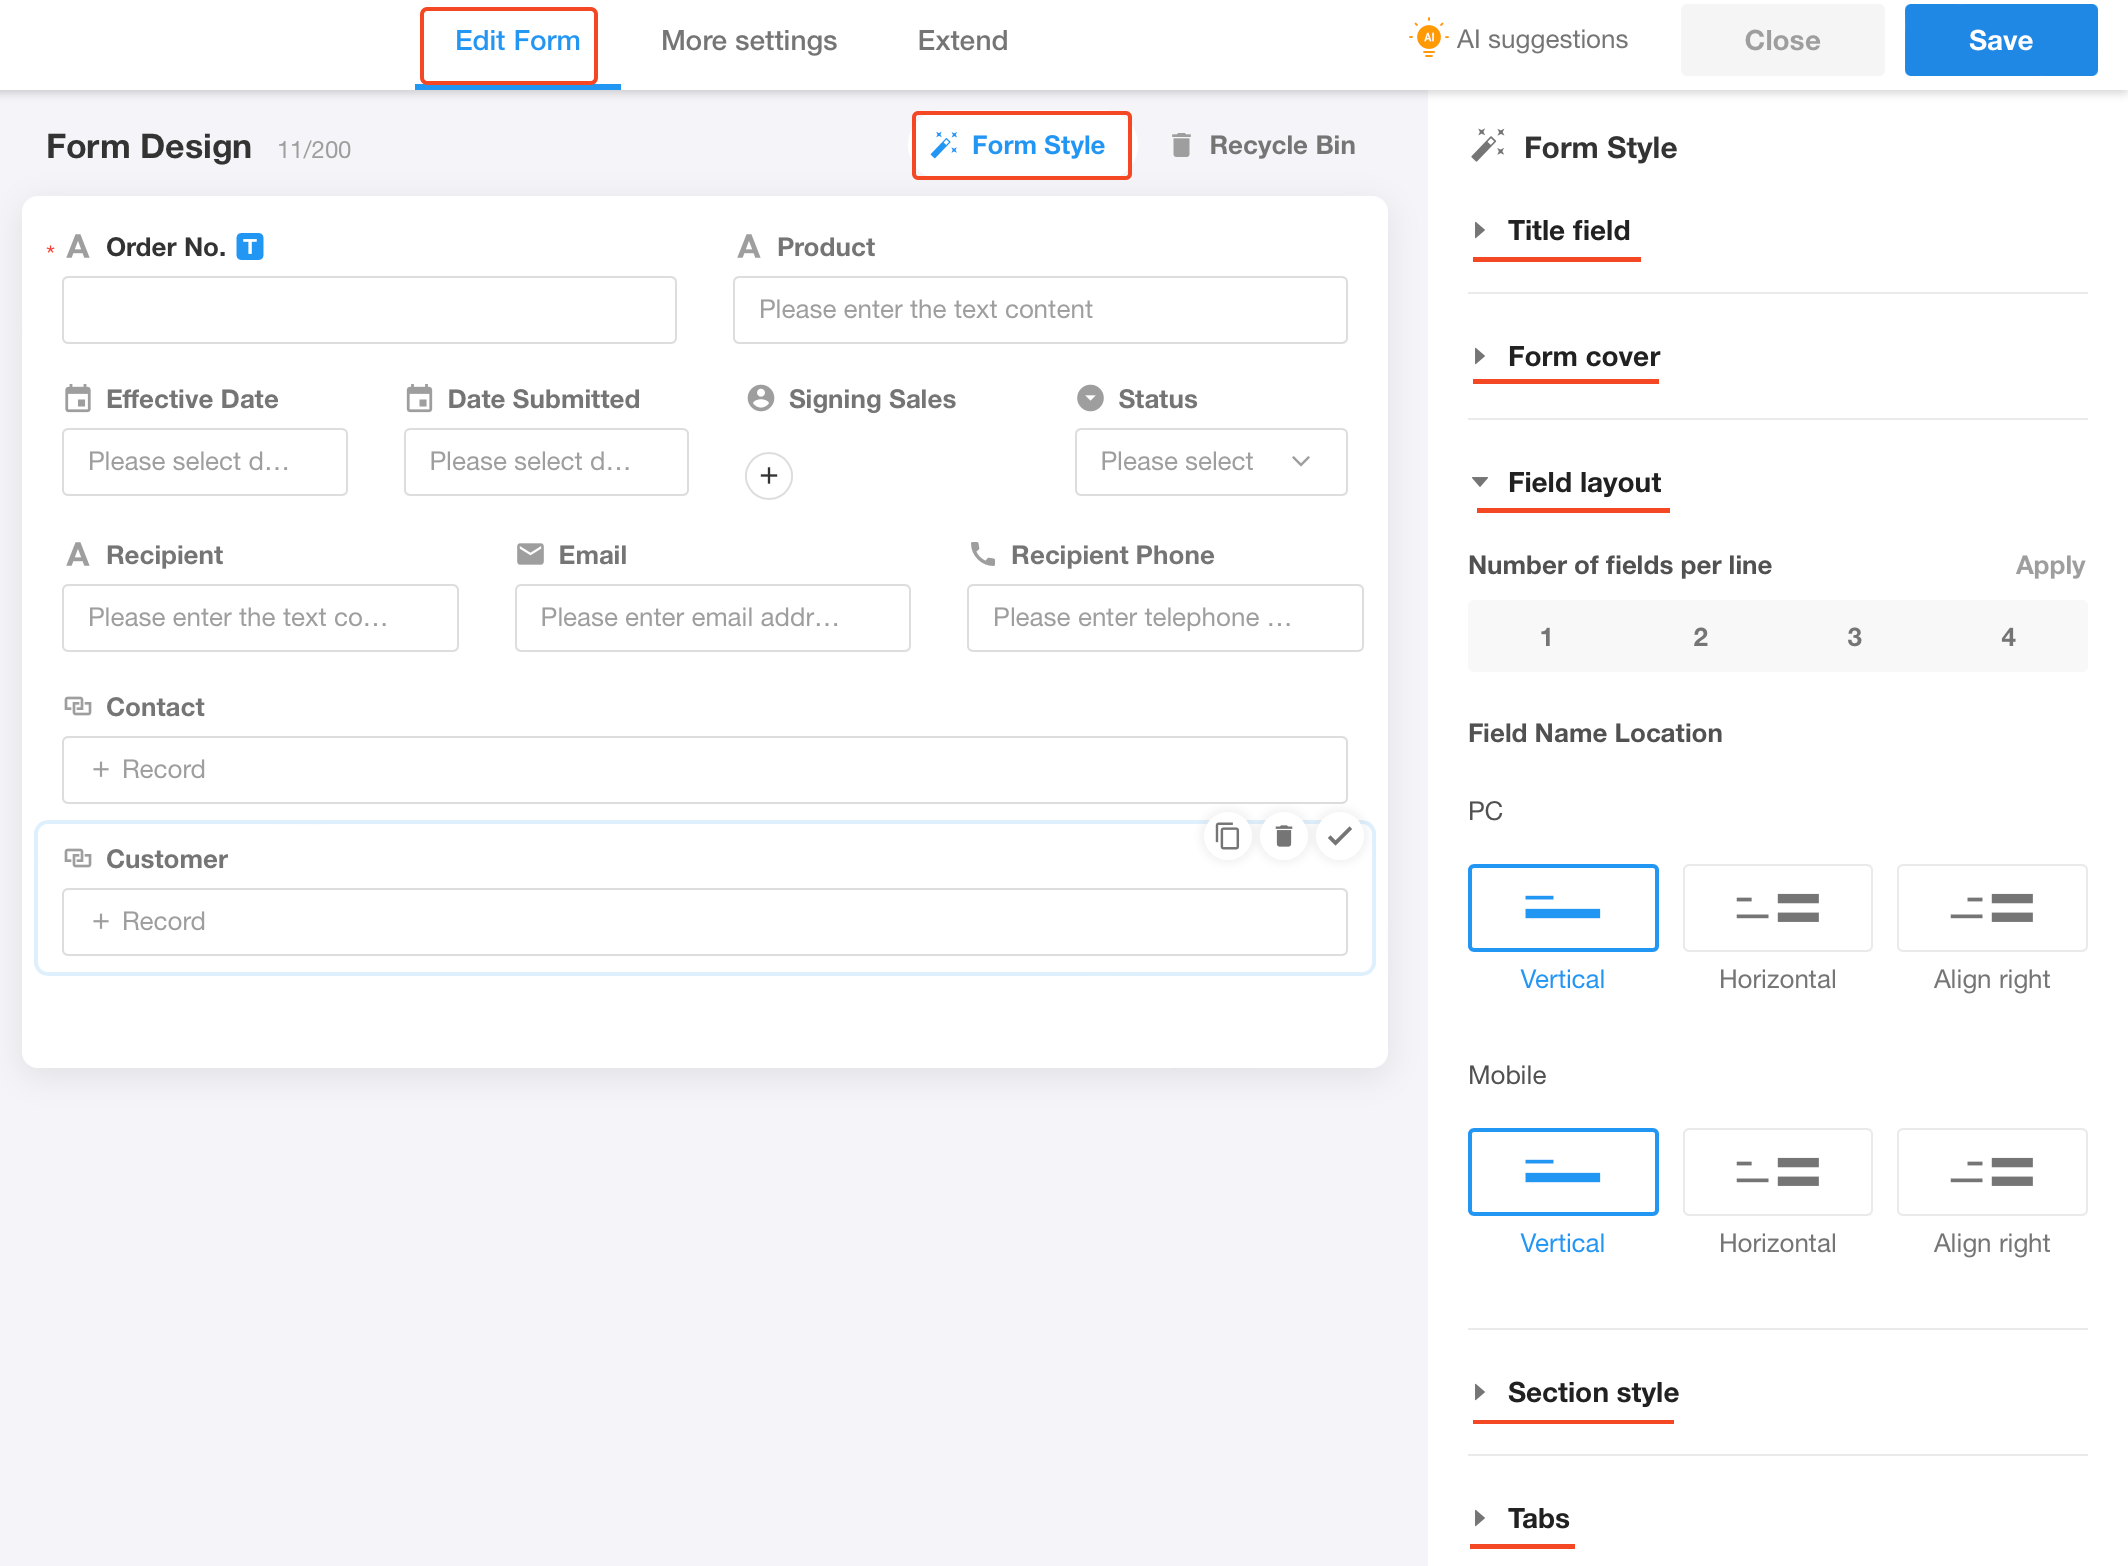
Set Form Style
It includes the record cover, field layout, section style and tabs.
1. Title Field
The title field can quickly identify a record, used in scenarios such as relating records and message notifications. More details about the title field.
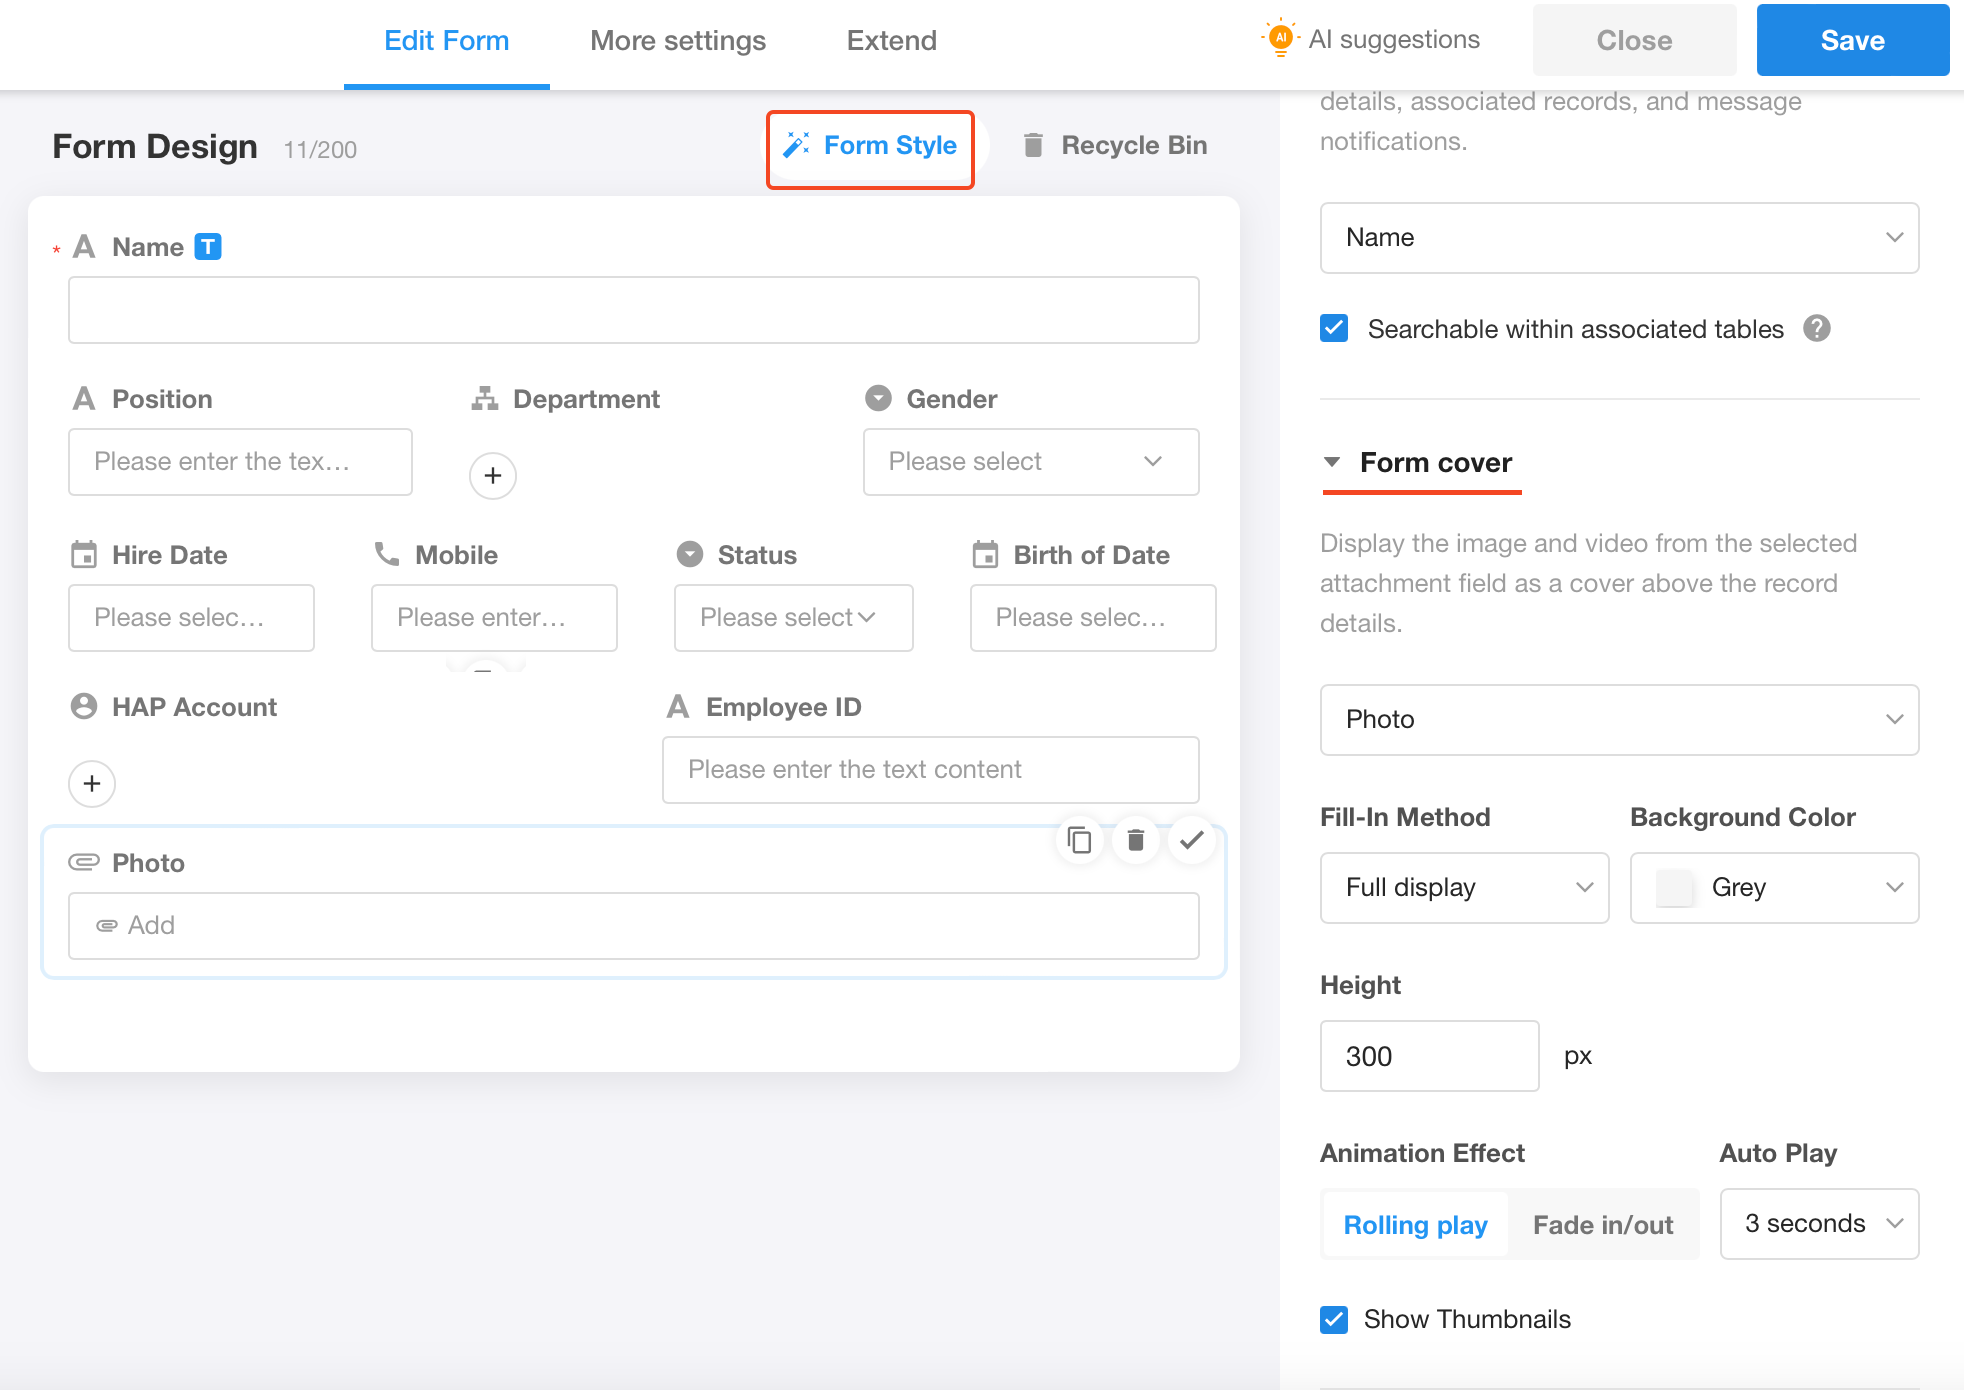
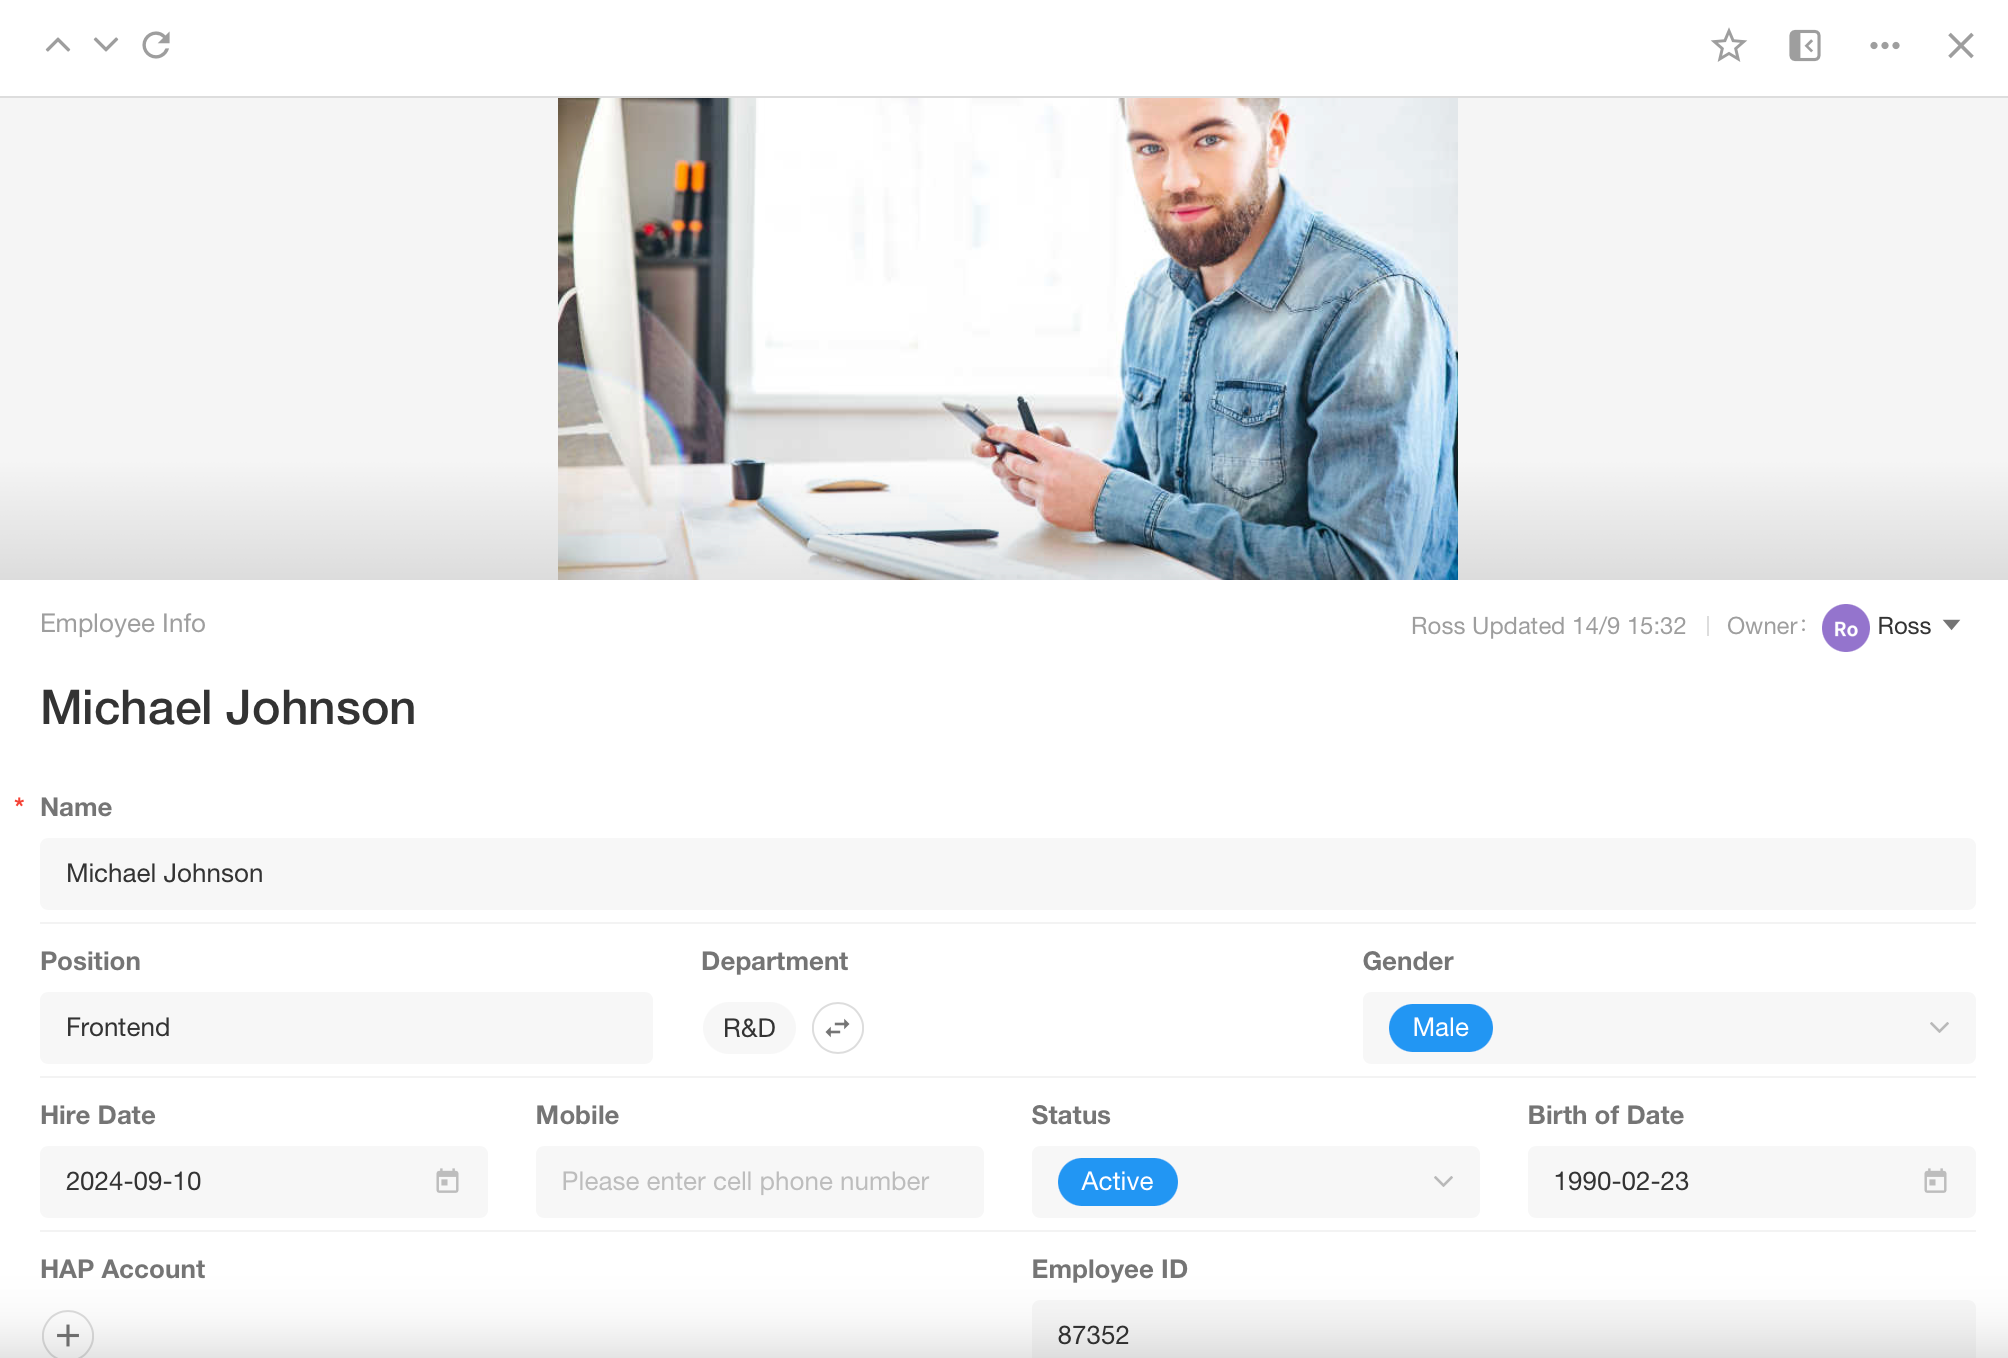
2. Record Cover
Select the image in the File field as the record cover, which can be displayed at the top of the record detail page, and can be configured with animation effects and the autoplay speed.
-
Height of image display: it defaults to 600px, with a maximum of 1000px and a minimum of 100px.
-
If there are multiple images in the attachment field, they can be played in a loop.
-
It works on App and H5 as well.
-
Support thumbnail display of multiple images or videos.
As shown below, the employee's photo is set as the cover, which is displayed at the top of this employee's record page.
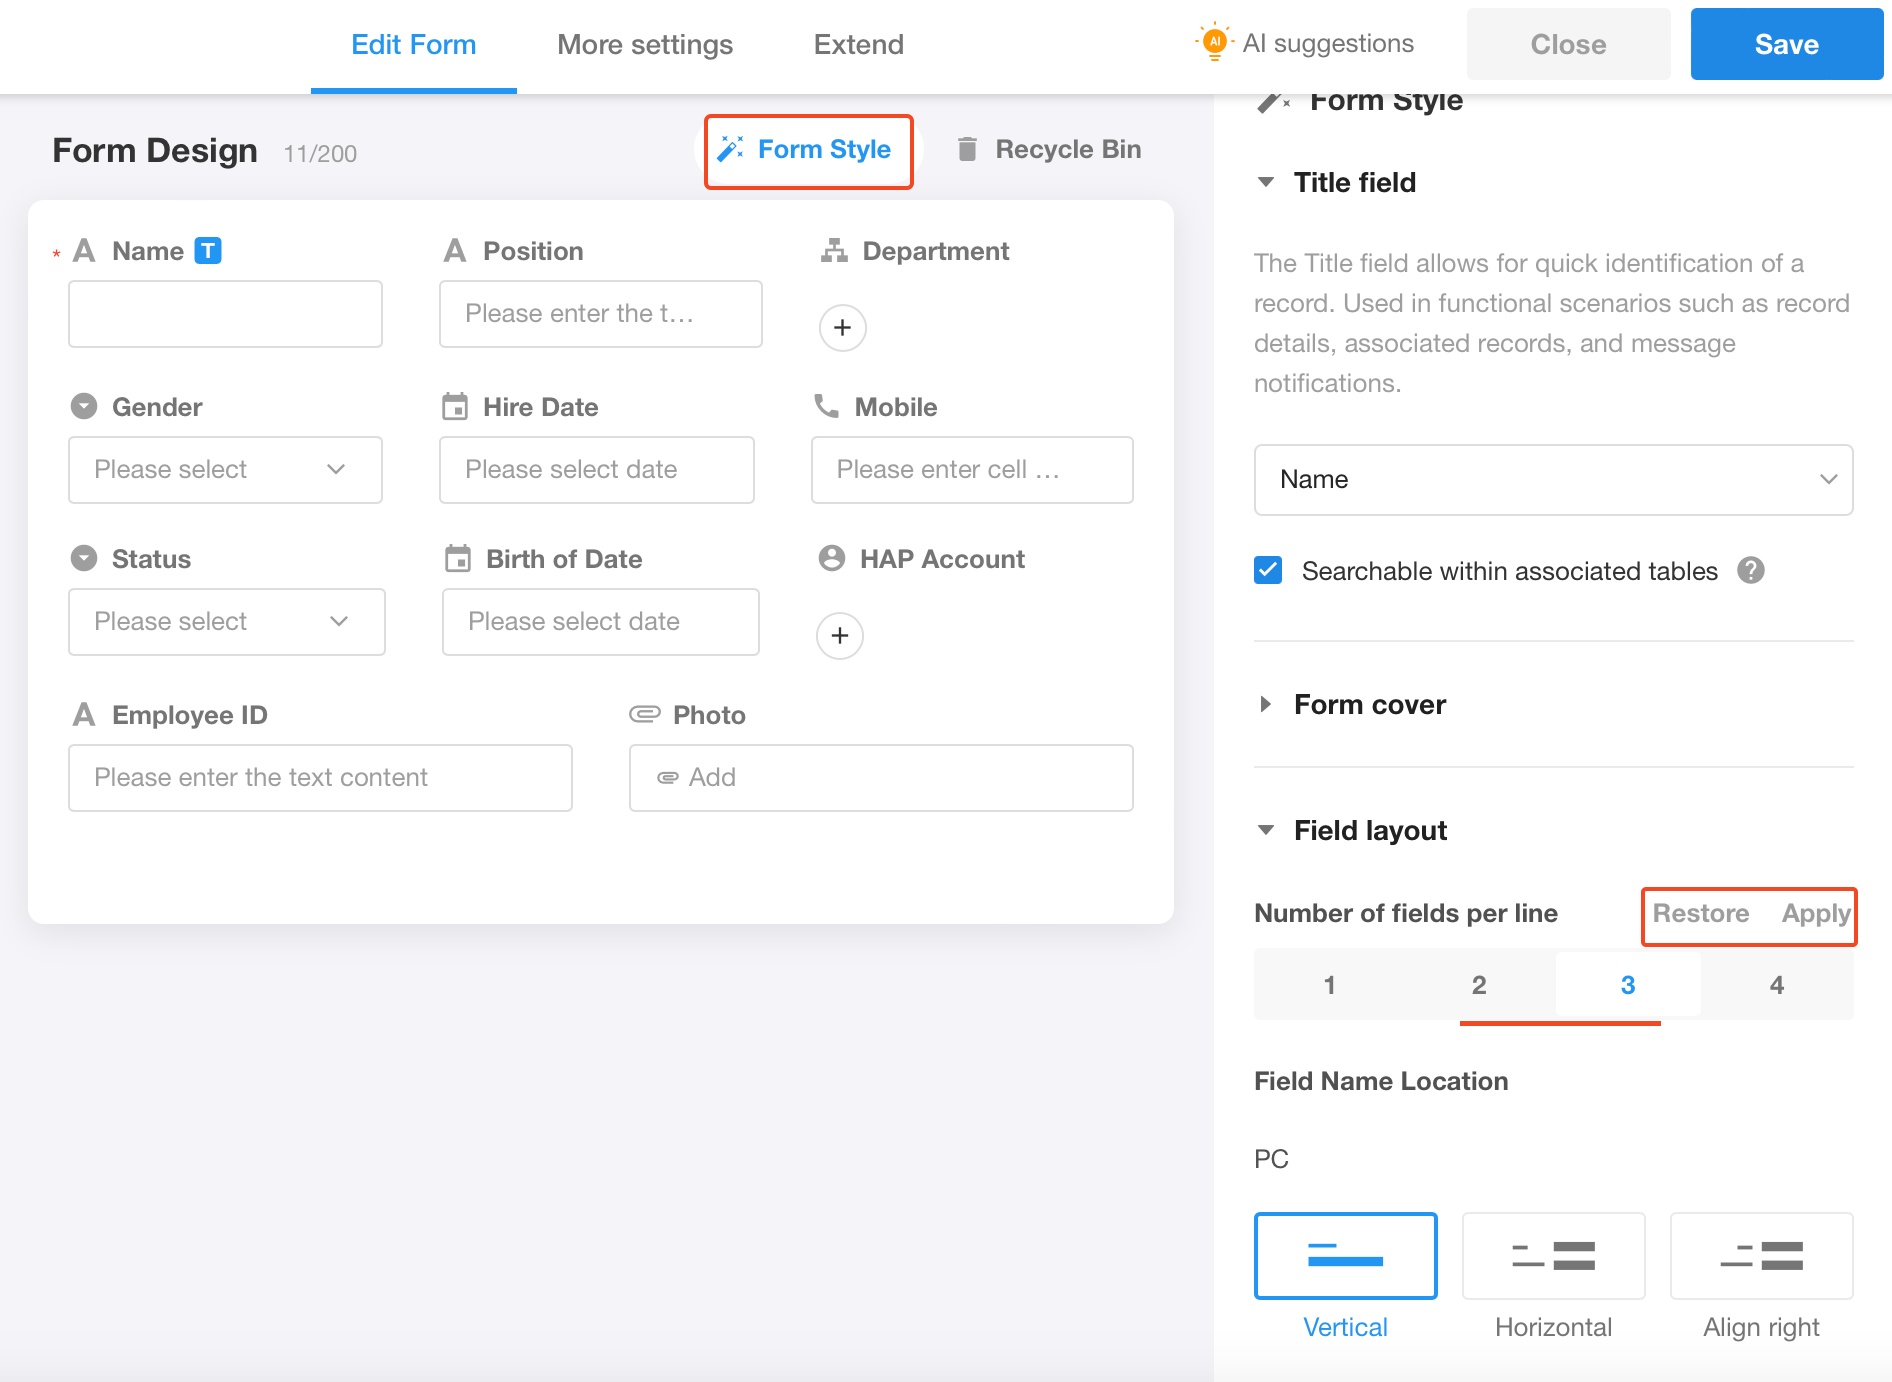
3. Field Layout
Here you can quickly set the number of fields displayed in a row in the form (up to 4), and adjust the relative position of the field title and input box.
Number of fields per line
It means how many fields can be displayed per line in the worksheet, up to 4 fields. The fields will be automatically rearranged after setting.
-
Apply: save your settings
-
Restore: Restore to the last saved selection
Note: Here you are only setting the number of fields displayed in each row and resetting the layout. After saving, the application administrator can still drag to adjust the position of the fields or adjust the field width to modify the layout. The actual number of fields per row may not necessarily be the same as the setting here.
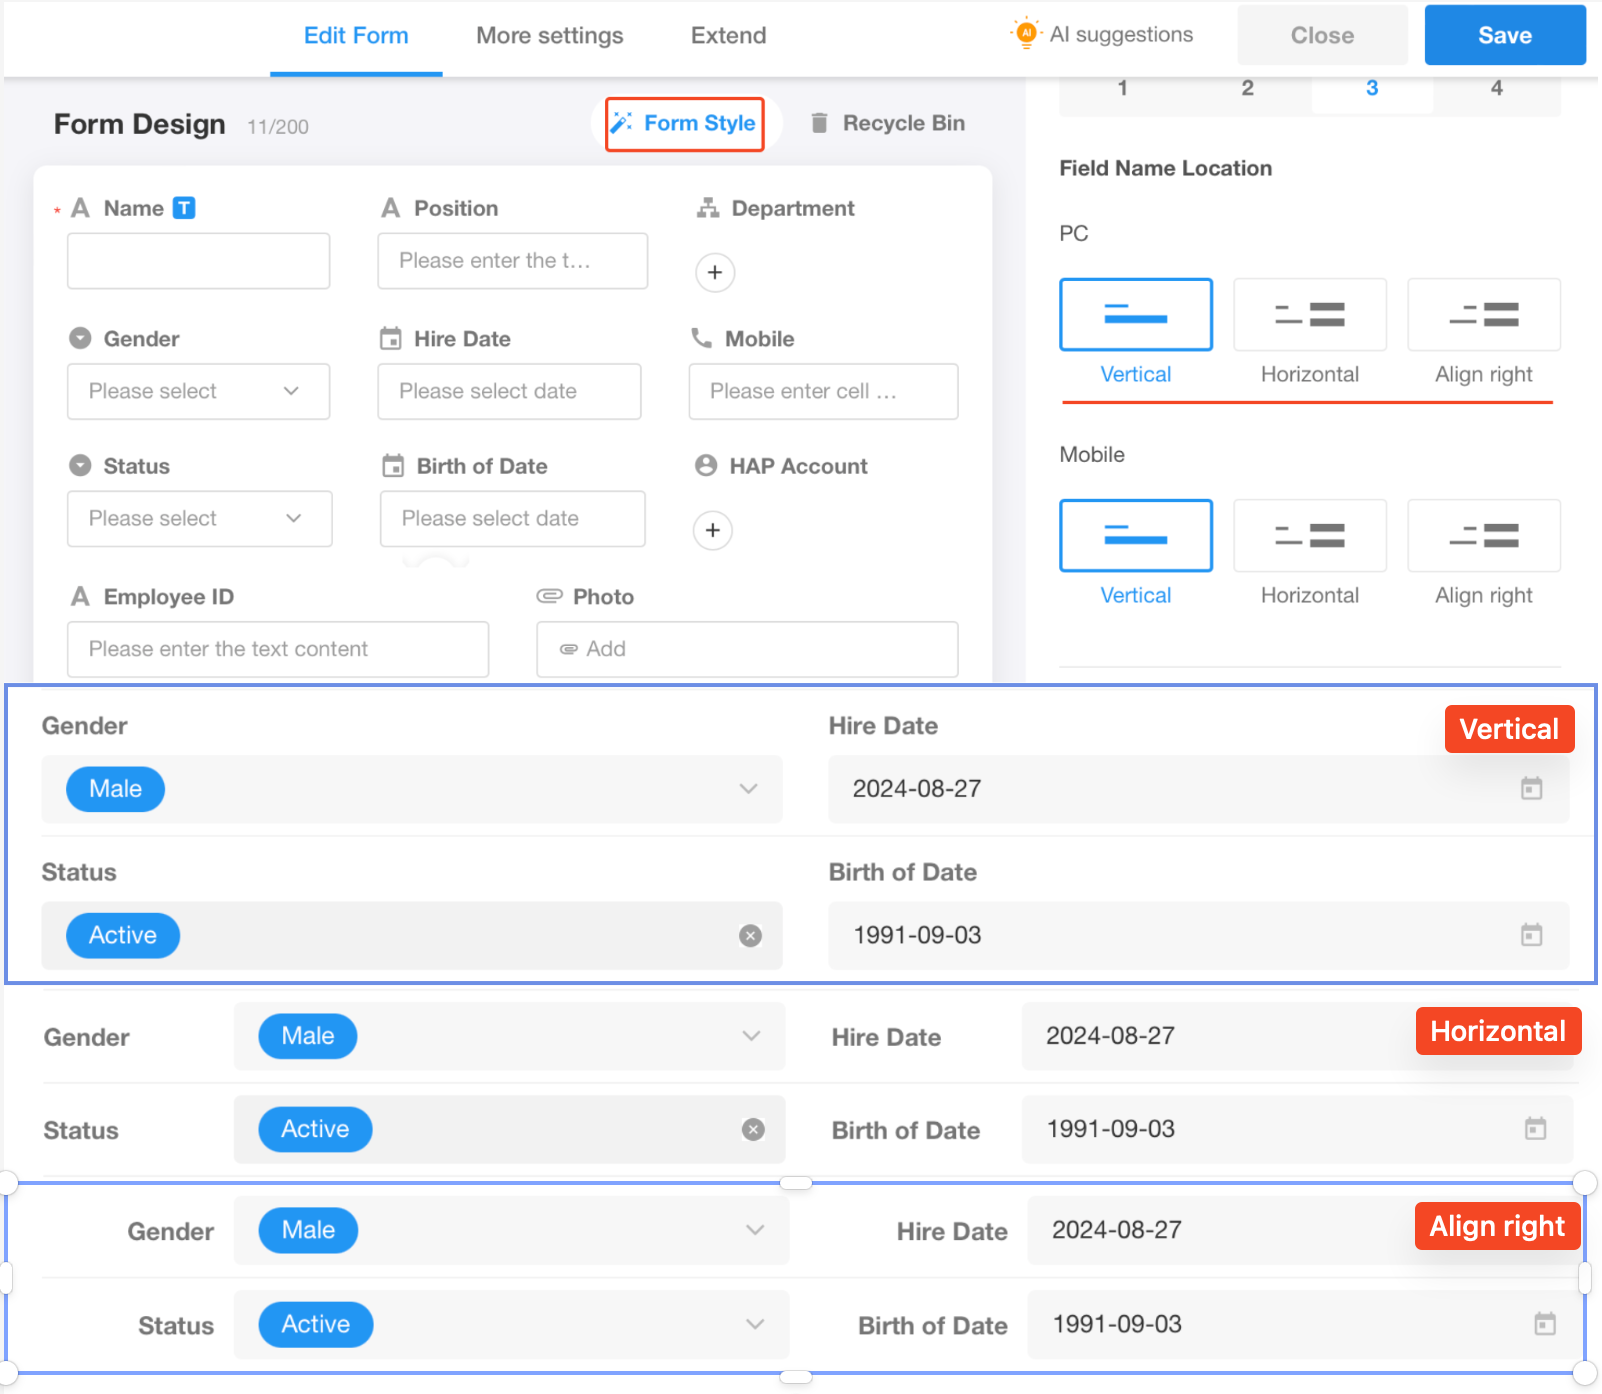
Display of Field Title
Set how the field title is displayed, as shown in the following 3 ways, vertical, horizontal, and align right. The display on PC browsers and on mobile devices can be configured separately.
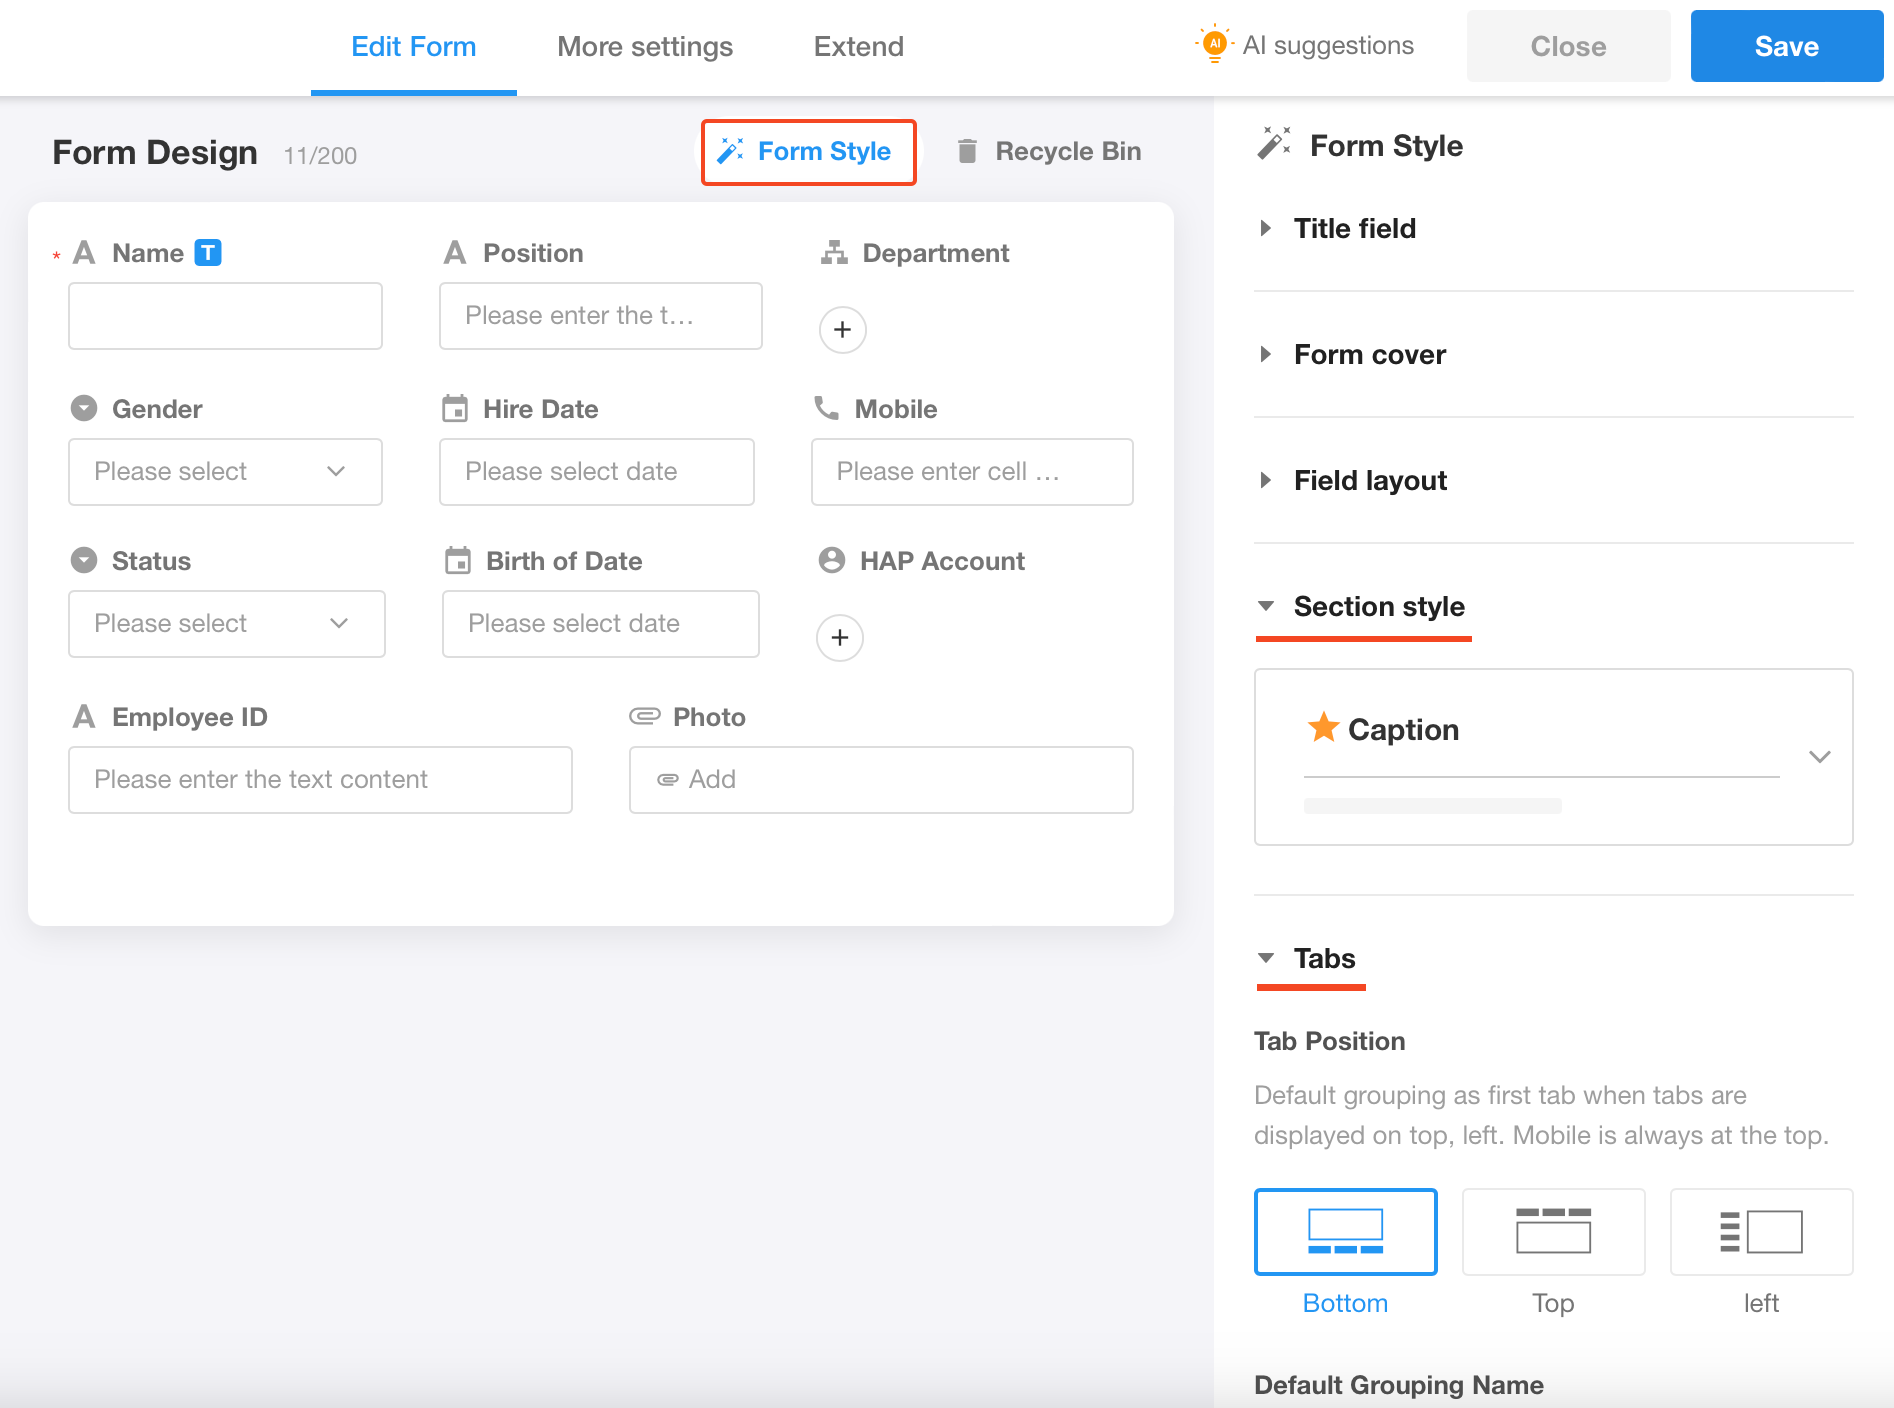
3. Section/Tab Field
Uniformly configure the style of Section and Tab fields in this worksheet, whether or not to display icons, and how the icons are to be displayed. View more details
Save
After finishing the above, click the [Save] button. This is the initial setup of the form, then you can try to add a new record.
Further Configuration
1. Business Rule
If whether to display a field or not depends on the content of other fields, you can set the display rules for the field.
More details about business rules
2. Public Form
You can publish the form so that external users can submit relevant data without logging in, such as submitting questionnaire, collecting registration information, etc.
Was this document helpful?