Submit Form and Save as Draft
When creating records, you may encounter the following scenarios:
-
While creating a record, you may fill in some fields but not want to submit it yet. Instead, you can save it as a draft and complete it later from the draft box.
-
When creating a record, you may want to customize the submit button label to better match your business scenario and improve usability.
-
After creating and submitting a record, you may want different follow-up actions, such as:
- Continue creating the next record without closing the form
- Retain some or all field values from the previous record when creating the next one
- Open the record detail page immediately after submission to trigger workflow via custom buttons or post comments
- Allow only one record to be created at a time by hiding other buttons
All the above requirements can be configured through Form Settings.
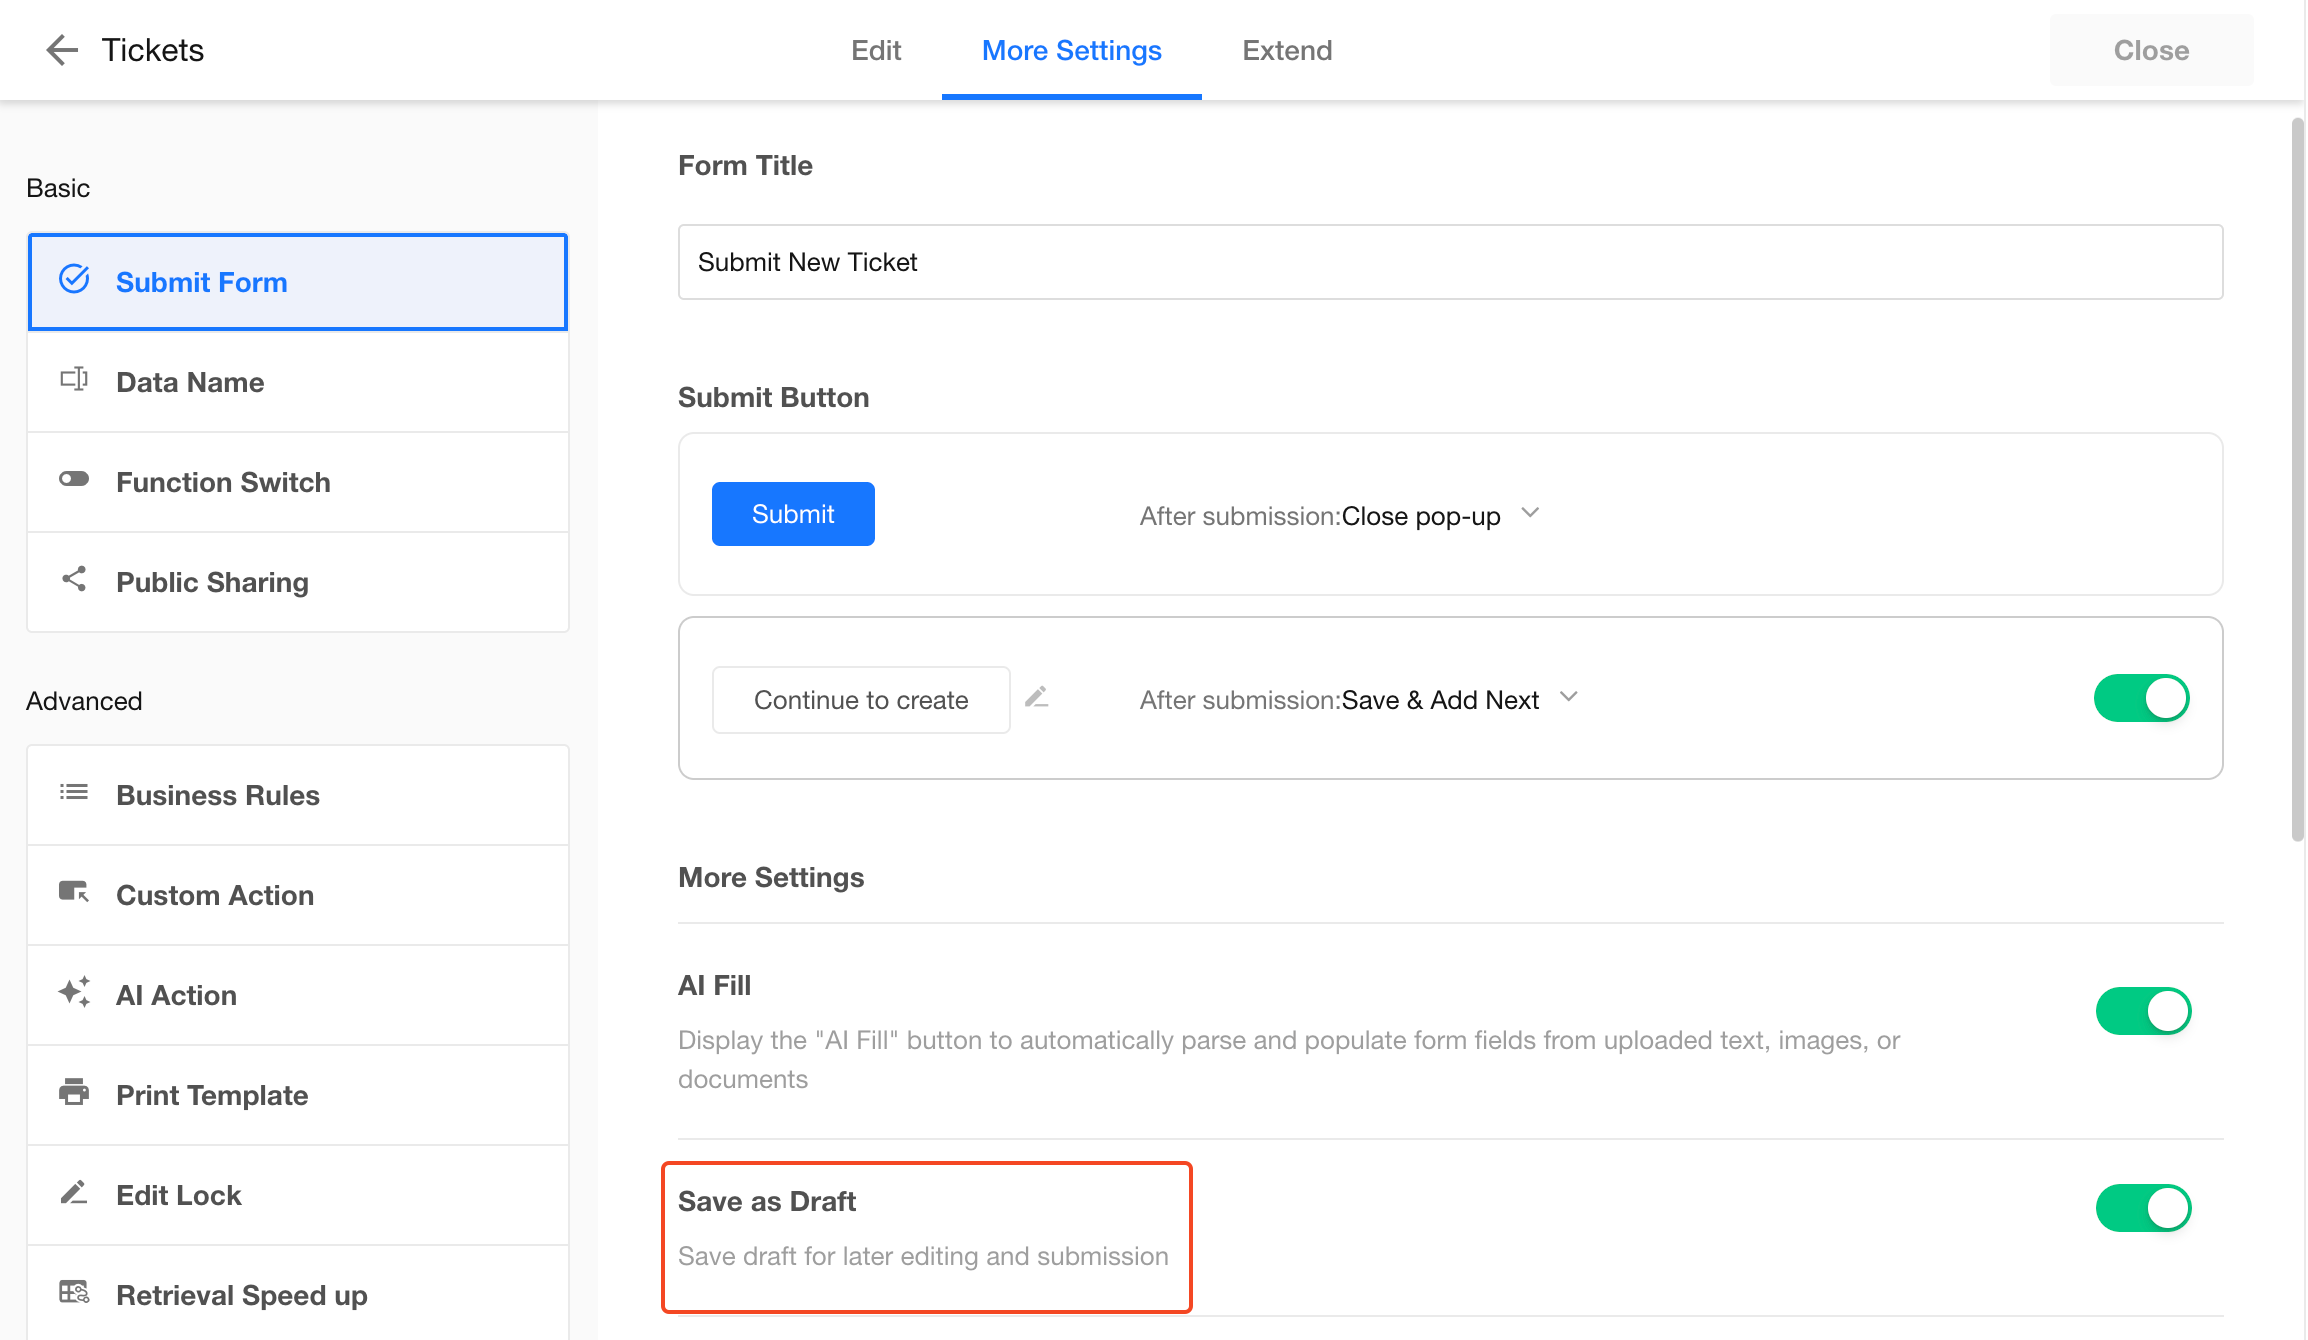
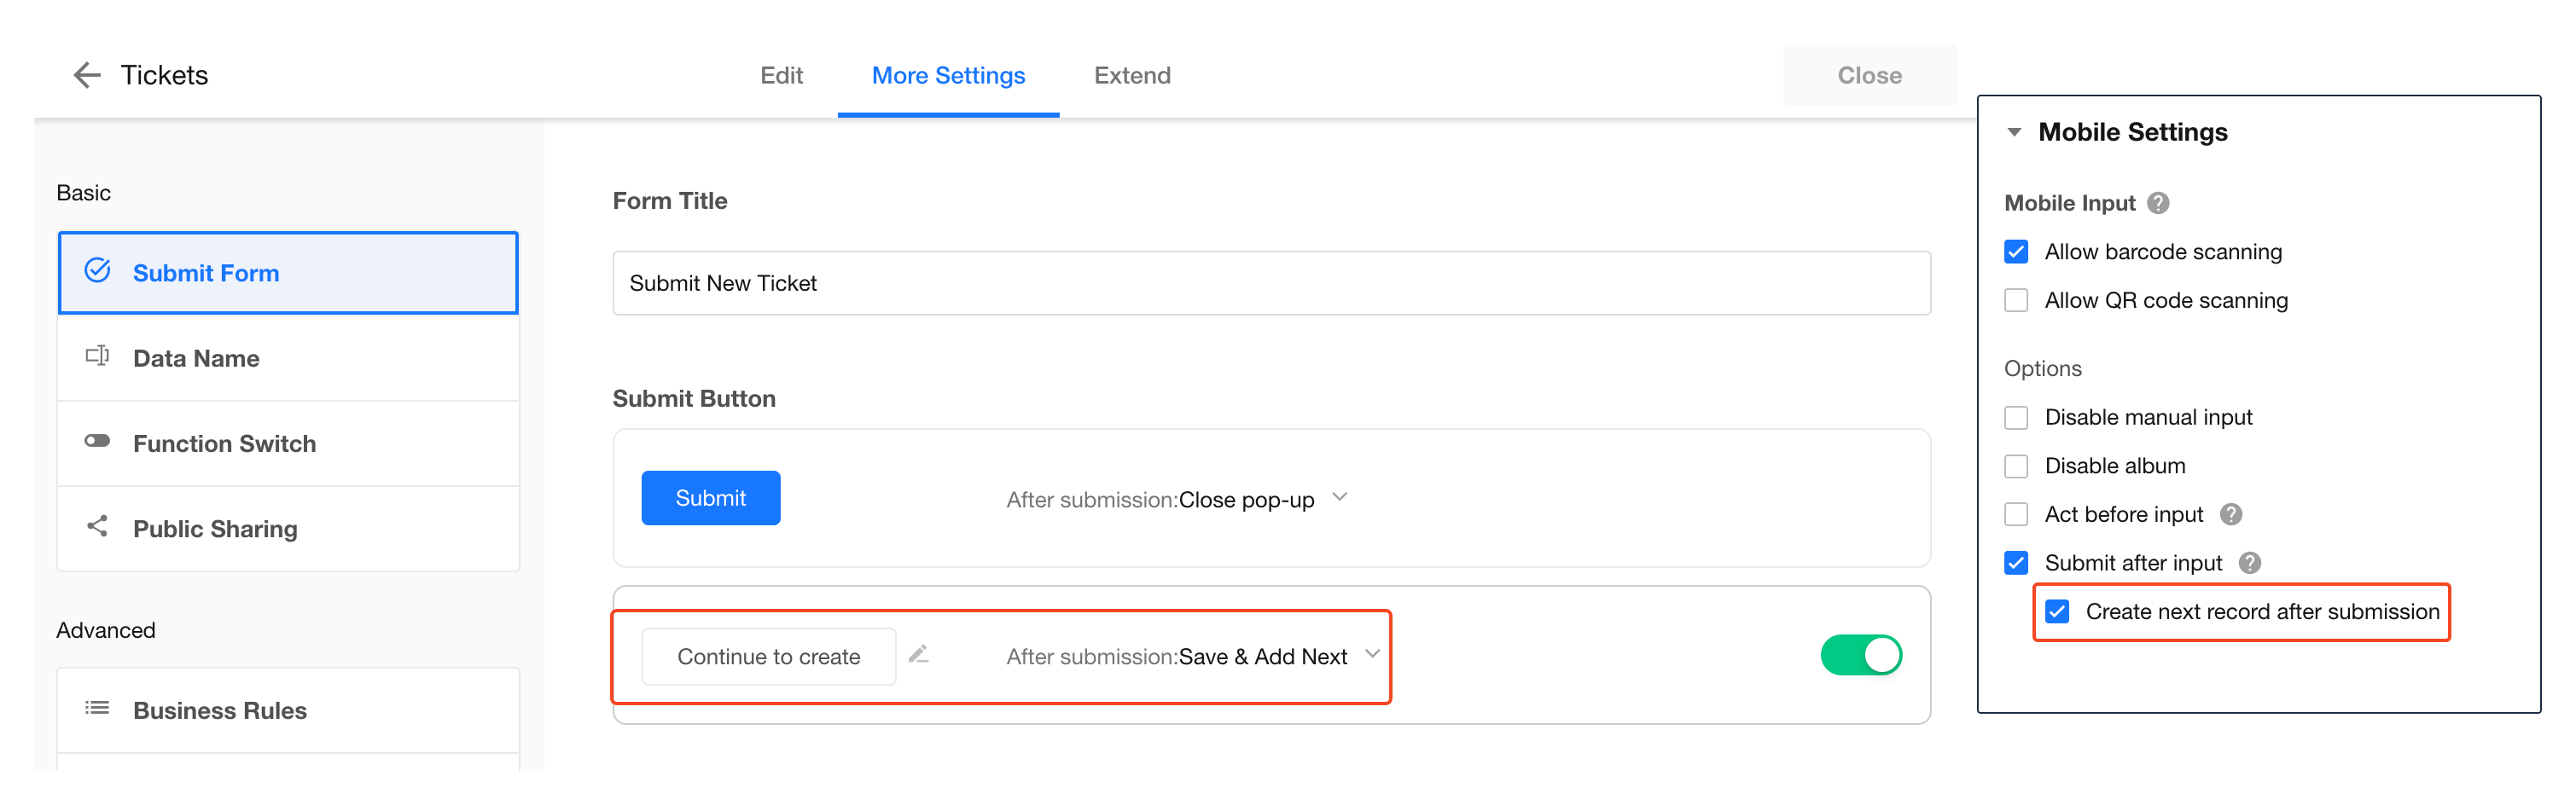
Entry to Form Settings
Go to the form design page as an application administrator, then click:
More Settings > Submit Form
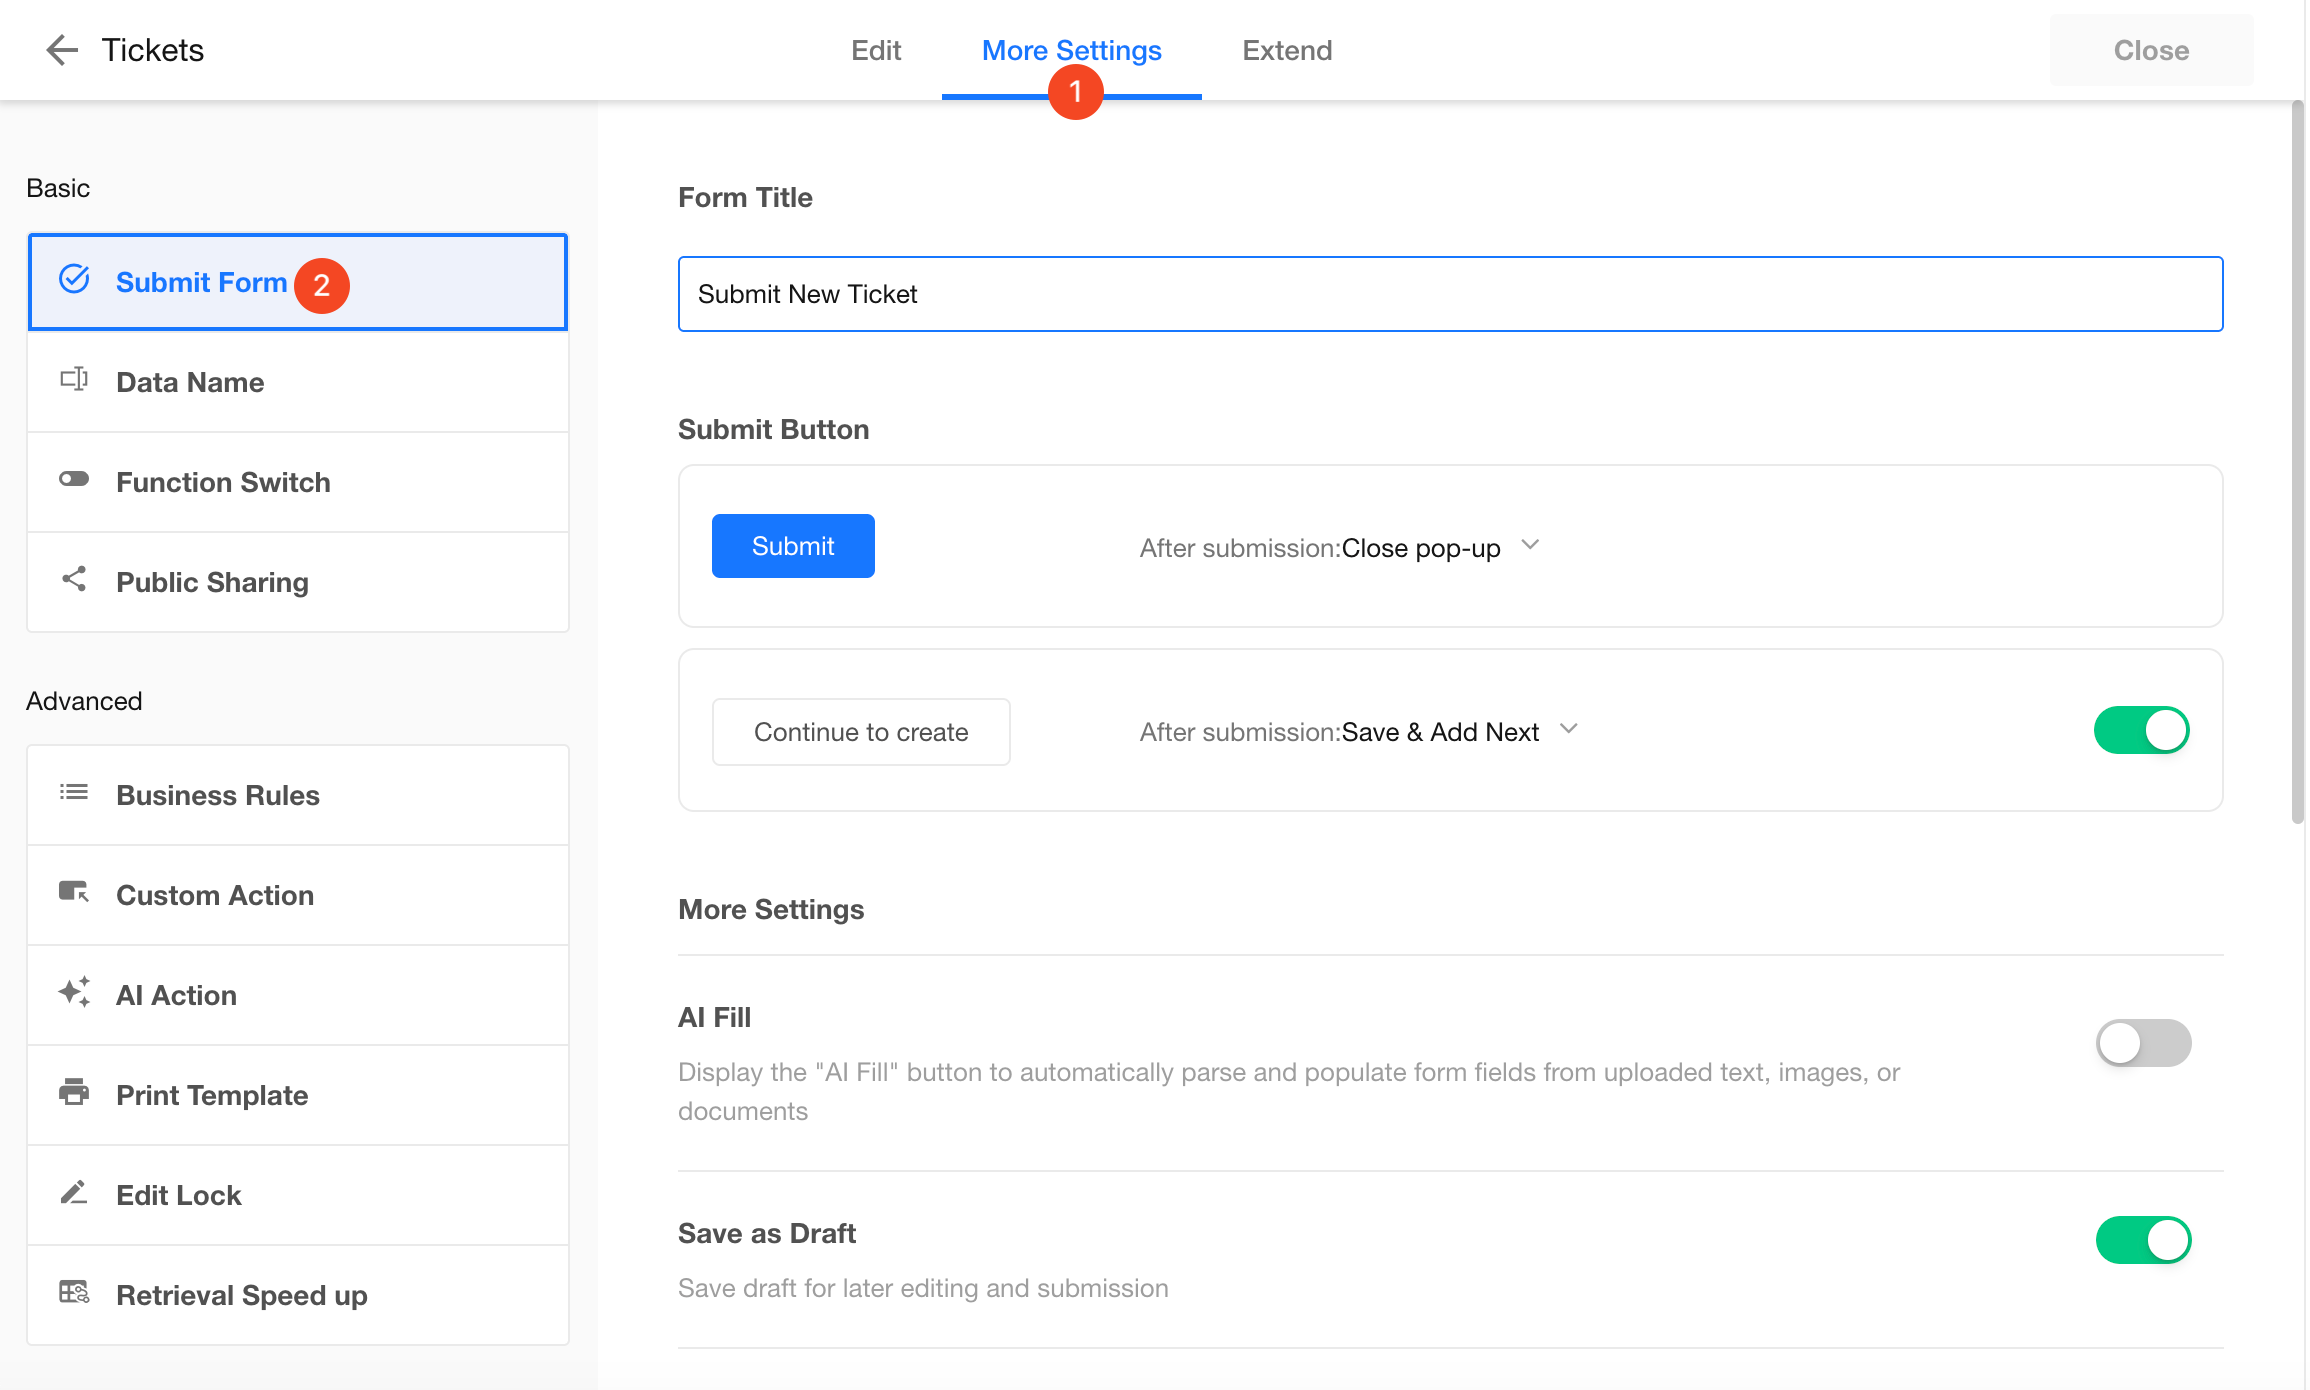
Main configurable items:
- Form title when creating a record
- Save as draft button
- Submit button label and actions
- Default submit button (Button 1)
- Continue creating button (Button 2)
- Whether to retain field values from the previous record (Button 3)

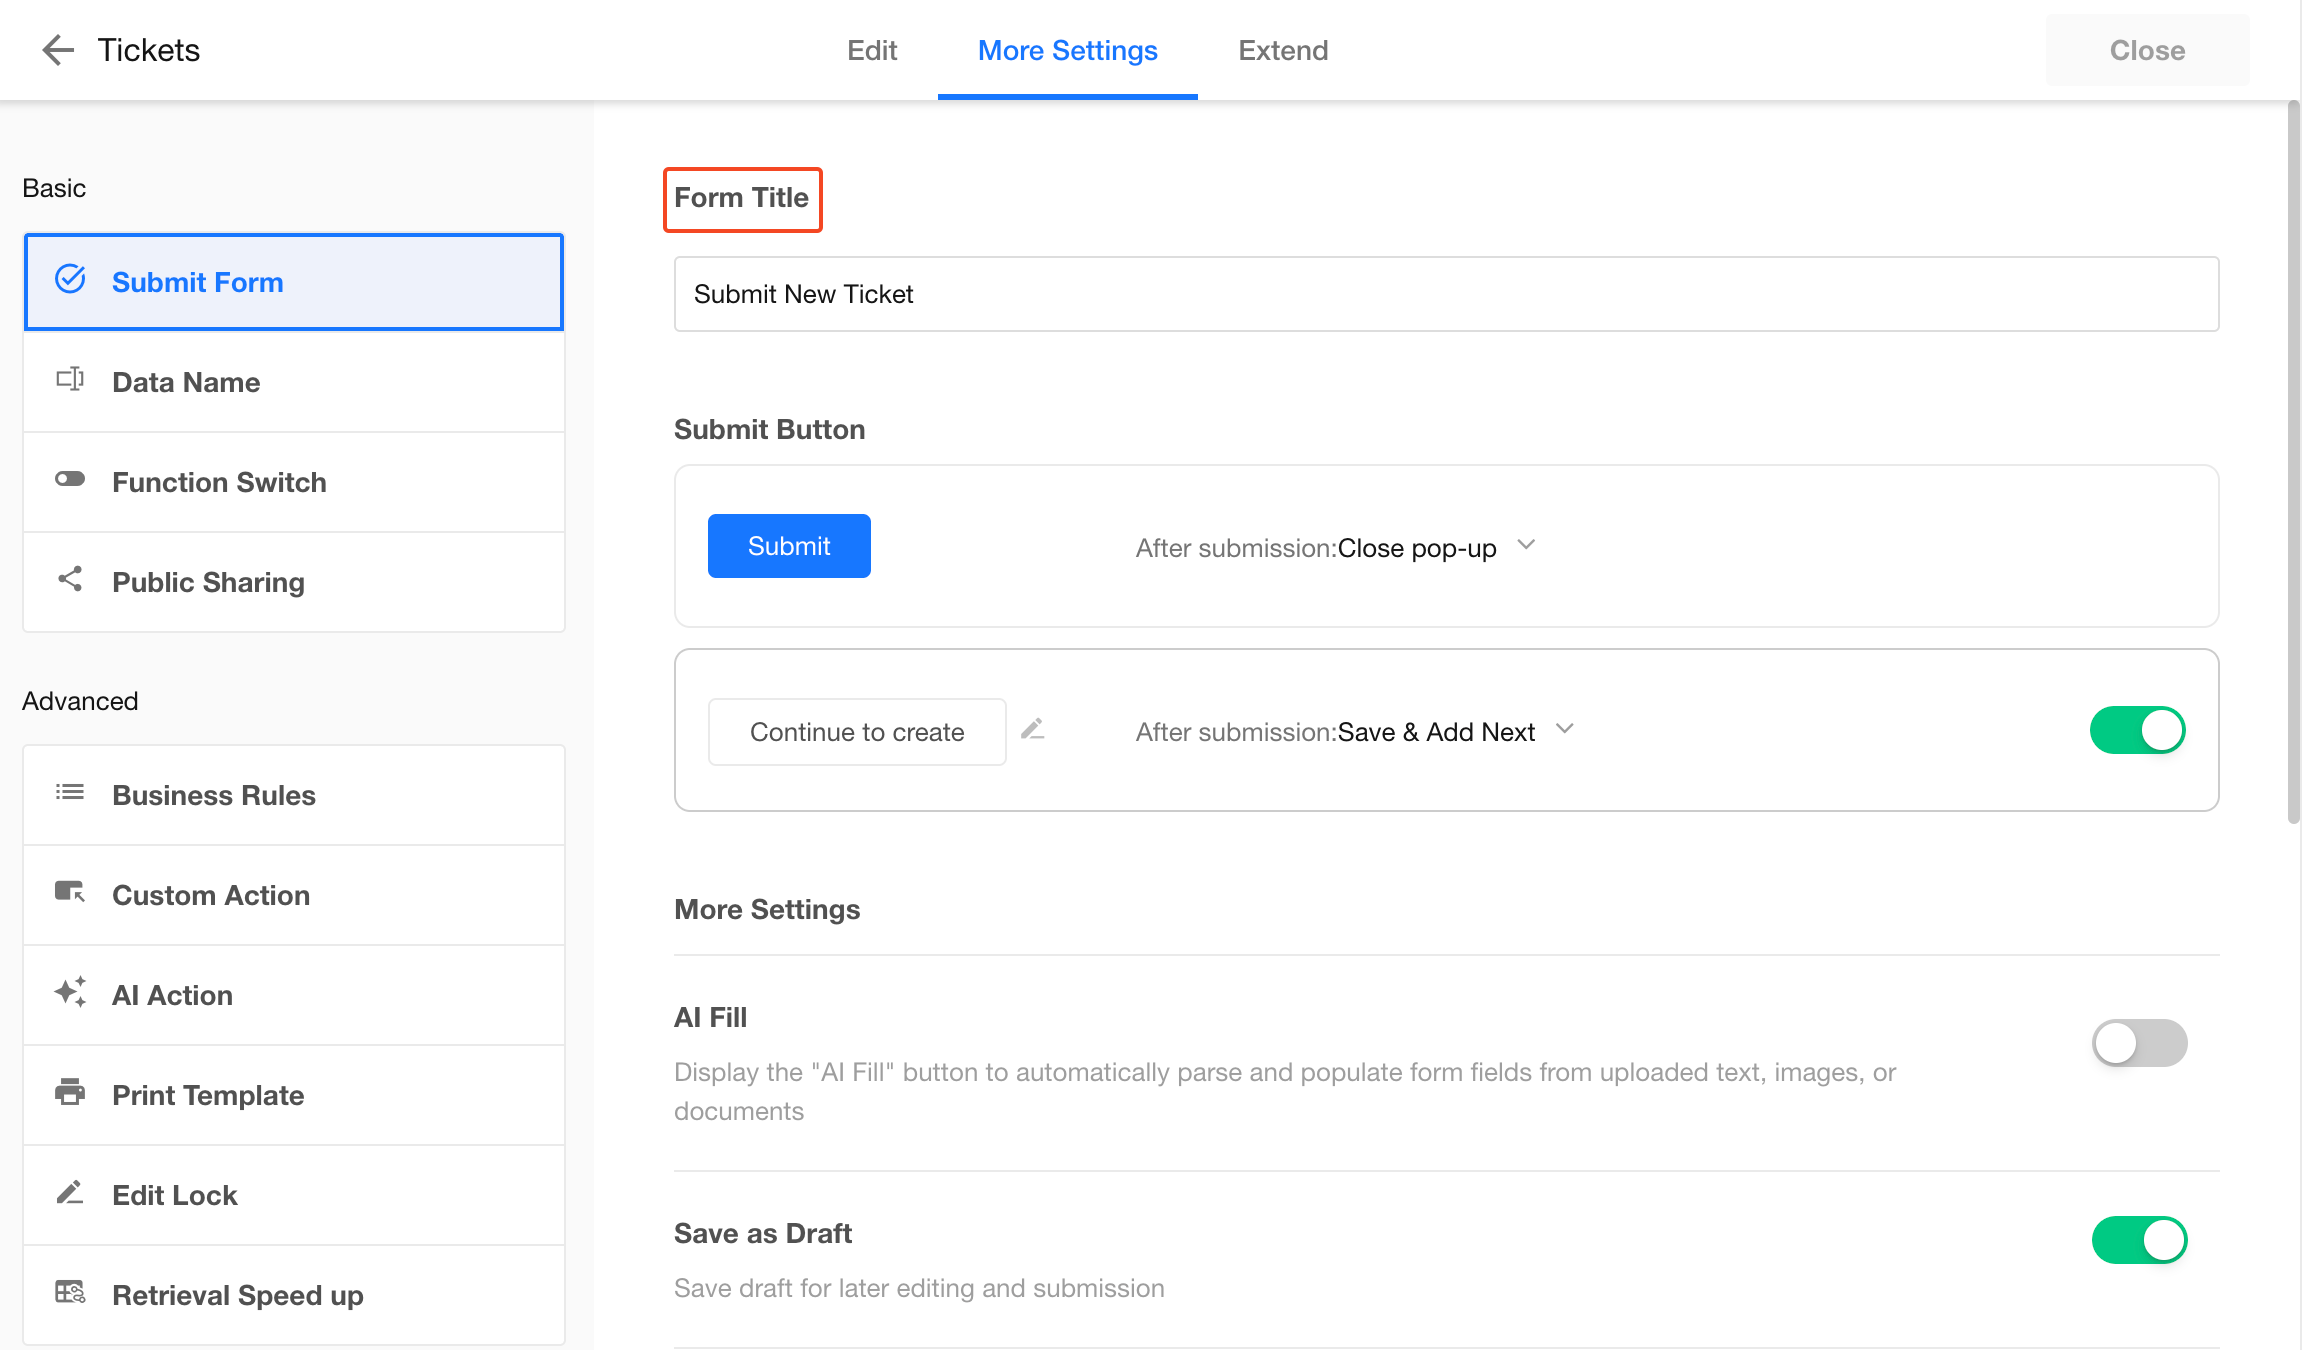
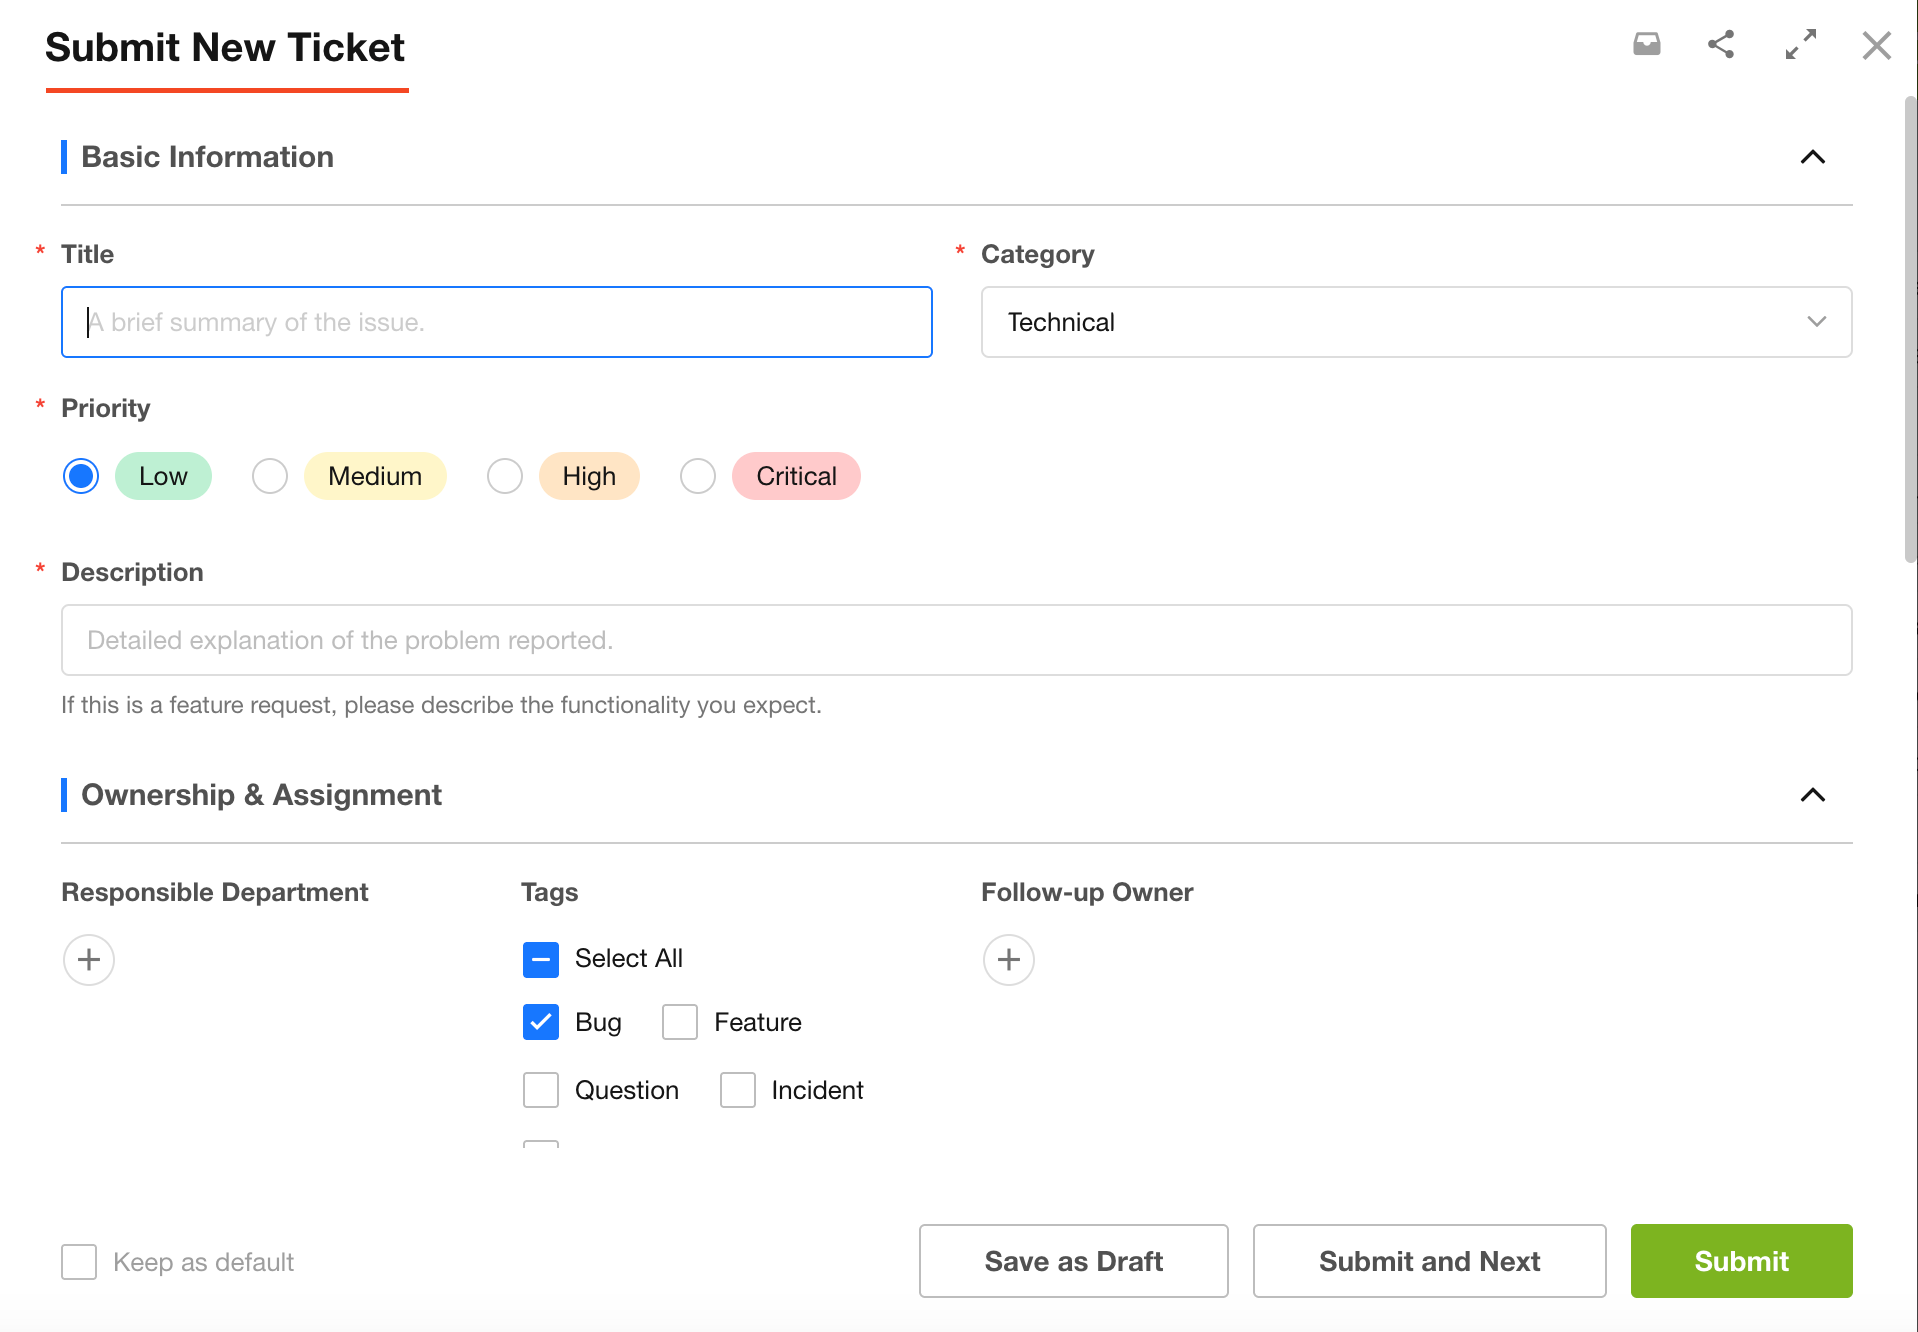
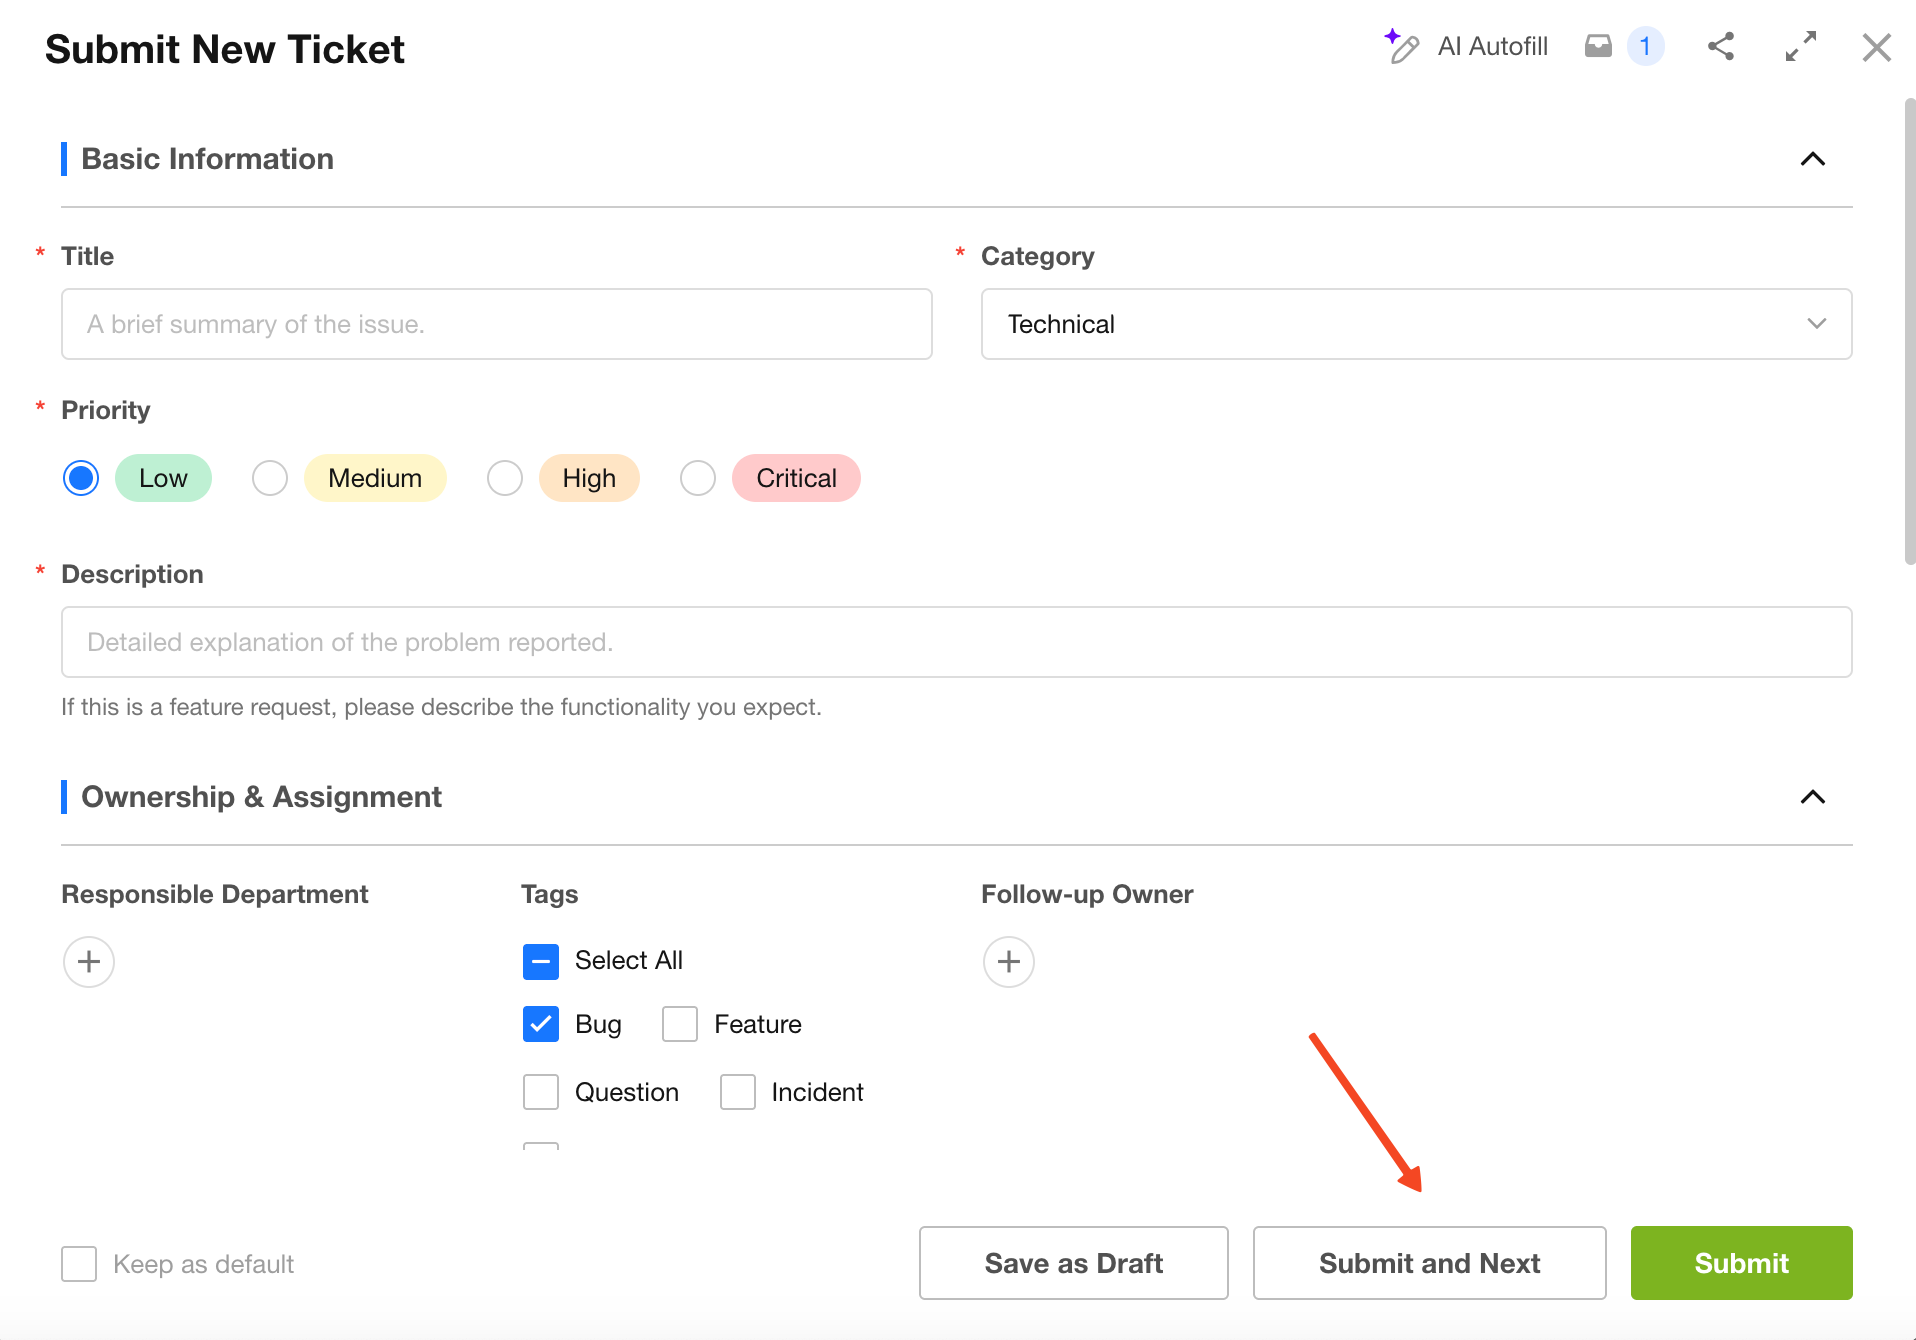
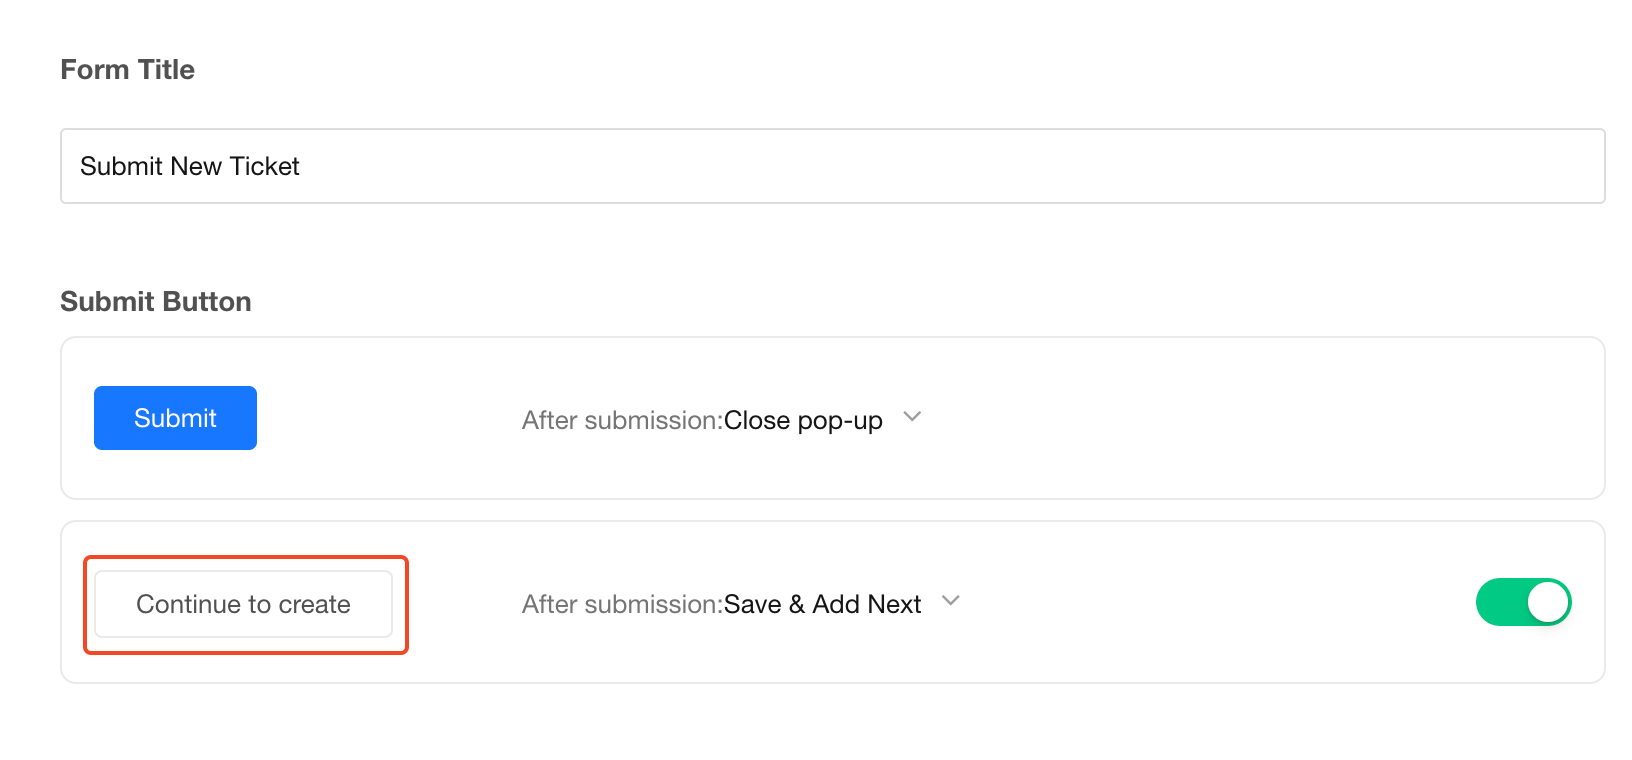
1. Form Title
This is the title displayed at the top-left corner of the record creation page.
For example: “Submit New Ticket”.
Display effect:
You can also change this by setting the record name. The priority is:
Form Title > Record Name > Record (default)
Example (Ticket worksheet):
- Submit New Ticket (Form title configured)
- Create Ticket (no form title, record name set to “Ticket”)
- Create Record (neither configured)
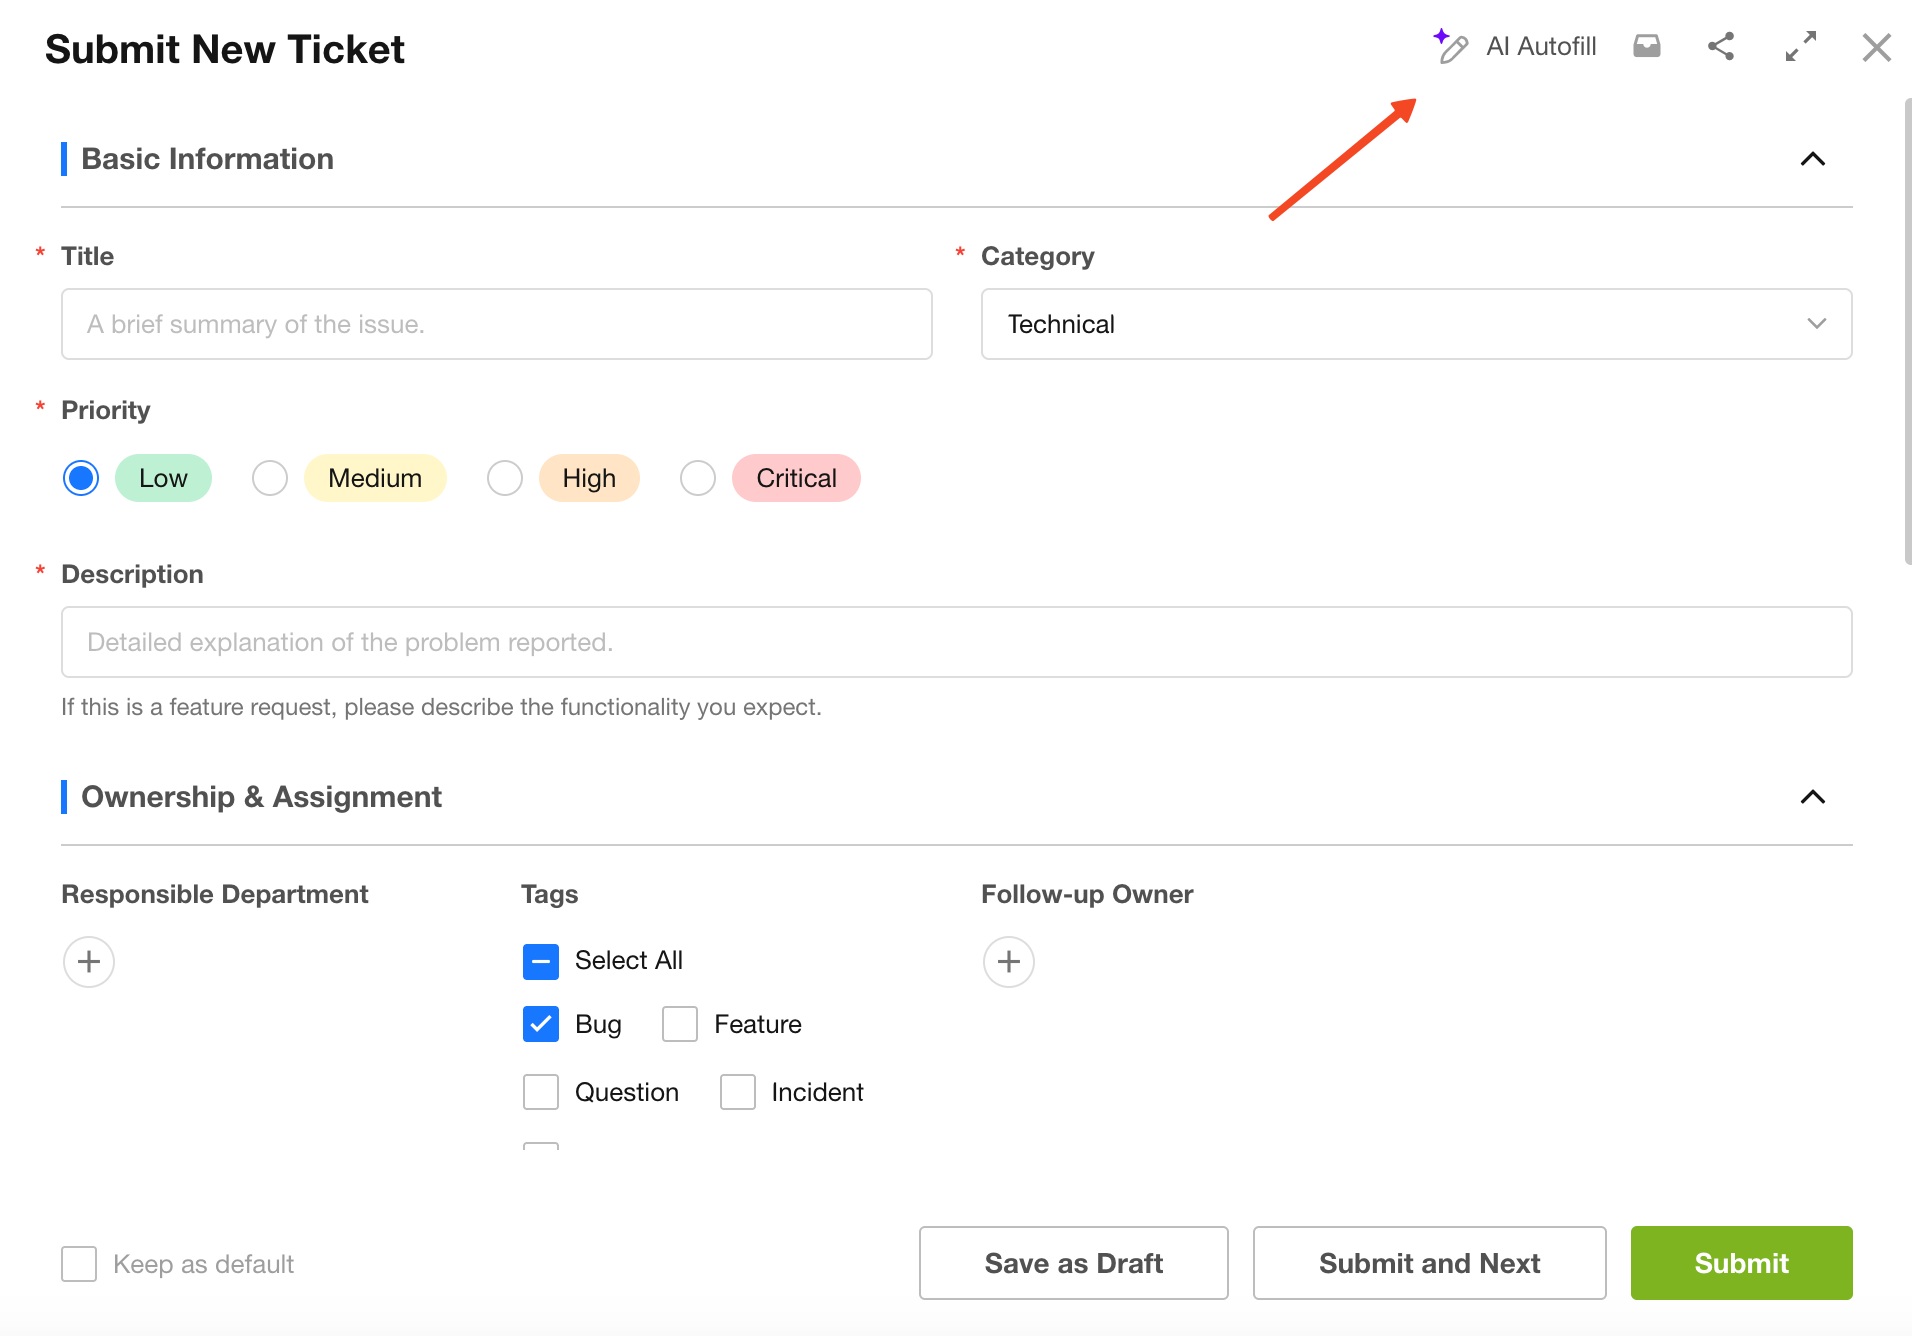
2. AI Autofill
When AI Autofill is enabled, an AI Autofill button appears on the record creation page.
Users can upload text, images, or documents, and AI will automatically parse and fill in the fields.
(On mobile, this appears as a purple camera icon.)
When disabled, the AI Autofill button is hidden.
Note: AI Autofill is not supported in public forms.

User interface:
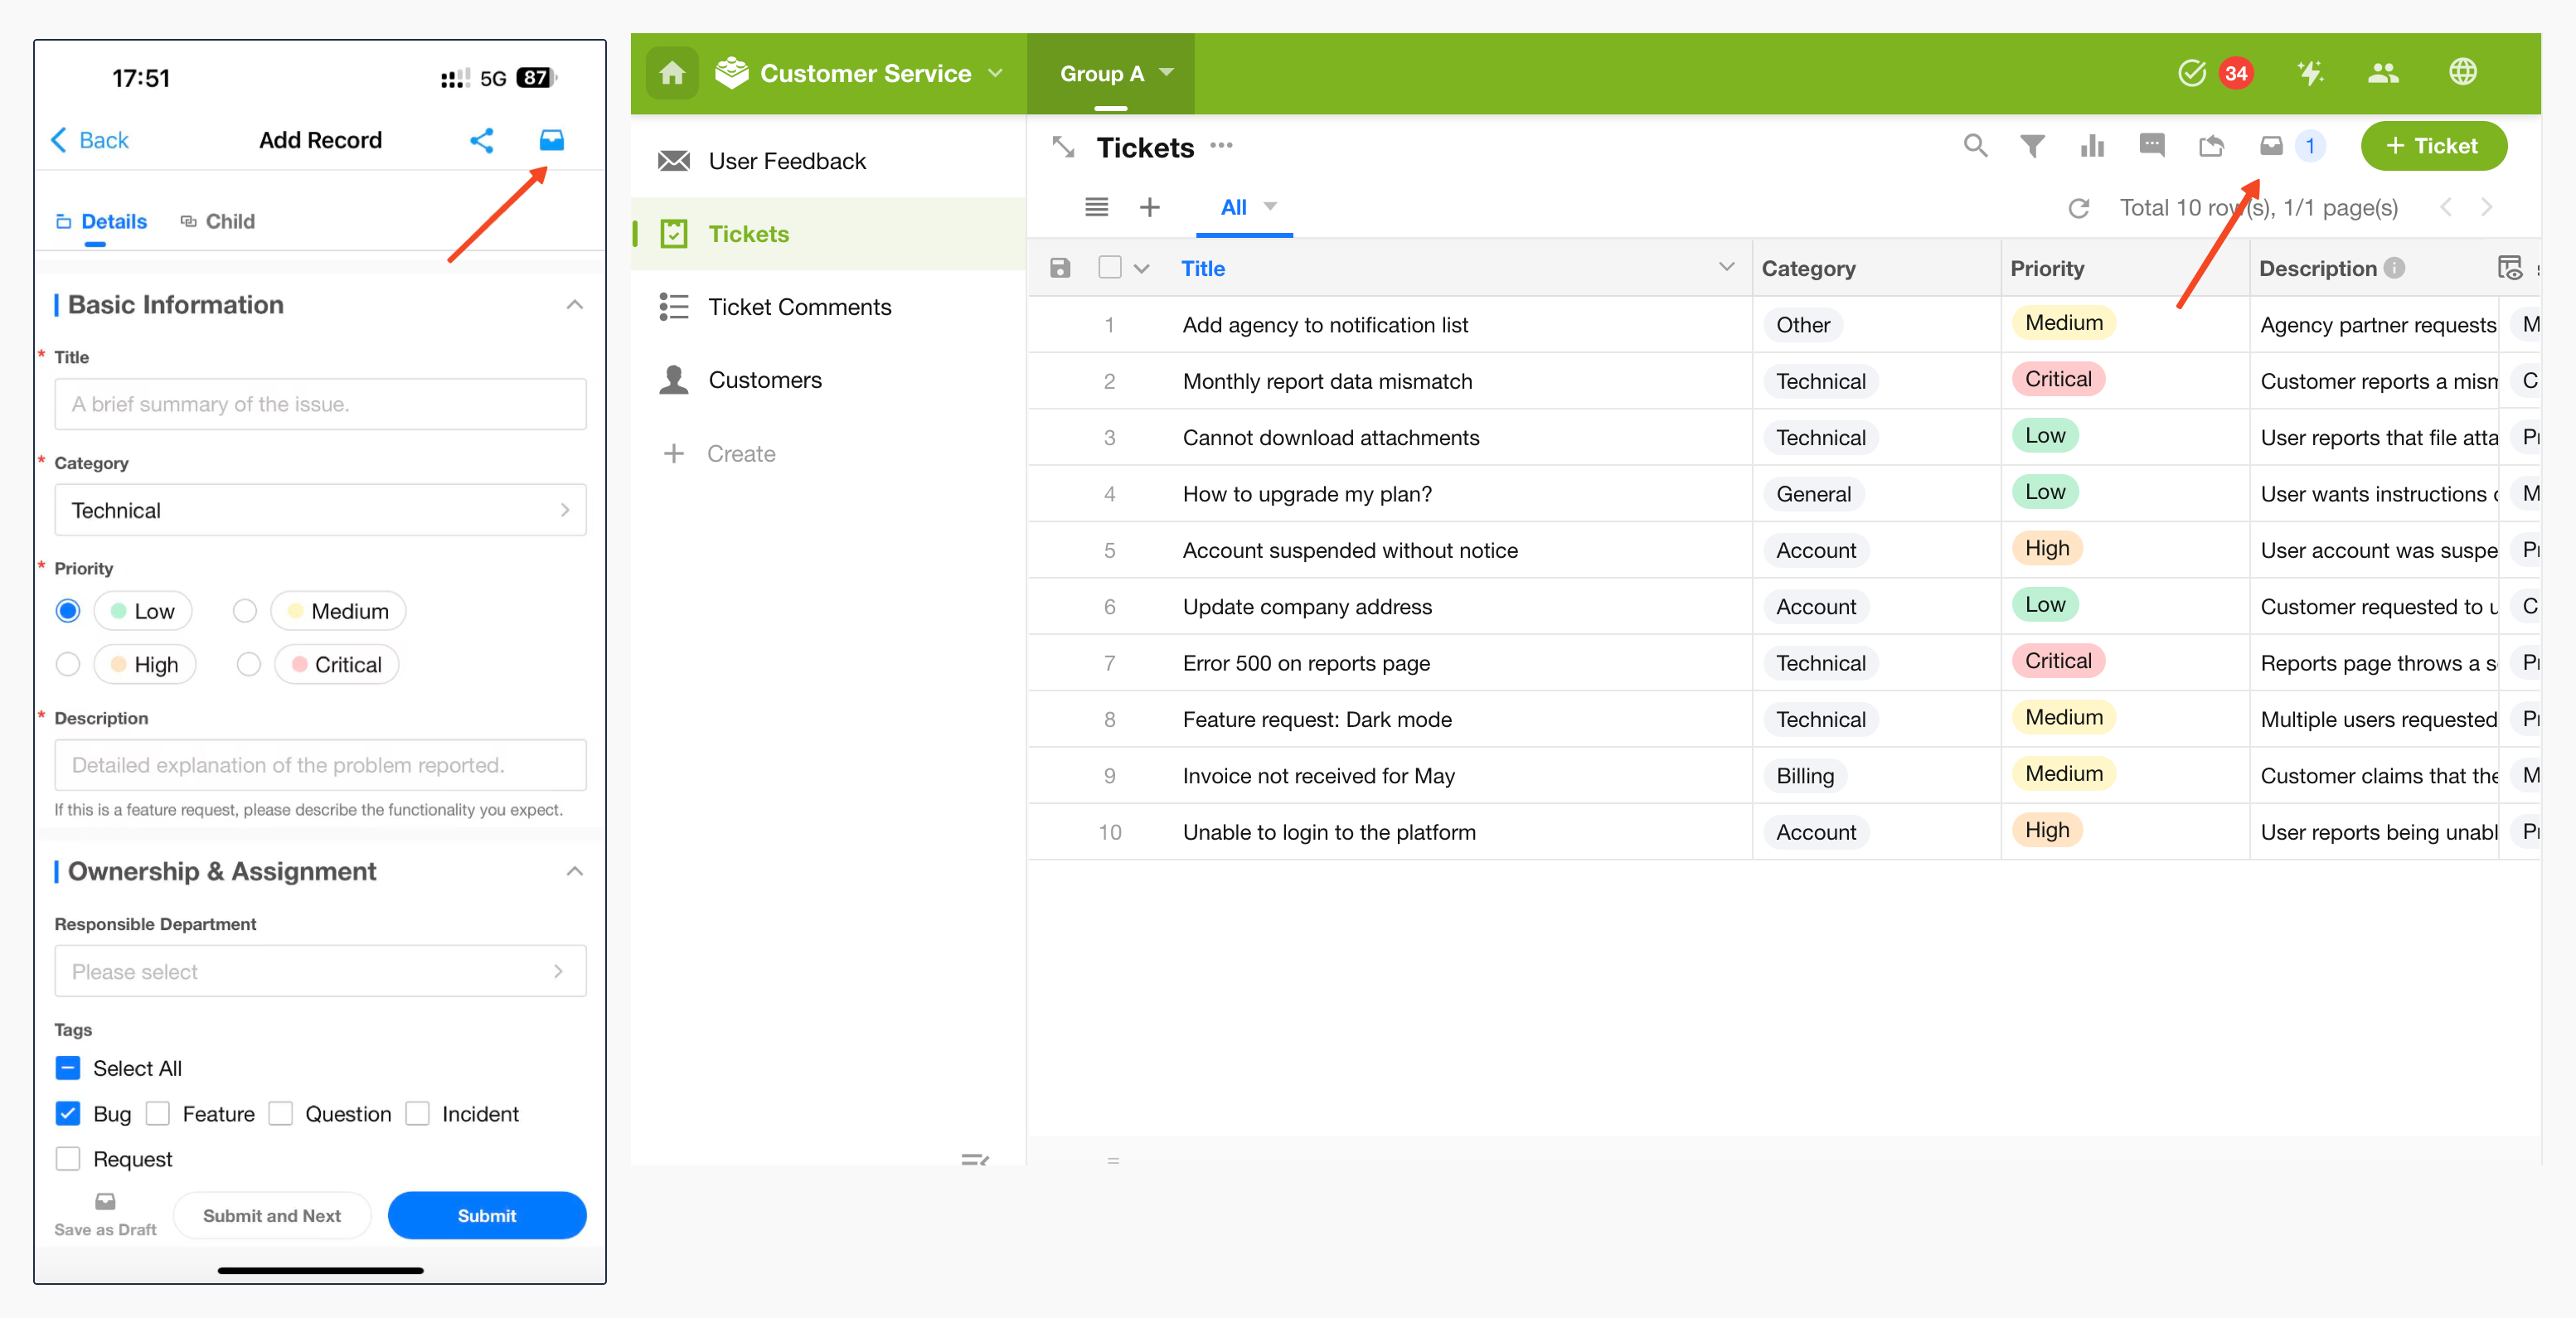
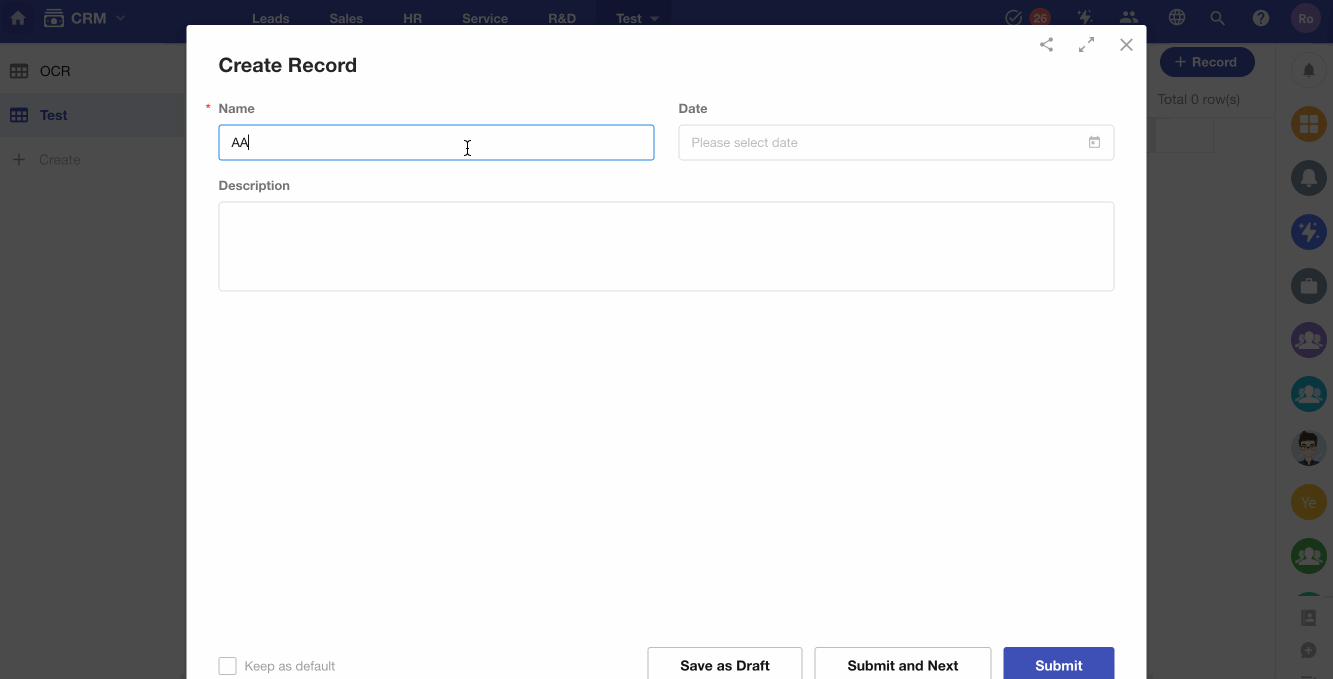
3. Save as Draft
When draft mode is enabled (enabled by default for new worksheets), a Save as Draft button appears on the record creation page.
Enable/disable draft: More Settings > Submit Form > Save as Draft
After filling in some fields, click Save as Draft to store the current input in the draft box.
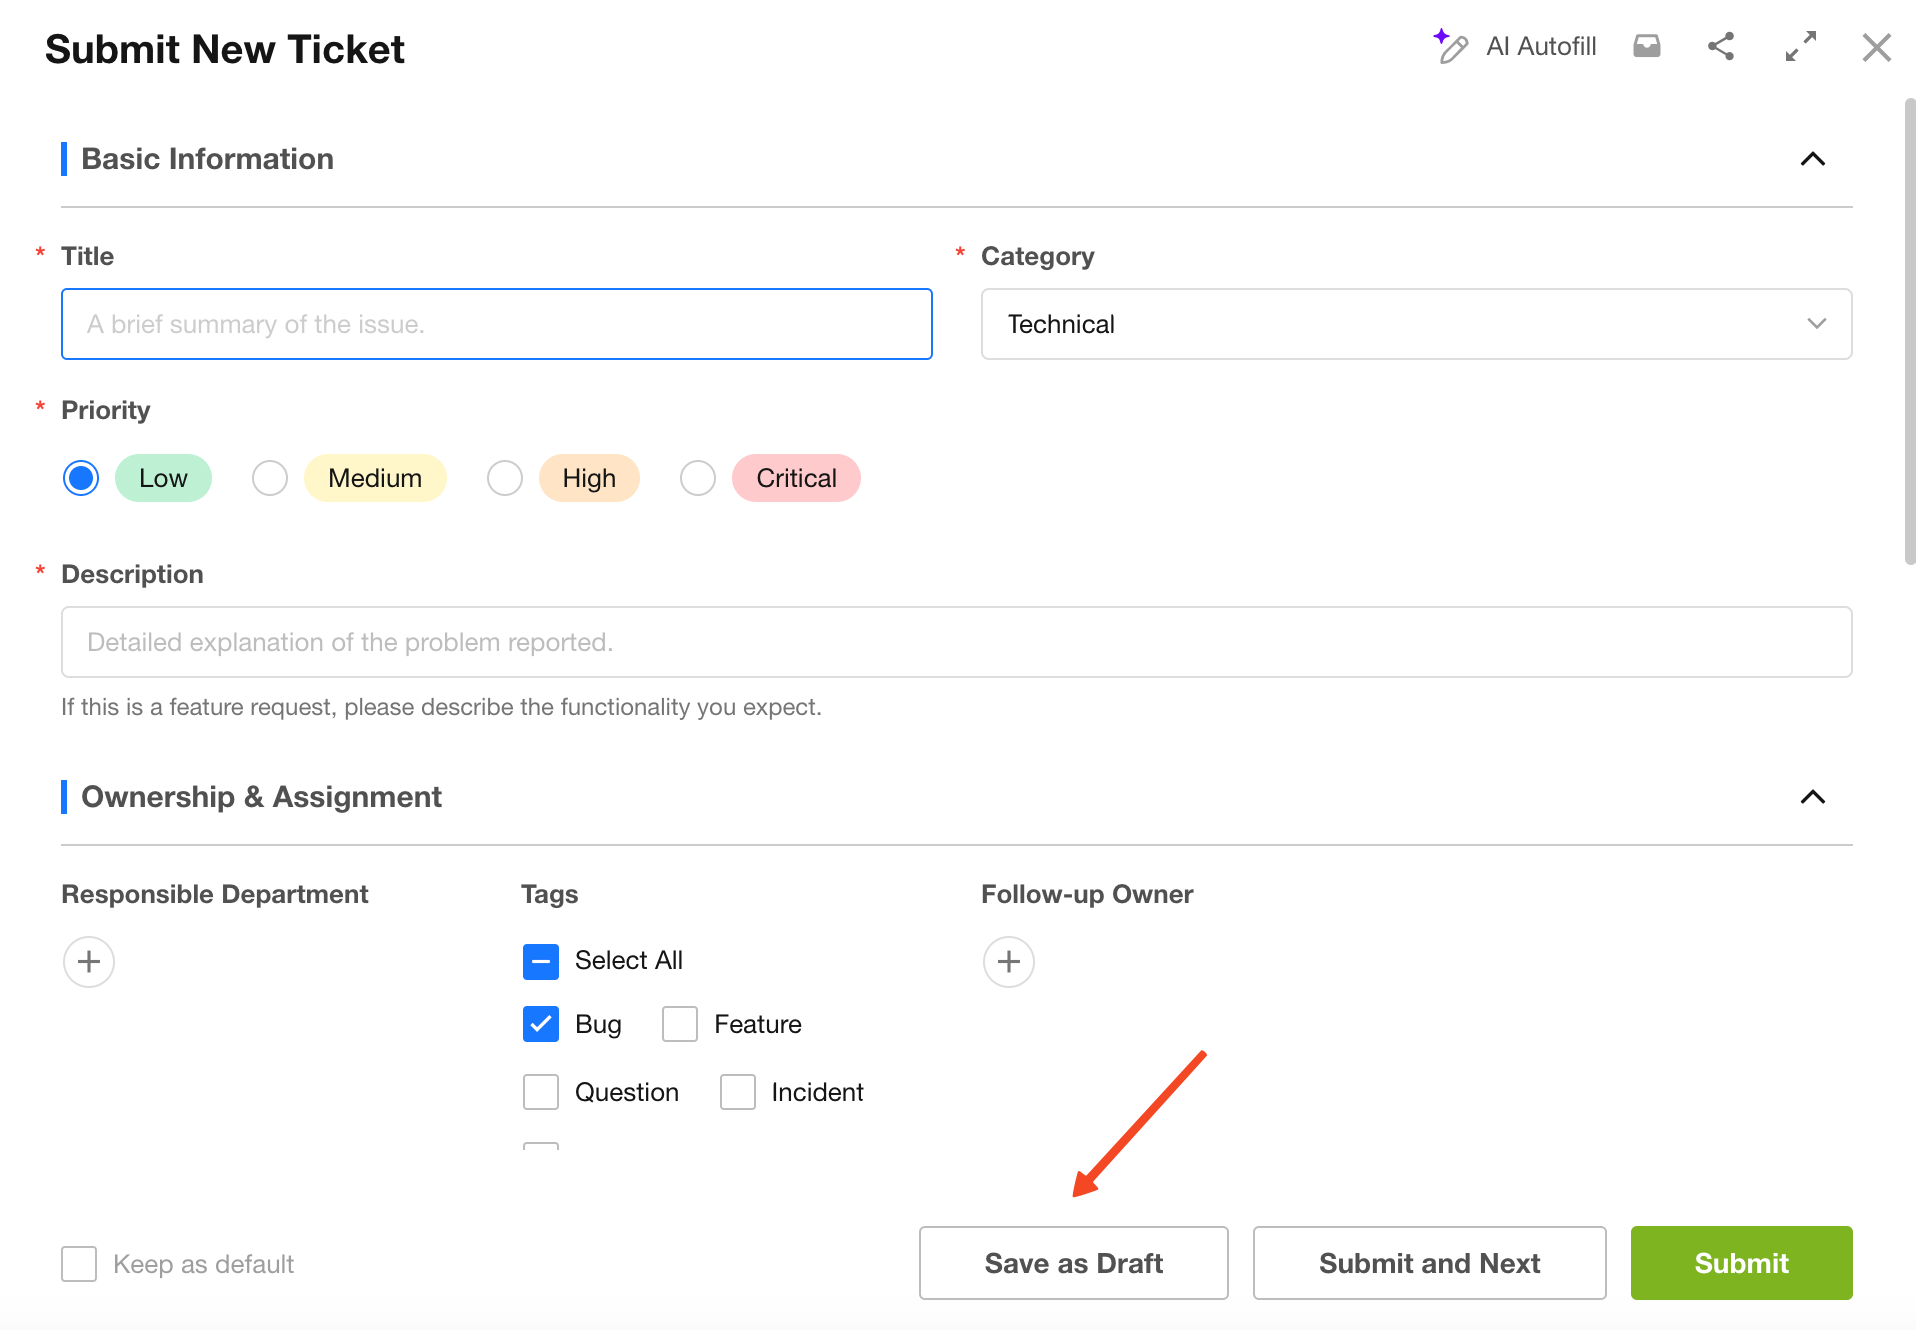
You can open and edit drafts later, then either save again or submit.
Draft Handling Logic
- Users can only view their own drafts
- Draft records are not accessible by workflow, worksheet queries, or APIs
- No notifications are sent for draft records (e.g., owner, member fields)
- Draft records do not trigger workflow
- No validation is performed when saving drafts (required fields, duplicate input, format, business rules, etc.)
- Each user can store up to 10 drafts per worksheet
- Draft records do not count toward worksheet record totals
- Attachments in drafts count toward storage usage
4. Default “Submit” Button
This button is always visible and cannot be hidden, but its label and behavior can be customized.
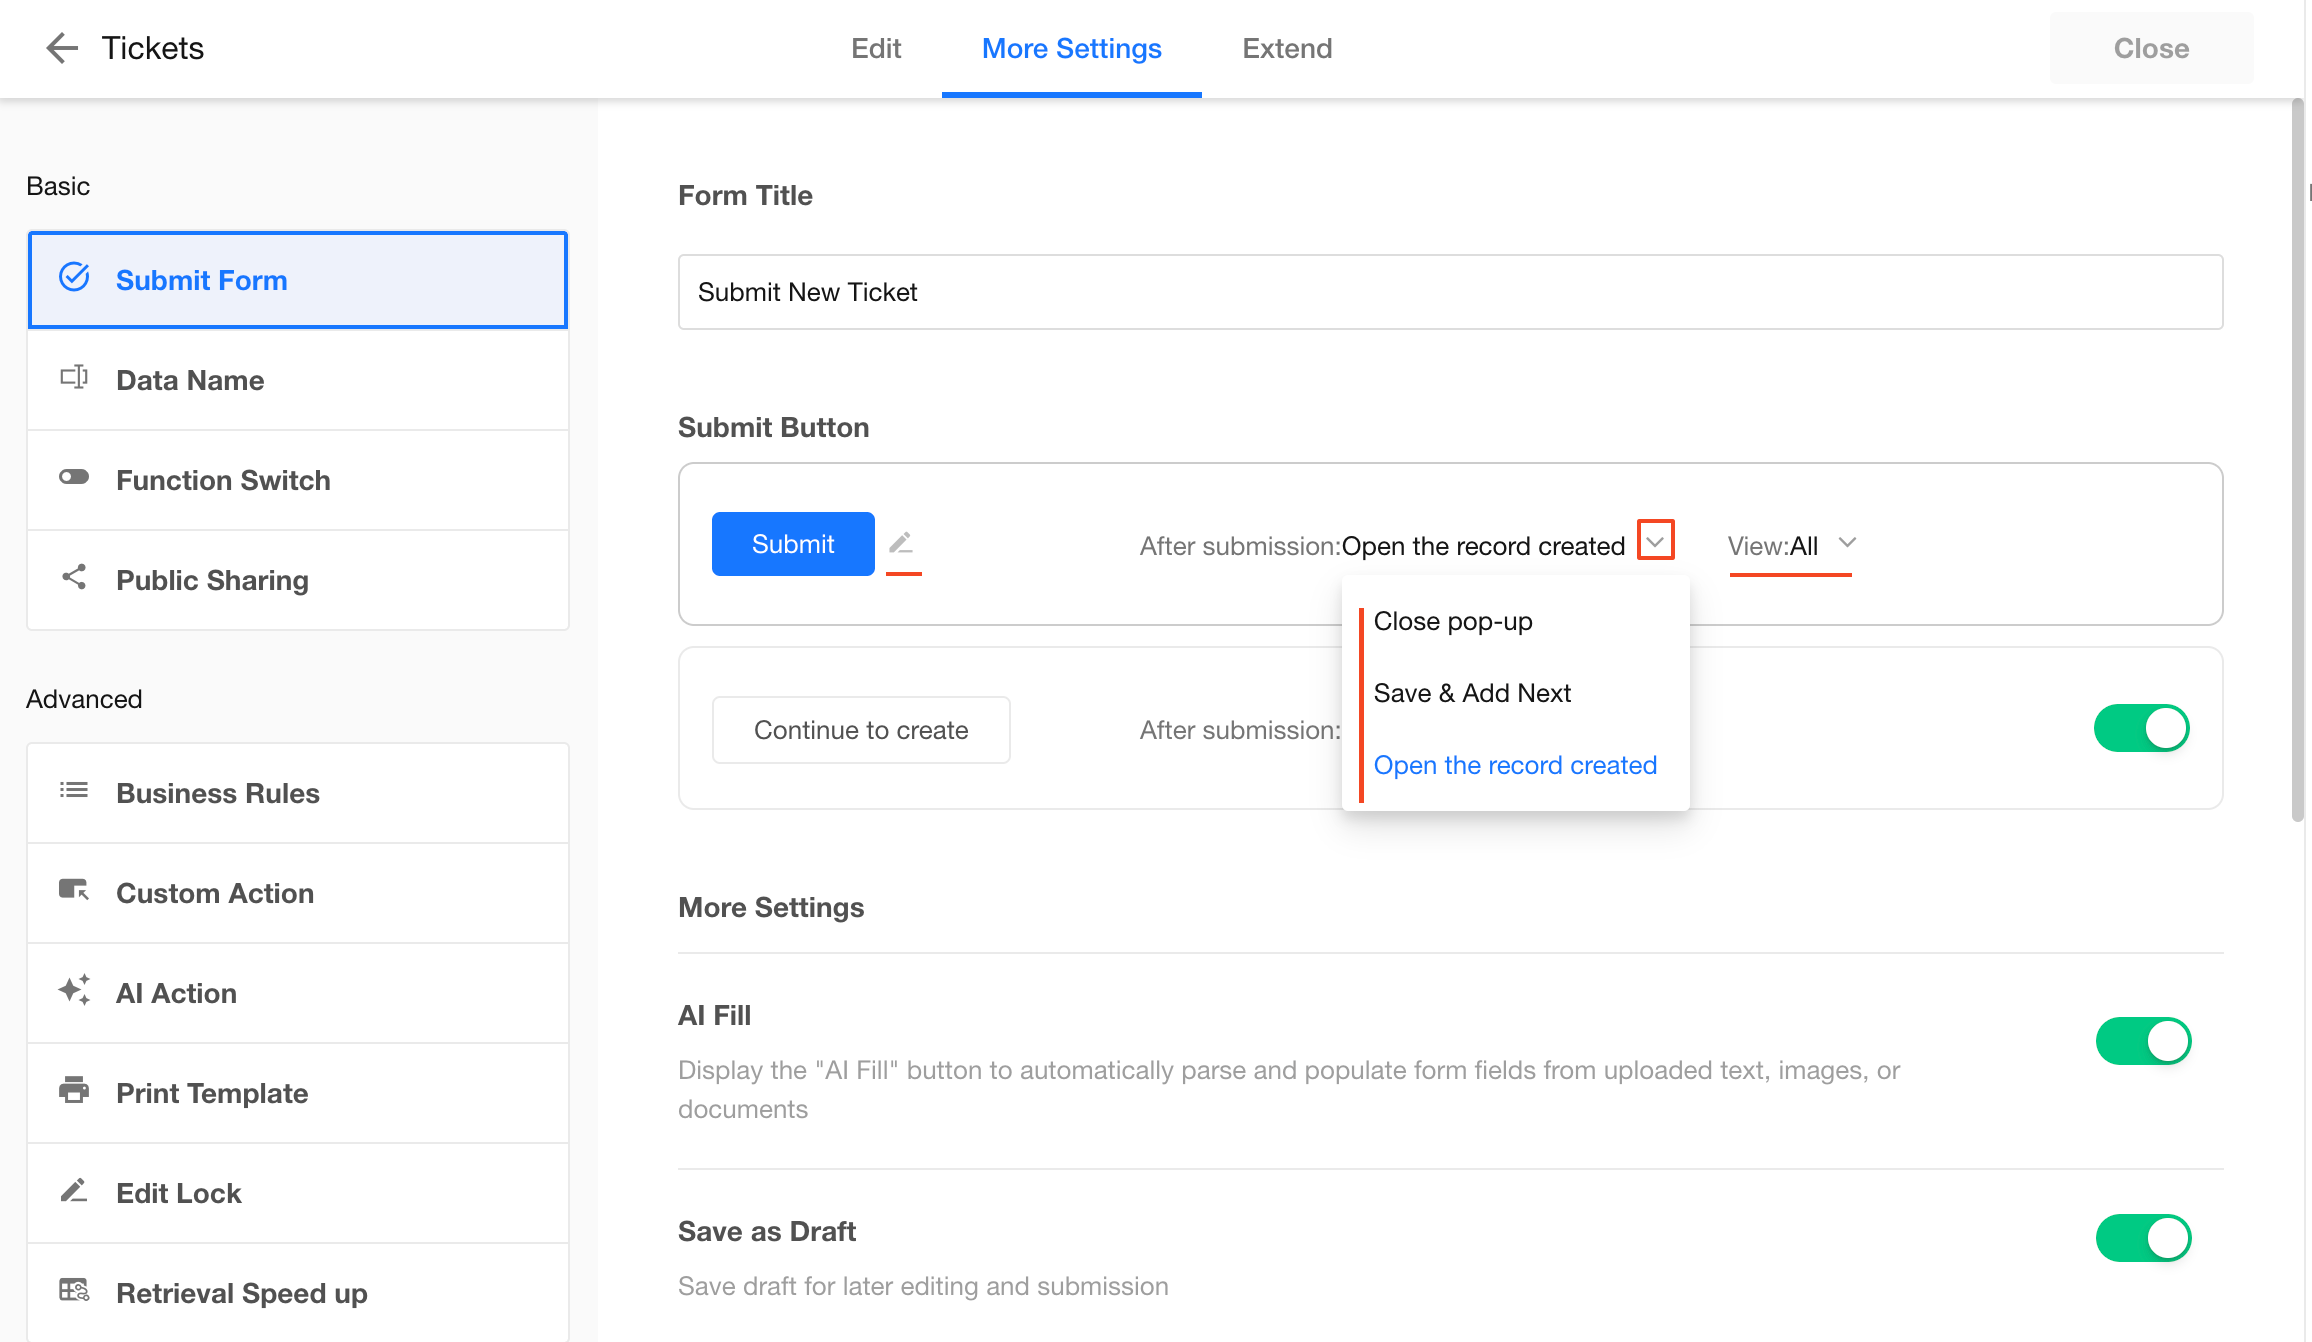
Button Label
You can rename the button based on its action, such as:
- “Submit and Close”
- “Submit and Continue”
Post-Submit Actions
You can configure one of the following:
-
Close the creation page
Close the creation page after submission -
Continue creating
Keep the form open and create another record -
Open the newly created record
Open the record detail page based on a selected view.
Users can post comments or trigger custom actions.
Displayed fields and buttons follow the selected view configuration.
5. “Continue to Create” Button
This is an auxiliary button. It can be hidden, renamed, or configured.
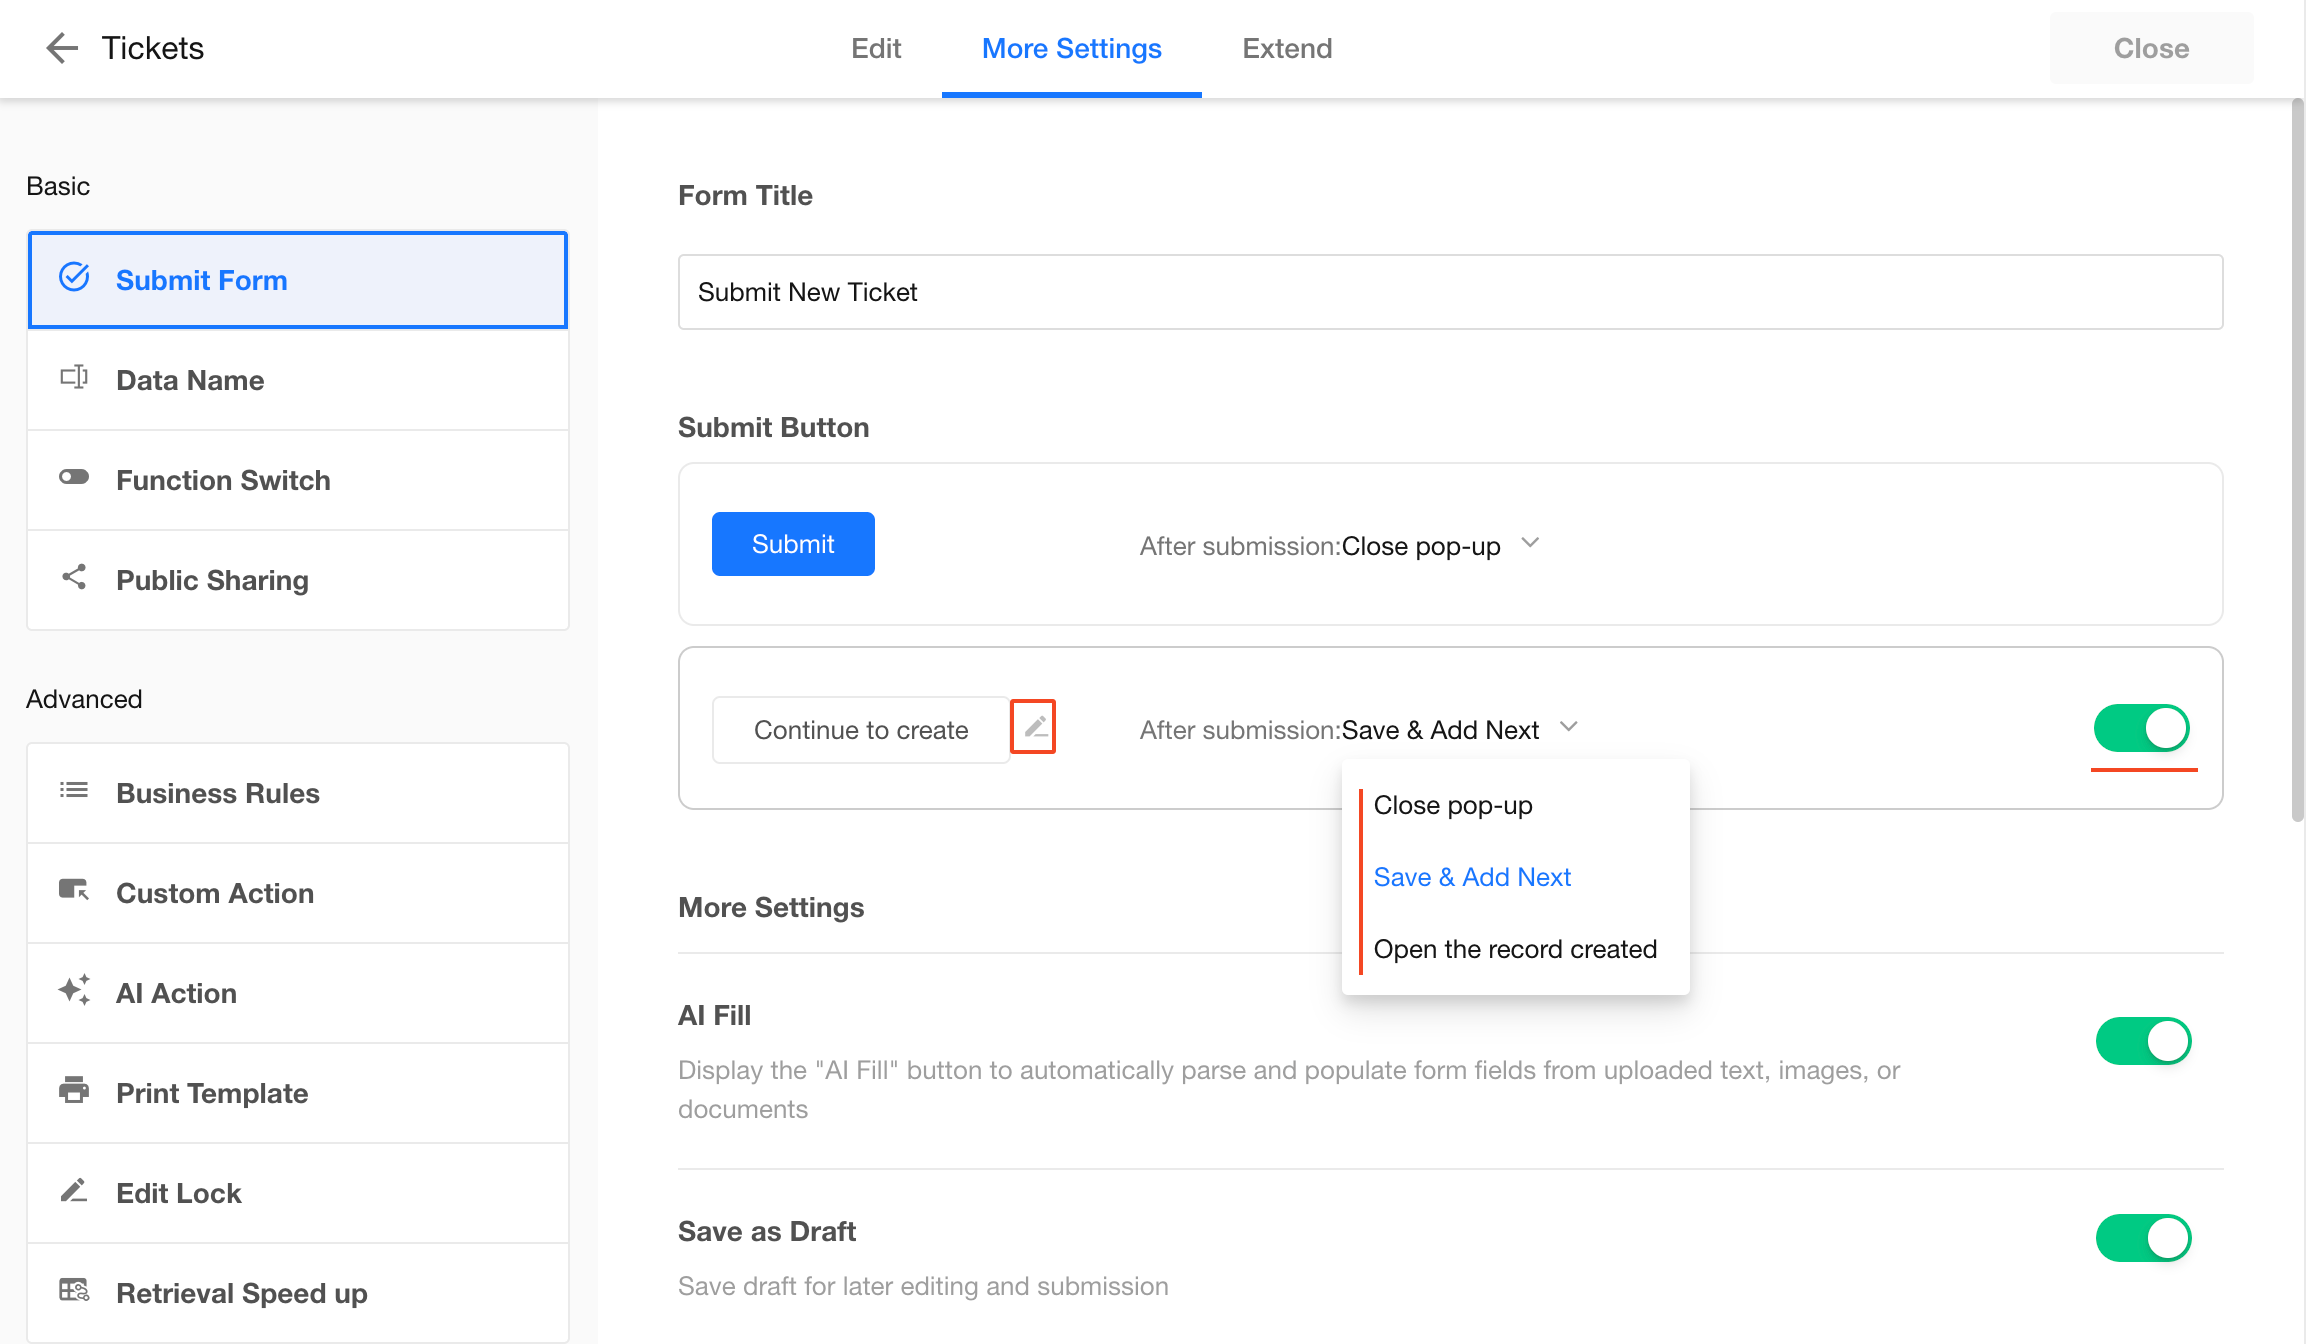
Example:
If the default submit button closes the form, use Continue to Create for batch entry.
6. Retain Values from Previous Record
When creating multiple records with similar data, you can reuse values from the previous submission.
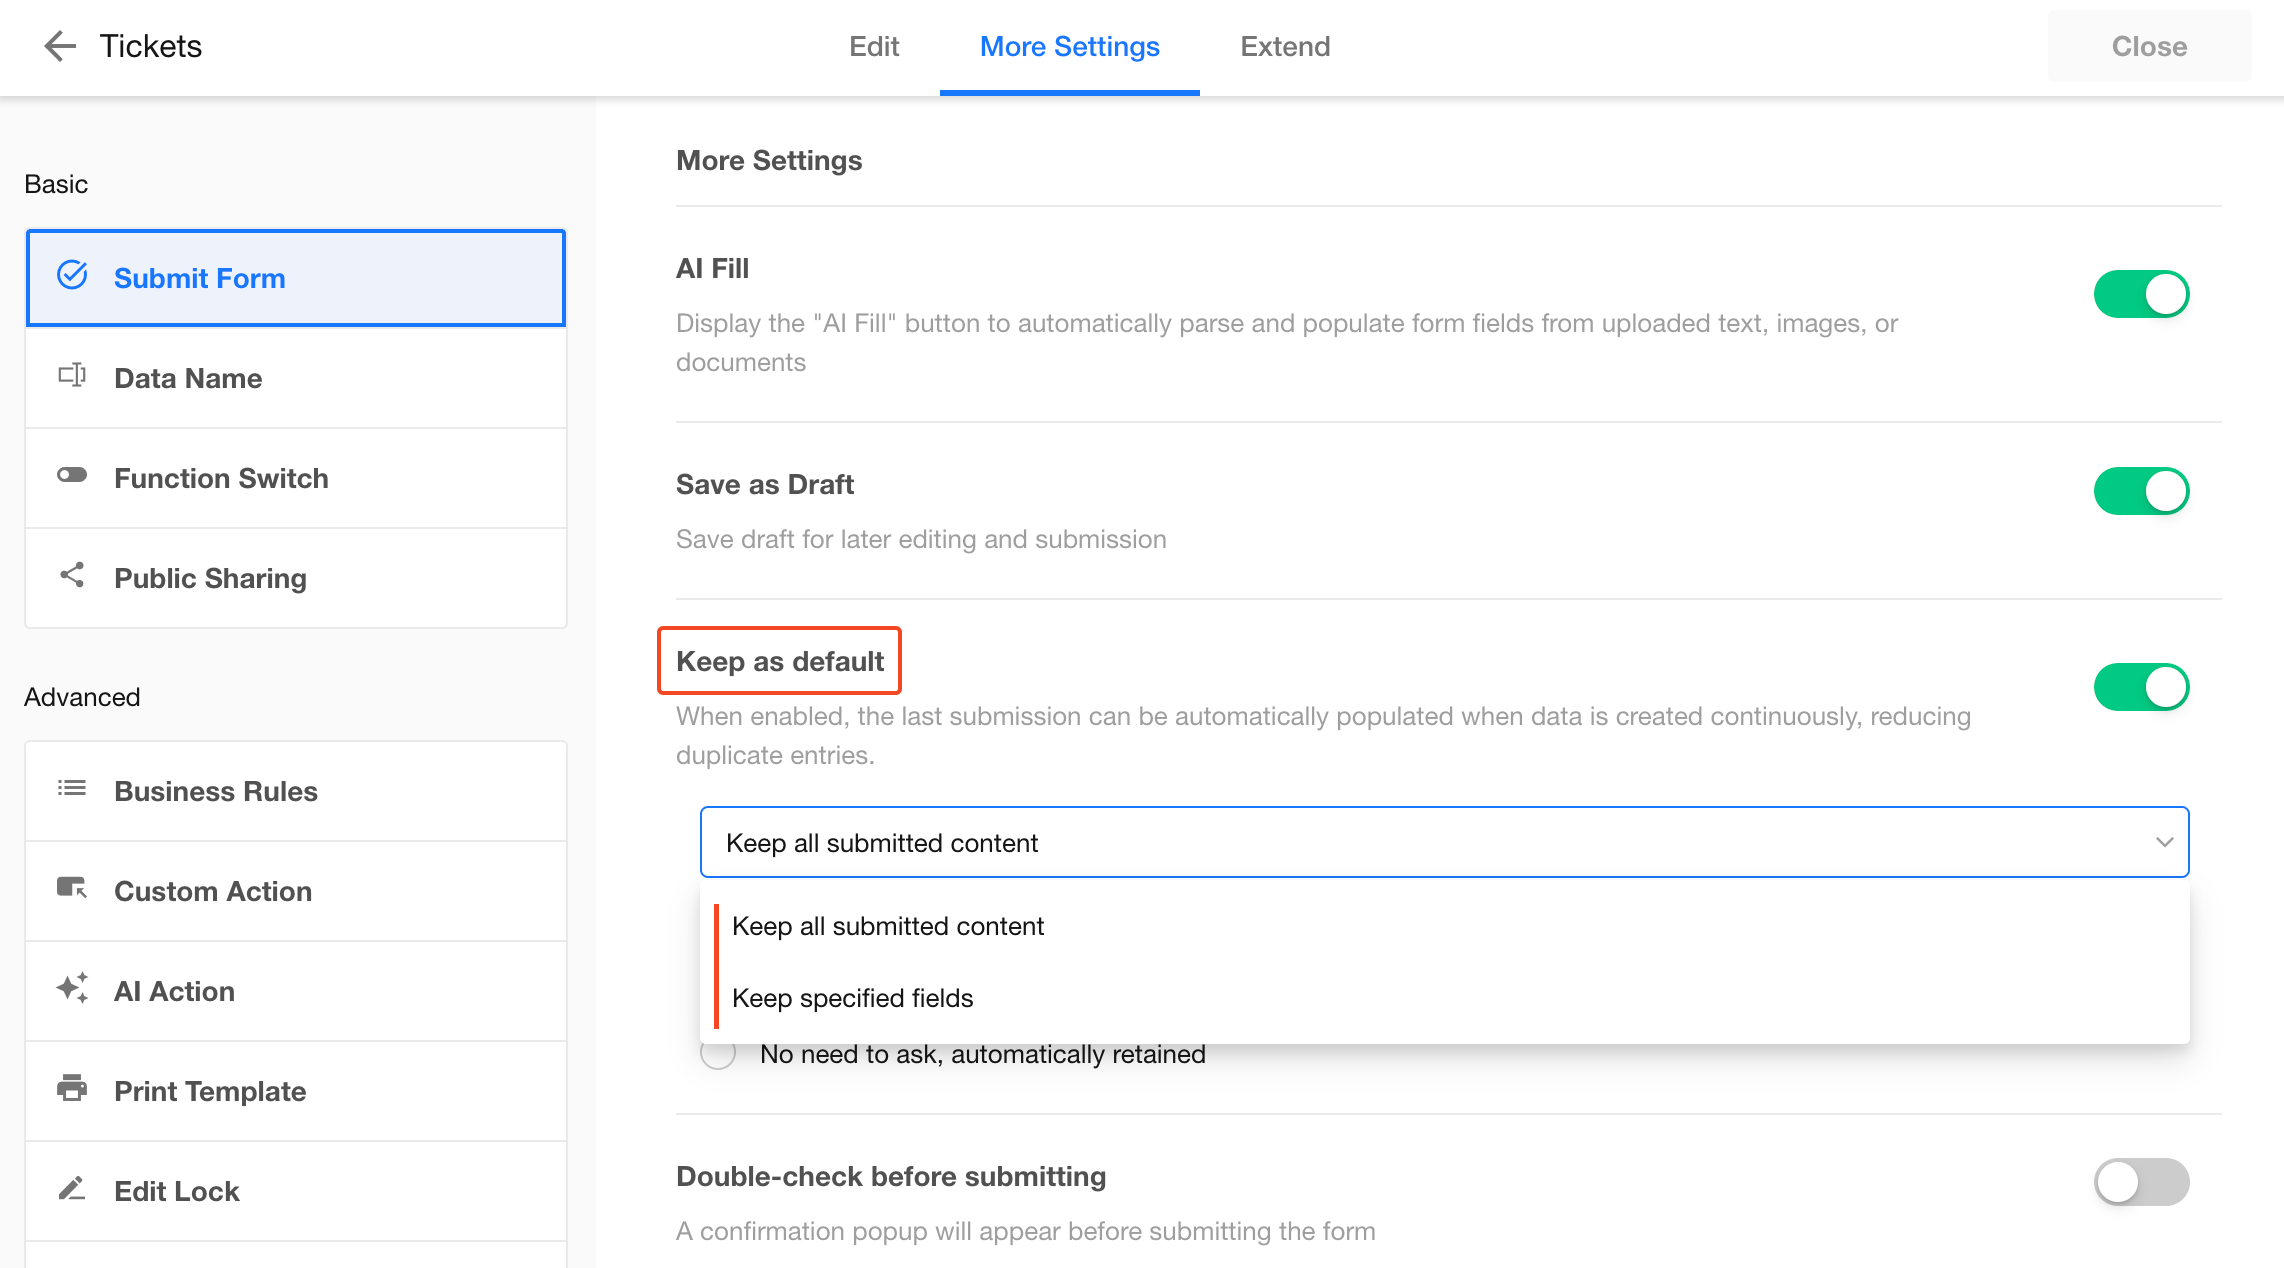
Scope
- Retain all fields, or
- Retain selected fields only
Retention Modes
-
User-controlled
Show a checkbox “Retain previous values” for users to choose -
Auto-retain
Automatically retain values without prompting
Example
Retain all fields (user decides):
Retain selected fields (auto):

Note: This feature only works when clicking the Continue to Create button.
Applicable Scenarios
- When manually clicking “Continue to Create”
- When enabled in field settings for mobile app “Create next record after submission”
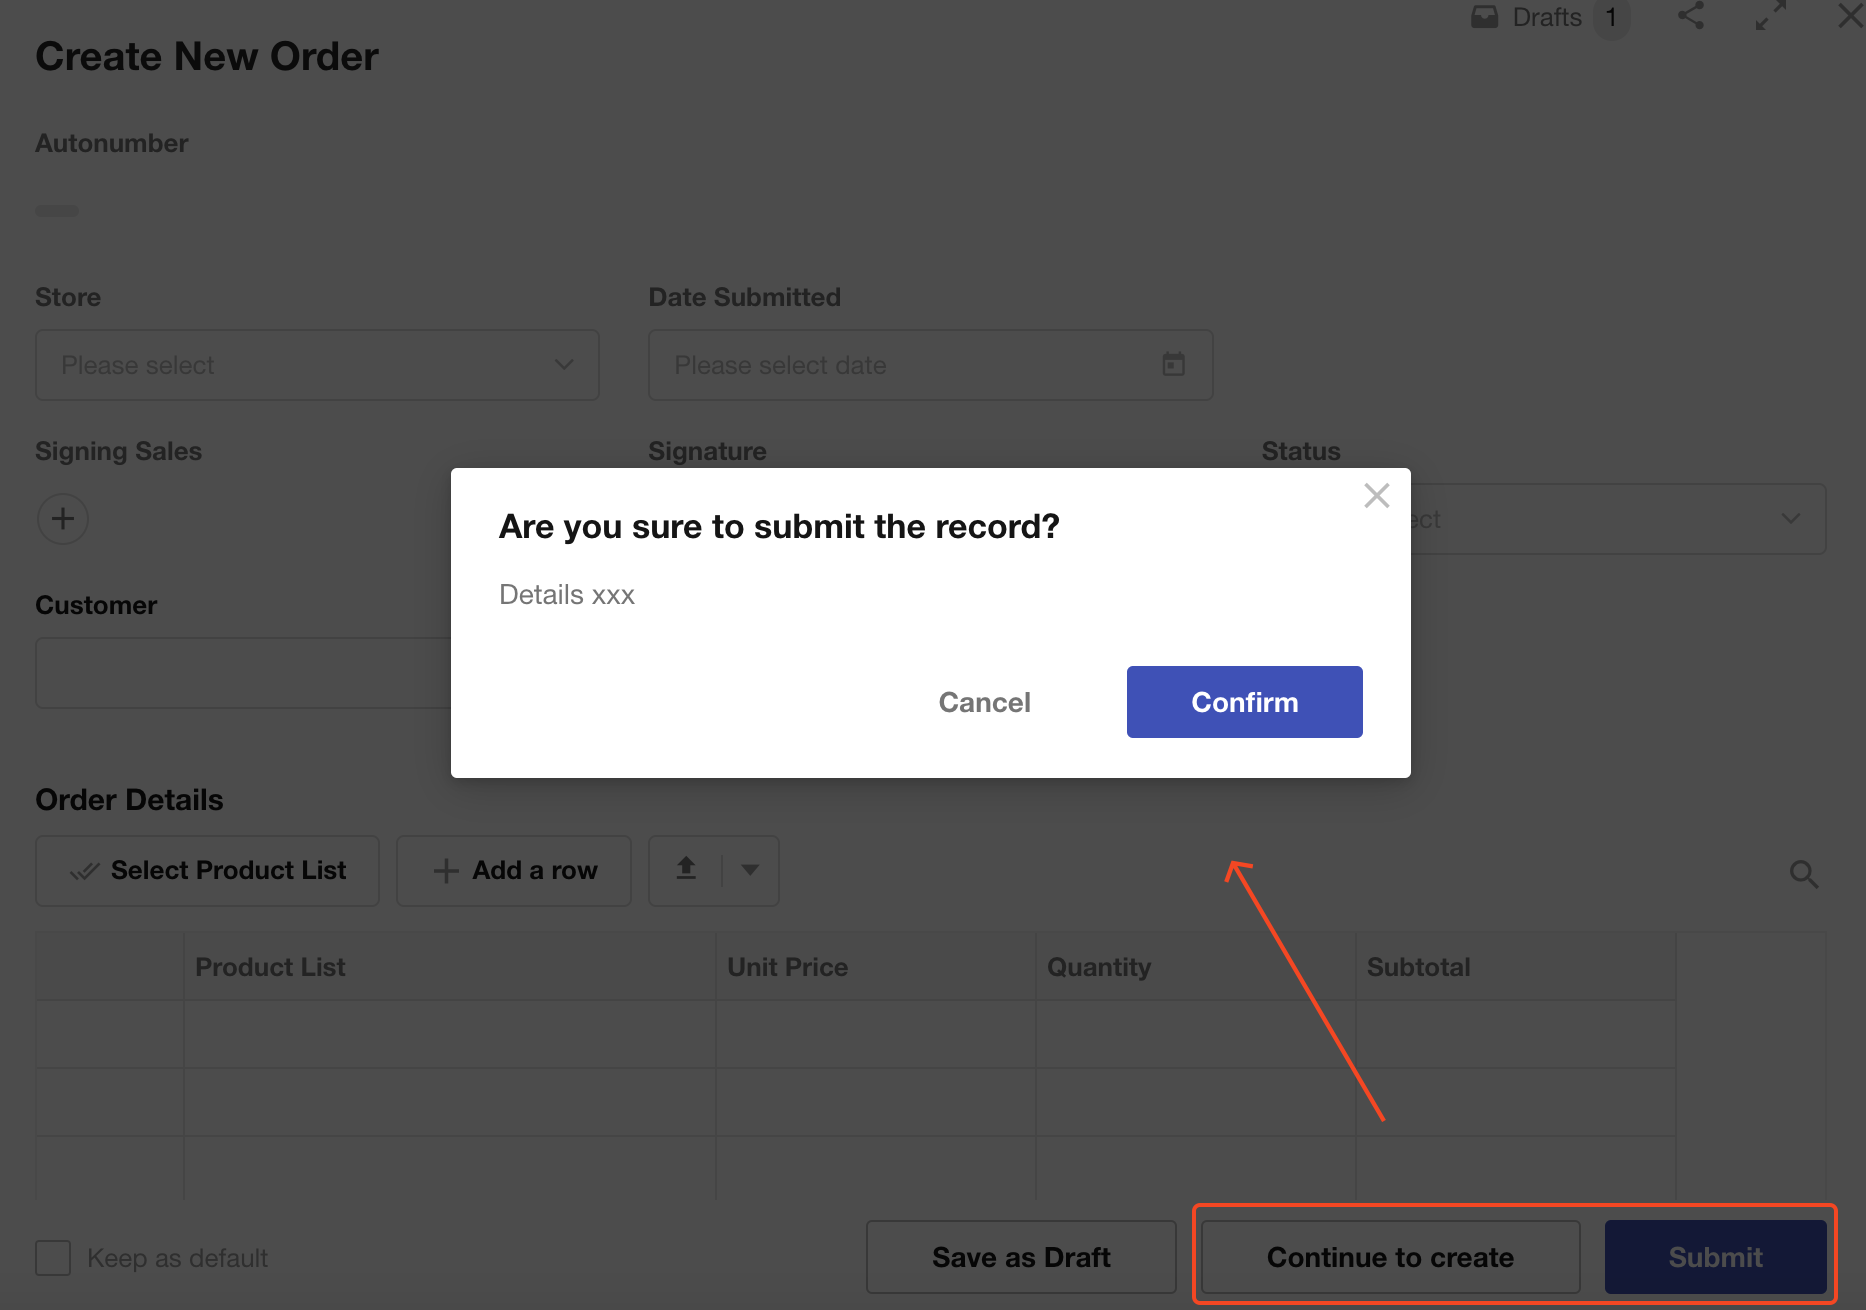
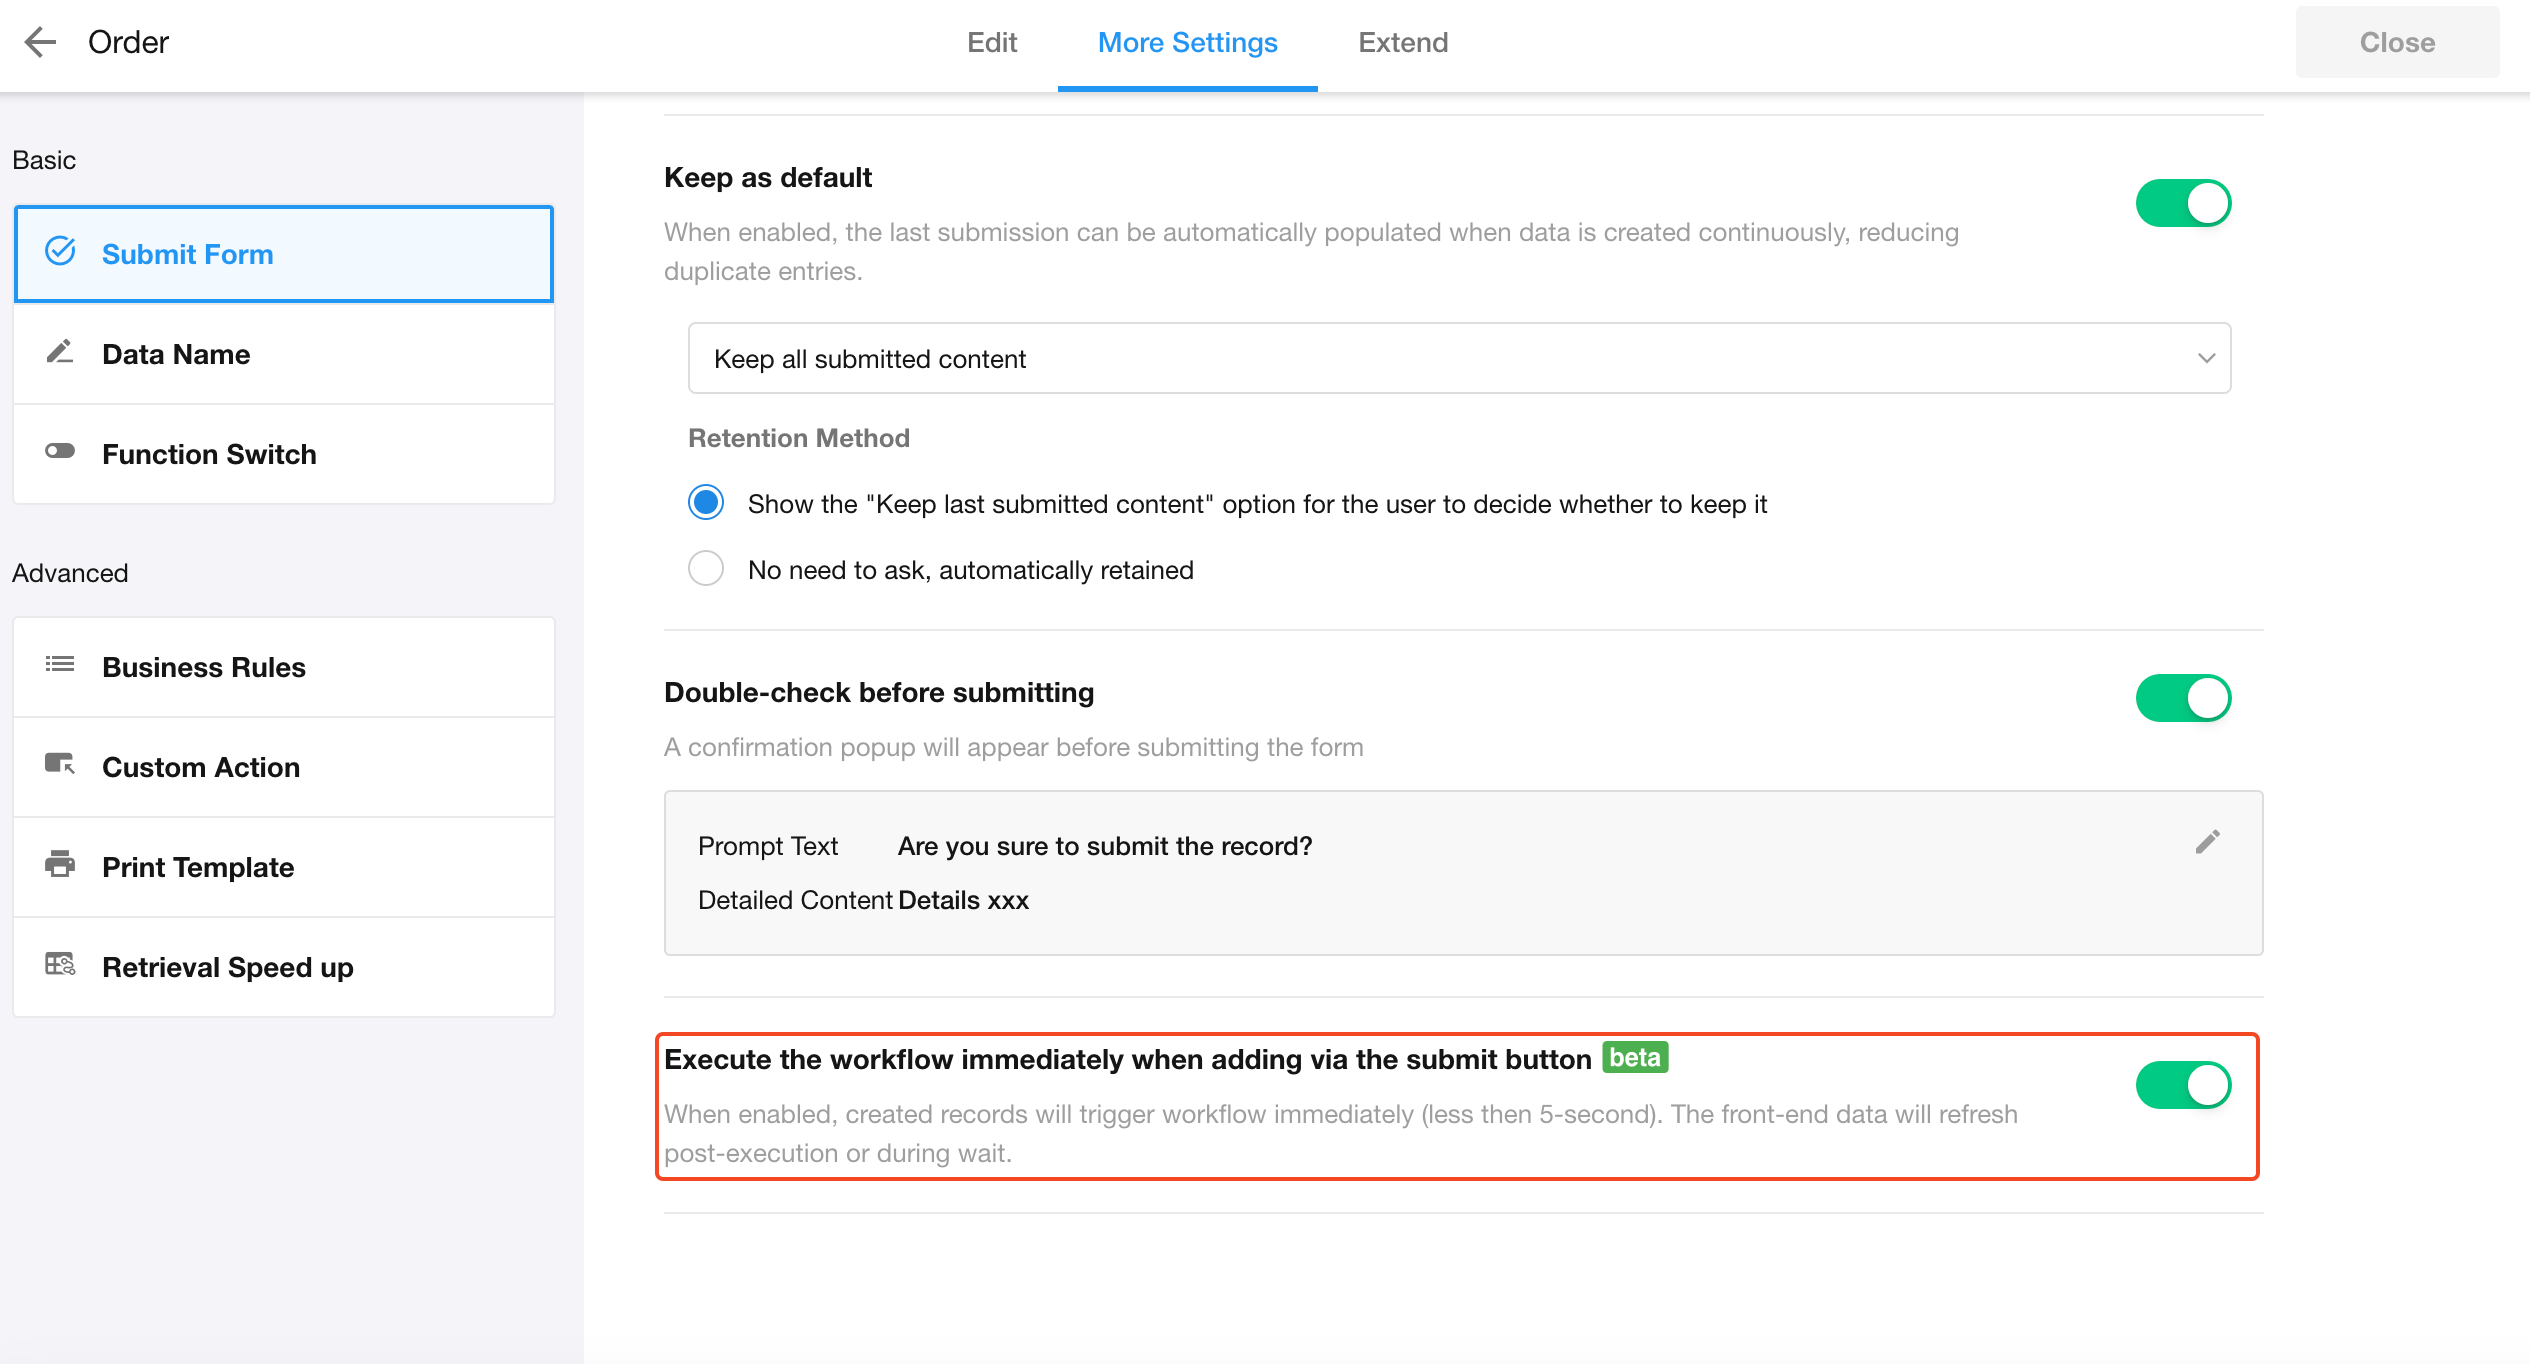
7. Confirmation Before Submission
You can enable a confirmation dialog when clicking the submit button.
The confirmation message and button text are customizable.
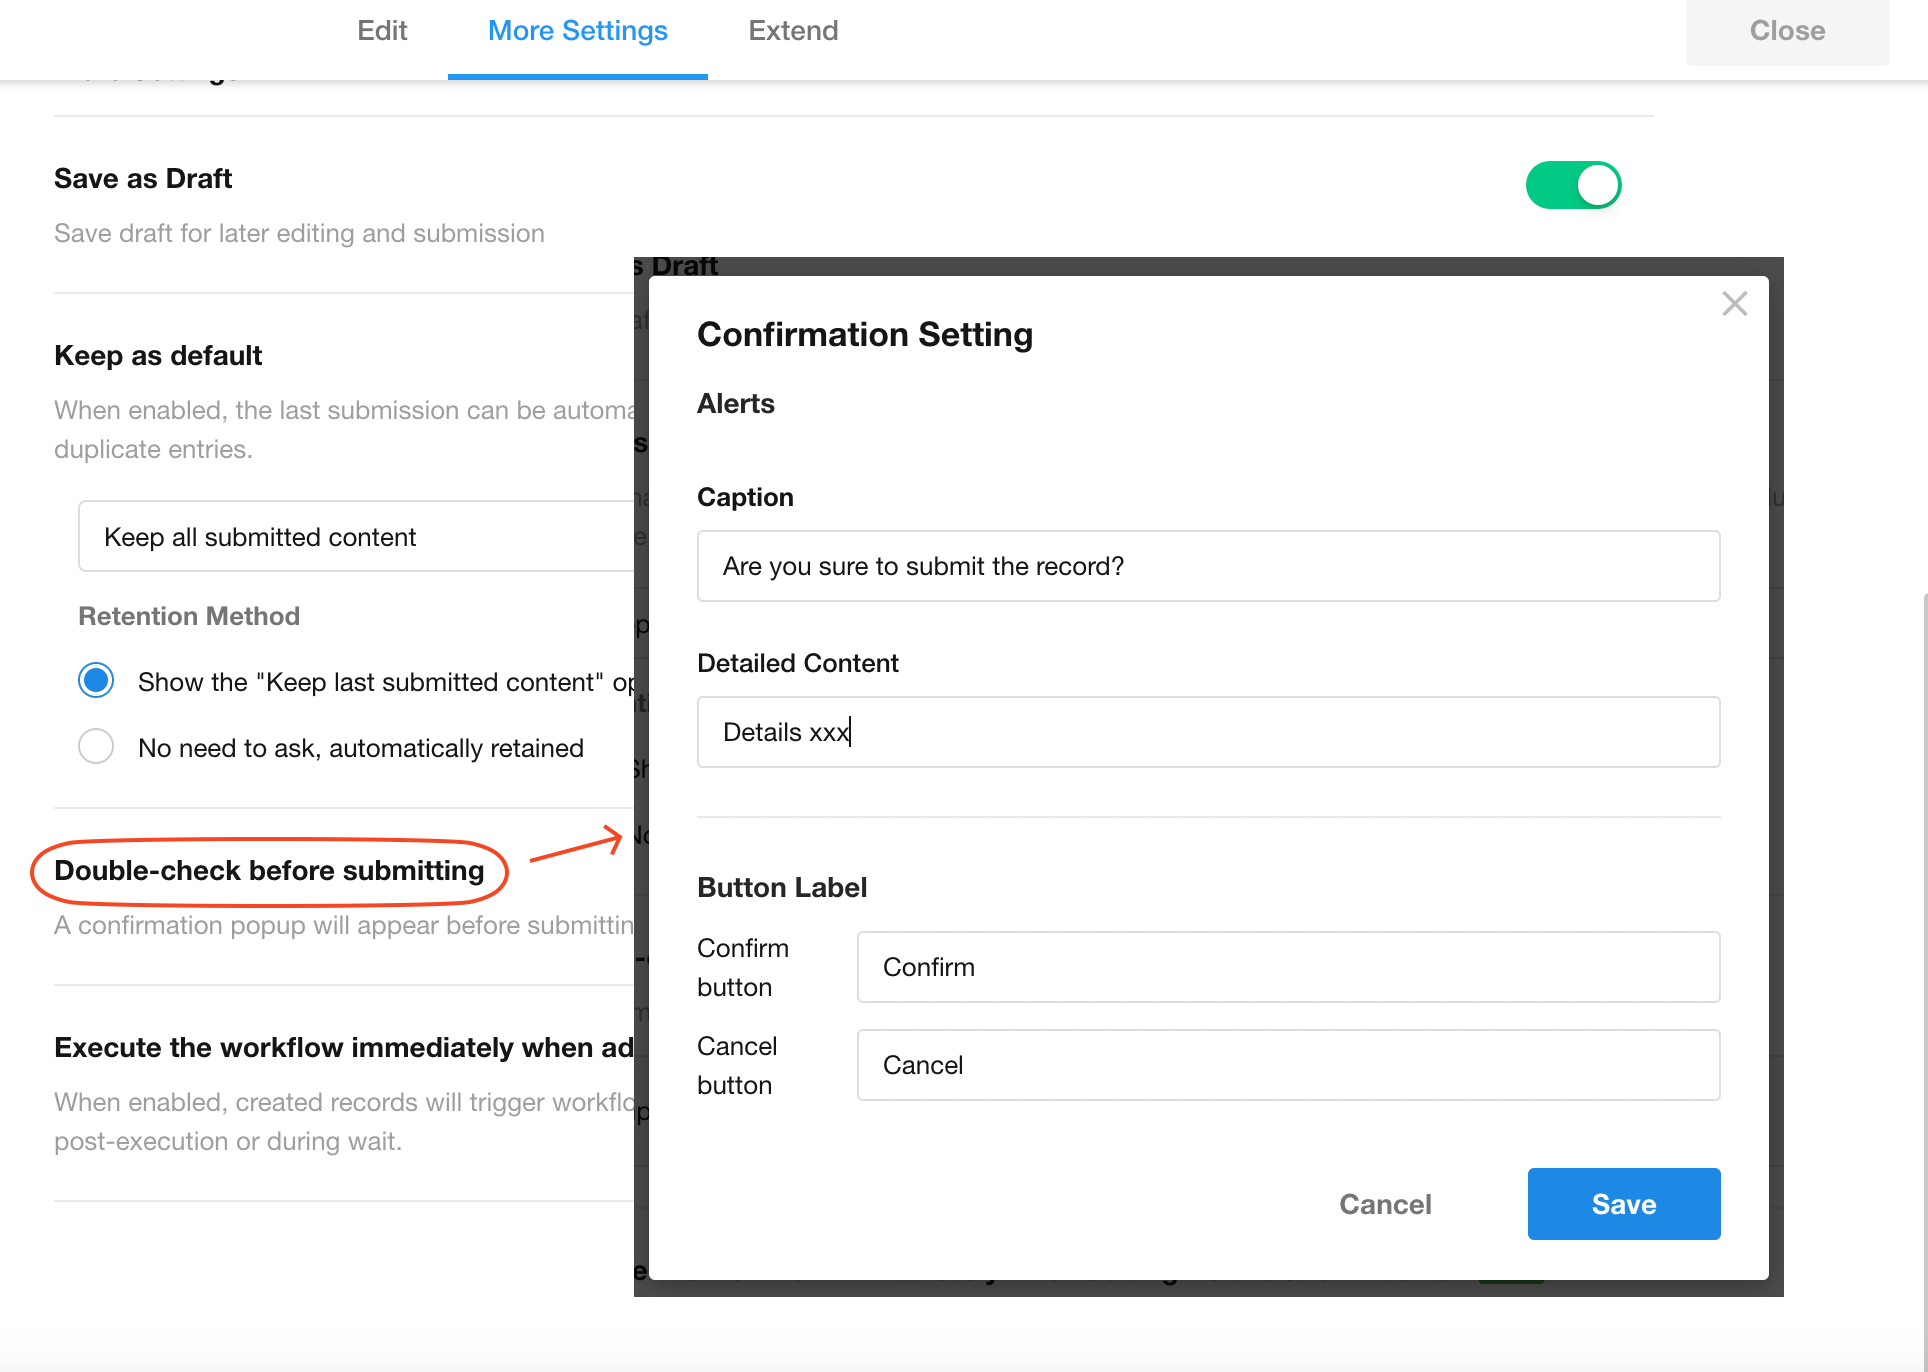
Effect:
8. Trigger Workflow Immediately After Submission
By default, workflows are triggered 5 seconds after record creation.
If needed, you can enable immediate execution.
Supported triggers:
- When a record is created
- When a record is created or updated
After enabling, workflows will run immediately upon submission (within up to 10 seconds).
If the user opens the record detail page, it will auto-refresh.
This setting only applies to records created via the Create button.
Other methods (Excel import, workflow, API) will still trigger workflows after 5 seconds.
Was this document helpful?