Custom Actions
Overview
In addition to built-in actions such as Share, Delete, and Print, application administrators can create custom buttons for a worksheet.
When users click a custom button, they can be prompted to complete specific fields in a pop-up window or trigger an automated workflow. This capability is called a custom action.
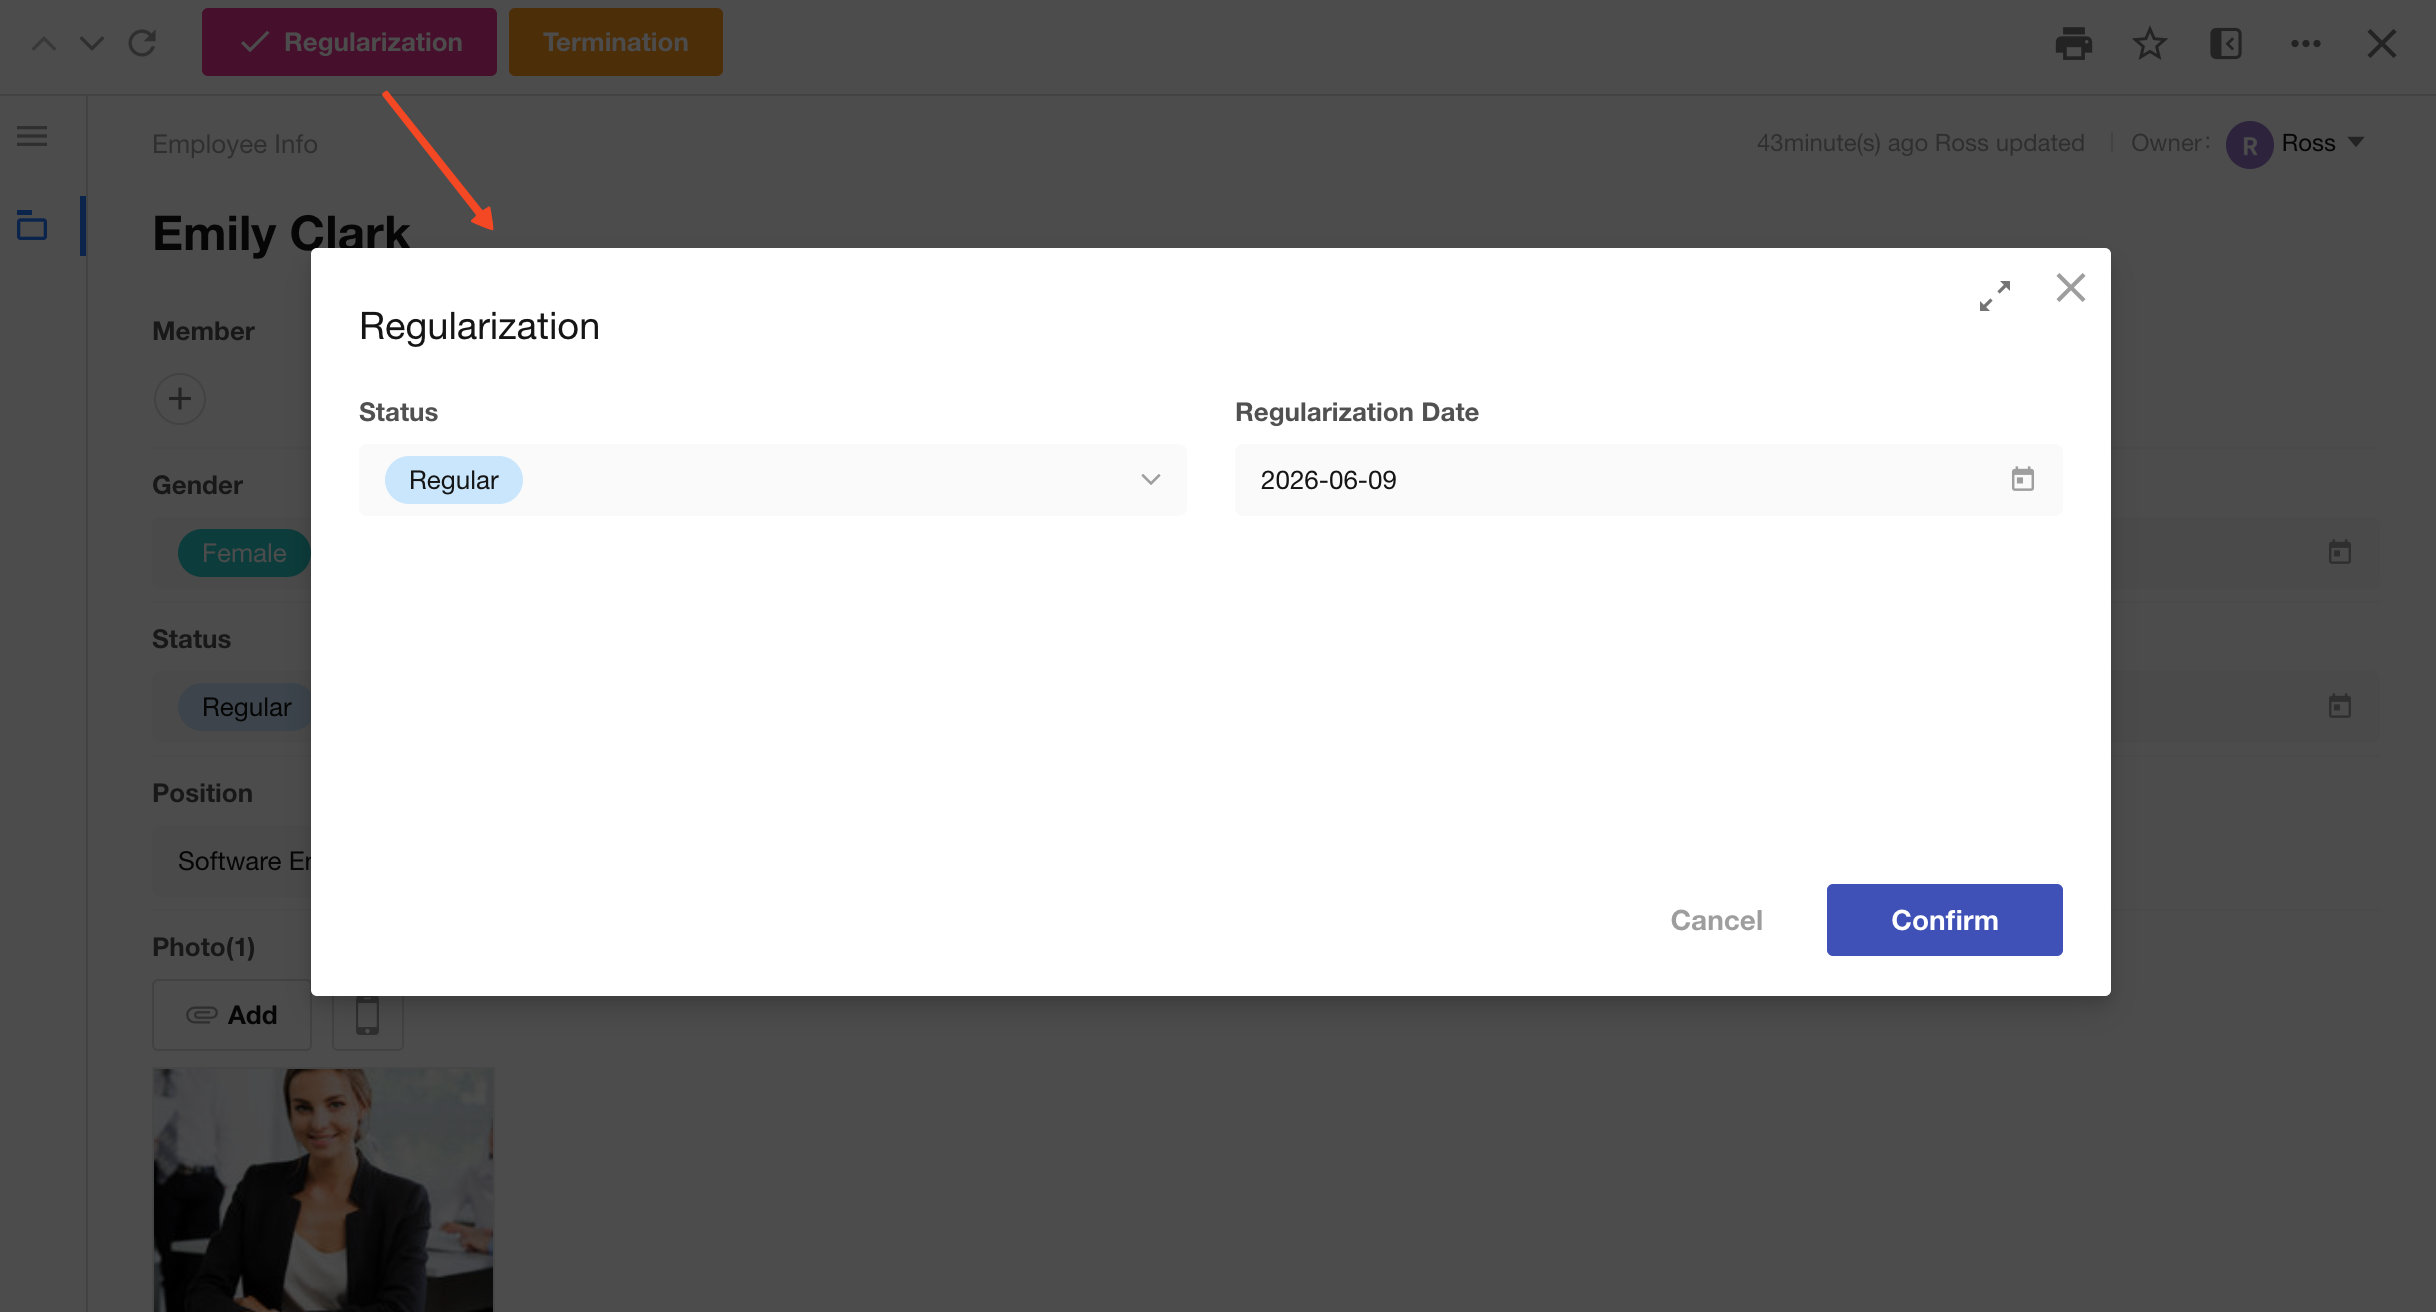
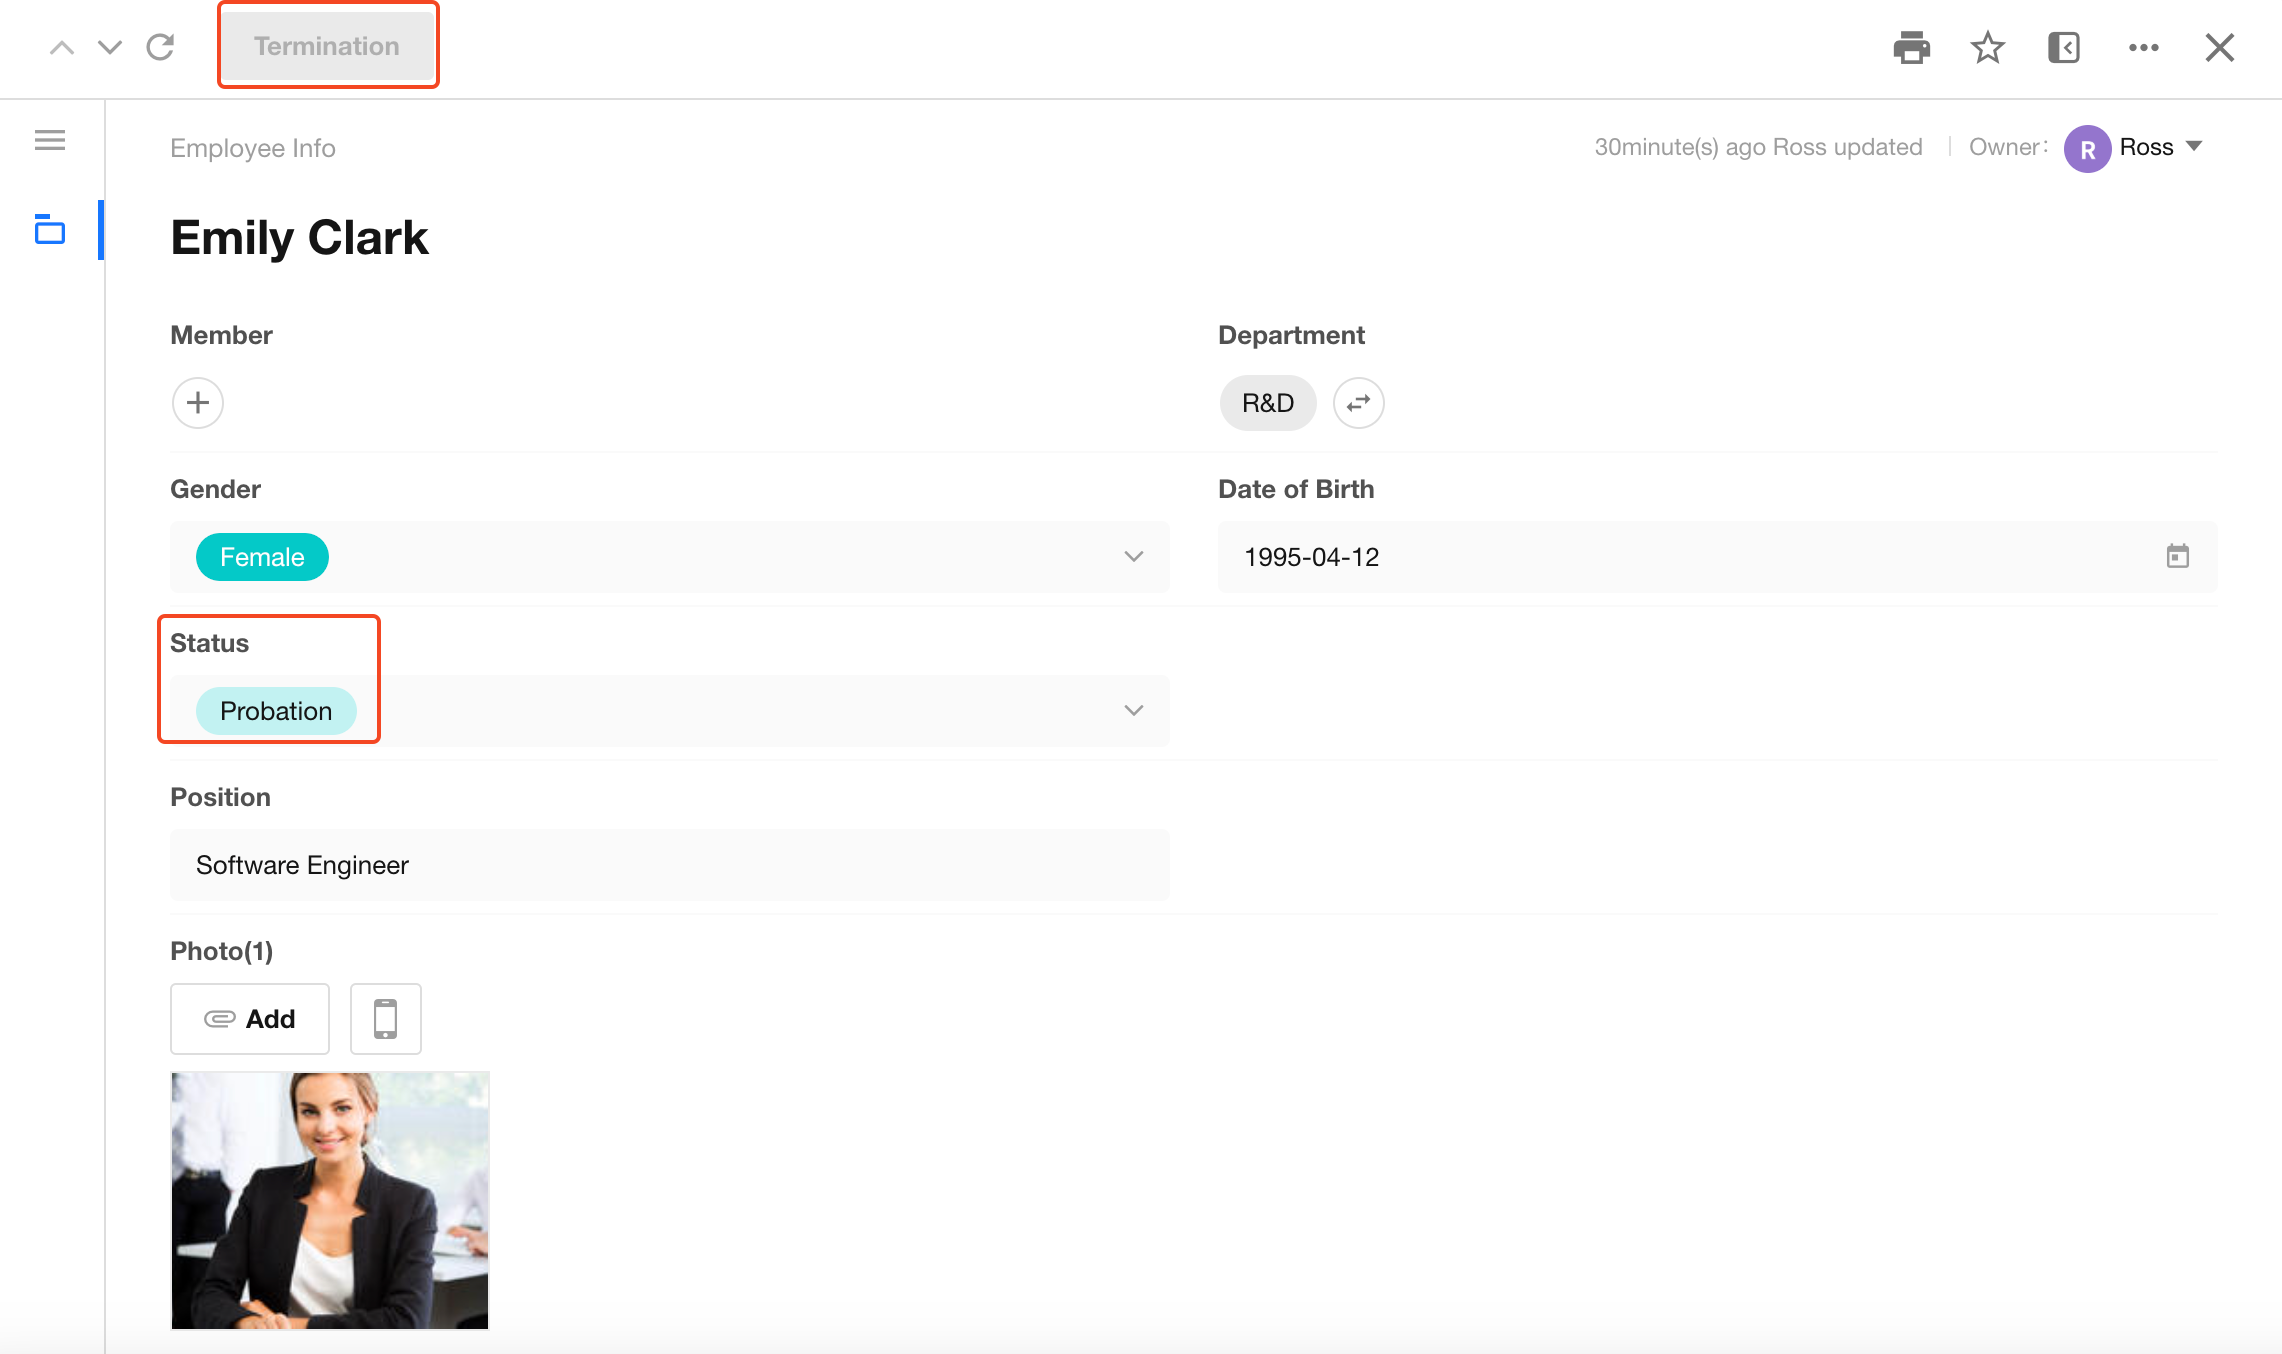
In the example below, two buttons—Regularization and Termination—have been added to the Employee Information worksheet.
When HR clicks the Regularization button, a pop-up window appears, allowing HR to complete only the fields required for employee regularization. After clicking Submit, the changes are saved directly.
When HR clicks the Termination button, a workflow is triggered automatically. The employee's Status field is updated to Terminated, and the Termination Date field is set to the current date.
Depending on how the button is configured, different actions can be performed when it is clicked:
-
Single Record
When a button is clicked from an individual record, users can complete specific fields in a pop-up window or trigger a workflow directly.
-
Multiple Records
In a table view, users can select multiple records and click a button to pass all selected records into a workflow. The workflow is executed once using the selected records as input.
See Example 3 for details.
Add a Custom Action
Custom actions can be added to both worksheets and views.
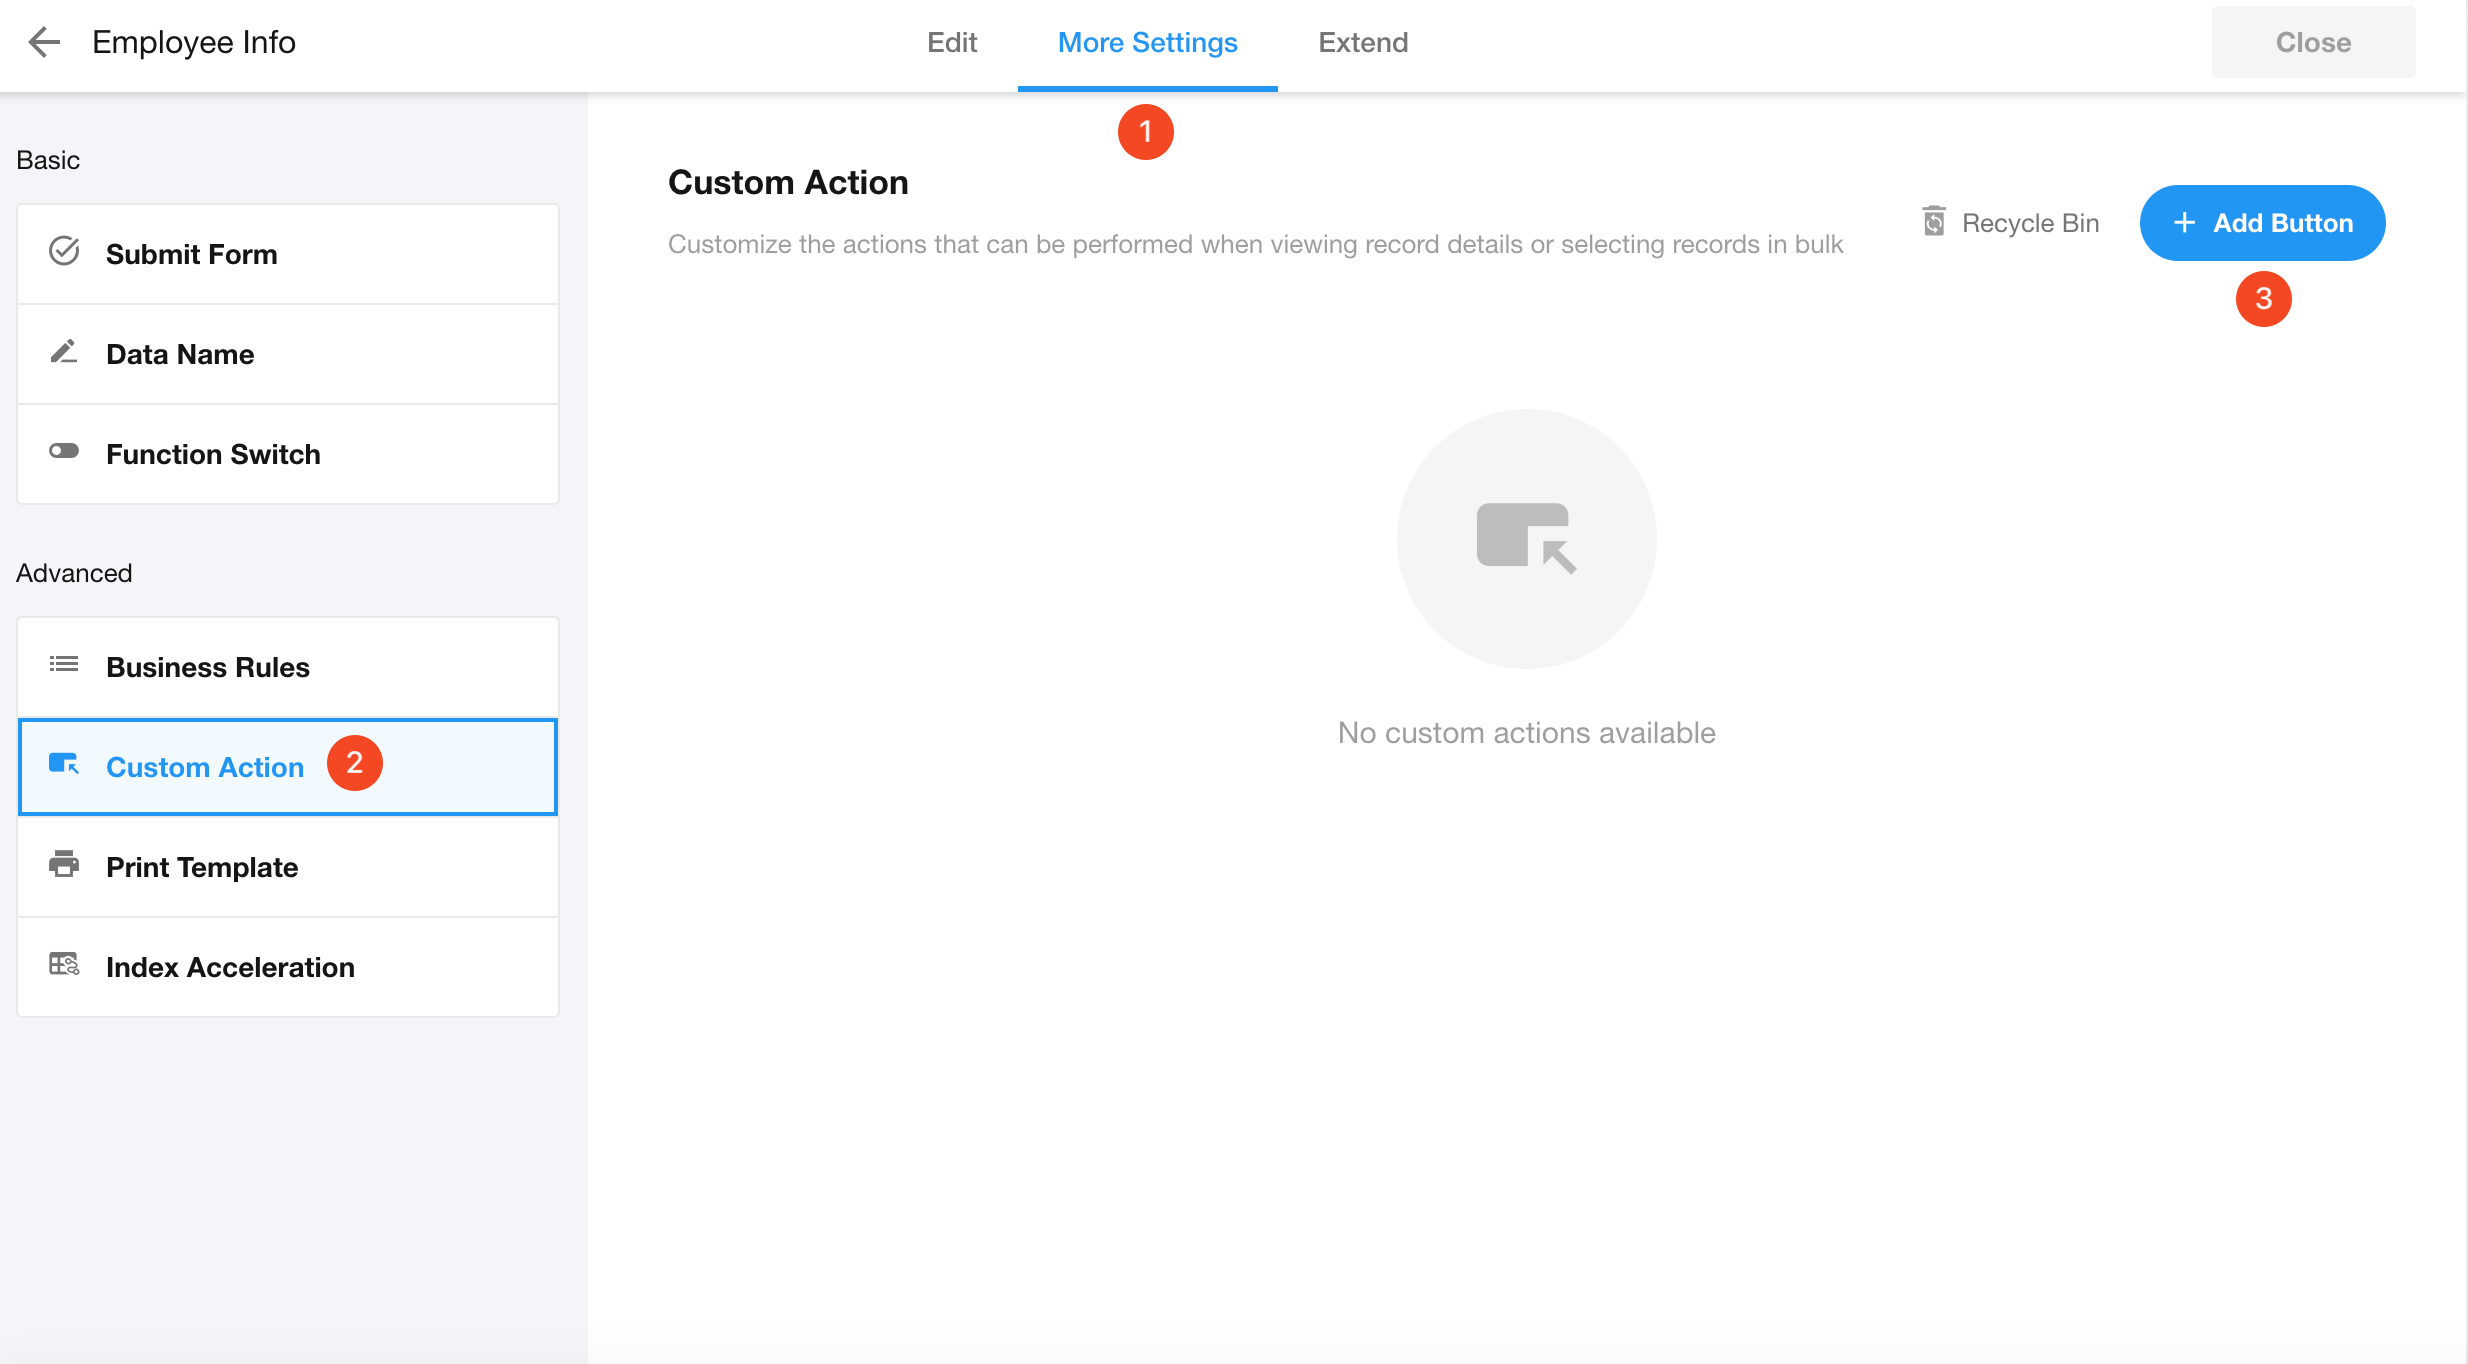
Add a Custom Action to a Worksheet
Go to Form Settings > Custom Action > Add Button.
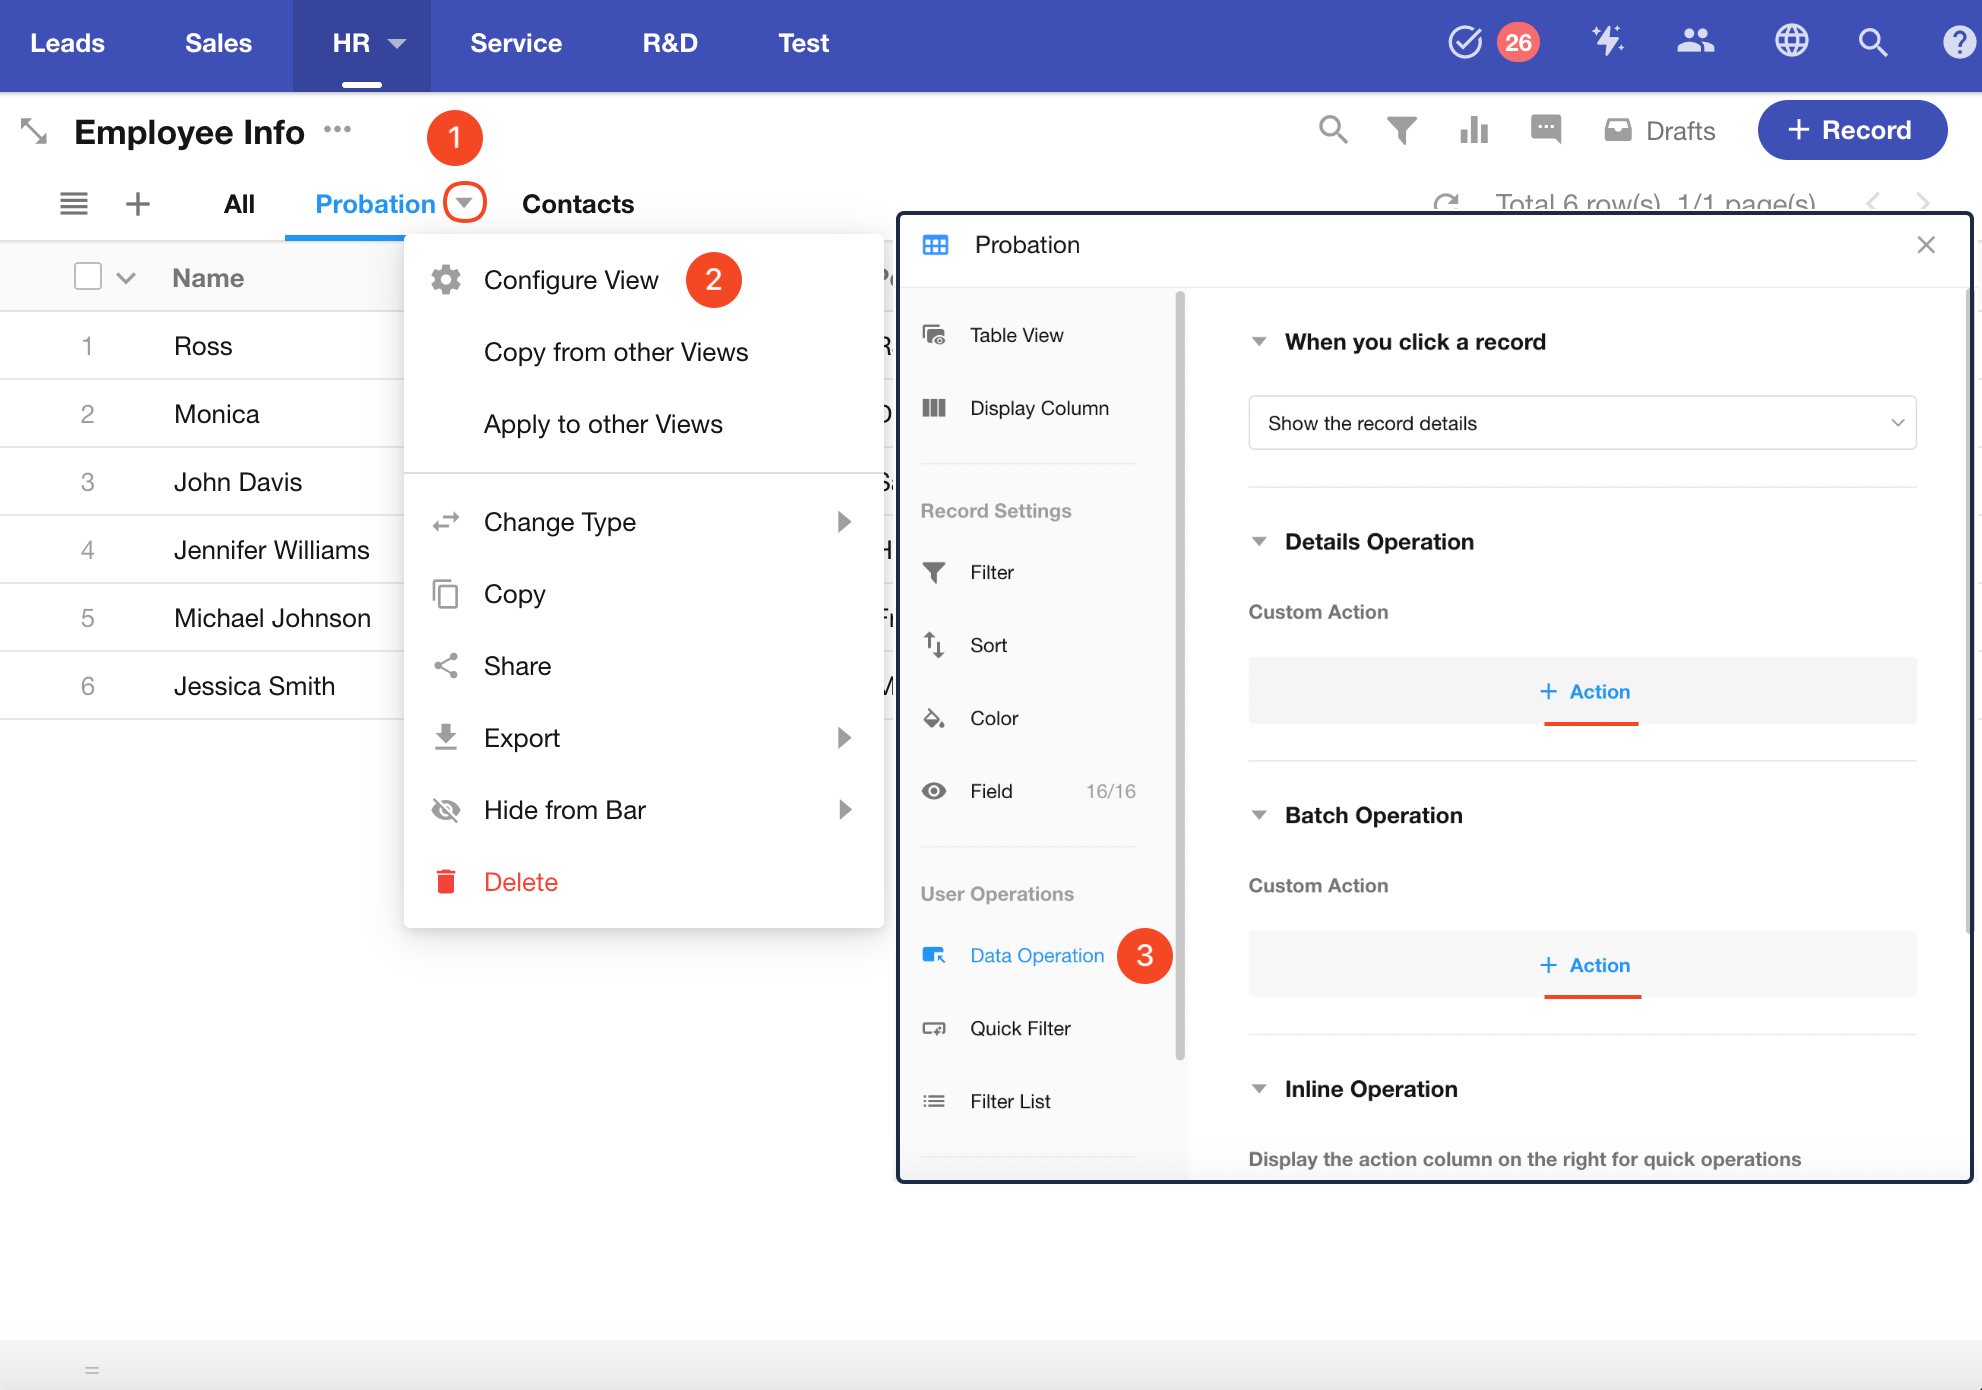
Add a Custom Action to a View
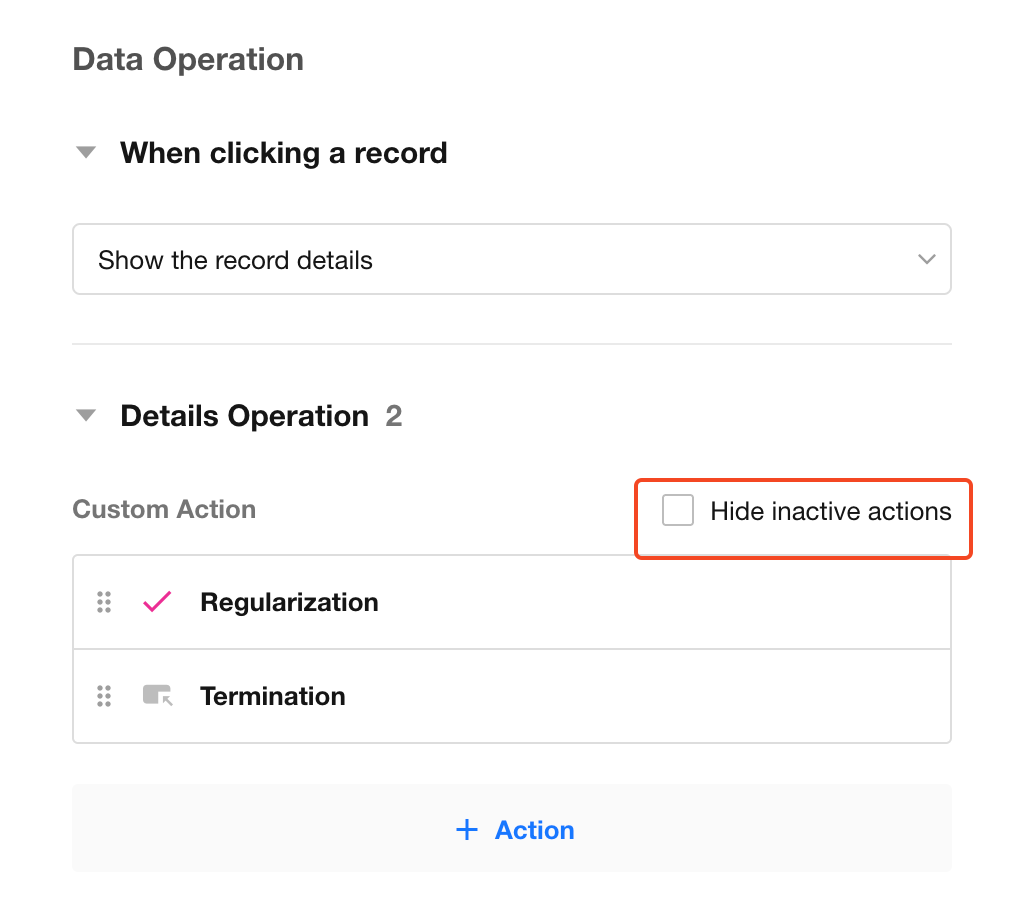
Go to Configure View > Data Operation > + Action.
Custom buttons created in a view are automatically synchronized to the worksheet's Custom Actions management page. From there, you can specify which views the button is available in.
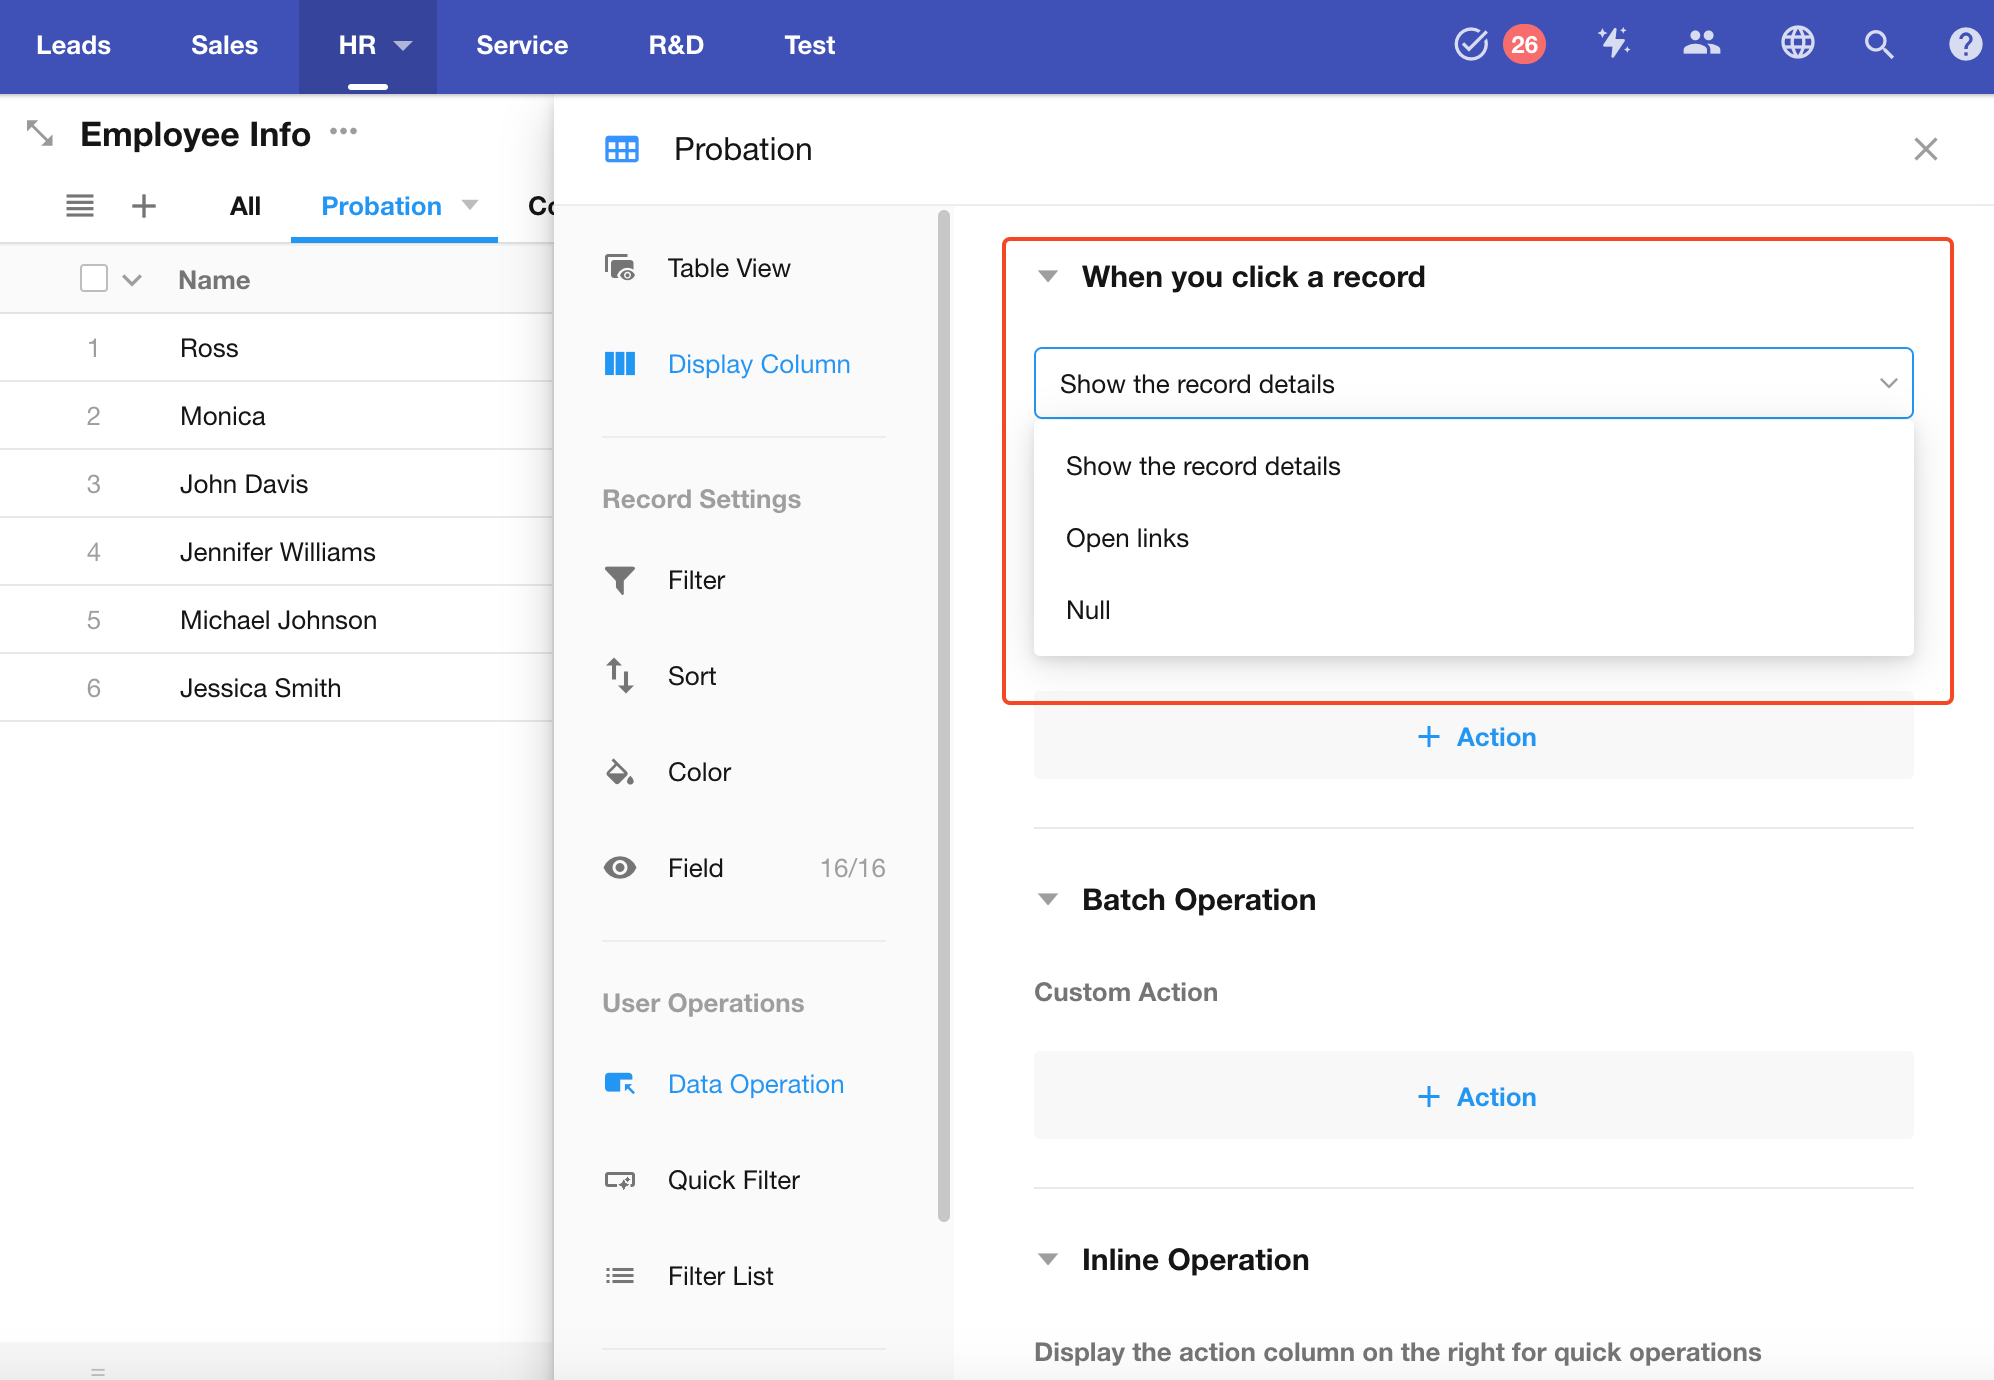
Record Click Behavior
When a user clicks a record row (or record card) in a view, you can configure one of the following behaviors:
-
Open the record details page directly
-
Open a link. If a text field in the record stores a URL, clicking the record opens that URL directly.
-
None. No action is performed when the record is clicked.
Examples
Example 1: Complete Specific Fields from a Custom Button
When a form contains many fields, you can use a custom button to display only the fields relevant to a specific task. This helps users focus on the required information and complete the operation more efficiently.
Scenario: Add a Regularization button to the Probation view. When clicked, users are prompted to complete the Regularization Date and Status fields.
Configure the Button
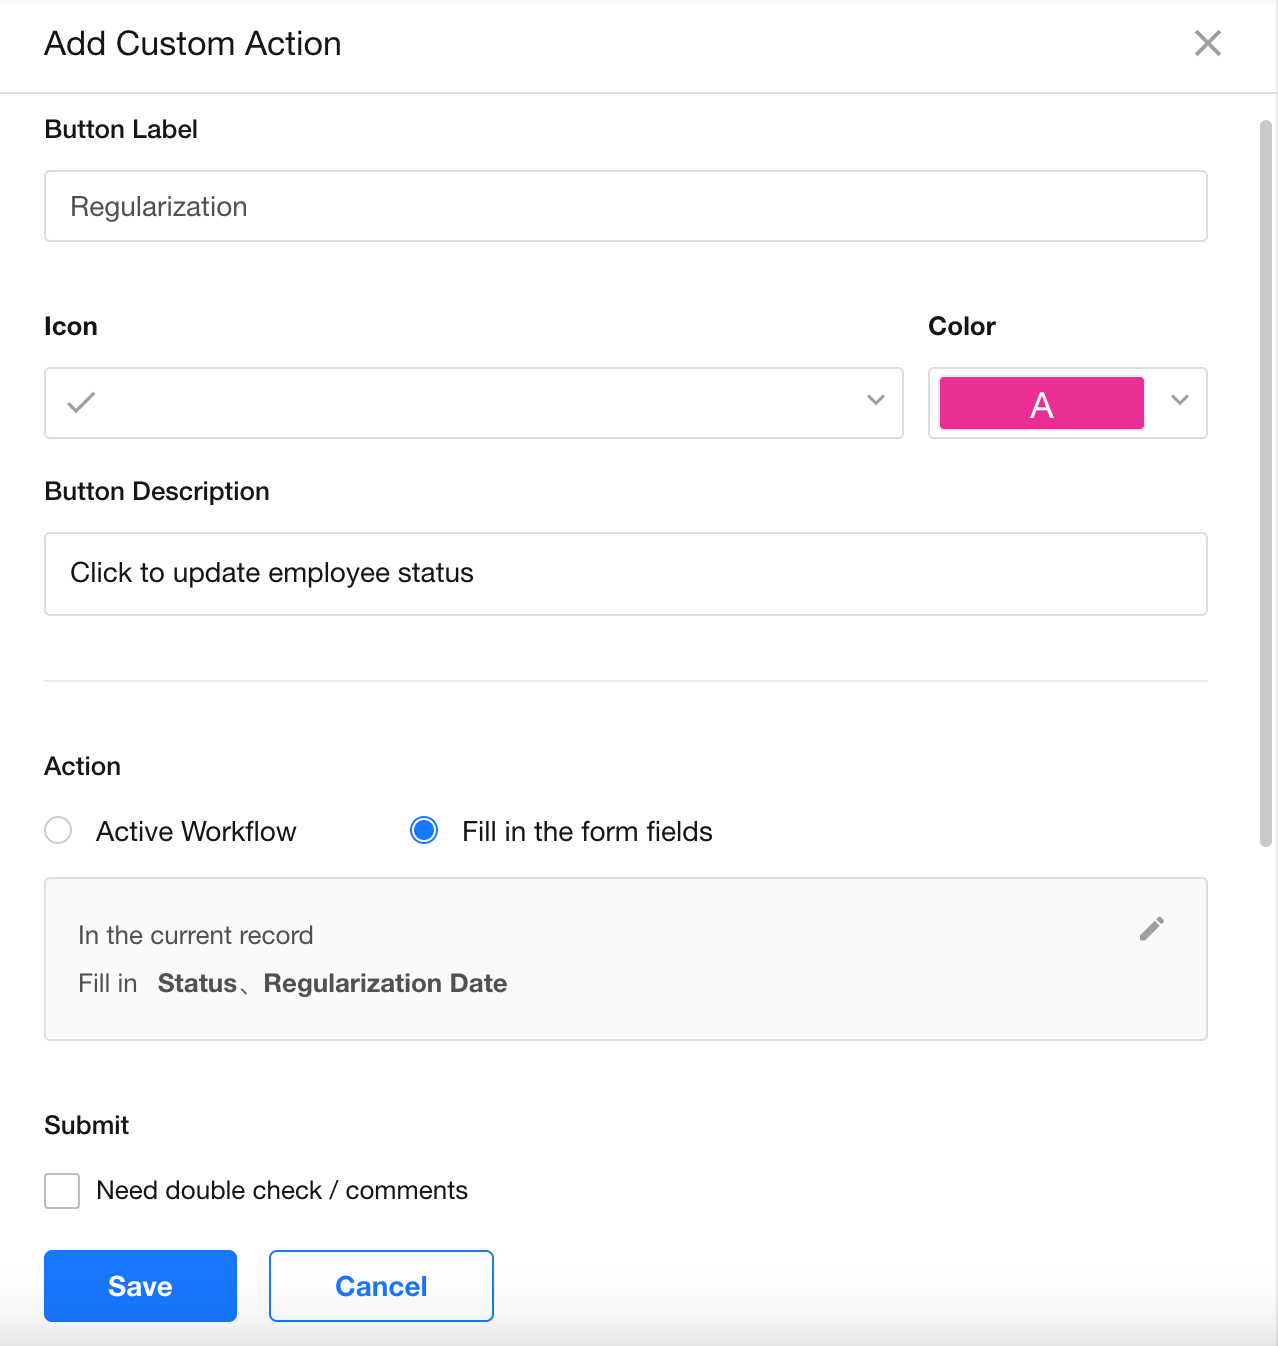
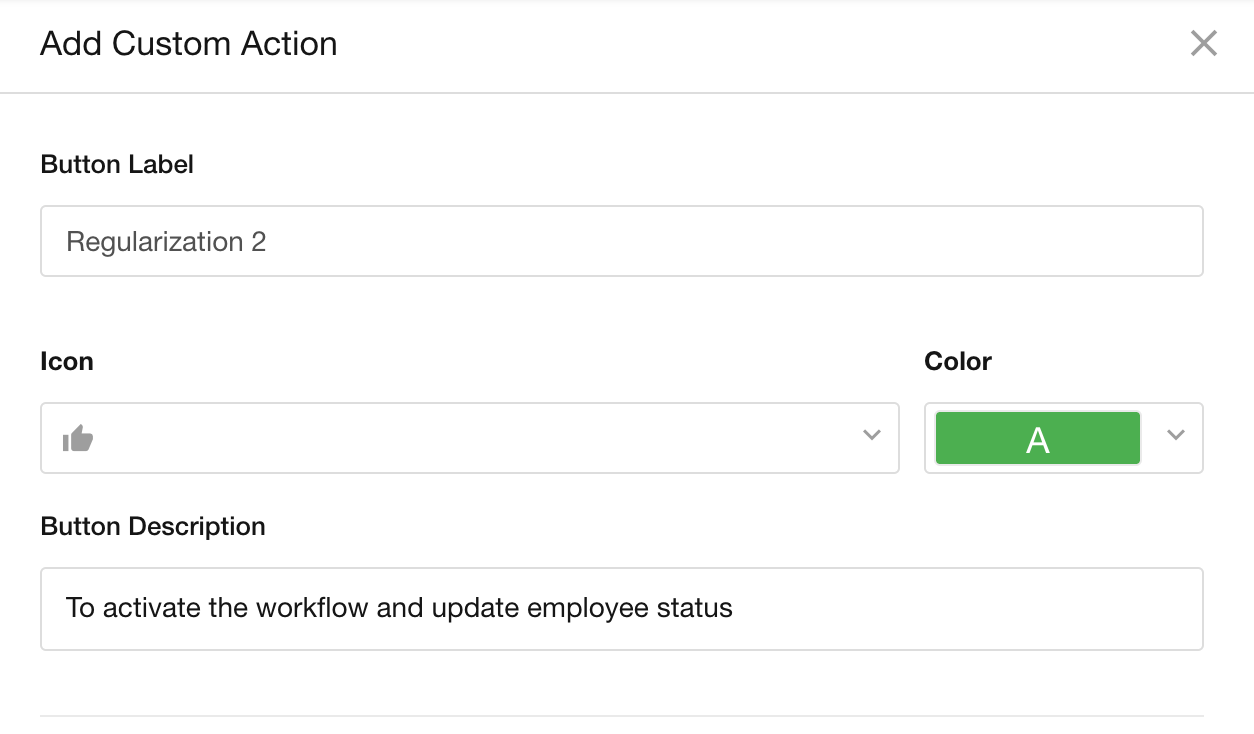
1. Name, Icon, and Description
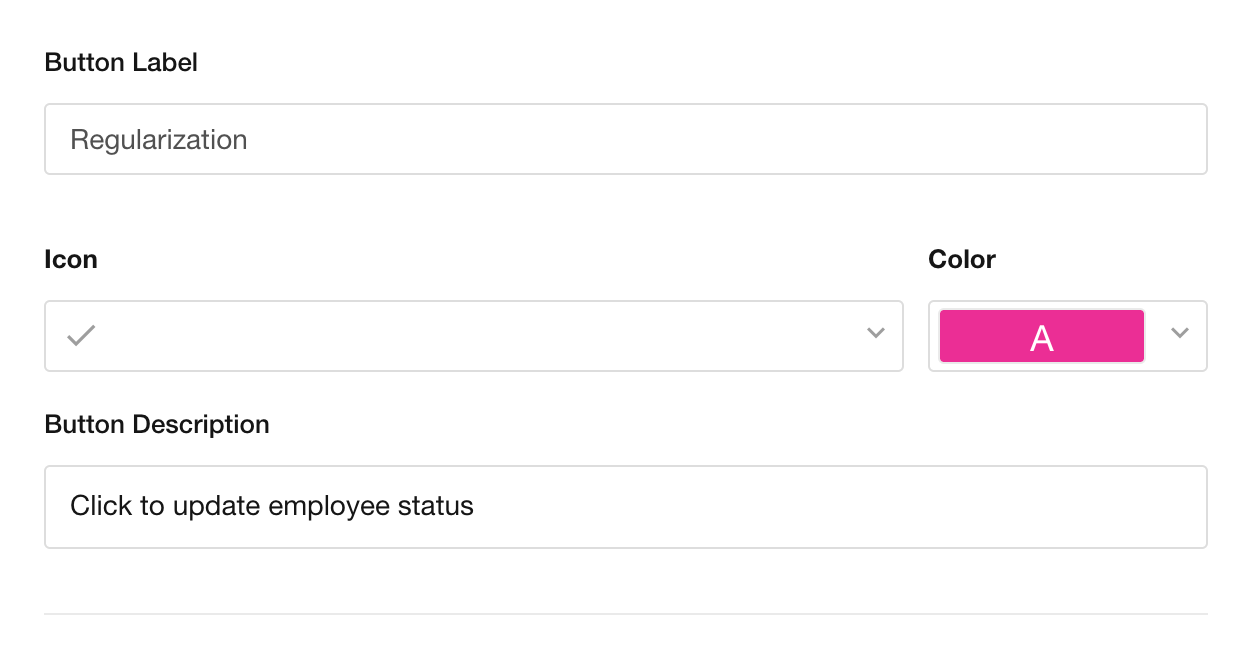
- The button name has no character limit.
- Icons and colors can be customized.
- The button description explains the purpose of the button and is displayed when users hover over it.
2. Choose an Action
When the button is clicked, you can choose one of the following actions:
- Execute a workflow directly
- Open a pop-up window for completing specific fields

A third option is also available: continue executing a workflow after the fields are submitted.
In this example, Complete Specific Fields is selected, allowing users to enter a value for the Regularization Date field.
3. Configure the Fields to Be Completed
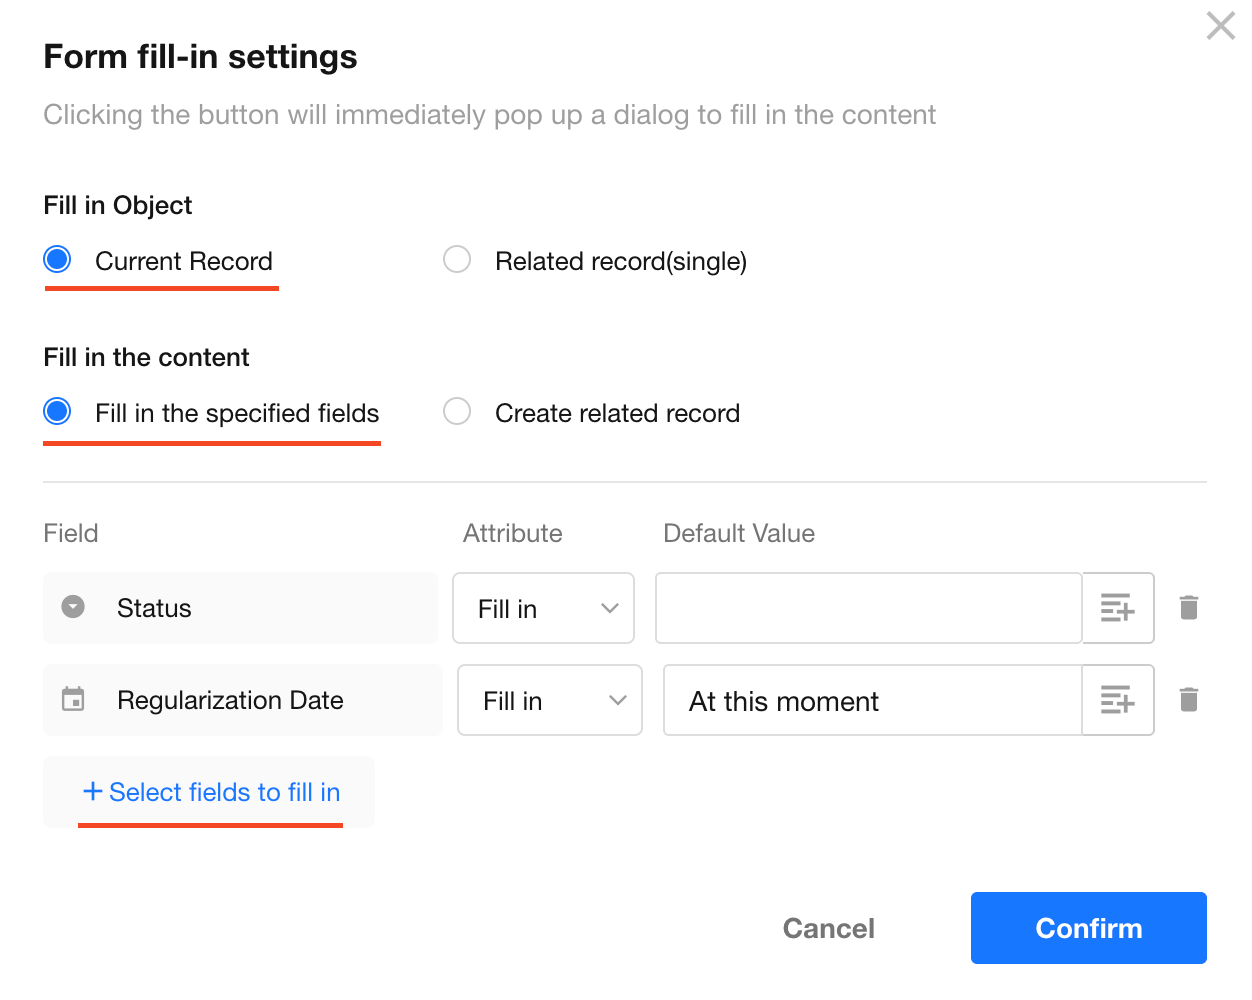
First, choose the target record:
- Complete fields in the current record
- Complete fields in a related record (only supported for a single related record)
Then choose the action:
- Update fields in an existing record
- Create a new related record
The following scenarios are supported:
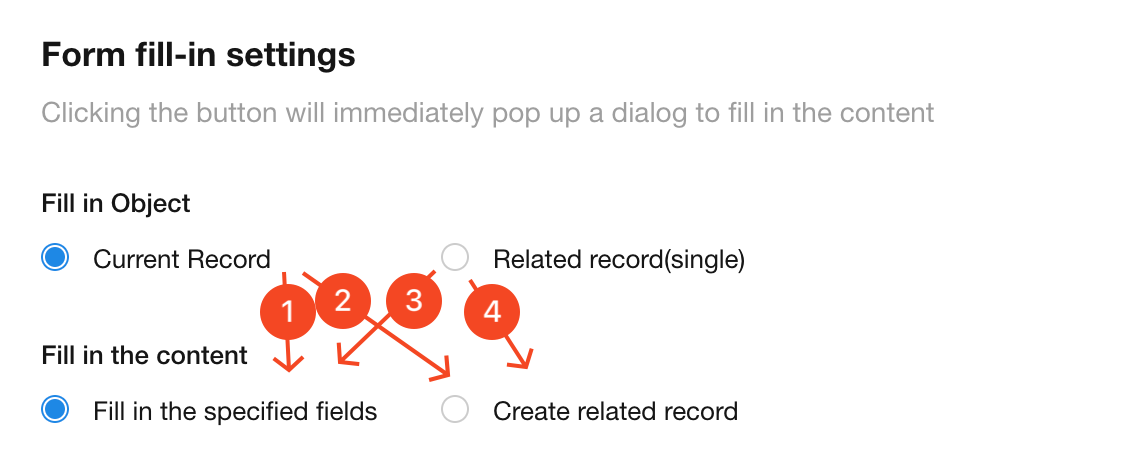
-
1. Complete specific fields in the current record
Supports setting default values. Member fields and date fields support dynamic default values, such as the current user and current date.
-
2. Create a related record for the current record
Clicking the button opens a dialog for creating the related record.
-
3. Update fields in a related record
Clicking the button opens fields from the related record. For example, if a Contact record is related to a Company record, users can edit company information directly from the Contact record.
-
4. Create a related record for an existing related record
Configure Field Properties
Fields displayed in the pop-up window can be configured as:
- Read-only
- Editable
- Required
You can also configure field default values:
- Fixed default value
- Dynamic default value
- Clear value (saved as blank if left empty)
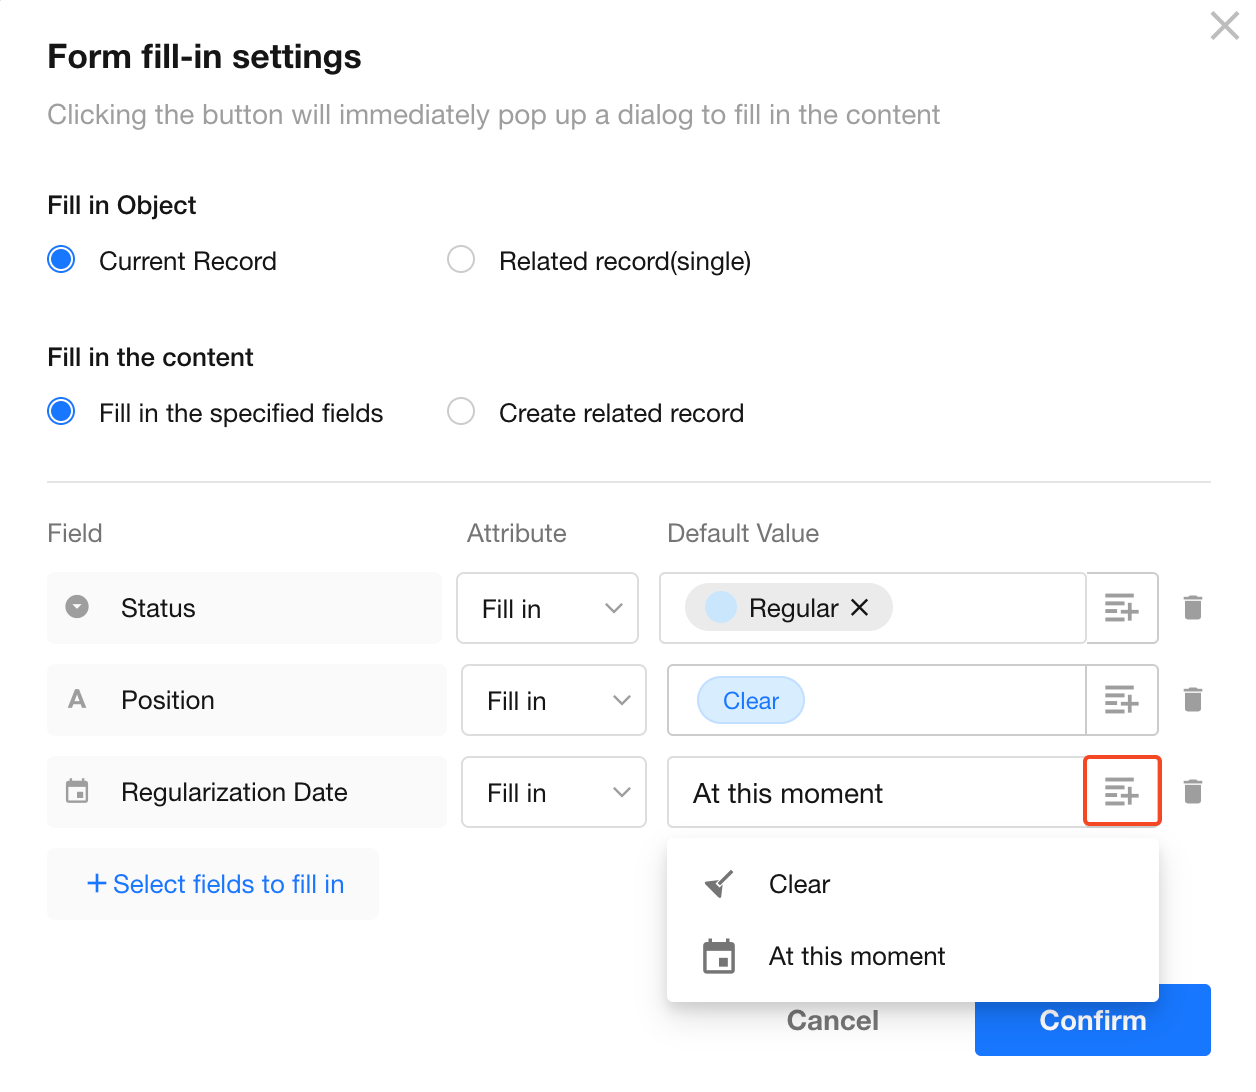
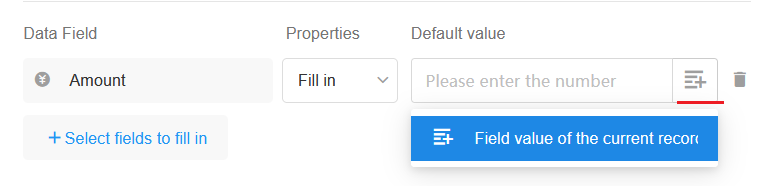
When completing fields in a related record, you can use values from the current record as default values.
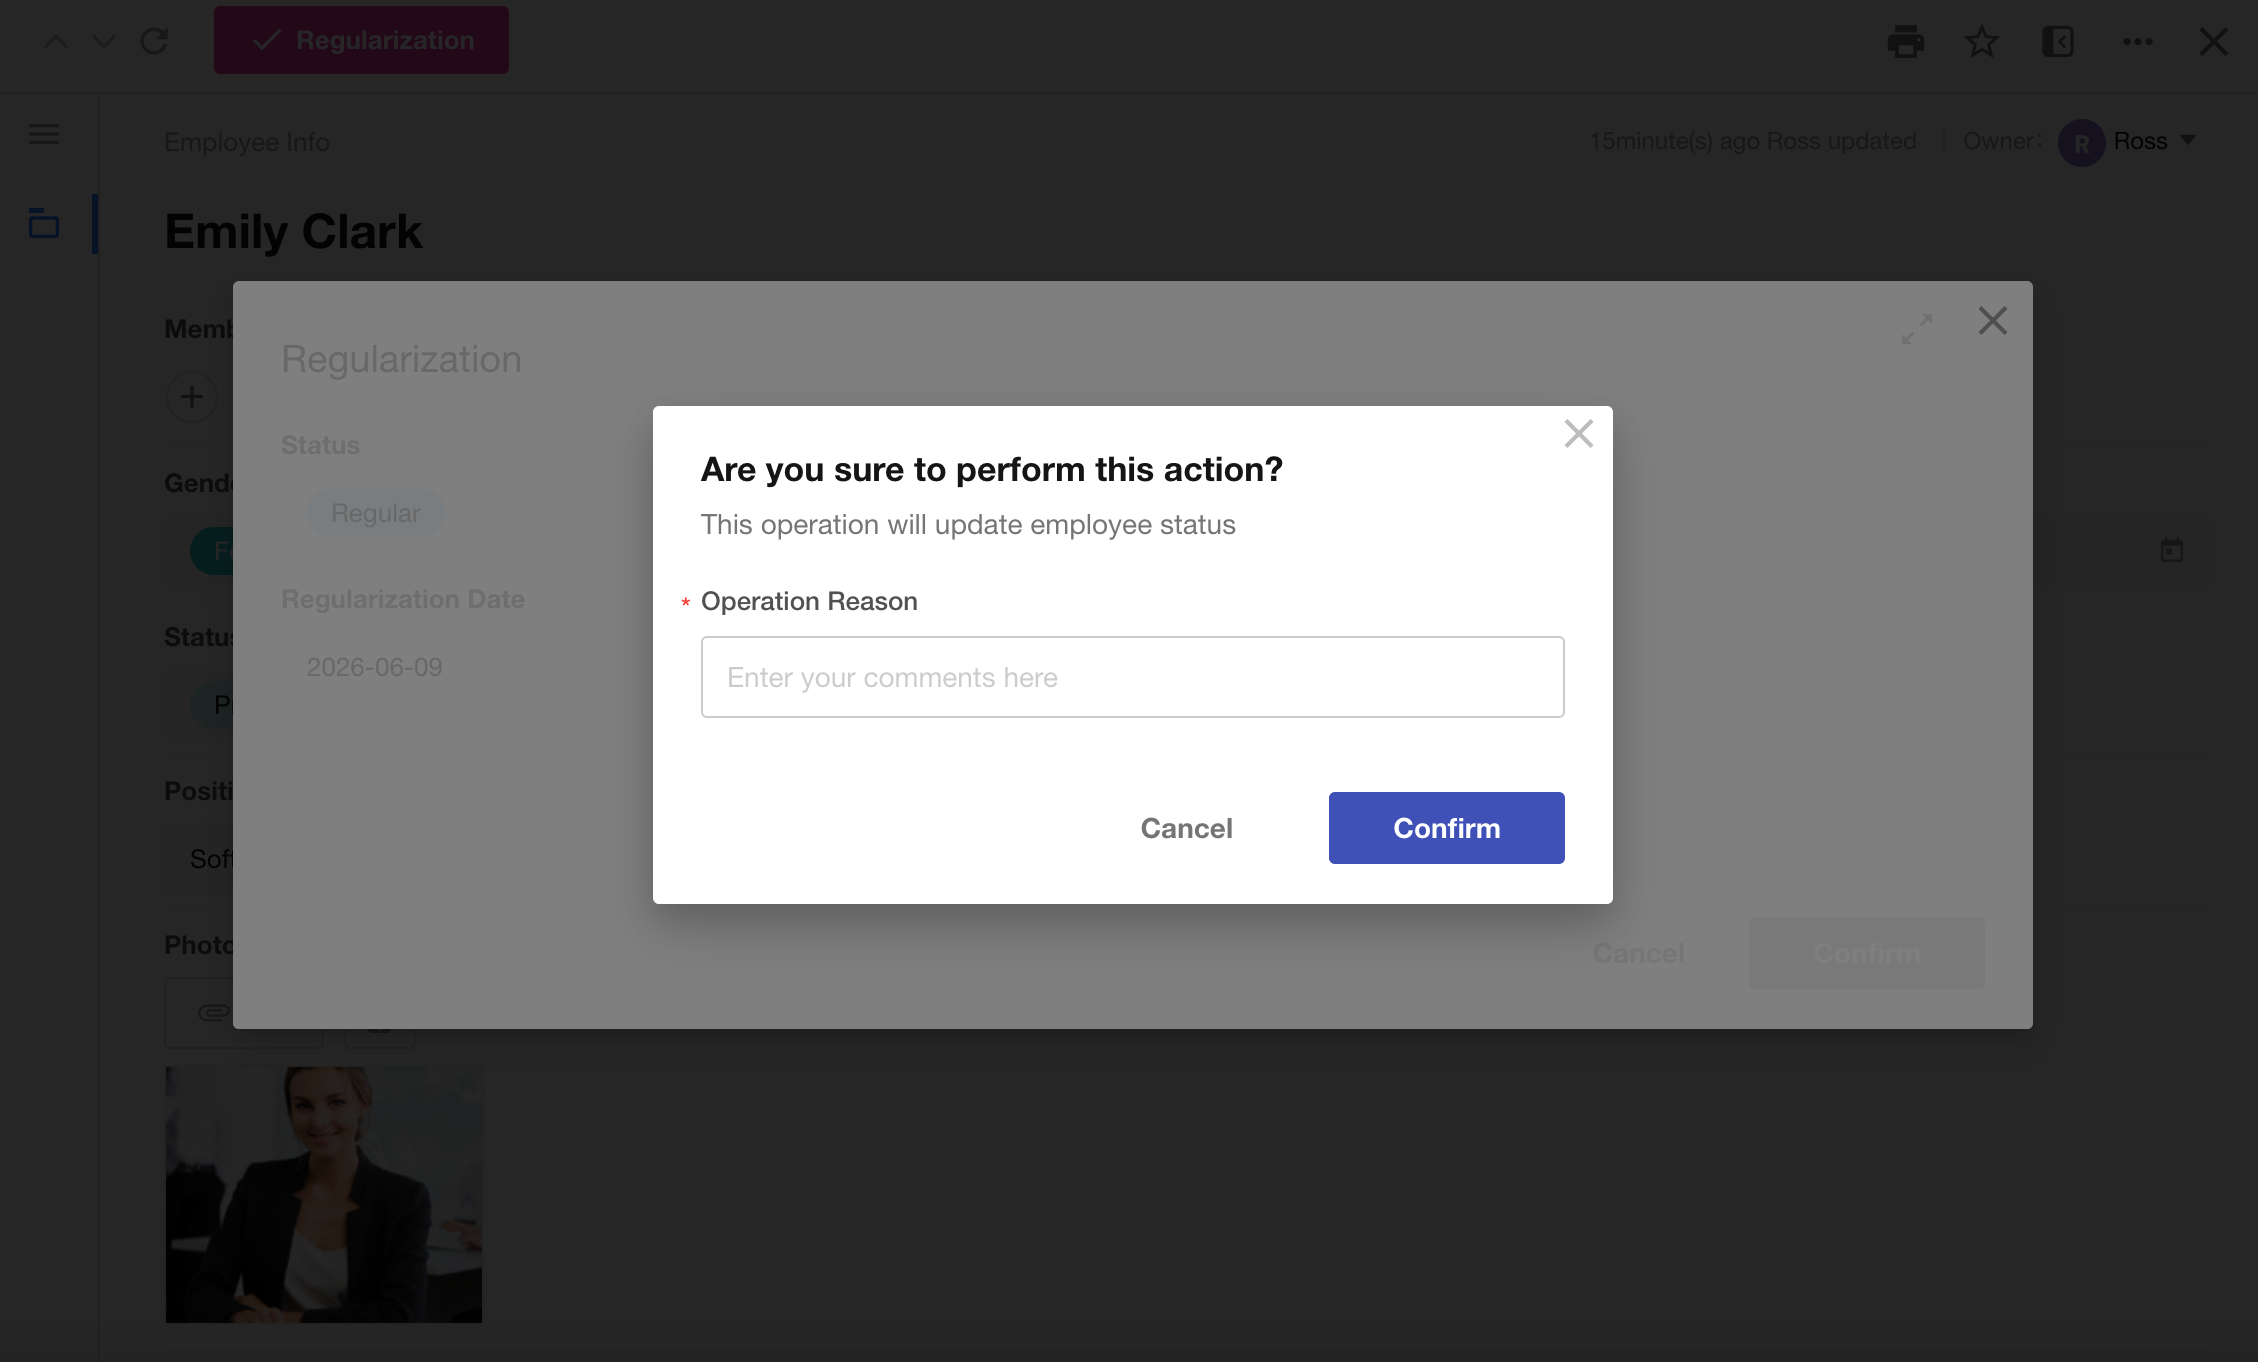
5. Confirmation and Comments
Before the action is performed, you can require users to confirm the operation and optionally enter comments.
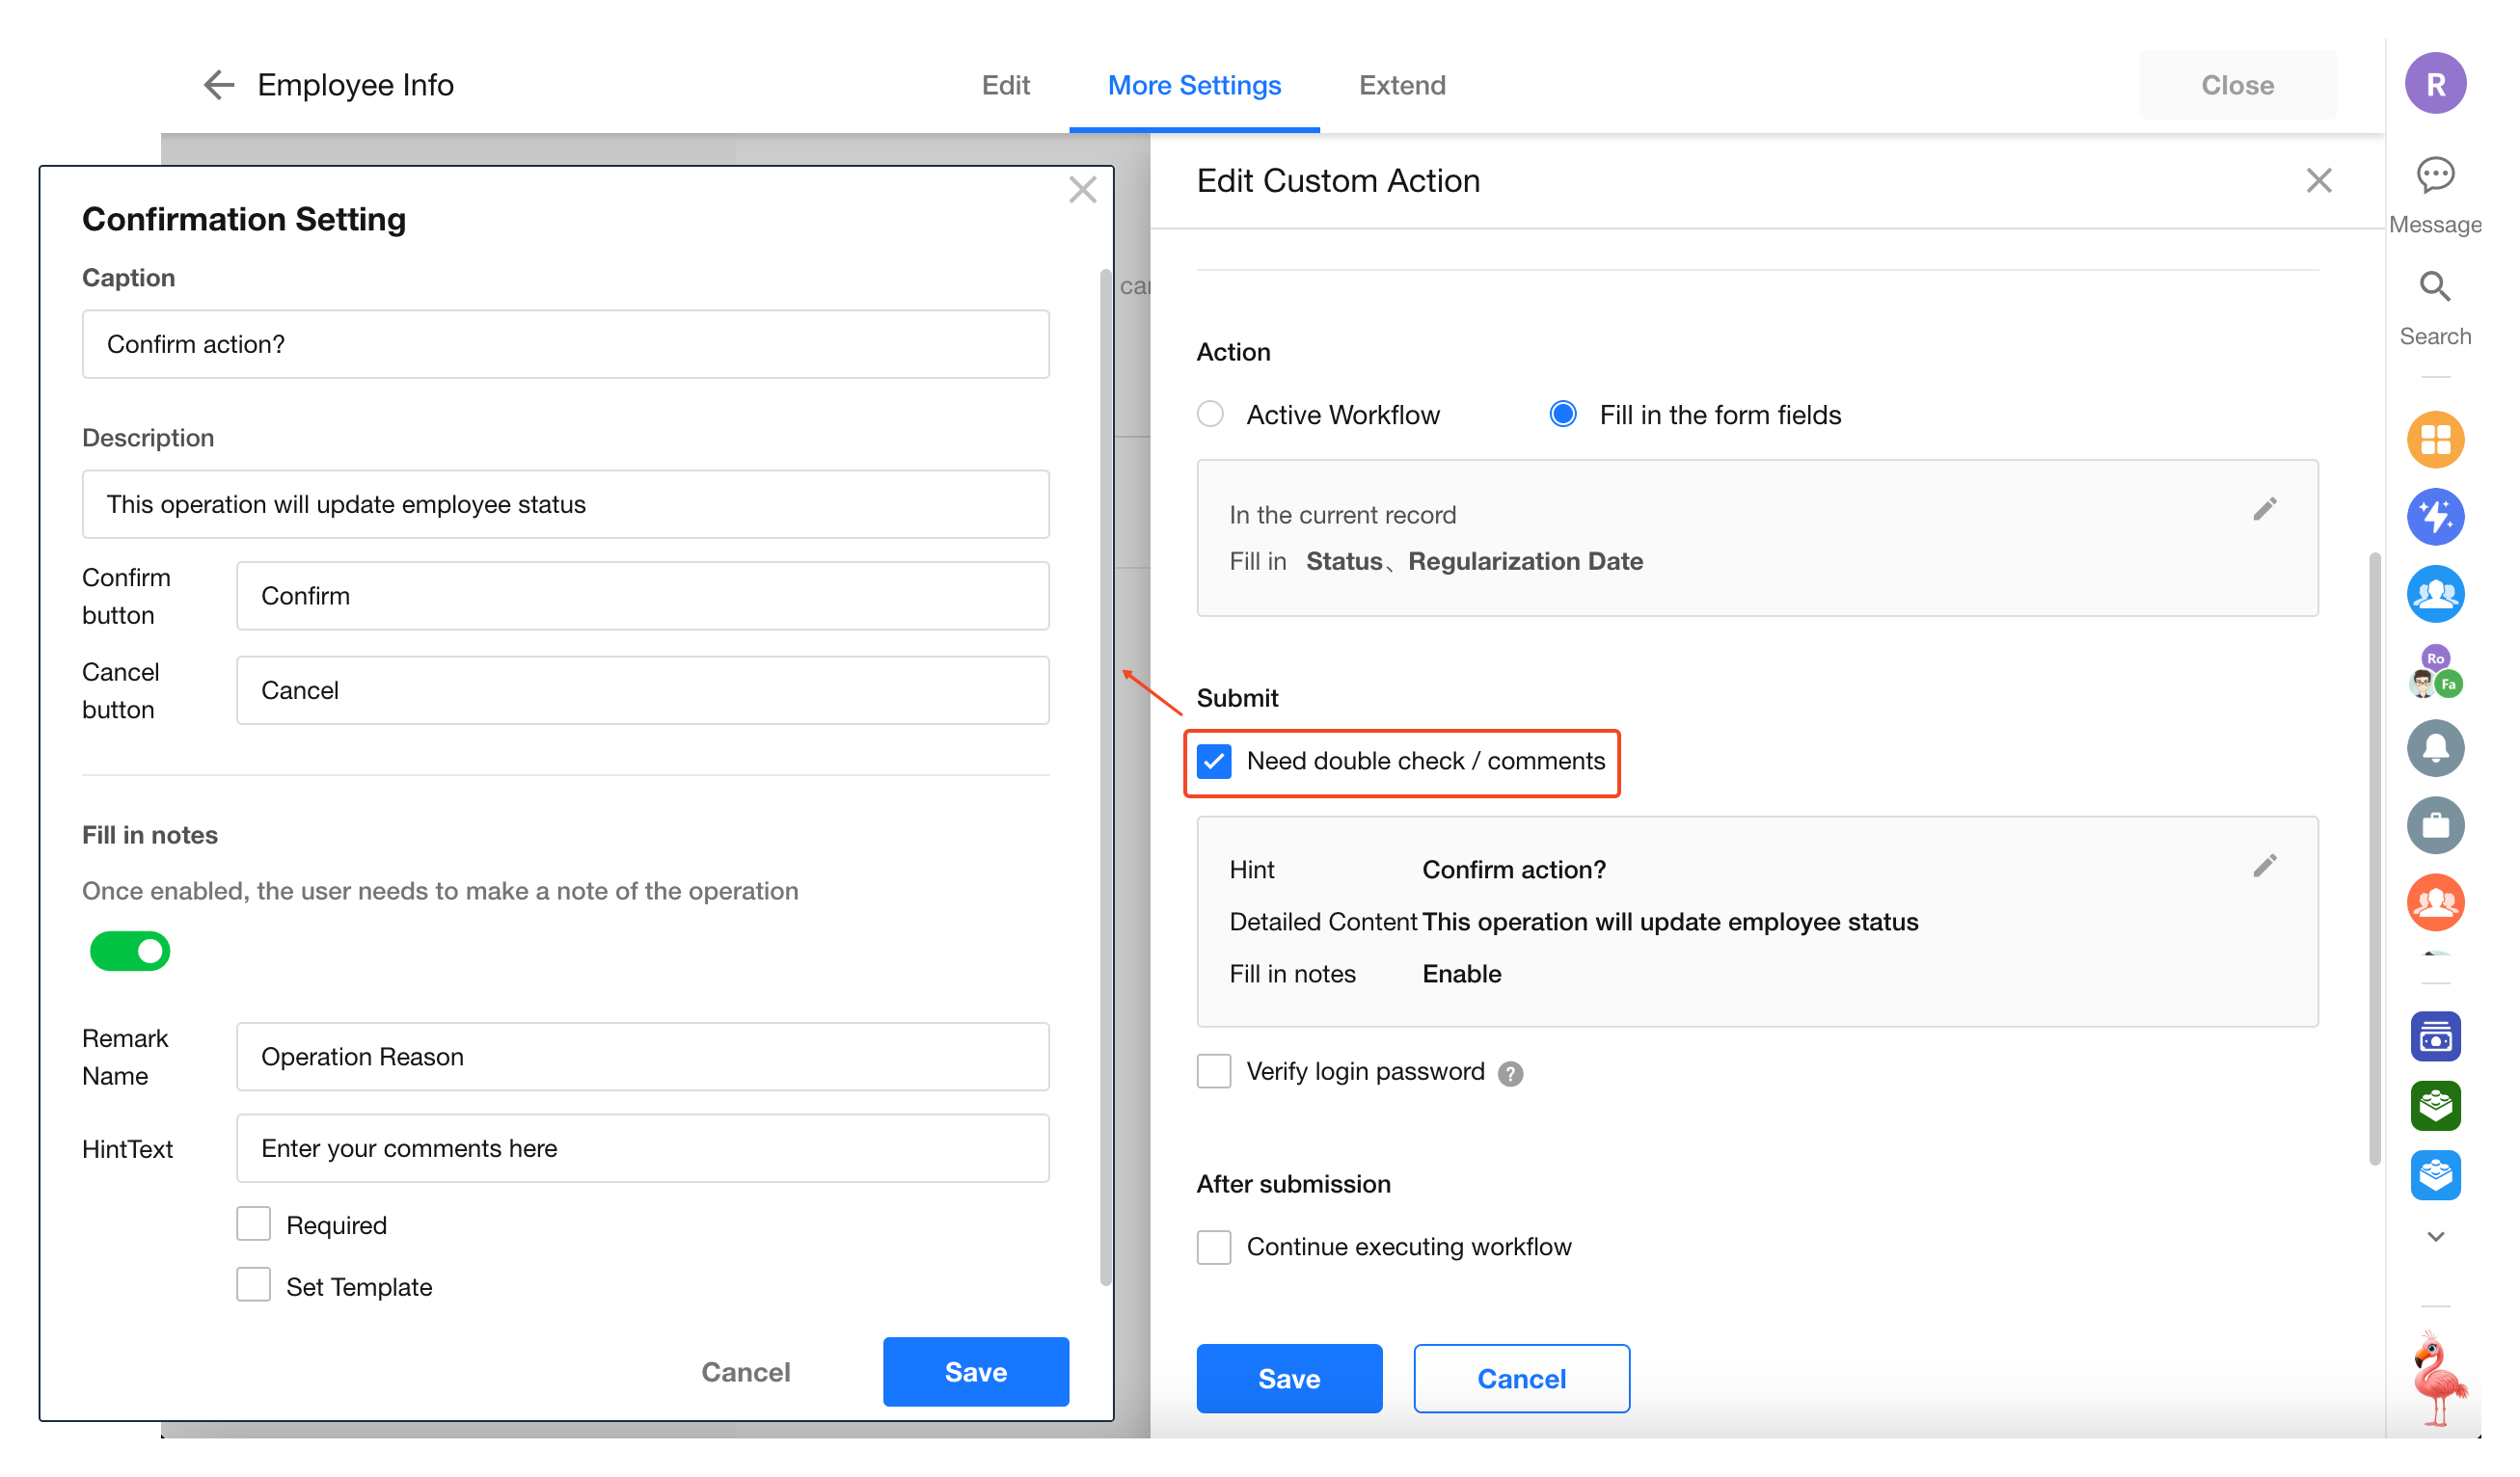
Result: Users must confirm the action before they can edit fields.
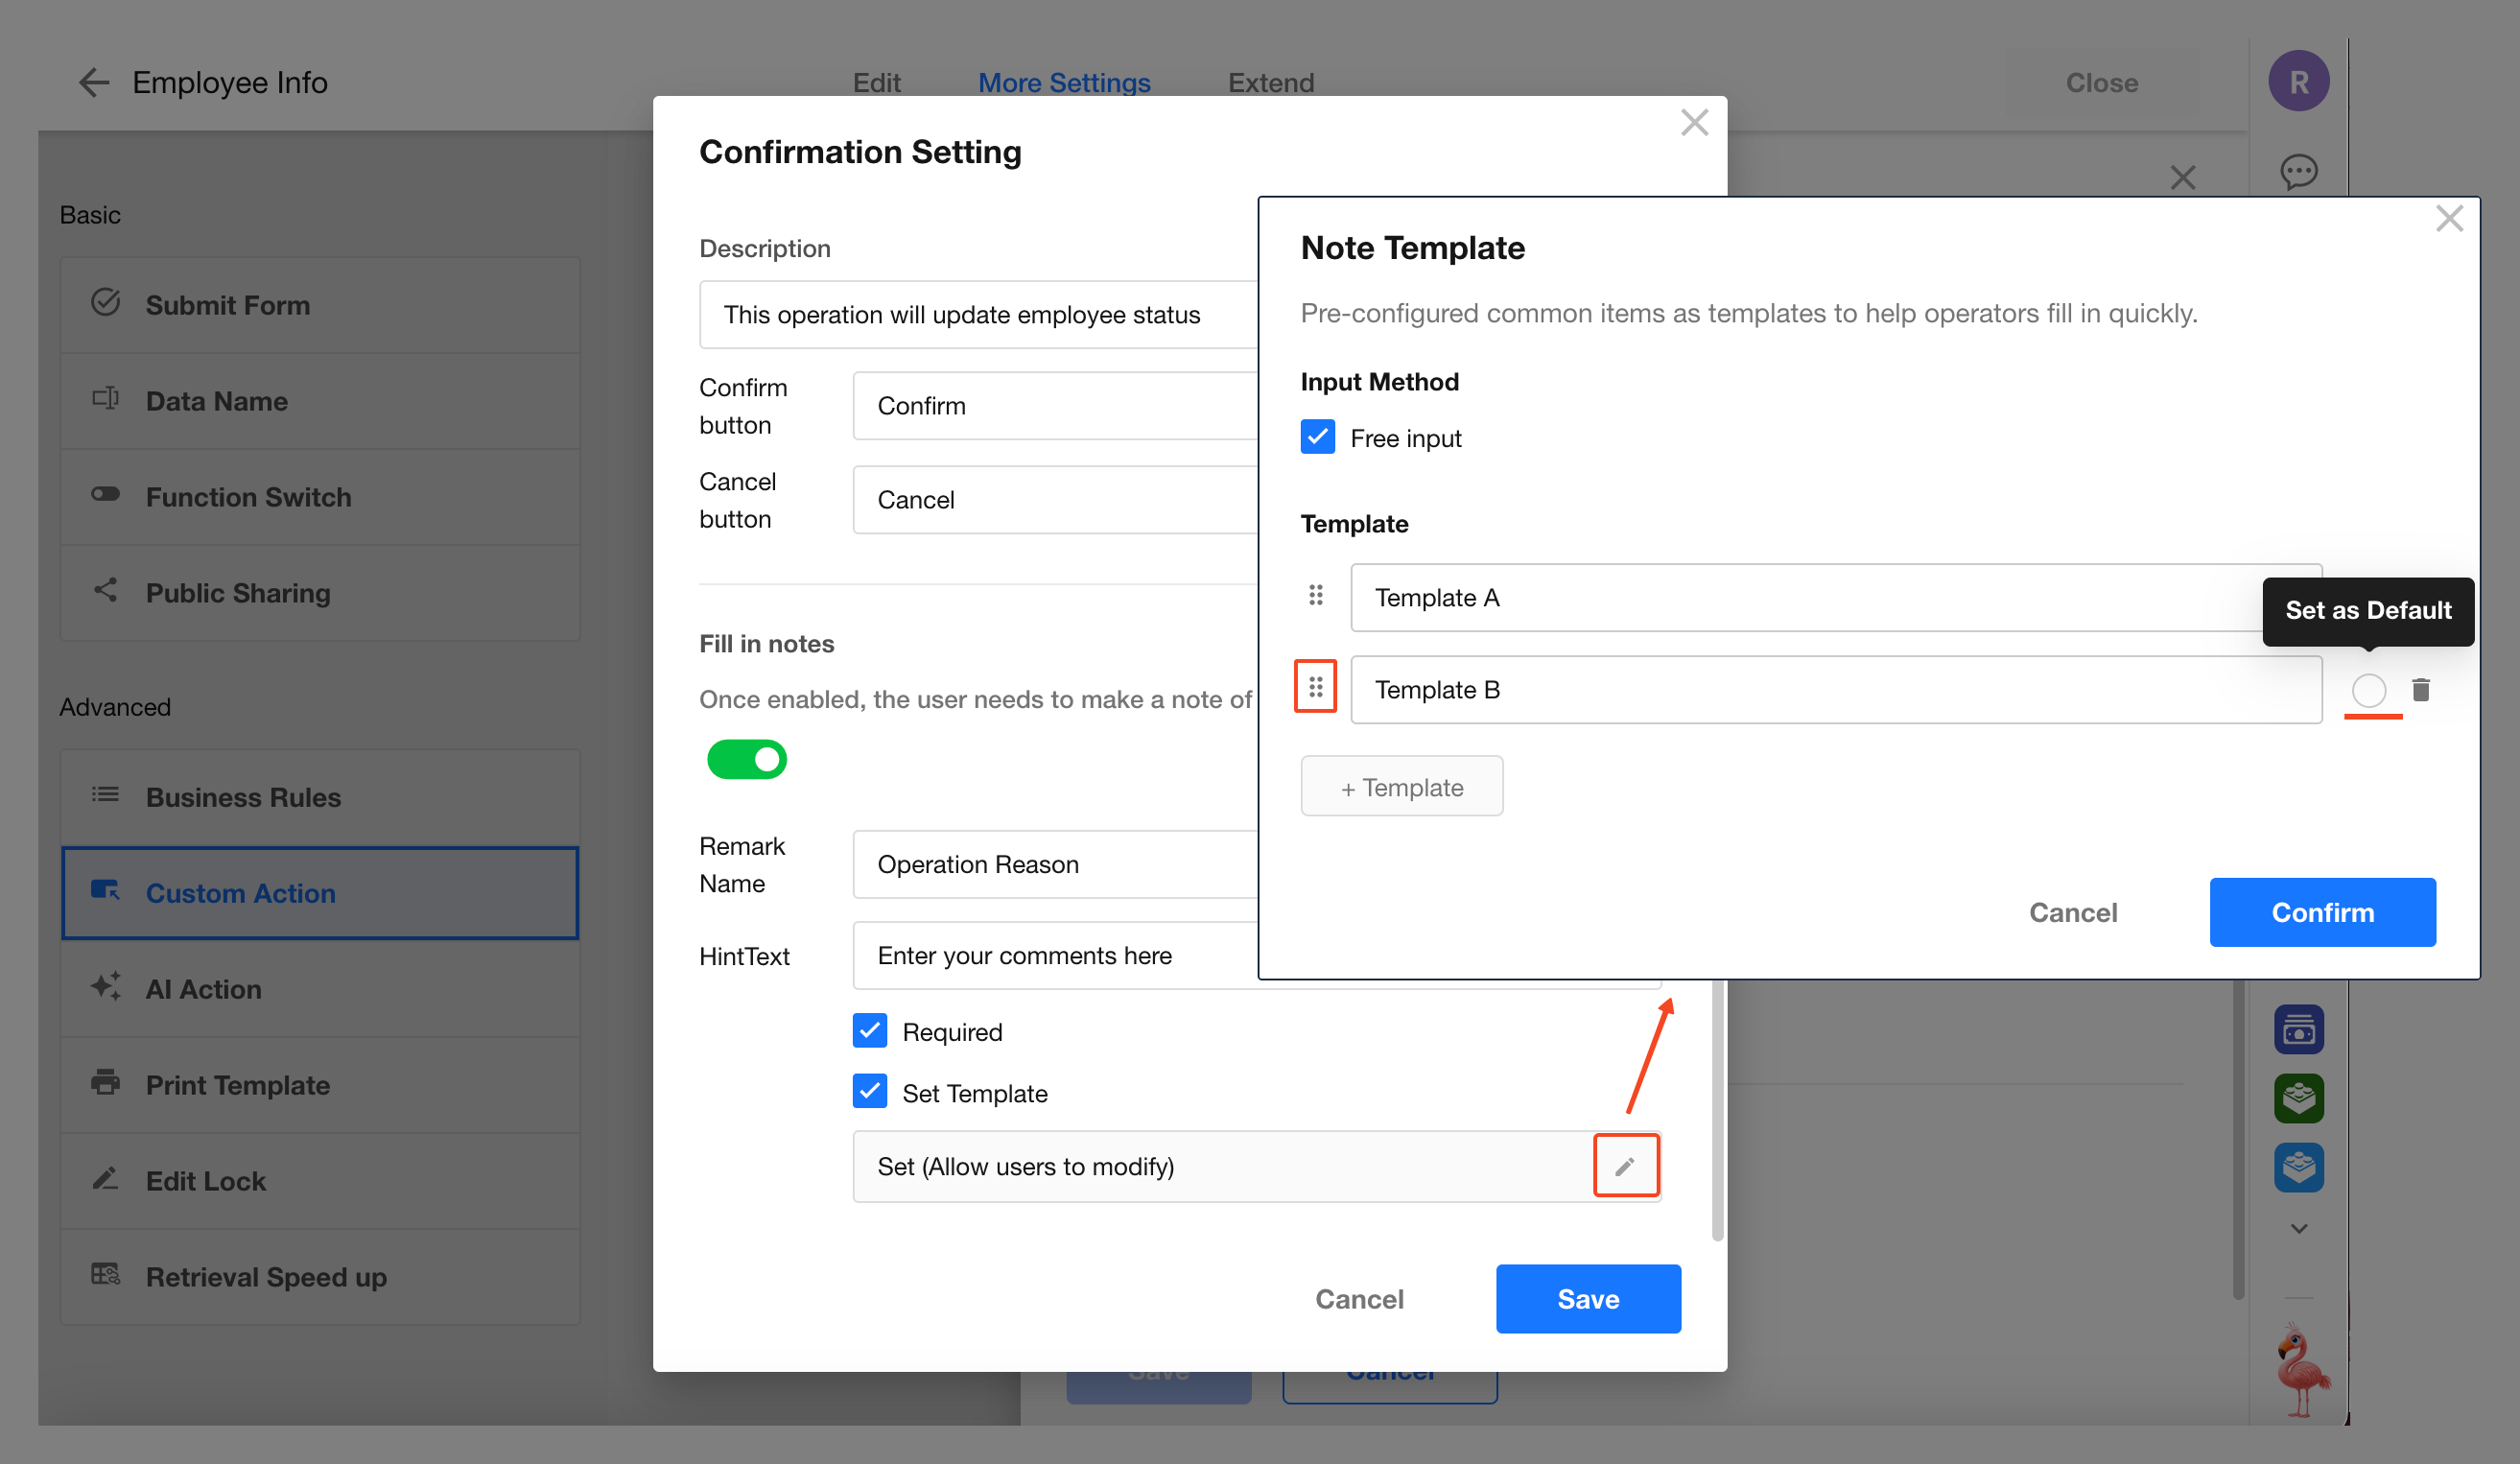
Comment Templates
You can create comment templates for frequently used notes or approval remarks, allowing users to fill in comments more efficiently.
If comment templates are disabled, users can enter comments freely.
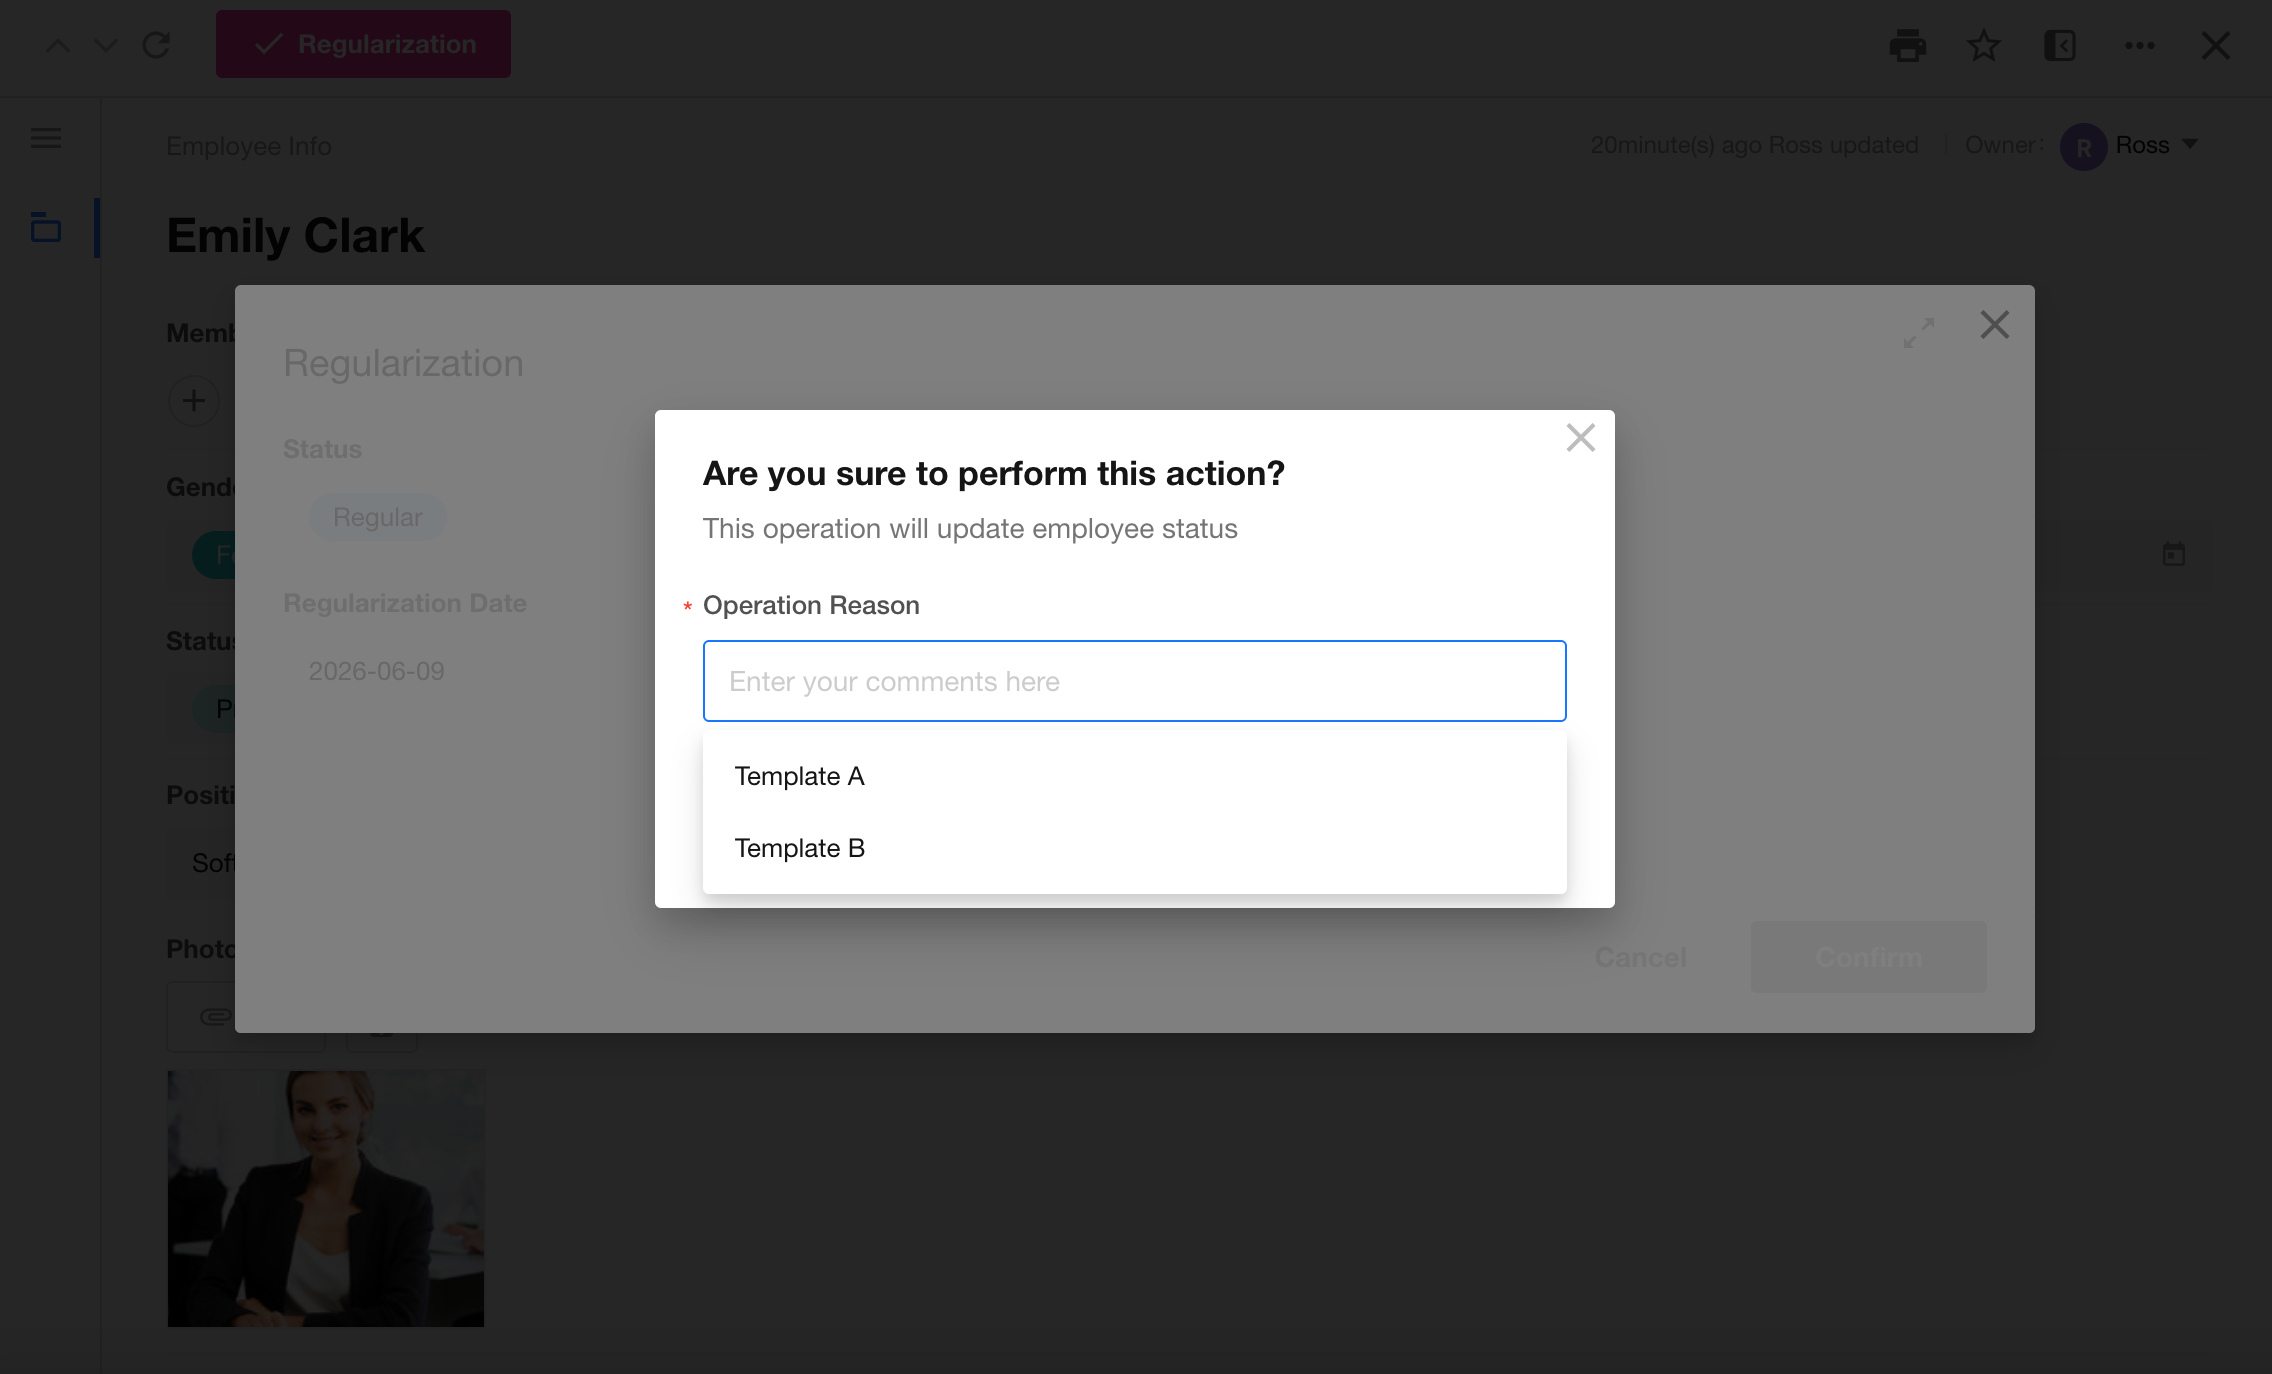
Template example:
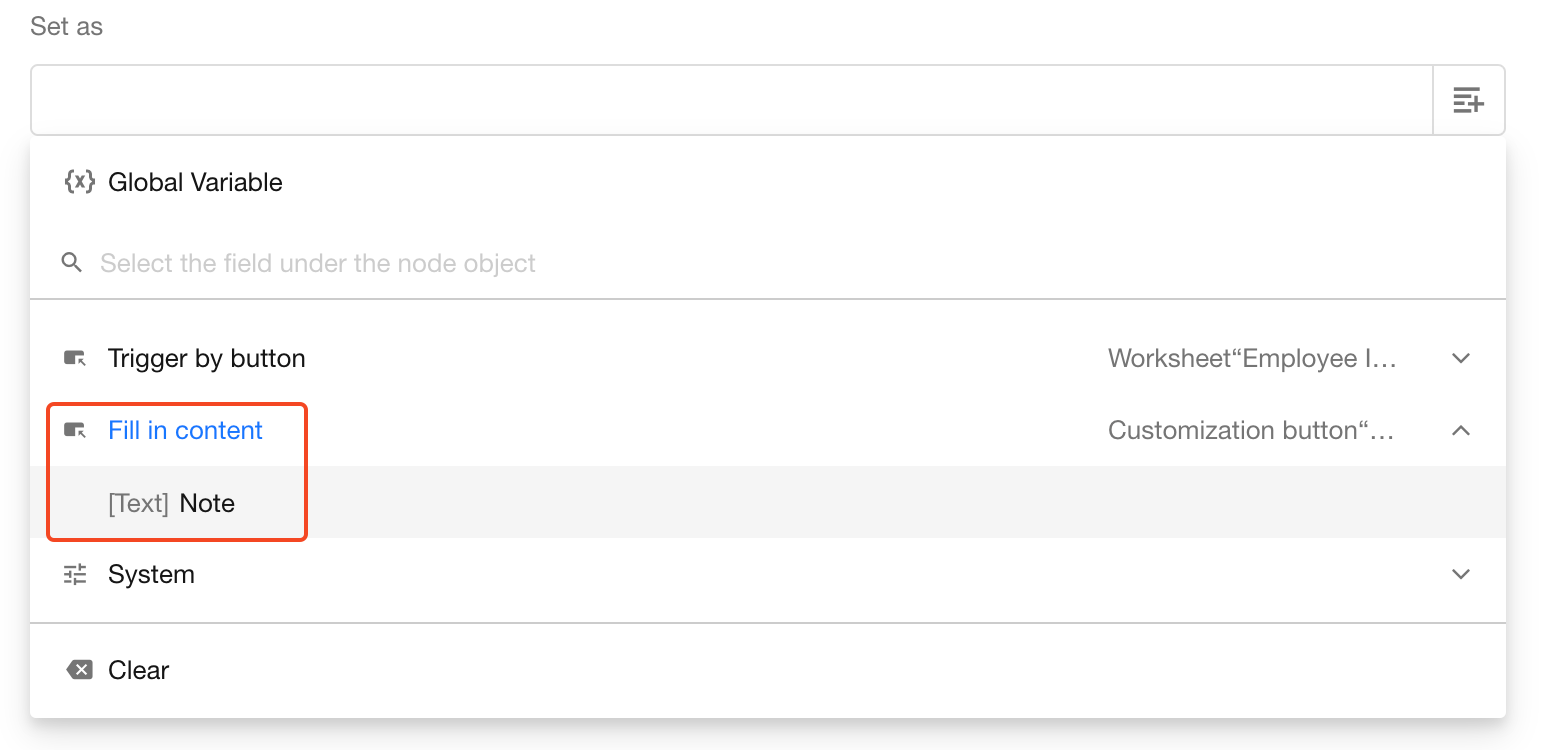
Access Comments in a Workflow
Comments entered during the action can be retrieved and used within a workflow.
6. Password Verification
When enabled, users must enter their login password before the action can be performed.

- After password verification is enabled, organization super administrators can additionally enable Passwordless Verification Within 1 Hour. When enabled, approvers can choose whether to skip password verification for the next hour. For details, see Passwordless Verification Settings.
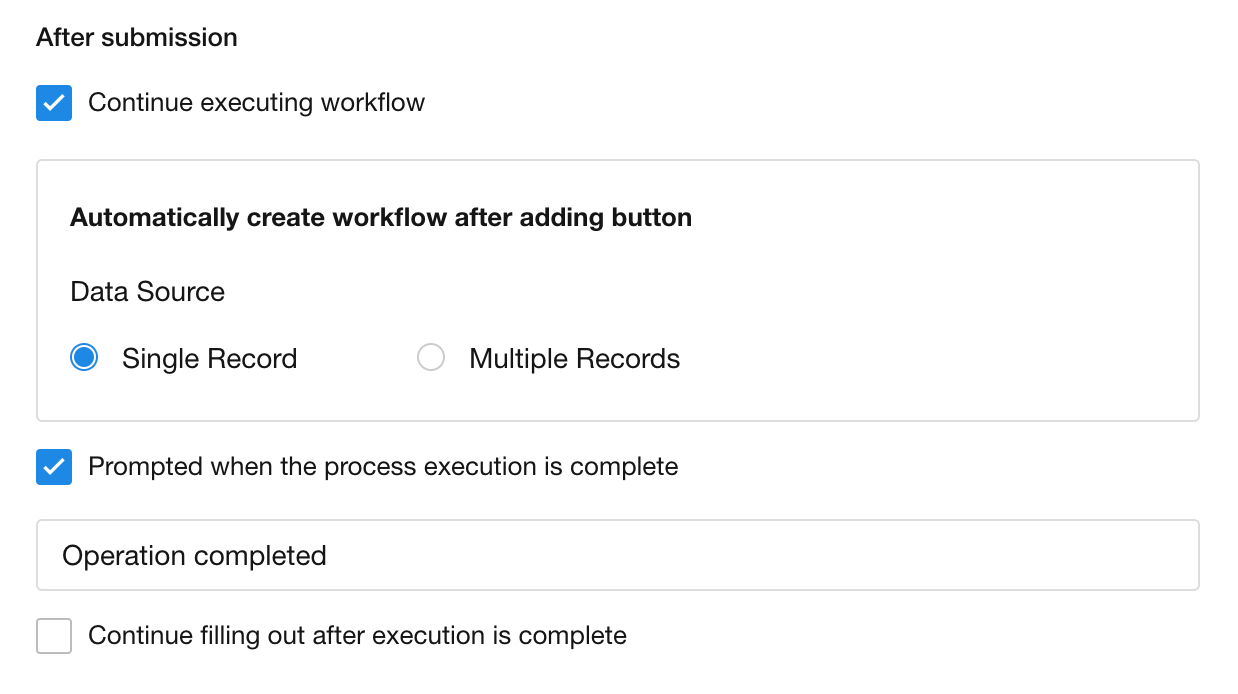
7. Continue with a Workflow After Submission
-
After users submit the field values, a workflow triggered by the button can be executed automatically. See Example 2 below.
-
You can choose whether workflow execution results are sent to the user who initiated the action. See Example 2 below.
-
If Continue Filling After Execution is enabled, the workflow runs after submission. Once the workflow completes, the field-entry dialog appears again, allowing users to continue entering data and triggering the workflow repeatedly.
8. Button Availability
-
Always
The button is always available.
-
When Conditions Are Met
Configure one or more filter conditions. The button is available only when the current record meets those conditions. Otherwise, the button is disabled and displayed in gray.
For example, the Termination button is available only when the employee status is Regular.
9. Hide Unavailable Buttons
When conditions are not met, the button cannot be clicked. To keep the interface clean, you can hide unavailable buttons.
In the view where the button is displayed, enable Hide Unavailable Buttons.
10. Overall Effect
Example 2: Execute a Workflow Directly from a Button
Scenario: Add a Regularization button to the Probation view. When the button is clicked, a workflow is triggered automatically to update the employee record by changing the Status field to Regular and setting the Regularization Date field to the current date.
1. Button Name and Description
To distinguish it from the button used in Example 1, name this button Regularization 2.

2. Select the Workflow Action
When configuring a workflow action, you need to specify whether the workflow is triggered by a single record or multiple records.
In this example, the Regularization button is used for an individual employee record, so select Single Record.
Notification After Workflow Execution
If Notify When Workflow Completes is enabled, a notification is displayed after the workflow finishes. The notification message can be customized to fit your business scenario.
In some cases, the workflow itself may execute successfully, while the business logic determines that the operation has failed. In this situation, displaying a generic success message may be misleading.
It is recommended to disable this option and use a Interface Push node within the workflow to inform users whether the operation succeeded or failed.
3. Other Settings
For details about confirmation prompts, password verification, button availability, icons, and colors, refer to Example 1 above.
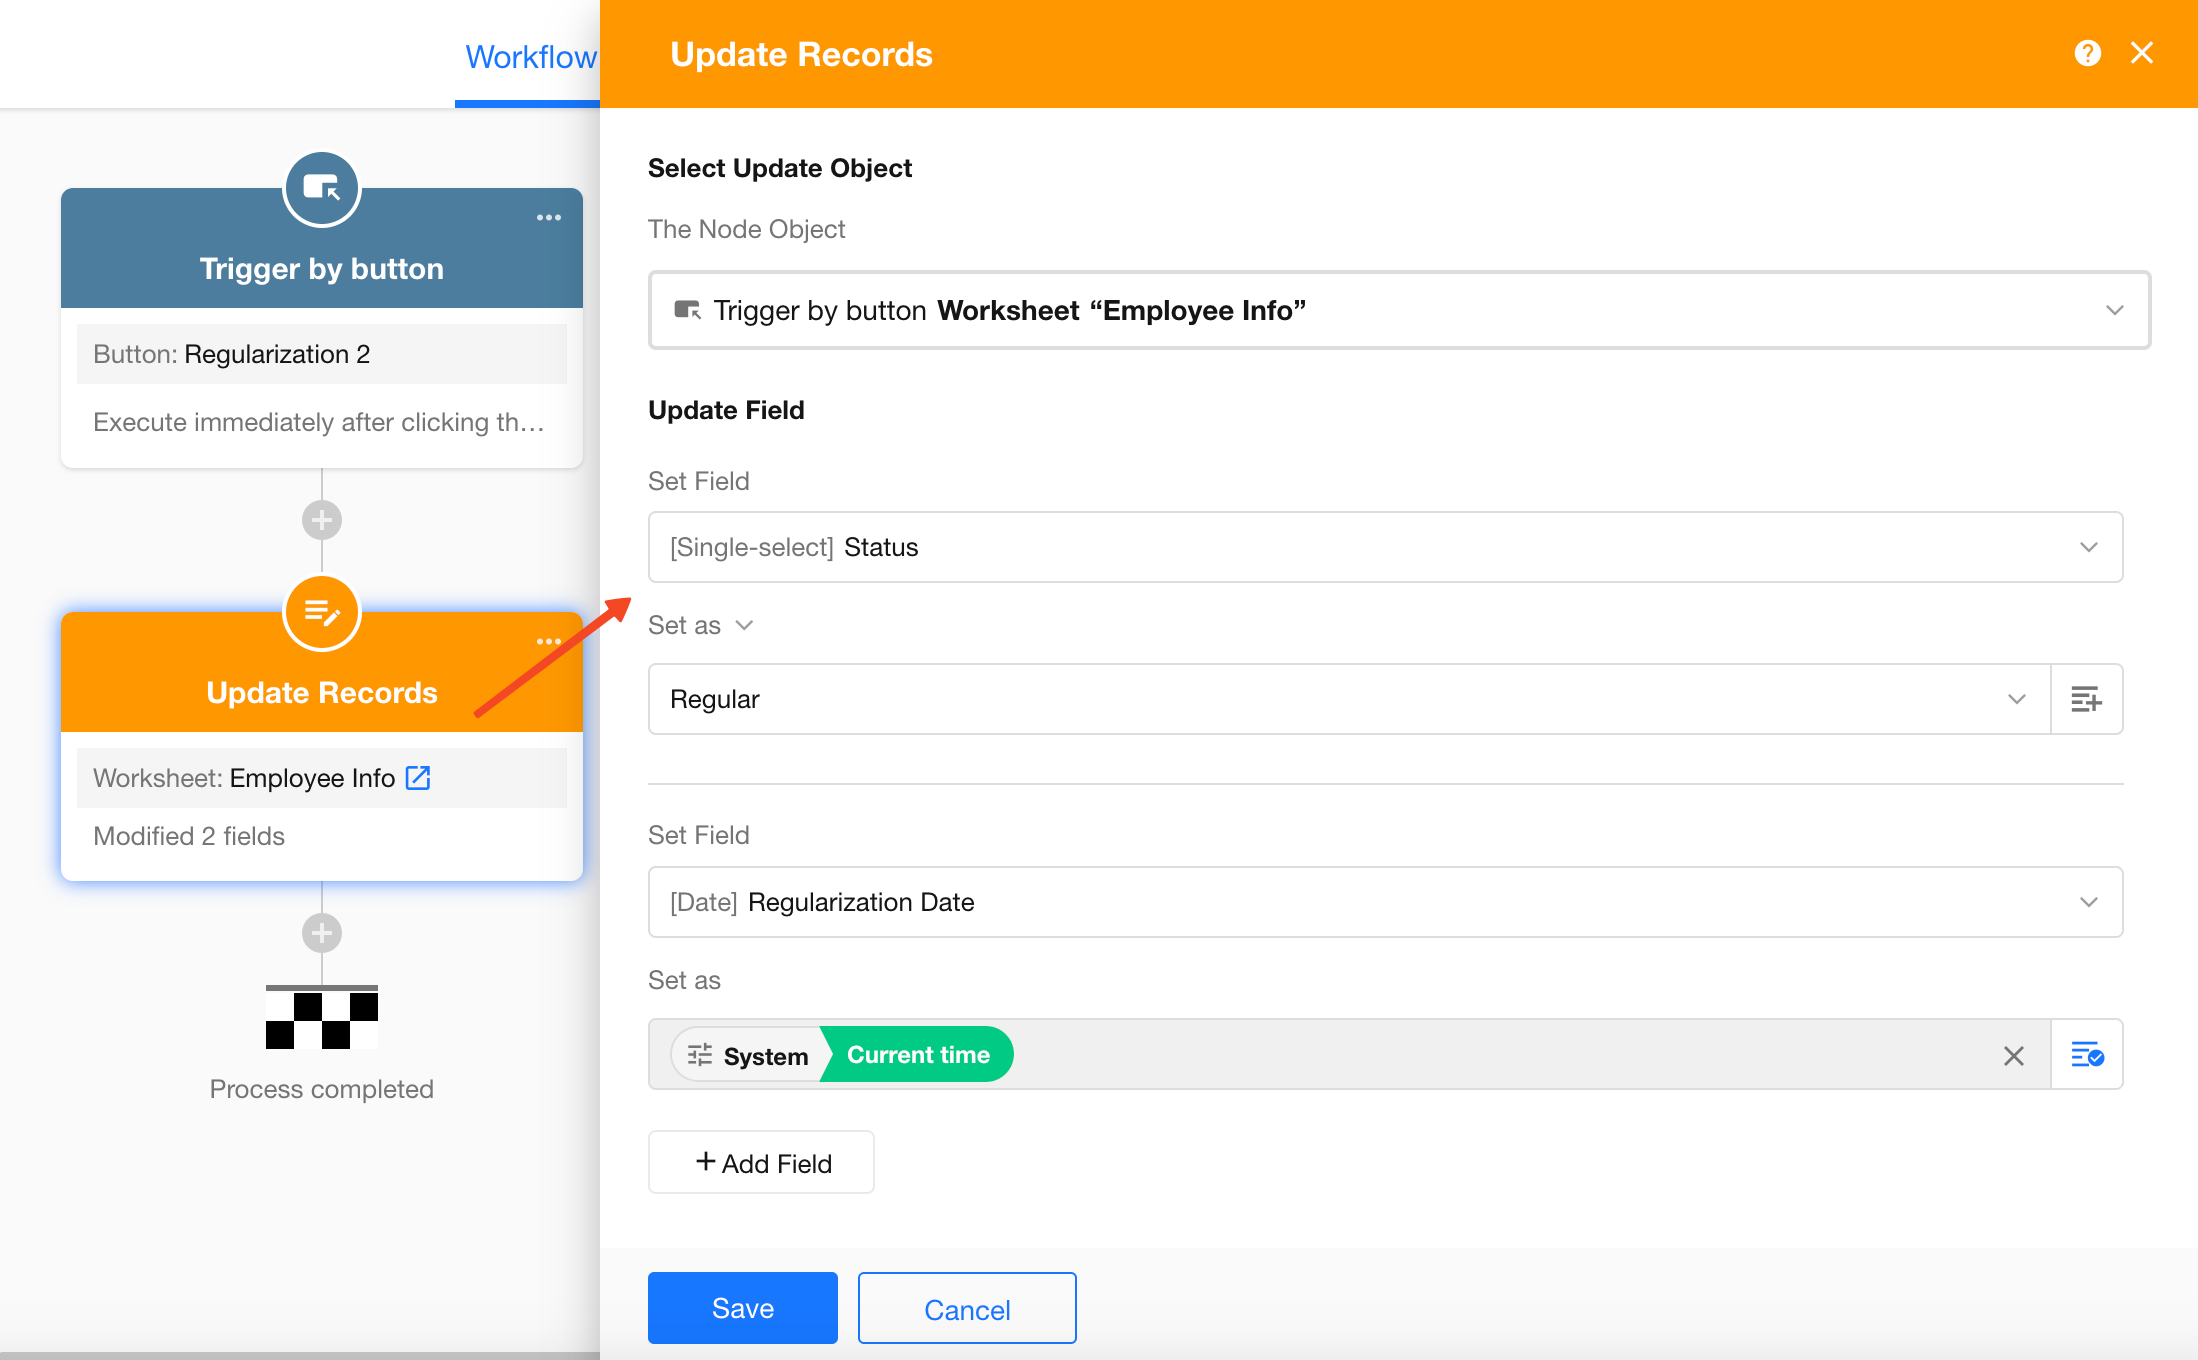
4. Create the Workflow
After clicking Add Button, the workflow configuration page opens automatically.
Add an Update Record node and configure it to update the Status and Regularization Date fields.
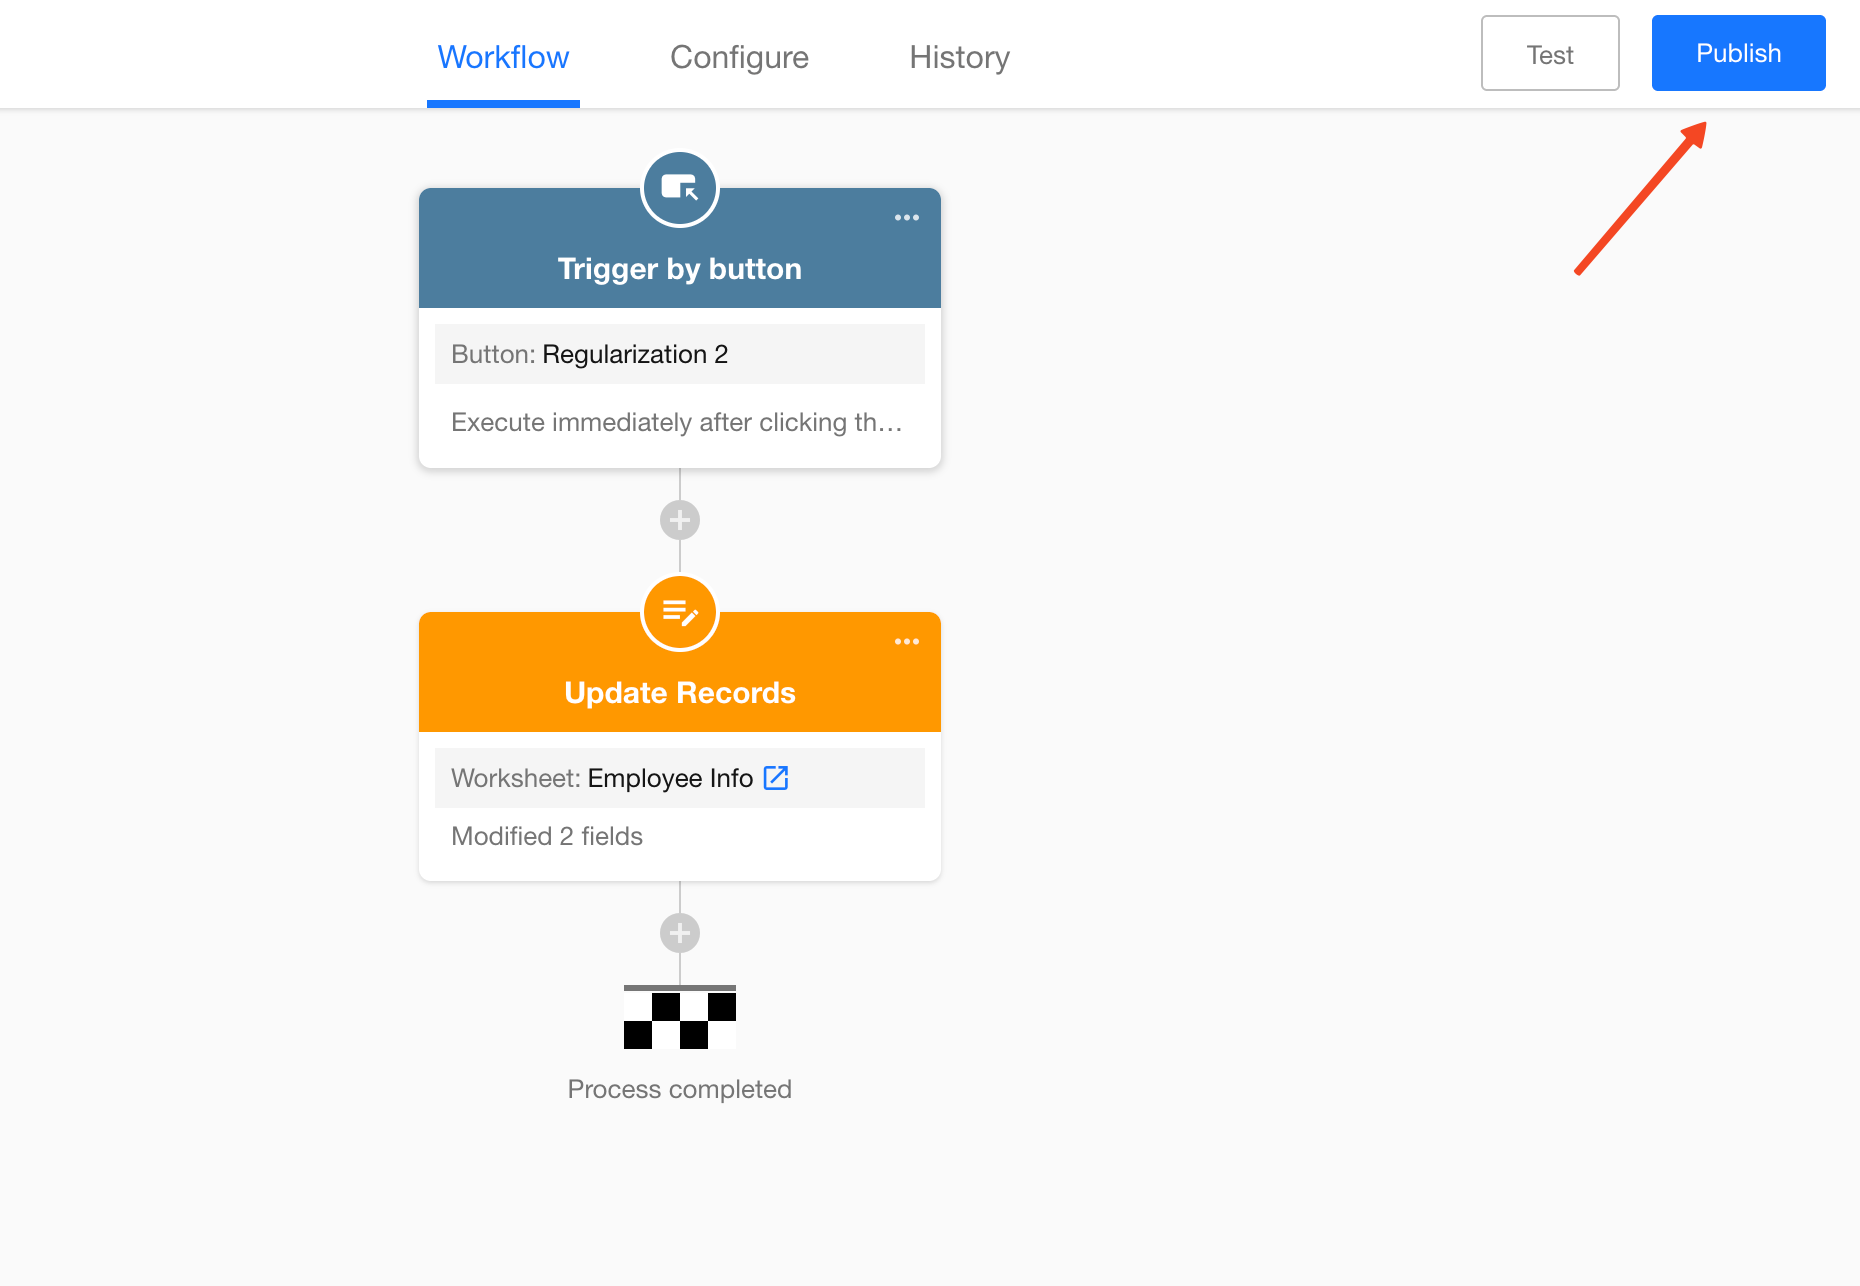
5. Publish the Workflow
After completing the workflow configuration, click Publish.
6. Test the Workflow
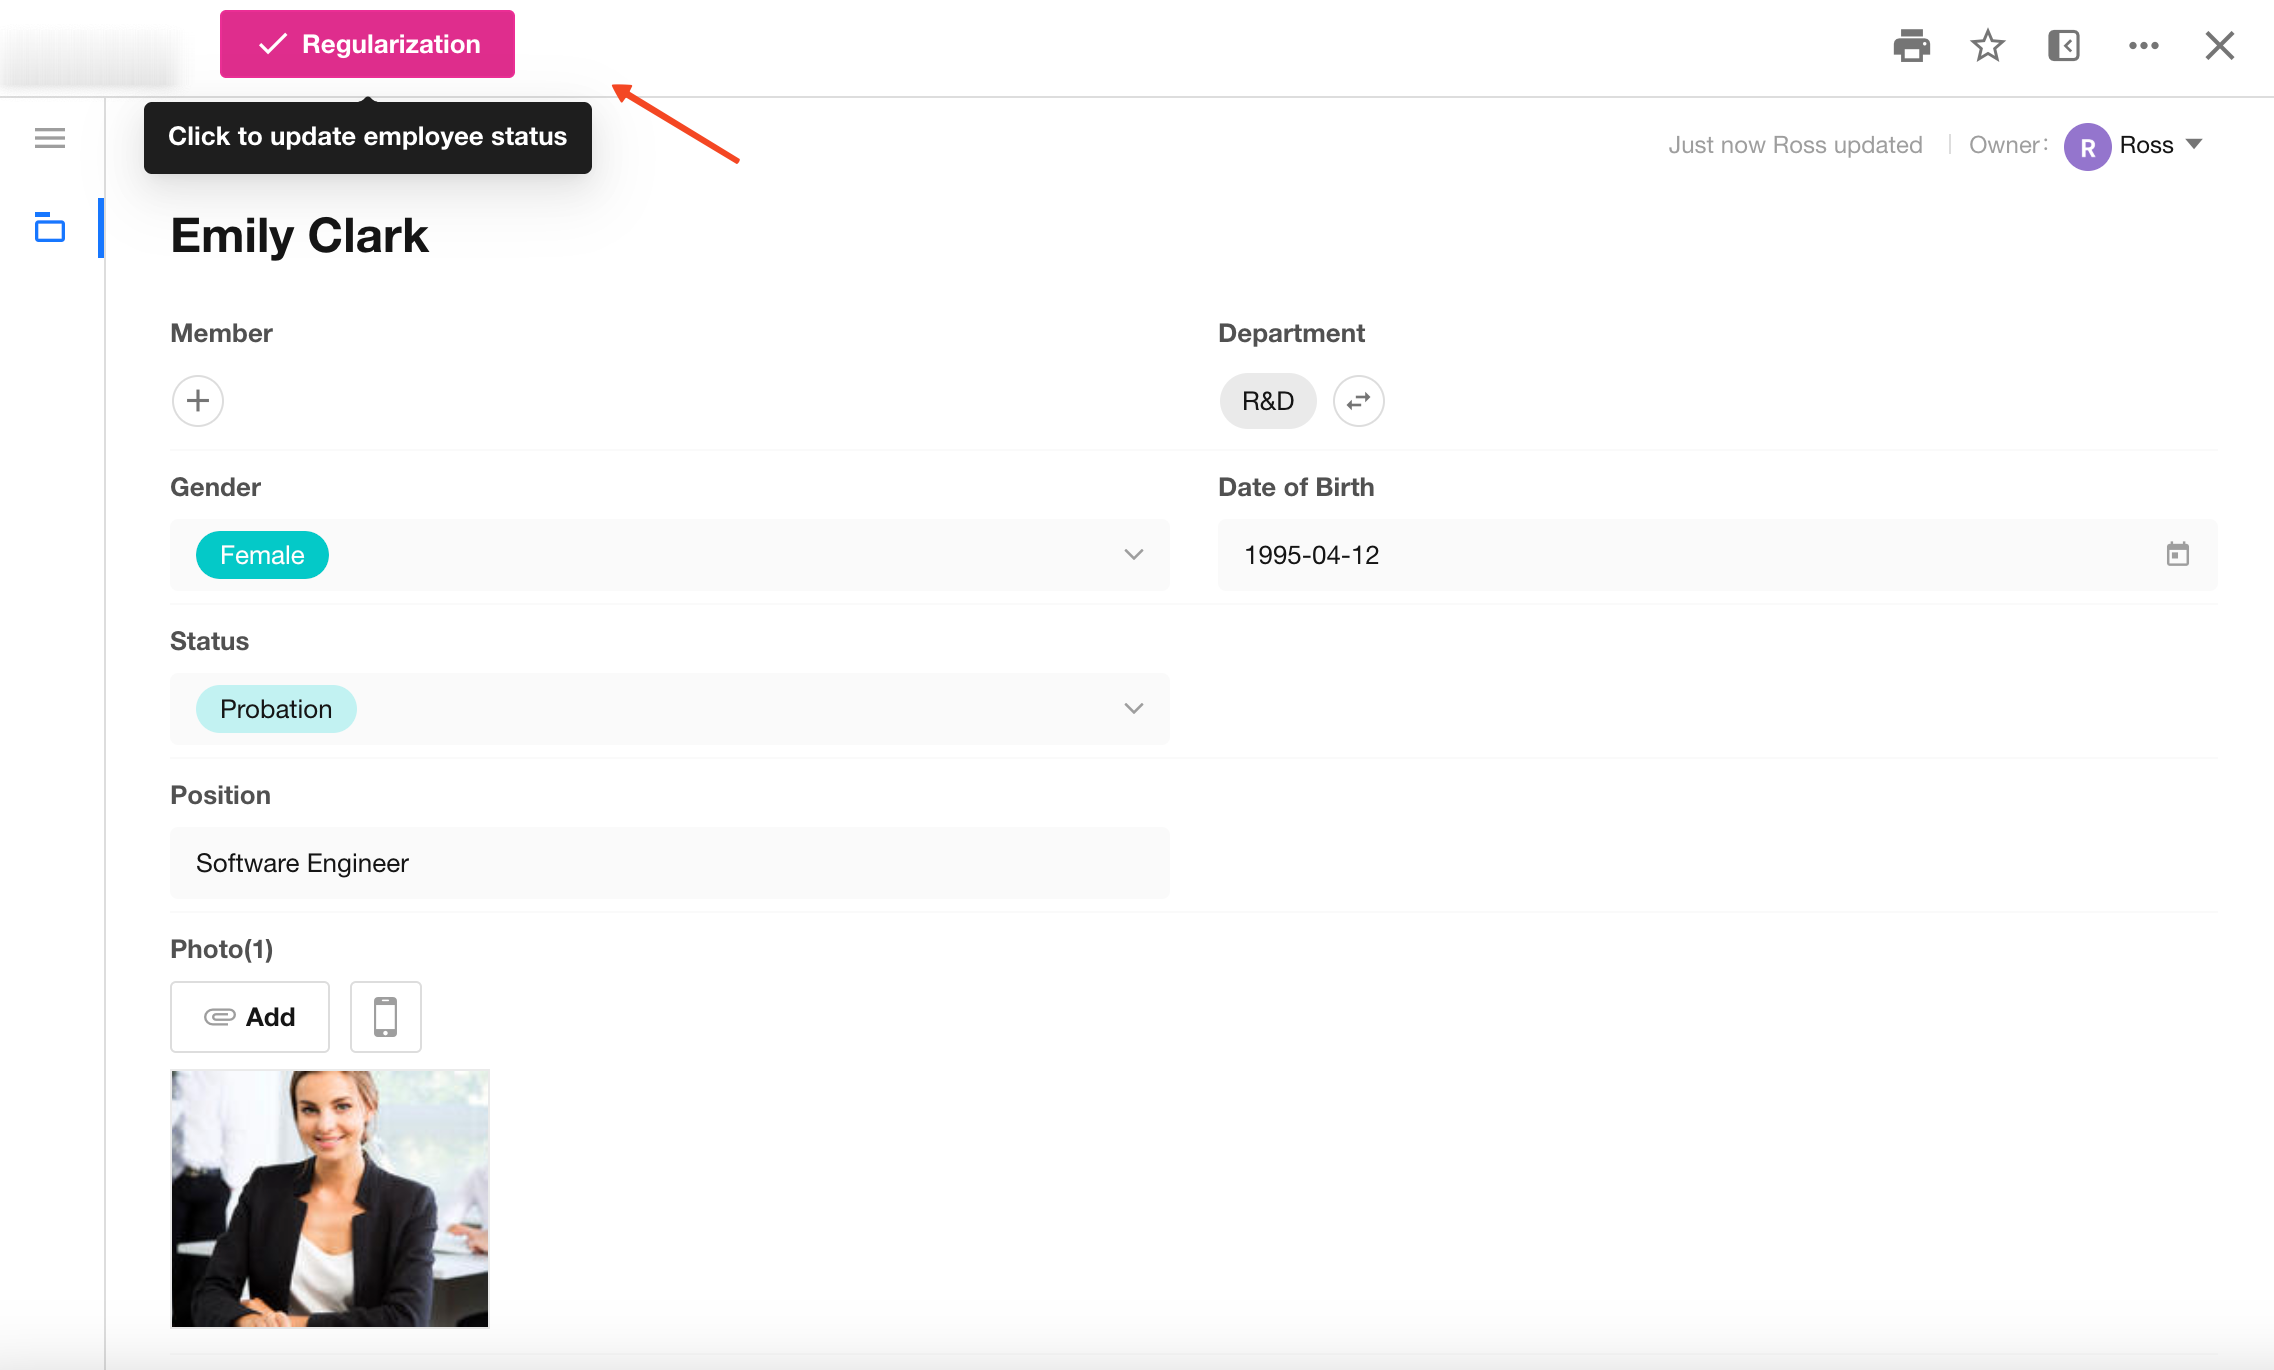
Open an employee record whose status is Probation, then click the button.
The Status and Regularization Date fields are updated automatically.
Example 3: Trigger a Workflow Once for Multiple Selected Records
Scenario: Employees submit multiple travel expense records, and the selected records are used to automatically generate a single expense reimbursement request.
1. Add a Button for Batch Operations
Because this scenario processes multiple records at once, add the button to the worksheet used for batch operations (Expense Details).
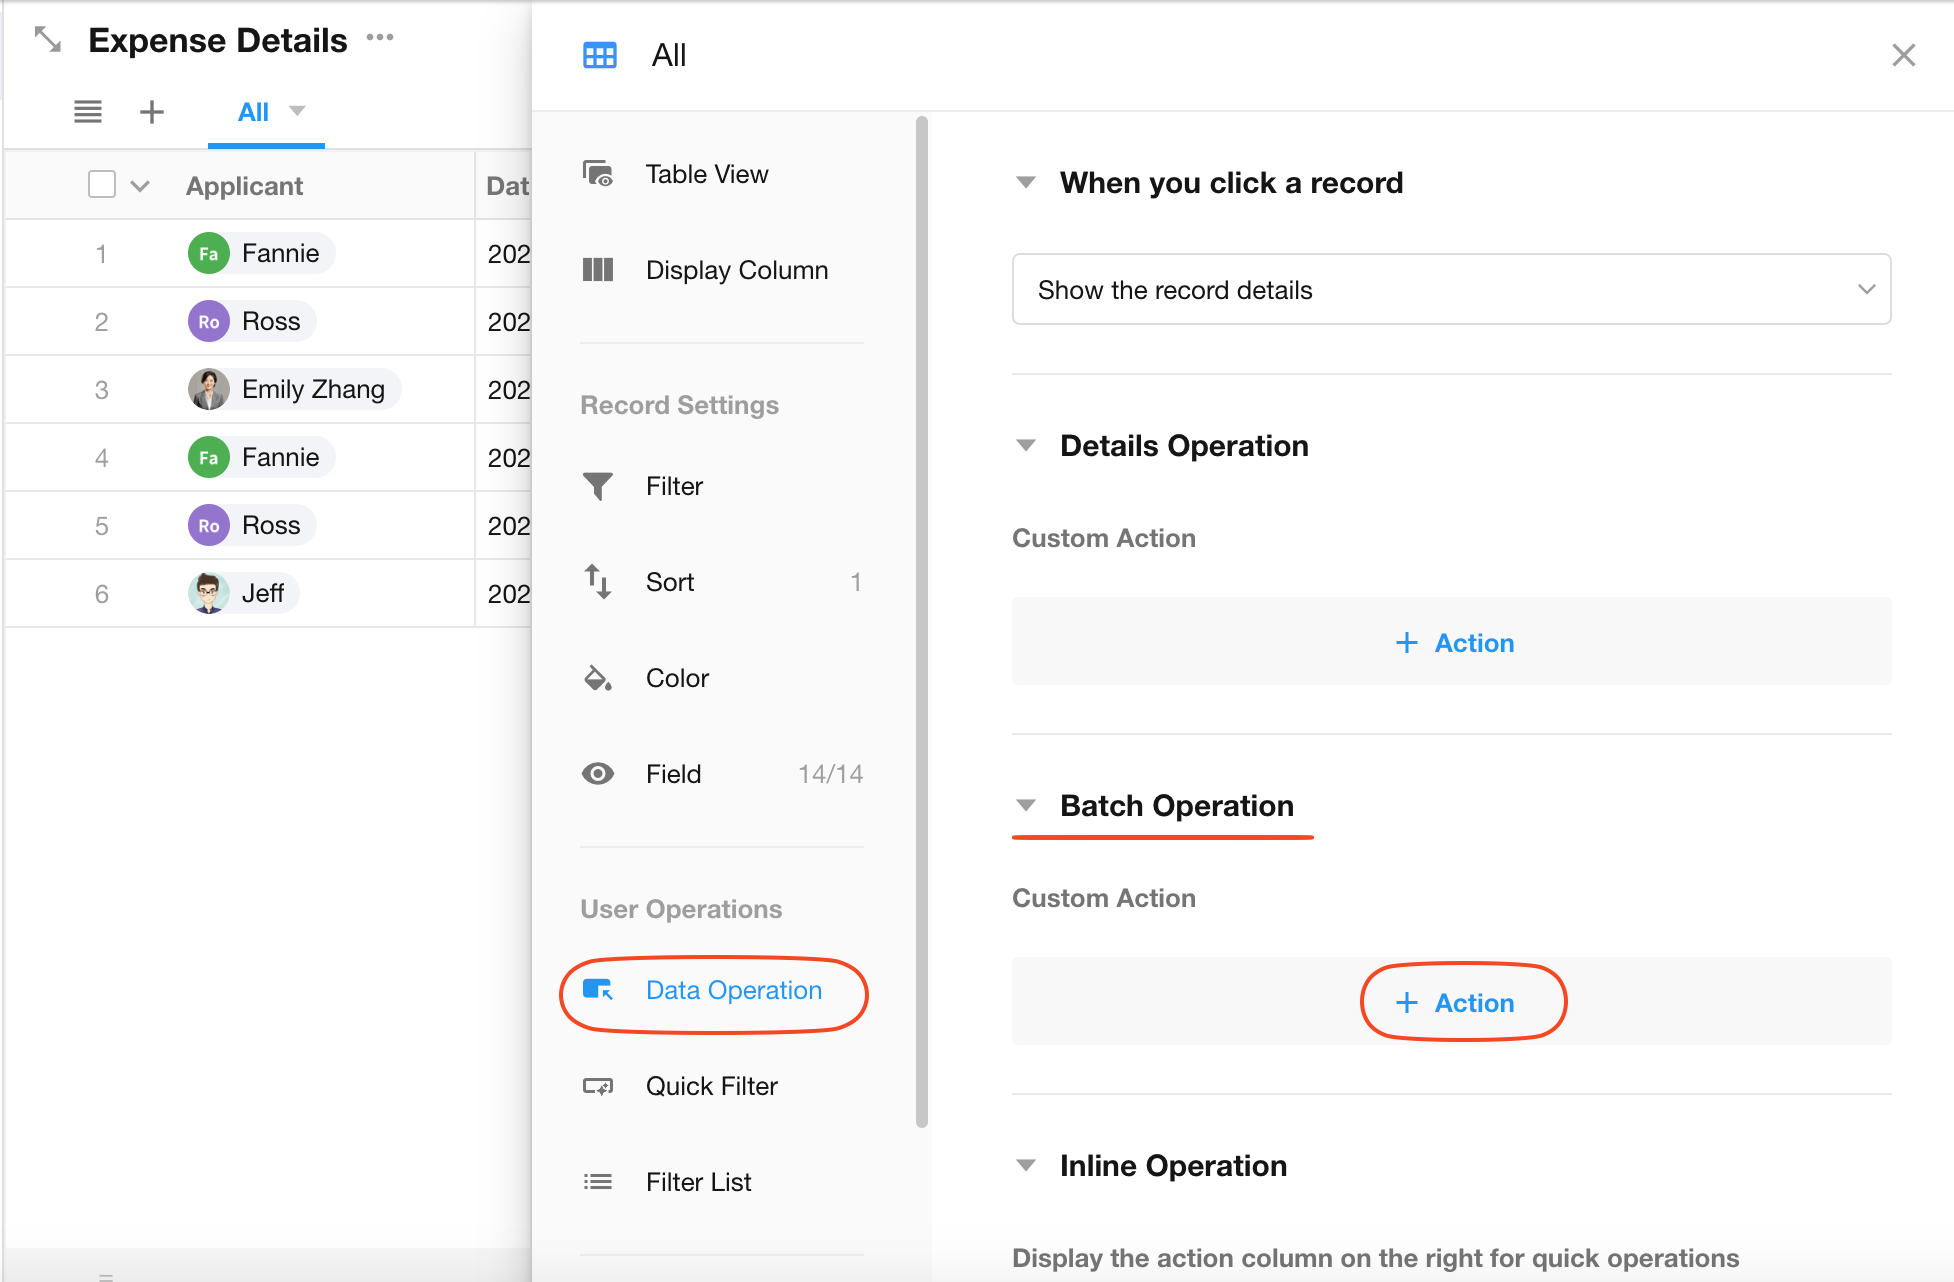
2. Select Multiple Records as the Data Source
Choose Multiple Records as the data source.
When users select multiple records and click the button, the workflow is triggered only once. The trigger node represents all selected records.

3. Configure the Workflow
-
1) Retrieve the Most Recent Expense Reimbursement Request
Retrieve the latest reimbursement request submitted by the current user so information such as bank account details and department can be reused.
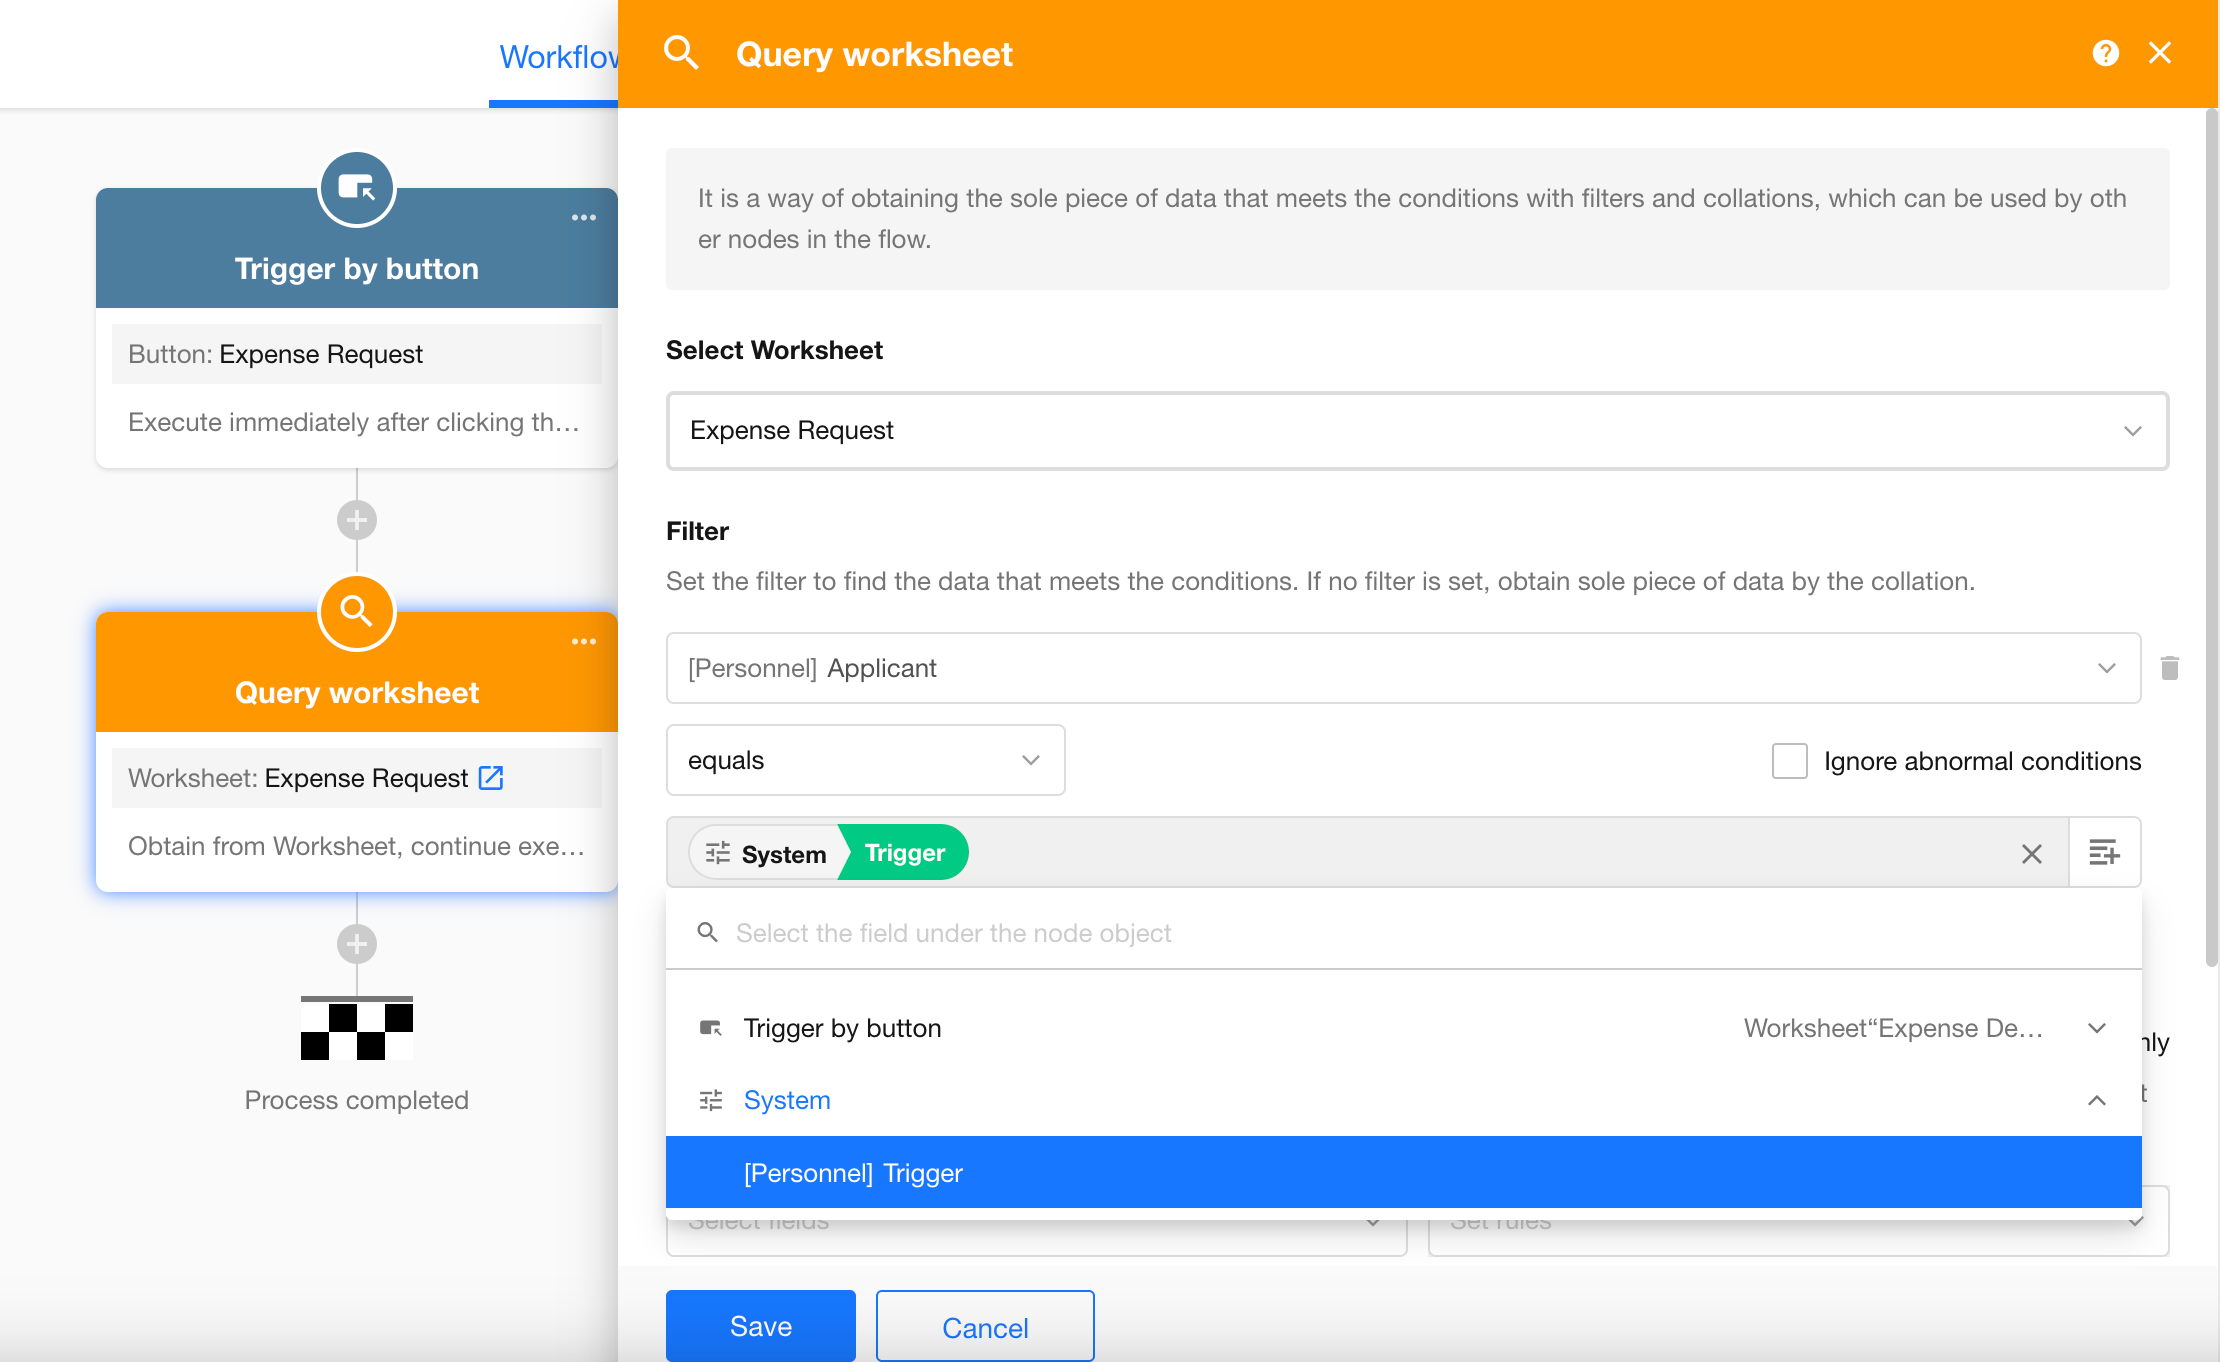
-
2) Retrieve Any One of the Selected Expense Detail Records
Because the workflow is triggered by multiple records, the trigger node represents all selected records.
Use the Get Single Data node and select From multiple data items to retrieve any one of the selected expense detail records. No filter conditions are required.

-
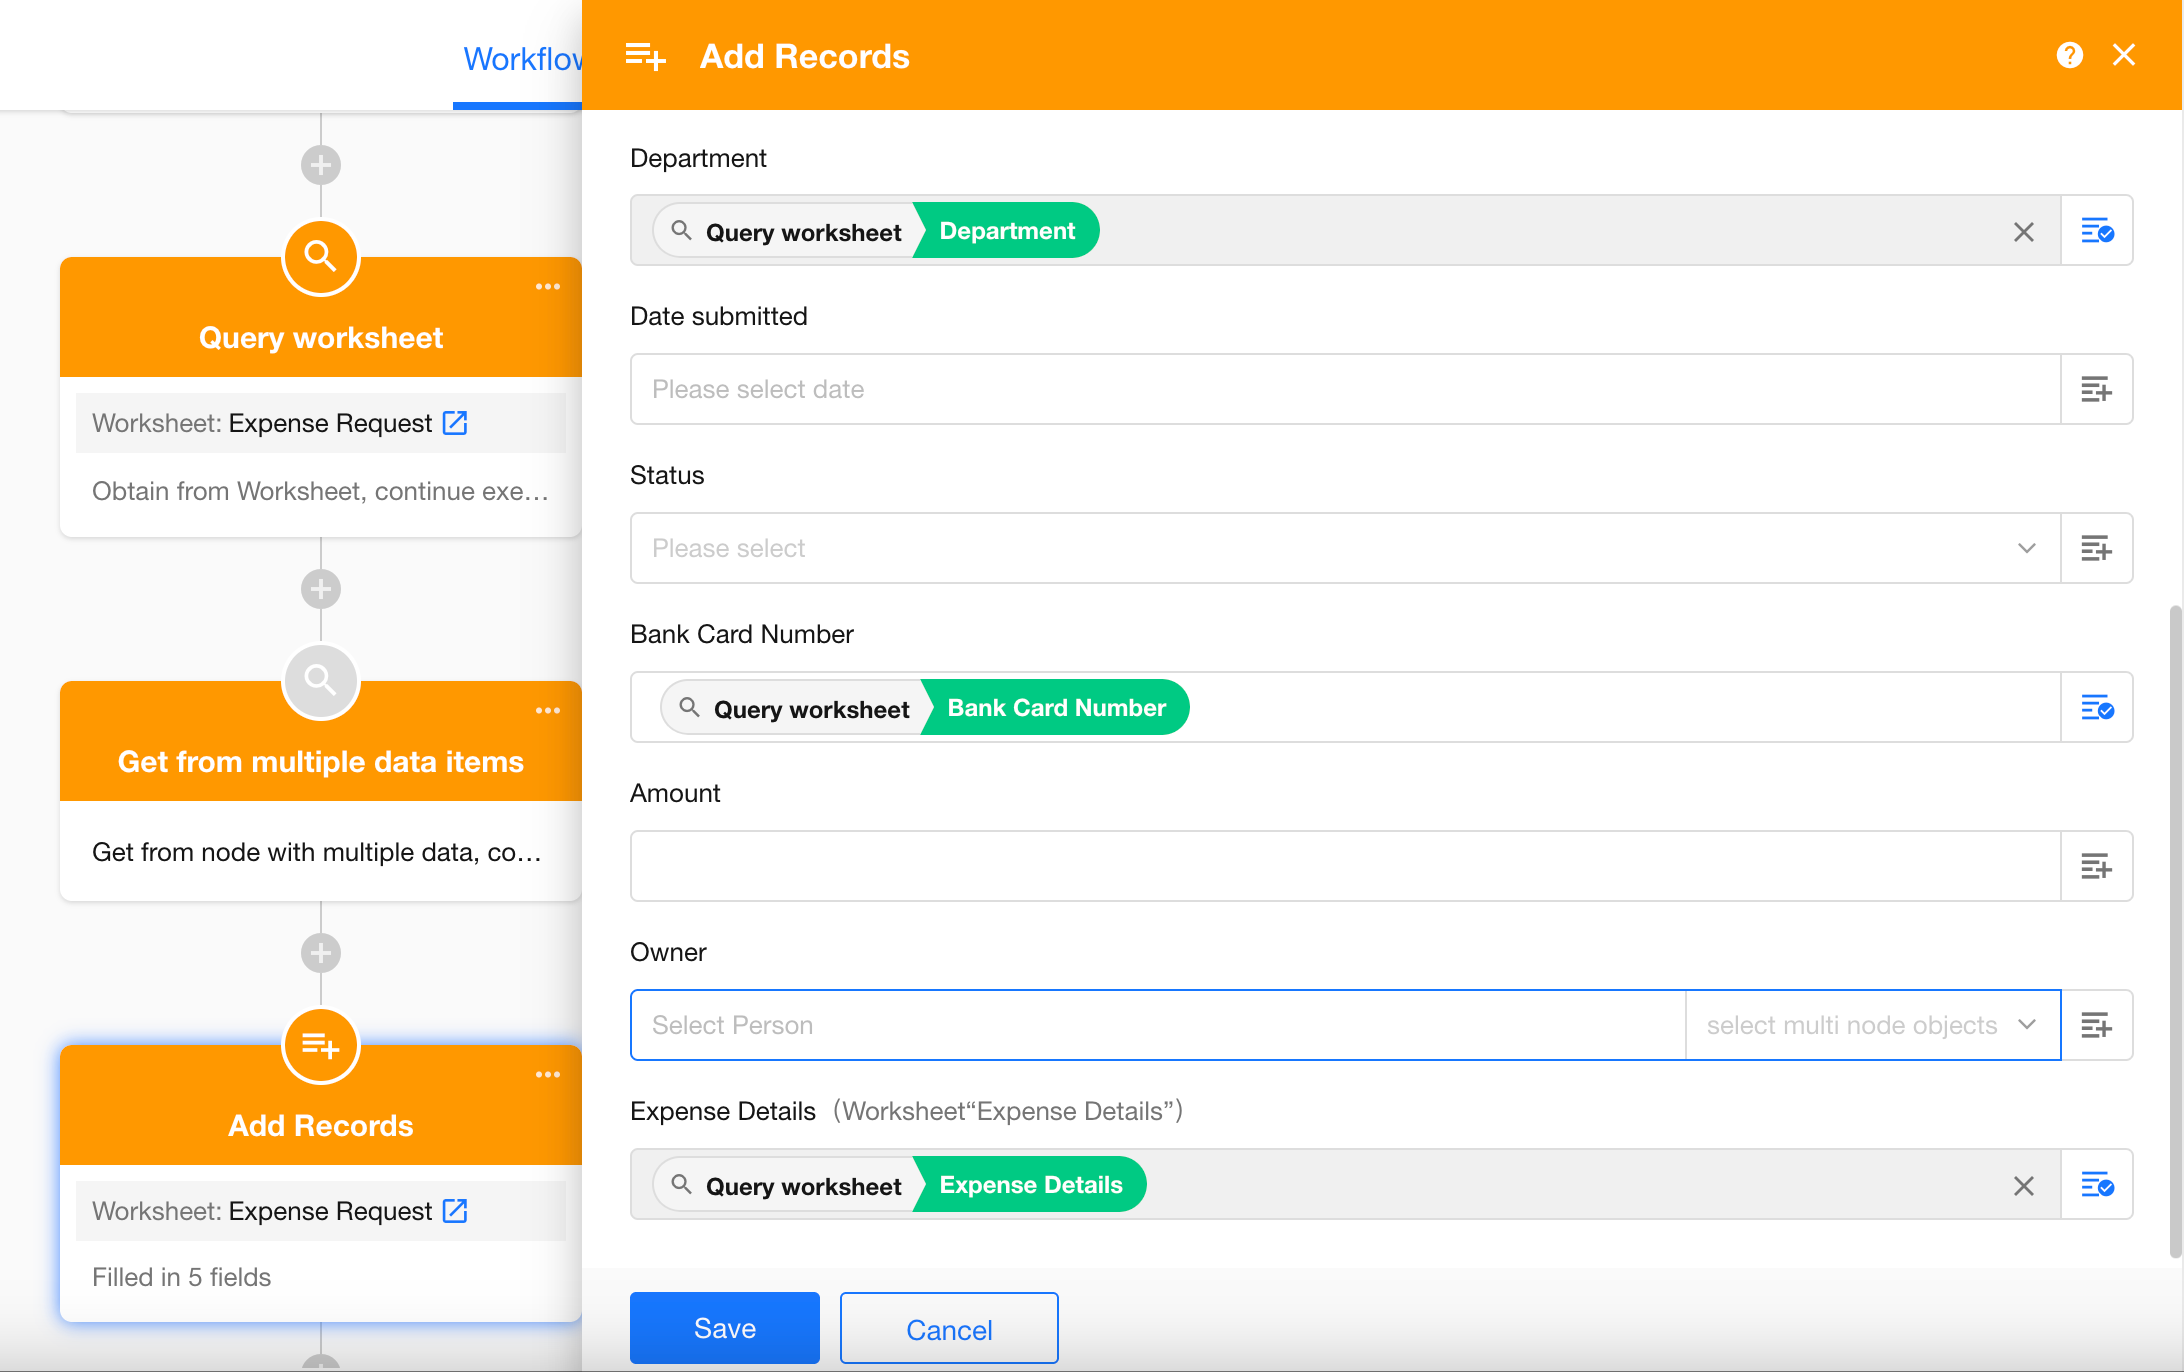
3) Create an Expense Reimbursement Request
For the Expense Details field in the reimbursement request, select the trigger node directly.
-
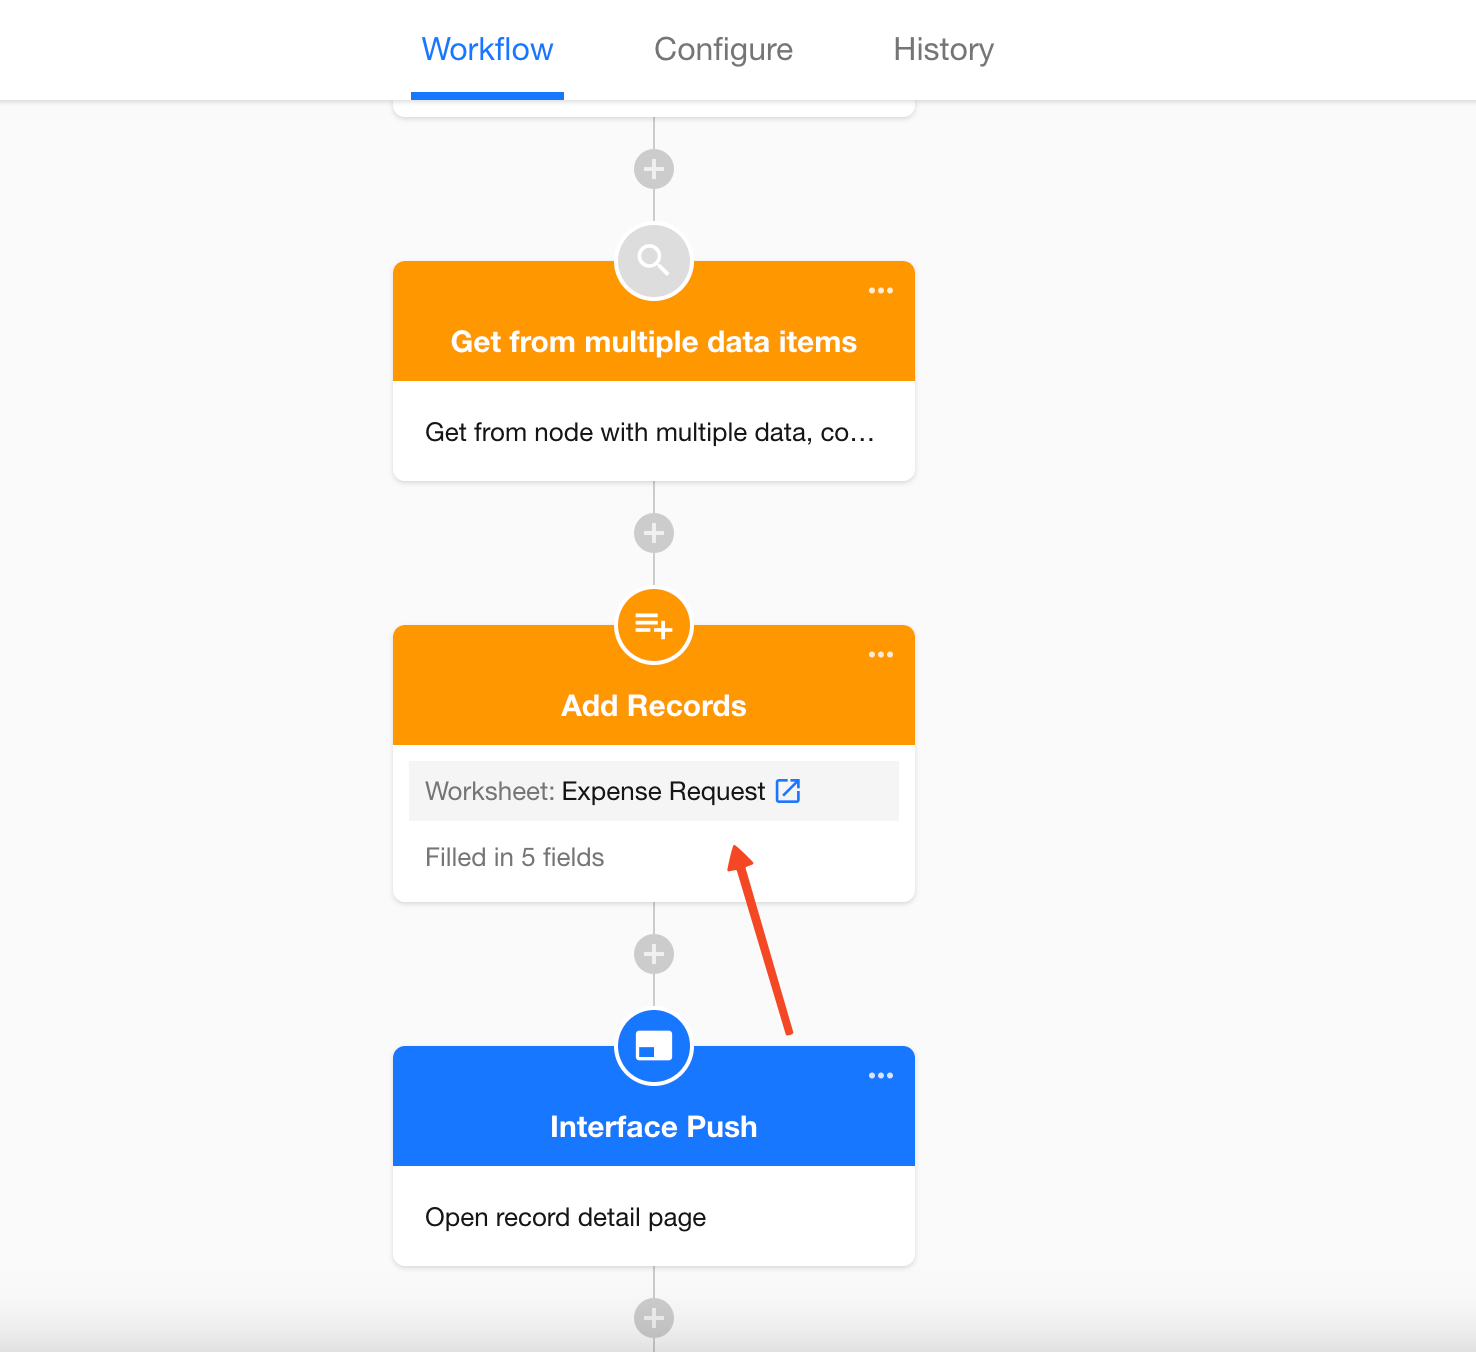
4) Open the Newly Created Record for Further Editing
If additional fields need to be completed manually, use a Interface Push node to automatically open the newly created expense reimbursement request record.
Result
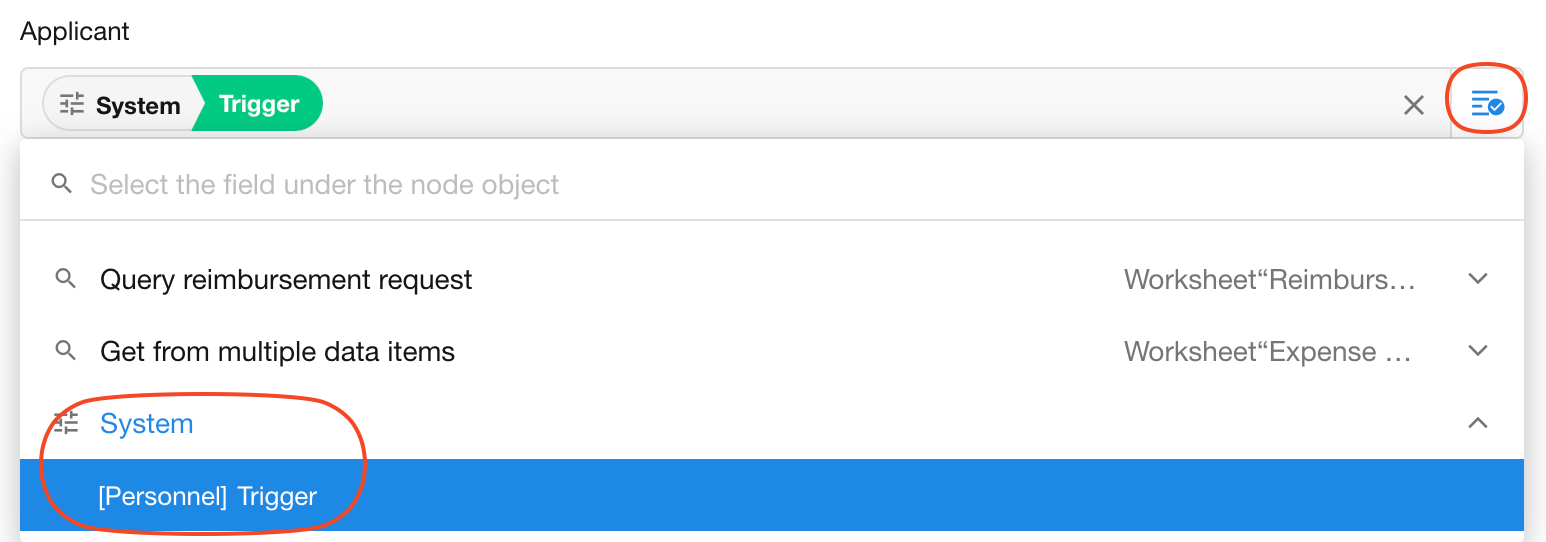
How to Get the User Who Triggered a Workflow from a Button
Under System Fields, you can retrieve information about the user who clicked the button and triggered the workflow.
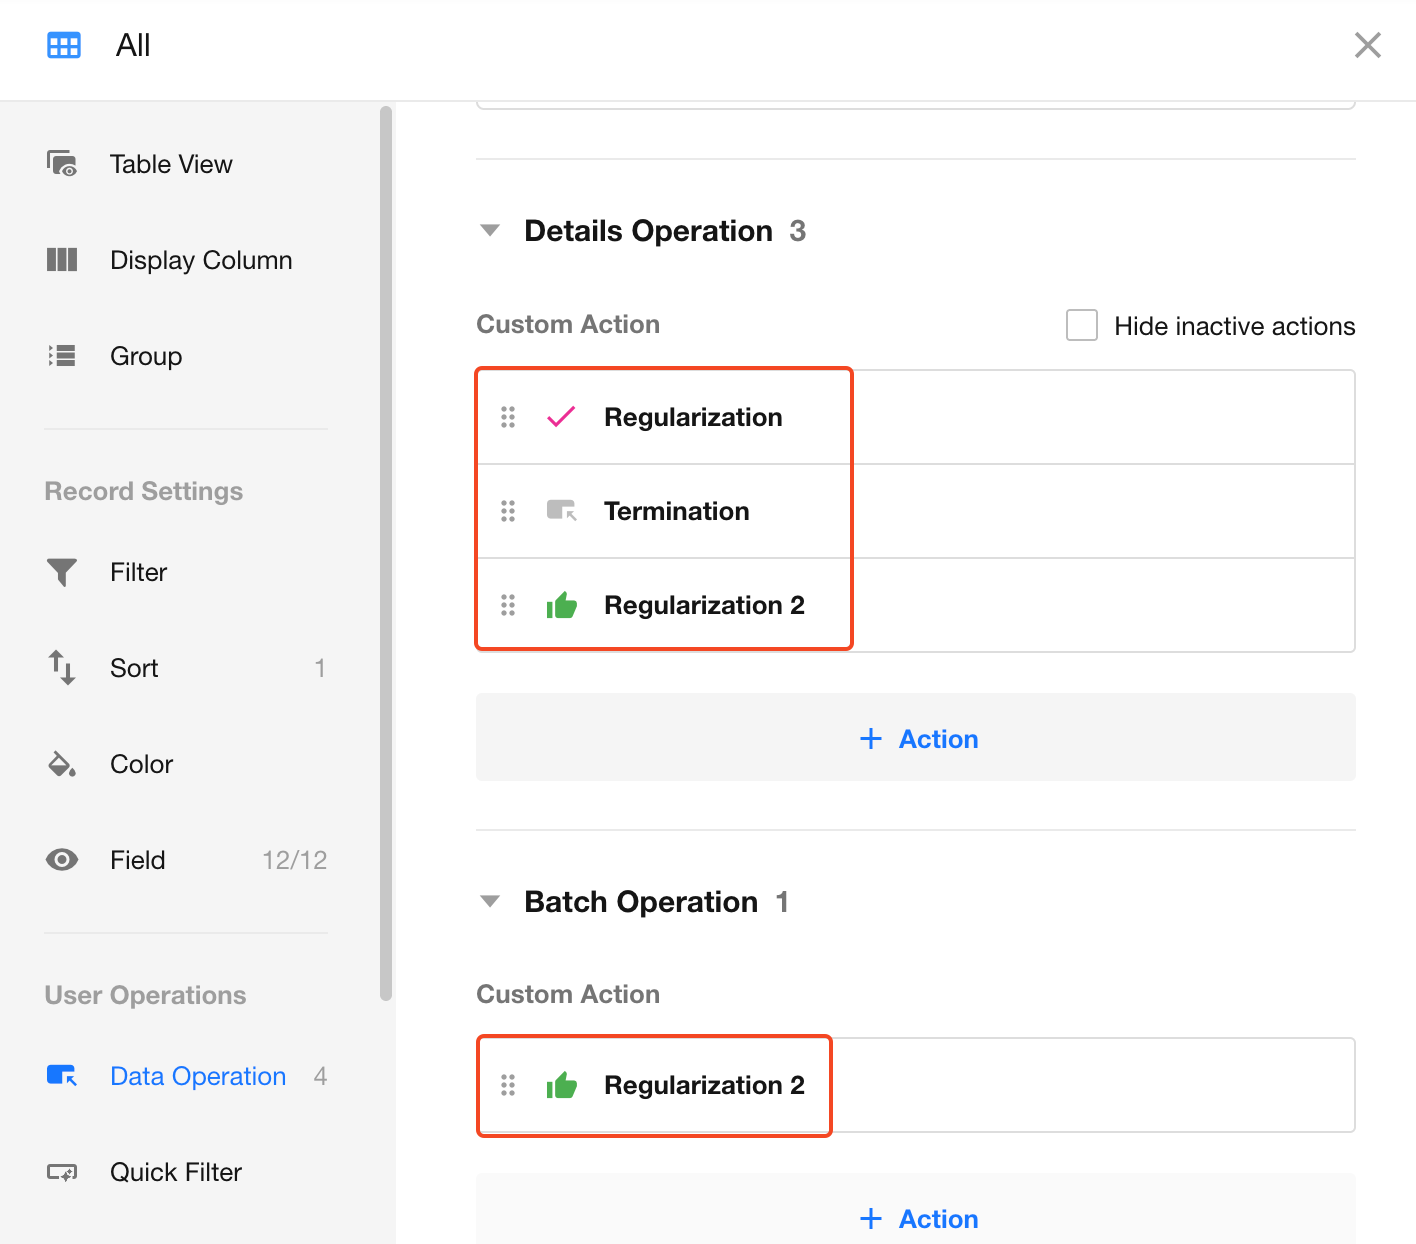
Custom Actions on the Record Details Page and in Batch Operations
You can configure whether a custom action is available on the Record Details page and during Batch Operations separately.
-
Record Details
The button is available when a user opens a record and views its details. It is also available when a single record is selected from a list.
-
Batch Operations
The button is available when multiple records are selected in a table view.
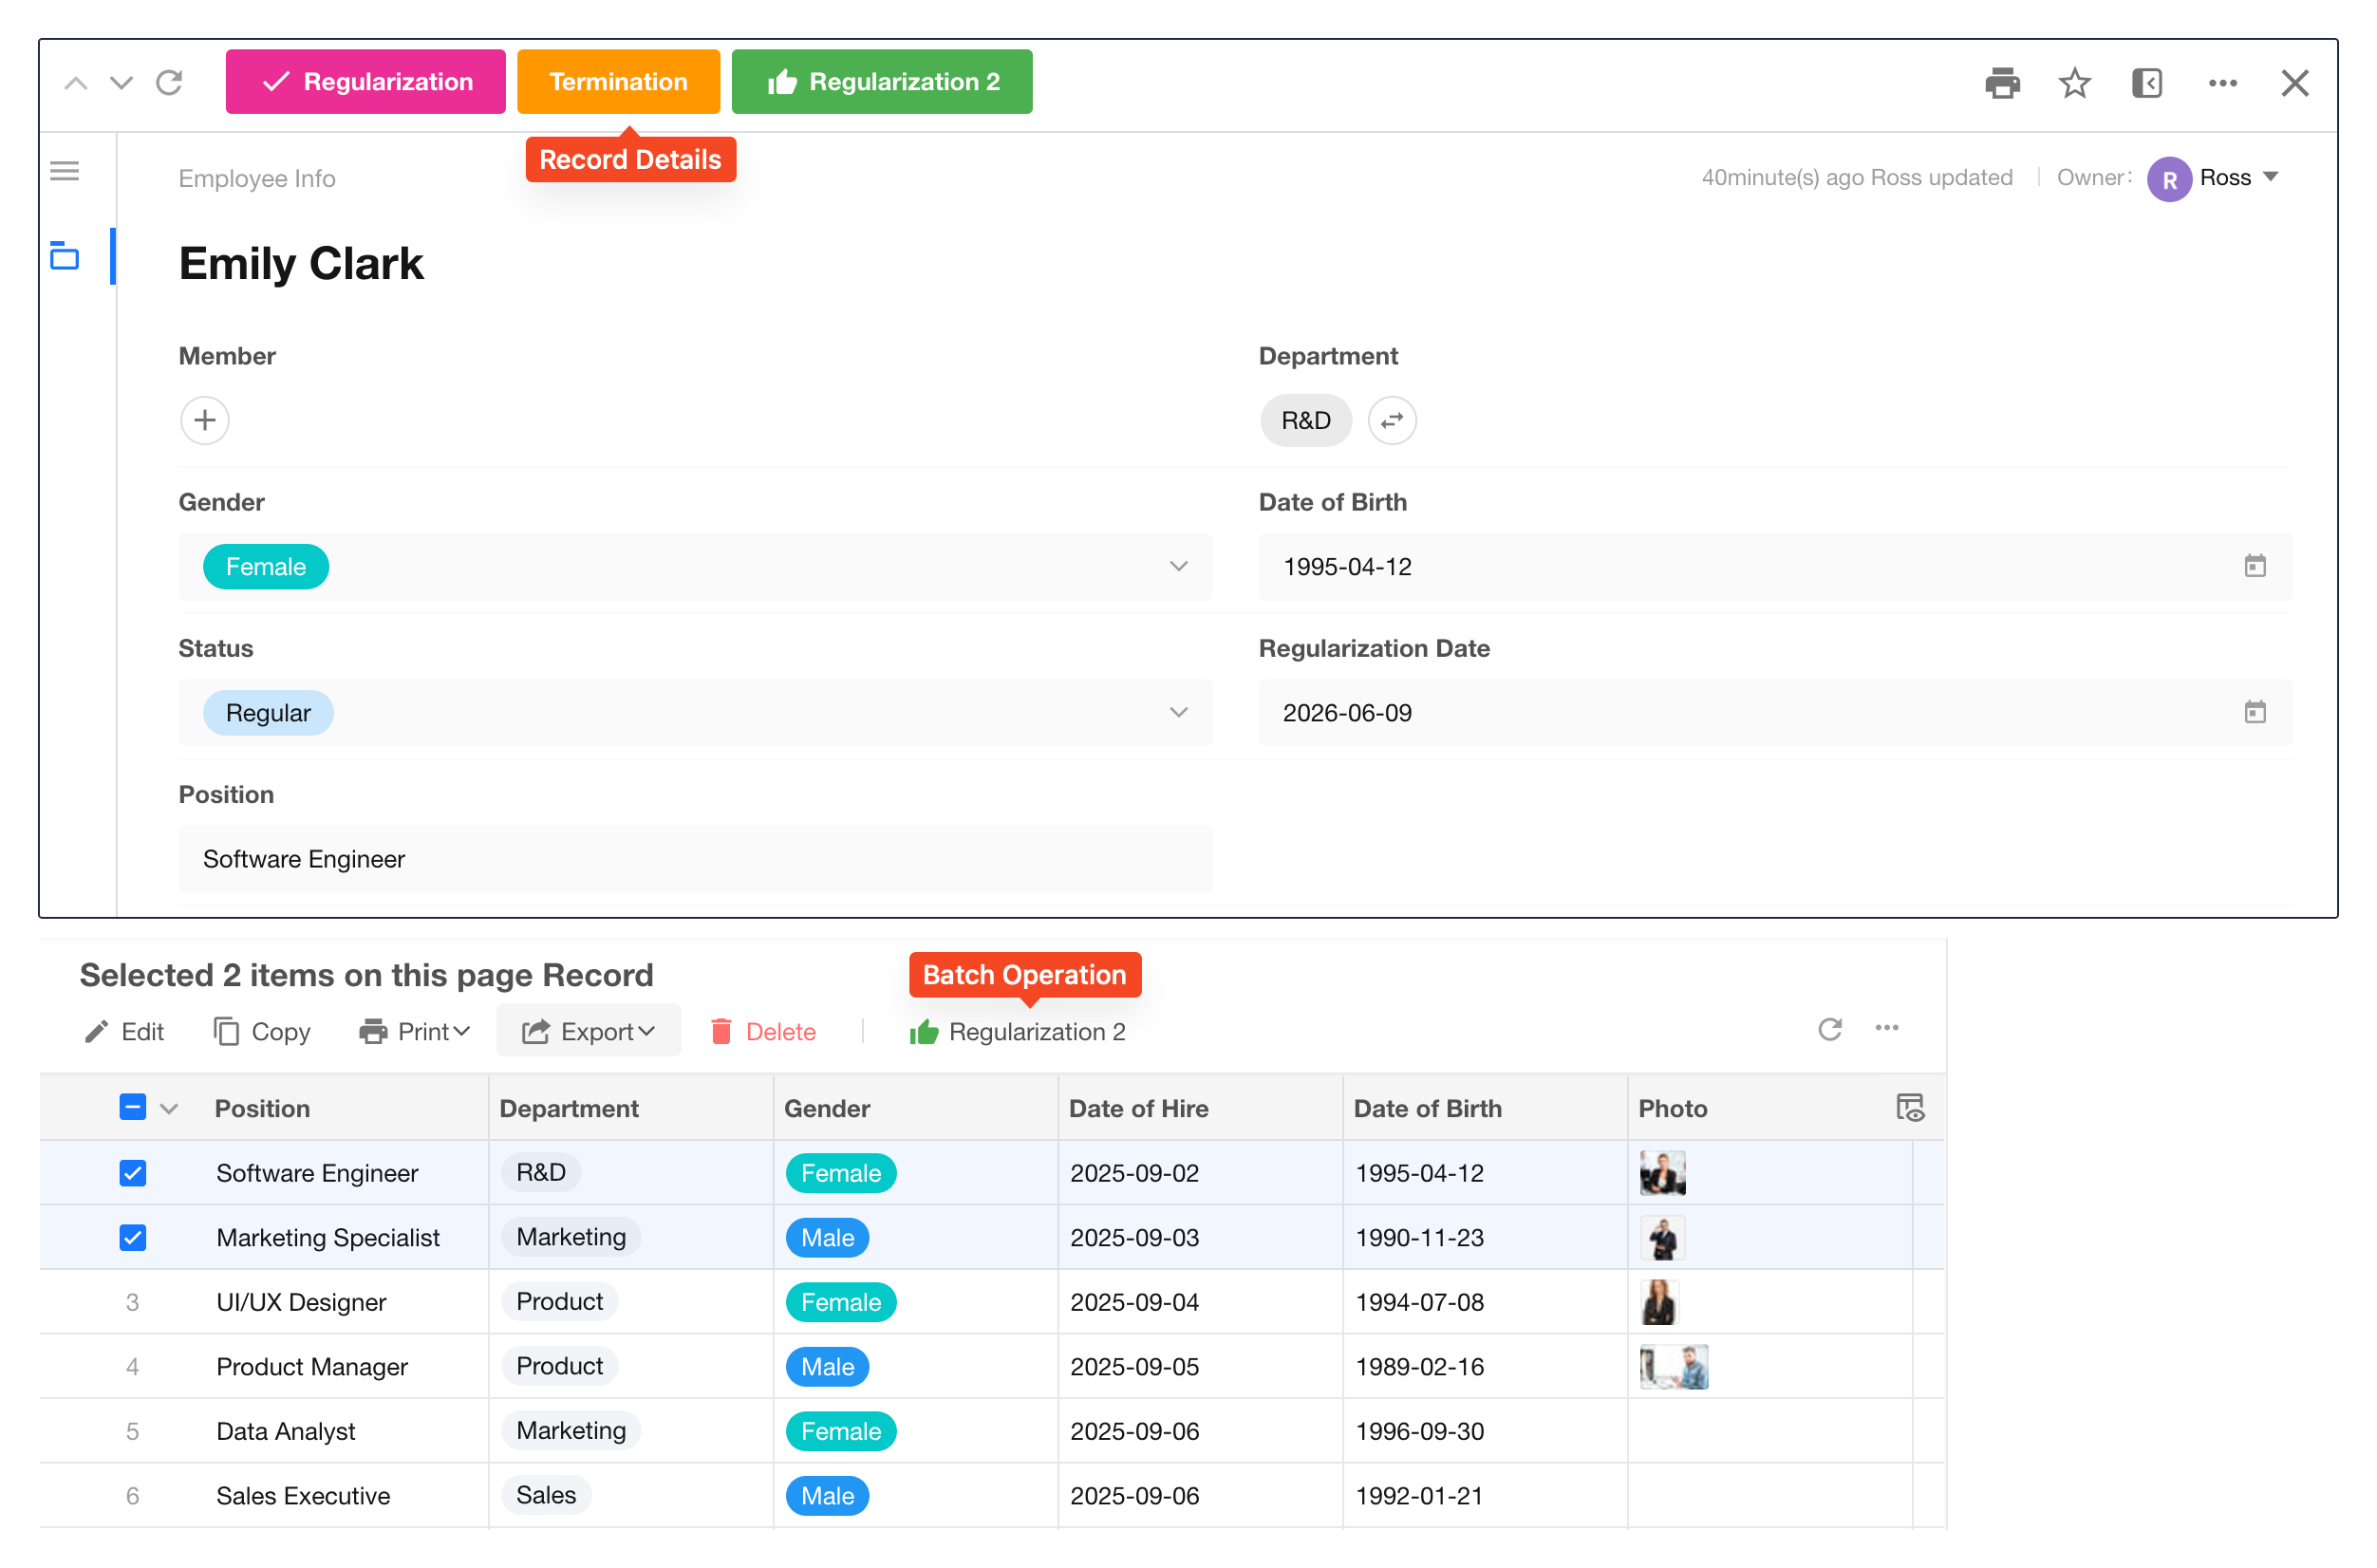
Result:
Quick Actions – Display Buttons in Record Rows and Cards
You can add buttons directly to record rows and record cards, making it easier to perform actions on records.
Supported button types include:
- Custom actions
- System action buttons
- Configured print templates
Supported views include:
- Table view
- Kanban view
- Gallery view
- Org view
If a button is unavailable in the current view, it will be hidden from the action column. If a record does not meet the button's availability conditions, the button is displayed in a gray state and cannot be clicked.
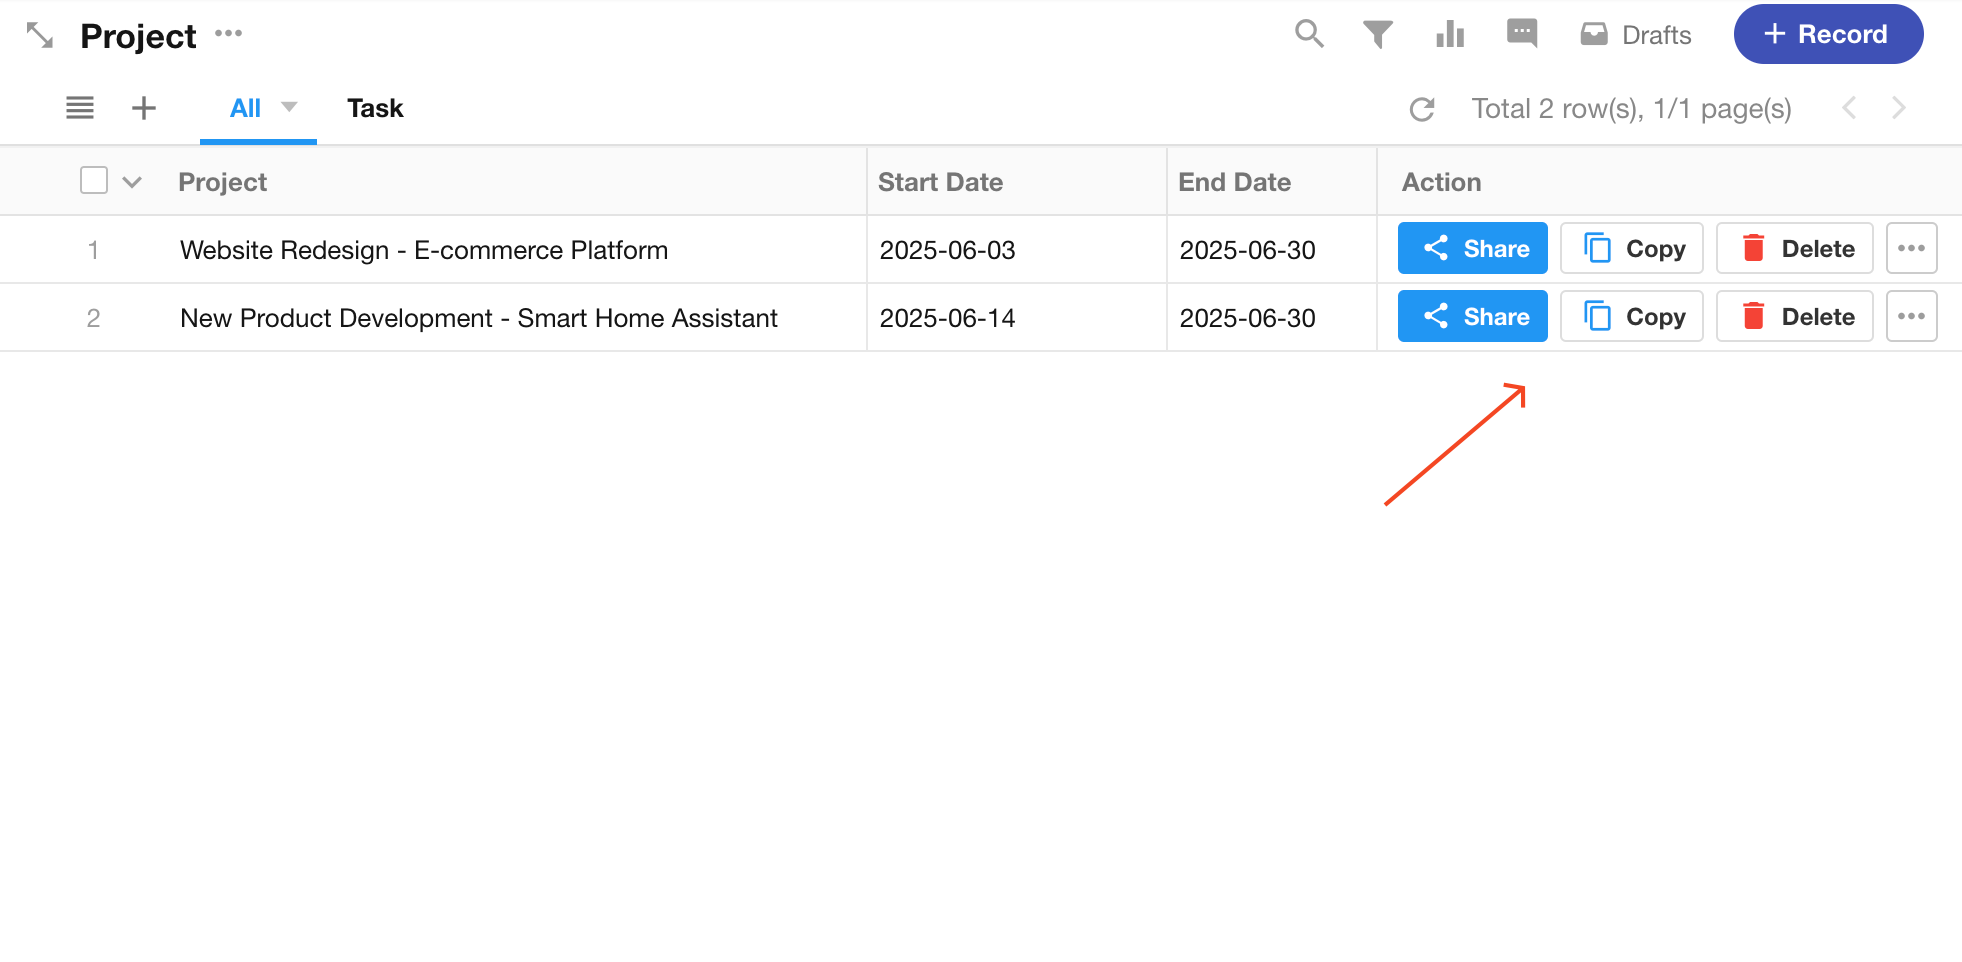
In a table view
Buttons are displayed in the action column on the right side of each record.
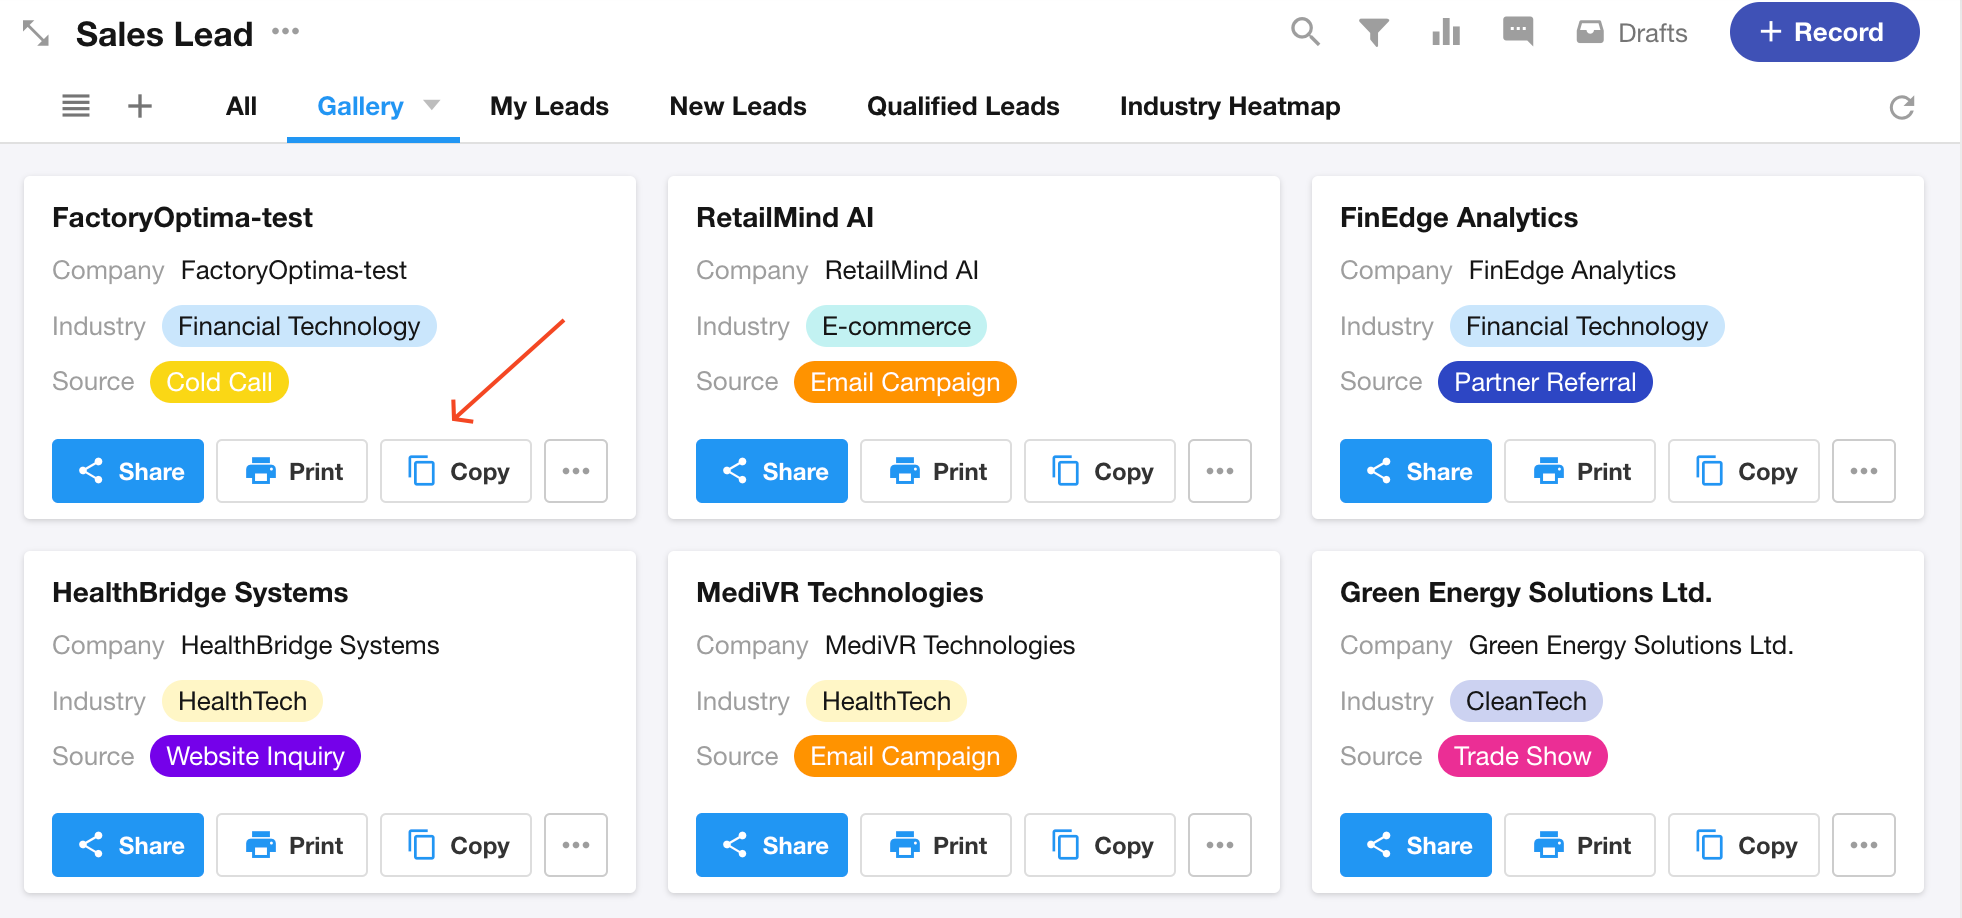
In a record card
Buttons are displayed directly on the card.
Add Buttons
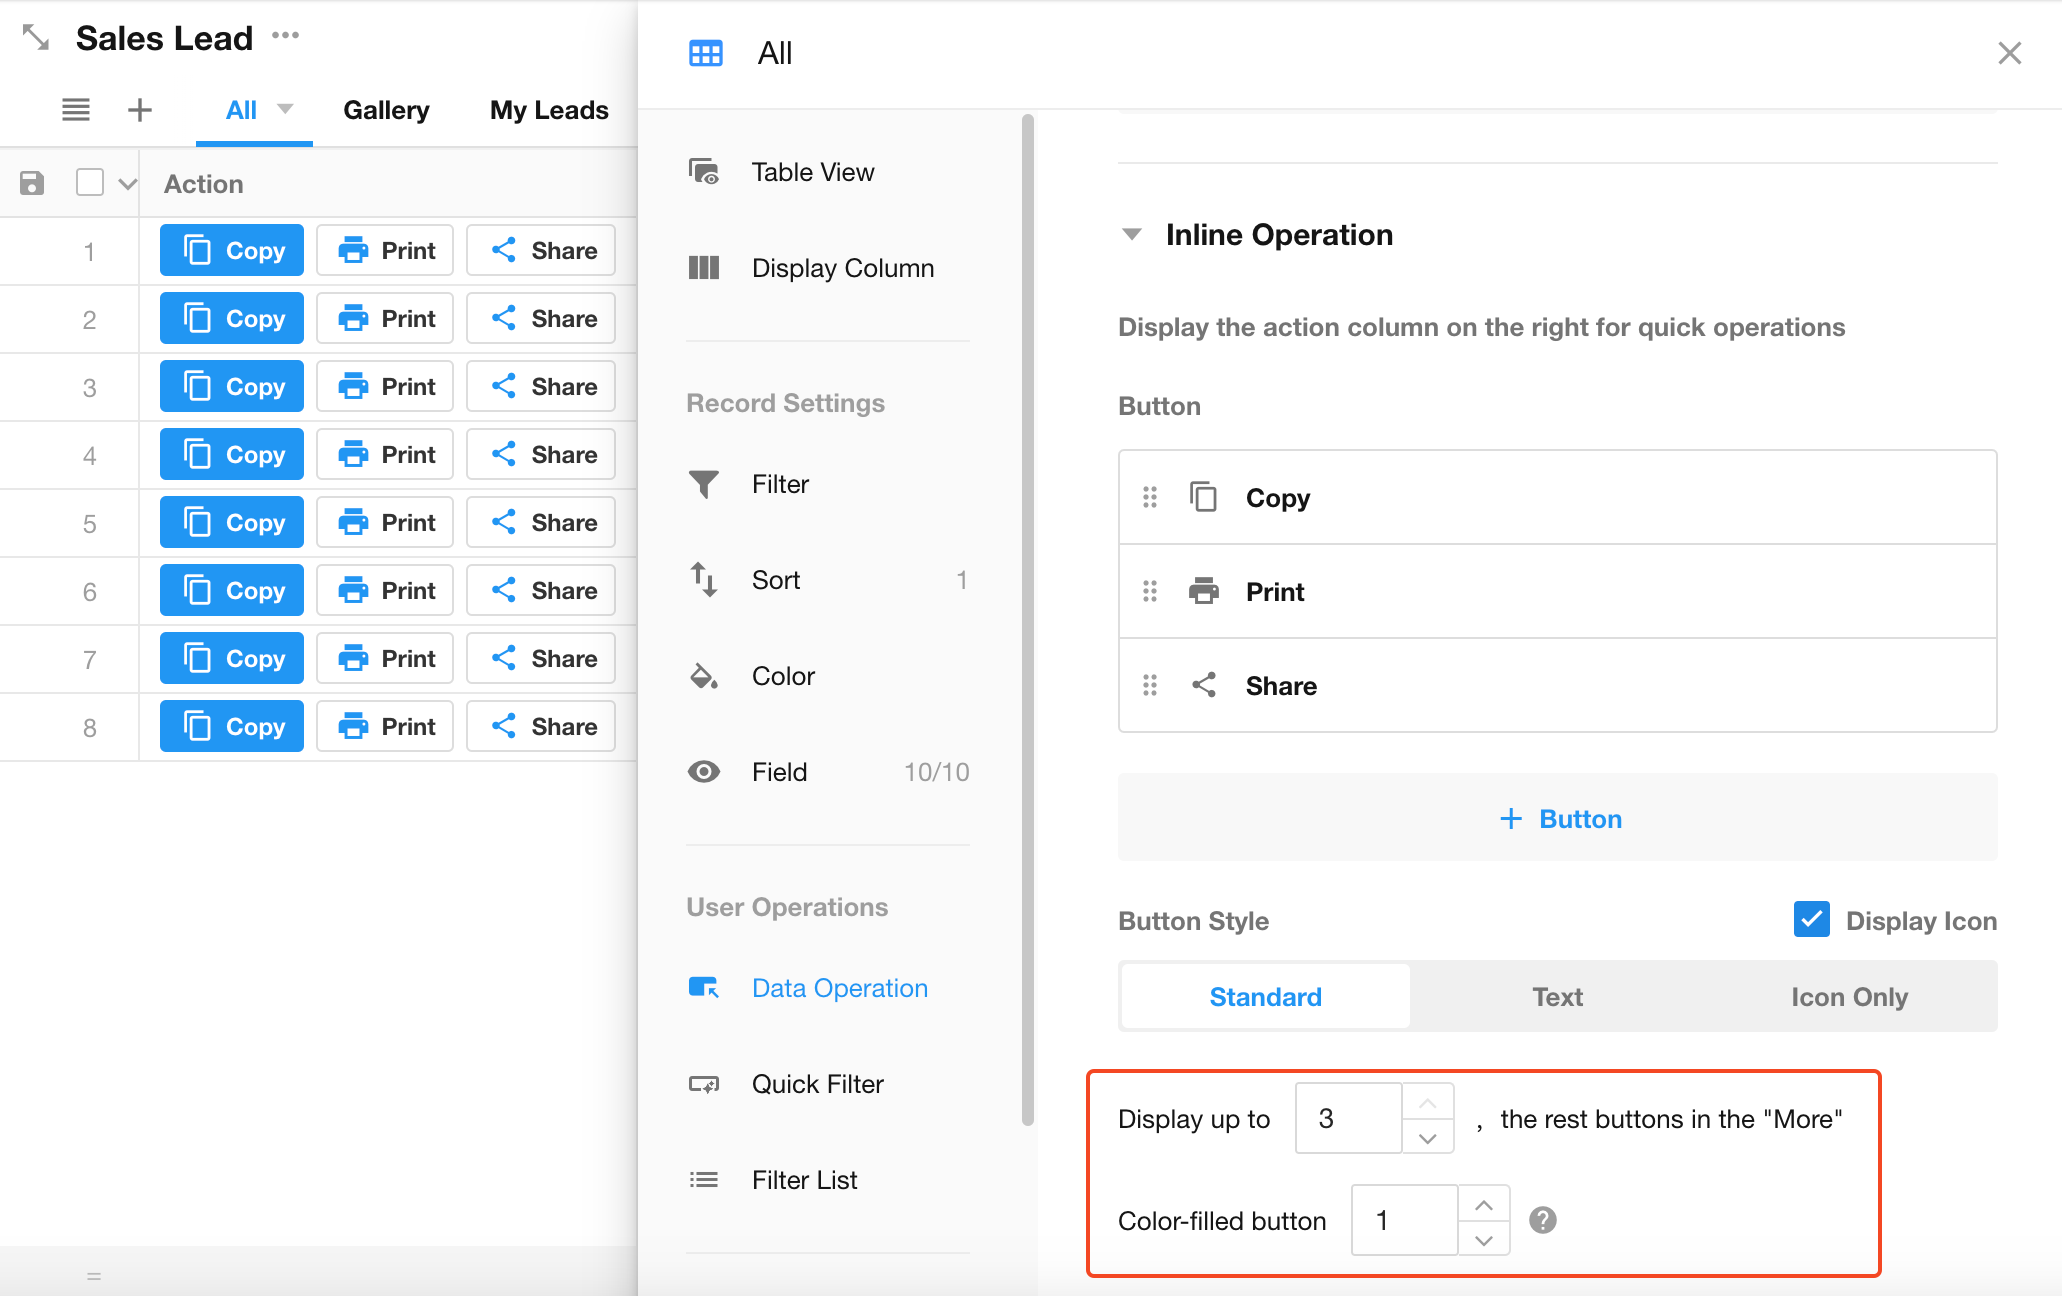
Go to Configure View > Data Operation > Inline Operation (or Card Operation in non-table views), and add the buttons you want to display.

Button Styles
A button consists of a name, icon, and color. The following display styles are available:
-
Standard
Displays the button name, icon, and color. The icon can be hidden if needed.
-
Text
Displays the button name and icon without color styling. The icon can also be hidden.
-
Icon Only
Displays only the icon. The button name and color are hidden.
Number of Displayed Buttons and Primary Buttons
-
Configure how many buttons are displayed directly in the operation column. Up to 3 buttons can be displayed. Additional buttons are grouped under the More menu.
-
Primary buttons are displayed as solid buttons, while other buttons are displayed as outlined buttons. Up to 3 primary buttons can be configured.
Was this document helpful?