Create Applications and Worksheets from Excel
Importing an Excel file is a quick way to build an application's structure and worksheet schema. You can also import the data from the Excel file directly into worksheets, making it easy to get started with an existing dataset.
Download the sample Excel file
Create an Application from Excel
1. Open the Import Entry

2. Select the Excel File to Import
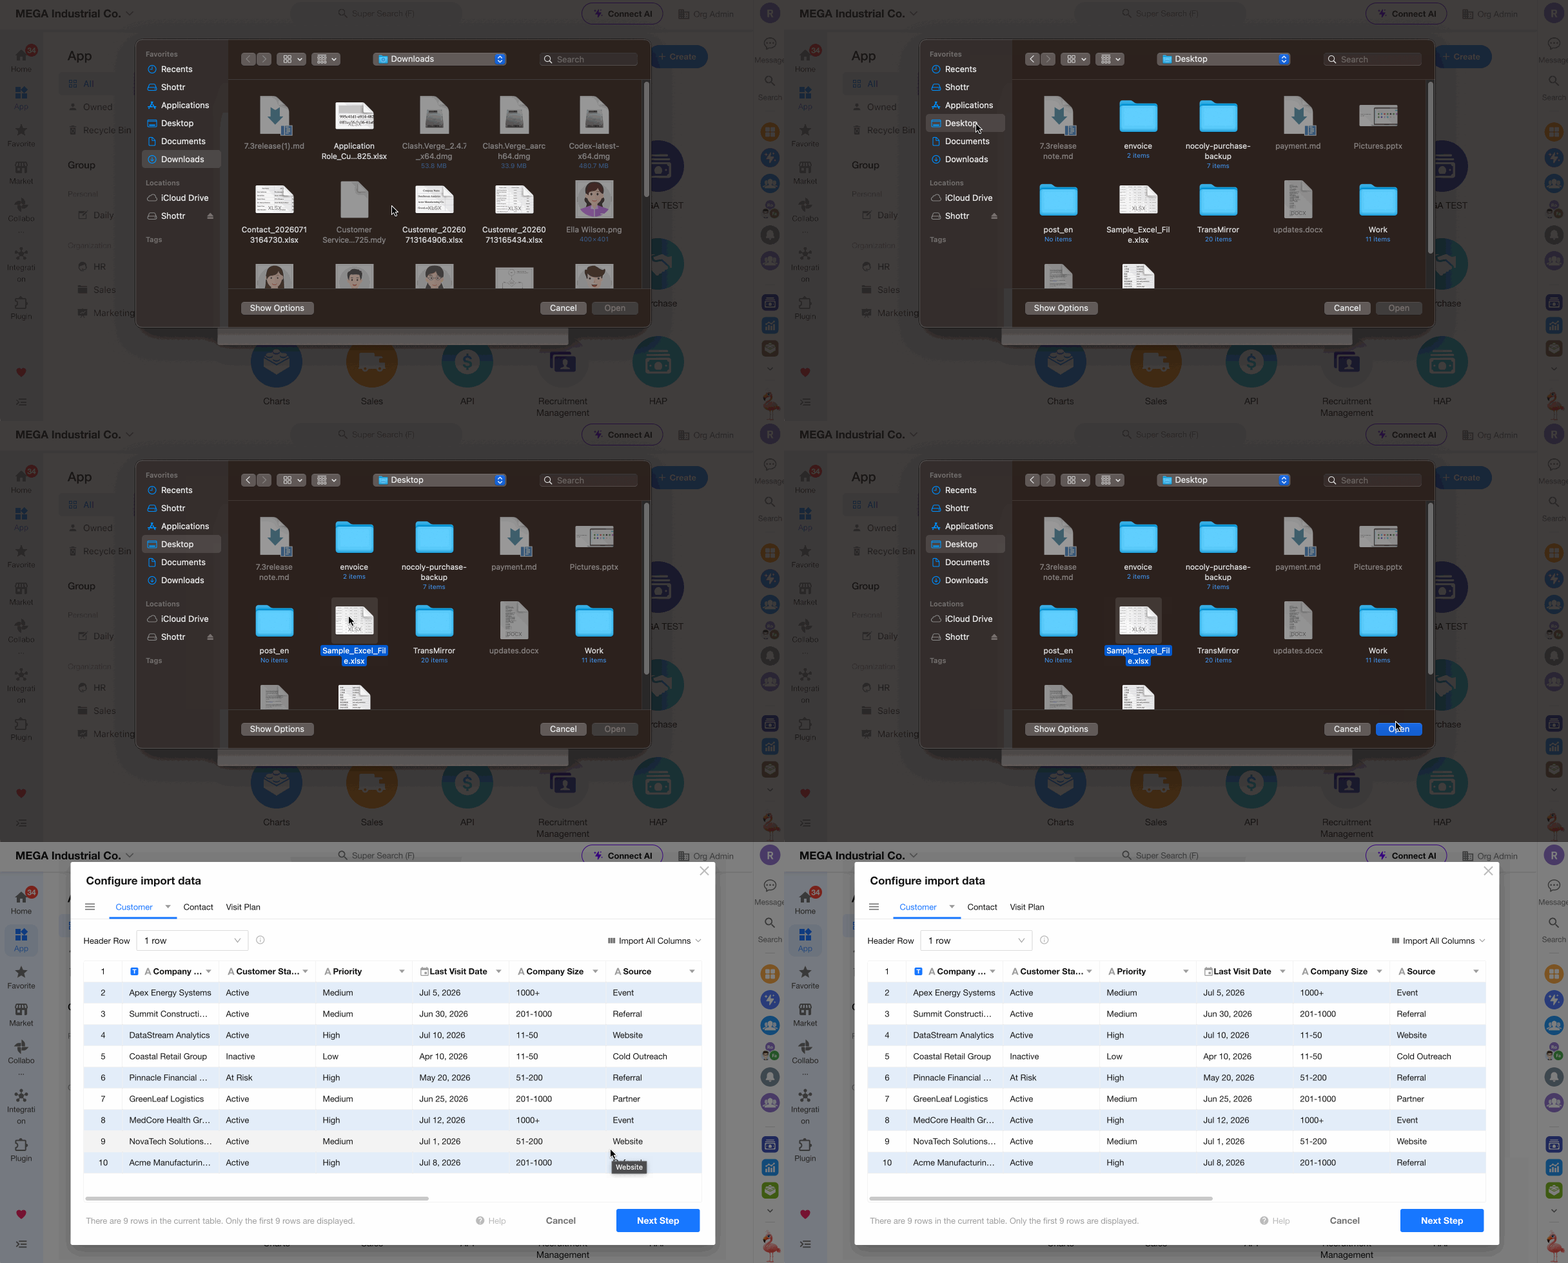
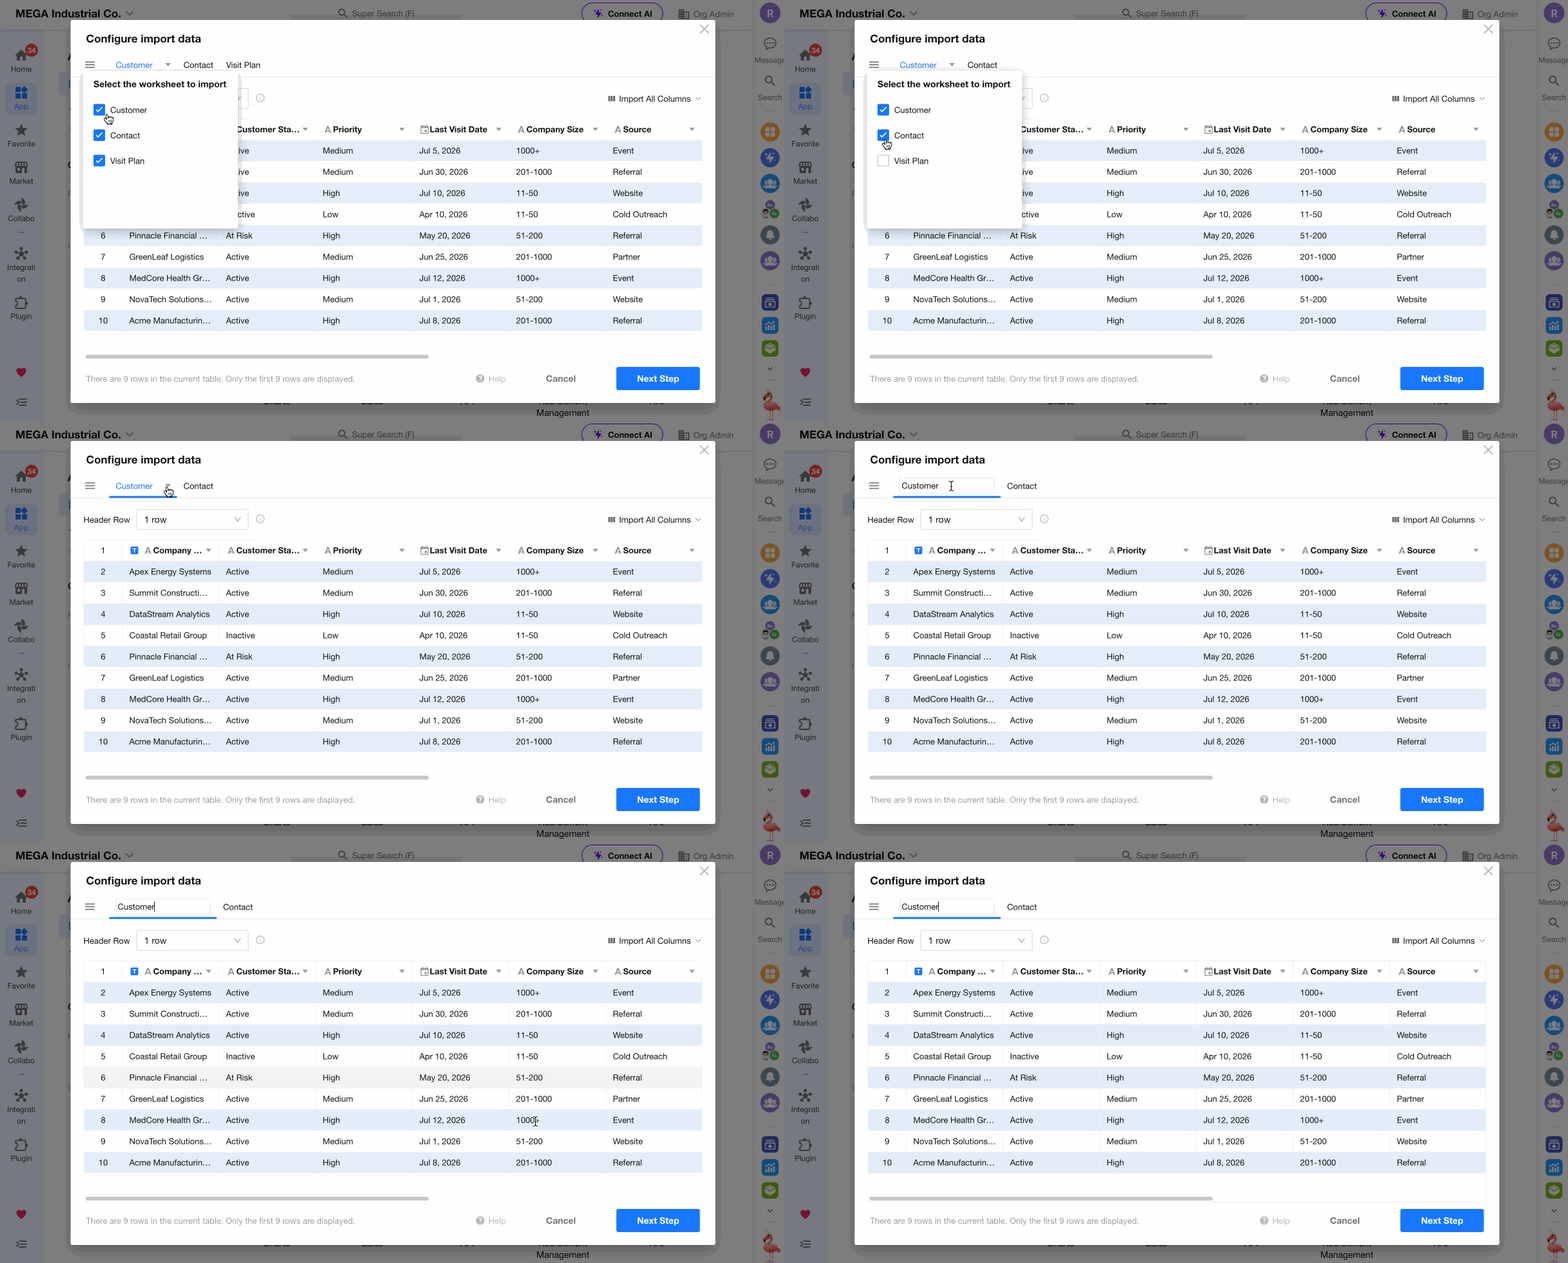
3. Select the Sheets to Import and Confirm Worksheet Names
Choose which sheets to import. Only the selected sheets will be created as worksheets.
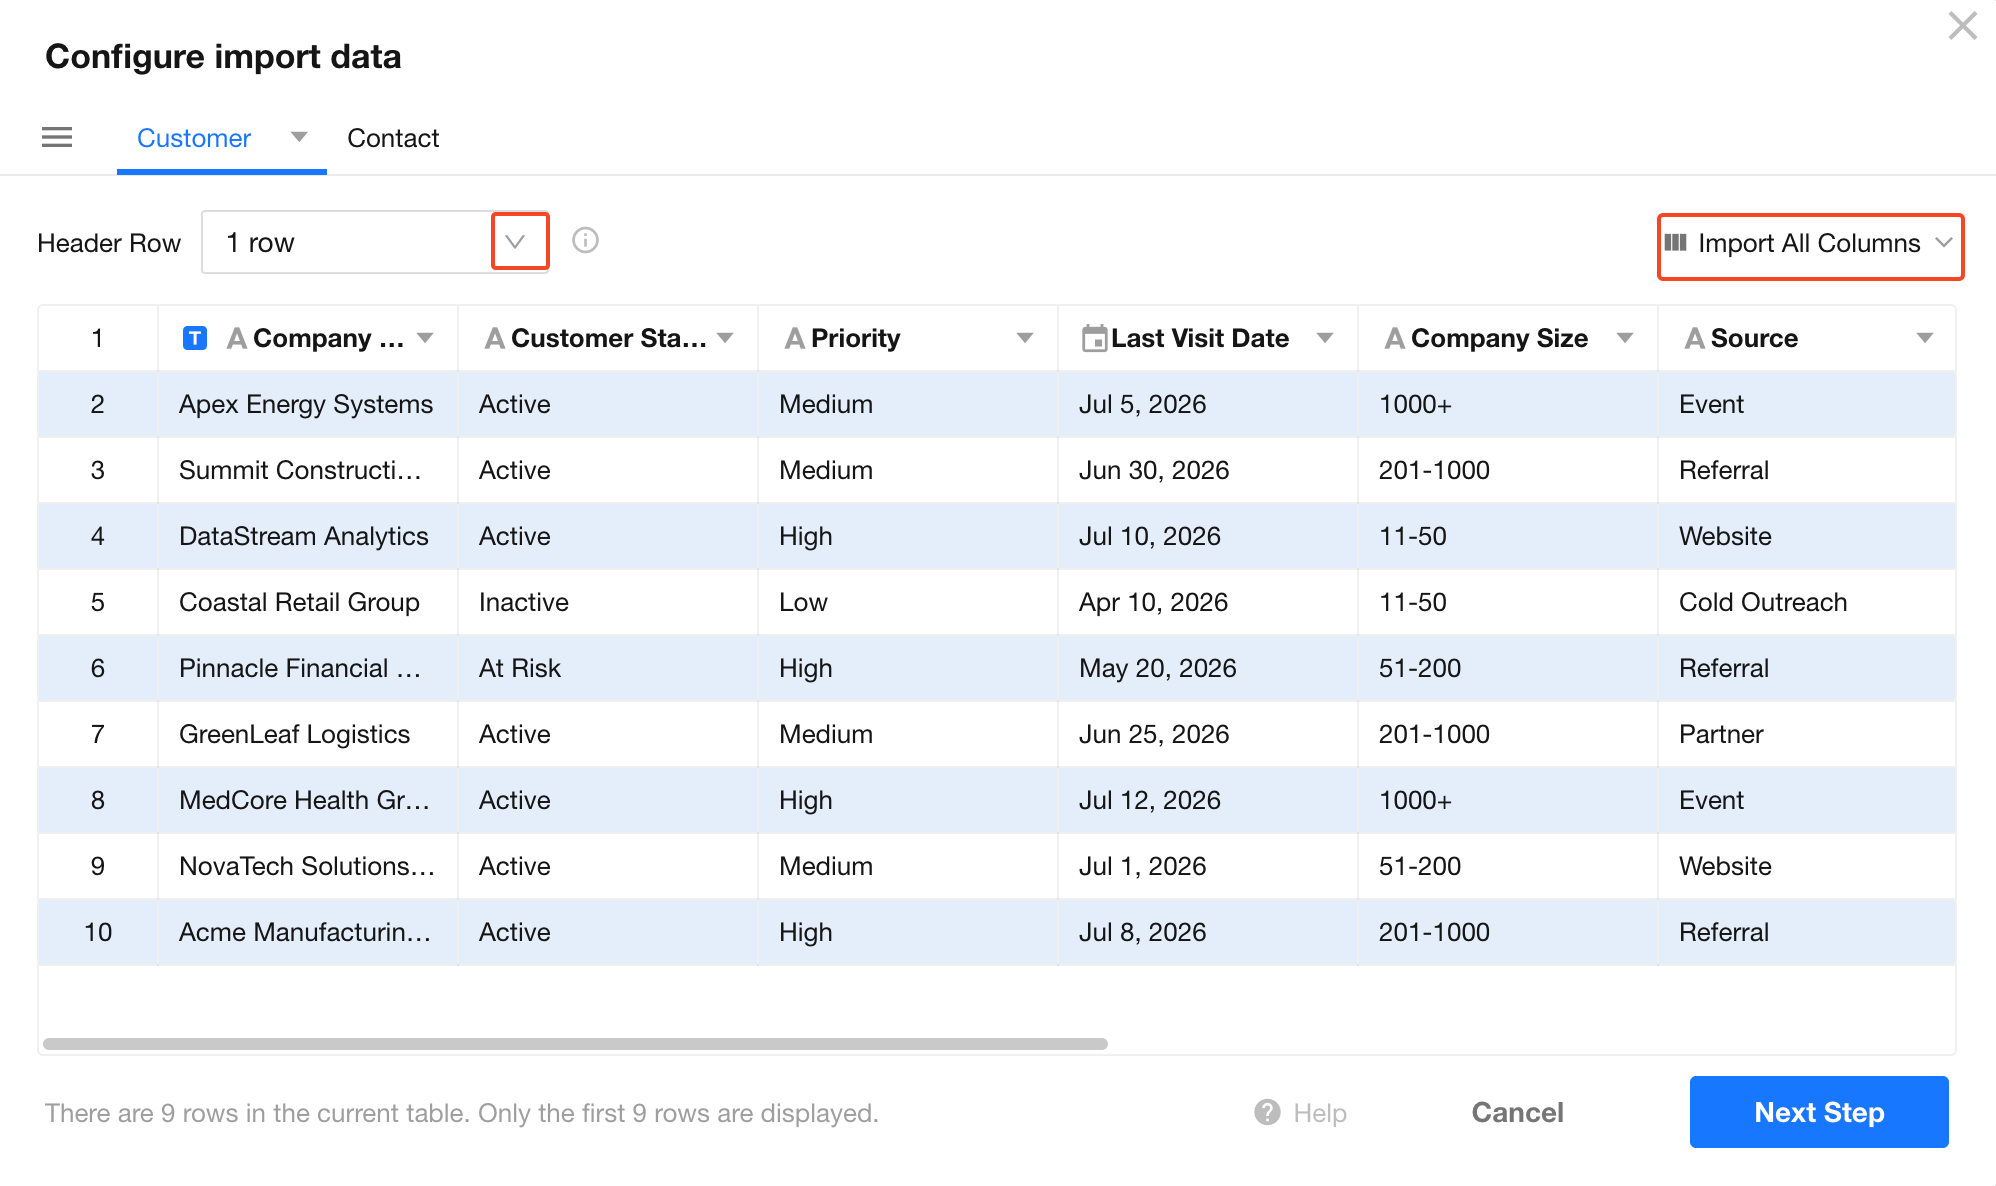
4. Select the Header Row and Columns to Import
Choose one row in the Excel file as the header row. Only the data below the selected header row will be imported; the header row itself is excluded.
The values in the header row will be used as the field names in the worksheet.
5. Configure Field Types and Names
You can quickly designate the title field and modify the name and type of each field.
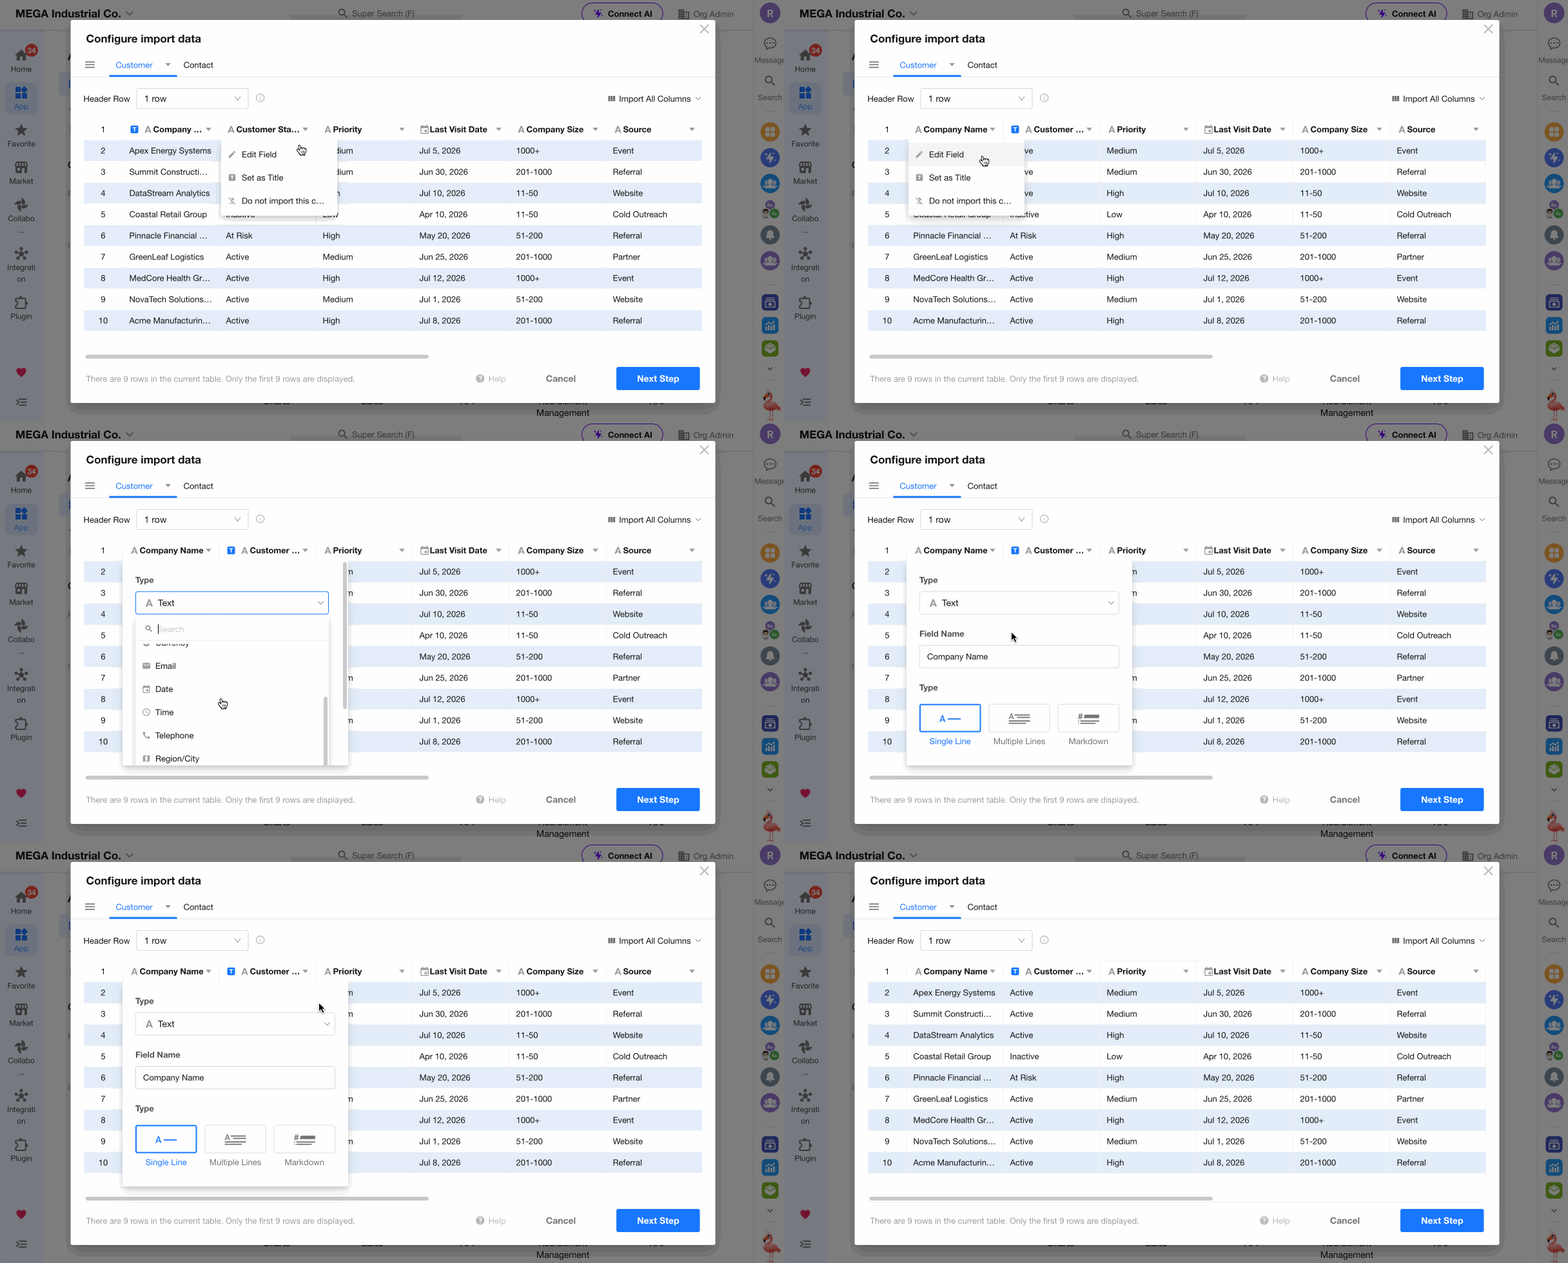
Only Number, Date, and Boolean (mapped to a Check item field by default) are automatically recognized. All other data types are imported as Text fields. Be sure to review and confirm each field type before importing.
6. Confirm the Application Name, Theme Color, and Icon
After the application is created and the data import is complete, you will receive an in-app notification.
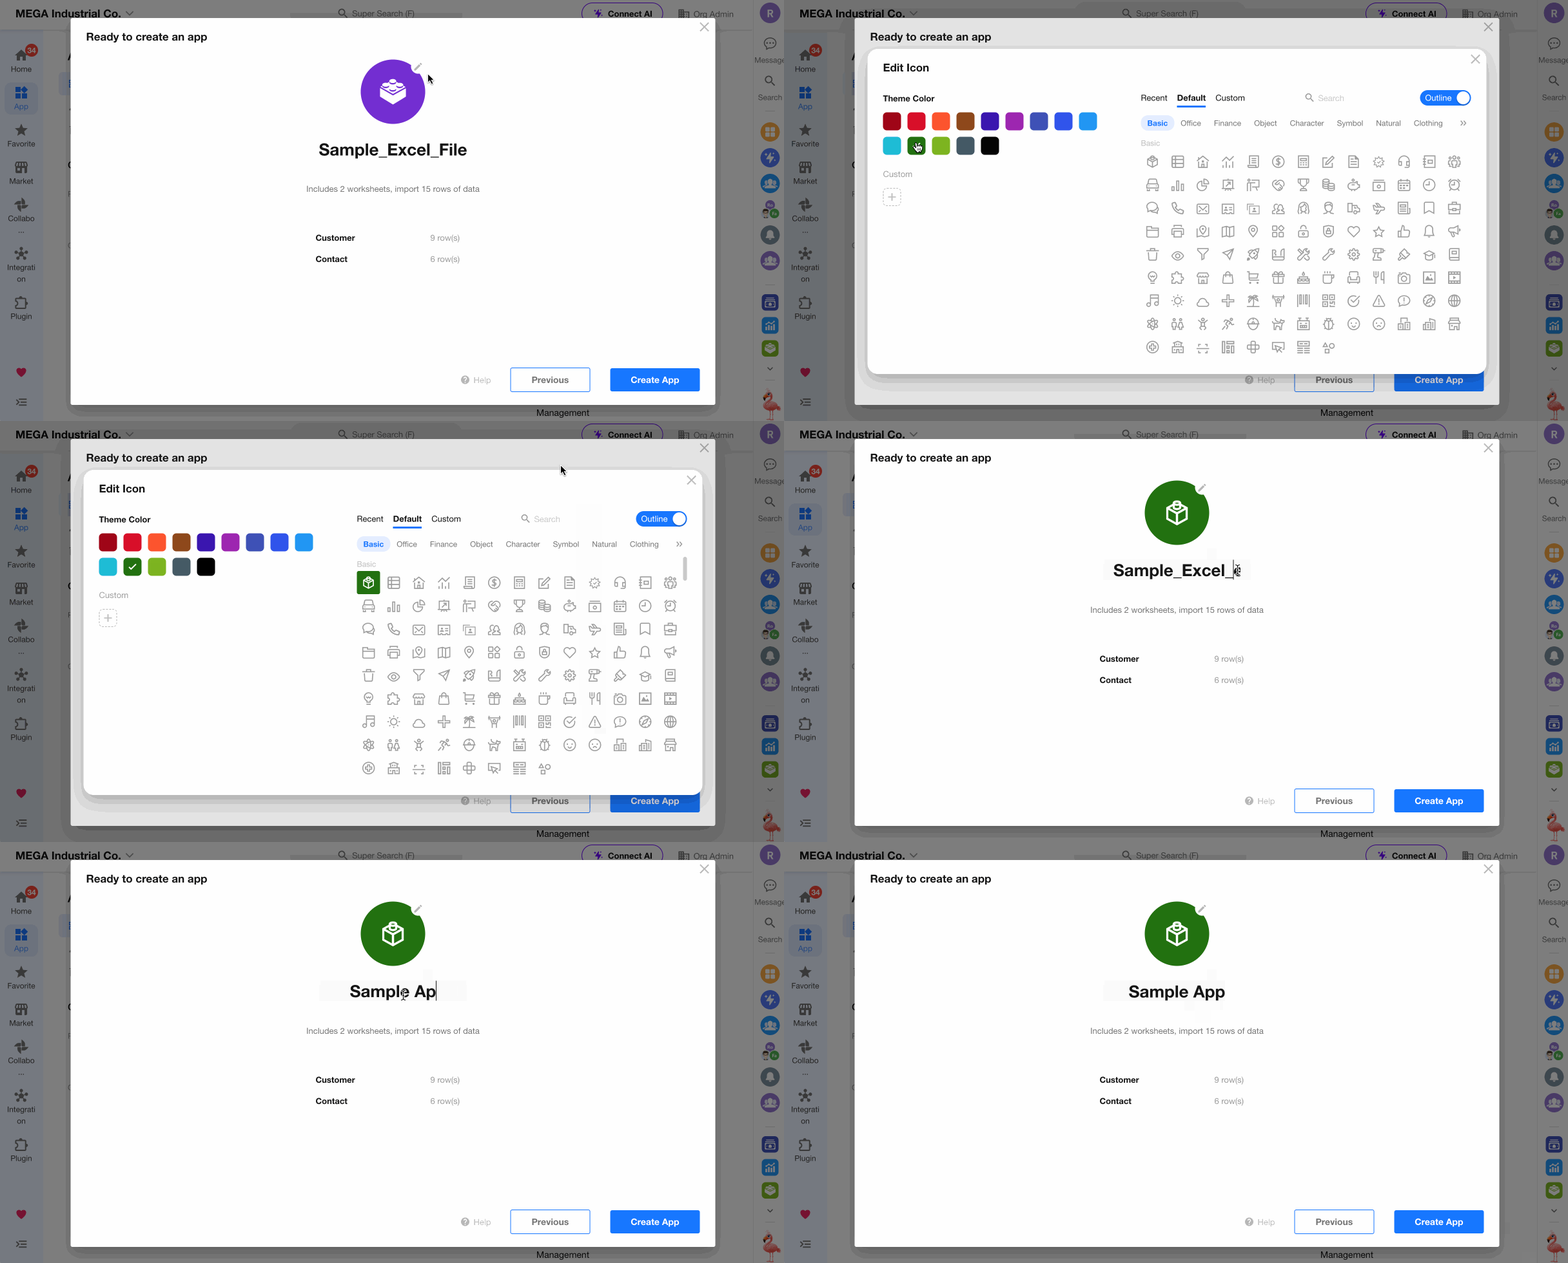
7. Create the Application and Verify the Results
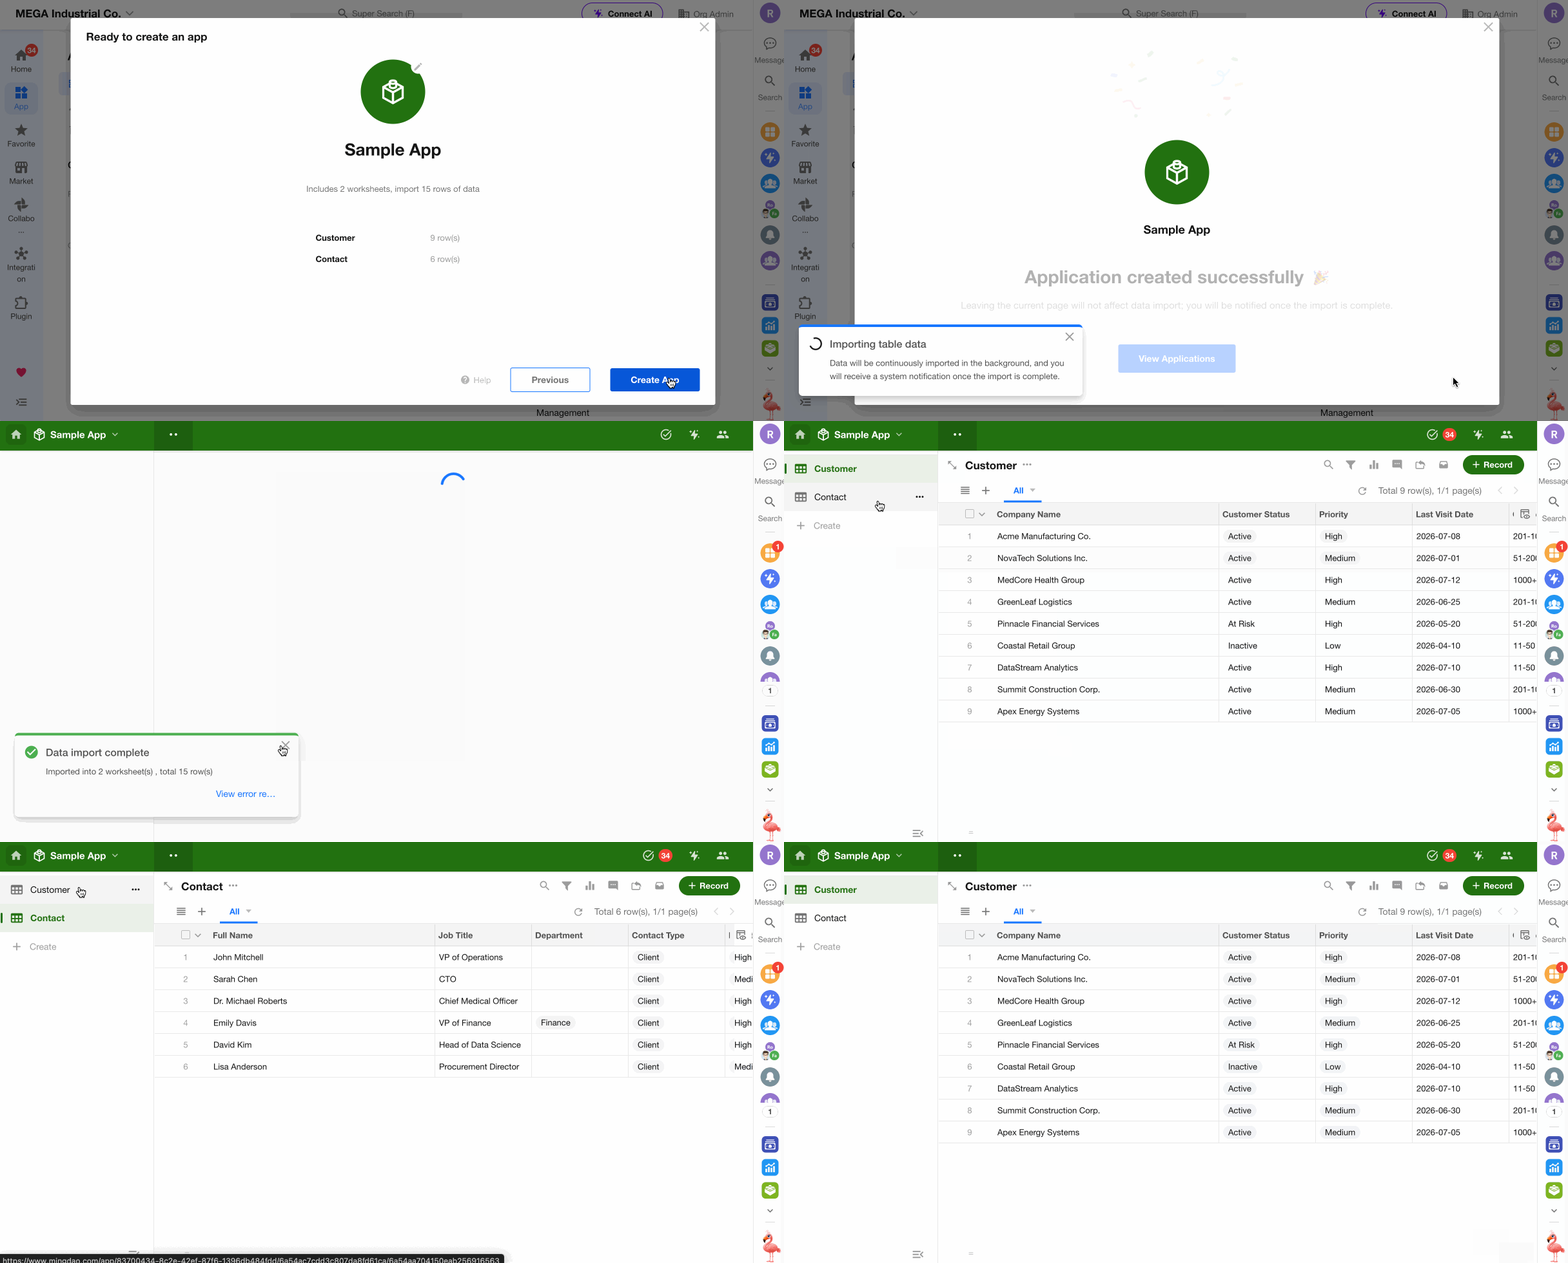
Relationships between worksheets cannot be created while creating an application. If your data includes related worksheets, first import the base worksheets to create the application, then import the related worksheets separately and configure the relationship fields.
Import Rules and Limits
- Sheets containing merged cells cannot be imported.
- Supports .xls, .xlsx, and .csv files up to 20 MB.
- Up to 20 sheets can be selected. Each sheet supports up to 20,000 rows and 200 columns.
- Free Edition: Up to 50,000 rows can be imported across all worksheets combined. Paid editions: No import row limit.
- By default, the leftmost field is used as the title field. If it is not a valid title field type, the system automatically selects the first eligible field from left to right.
- Only Number, Date, and Boolean (mapped to a Check item field by default) are automatically recognized. All other fields are imported as Text fields.
Create a Worksheet from Excel
1. Select Create from Excel and Choose the Excel File
Click + App Item in the application menu, then select Create from Excel. Select or drag the target file into the dialog.
Since the Customer and Contact worksheets have already been created, this example imports only the Visit Plan sheet.
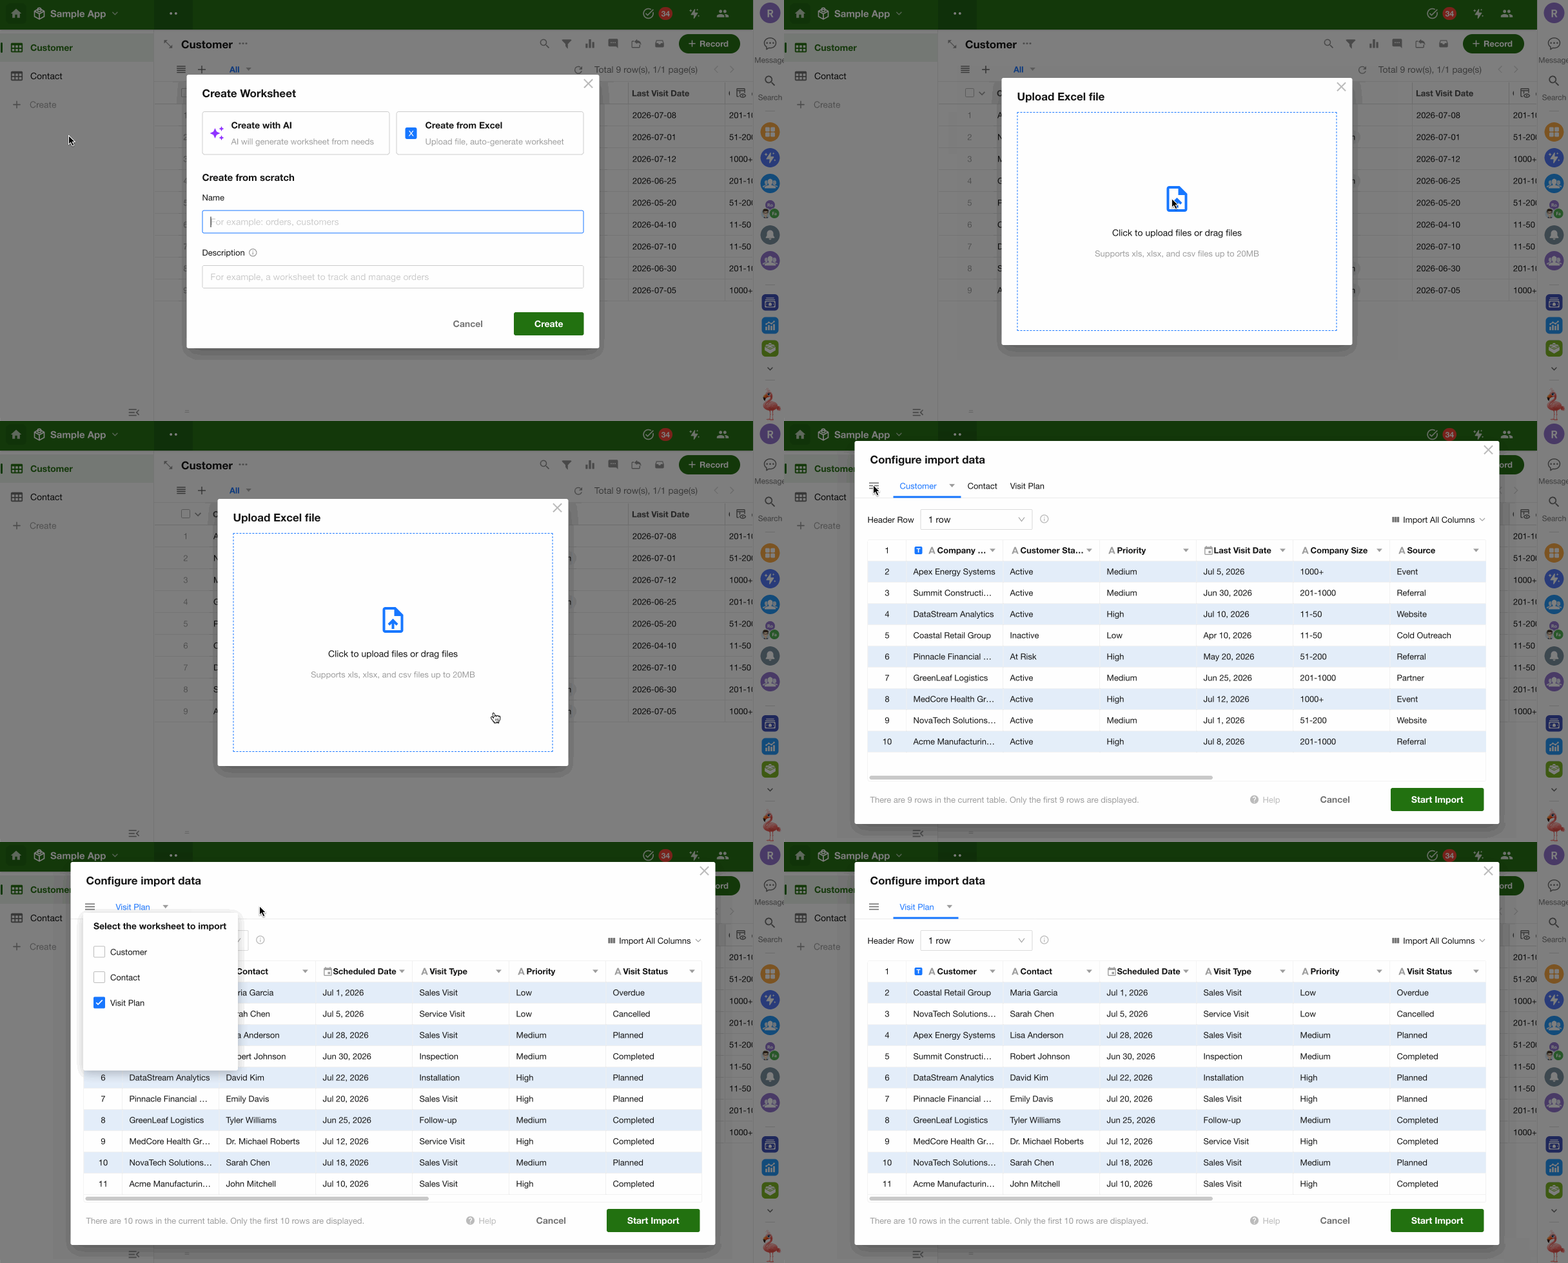
2. Select the Sheet to Import and Confirm the Worksheet Name
The Customer and Contact worksheets were created during the previous import, so this time only the Visit Plan sheet needs to be imported.
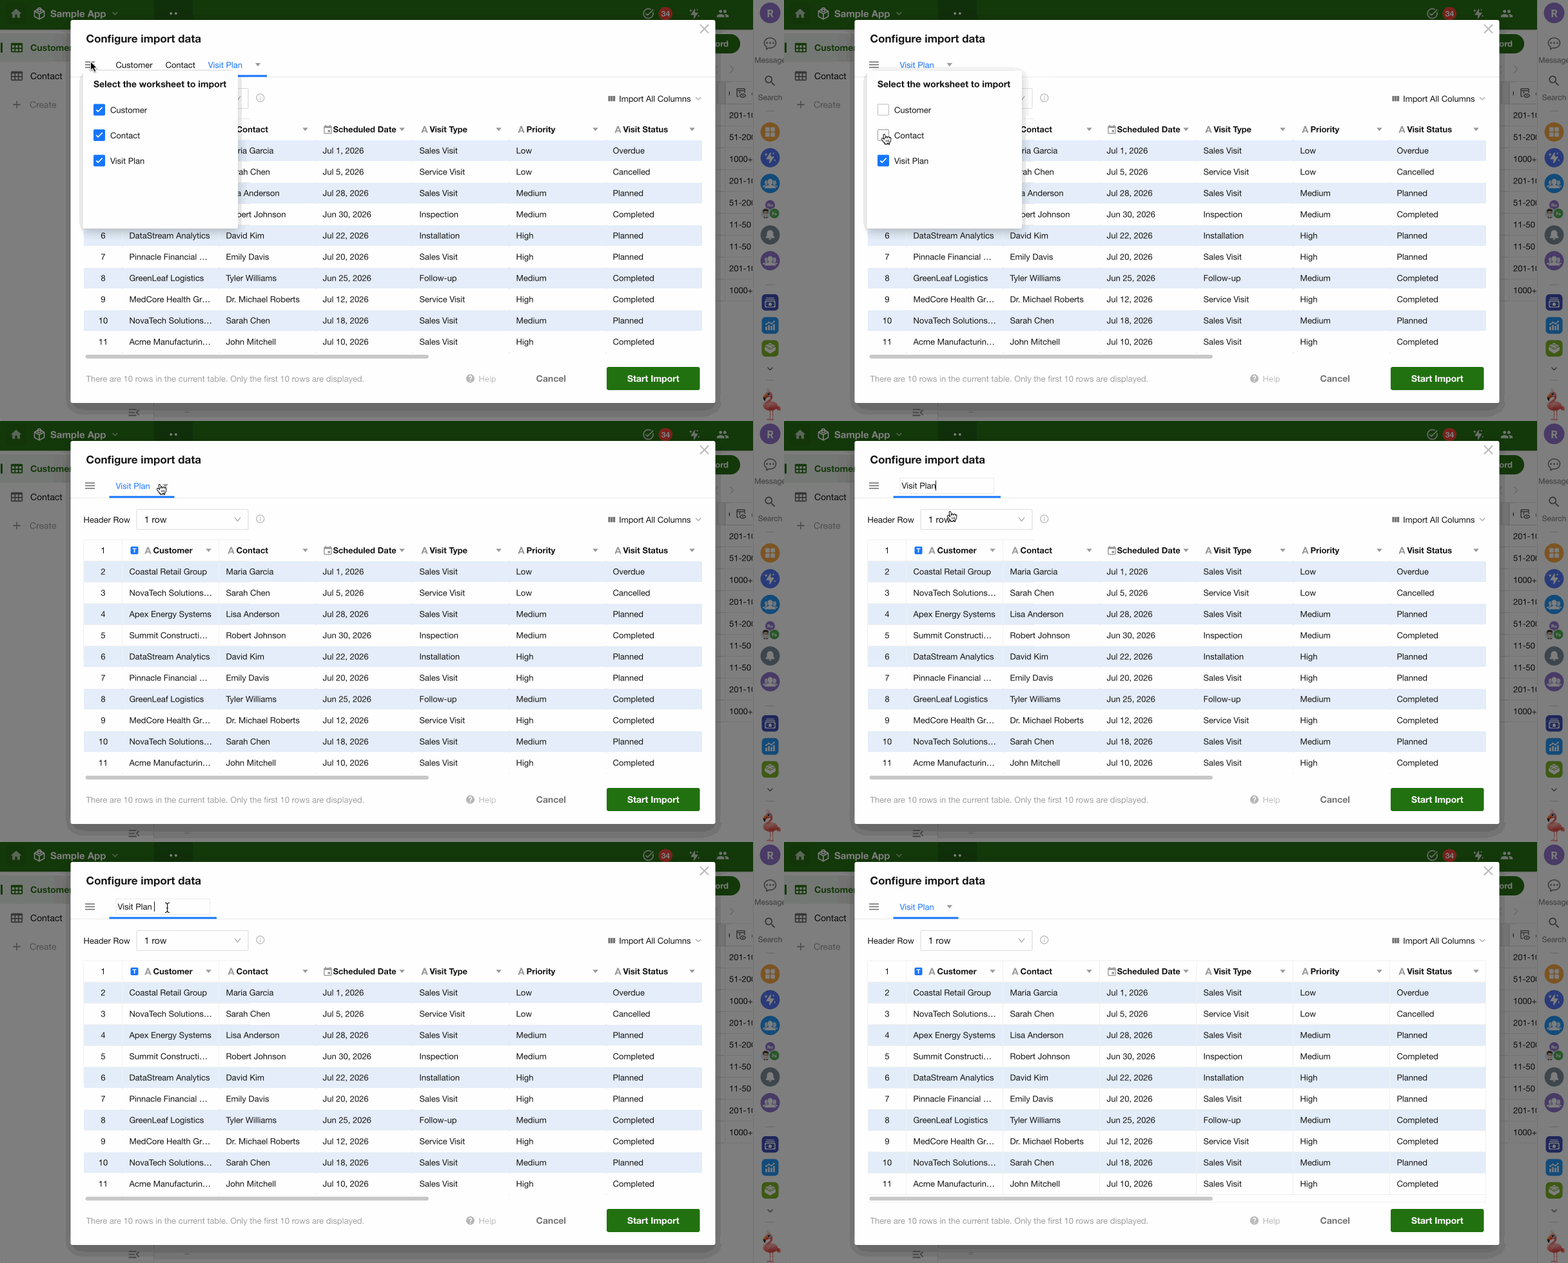
3. Select the Header Row and Columns to Import
Choose one row in the Excel file as the header row. Only the data below the selected row will be imported; the header row itself is excluded.
The values in the header row are used as the default field names in the worksheet.
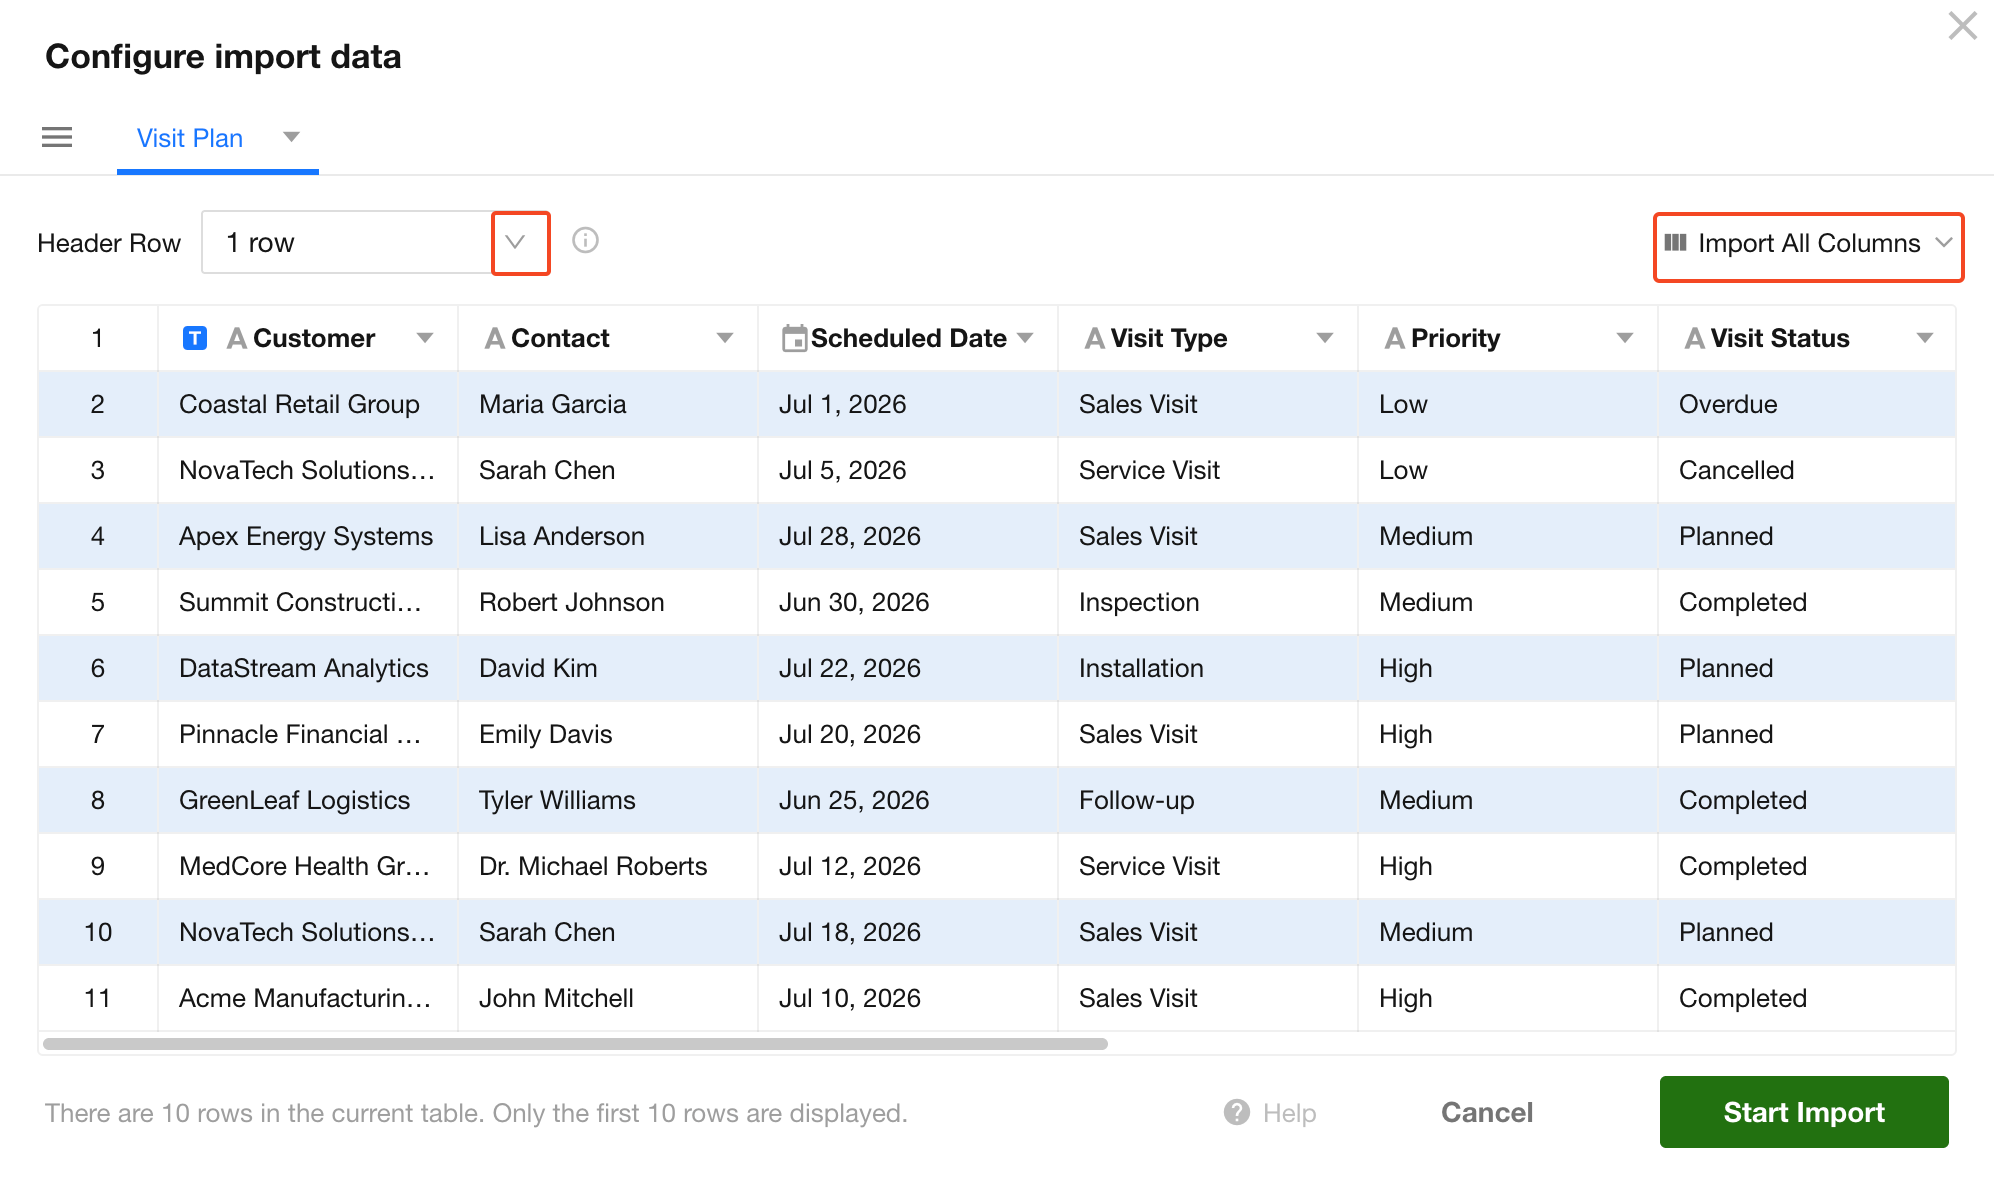
4. Confirm the Title Field and Configure Field Types and Names
You can quickly designate the title field and modify the name and type of each field.
Because the Visit Plans worksheet is related to the Customers and Contacts worksheets, you can configure the corresponding fields as relationship fields and map them to the existing worksheets. The related records will be linked automatically after the import.
When creating a worksheet, relationship fields can only be mapped to worksheets that already exist.
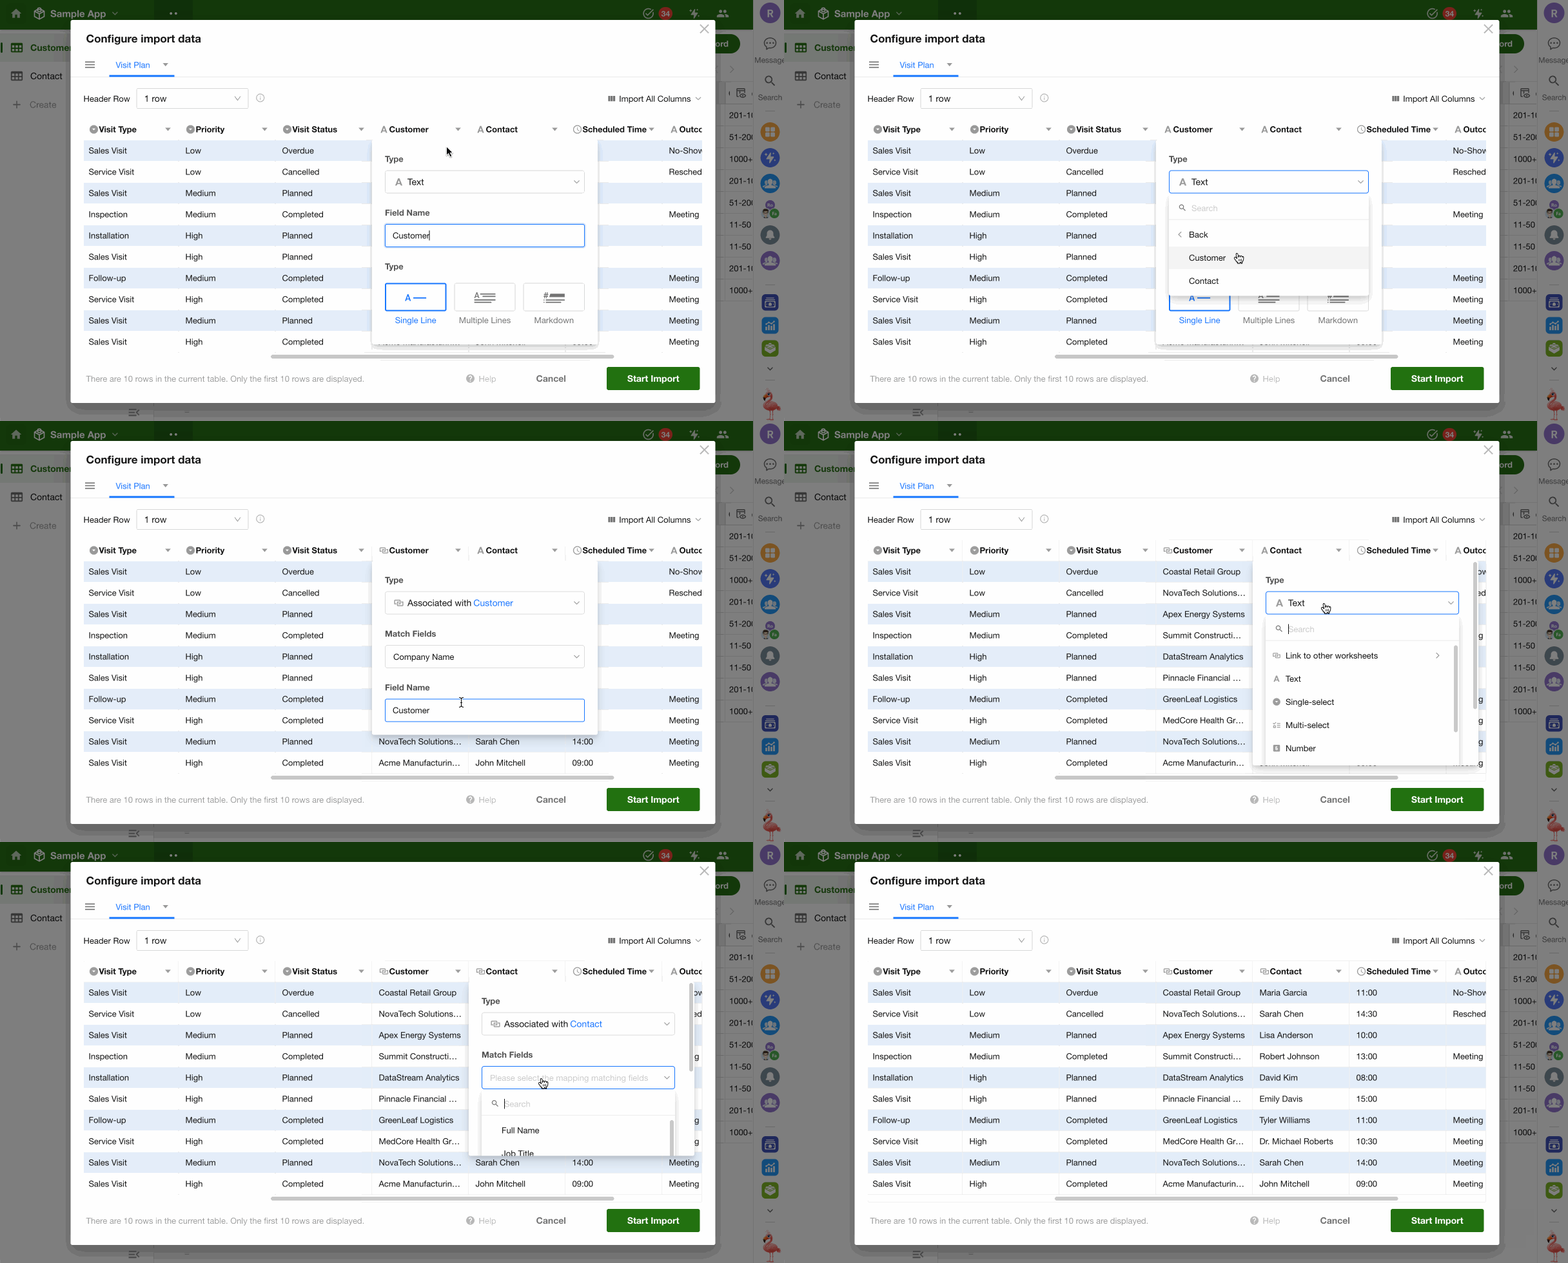
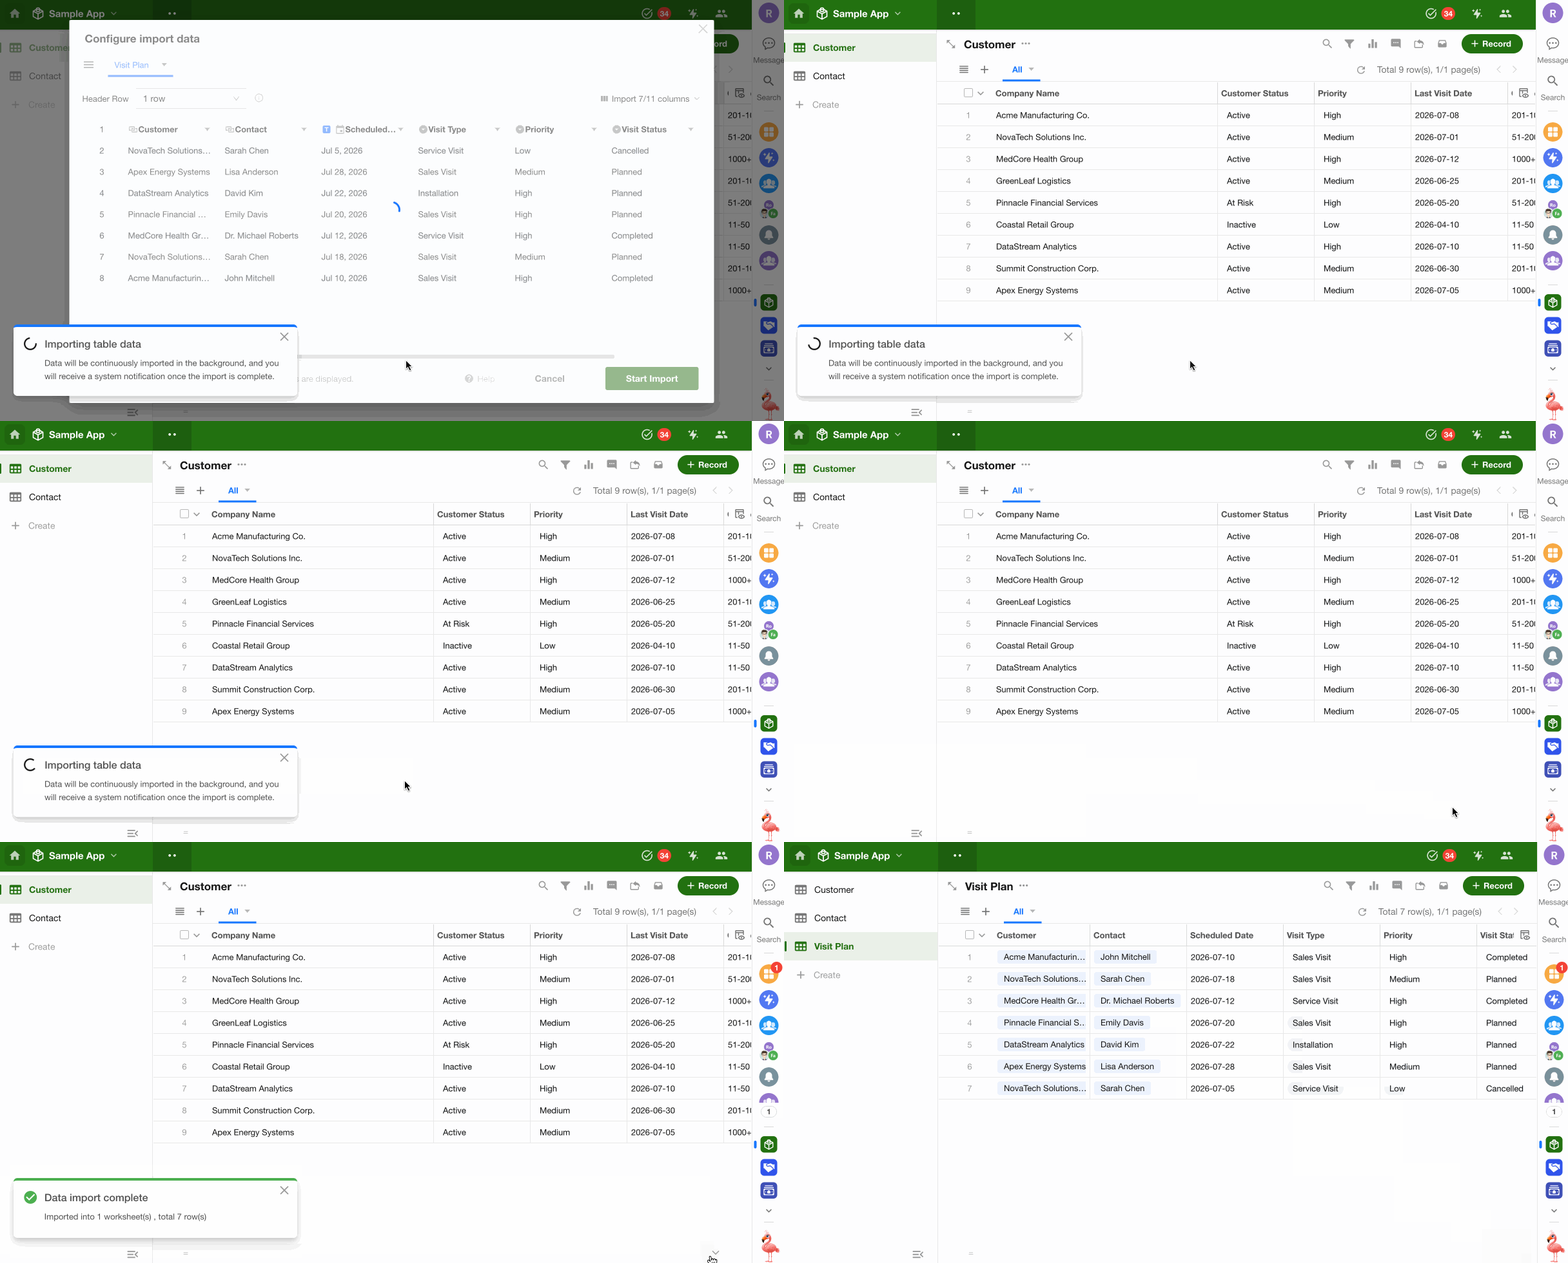
5. Start the Import
After the worksheet is created, review the imported data and verify that the field configuration is correct.
Was this document helpful?