Autonumber Field
The autonumber field automatically generates a custom-formatted identifier for each record. Common formats such as HT0001, HT-2020-09-10-001, and RK-Wuhan-20201010001 can all be achieved.
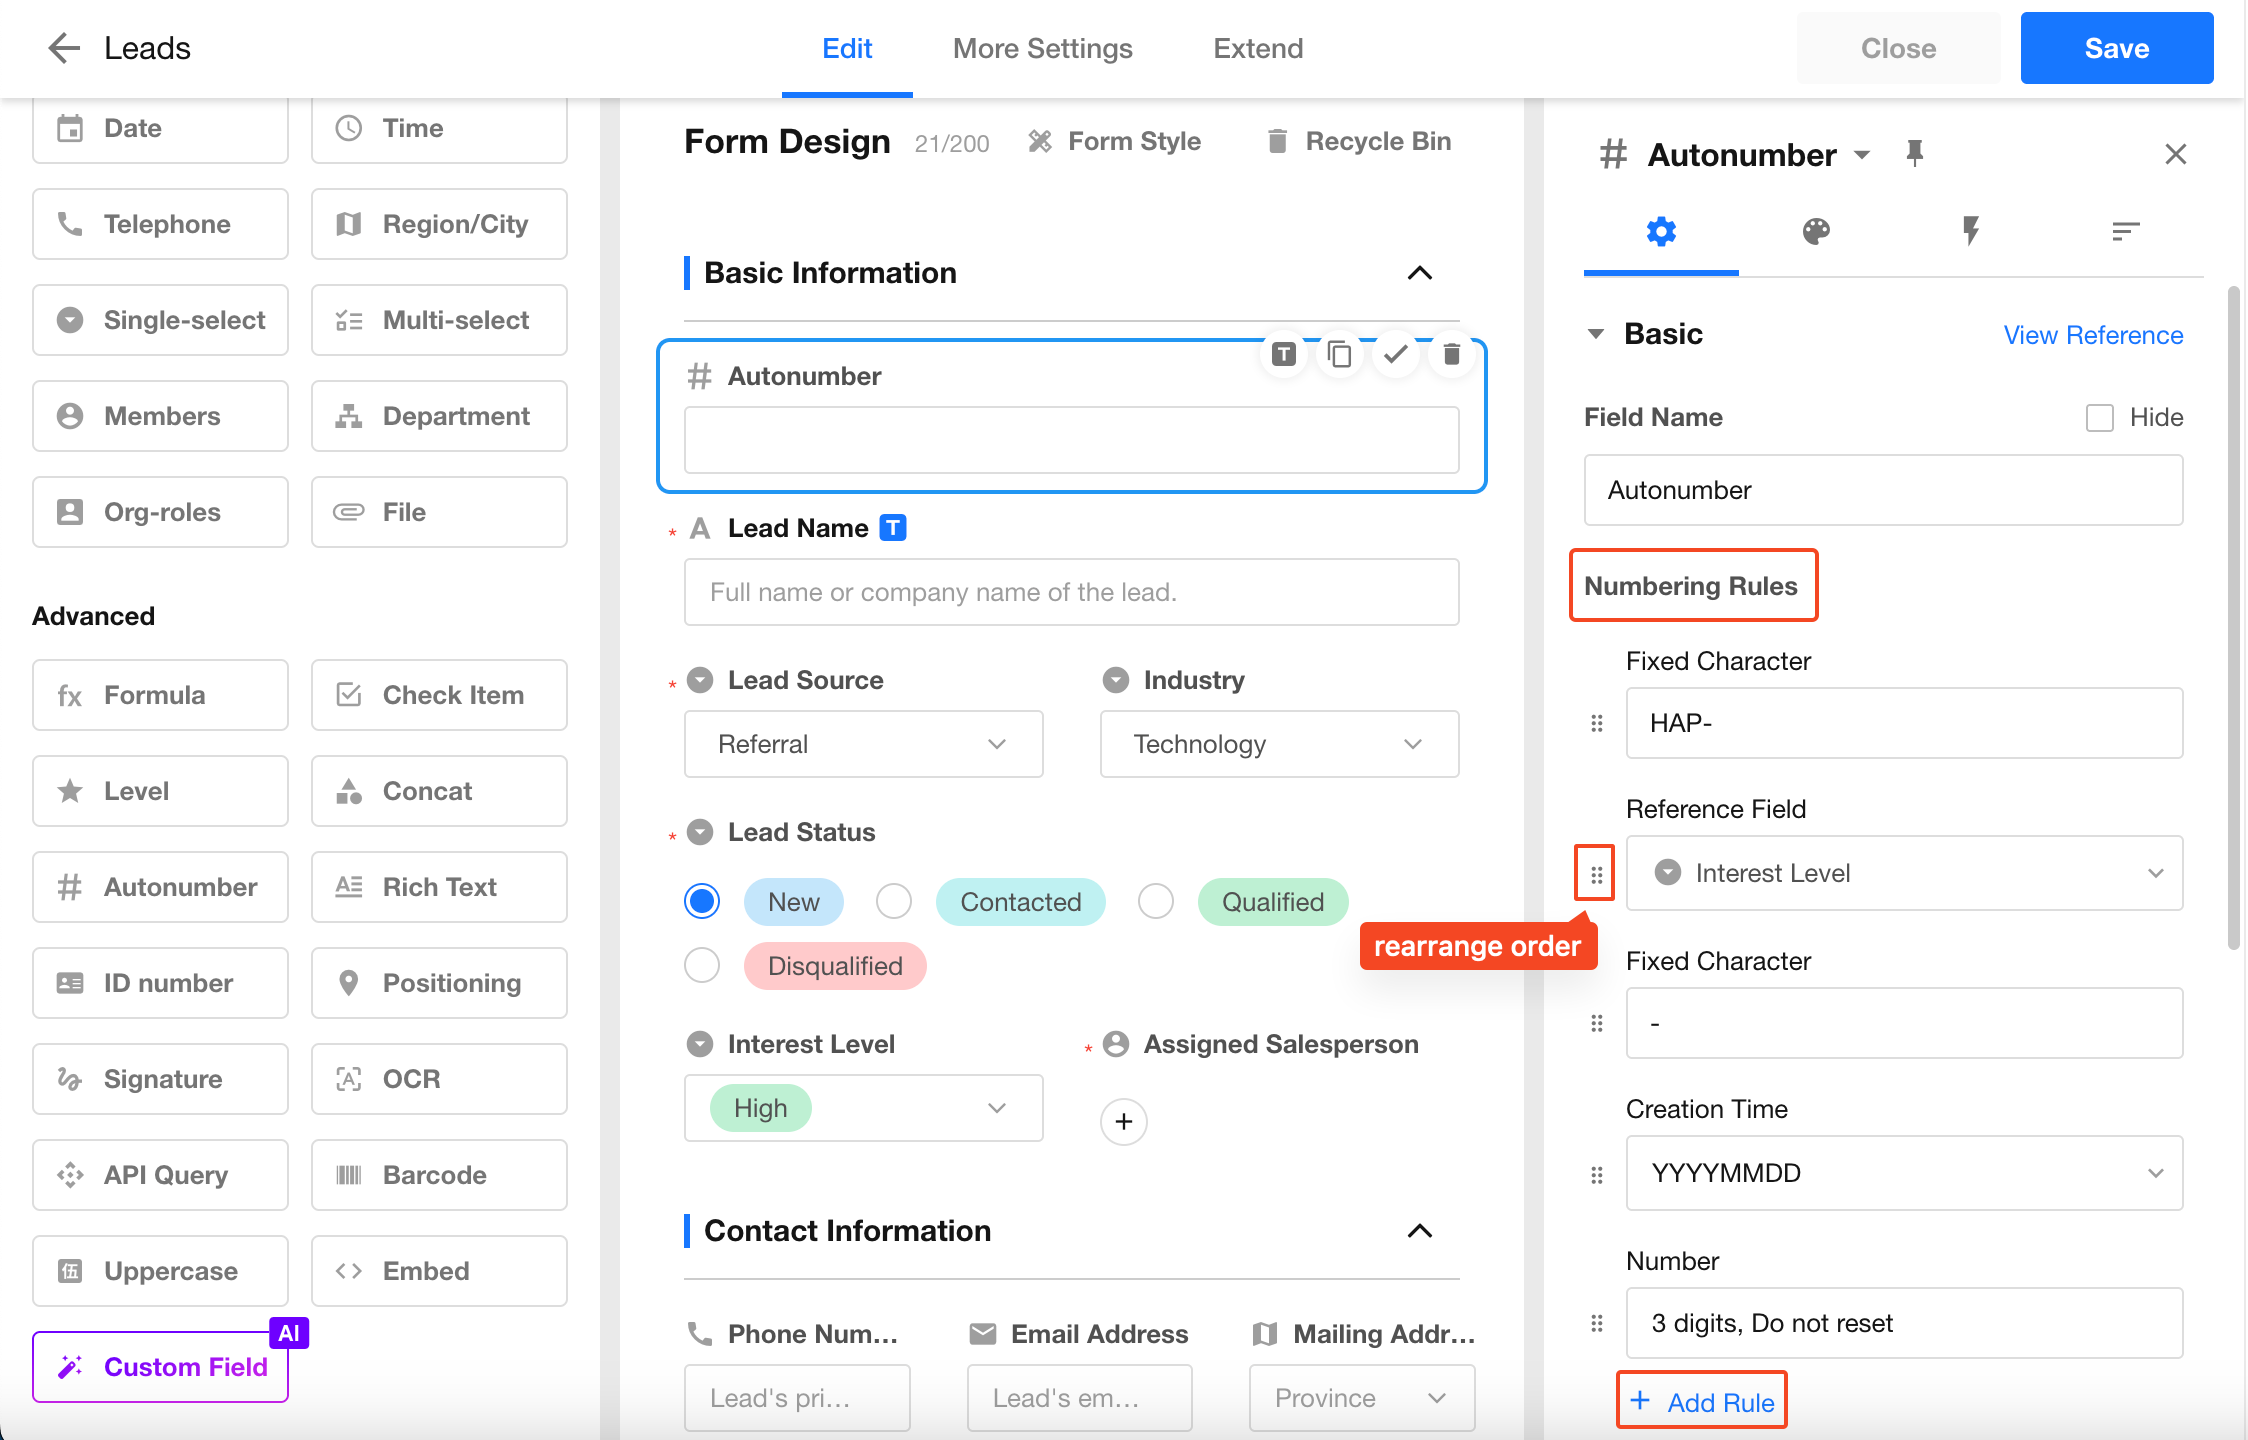
1. Configure Numbering Rules
An auto number can be composed of a sequence number, fixed character, referenced fields, and creation time. The sequence number is required and can be selected only once, while fixed character and referenced fields can be added multiple times. Their order can also be rearranged.
After modifying the numbering rule, it only applies to newly created records. Existing records retain their original numbers. Even if an existing record has an empty number, it will not be regenerated based on the new rule.
1. Sequence Number
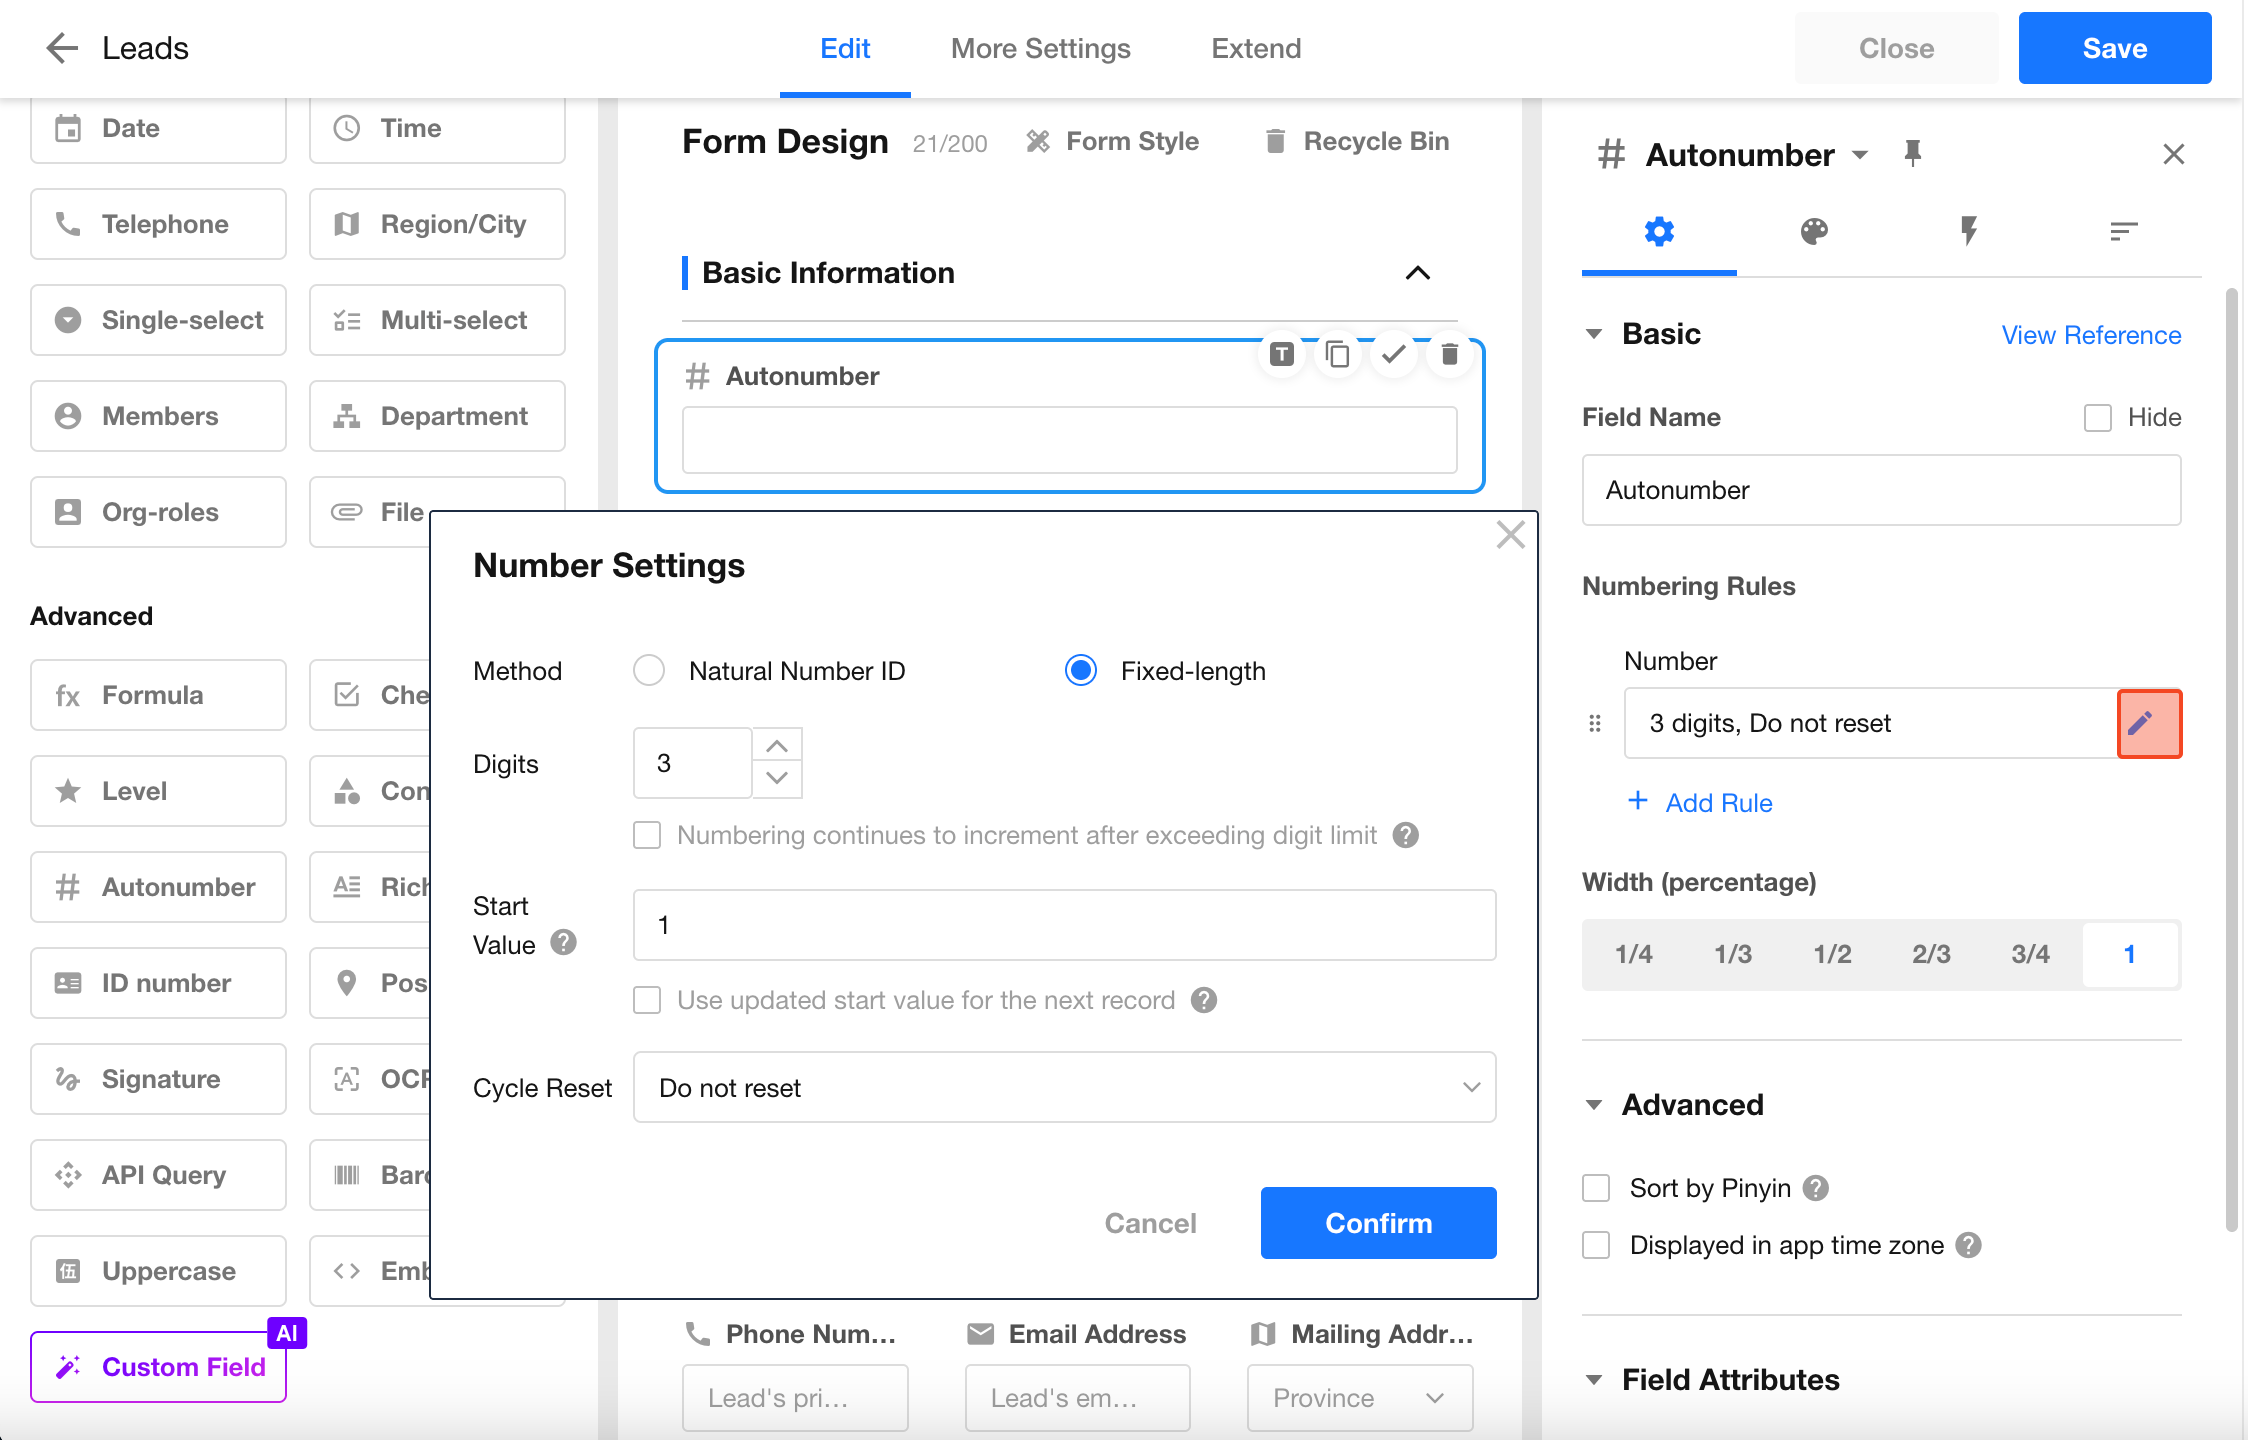
The sequence number is an auto-incrementing value with configurable format, digit length, starting value, and reset cycle.
Numbering Format
- Natural number: increments starting from 1
- Fixed-length number: pads with leading zeros when the digit length is not met
Digit Length
For example, if the digit length is set to 3, the sequence will be: 001, 002, ... 999.
- If "Continue incrementing beyond digit length" is enabled, the next number after 999 will be 1000
- If disabled, the sequence will reset to 001
Starting Value
Defines the initial value of the sequence.
- If set to 1, the sequence will be: 1, 2, 3, 4...
- If set to 5, the sequence will be: 5, 6, 7, 8...
Record number = Starting value - 1 + Total number of created records (including deleted records and the current record)
By default, the starting value is 1. After creating 5 records, the maximum number is 5. If you then change the starting value to 30 and create a new record, its number will be 30 + 5 = 35.
If you want new records to start from 30, you can reset the auto number. After resetting, numbering will begin from 30.
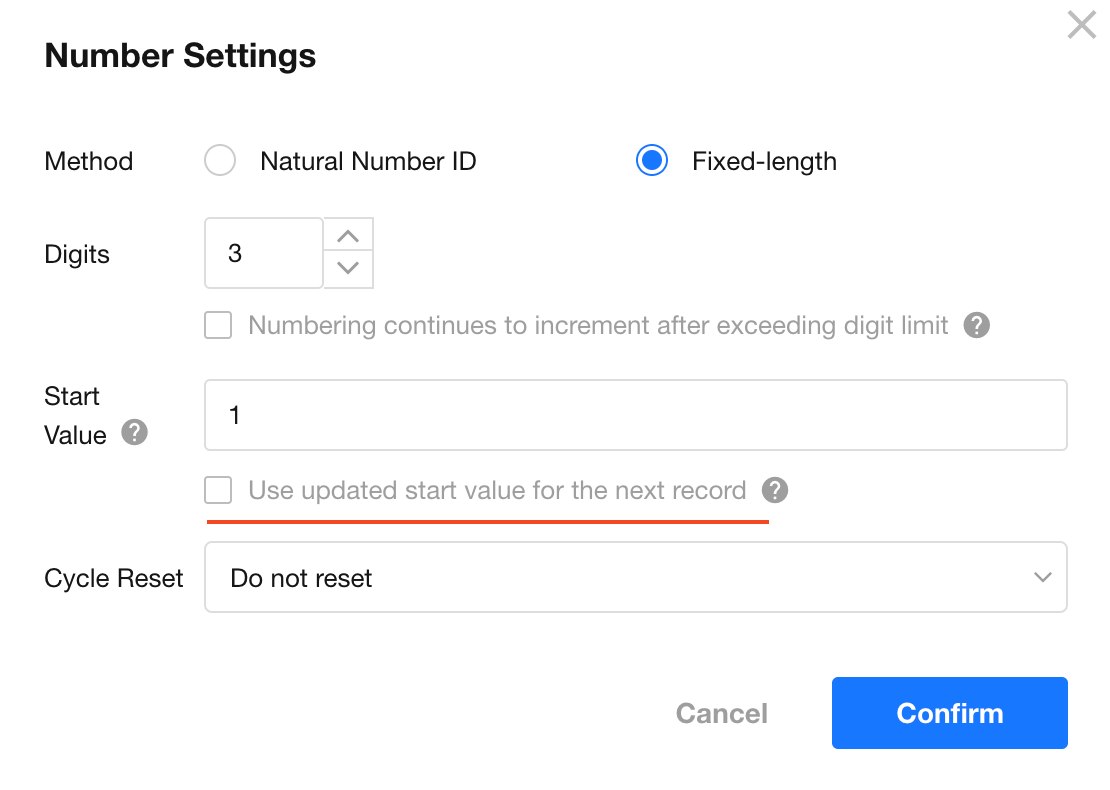
If "Use updated start value for the next record" is enabled, the next record will start directly from the new starting value without considering existing records. For example, if the current sequence has reached 10 and you set the starting value to 1, the next record will be numbered 1.
Reset Cycle
In some scenarios, numbering needs to reset periodically (e.g., restaurant queue numbers resetting daily).
Available reset cycles:
- Daily
- Weekly
- Monthly
- Yearly
Once the reset time is reached, numbering restarts from the starting value.
For example, if the reset cycle is set to daily and the starting value is 1, records created the next day will start from 1 again.
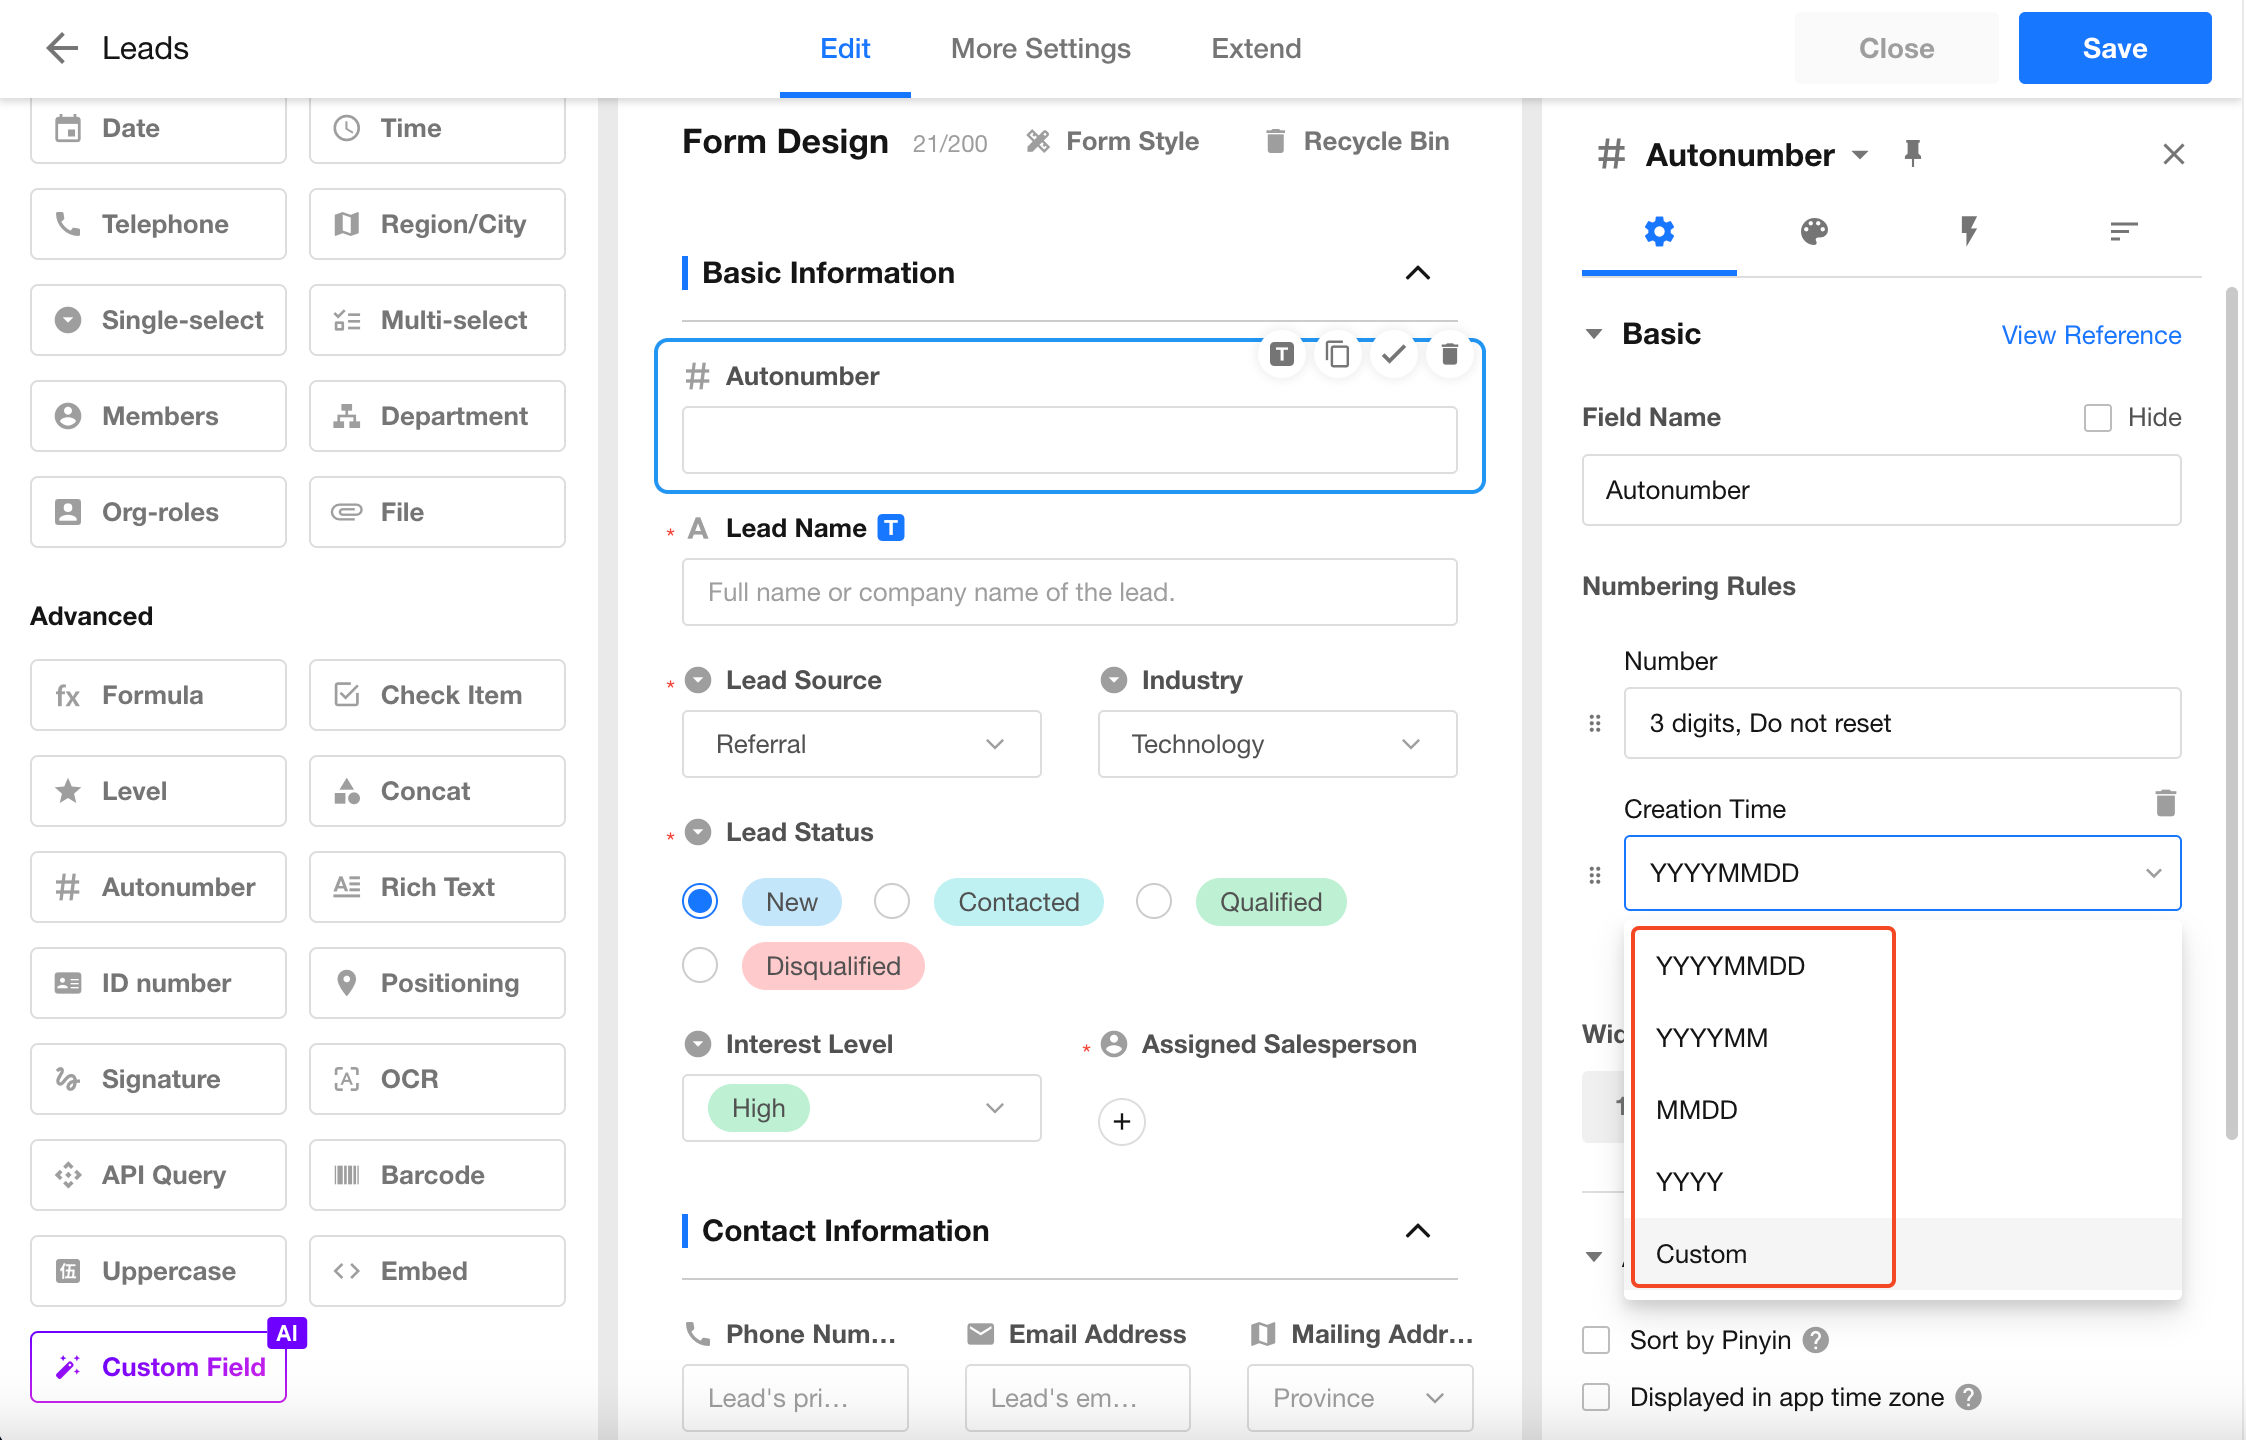
2. Creation Time
Sometimes the record creation time needs to be included in the number. You can select predefined formats or customize the format.
3. Fixed Character
Fixed character serves two main purposes:
-
As a separator
For example, use “-” to connect the creation date and sequence number -
As a business identifier
Different business processes can share the same numbering rule but be distinguished by a prefix
4. Referenced Fields
You can include worksheet fields in the numbering rule to further distinguish business scenarios. Multiple fields can be referenced.
Supported field types:
- Text field
- Option field
- Date field
- Region/City field
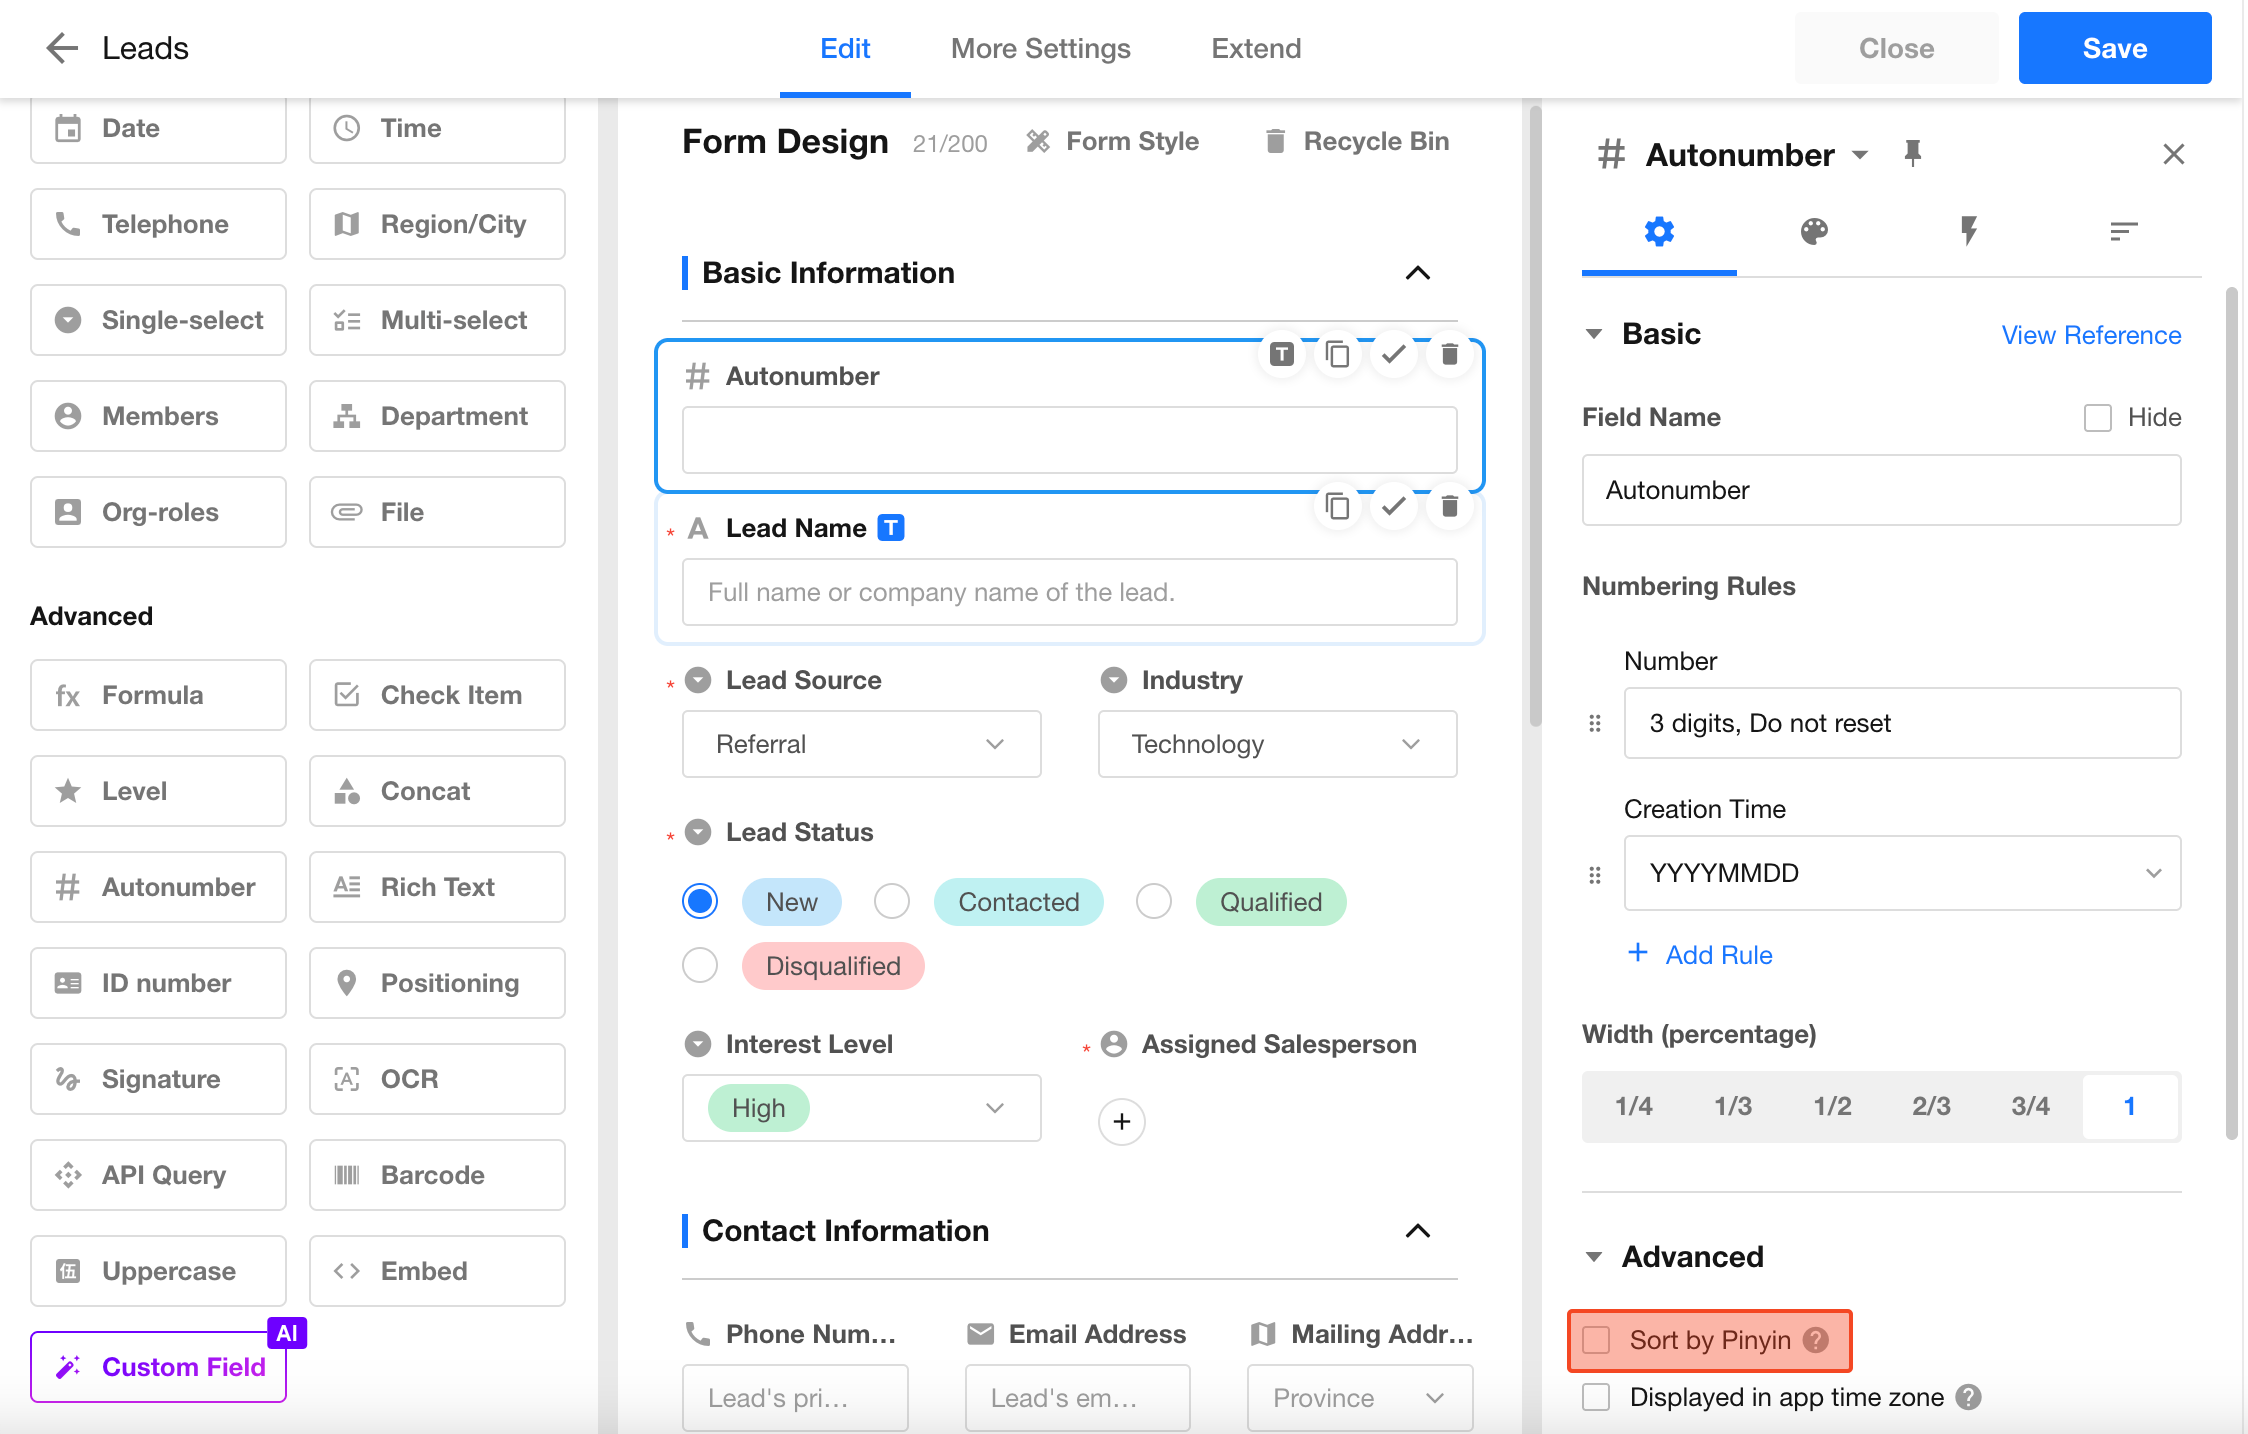
Sort by Pinyin
When enabled, if the number contains Chinese characters, sorting will follow Pinyin (A–Z).
Note: When this option is enabled, sorting indexes will not take effect. If Pinyin sorting is not required, it is recommended to leave it disabled.
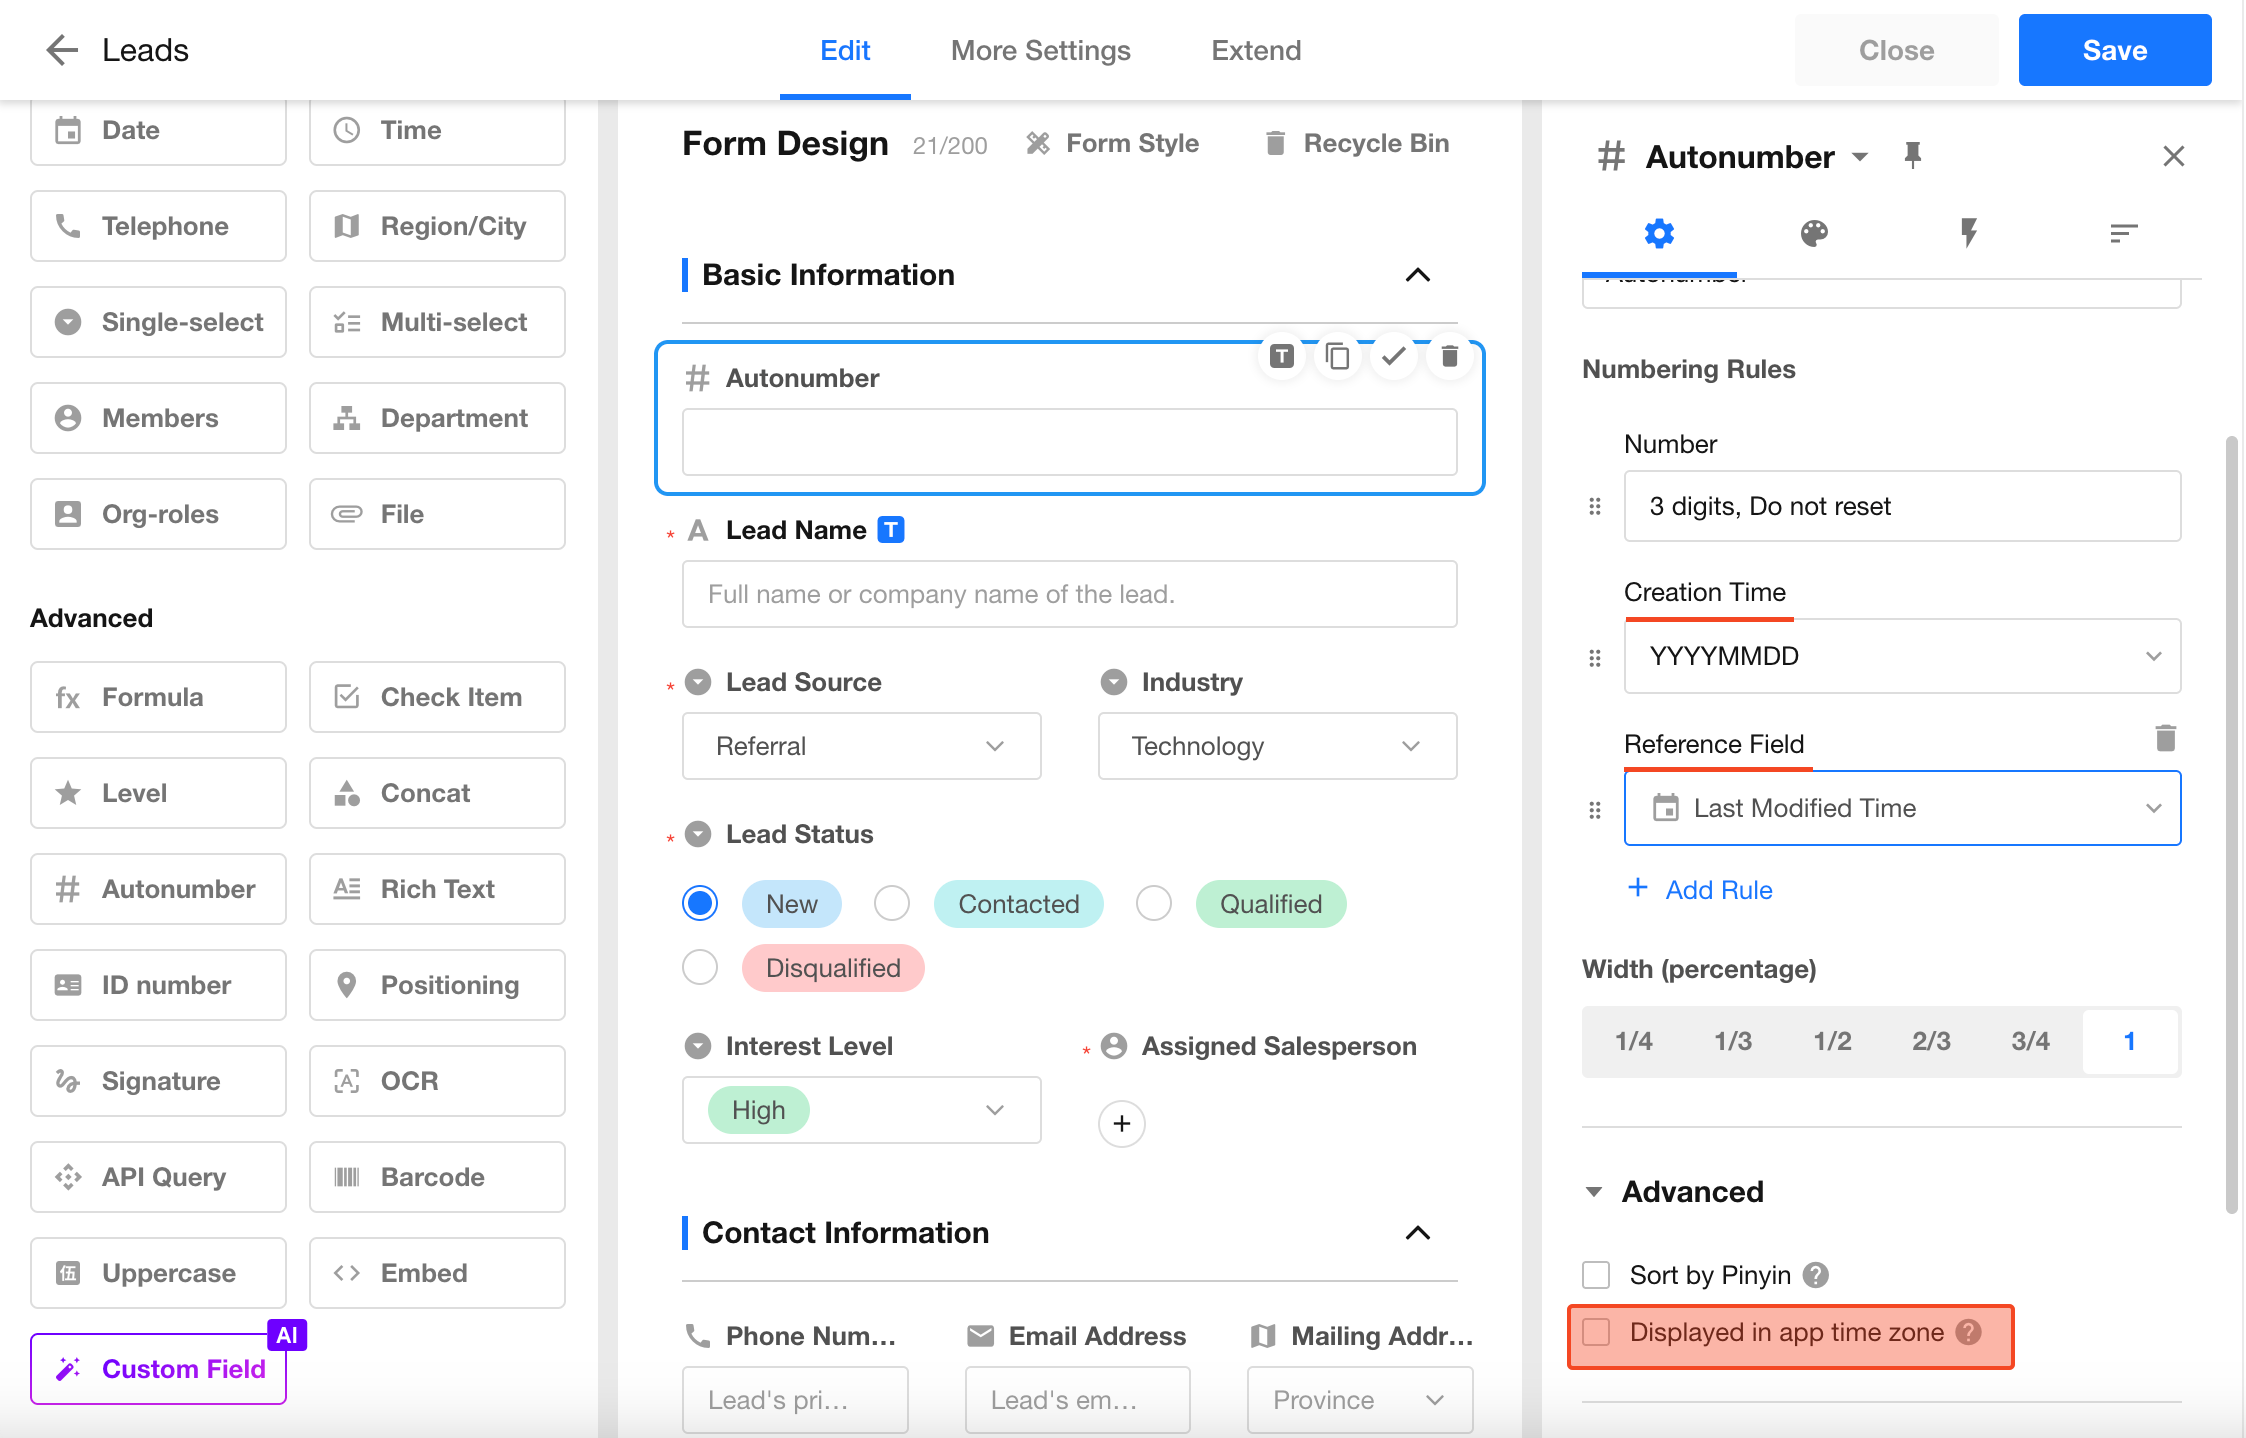
Displayed in App Time Zone
When Displayed in app time zone is enabled, any time-related fields in the numbering rule will be stored based on the app’s time zone. After saving, changing the app time zone will not affect existing numbers.
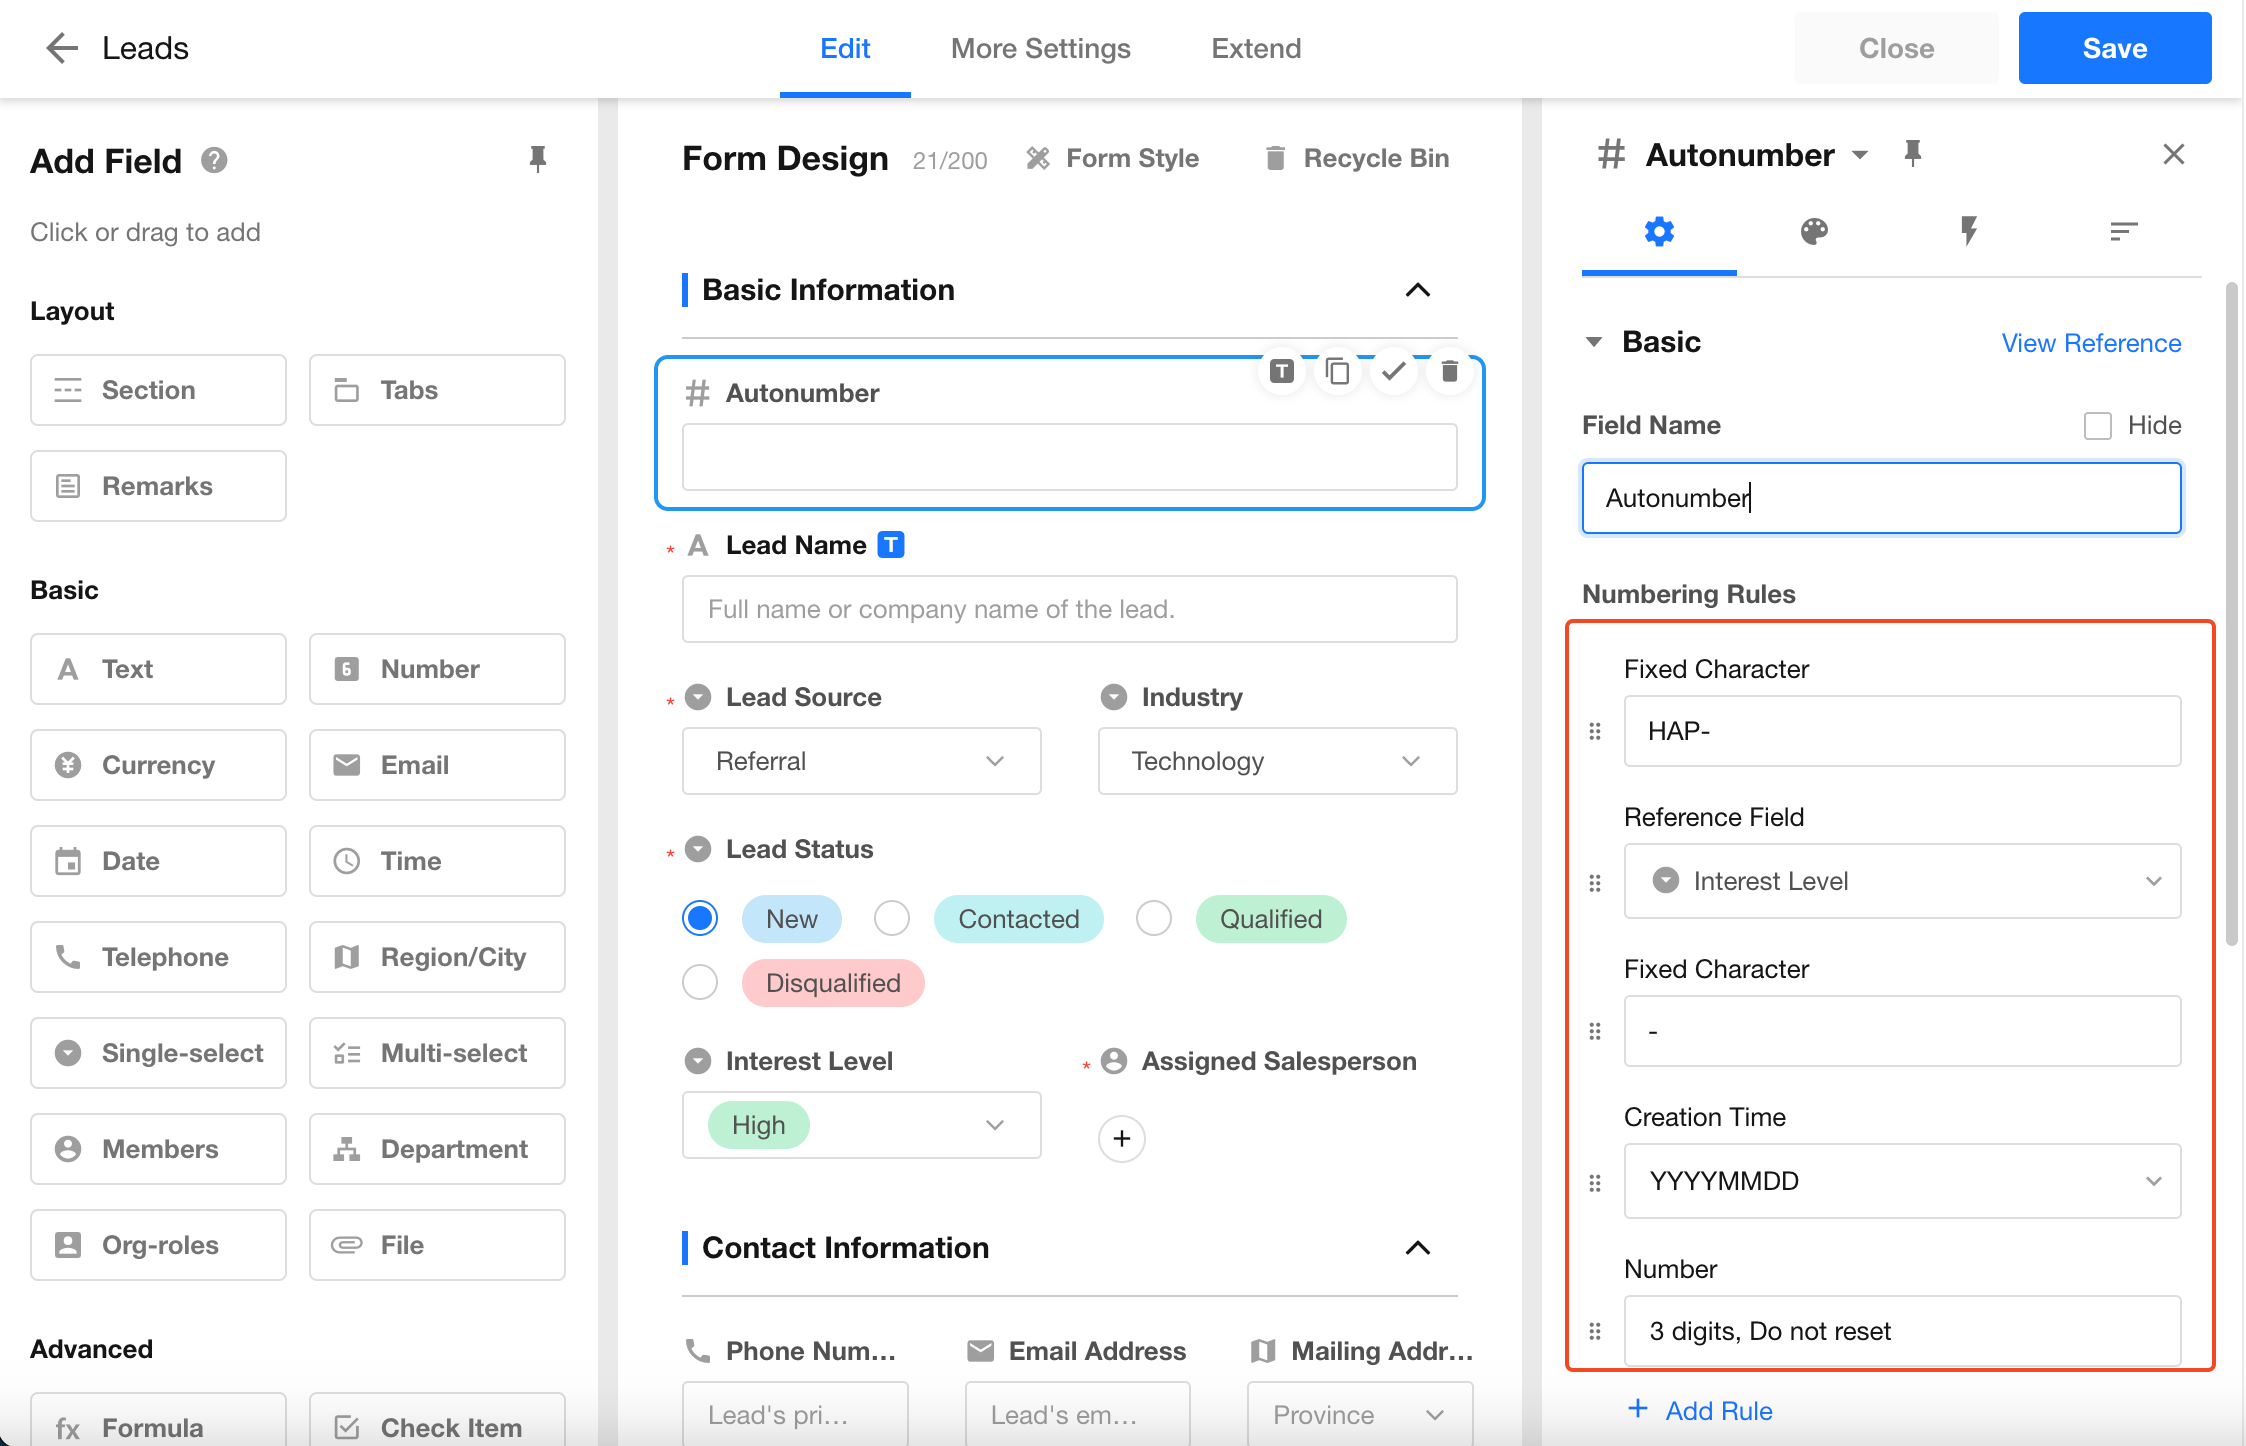
II. Configuration Example
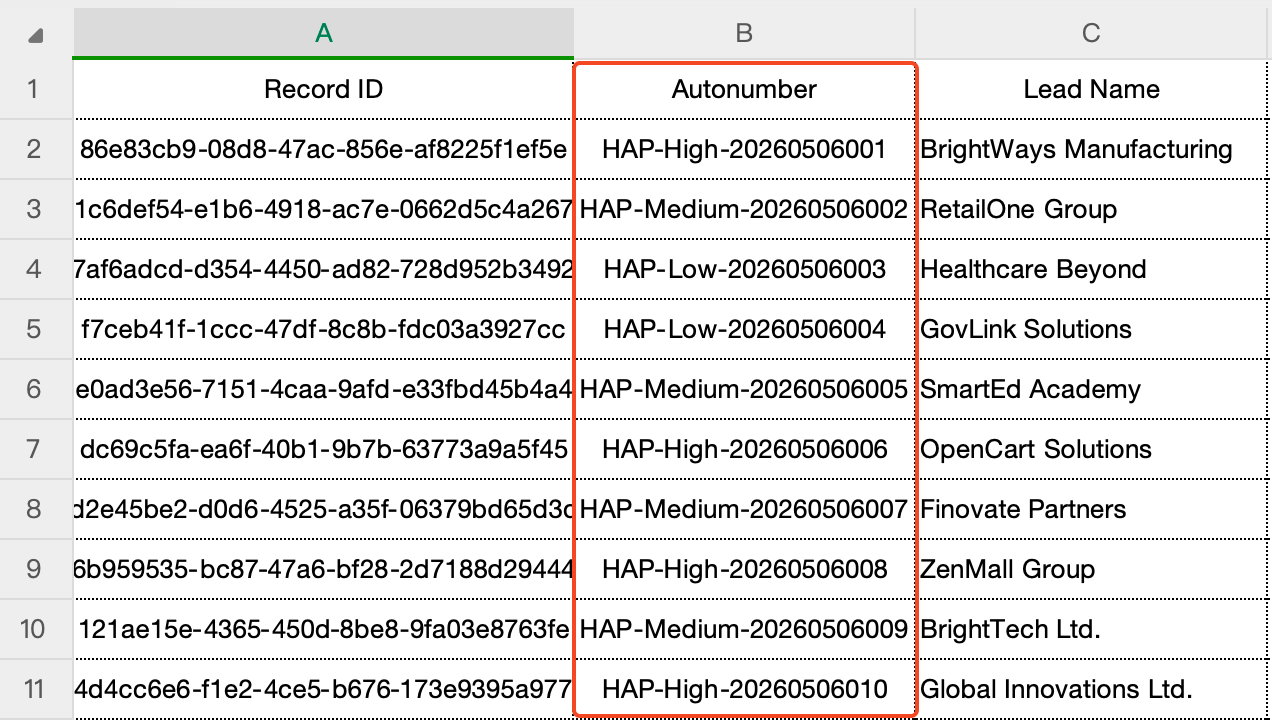
For example, to generate a record number in the format HAP-High-20260506001, configure the rule as follows:
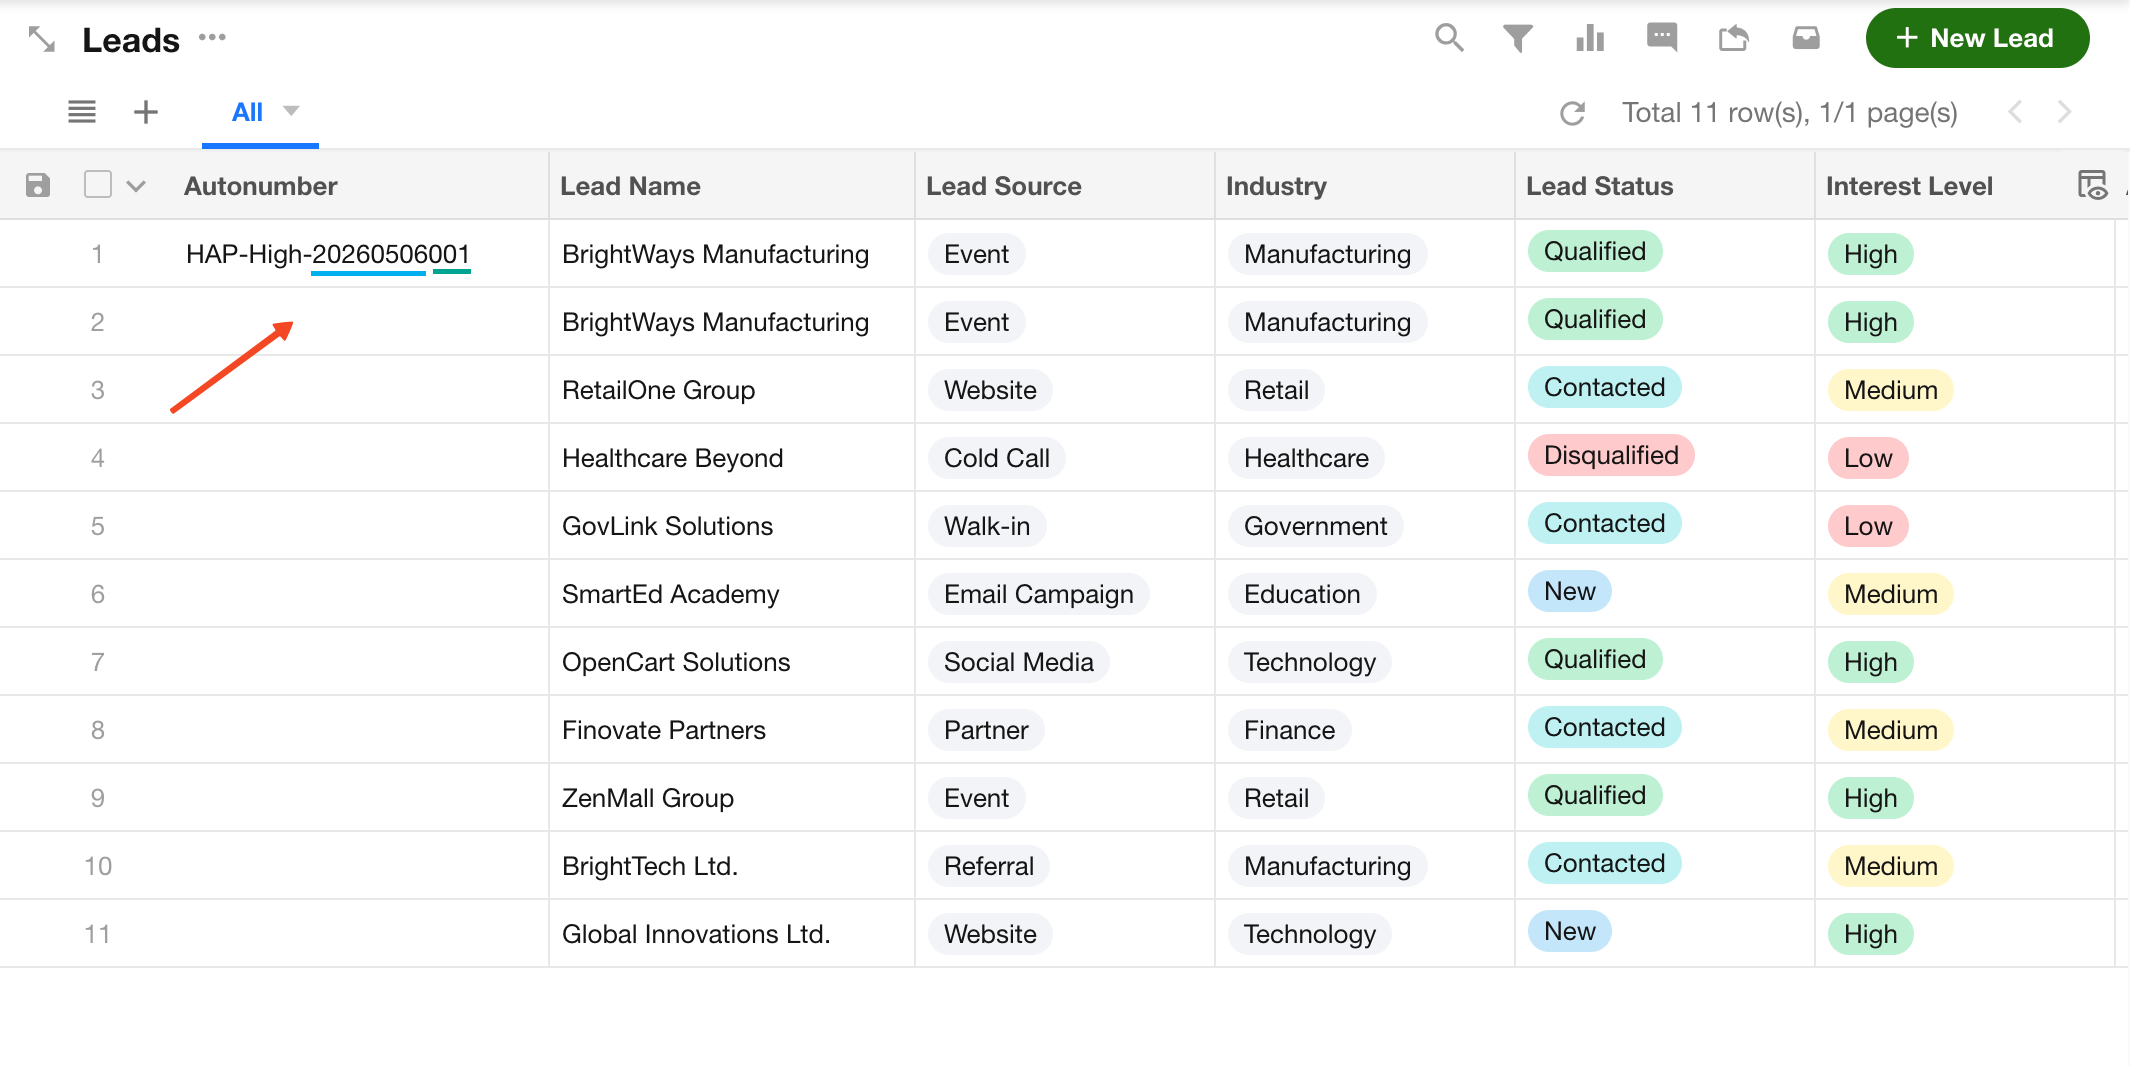
Result:
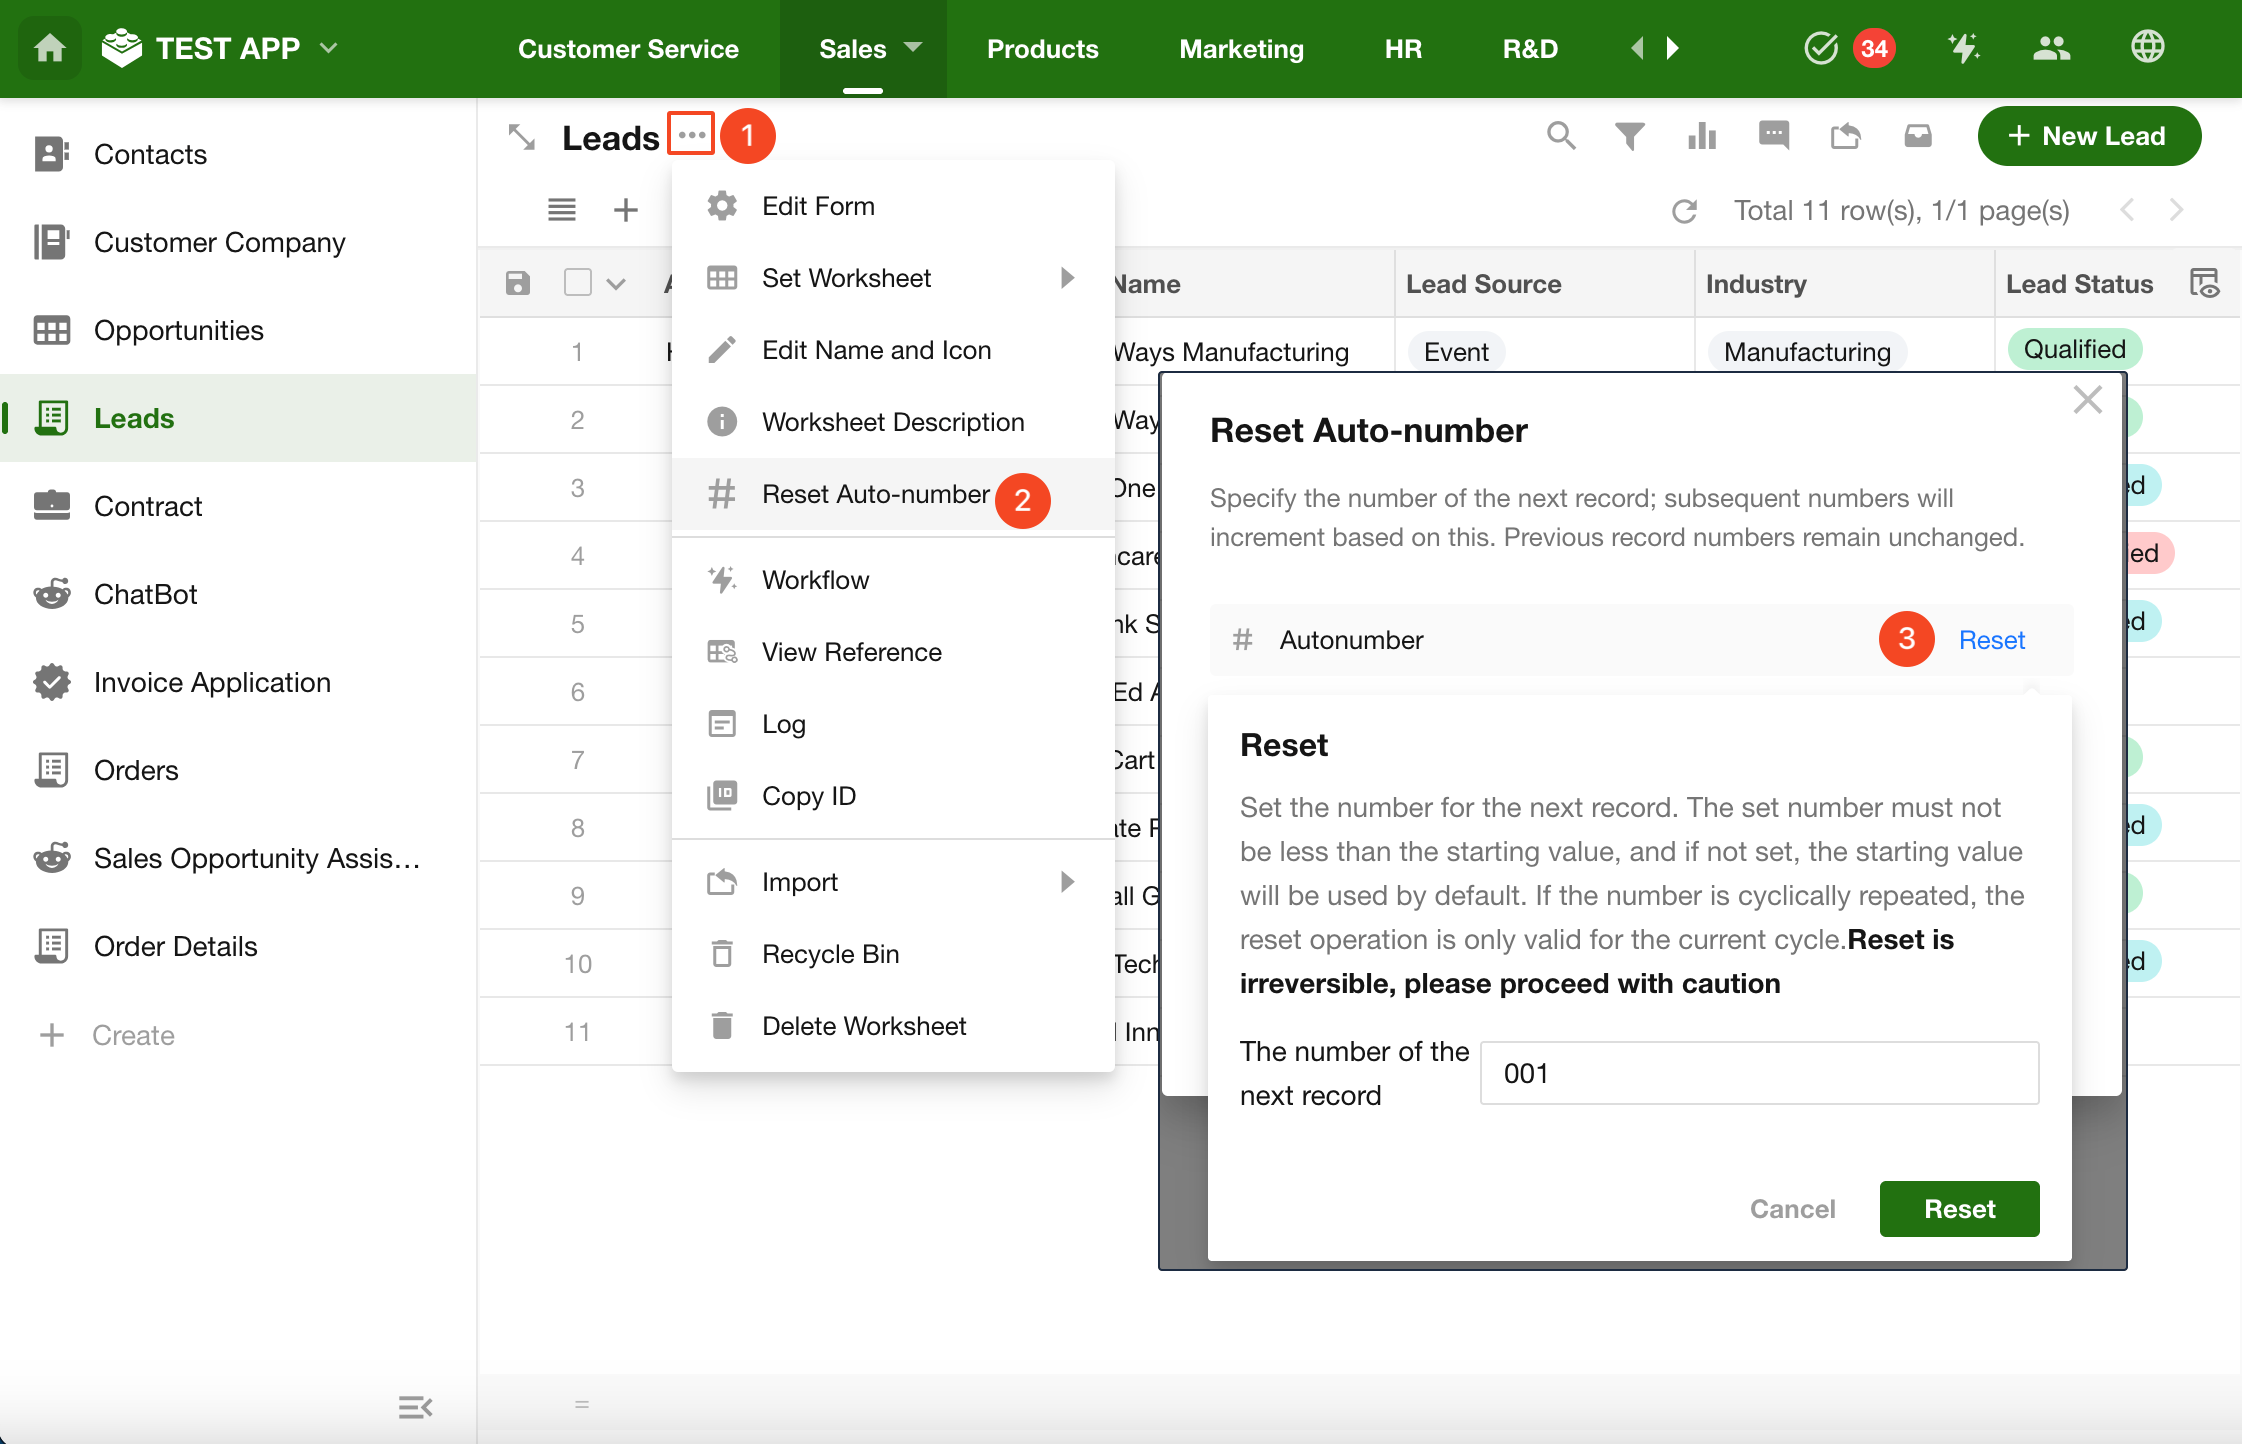
III. Reset Auto Number
To reset the auto number, click the More button next to the worksheet name, then select Reset Auto Number. After resetting, new records will start numbering again from the configured starting value. This action cannot be undone.
For example, if the current number has reached MD098, after resetting, new records will start from MD001. (If the starting value is set to 5, numbering will start from MD005.)
- If the numbering is set to reset by cycle, the reset operation only applies to the current cycle.
- Since numbering can be reset, it may not always be unique.
During reset, you can directly specify the number for the next record. If "The number of the next record" is selected, the default value is the starting value, but you can manually enter a custom value. The next created record will use this value.
IV. FAQs
How to Update Auto Numbers for Existing Records
As mentioned earlier, modifying the numbering rule does not automatically update existing records. You can update them using either Excel import or a workflow.
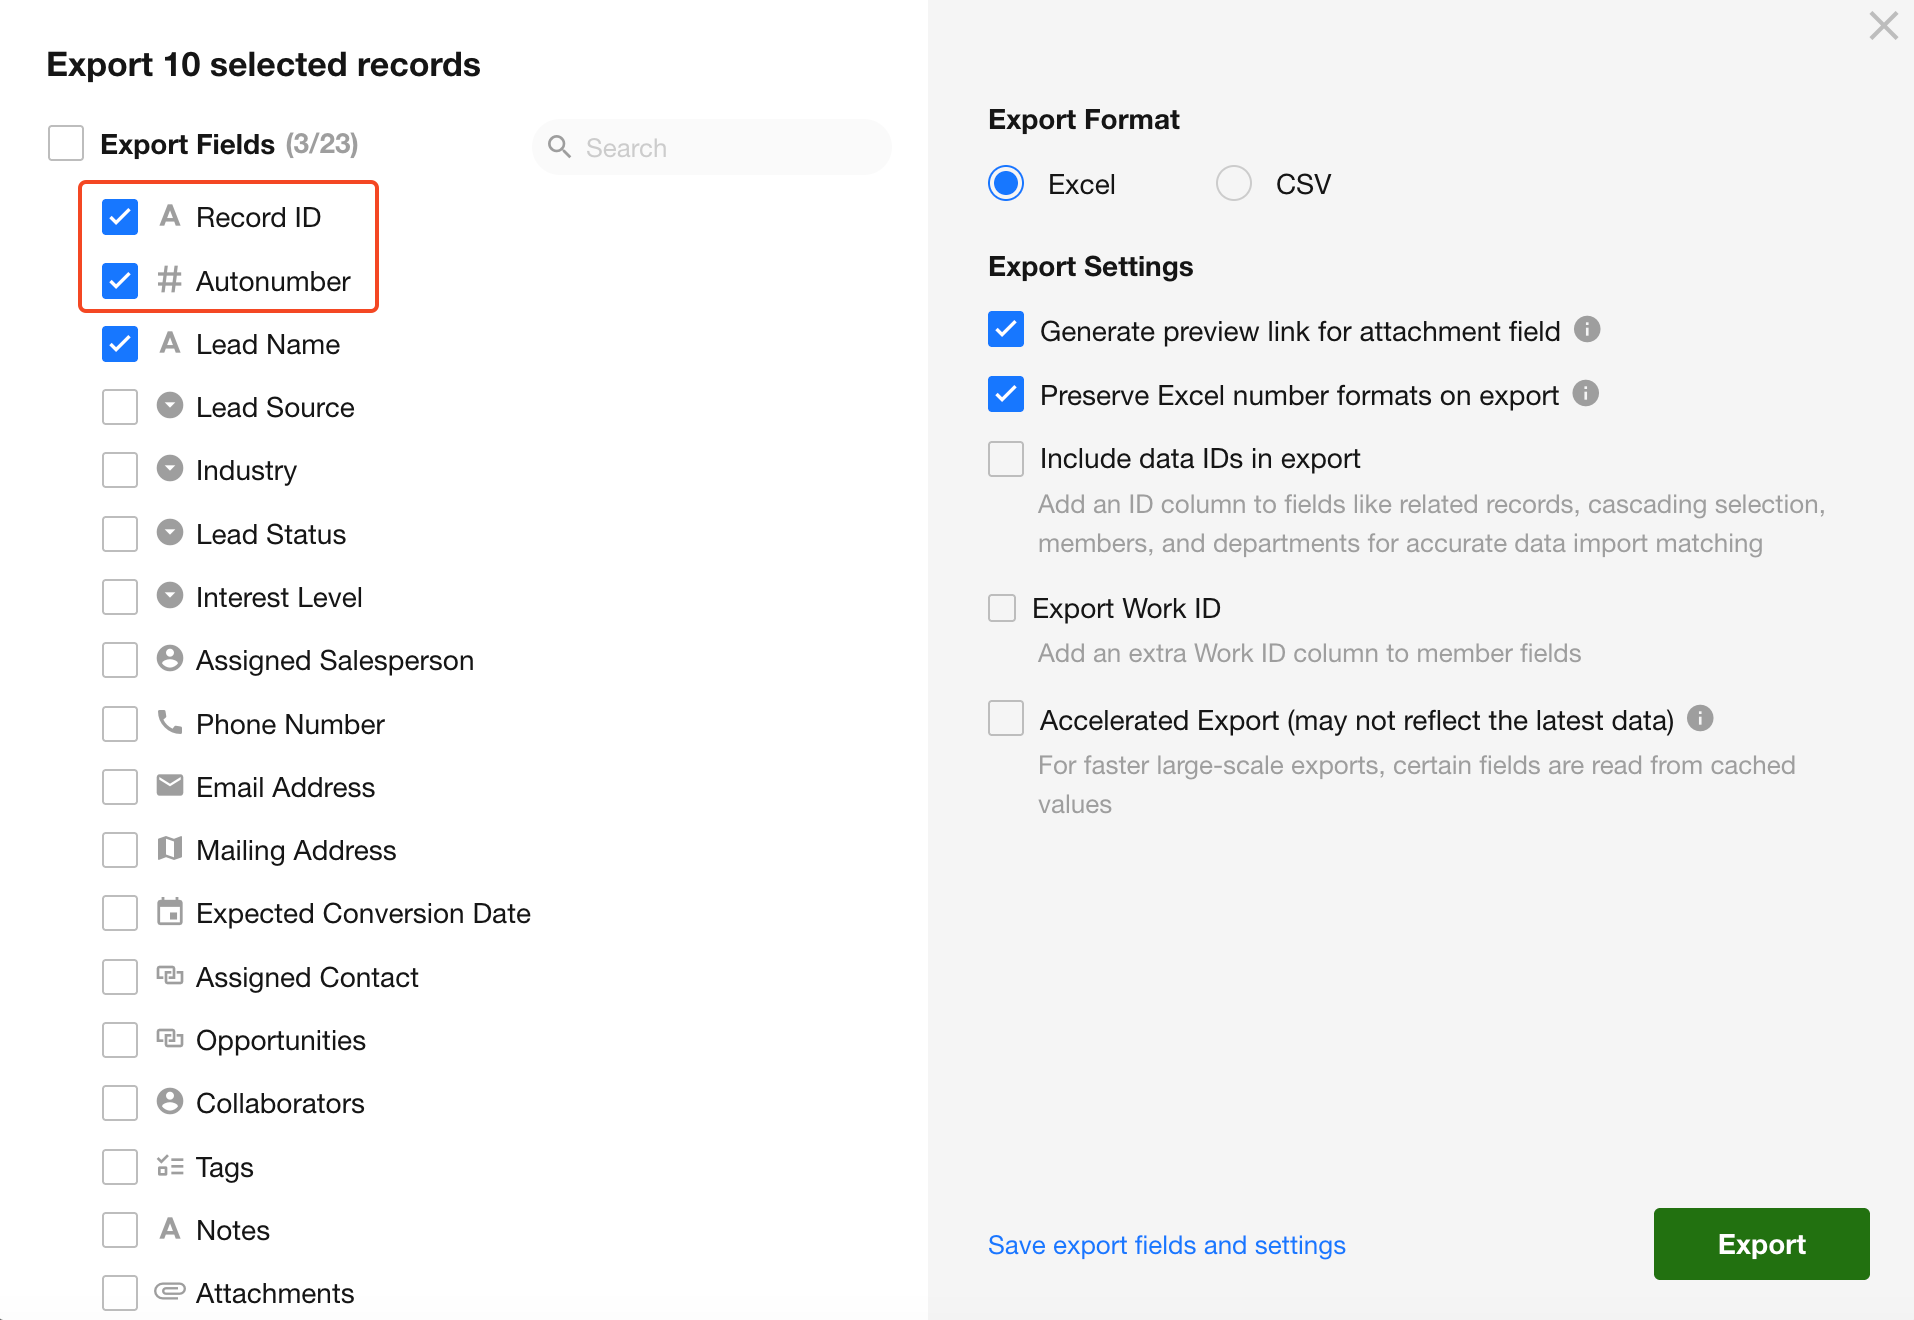
Method 1: Update via Excel Import
-
Export the worksheet data. You only need to export the Autonumber field, Record ID field, and another field that can uniquely identify records.
-
Open the exported Excel file, update the numbering for each record, and save the file. Do not modify other fields.
-
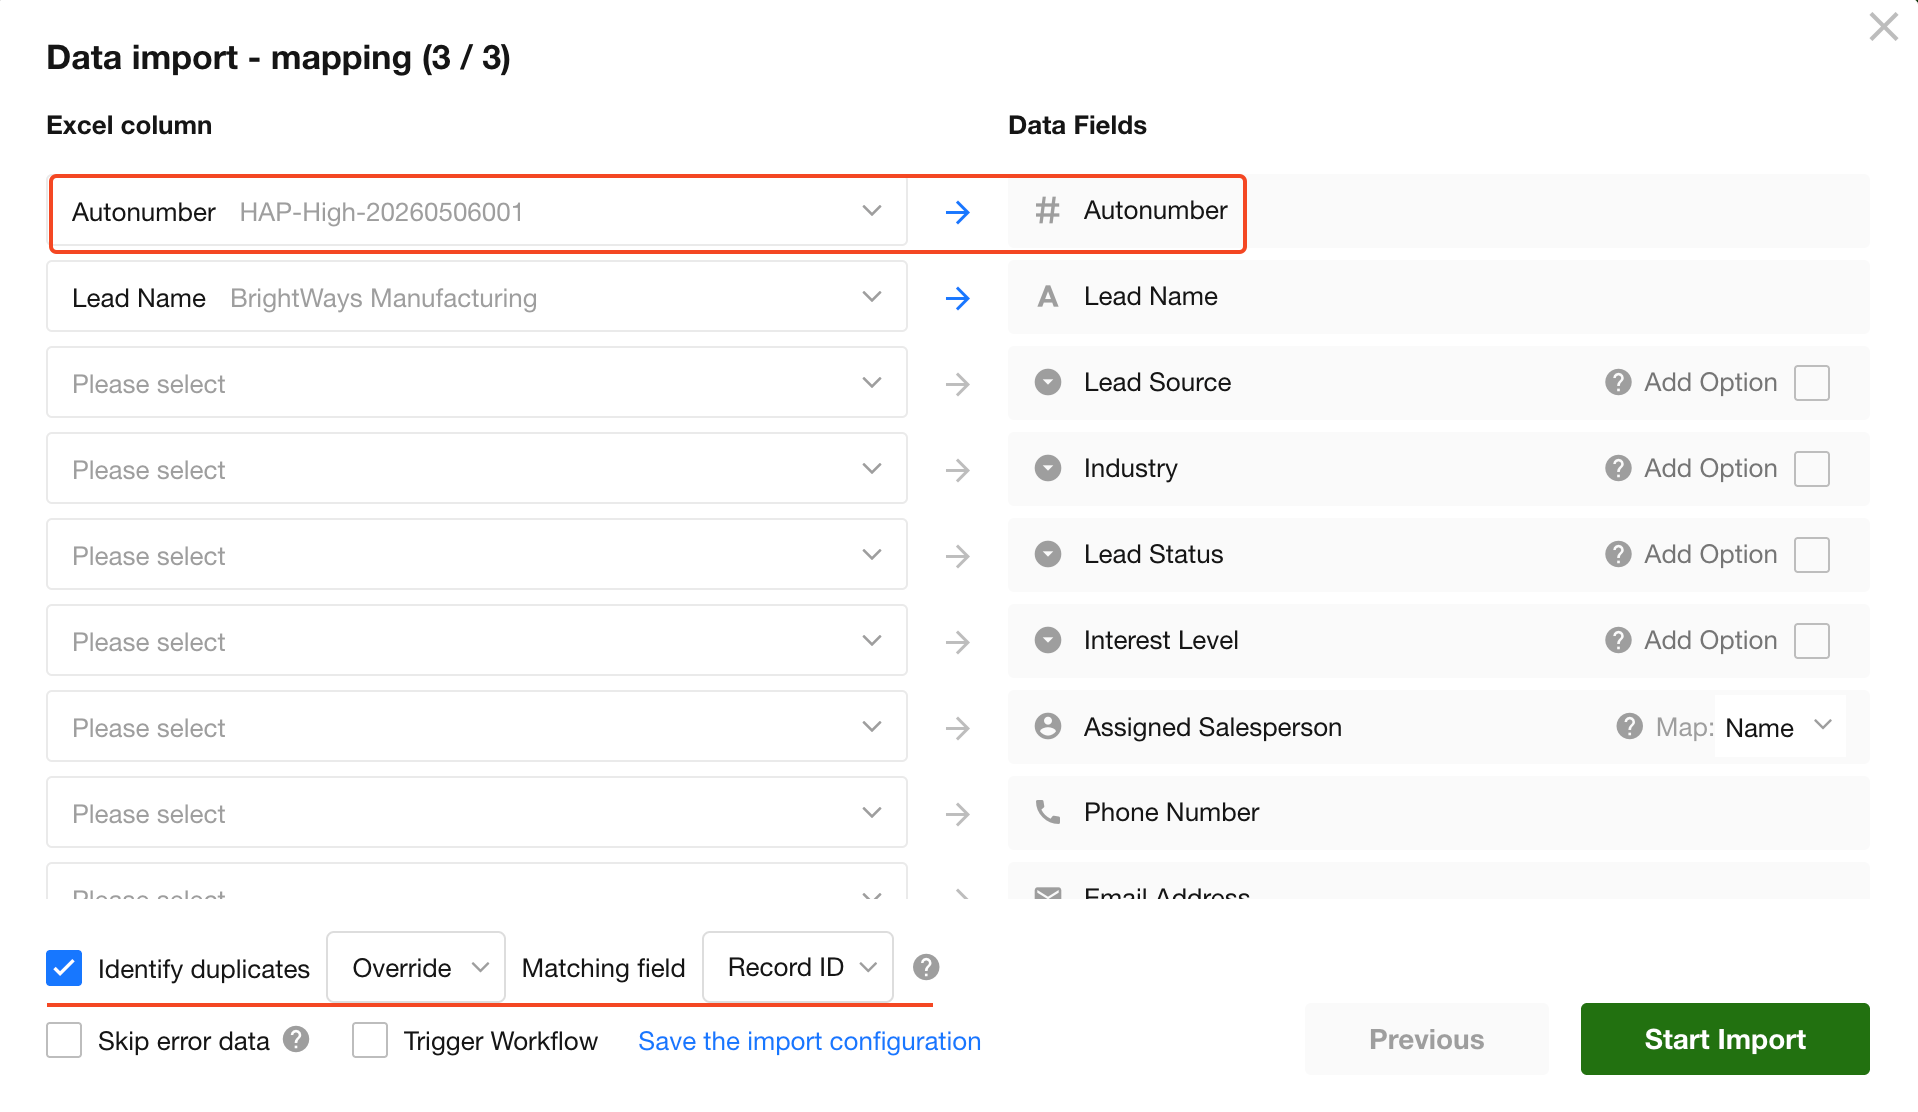
When importing the Excel file:
- Enable Identify duplicate records
- Use Record ID as the matching condition
- Select Overwrite existing data
-
Refresh the view to see the updated auto numbers.
Method 2: Update via Workflow
-
Add a text field named Correct Number.
-
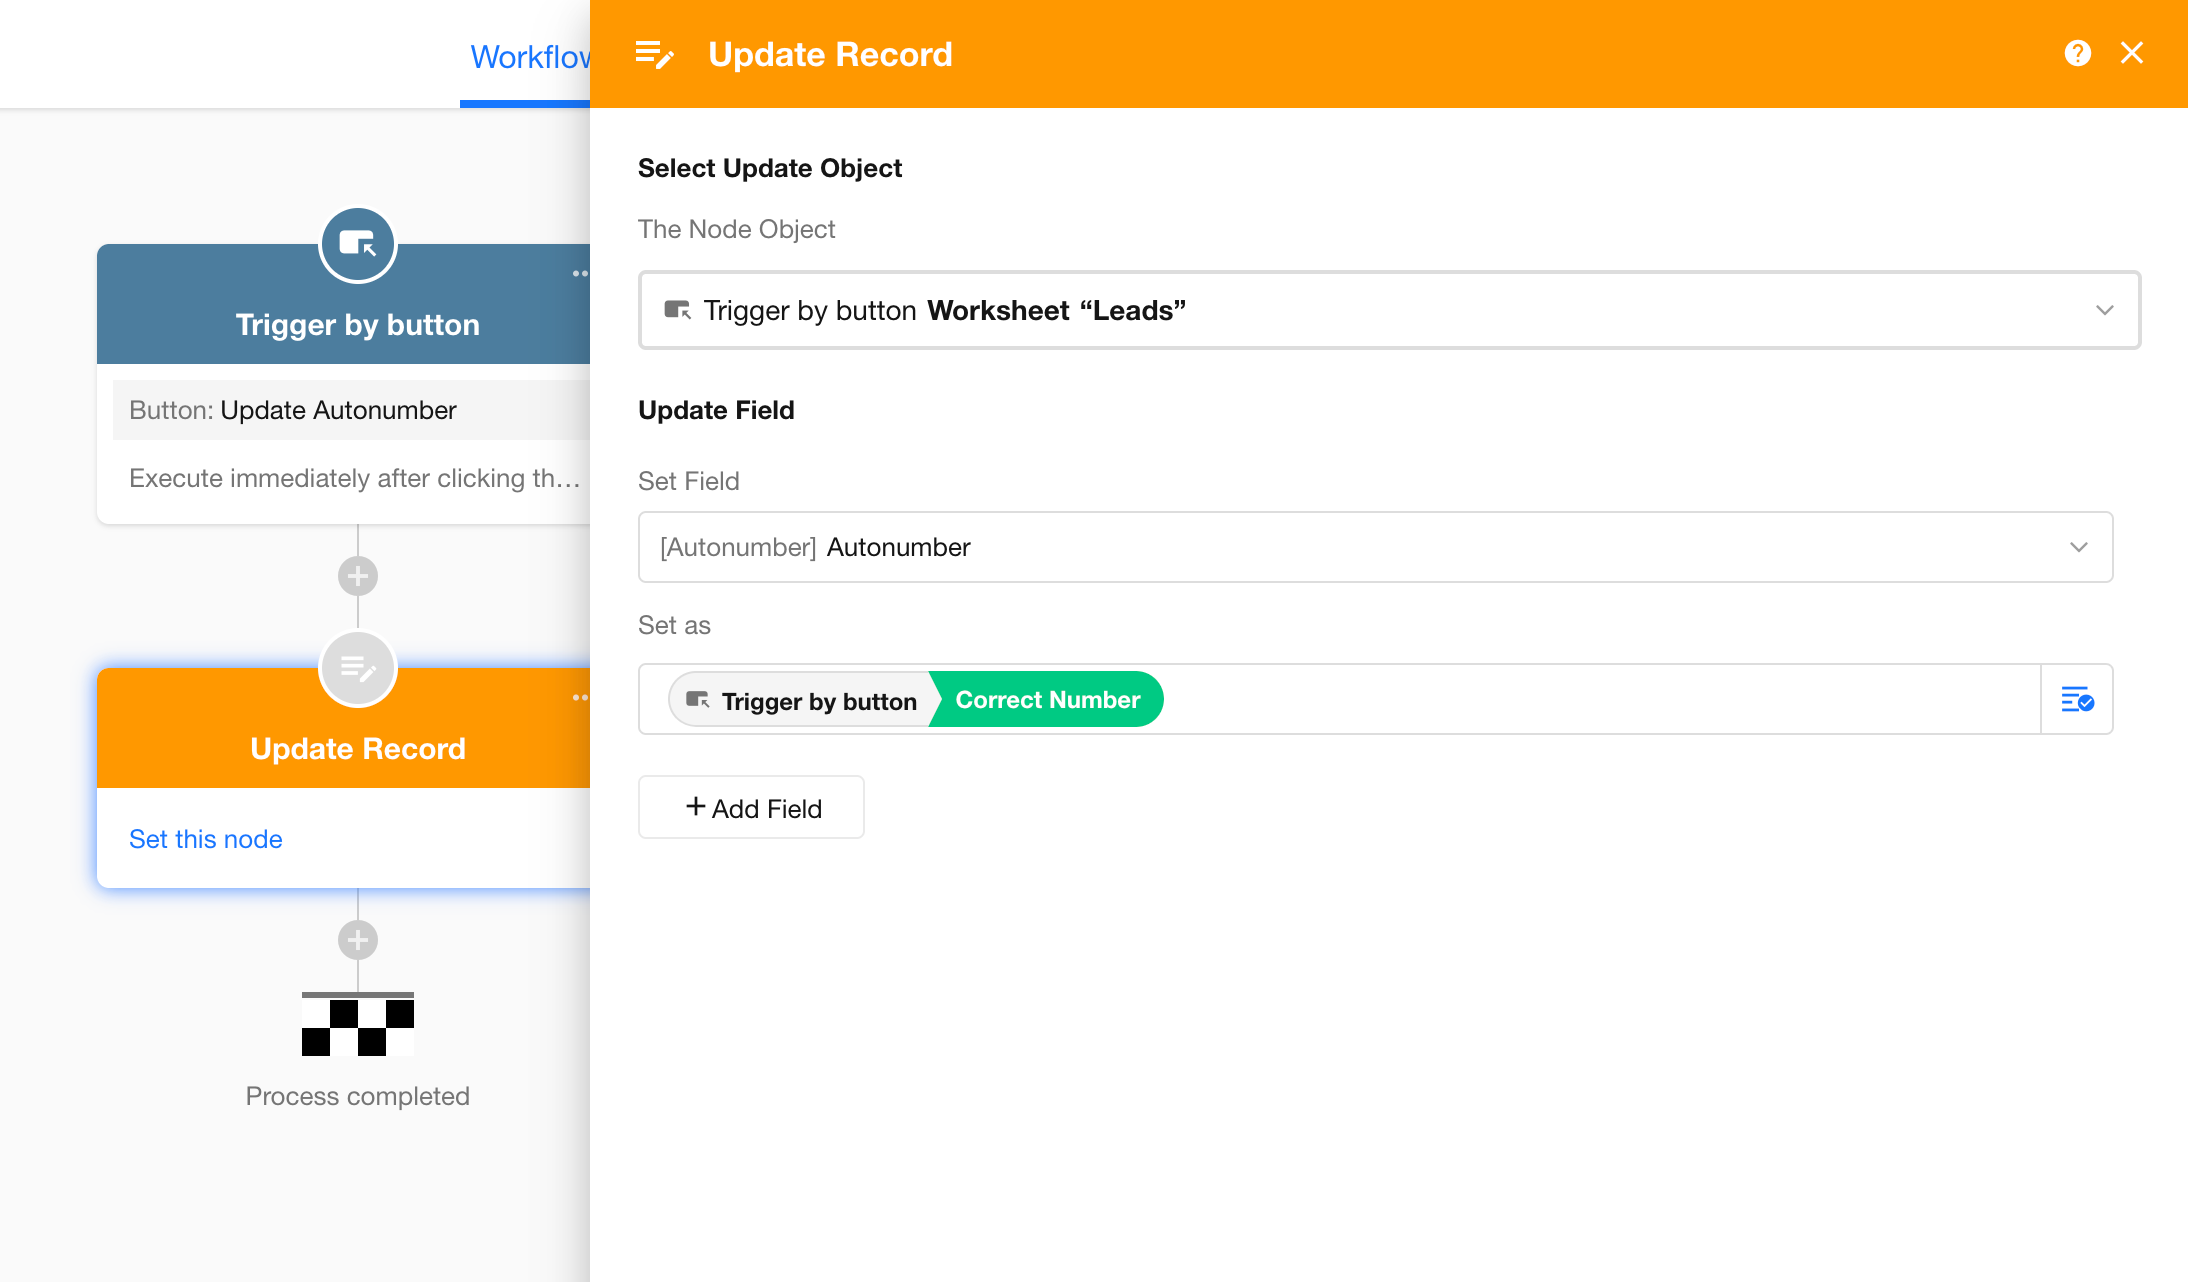
Create a custom button and configure a workflow triggered by this button.
After the trigger node, add an Update Record node to assign the value from the Correct Number field to the Autonumber field.
-
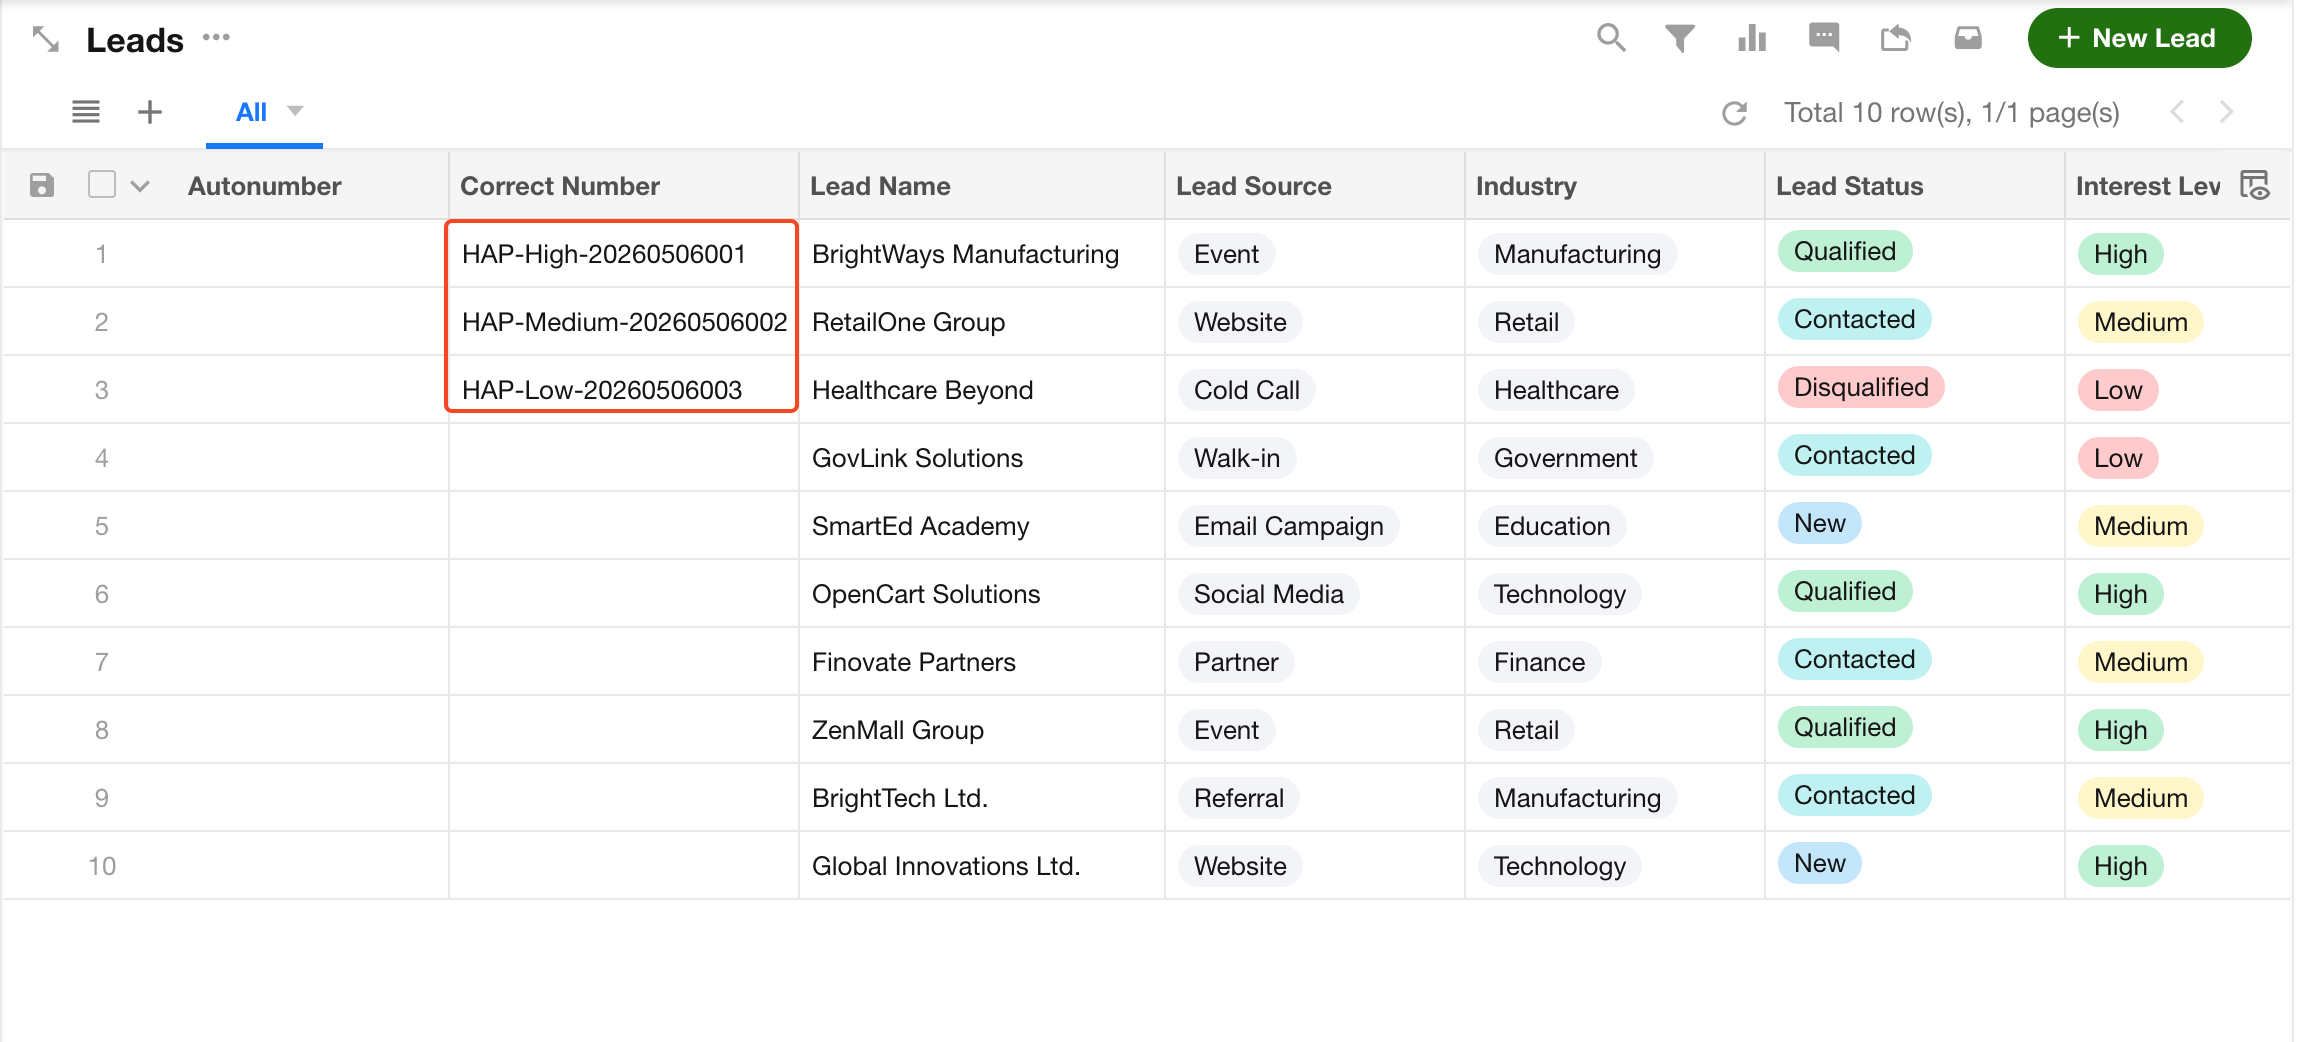
In the worksheet, manually fill in the correct numbers for all historical records in the Correct Number field.
-
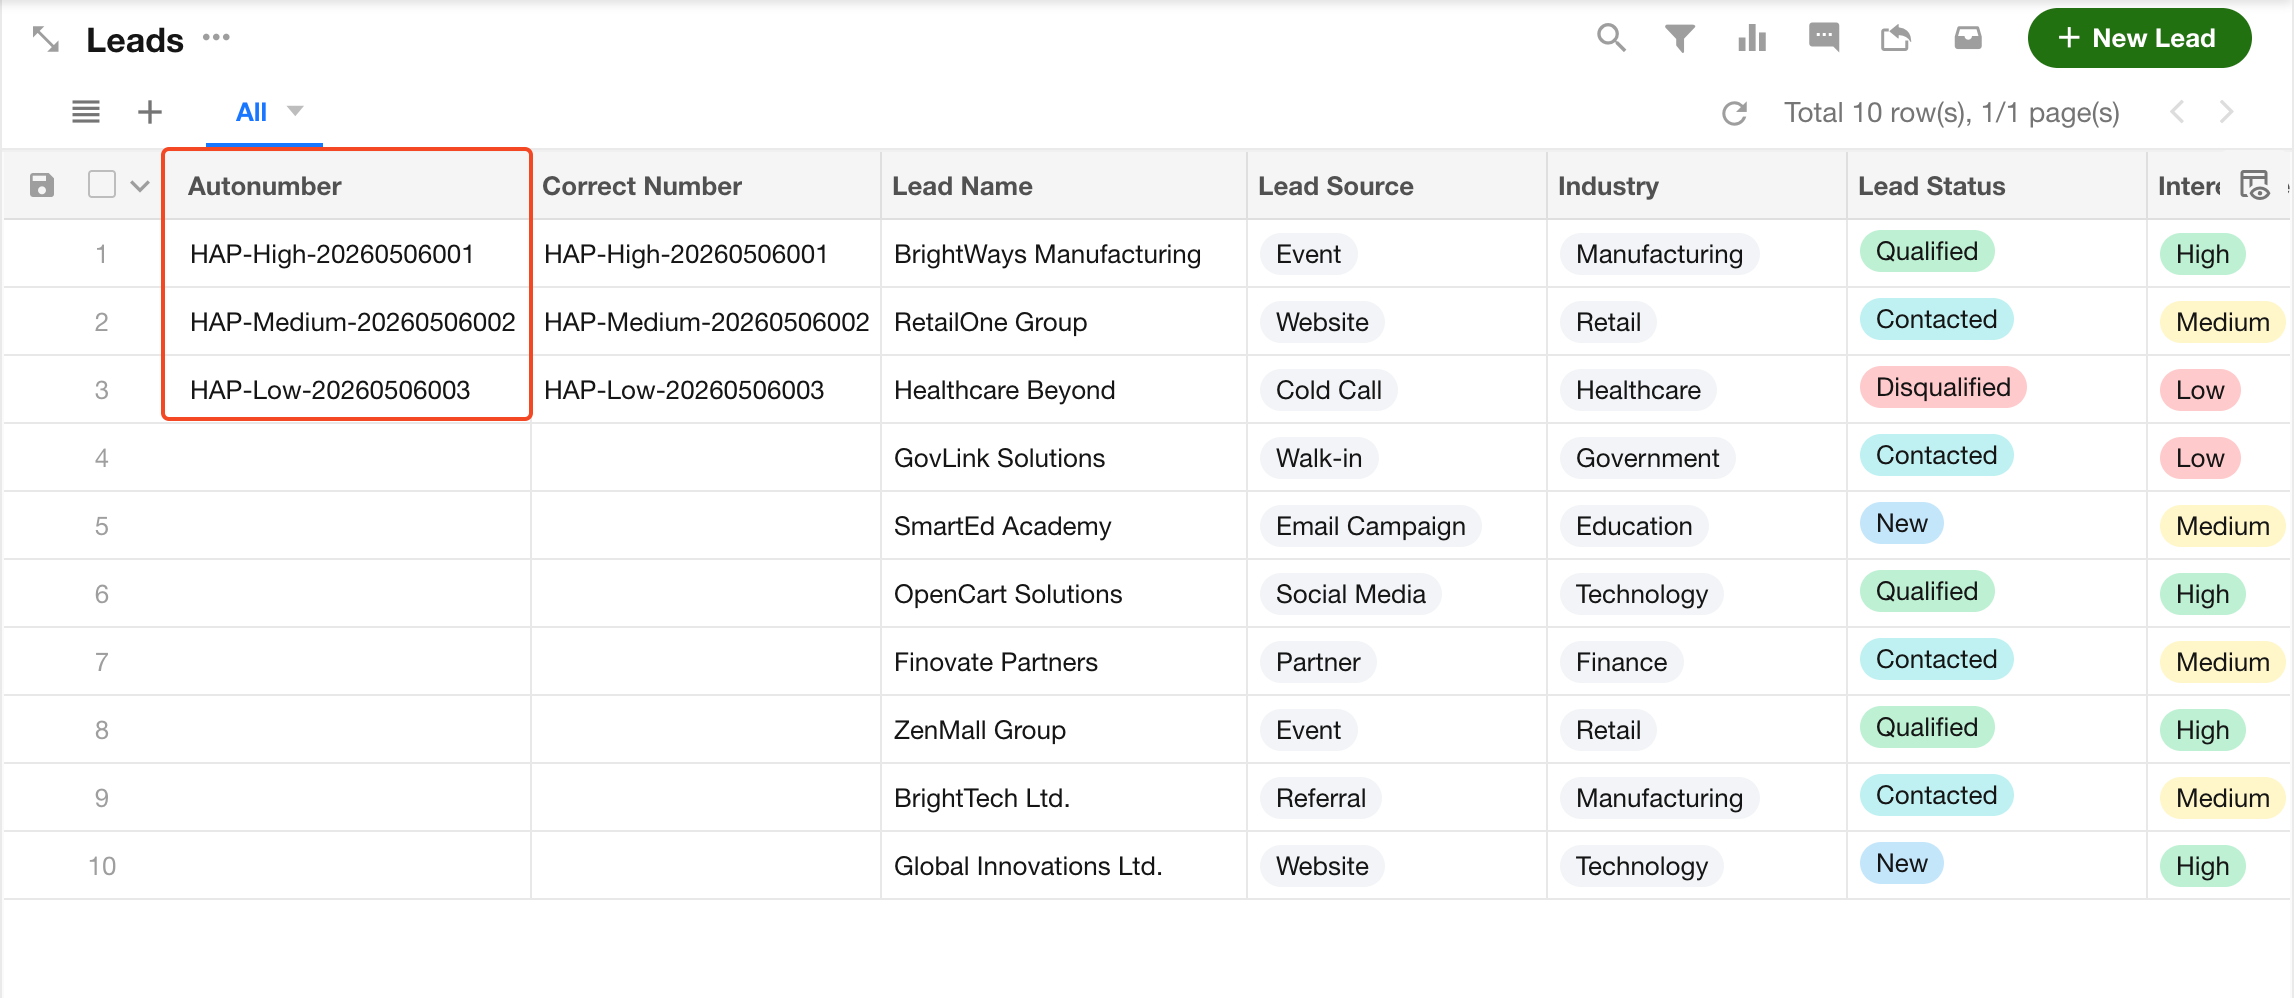
Select the historical records in bulk and click the button to update the auto numbers.

-
Refresh the view to confirm the updates.
-
After completion, remember to delete the custom button and the Correct Number field.
Why Do New Records Start from 1 Instead of Continuing Sequentially?
For example, if there are already 5 records in a worksheet and you add an auto number field, the field values for these records will initially be empty. After updating them manually to 1–5, you would expect the next record to be 6. However, it may still start from 1.
This happens because the default starting value is 1, and updating existing records does not consume this value. Therefore, numbering still begins from 1.
Method 1: Adjust the Starting Value
Set the starting value to 6. New records will then be numbered 6, 7, 8, and so on.
Method 2: Reset Auto Number
Use Reset Auto Number from the worksheet’s More options and set the next record number to 6. Subsequent records will then follow sequentially (6, 7, 8...).
Was this document helpful?