Control - OCR
The OCR control can quickly and accurately extract text from files and automatically fill it into corresponding fields. Users can also upload multiple attachments in bulk, with the recognized text written into subforms.
Demonstration
-
Invoice Recognition
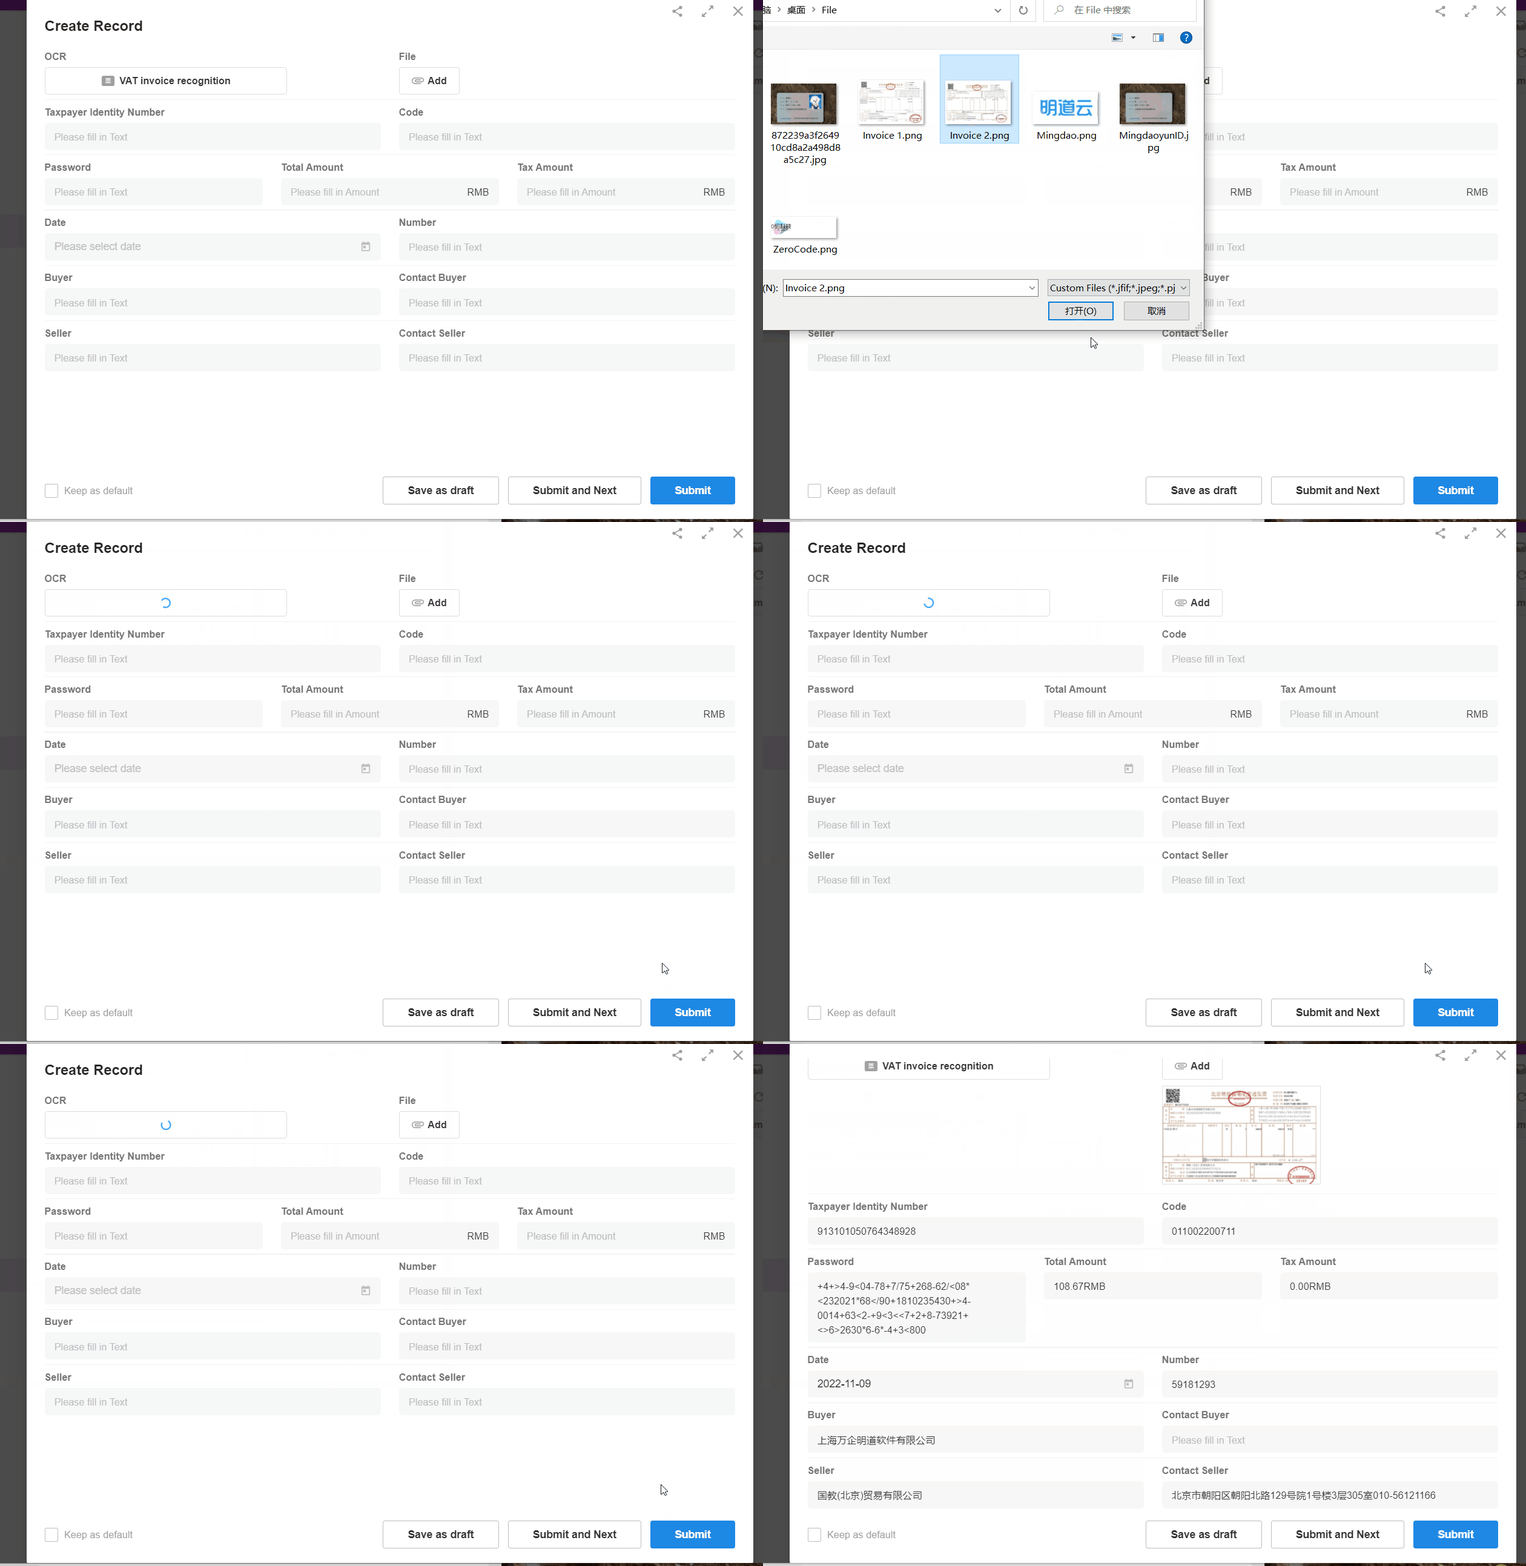
-
Multi-invoice Recognition
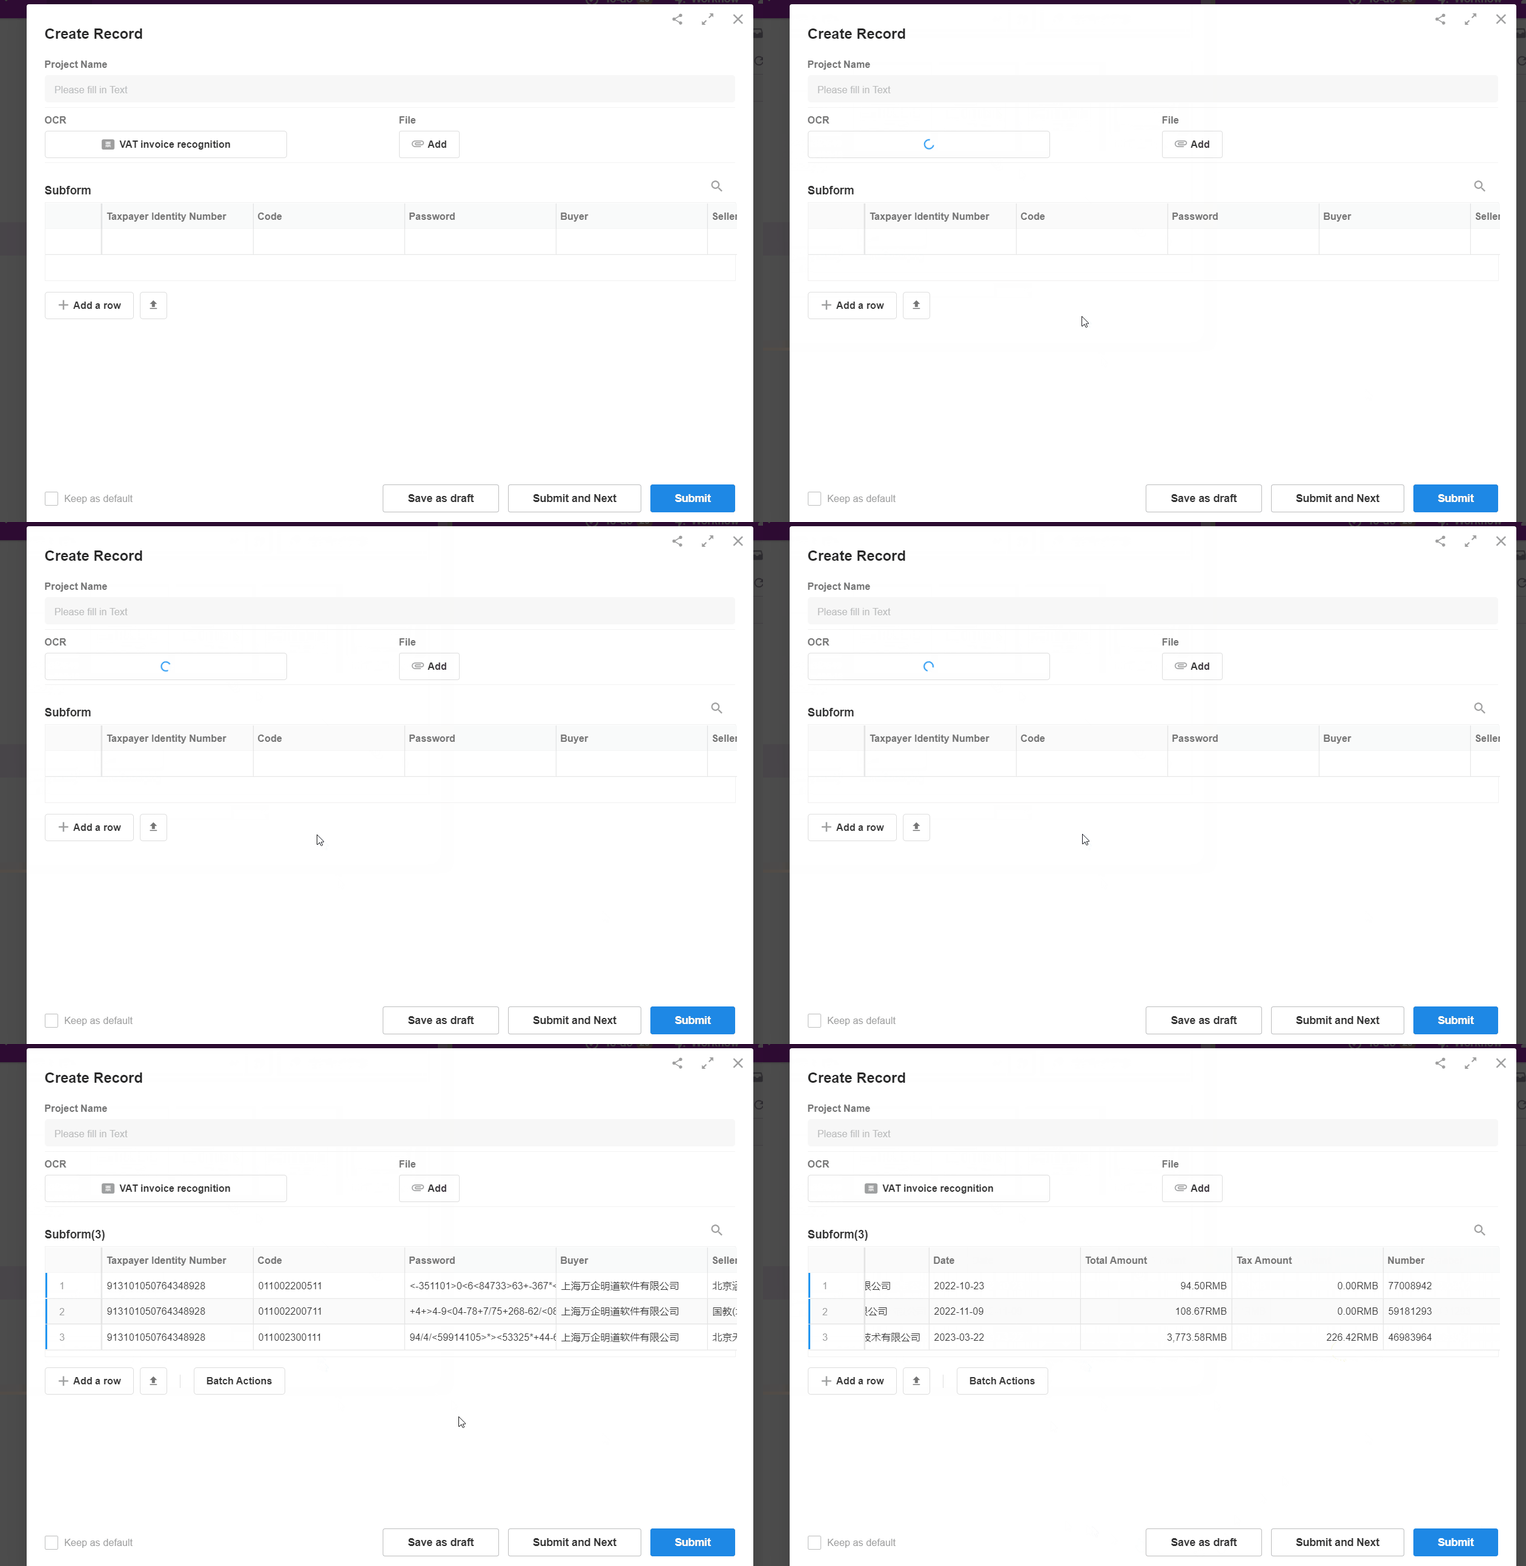
-
ID Card Recognition
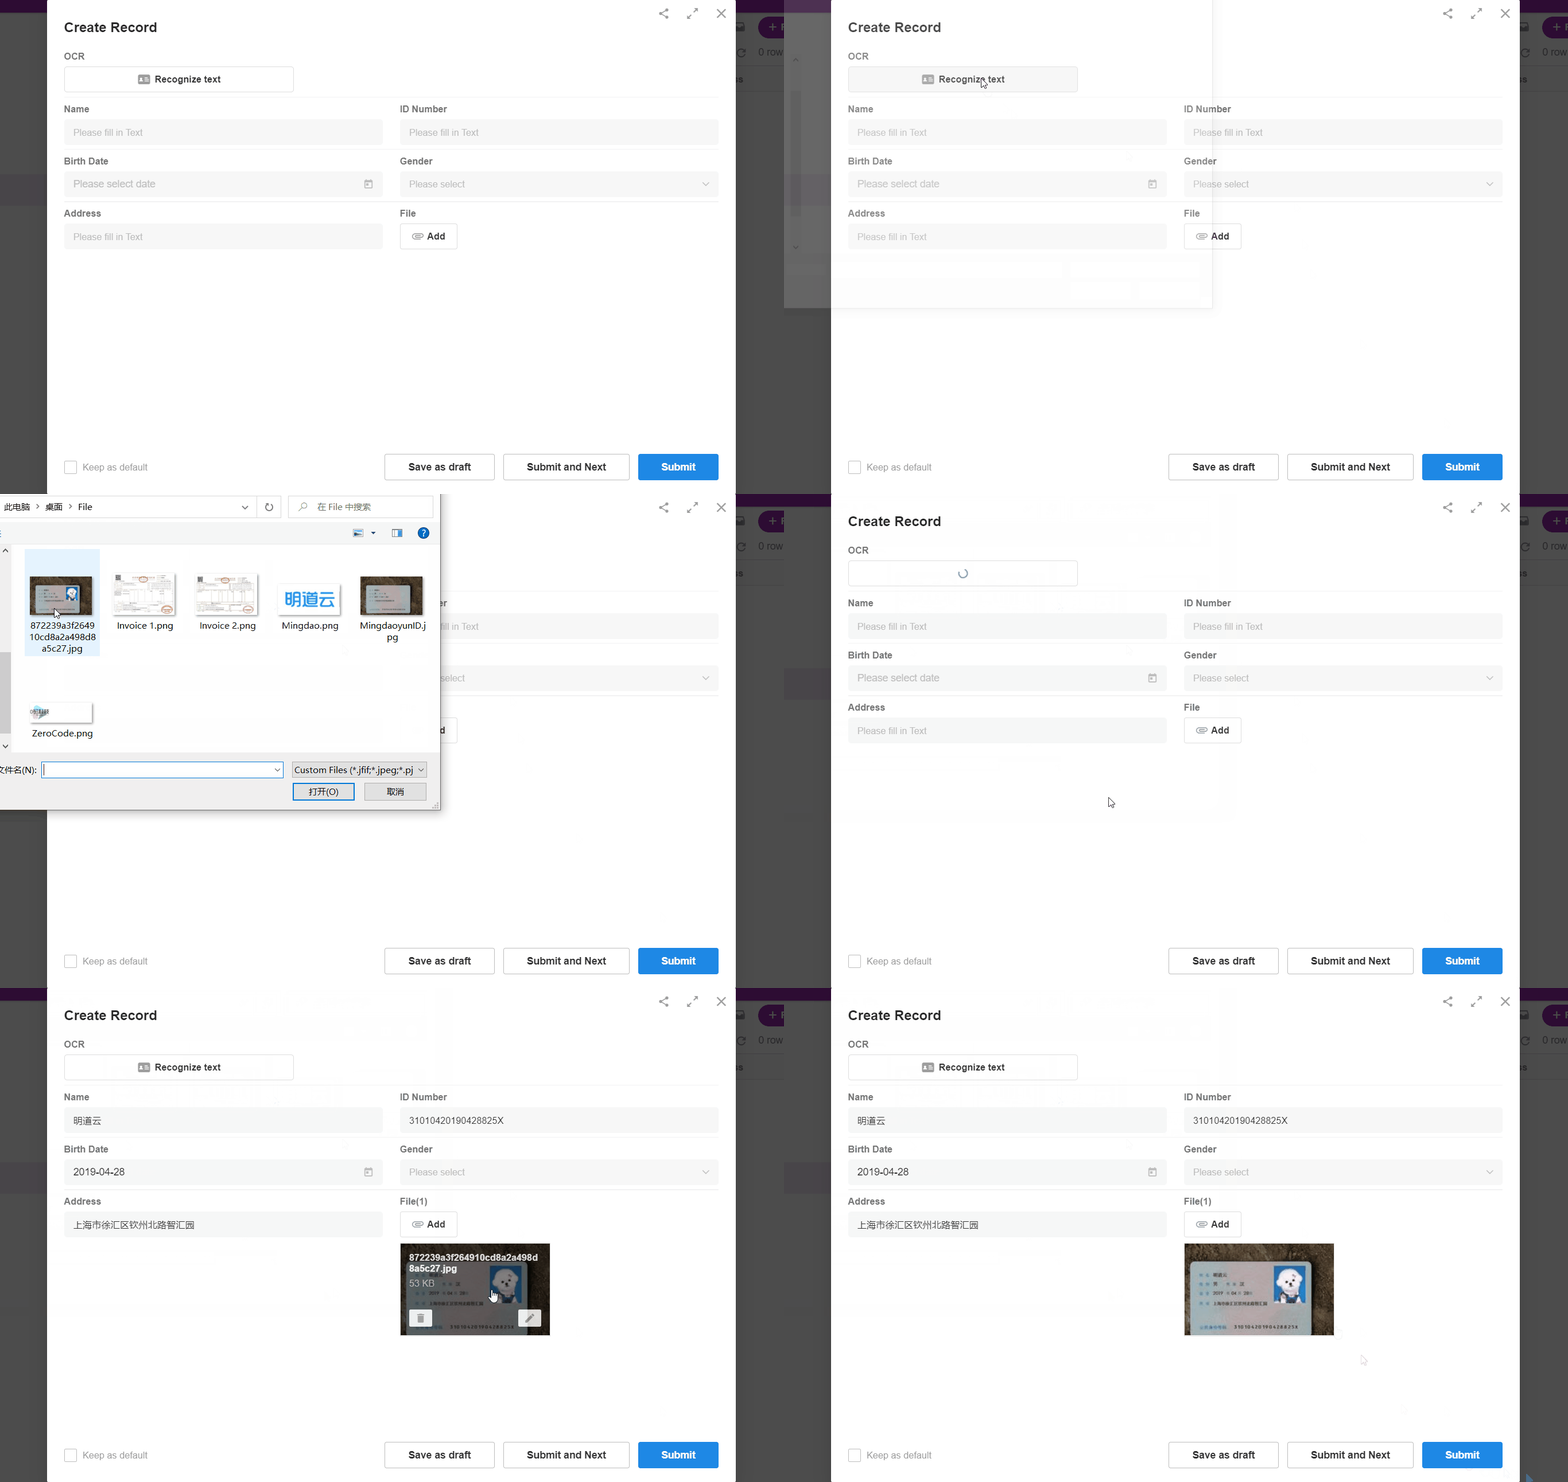
-
General Text Recognition
Recognized text from images will be written into fields as plain content, excluding formatting such as font size, line breaks, or spaces.
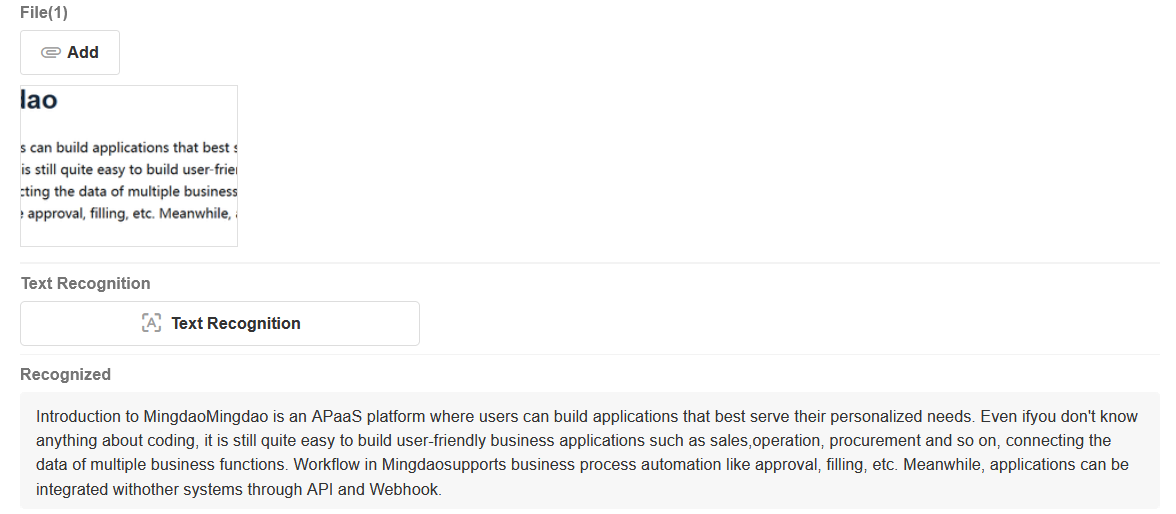
OCR Field Configuration
Taking ID card recognition as an example (upload images on PC; take photos or upload images in the app):
-
ID Card Recognition/General Text Recognition: upload images.
-
Invoice Recognition: Upload PDF files or images. For PDF files, only the first page will be recognized.
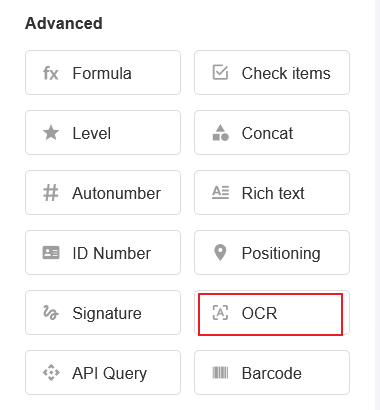
1. Add the OCR control
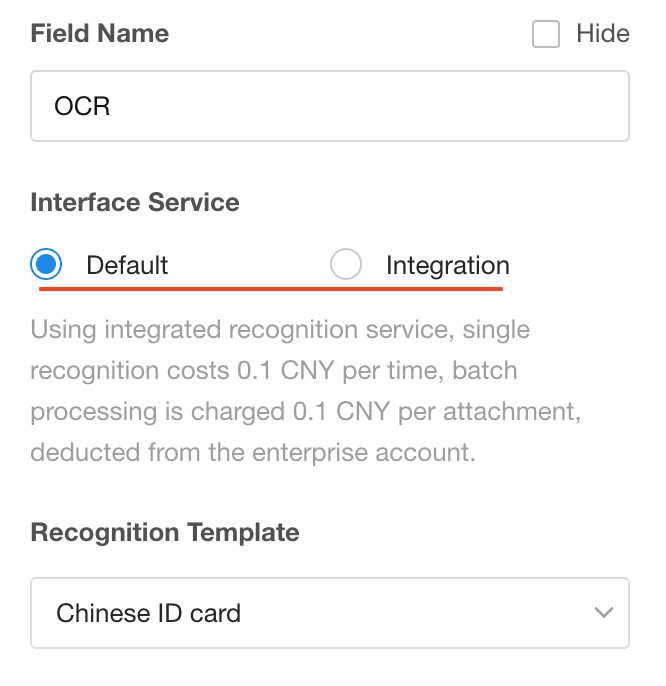
2. Select the interface service
Two types of interfaces are available:
-
Defaul: Pre-configured interfaces that can be directly called. Cost: ¥0.1 per request, deducted from the organization credits.
-
Integration: Custom interface services defined in the Integration Center. No fees are charged by this platform, but fees may apply based on the third-party platform integrated.
2.1 Default interface service
-
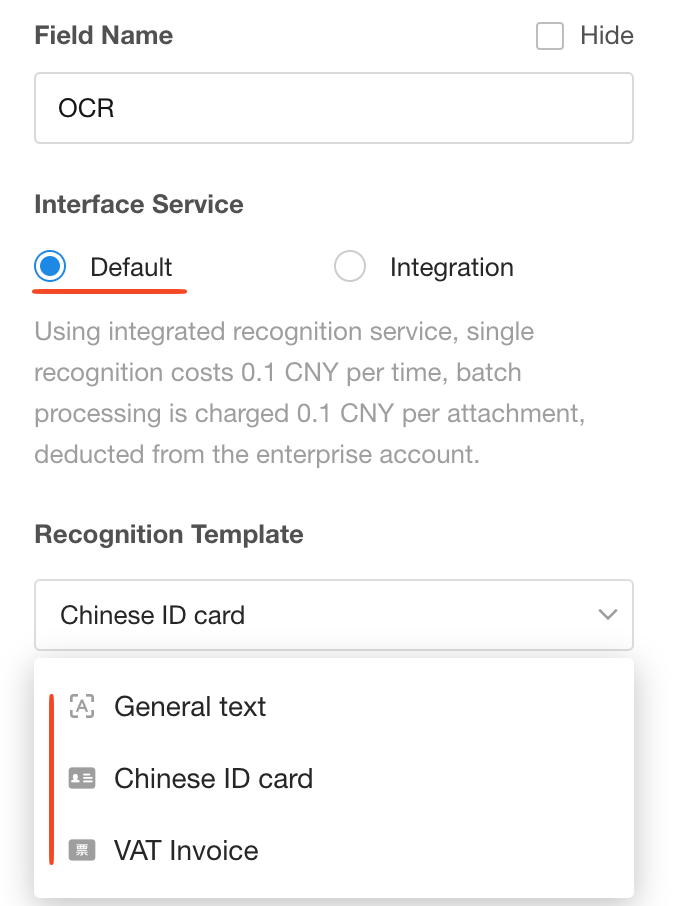
1) Select the recognition template (Chinese ID Card)
-
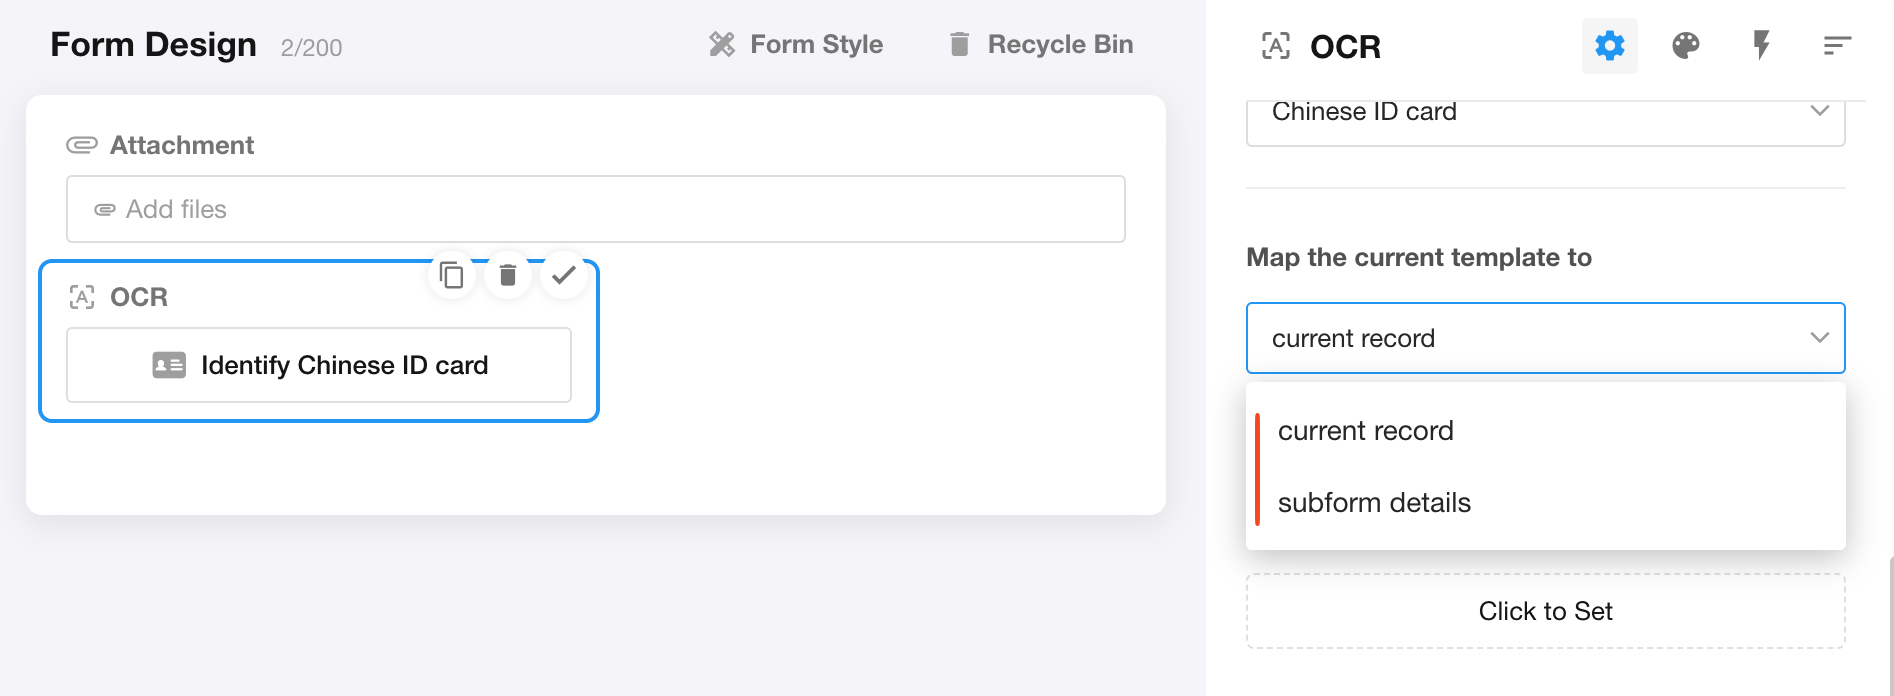
2) Choose where to write the recognized content
Current record or Subform
-
Here, we select writing the recognized content to the current record.
If you choose to write the recognized content into fields of the current worksheet, batch image uploads are not supported.
-
-
3) Click to set fields mapping
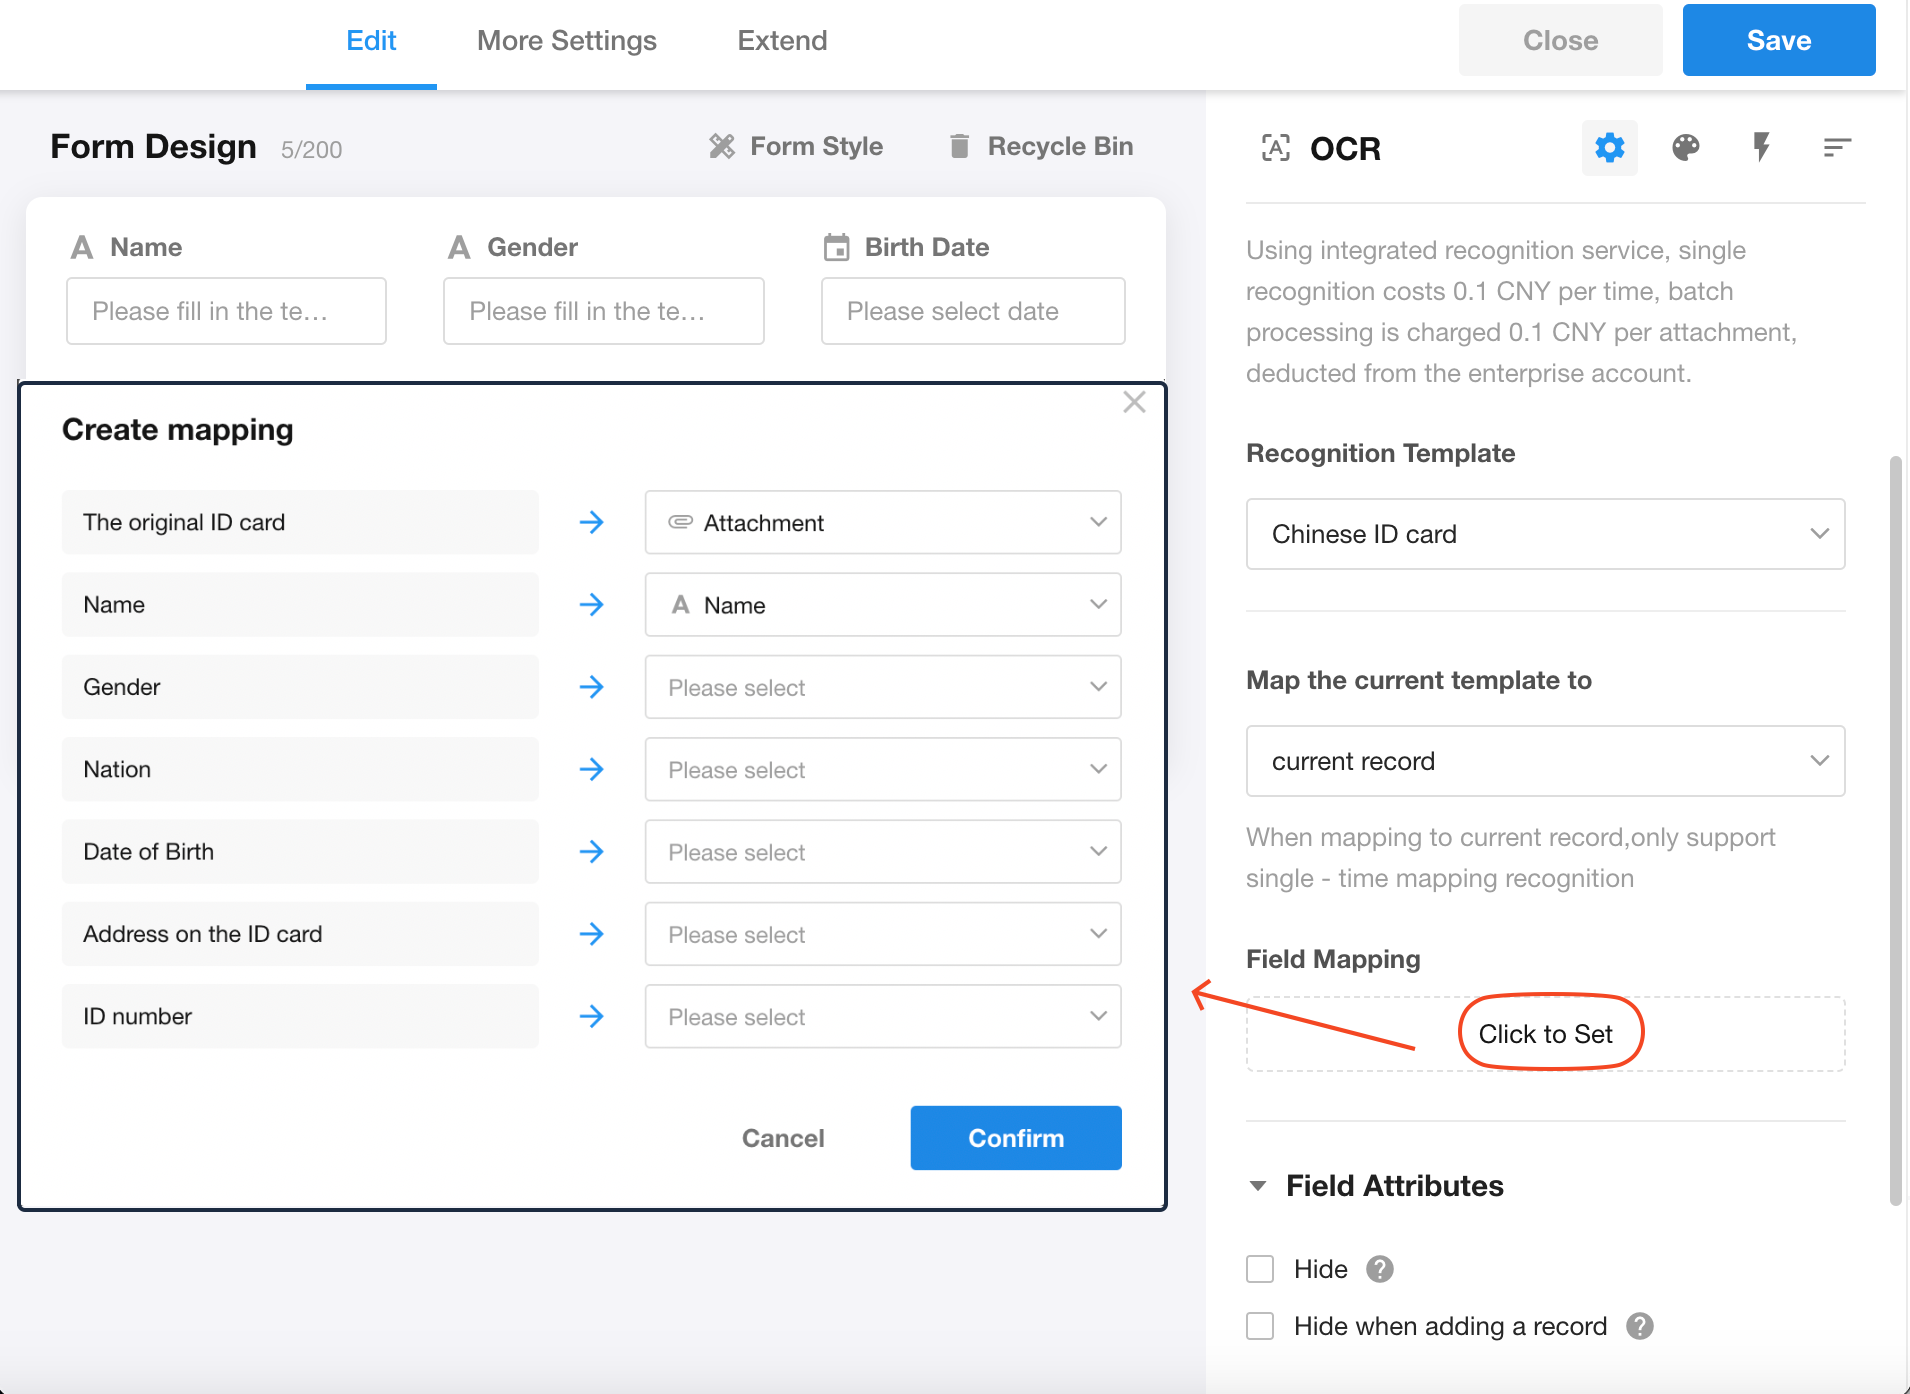
-
4) Select corresponding fields in the worksheet
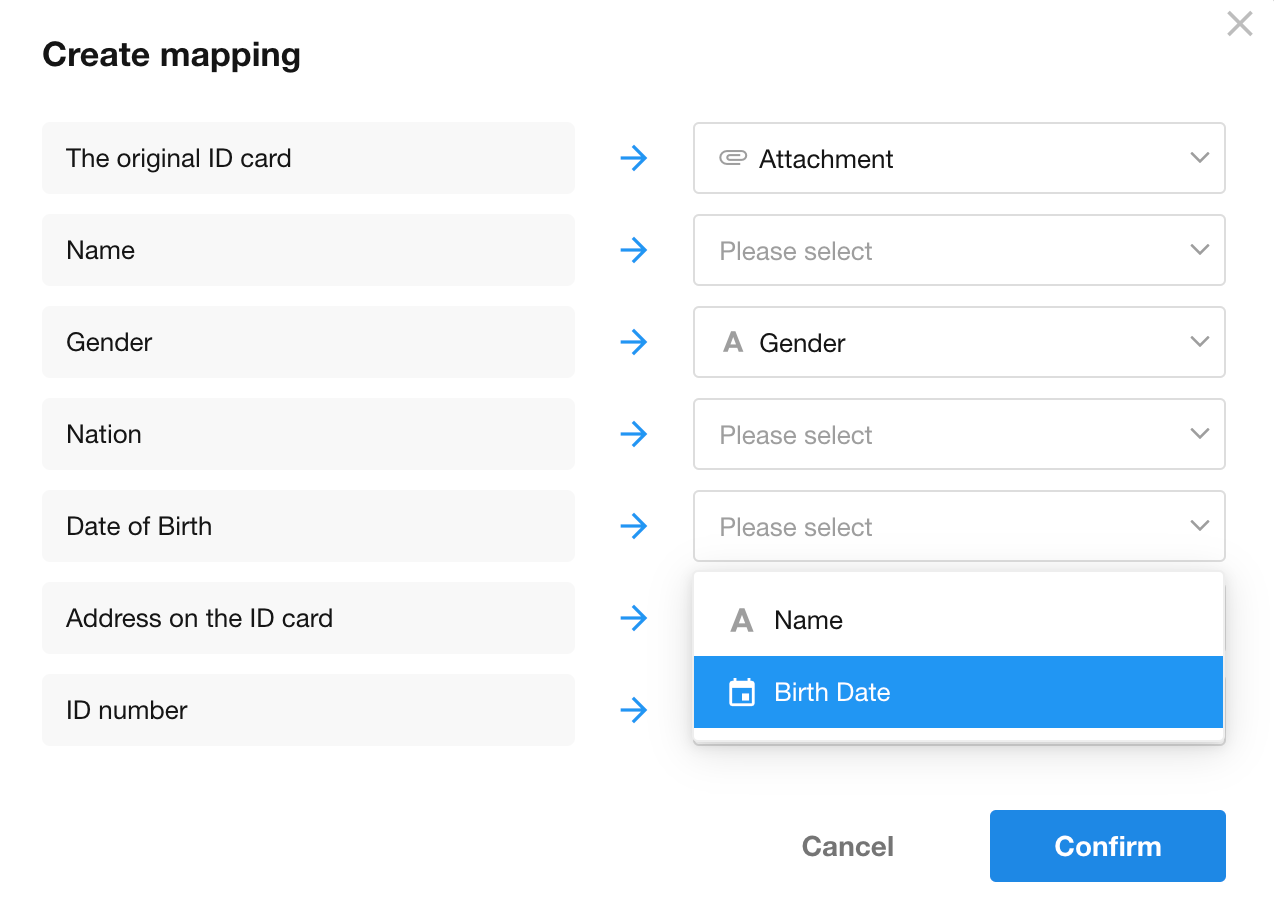
-
5) Complete setup and start testing
2.2 Integration Center interface services
In the HAP Integration Center, users can utilize self-developed recognition services or third-party platform recognition services. After configuring the connection and API in the Integration Center, the OCR field can directly use these services. Any associated fees will be paid directly to the third-party platform.
Introduction to Integration Center
-
1) Select the pre-configured interface in the Integration Center
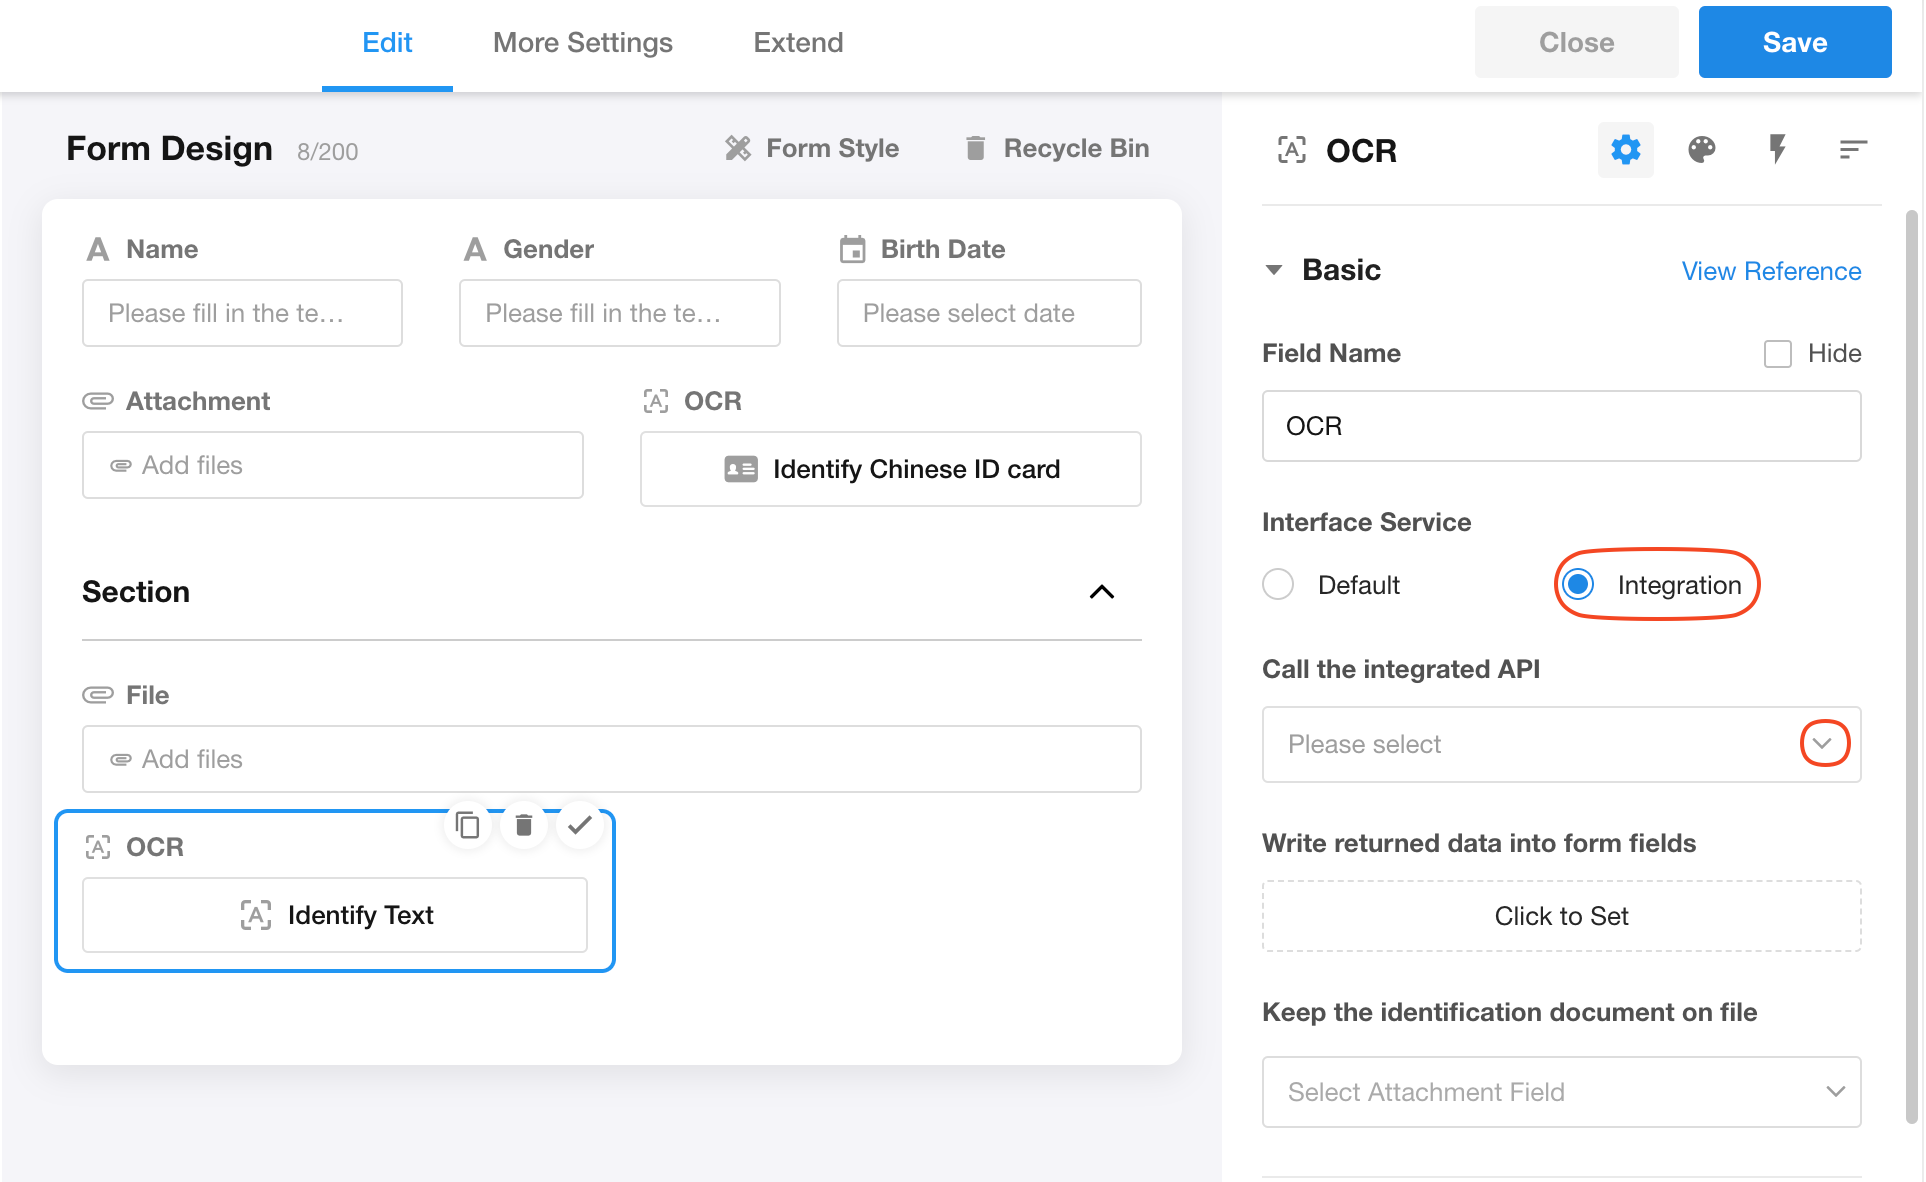
If you have completed the integration but cannot see the desired interface when selecting, it may not be authorized for the current application. Locate the connection and add the current application to resolve this.
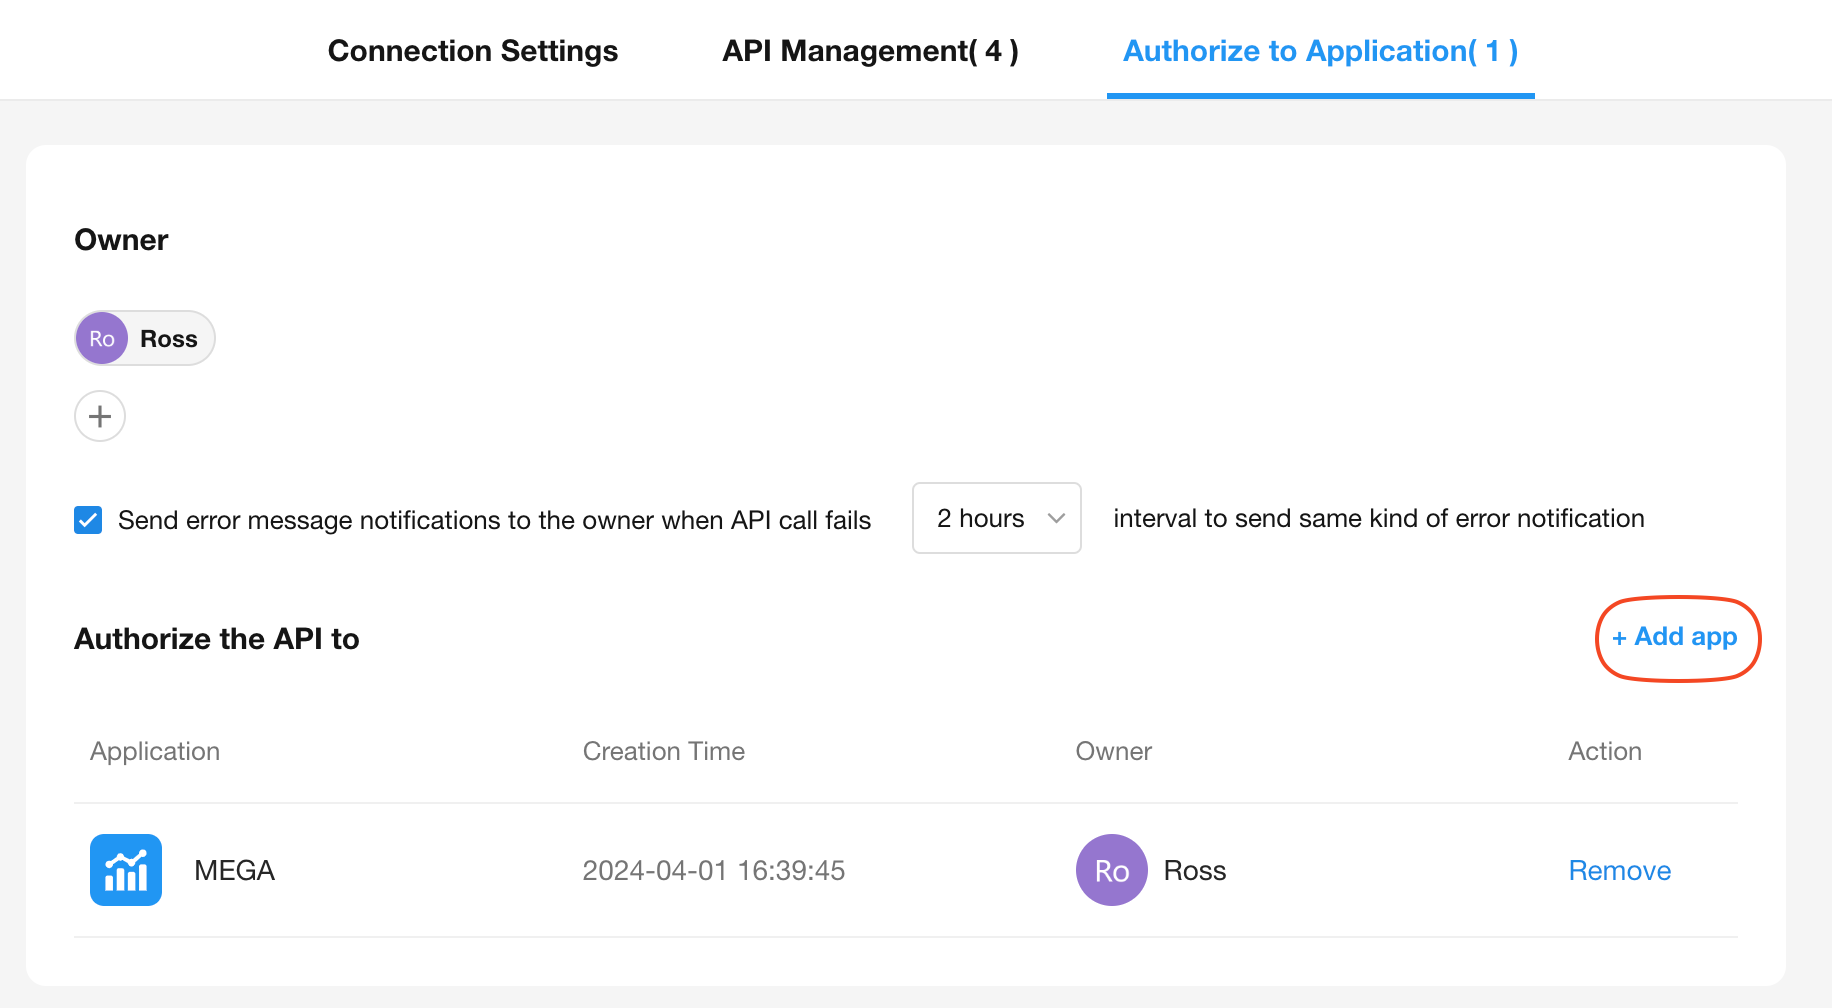
-
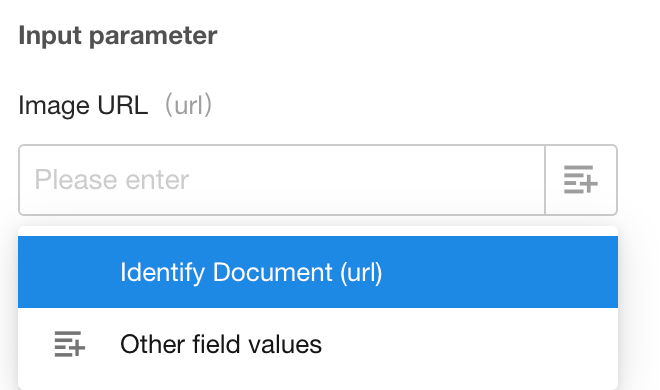
2) Configure the parameters to be passed
In this example, the parameter to be passed is the image URL, so we select "Recognition Document URL".
-
3) Write the recognized content to worksheet fields
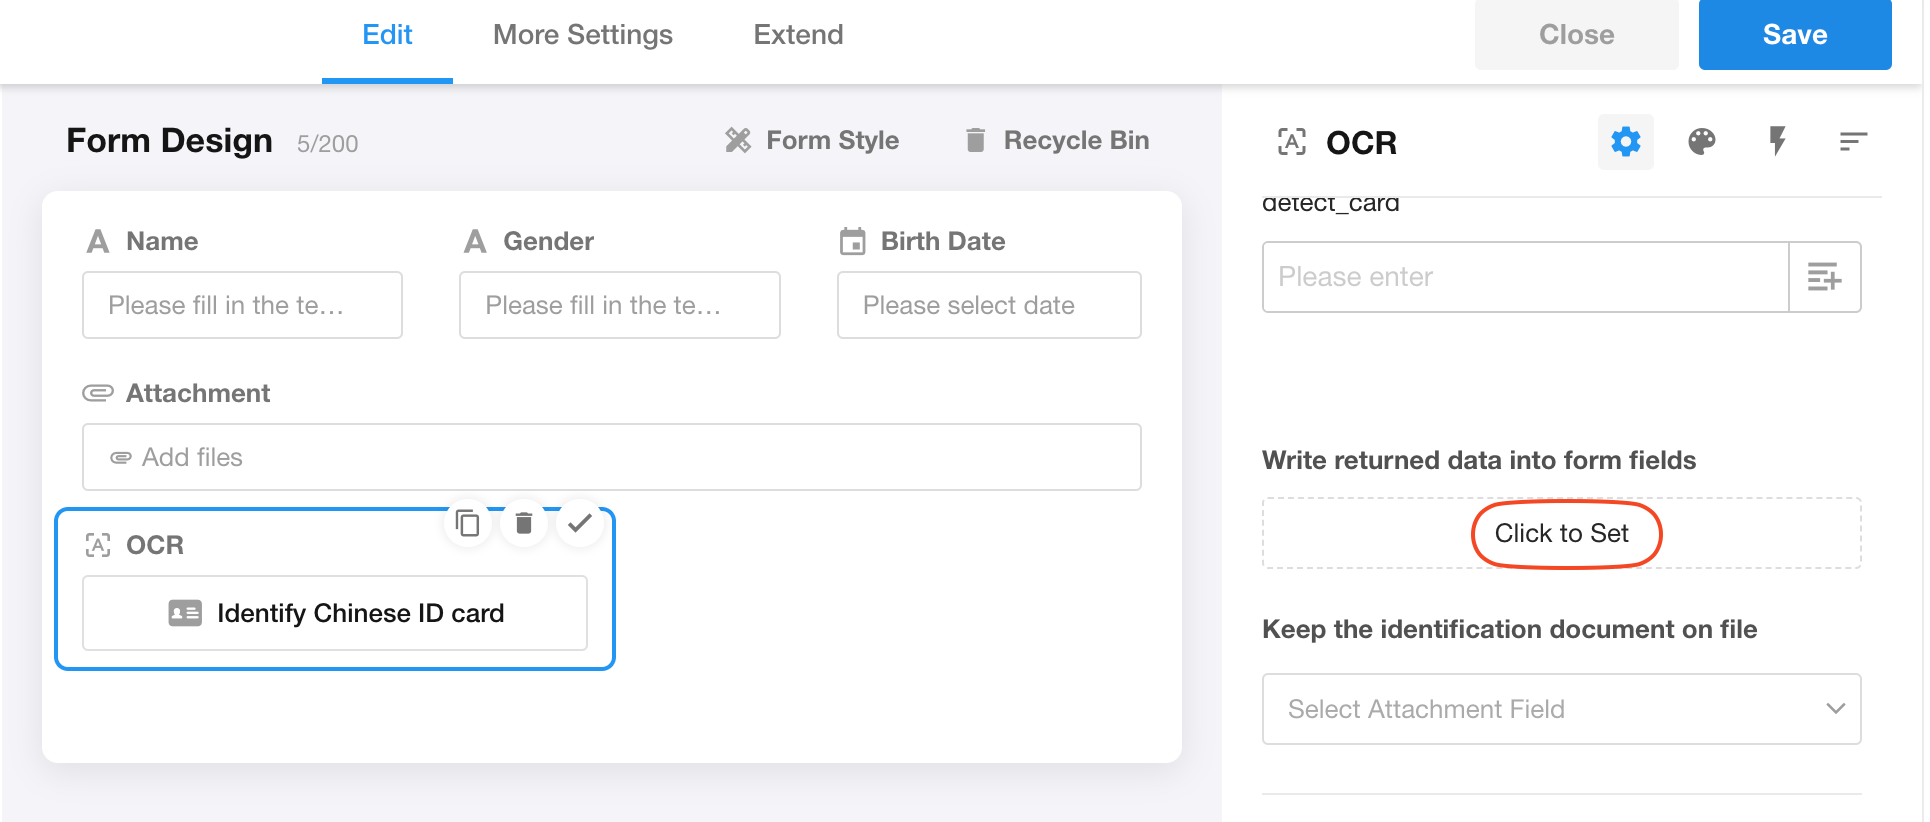
If ID card reverse-side recognition is also needed, simply add another OCR control.
-
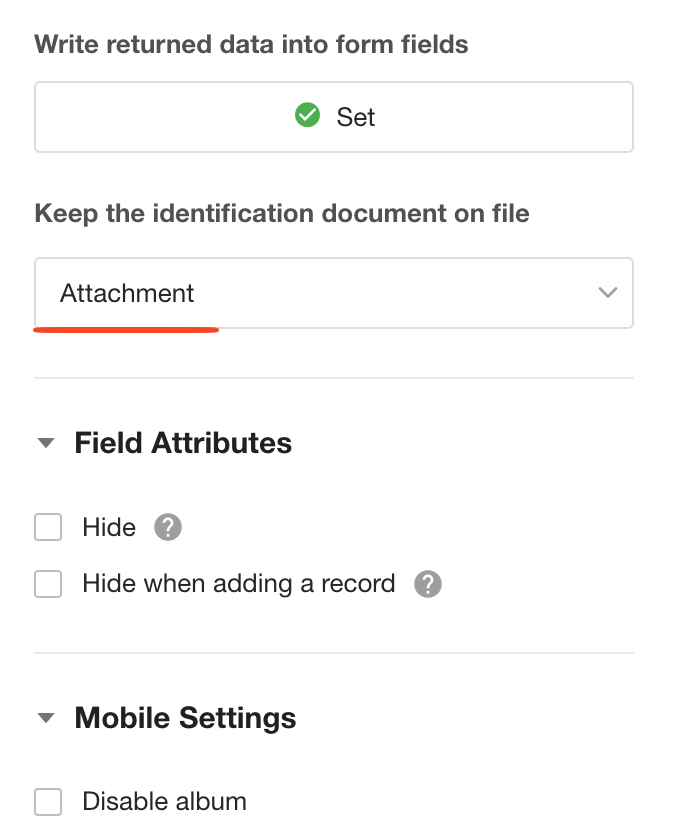
4) Save the recognized image to a file field
-
5) Complete the configuration and begin testing
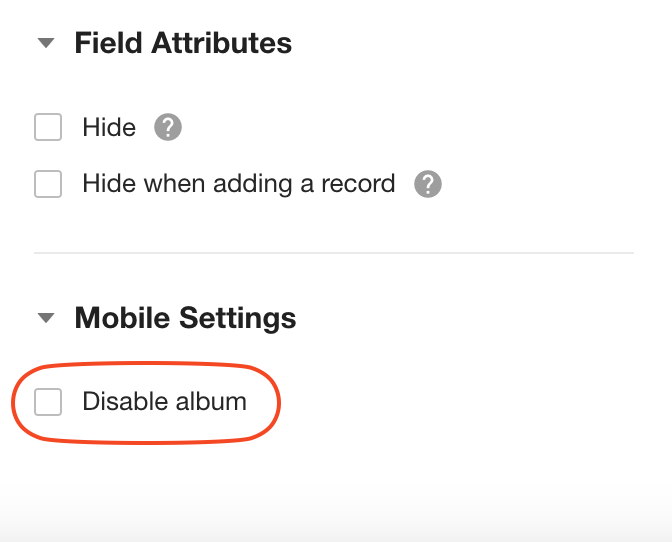
Mobile settings - Disable album
If "Disable album" is checked, in the mobile app, users can only take photos for content recognition and cannot upload images from their album.
Notes
-
For invoice recognition, invoice details should be written to a subform, not a relationship field.
-
If the tax rate field displays as 0, check whether its decimal places are set to 0. Adjust it to 2 decimal places to resolve the issue.