Control - Single select/Multiple select
For the single select and multiple select control, you can configure the available options in advance, so that the users can complete the input with a single click, improving input efficiency. In addition, you can assign values for each option for the later calculation, if needed.
1. Placement
There are 3 types of placement style for options, which are drop-down menu, tile (horizontal, vertical and matrix arrangement) and progress bar. You can also take into consideration the field width to make the layout better.
The placement style of progress bar is not available for multi-select controls.
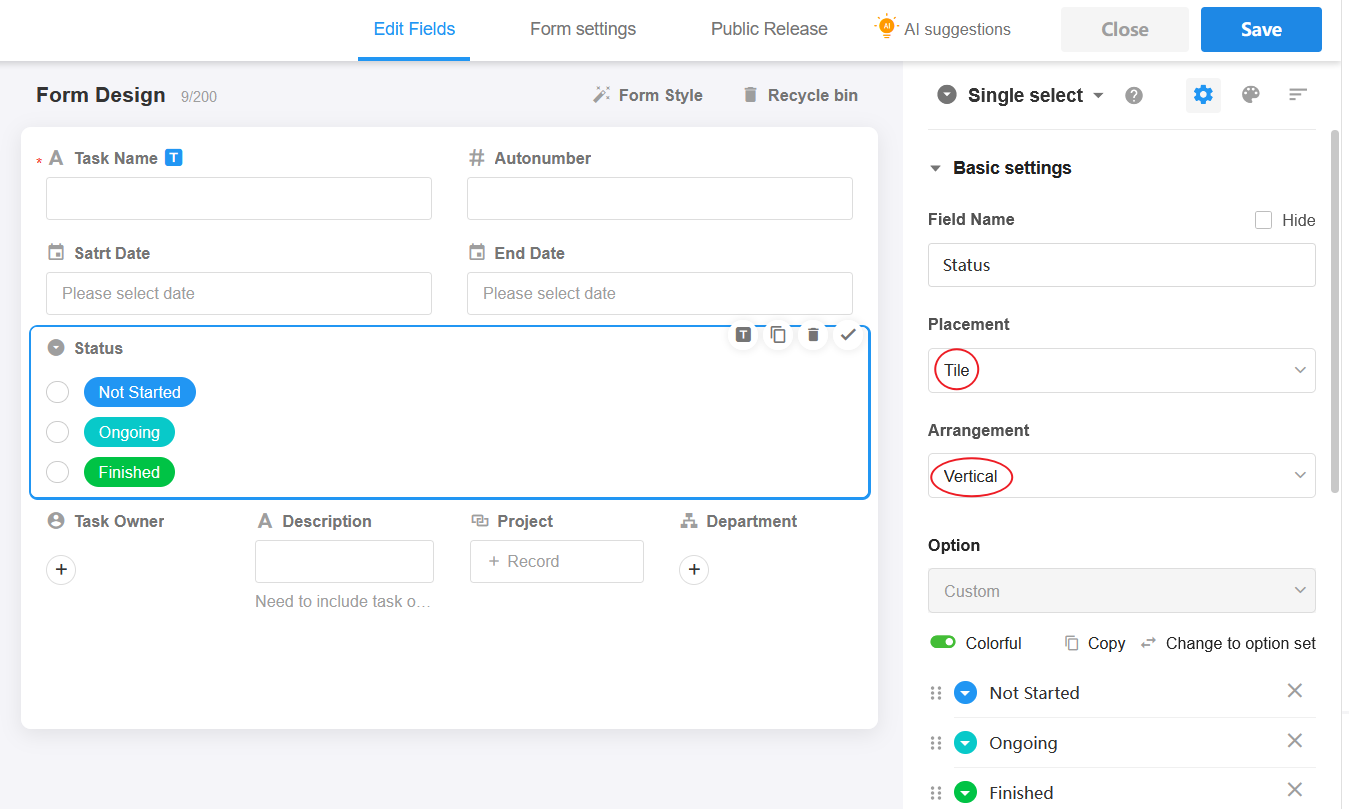
Example:
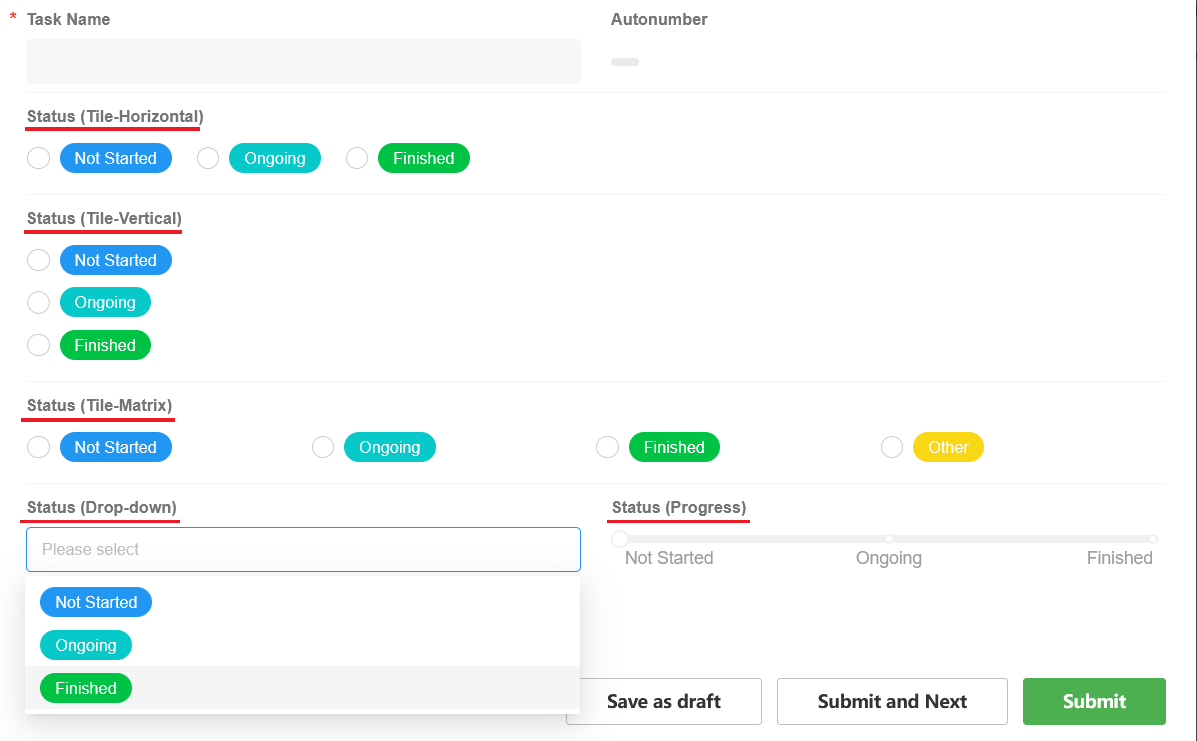
-
If it is tiled horizontally, the options will be displayed next to each other, and when there are multiple lines, the options are not aligned.
-
If it is a matrix arrangement, it will be fixed to display in a line of X options according to the length of each option, and left-aligned for multiple lines.
2. Add/Delete options
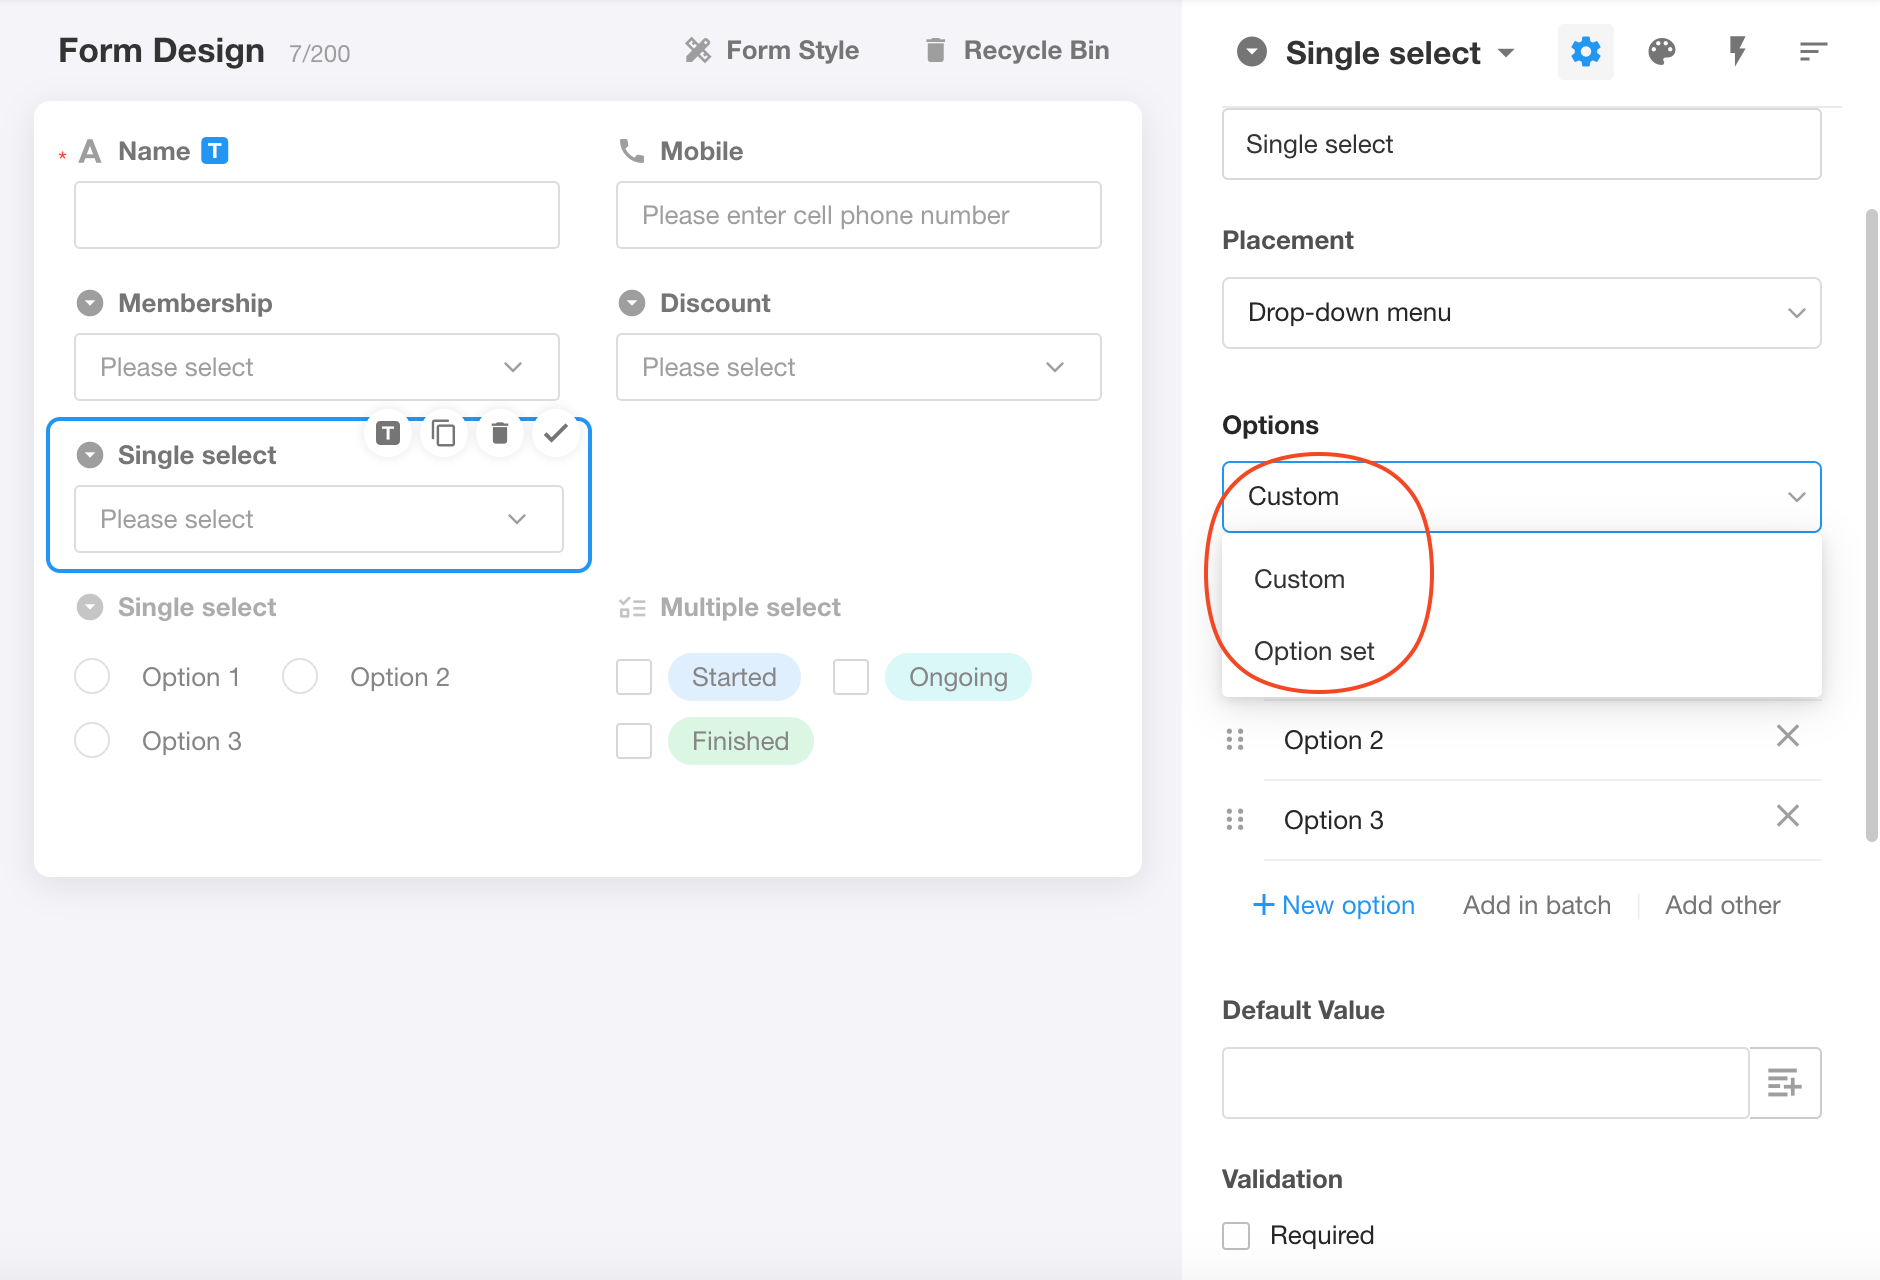
You can configure custom options for the field or select a configured set of options.
Once selected and saved, they cannot be changed unless the field is deleted.
To learn more about option sets, check out this article.
3. Add/Remove custom options
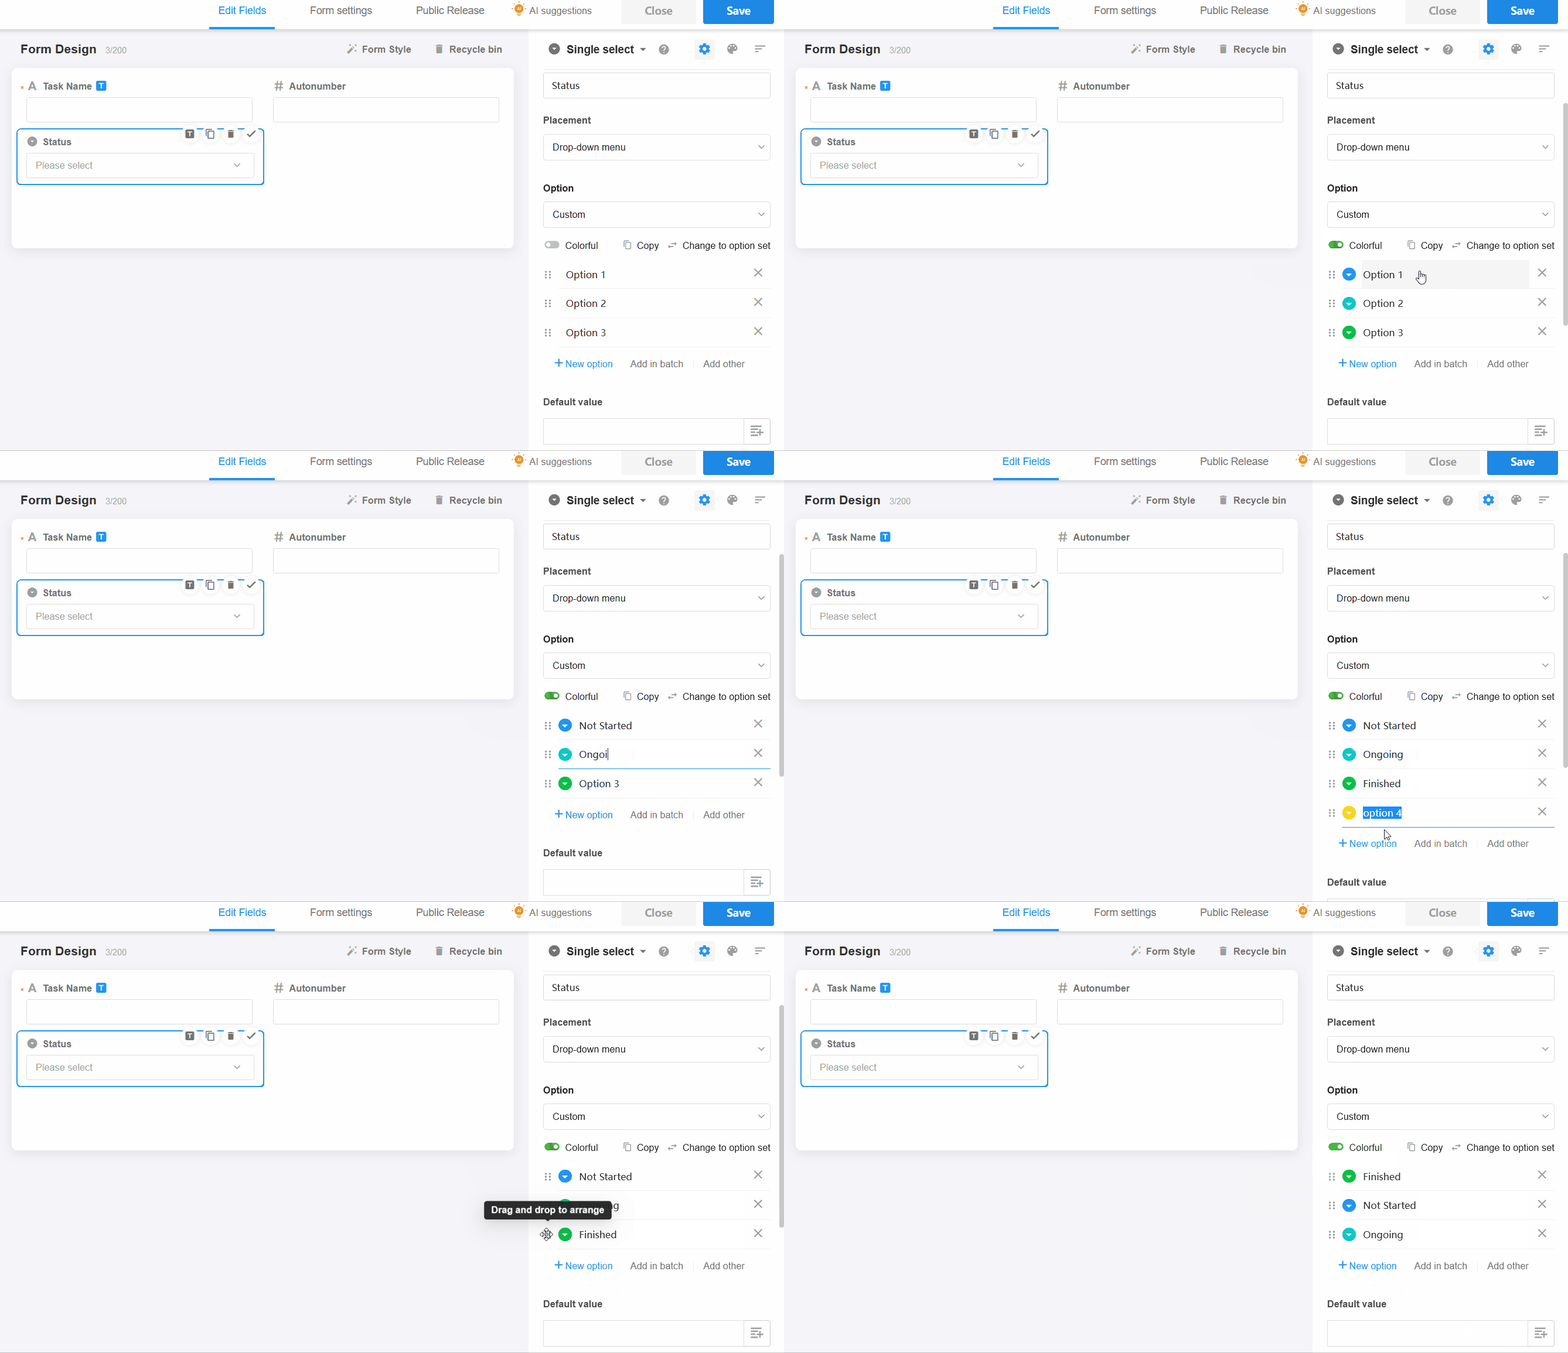
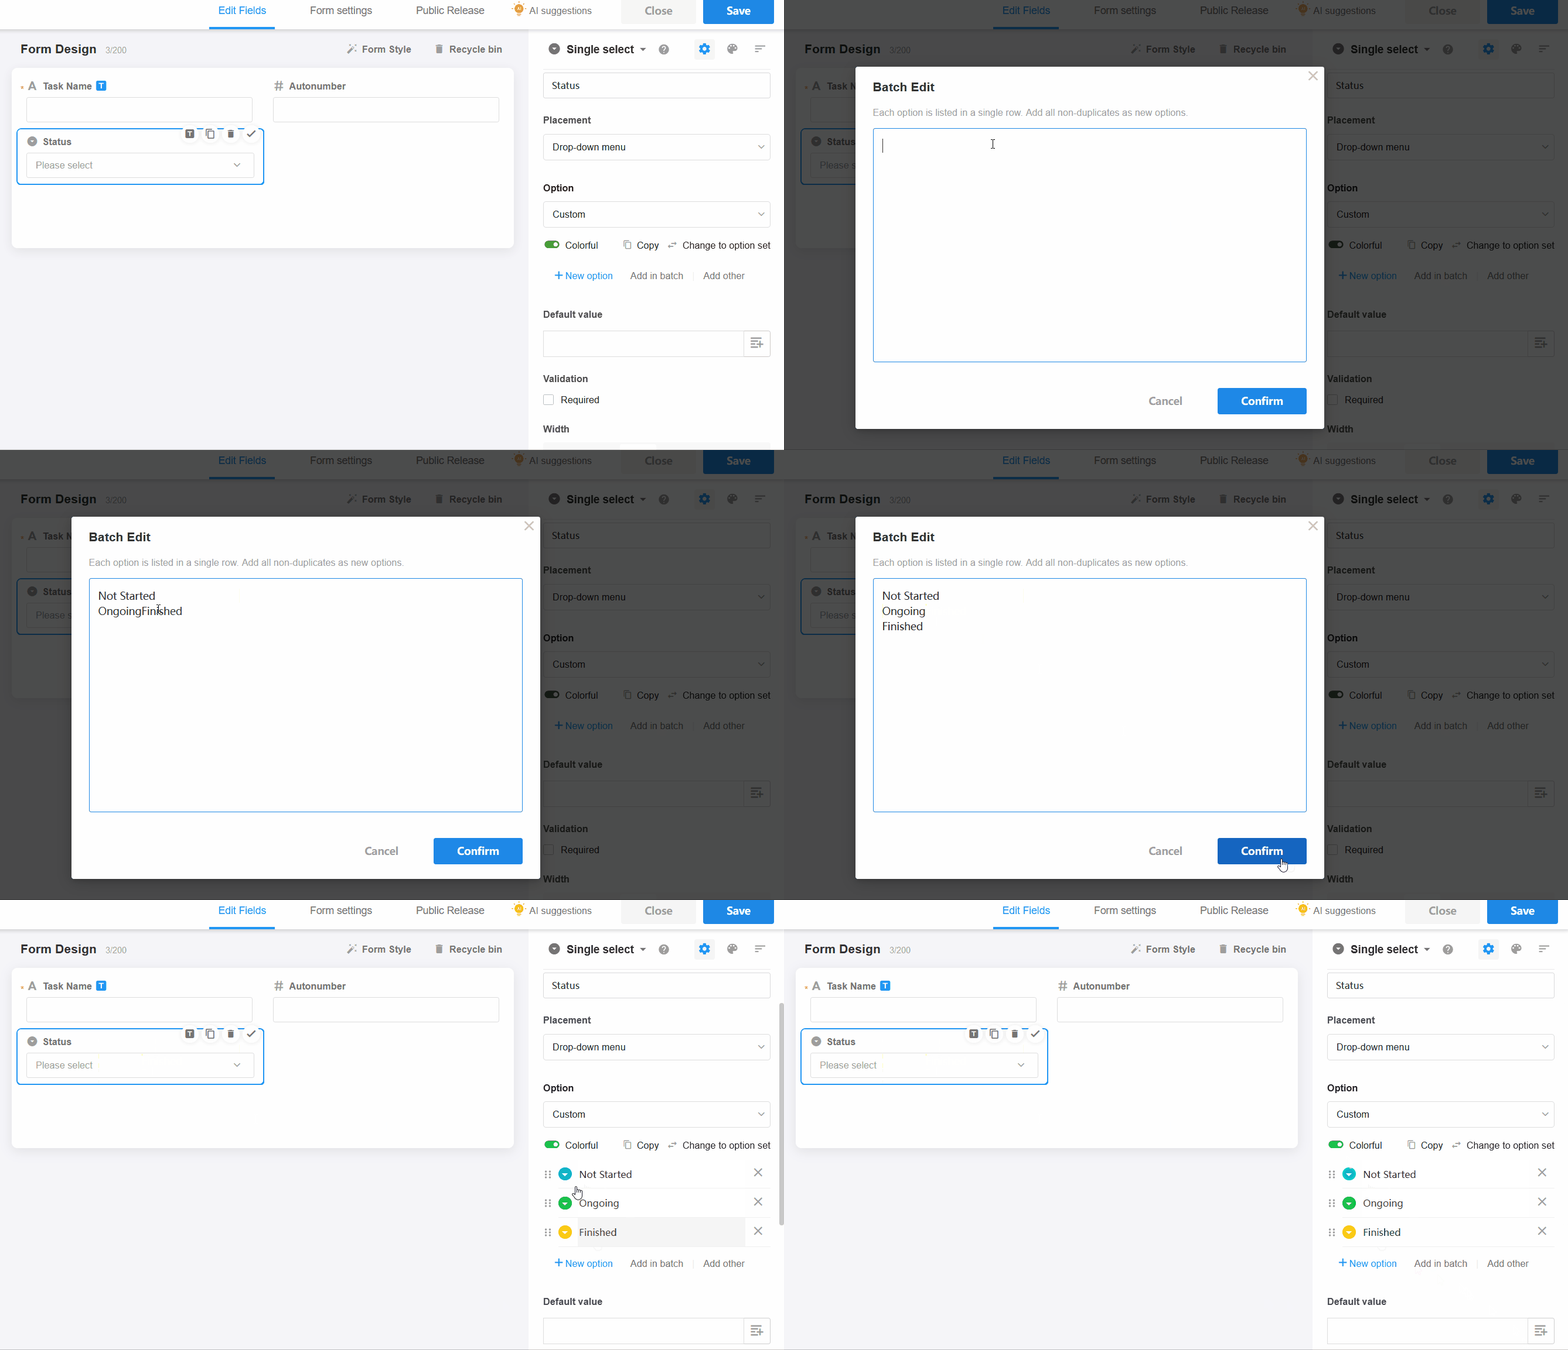
Batch add options
You can enter multiple lines of text, and each line is automatically recognized as an option.
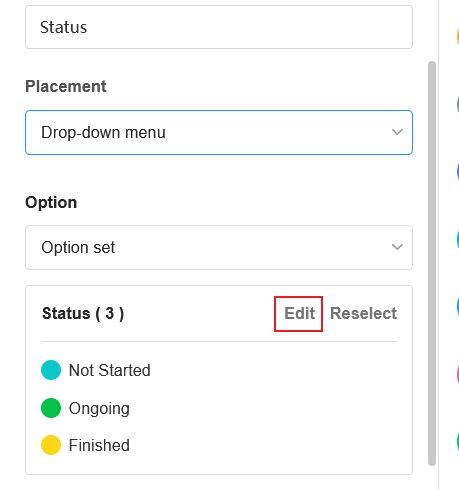
If the options are from an option set, they are automatically synced to the option set when editing them in a field.
3. Other option
When not all options can be listed, it is necessary for the user to manually enter other content to be added. "Other" option can be customized with a name such as "None of the above". The "Other" option will always be displayed last.
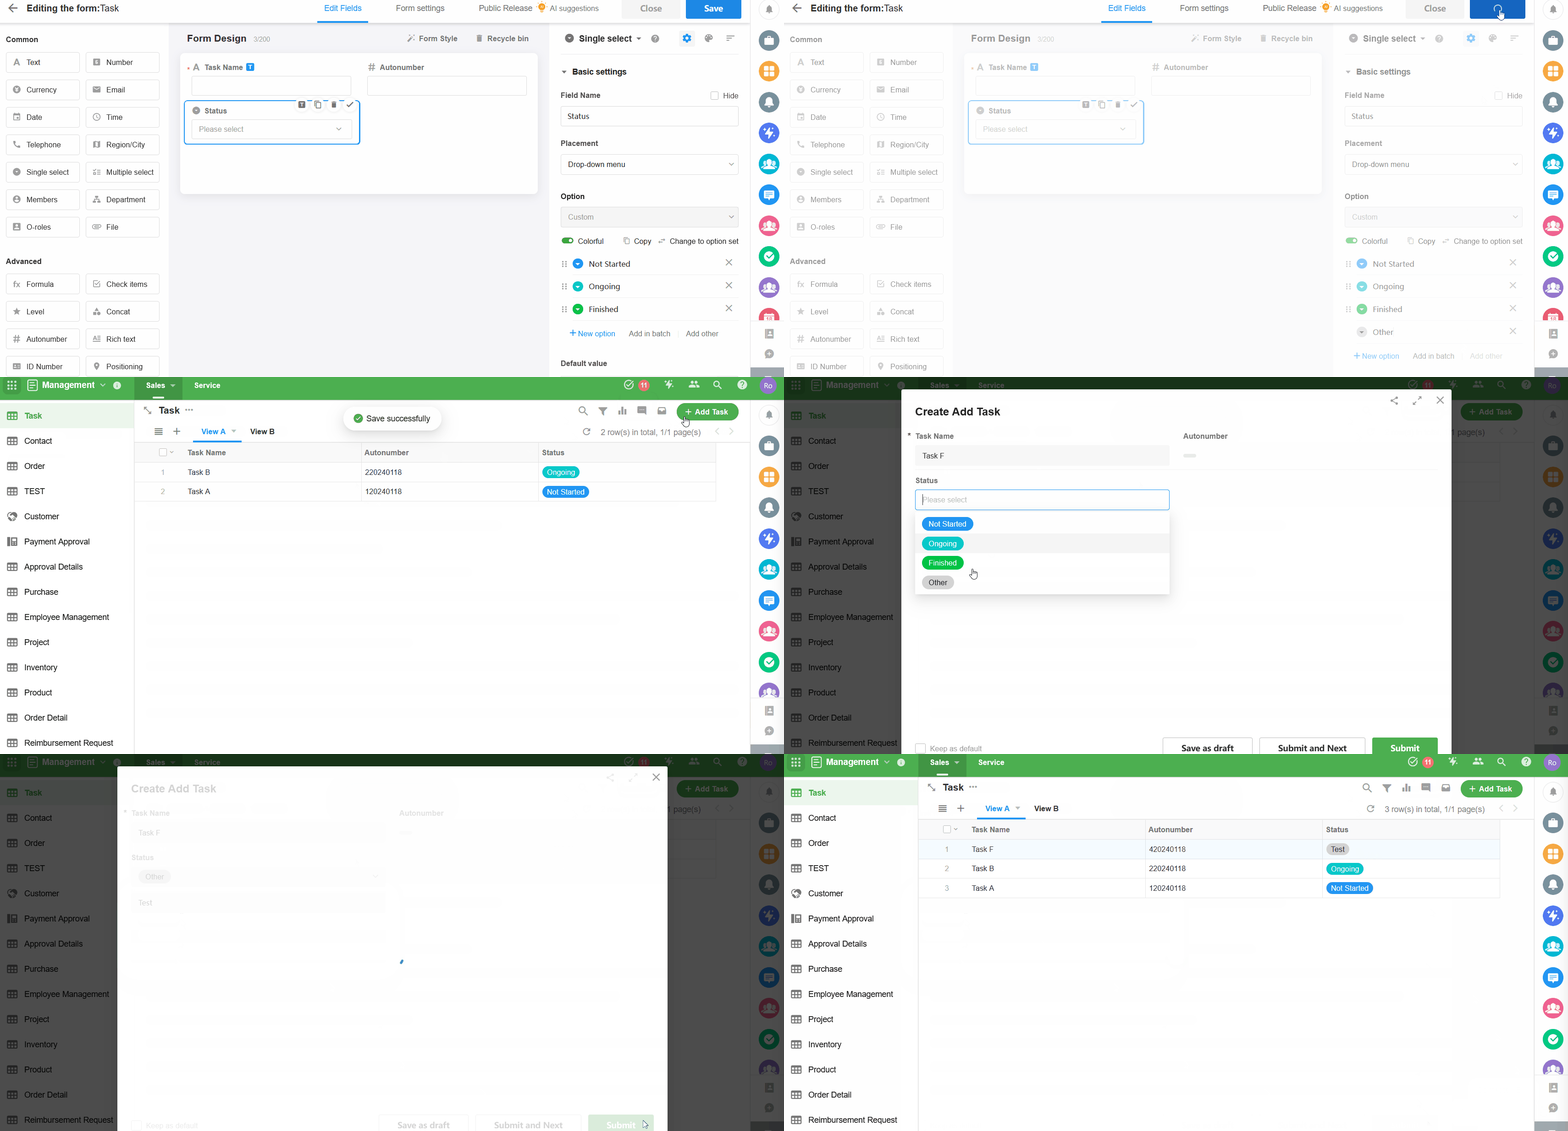
For the "Other" option, it will show the input content when displaying, but for filtering, you still need to select "Other".

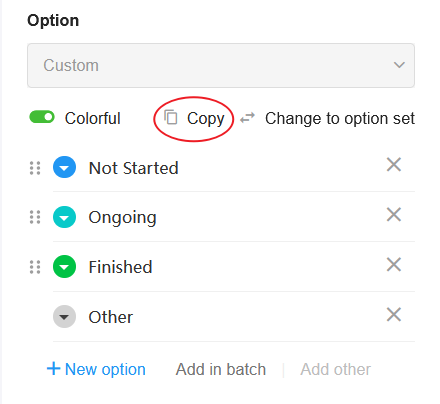
4. Copy options
It will copy all the existing options as new options.
5. Options sorting
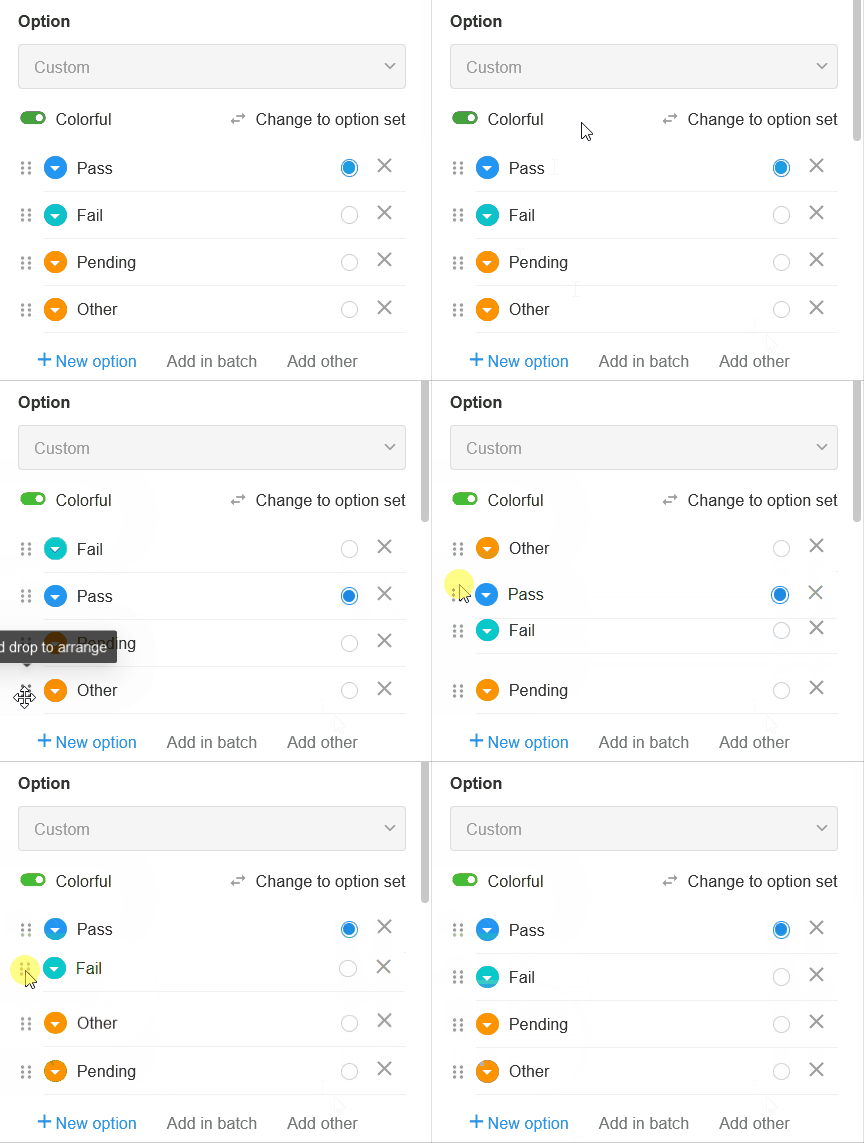
When sorting records in a view, the system supports sorting by options, and the order of sorting corresponds to the positions of the options in the field configuration.
It is worth noting that if the positions of options are adjusted, in order to ensure that the records in the view are correctly sorted according to the new order of options, the application administrator needs to perform a batch data refresh operation. Only in this way can the record sorting in the view align with the updated order of options in the field configuration.
To learn more about batch refreshing data, check out this article.
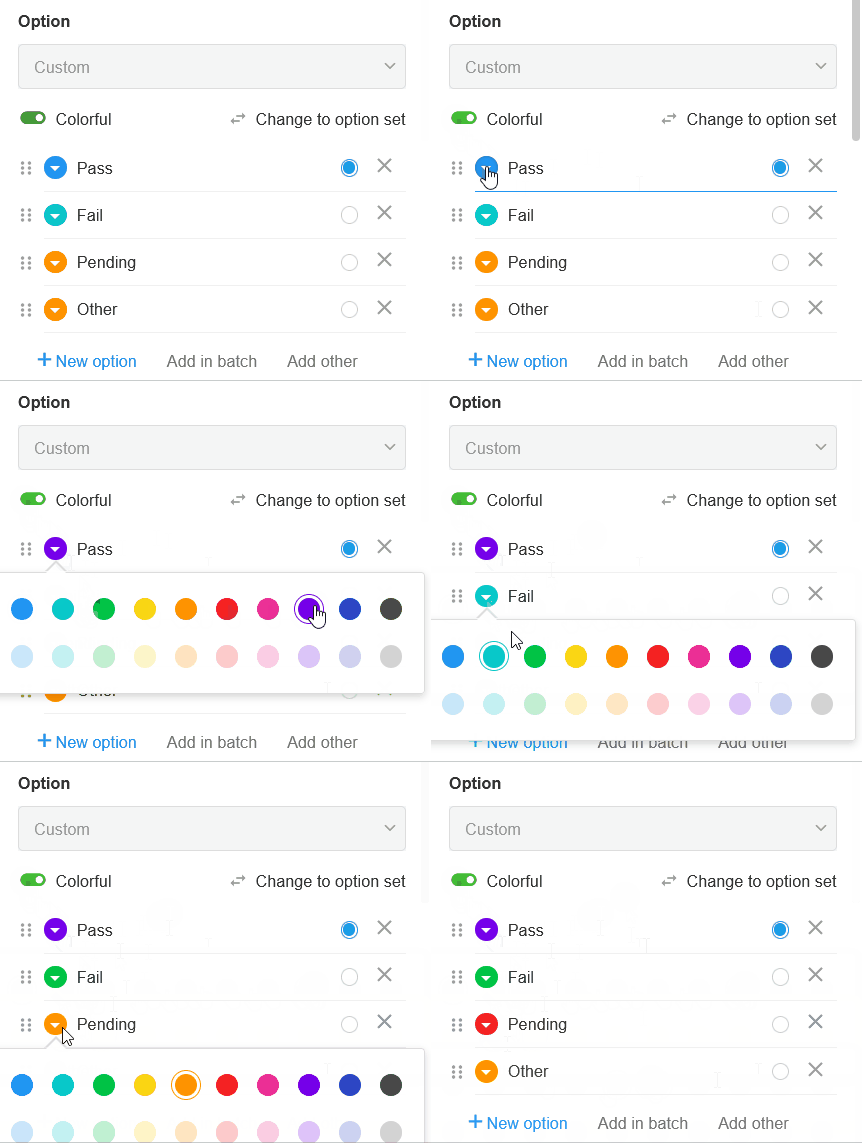
6. Set option colors
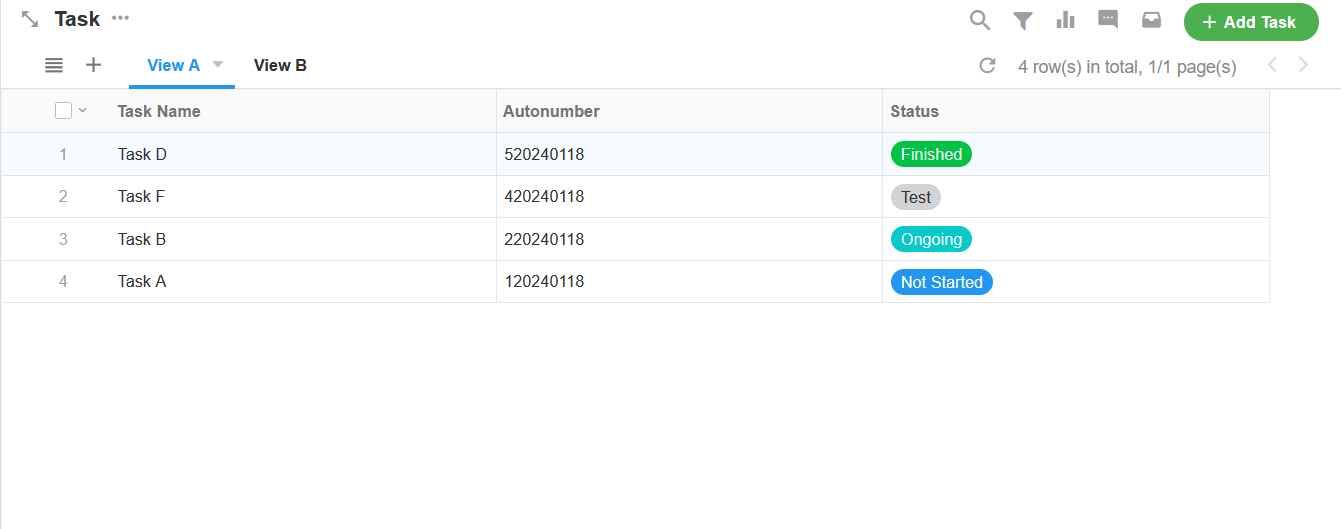
For each option, you can set a color for easy identification and management.
As shown in the worksheet:
7. Assign values to options
Sometimes, behind each option, there may be implicit specific numerical values. For example, when setting a single-choice field to represent tax rates (such as 1% or 3%), these percentages are actually textual content and cannot be directly used for numerical calculations. In order to use these tax rates in calculations, we can assign a corresponding numerical value to each option (such as 0.01 representing 1%, 0.03 representing 3%). This way, in actual calculations, the system can utilize the assigned numerical value rather than the textual content displayed in the options.
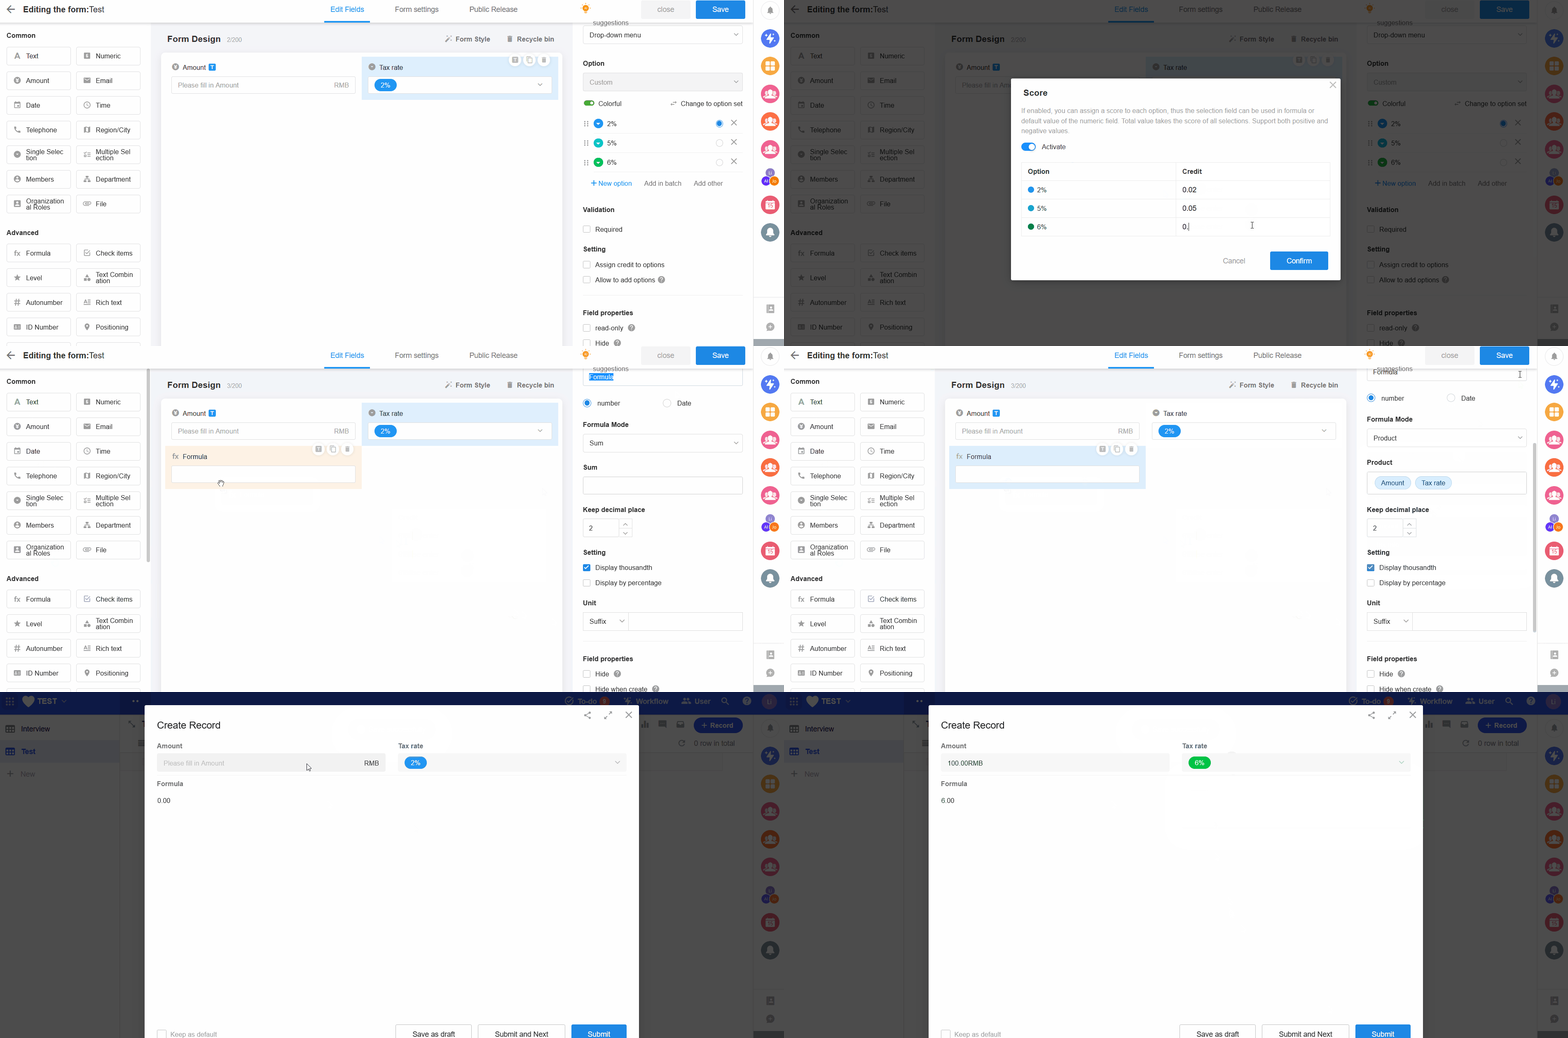
The assigned value can only be used in formula control and to set default values (other field values).
Assigned values cannot be used for calculations when setting default values with functions.
Option sorting is not based on the assigned values.
8. Default values of options
If you set default values for the options, the default options are automatically selected when a new record is added. For the custom option and option set, the default value is configured in different ways.
It supports setting fixed default values, or dynamic default values.
-
Fixed default value
Click the input box and select a fixed default option.
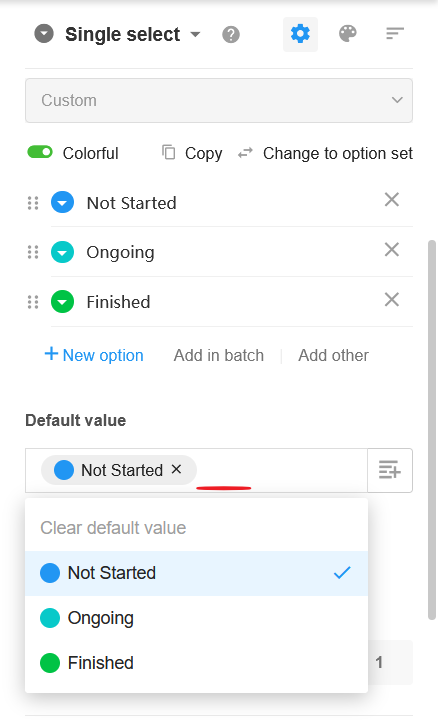
-
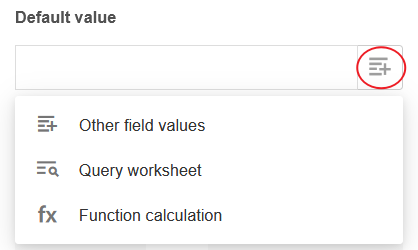
Dynamic default value
You can set dynamic defaults in three ways, other field values, query worksheets, and functions.
Examples of setting default values by functions
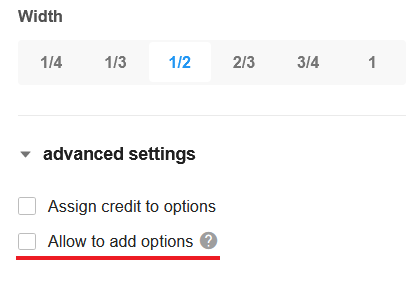
9. Allow users to add options
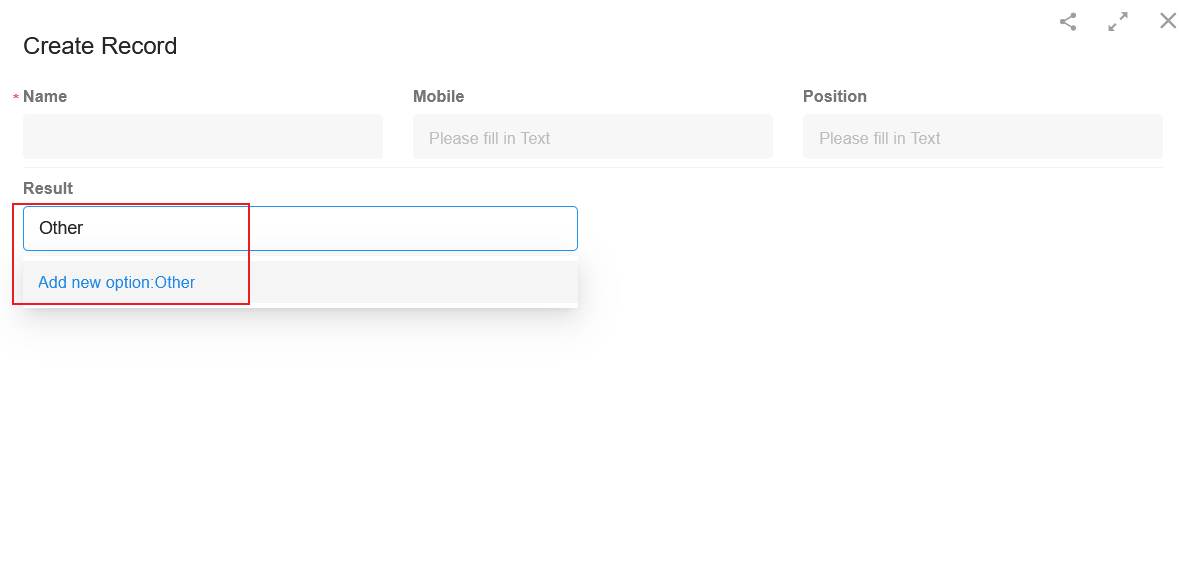
Sometimes, the options configured by the admin cannot cover all needs. When selecting, if there is no appropriate option, users can enter manually and add it as a new option.
"Allow to add options" is only available in the drop-down mode.
Users enter the option content in the input box and press Enter to add the option.
10. Show all options when read-only
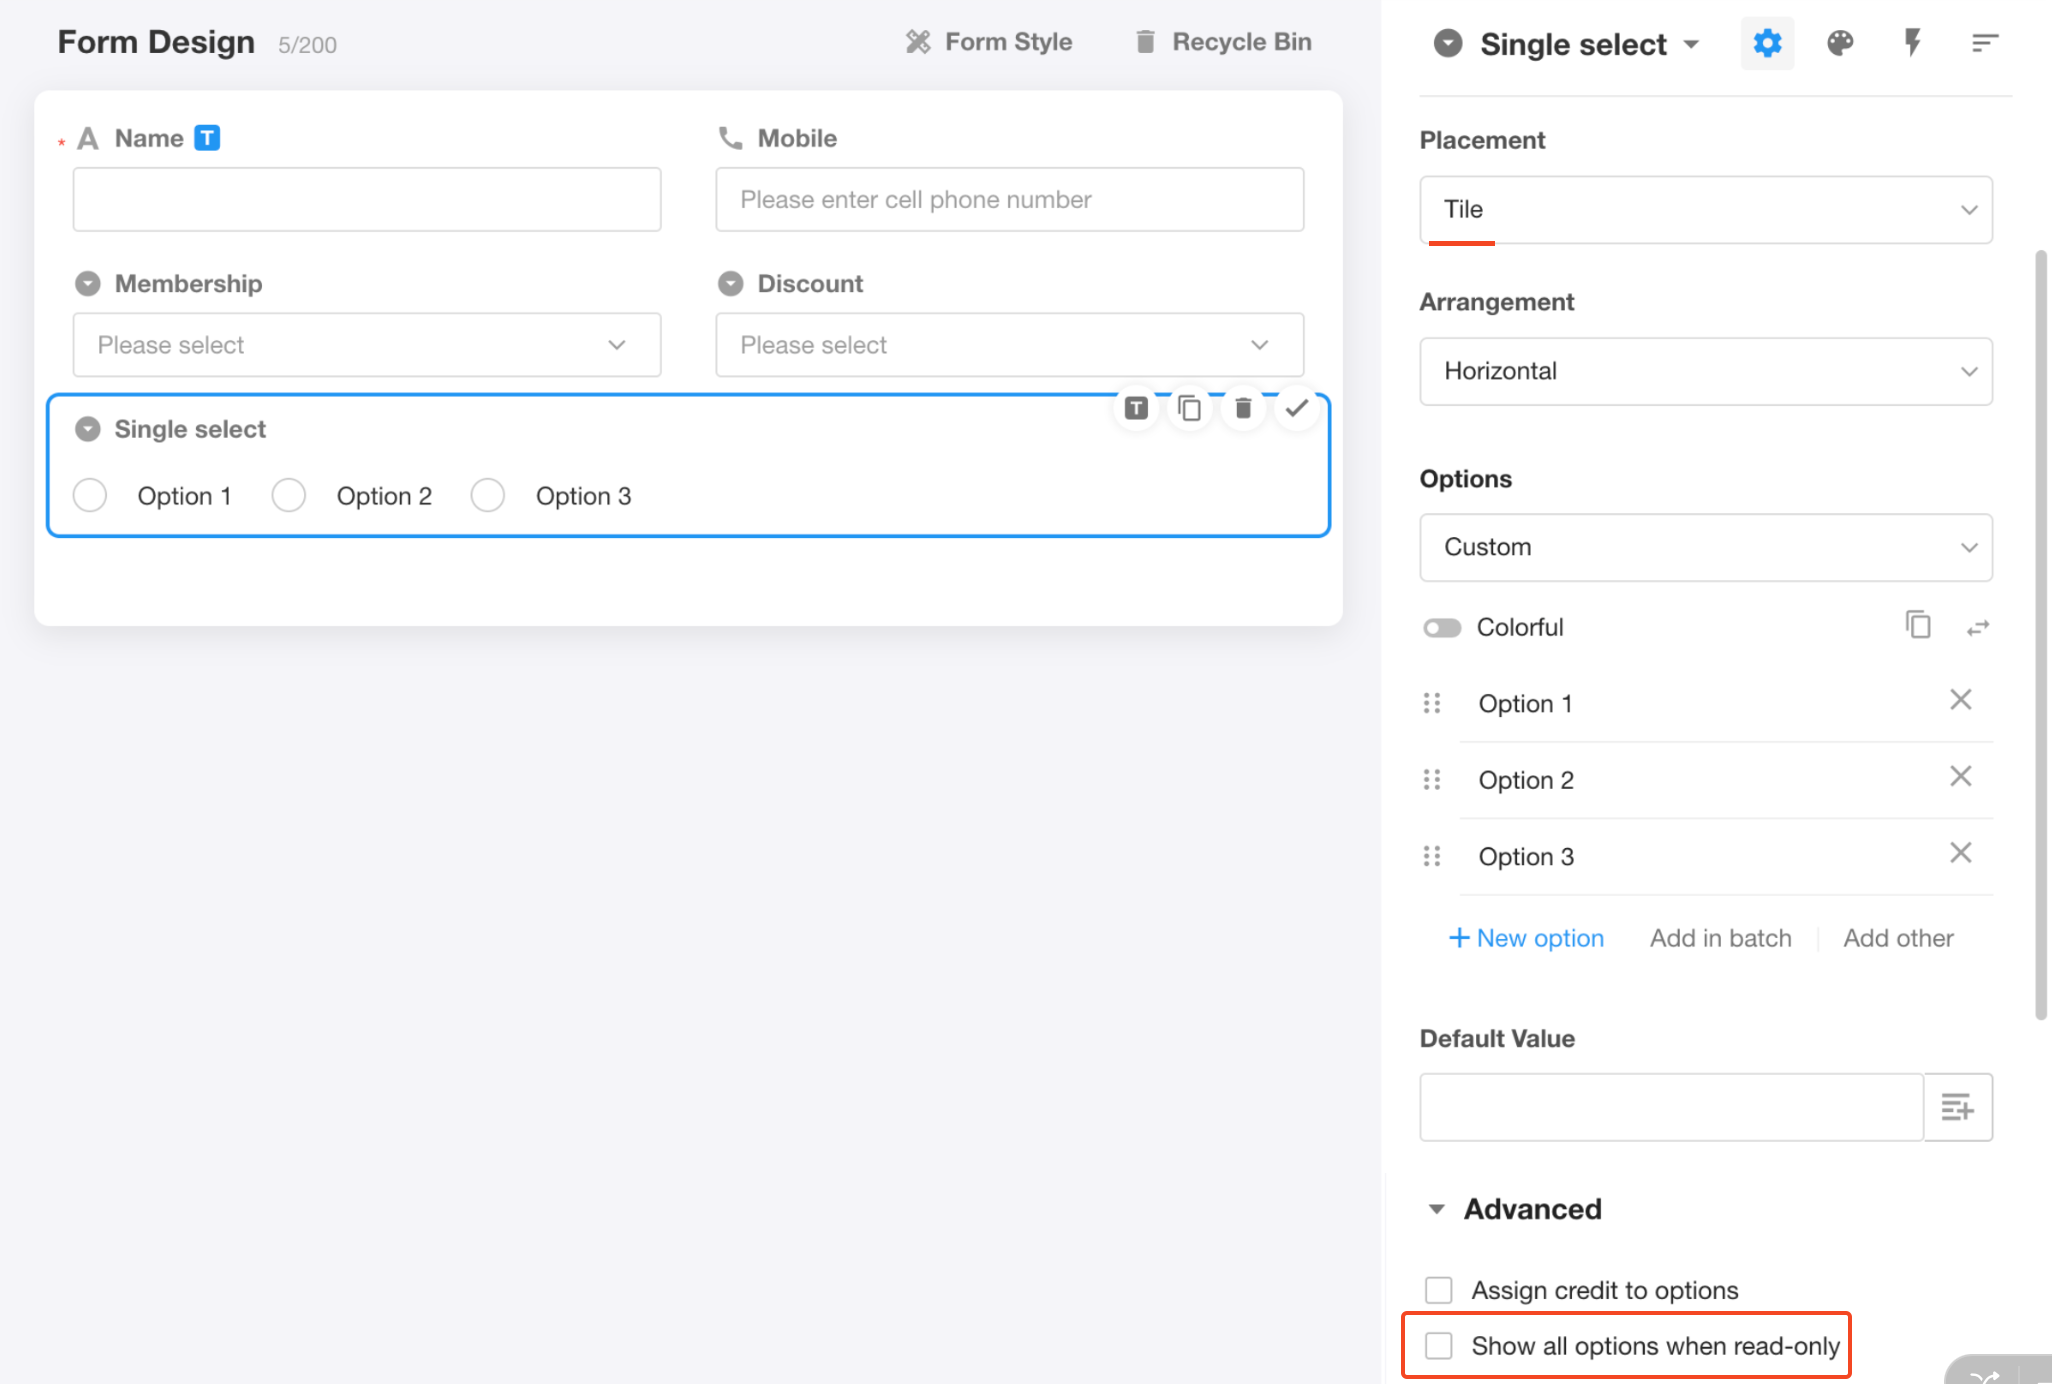
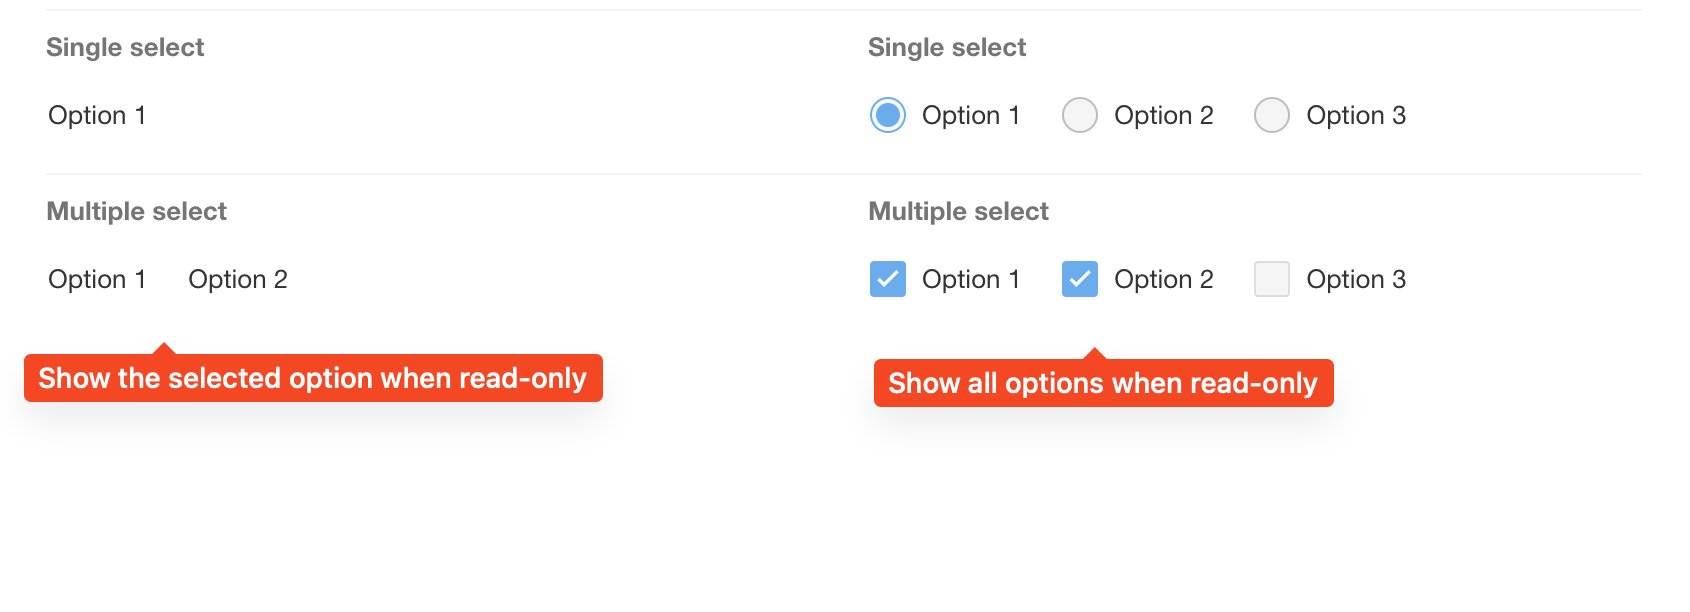
When the options are tiled for display, you can check “Show all options when read-only”, if you don't check it, only the selected option will be displayed.
11. Option set
An option set is a reusable template or data source of options designed to simplify the configuration process for single-select and multiple-select controls. When creating or editing single or multiple-select controls, users can directly select the desired options from existing option sets or convert custom options in the current field into an option set for sharing across other worksheets (please note that this conversion is irreversible).
Below are detailed explanations on the usage of option sets:
-
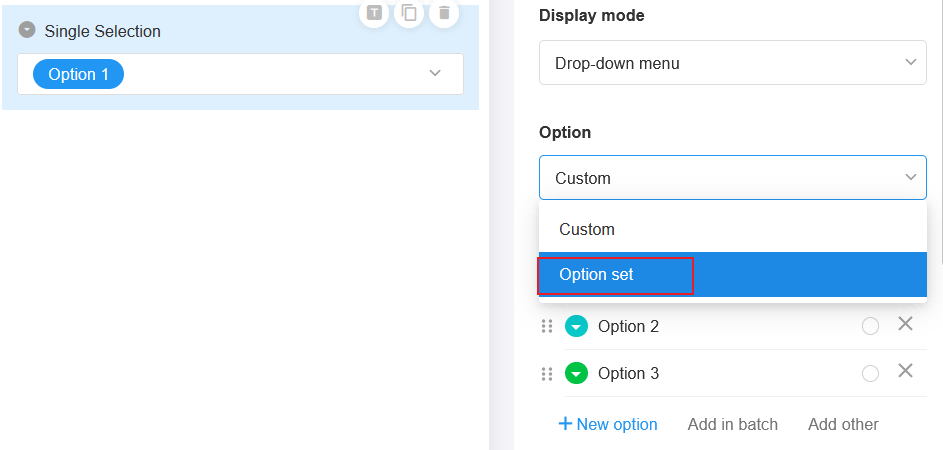
Select an option set
When creating a new single or multiple-select field, users can directly choose an existing option set. This allows for quickly configuring a set of predefined options for the field, enhancing configuration efficiency.
-
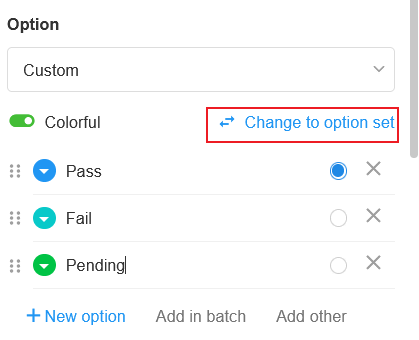
Convert custom options to an option set
If custom options in the current field need to be shared across other worksheets, users can choose to convert these options into an option set. After conversion, any further edits made to these options will automatically synchronize to the option set. Fields in other worksheets referencing this option set will also be updated accordingly, ensuring data consistency.
-
Convert selected option set to custom options
In certain situations, users may wish to convert a selected option set into custom options. This action will detach the field from the original option set and create a new set of custom options based on the content of the original option set. After conversion, all historical data related to this field will be updated with the new custom options. Additionally, users have the option to convert these custom options back into a new option set, but please note that the newly created option set is not the same entity as the previous one.
-
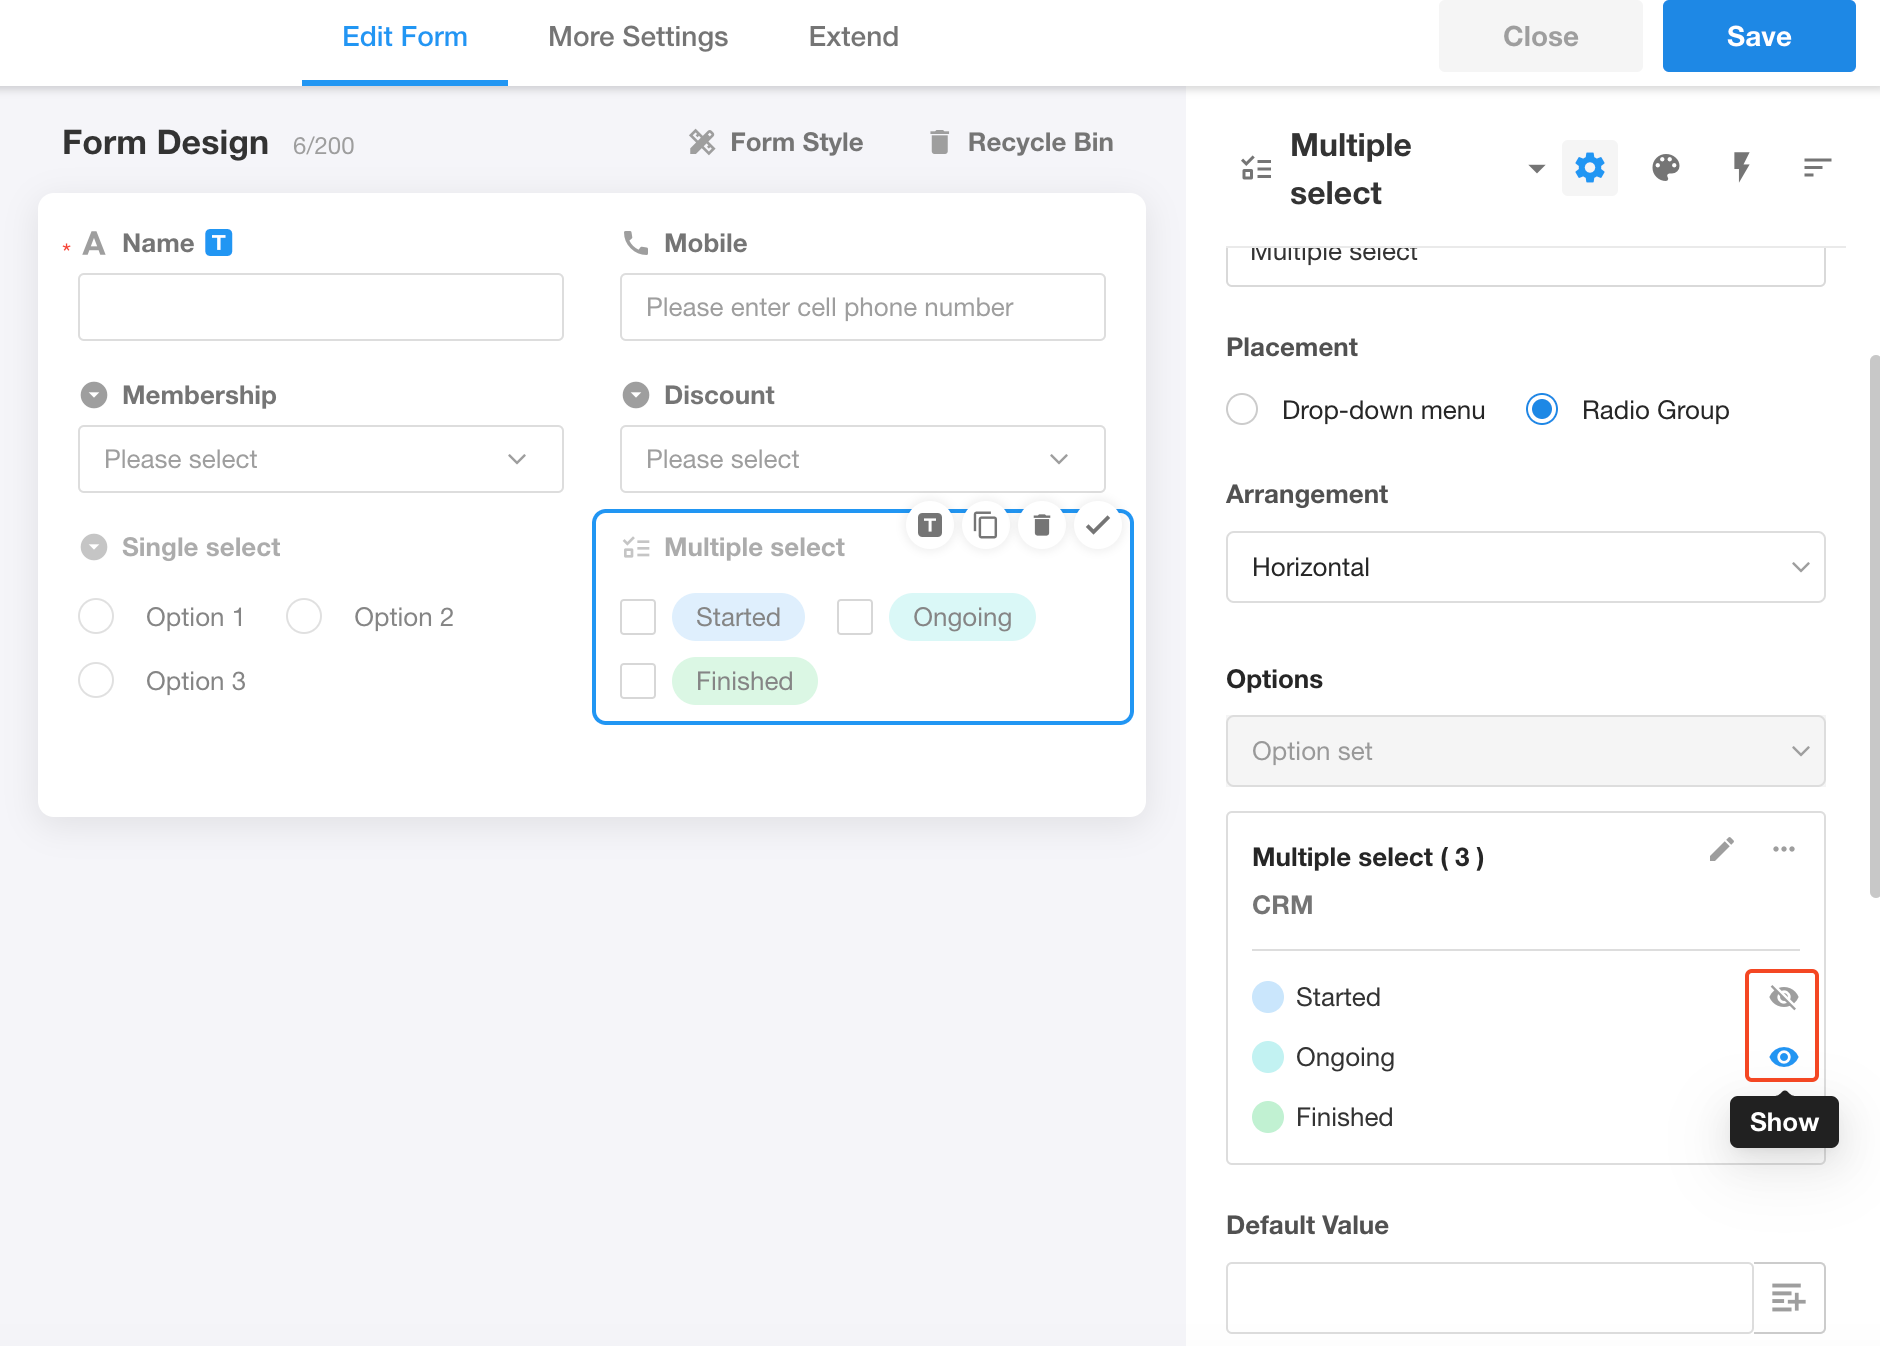
Hide some options in an option set
To meet specific requirements for different fields, users can choose to hide certain options within an option set. Hidden options will not be displayed to users when selecting a field, ensuring that users only see and select relevant options. This function helps simplify the user's selection process and reduces unnecessary disruptions.
-
Manage option sets
To learn more about templates, check out this article