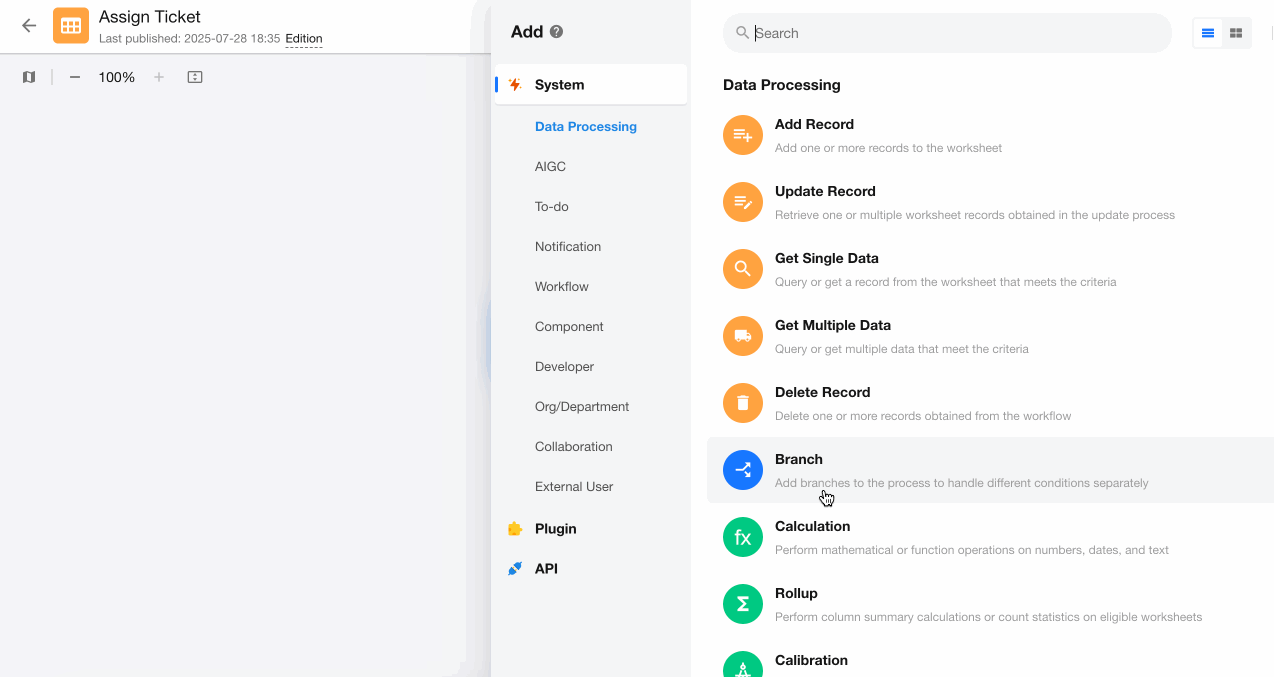
Node - Branch
Node Function: The branch node uses filters to route records with different statuses through different branch workflows. After all executable branches complete, they merge back to continue the main workflow.
Example: When a new ticket arrives:
-
If it's presale/purchase-related: Assign to Member A for follow-up
-
If it's business cooperation-related: Assign to Member B for follow-up
-
All other tickets: Assign to Member C for follow-up

Four Different Branch Structures
-
Parallel Branches:
Configure different branch conditions based on record data, allowing multiple branches to be added.
All qualifying branches execute sequentially from left to right.
The left branch completes before the adjacent right branch begins execution.
Exception: If the left branch contains Delay nodes, Approval nodes, Fill-in nodes, or sub-process nodes, the right branch will start executing without waiting for the left branch to complete.
-
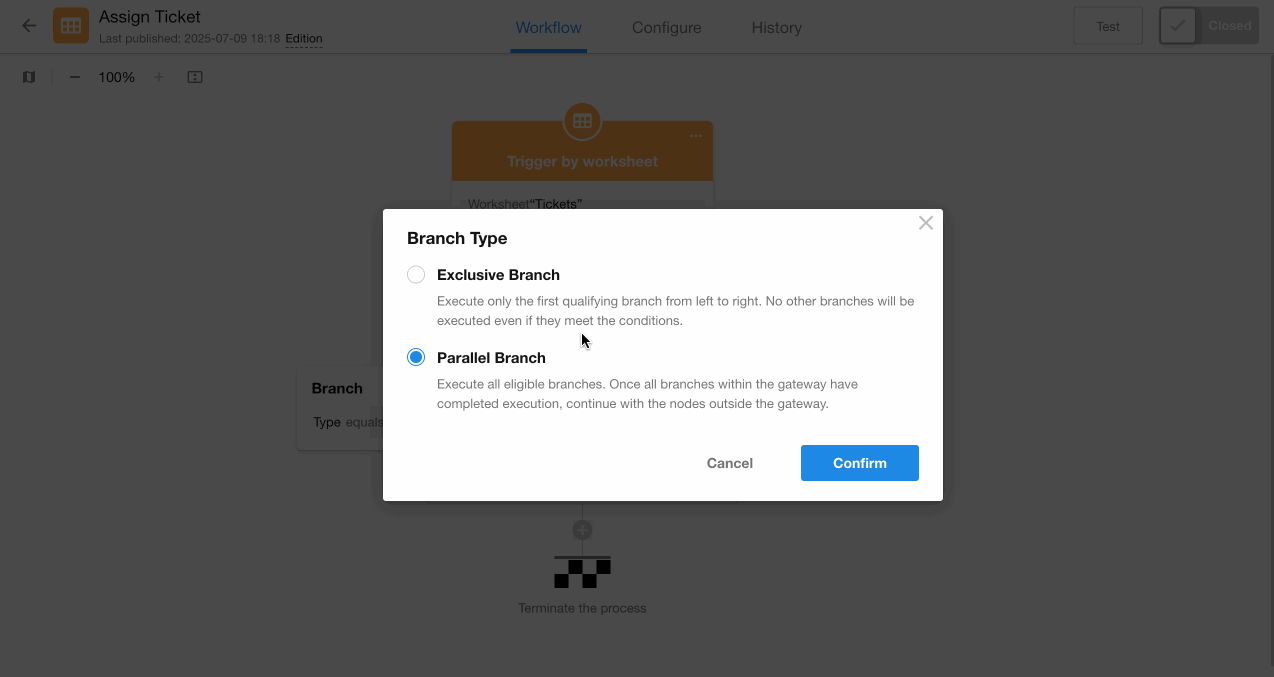
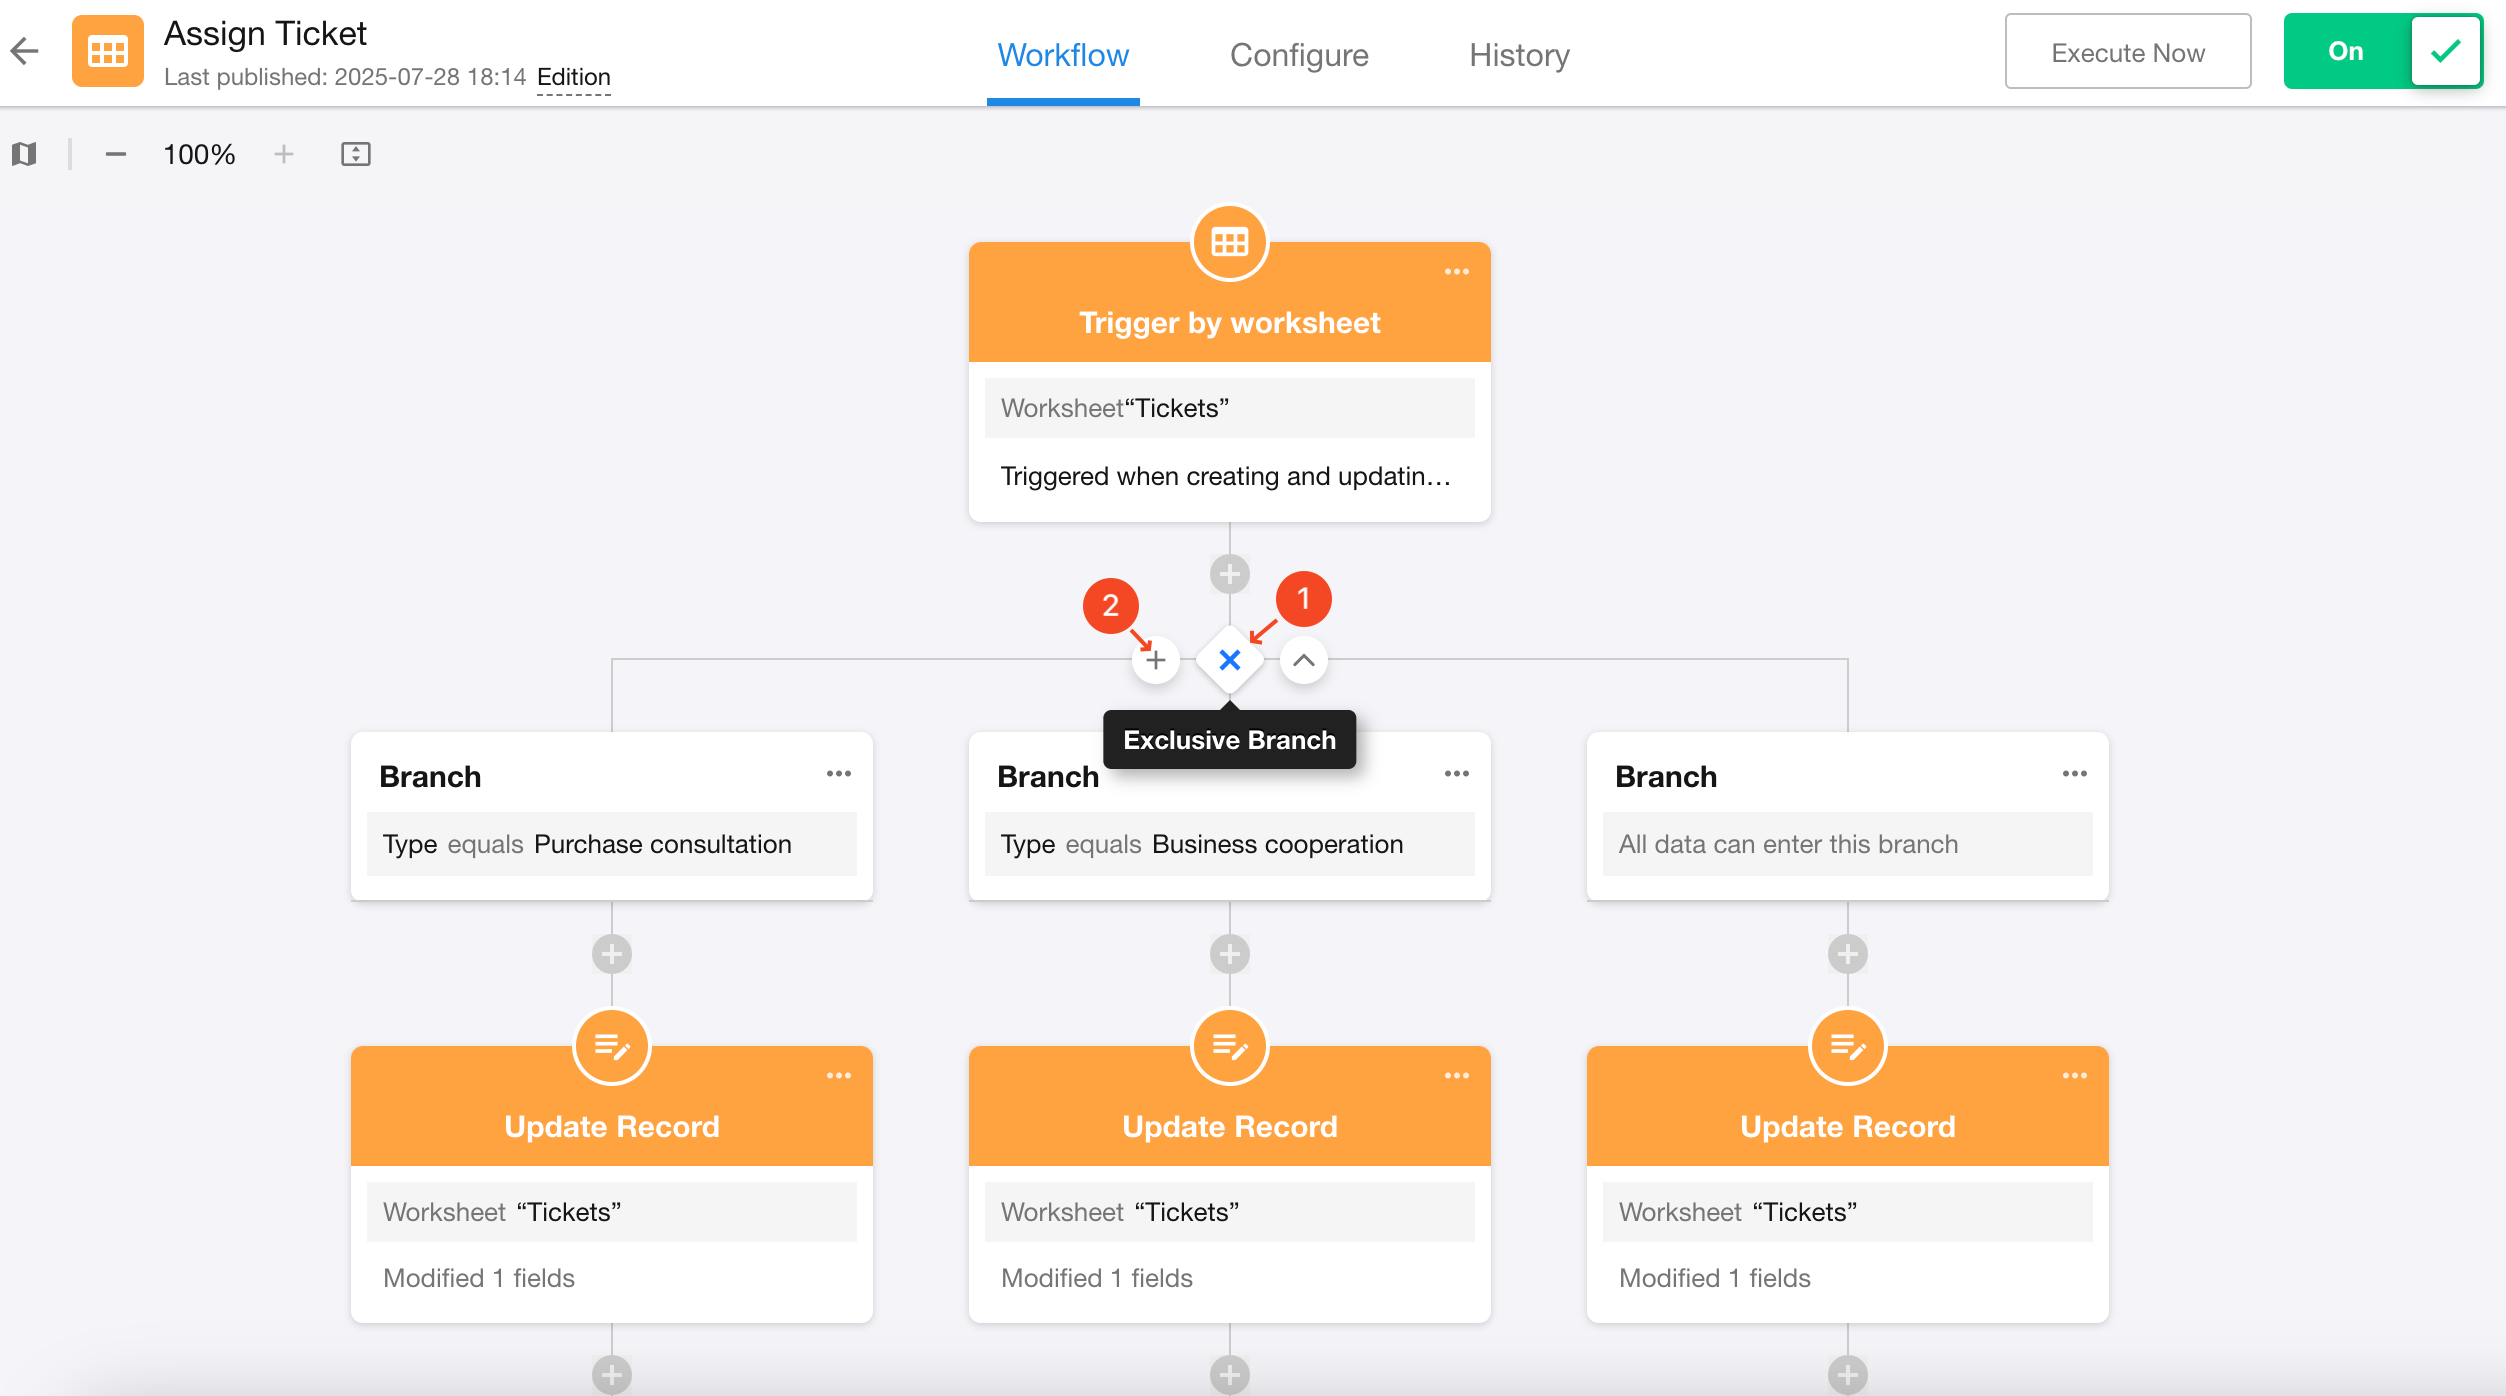
Exclusive Branches:
Configure different branch conditions based on record data, allowing multiple branches to be added.
Only the first qualifying branch (leftmost) will execute.
Right branches will not execute even if they meet conditions.
Parallel and exclusive branches can be switched between.
-
Approval Result-Based Branches:
Fixed as "Agree" and "Reject" branches based on approval node results.
-
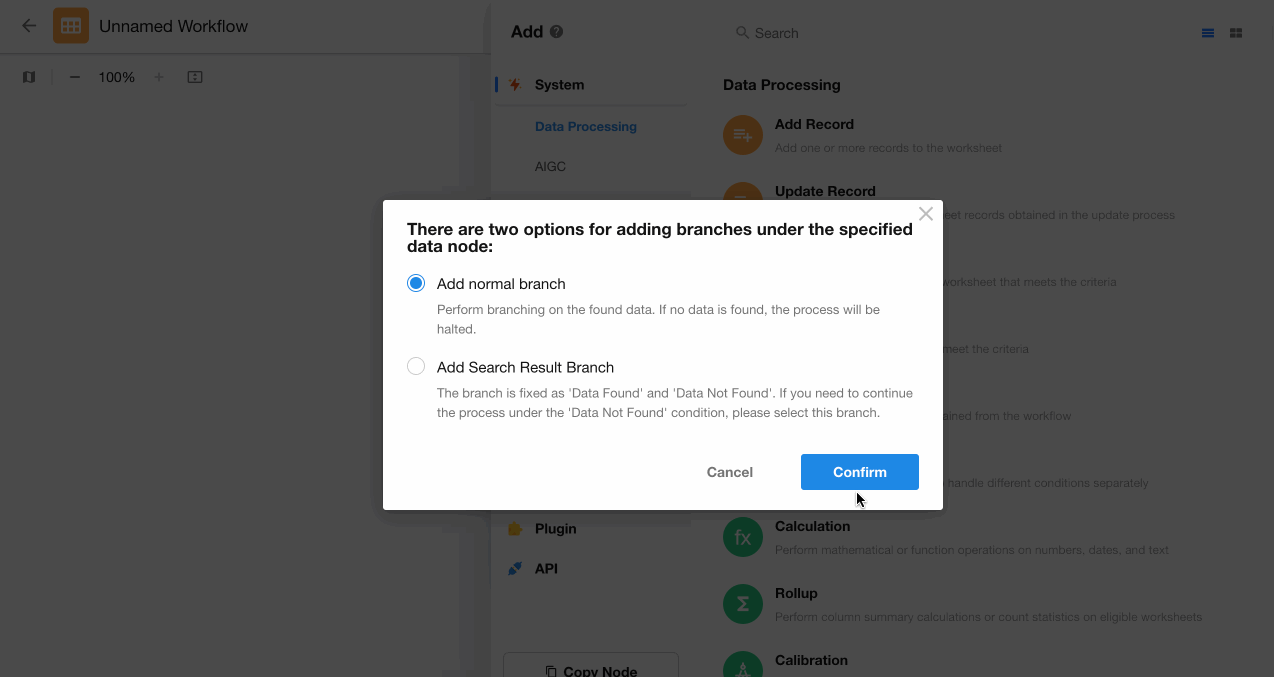
Data Retrieval Result-Based Branches:
Fixed as "Has Data" and "No Data" branches based on query results from "Get Single Data" nodes。
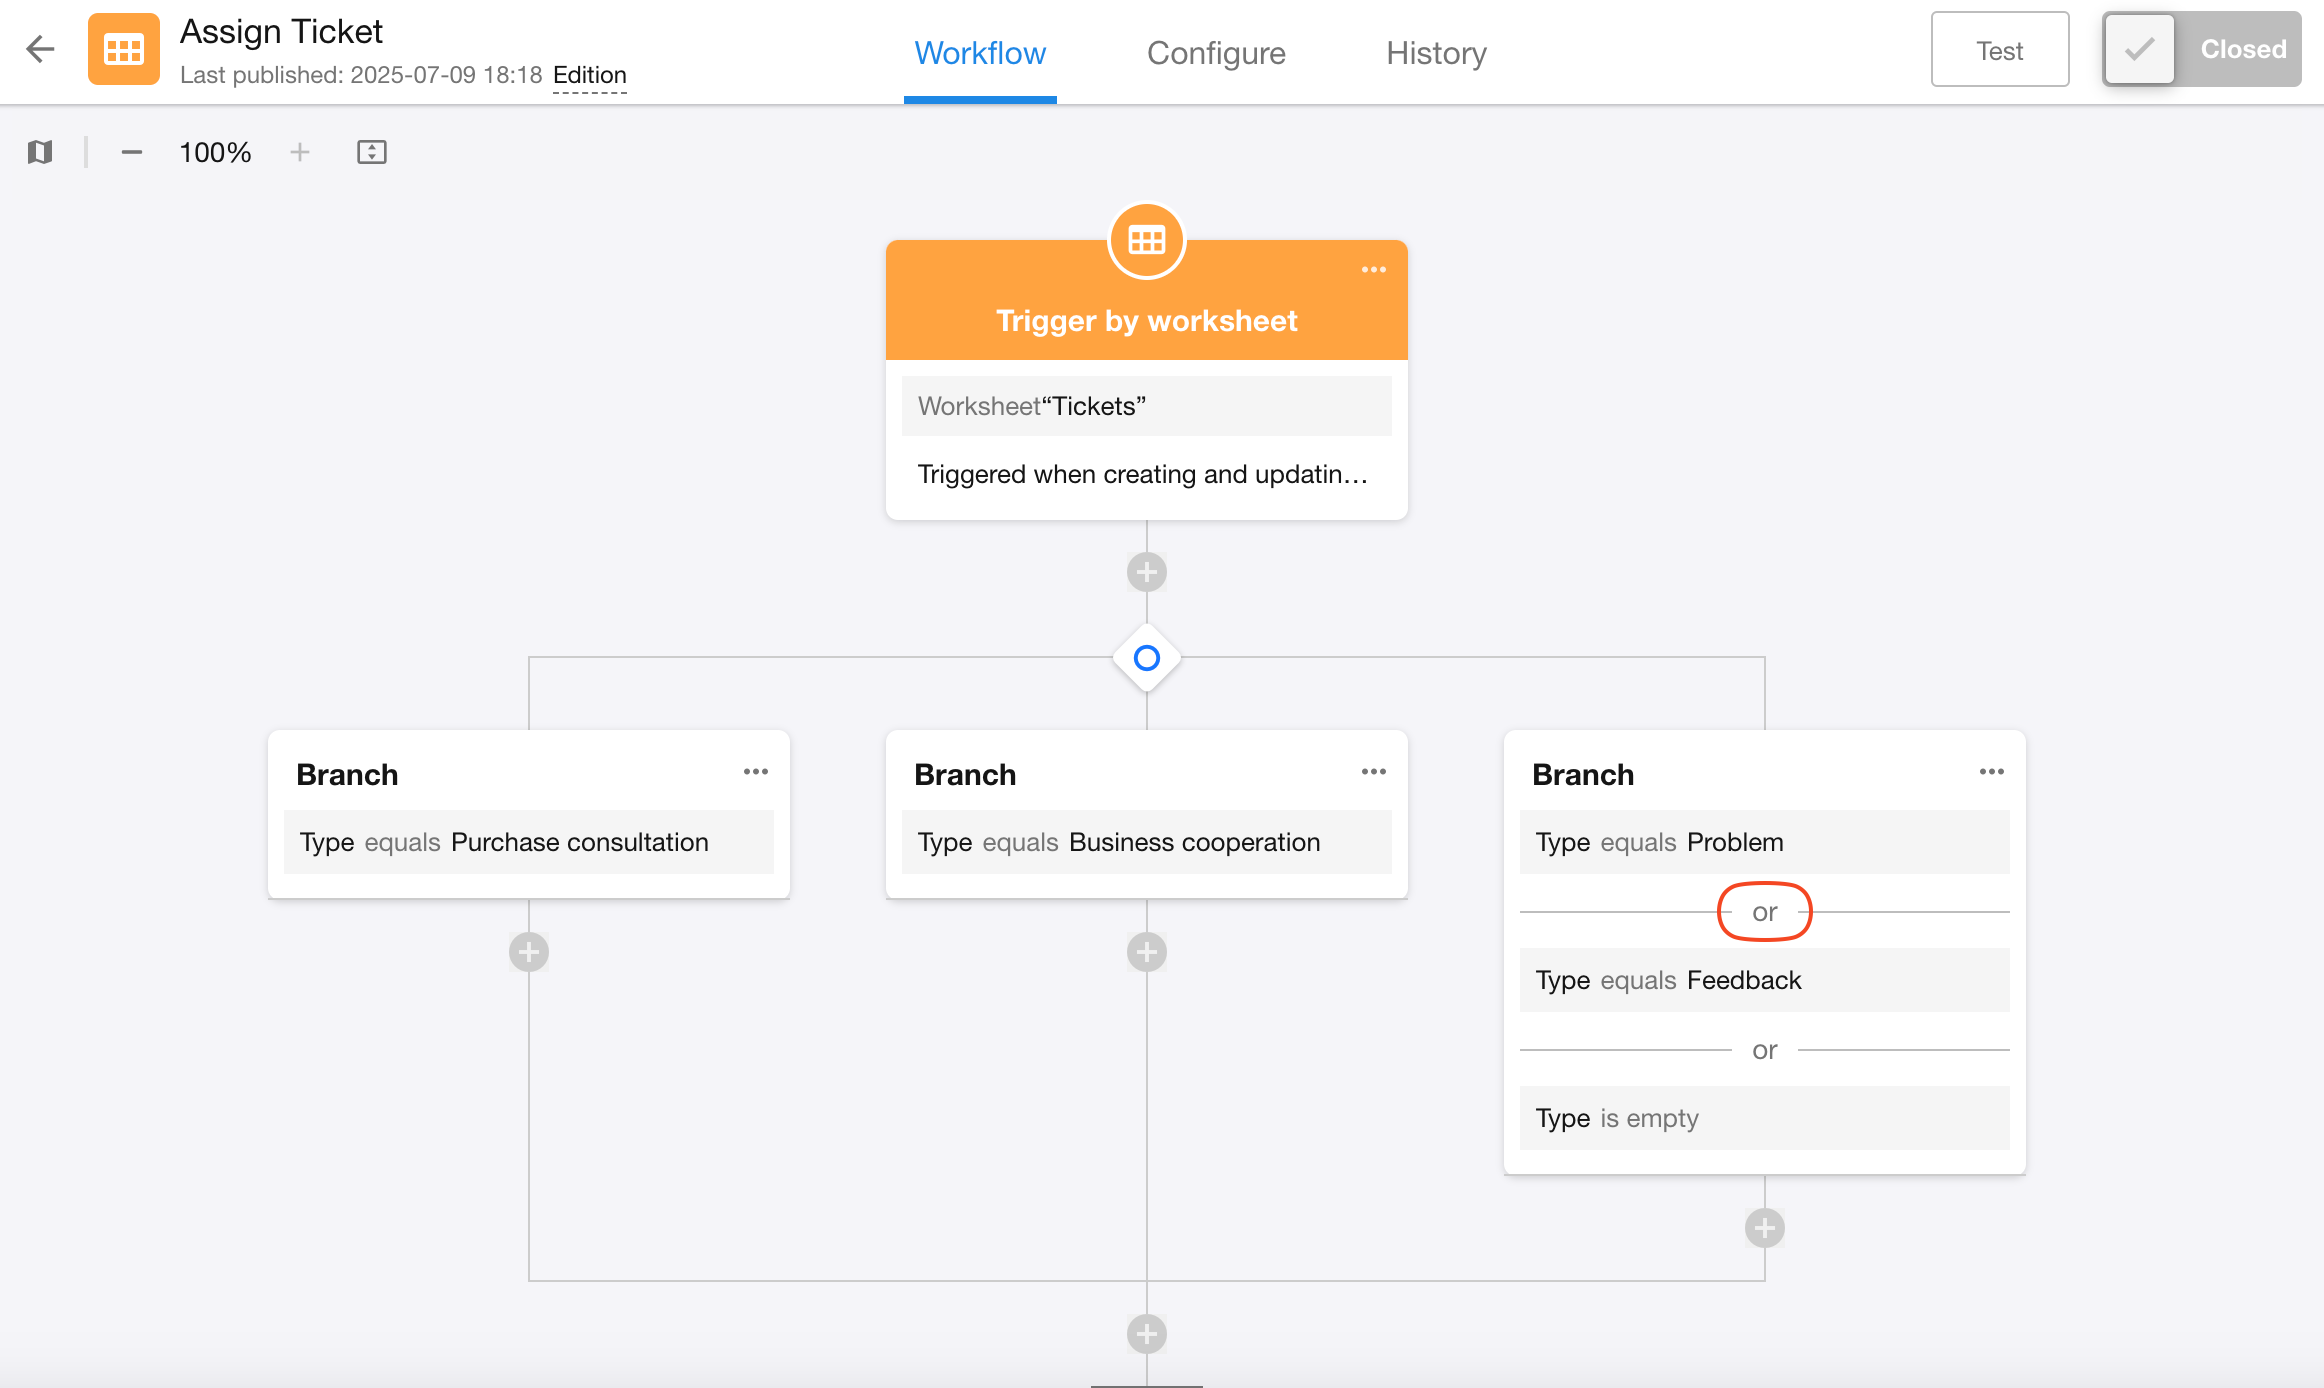
I. Examples of Parallel and Exclusive Branches
Example: When receiving new ticket feedback:
-
If purchase consultation-related: Assign to Member A for follow-up
-
If business cooperation-related: Assign to Member B for follow-up
-
All other tickets: Assign to Member C for follow-up
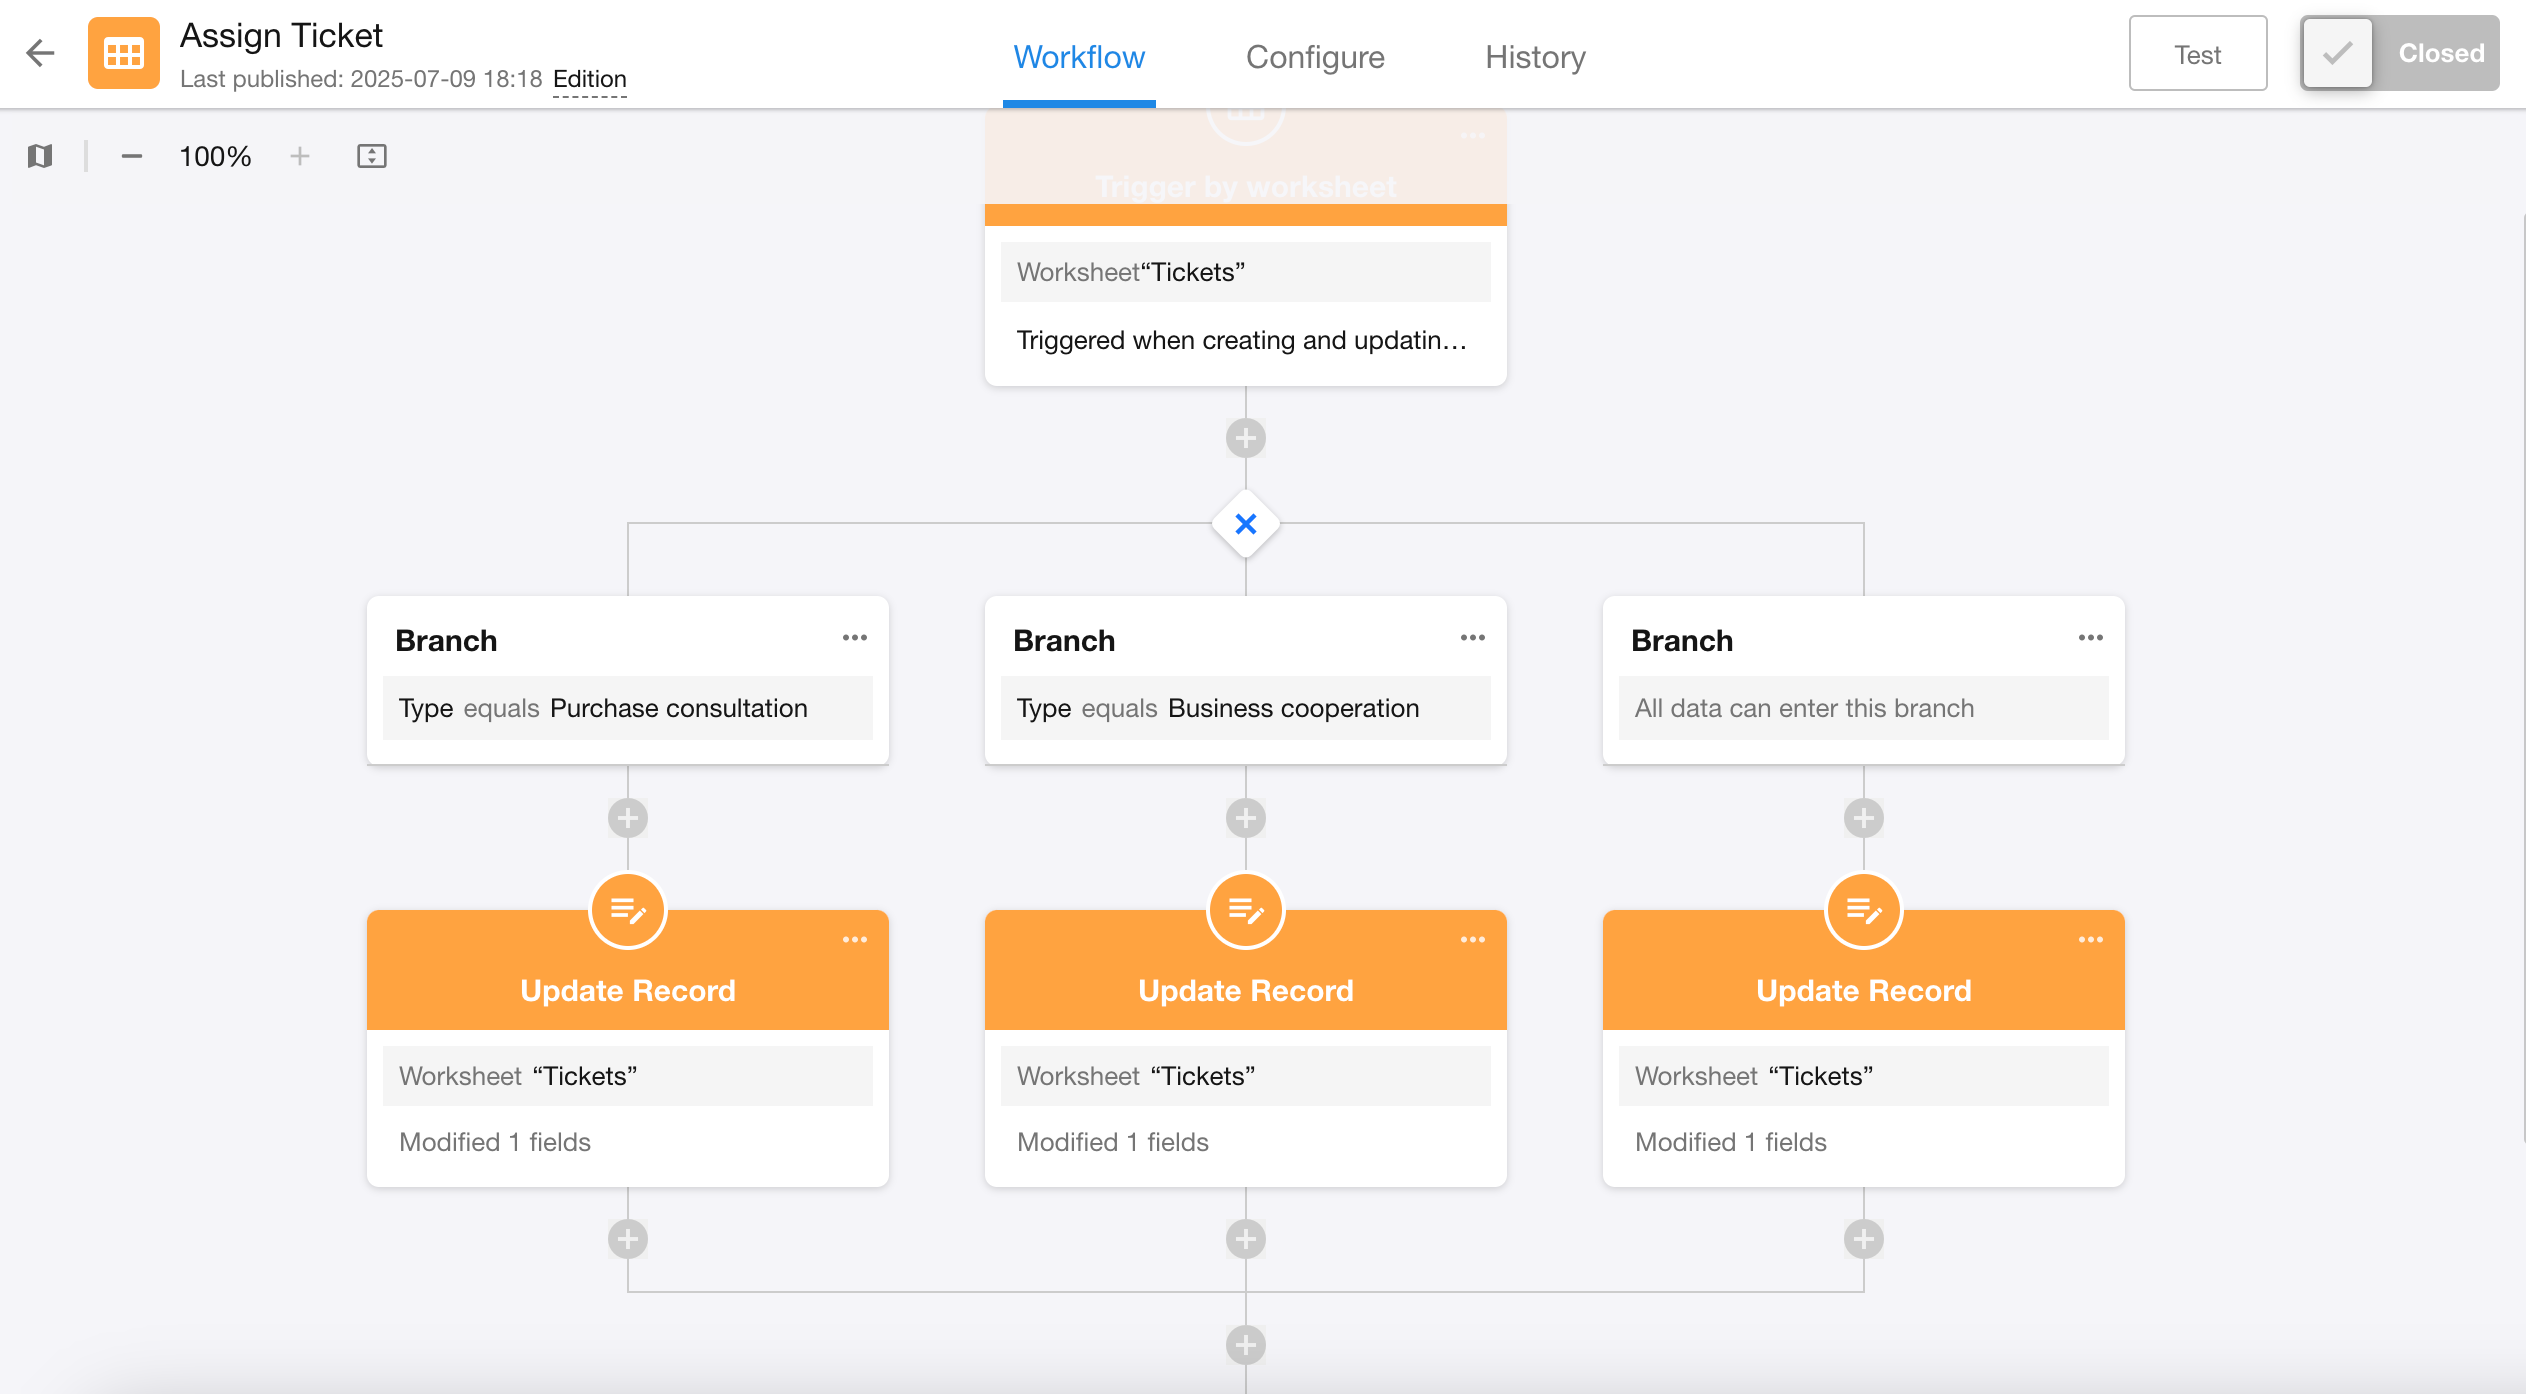
1. Add "Branch" node
Based on the example, we determine 3 branches. First configure the first two branches, as both parallel and exclusive branches will execute at most one of these two branches.
2. Configure the last branch
The third branch covers all other ticket types besides "Purchase Consultation" and "Business Cooperation", including cases where the field is empty.
-
Parallel Branch Configuration:
Since parallel branches only evaluate branch filter conditions and execute if met, for the third branch under parallel type, all condition values must be added to the filter.
-
Exclusive Branch Configuration:
The third branch essentially represents remaining conditions after the first two branches - it must execute when the first two conditions aren't met. Therefore:
-
Switch to exclusive branch type
-
Add a branch without any filter conditions
-
3. Complete action nodes for each branch
Configure corresponding action nodes for each branch respectively.
II. Example of Approval Result-Based Branches
Example: When an expense reimbursement application is:
-
Approved: Update the record status to "Approved"
-
Rejected: Update the record status to "Rejected"
Configuration:
-
Directly add a "Branch" node after the "Approval" node.
-
Select approval result-based branching, which automatically creates fixed "Agree" and "Reject" branches.
-
Configure corresponding action nodes for each branch.
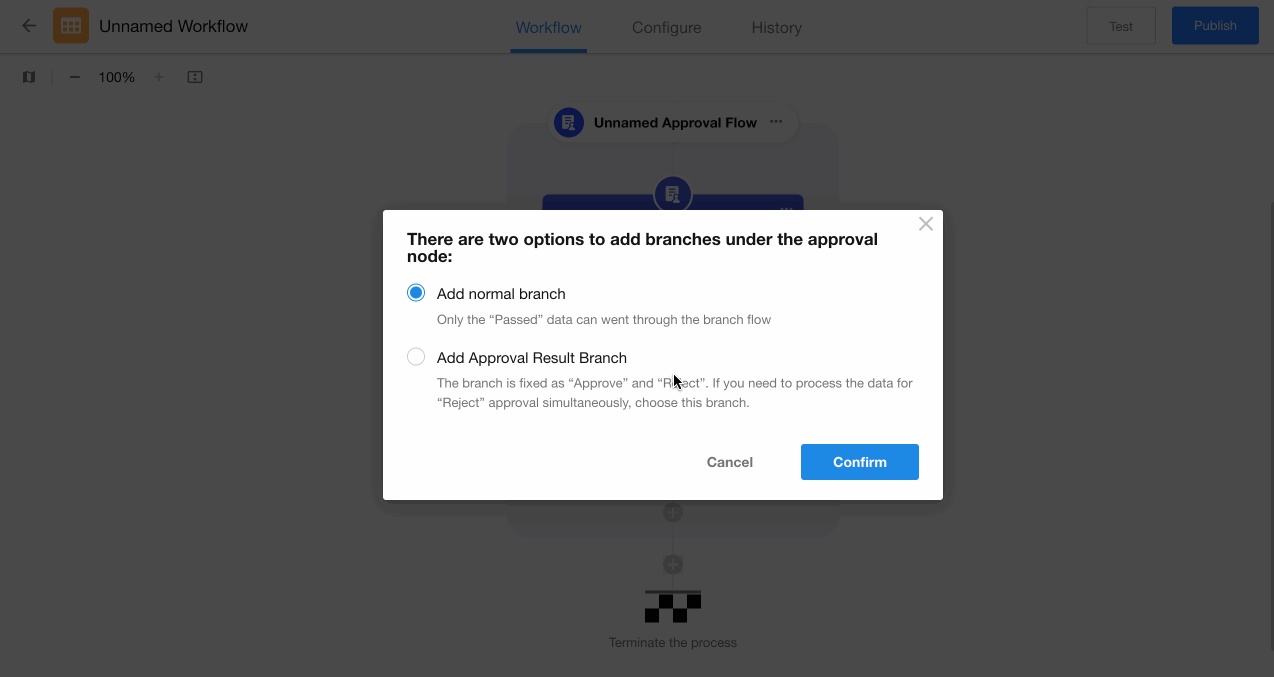
Without approval-result based branches after the approval node: rejected applications terminate the workflow; subsequent nodes won't execute. Adding branches ensures workflow continuation even for rejections.
III. Example of Data Retrieval Result-Based Branches
A data retrieval result-based branch can be added after the "Get Single Data" node.
Example: When a lead record is processed and needs to be converted to a customer:
-
First query the customer worksheet to check if this customer already exists
-
If exists: Directly relate with the existing customer record
-
If doesn't exist: Create a new customer record
-
Configuration:
-
Add a "Branch" node after the "Get Single Data" node.
-
Select data retrieval result-based branching.
-
Configure action nodes under both the "Has Data" and "No Data" branches.
To determine if the "Get Multiple Data" node retrieved any data:
First use a "Rollup" node to count records
Then check if the result is greater than 0 to determine data existence
Operations for Branch Nodes
1. Add a branch
Only parallel and exclusive branches support adding or copying branch workflows.
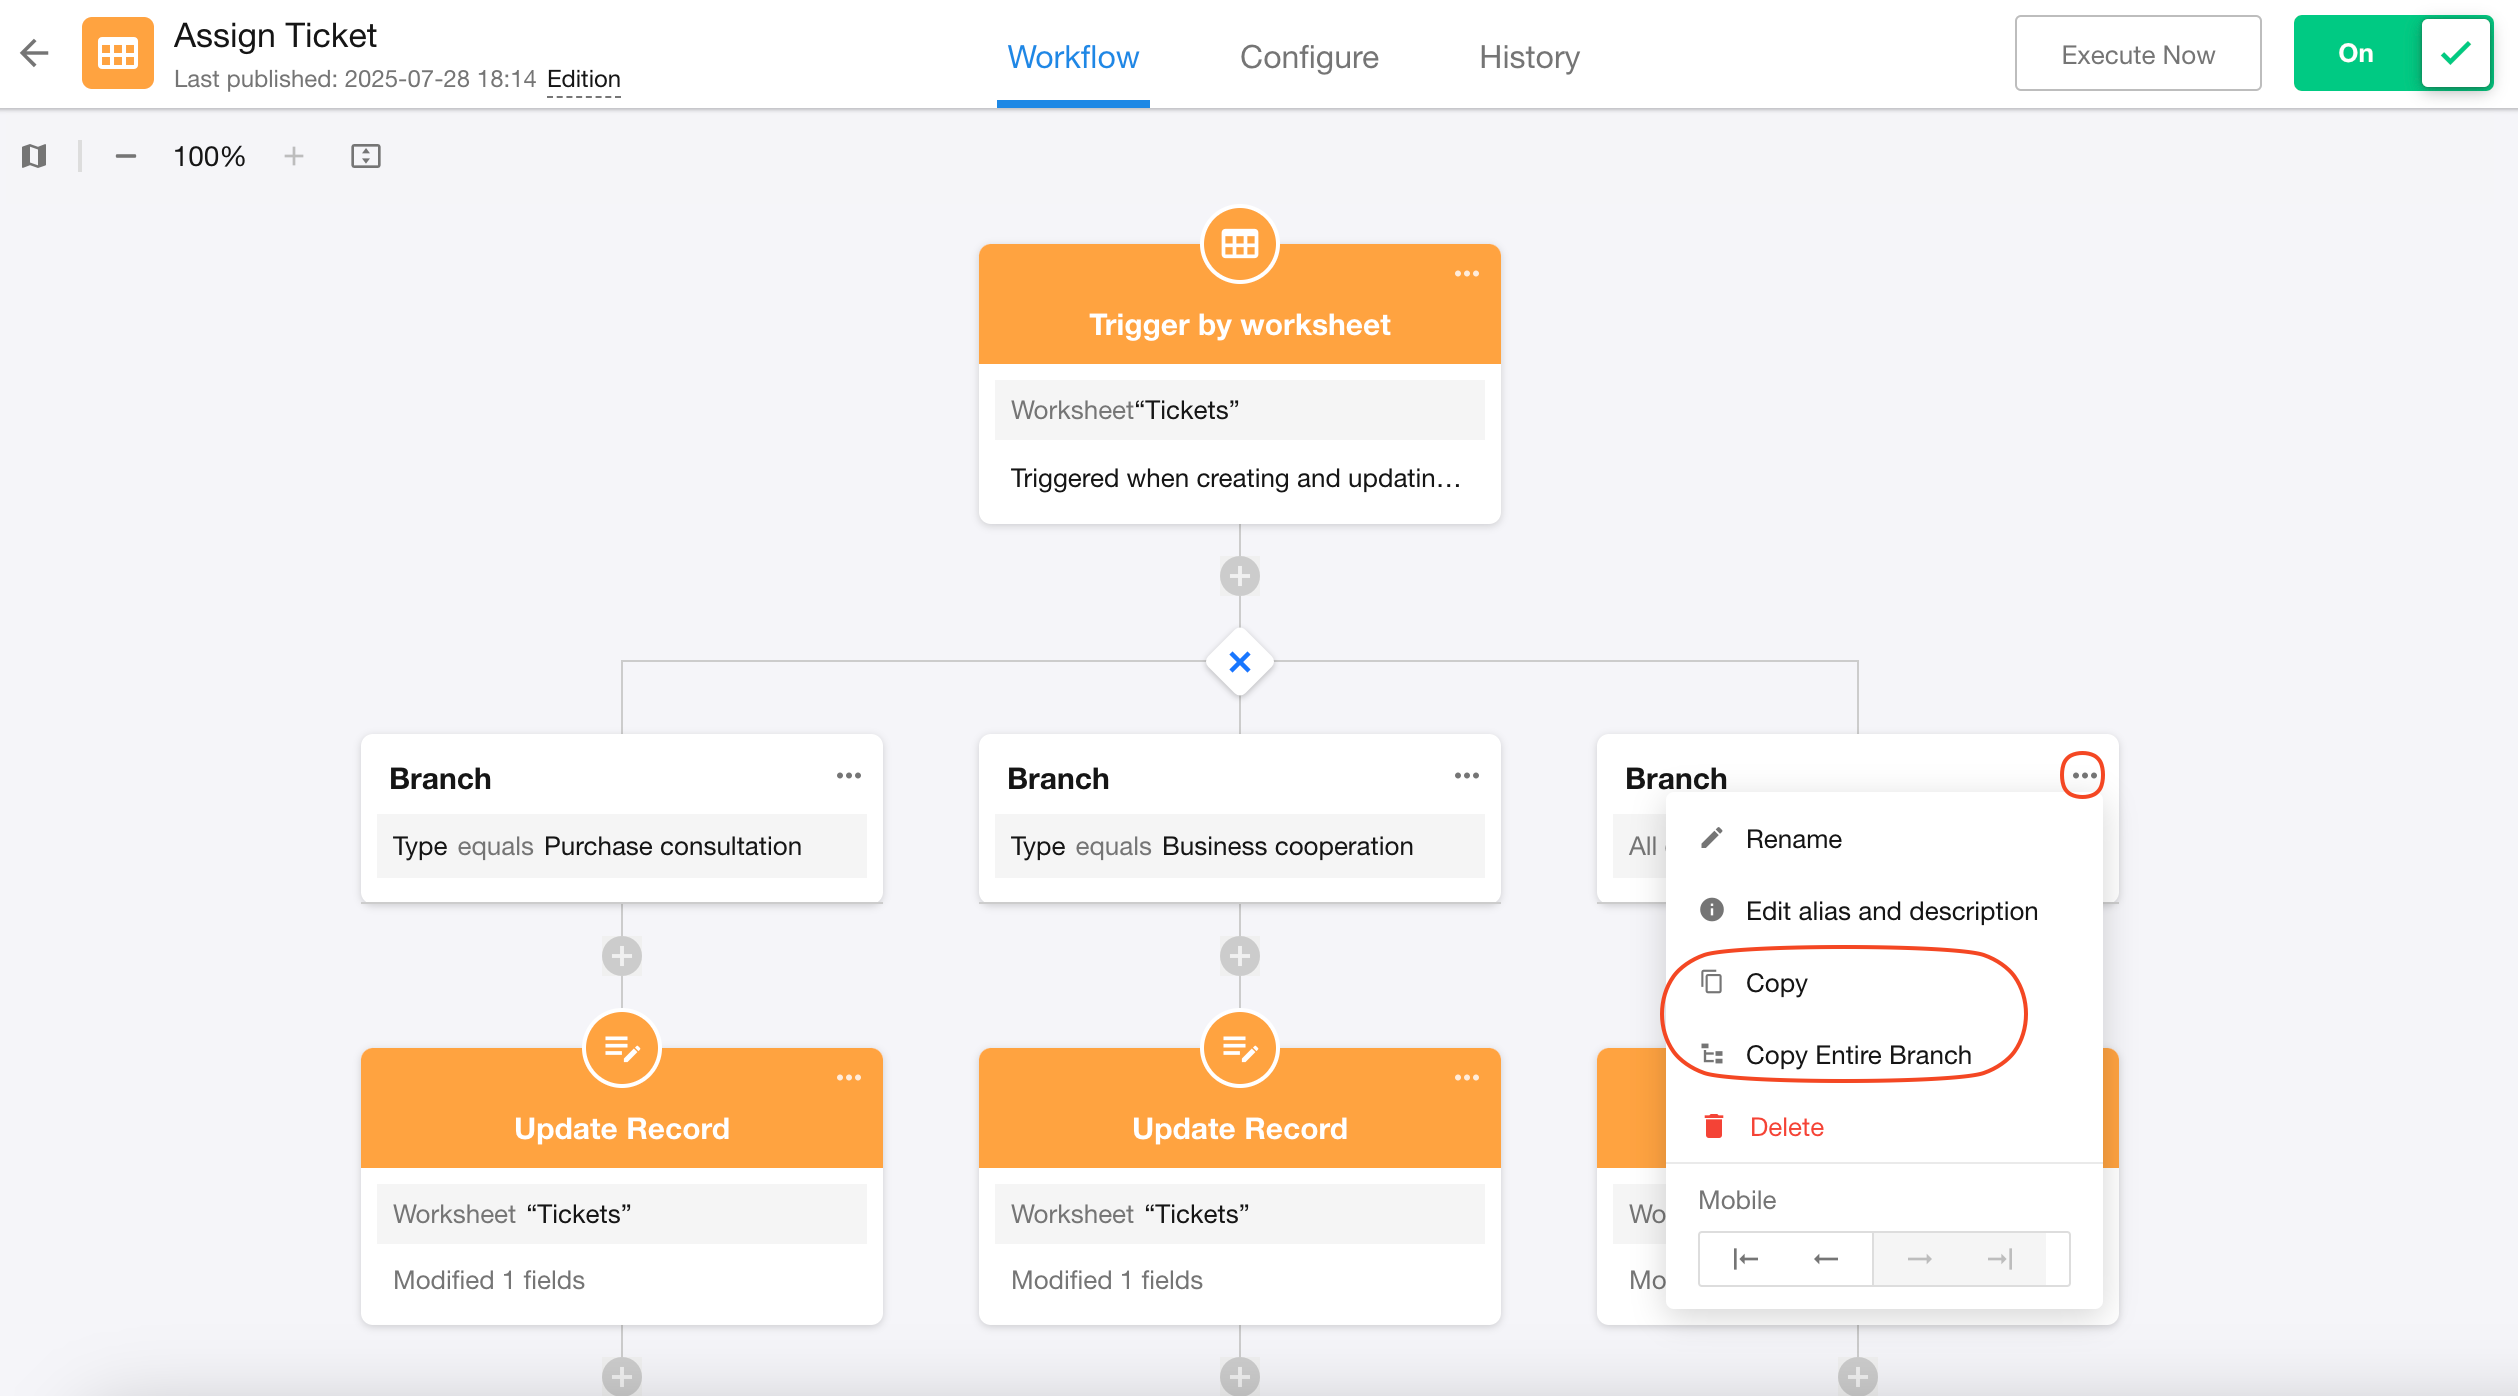
2. Copy a branch
Branches can be copied, including:
-
Copying only branch filters
-
Copying all nodes in the branch workflow
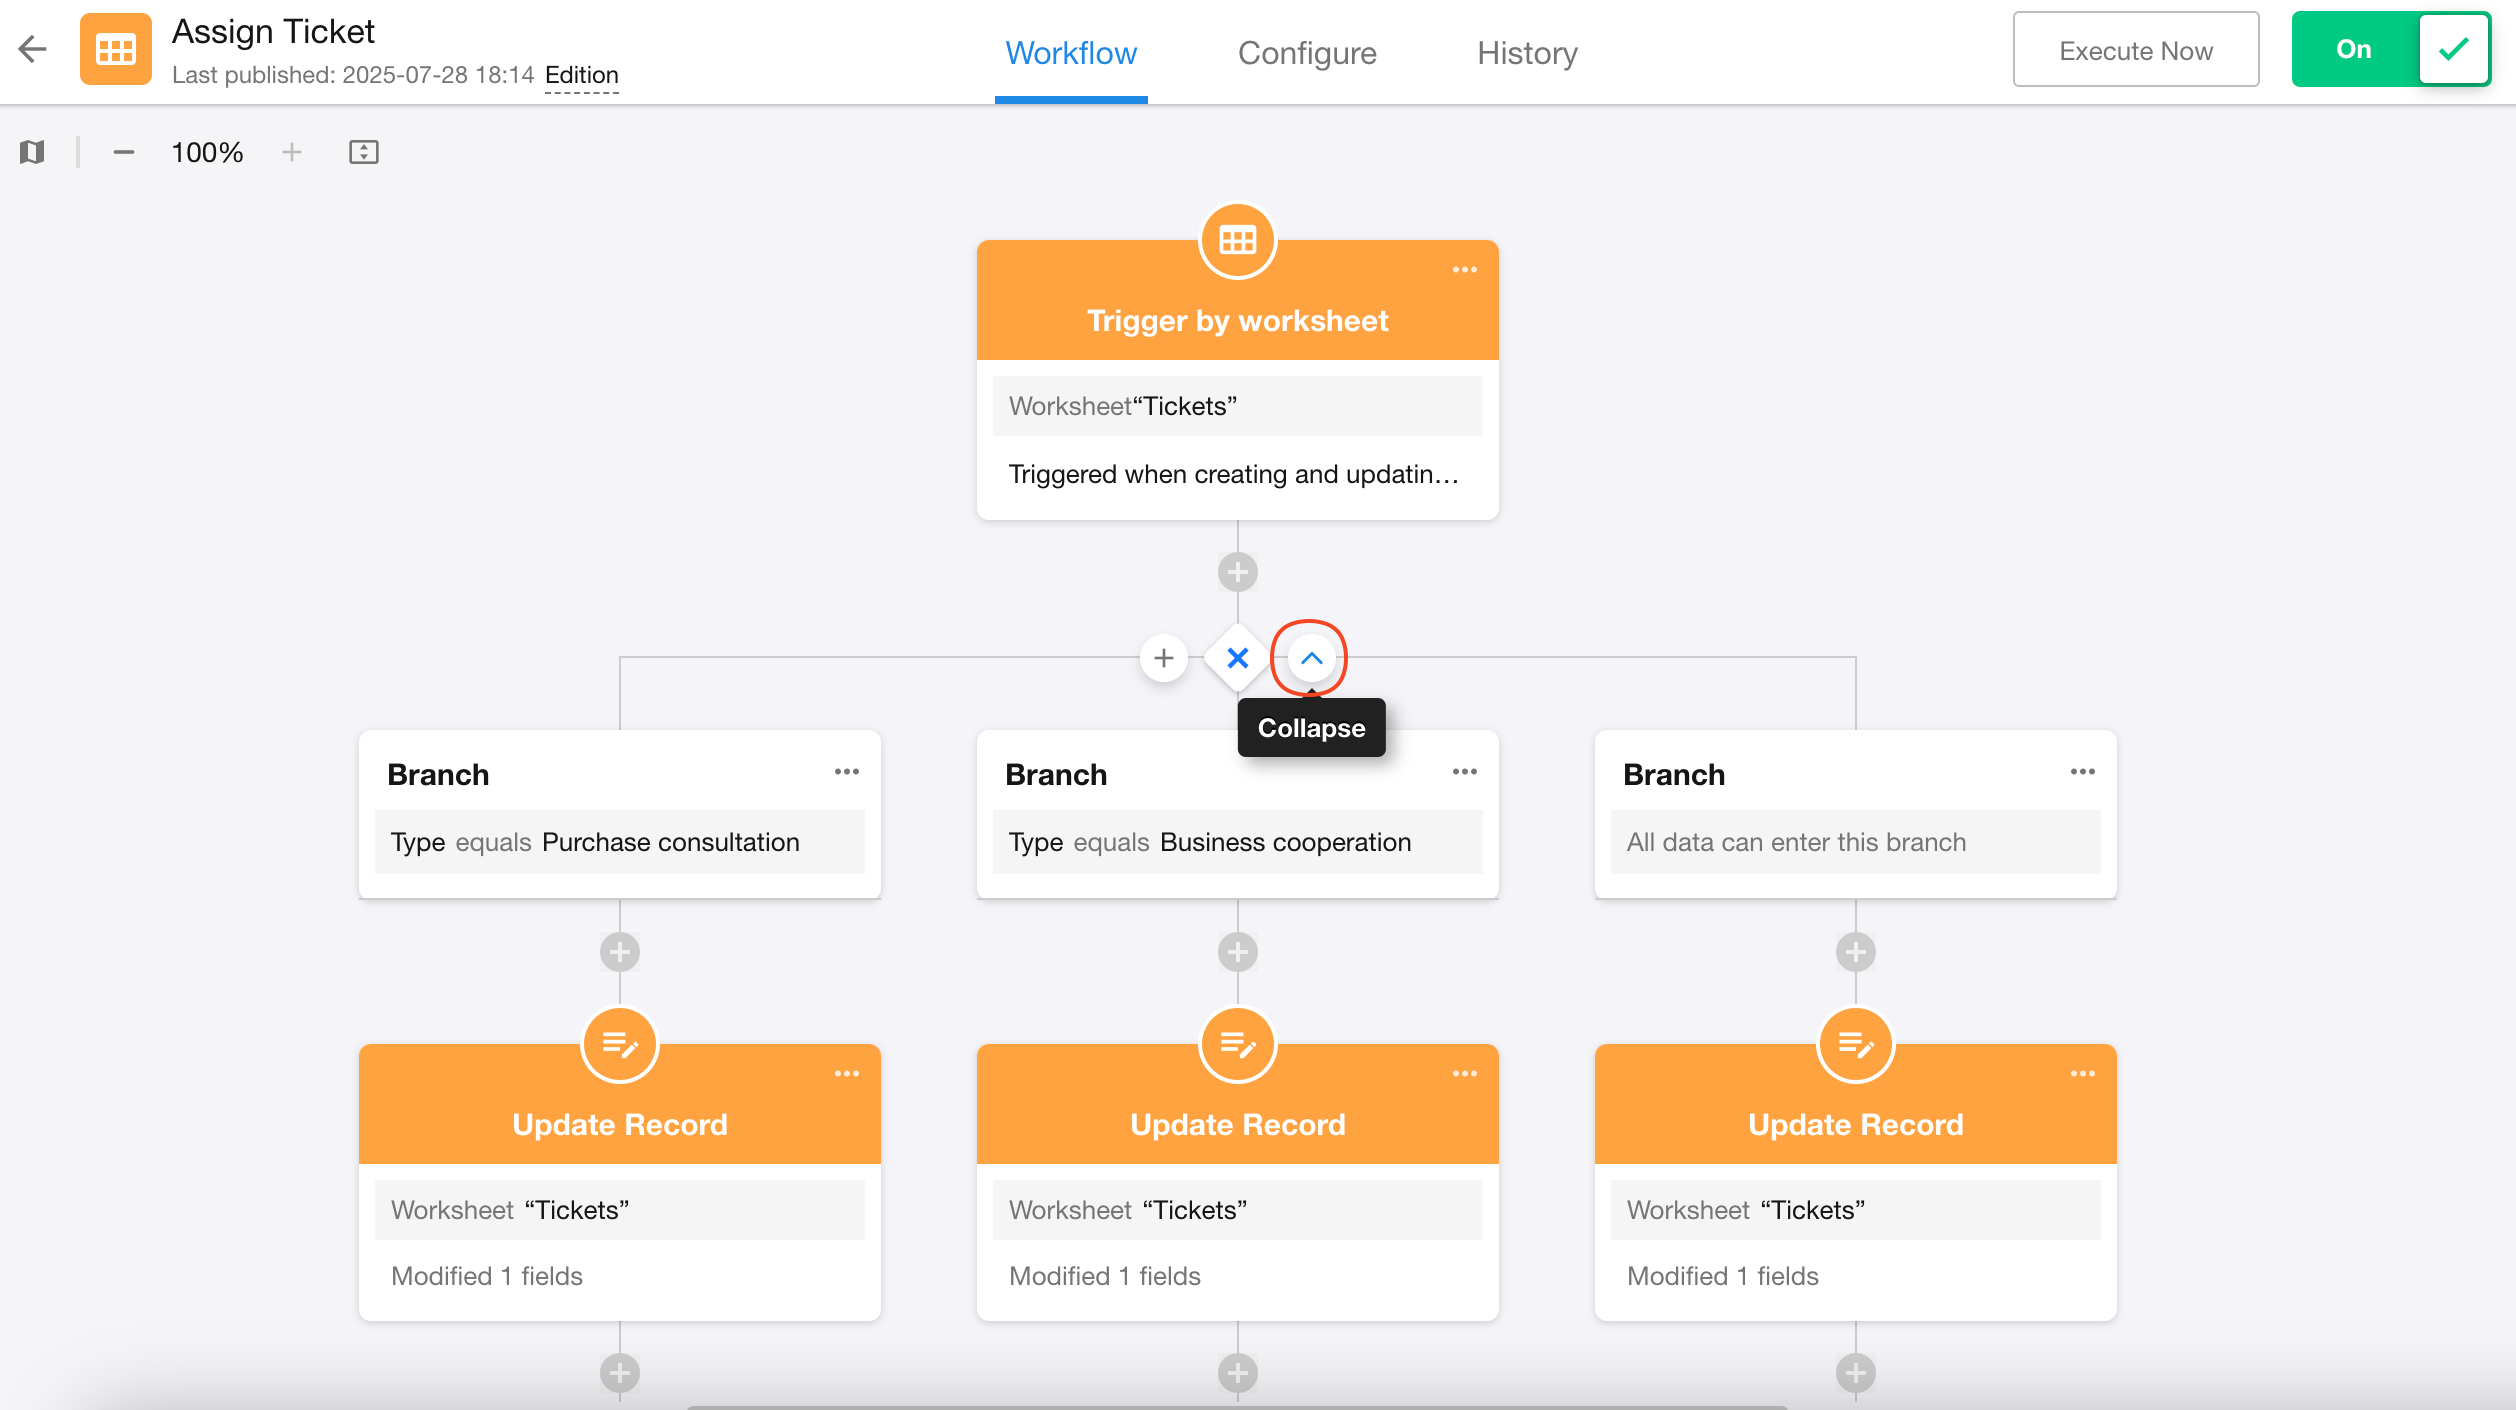
3. Expand/Collapse branch workflows
Only parallel and exclusive branches support expanding and collapsing branch workflows.
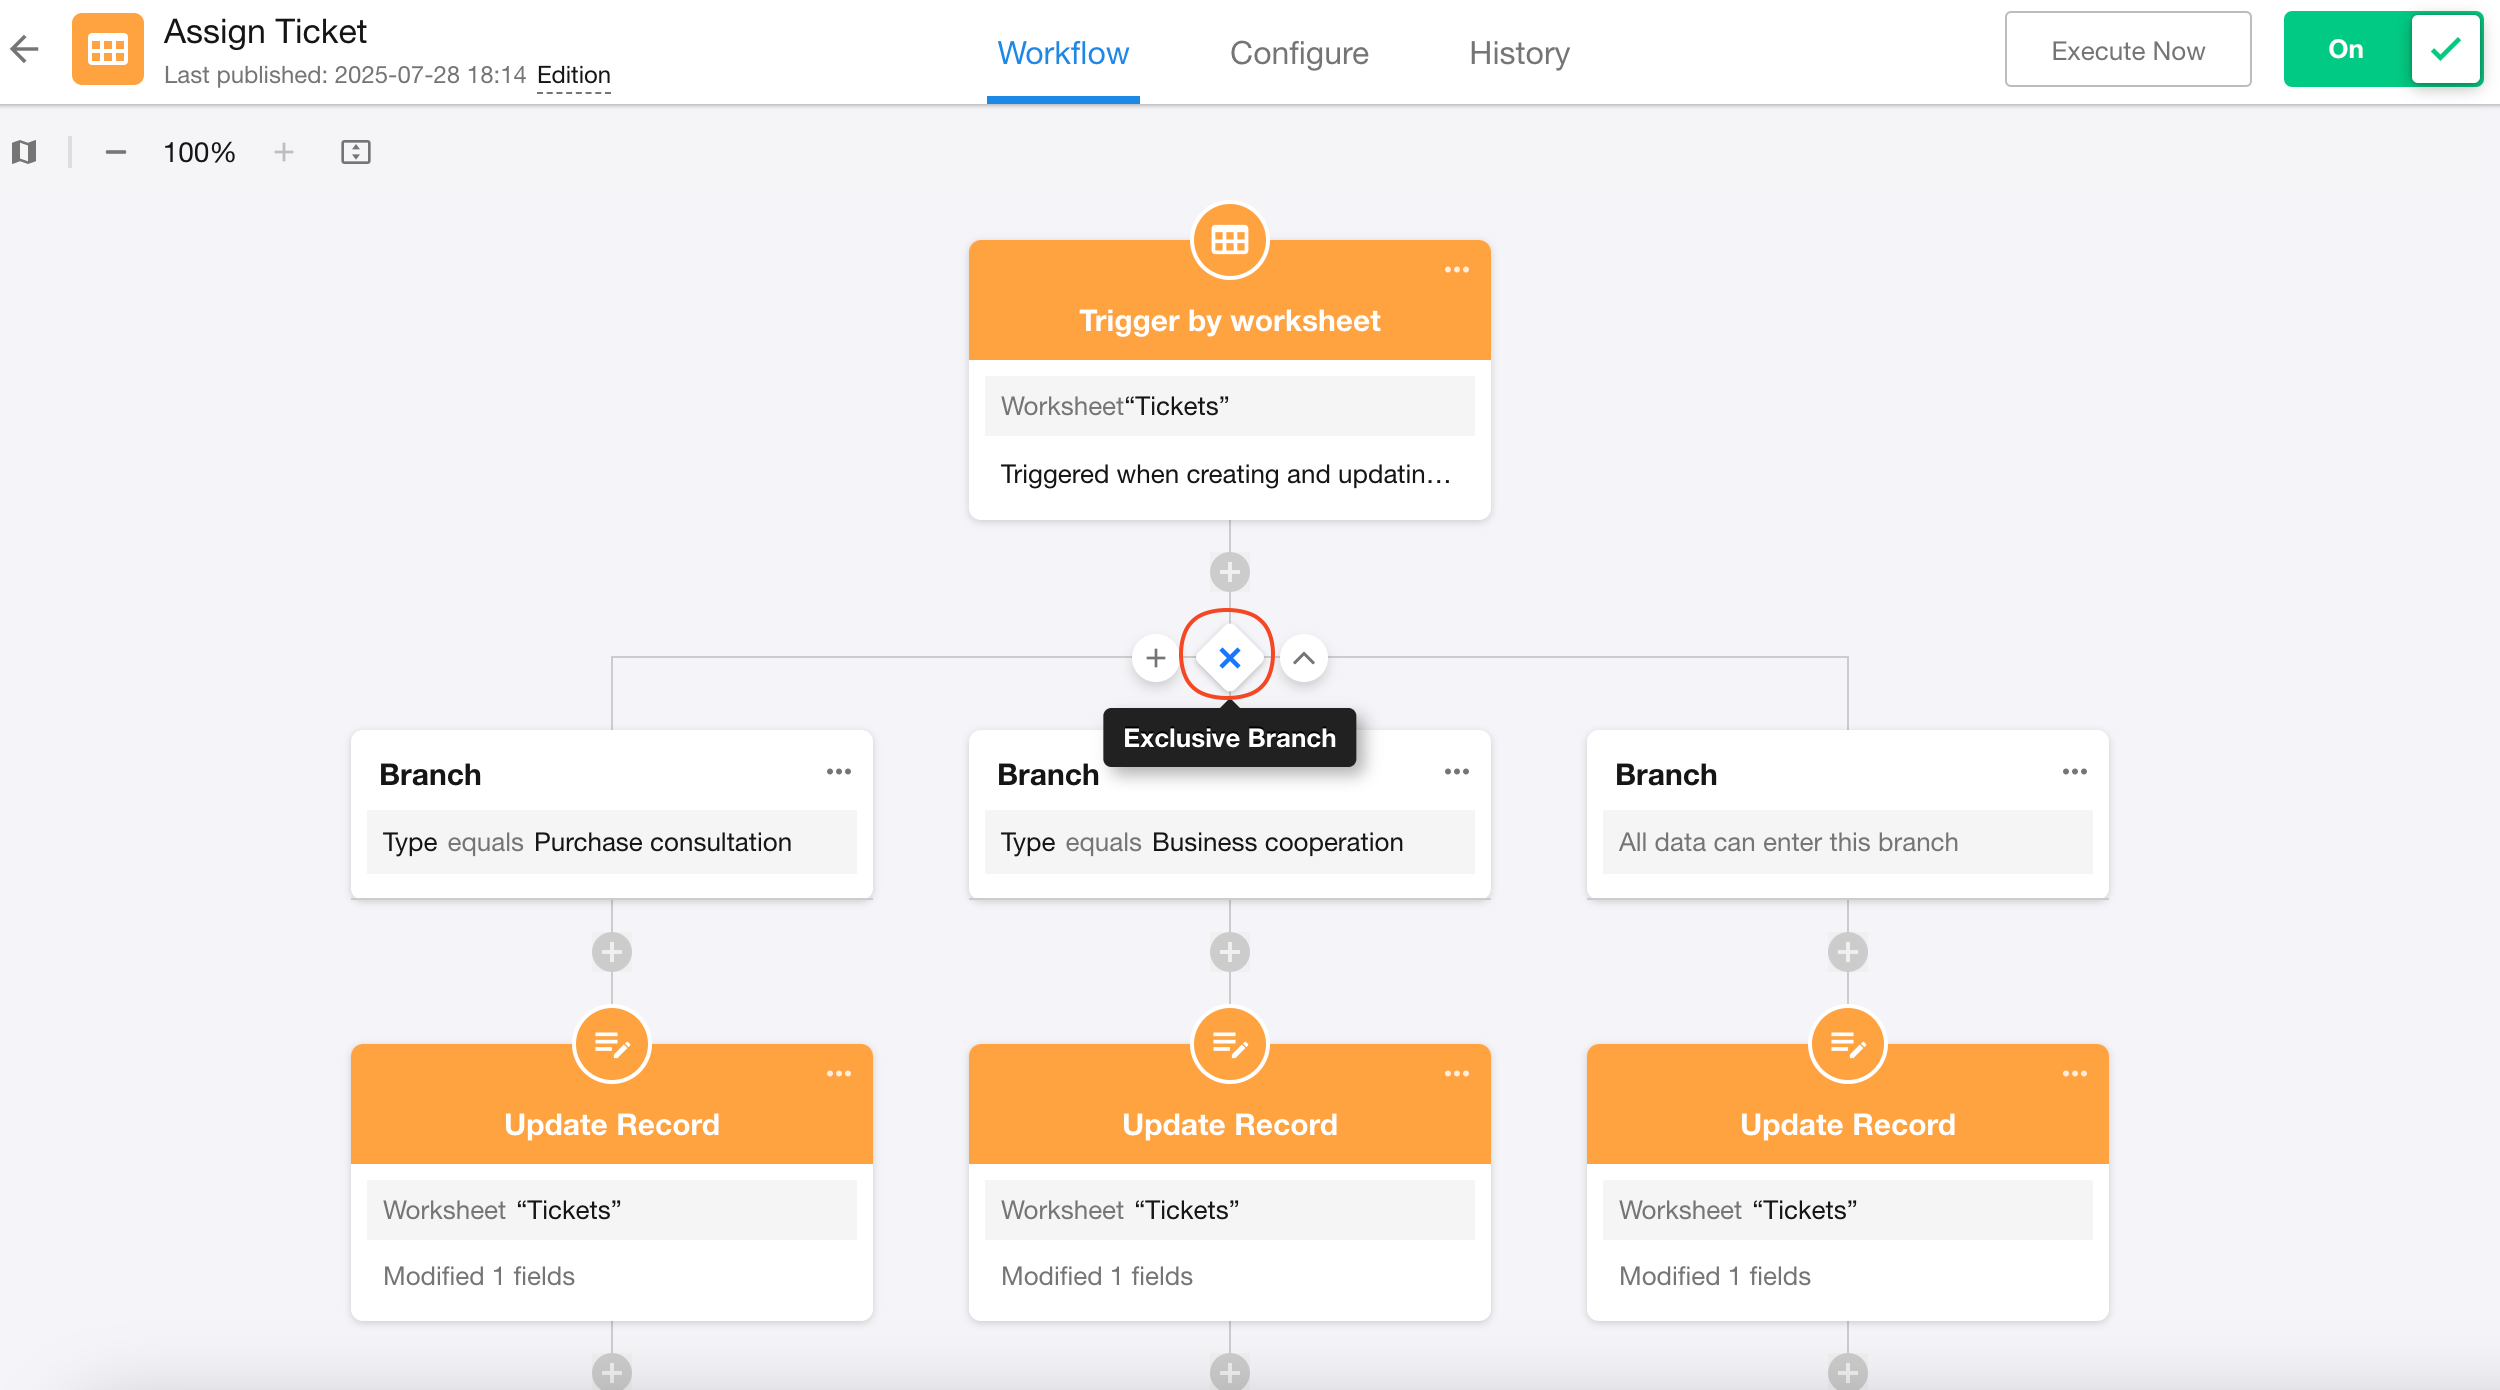
4. Switching between parallel and exclusive branches
Parallel branches are represented by a "circle" icon; exclusive branches are represented by an "X" icon. Click the icon to switch branch types.
5. Adjust branch order
Regular branches support order adjustment: move left/right or move to far left/right.
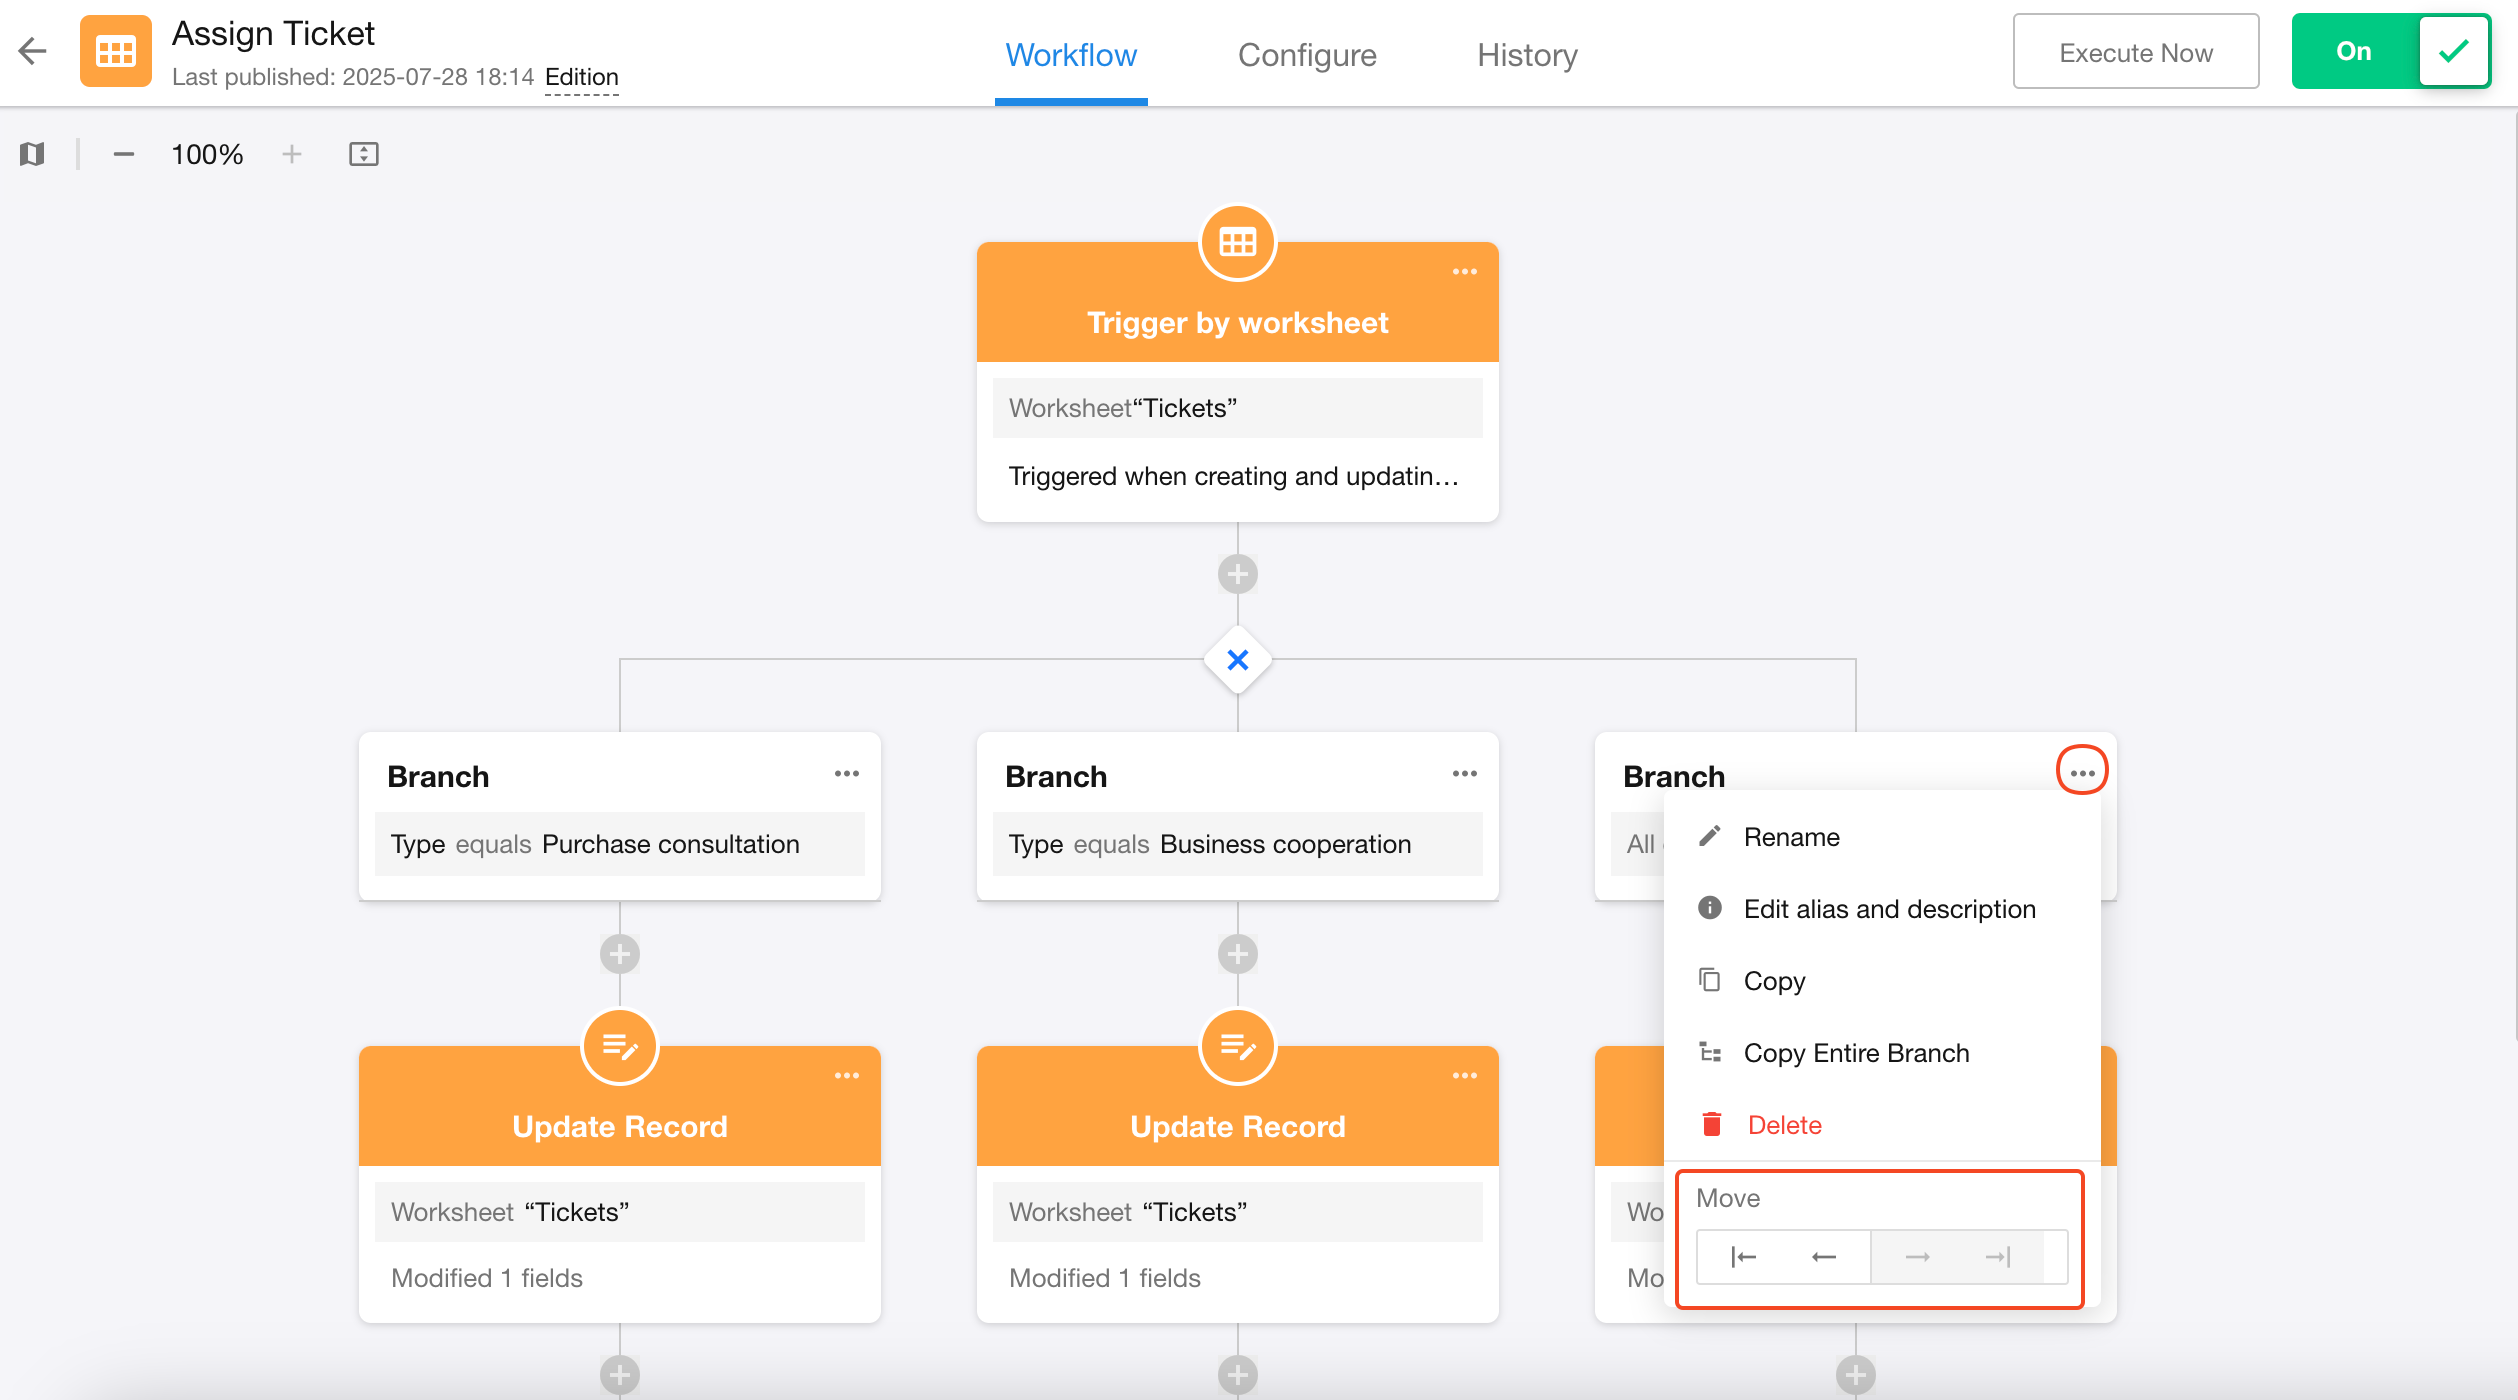
6. Delete a branch workflow
When there are more than two branches:
- Deleting a branch removes both its filter conditions and all nodes in that path
When only two branches exist:
-
Deleting "Branch 1" follows the above logic
-
The remaining "Branch 2" retains subsequent nodes as a single-path workflow (filter conditions removed)
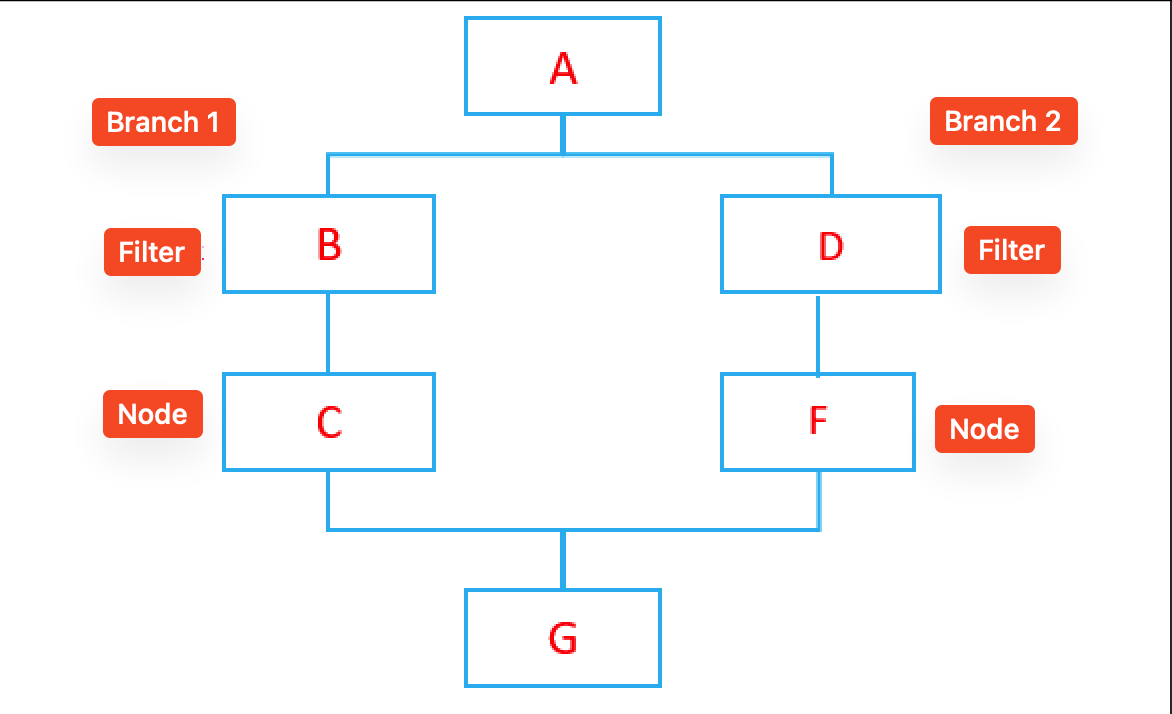
As shown in the diagram, the final retained path is: A > F > G
Was this document helpful?