Workflow Plugin - Custom Node
A workflow plugin allows you to package frequently used code block processing, API requests, and other data processing logic into a custom node that can be shared with all users in your organization.
A custom node works similarly to a reusable business process, but it is not designed to handle complete business workflows. Instead, it is used to encapsulate a specific data processing step.
Custom nodes can include the following components:
- Branch
- AIGC
- API request
- code block
- JSON parsing
You can customize the node name, icon, and input parameter display style. After configuration, the custom node works similarly to the built-in workflow nodes provided by the system.
By packaging complex code blocks and API requests into custom nodes, developers can significantly simplify usage for other users and better enable no code capabilities.
Usage Example
Scenario
When integrating external APIs in workflows, data often needs to be encrypted using different methods. Previously, users had to manually handle encryption through code block, which made the process inconvenient and difficult for users without coding experience.
In this scenario, you can create a custom workflow node to provide the following functionality:
Allow users to select an encryption method (MD5, SHA-1, SHA-256, or HMAC) and encrypt the input data accordingly. The custom node can then be shared with all users in the organization.
Create a Workflow Plugin
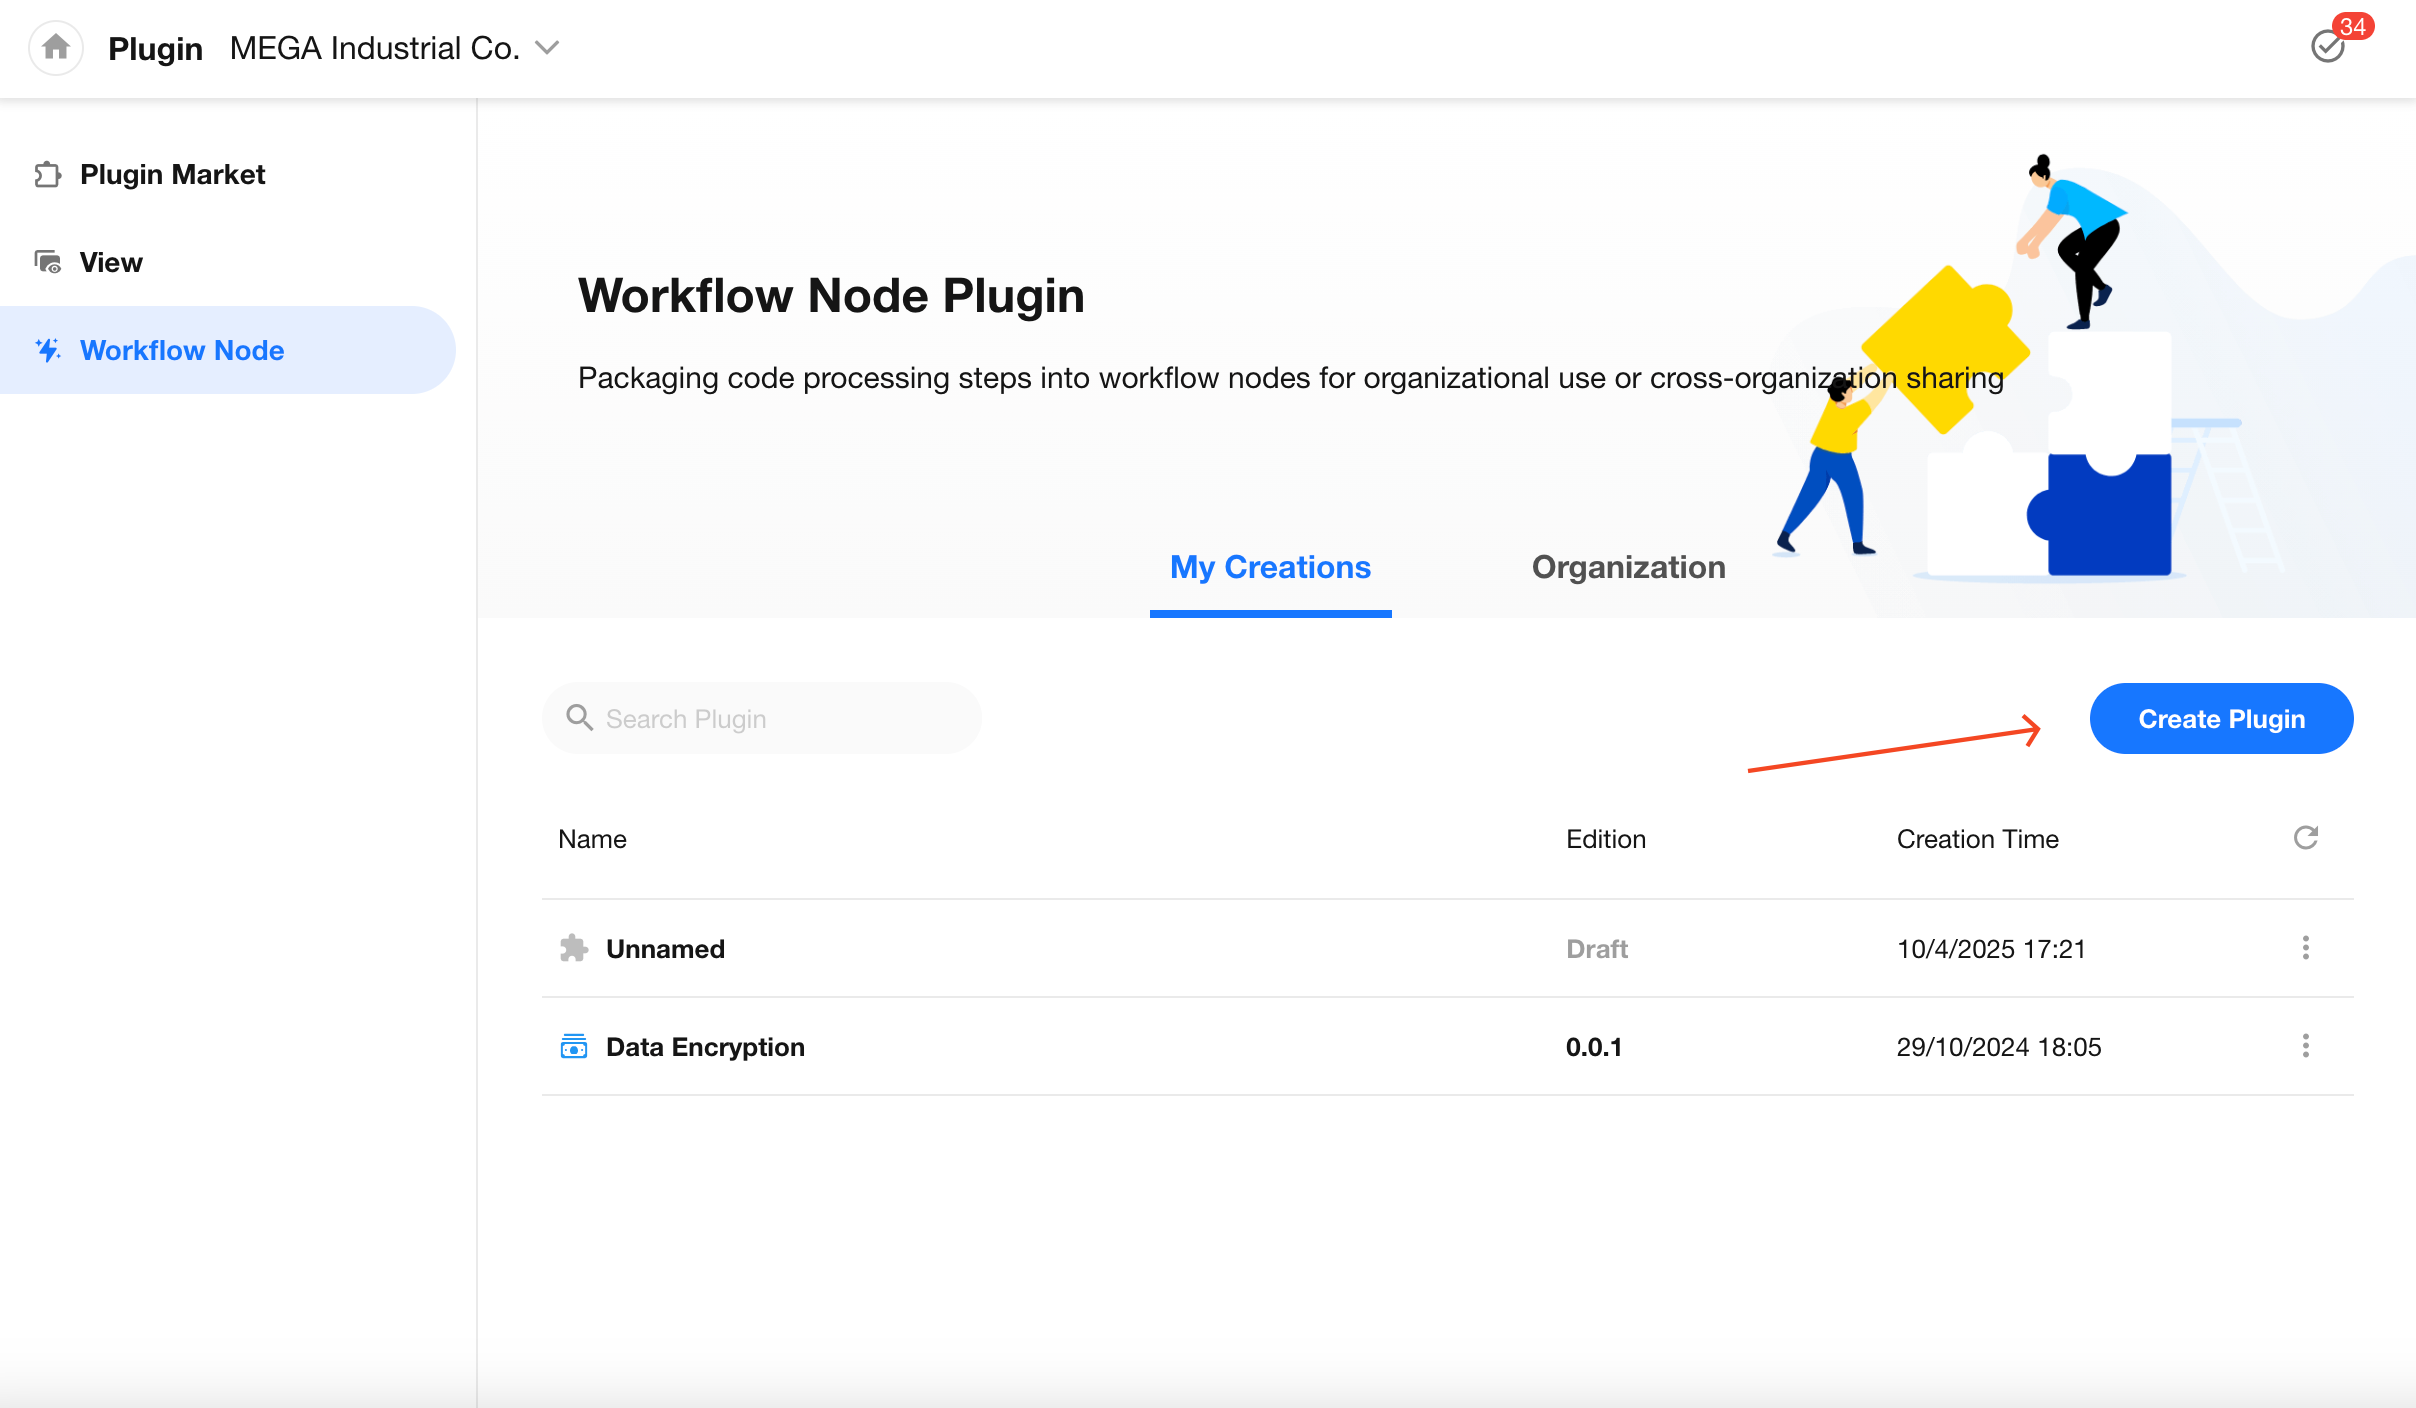
In Plugin Center, go to the Workflow Node tab and click Create Plugin to start developing a new workflow node plugin.
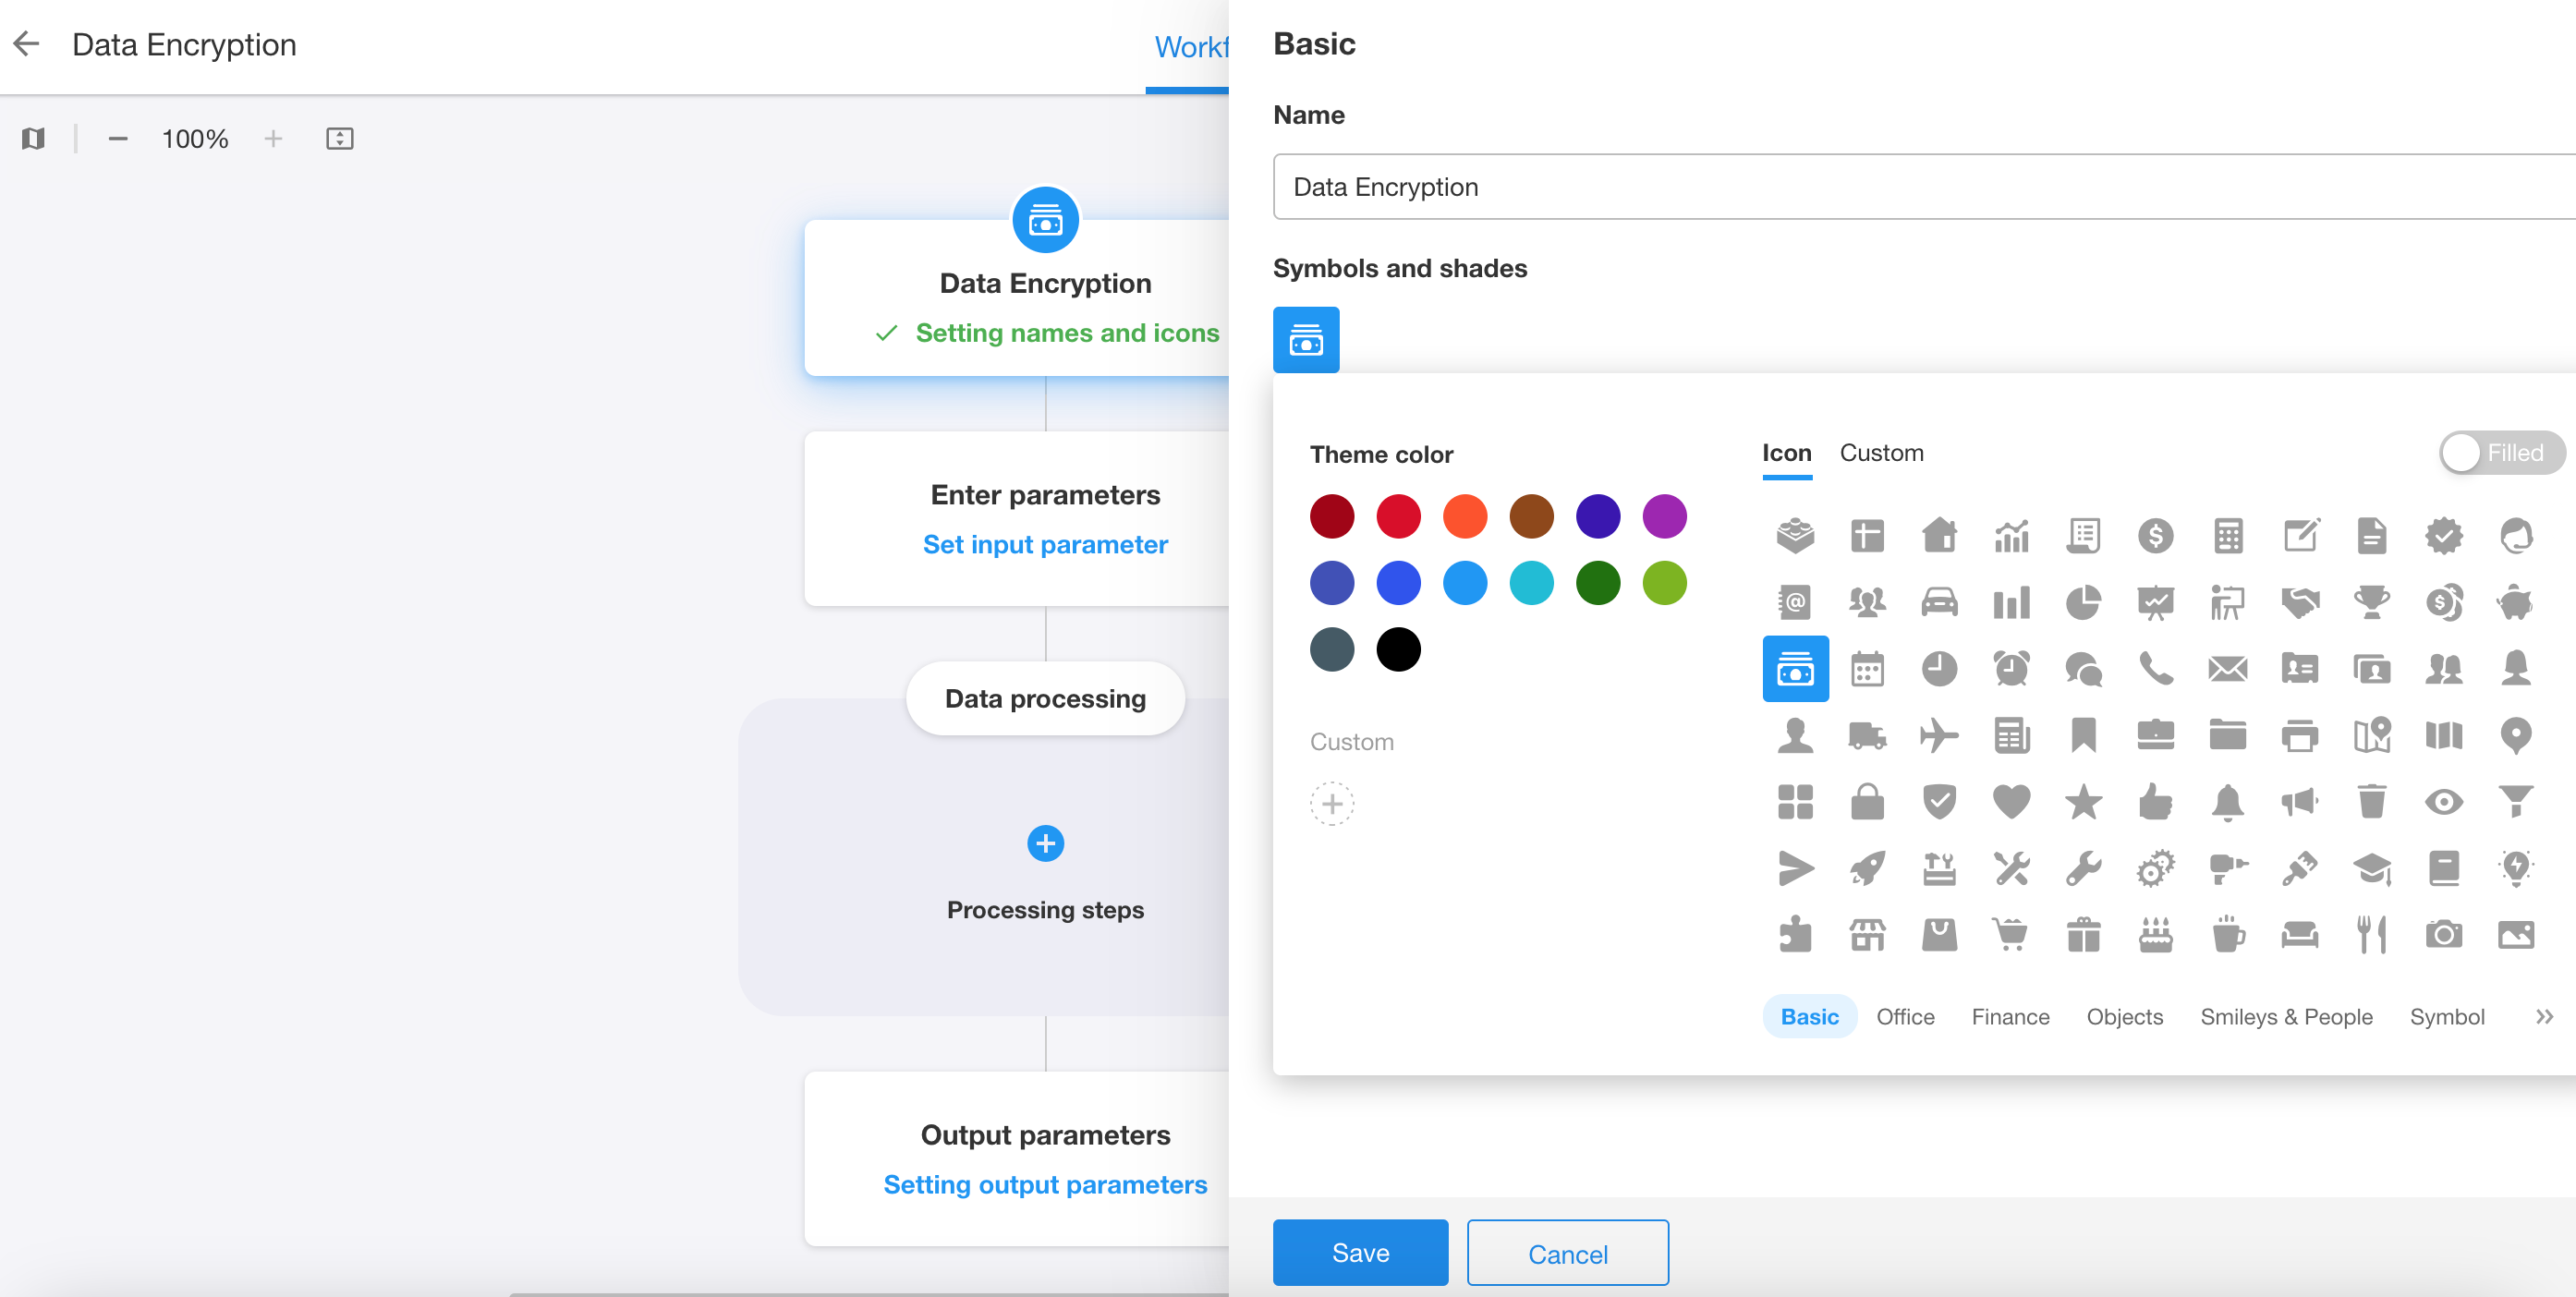
Configure Node Name, Icon, and Description
The description will be displayed when users use the node.
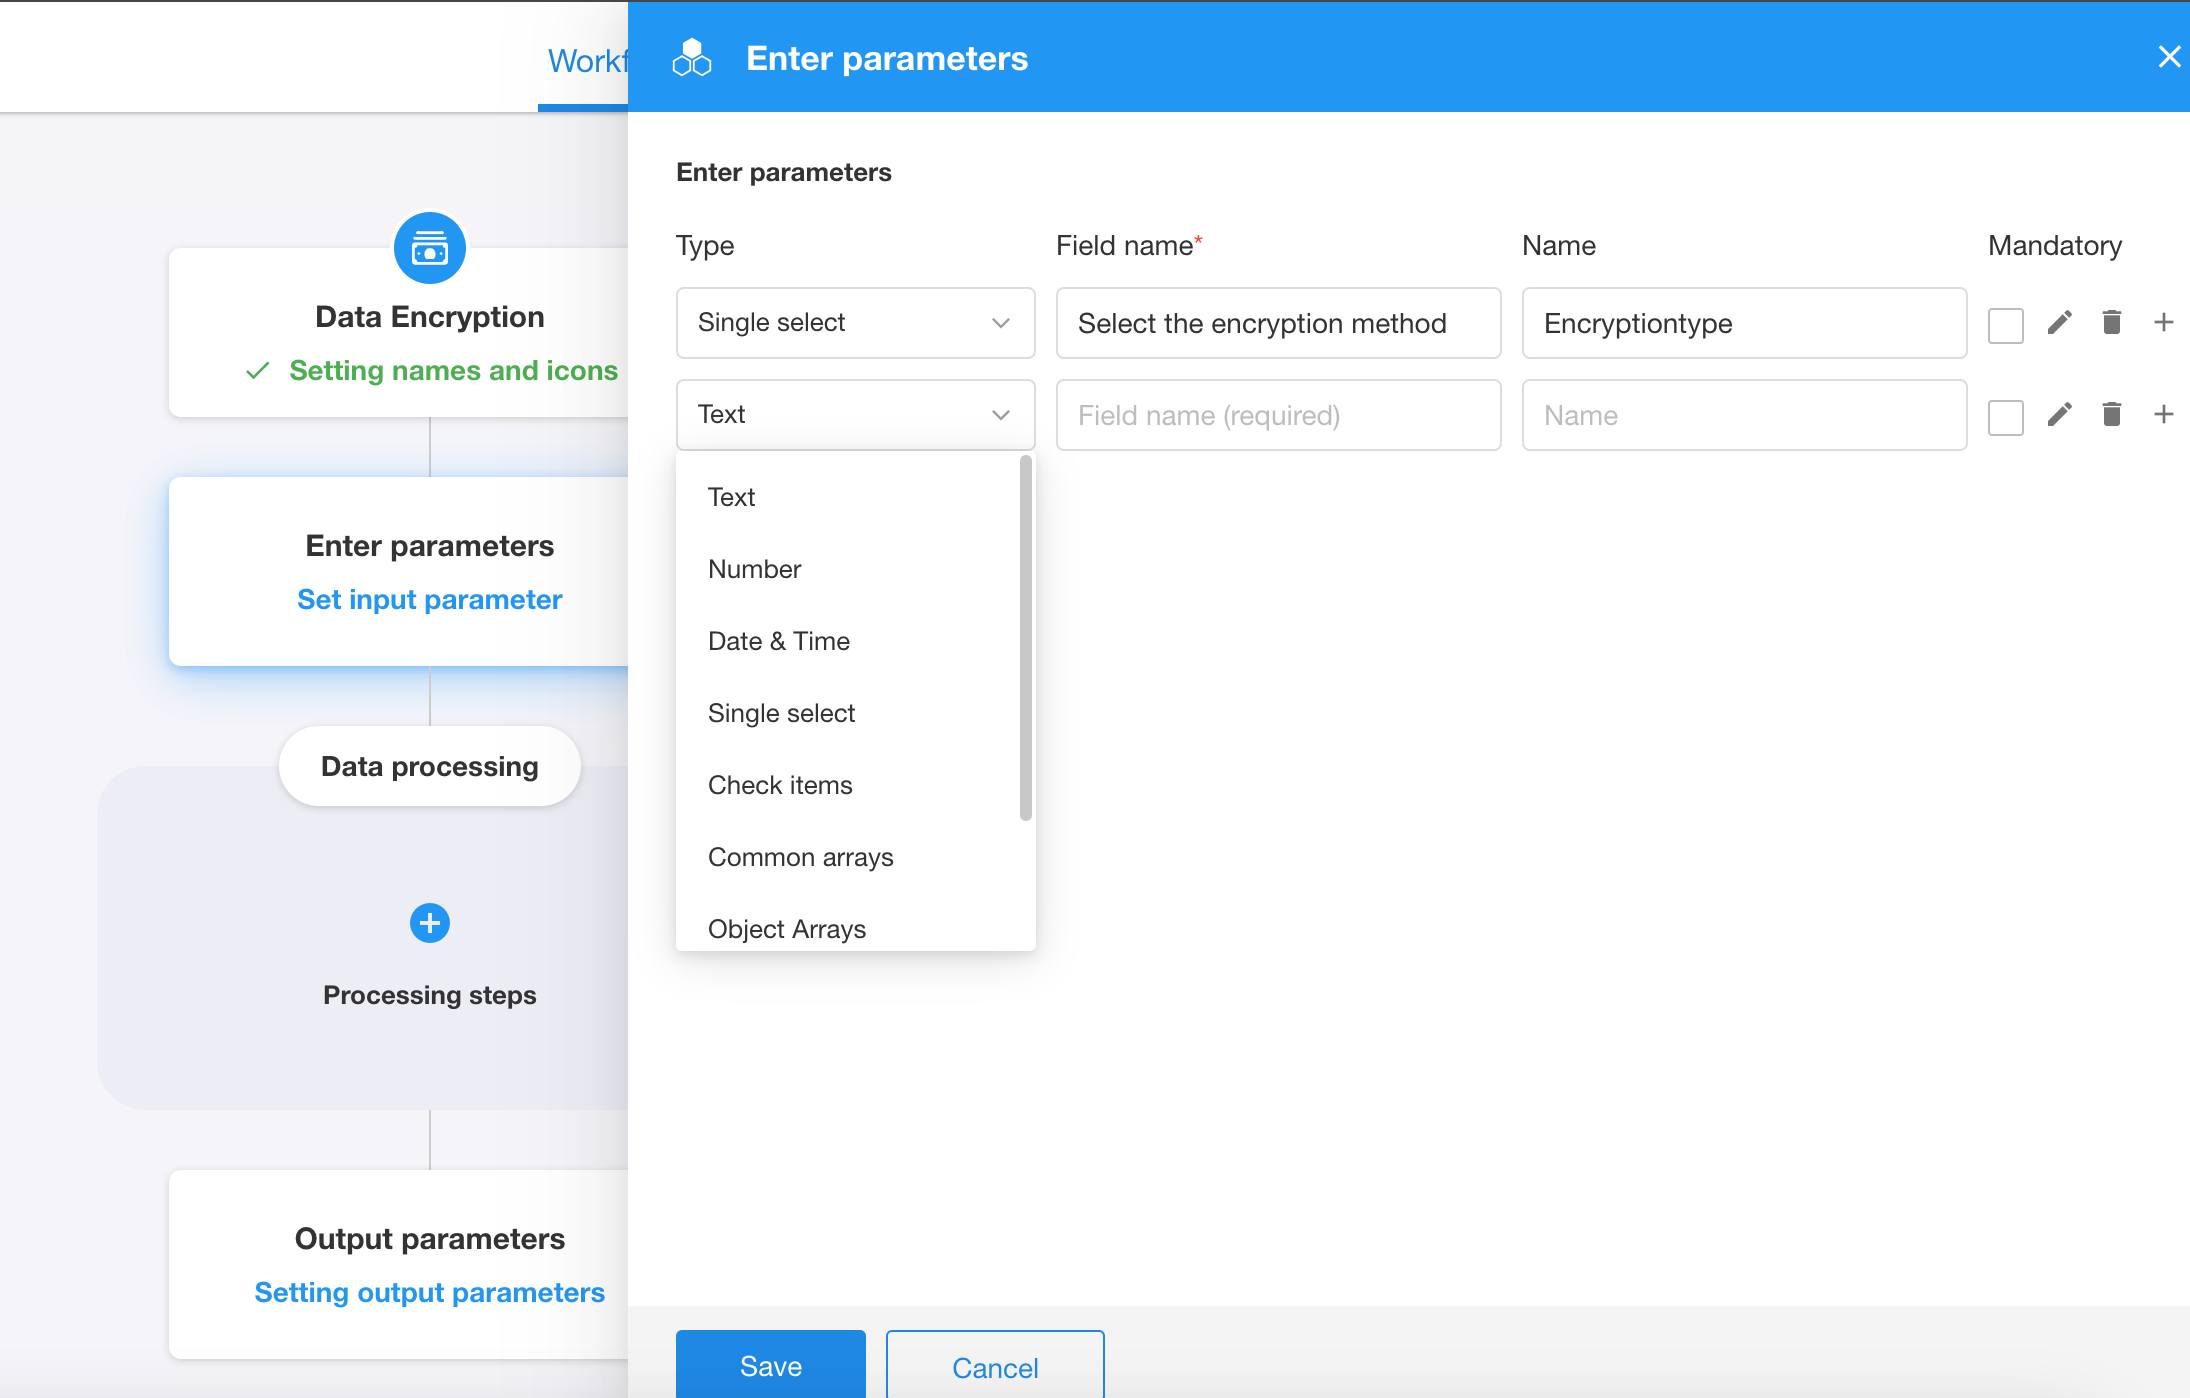
Configure Input Parameters
You can configure additional input methods for options and checkbox fields, and set group titles to optimize the input experience and make parameters easier for users to configure.
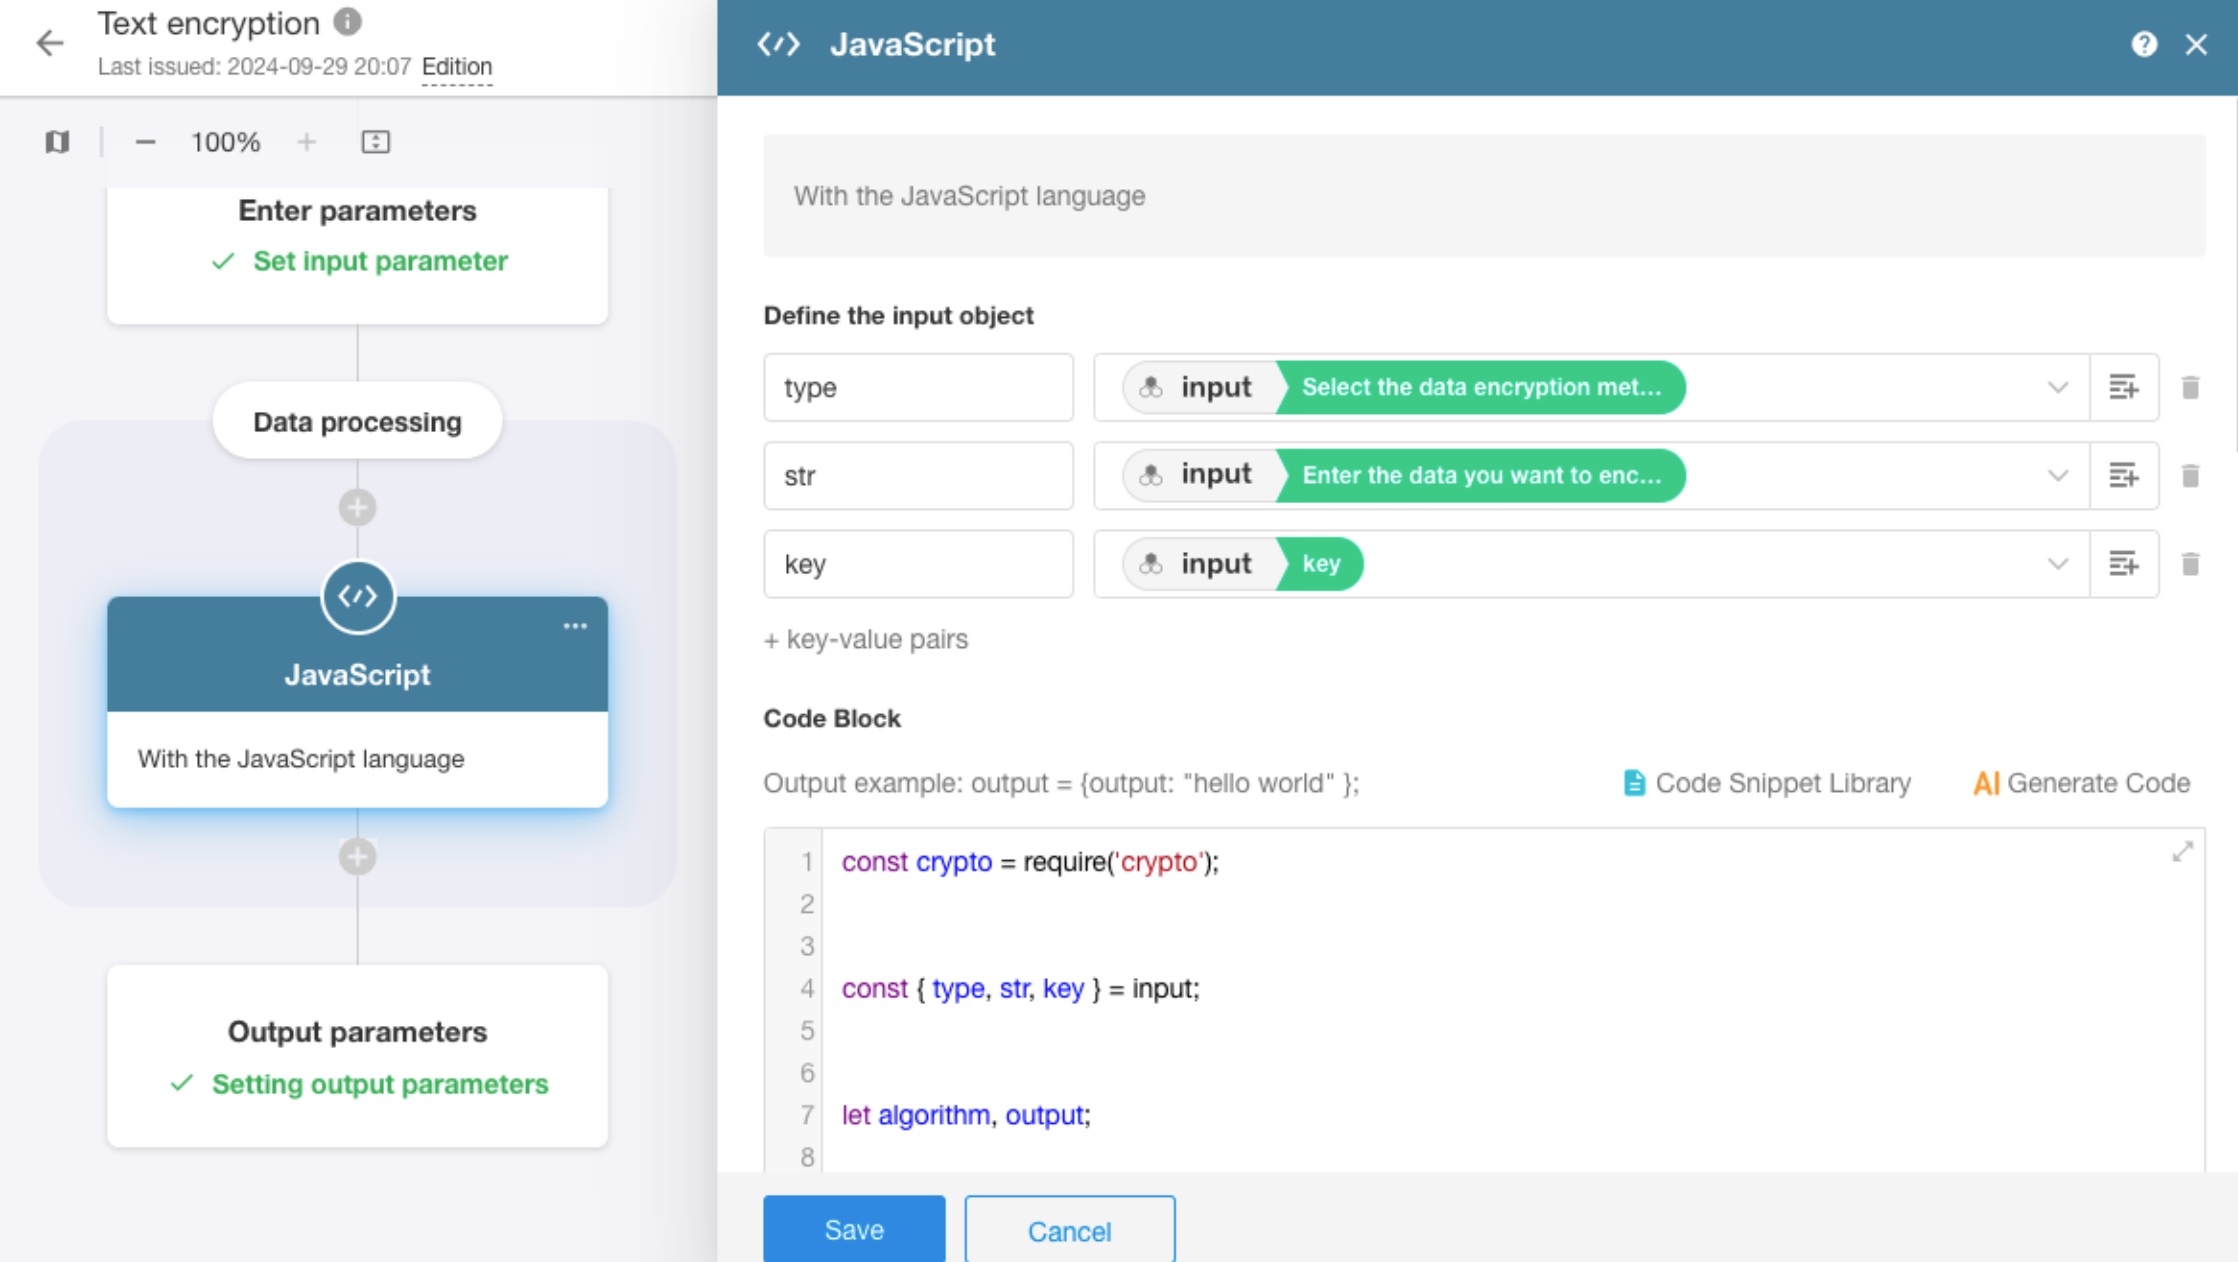
Configure Data Processing Steps
In the data processing section, add and configure the required data processing nodes.
Configure Output Parameters
Add output parameters and select output values from the configured data processing nodes.

Publish and Test the Plugin
Click Publish in the upper-right corner to publish the plugin.
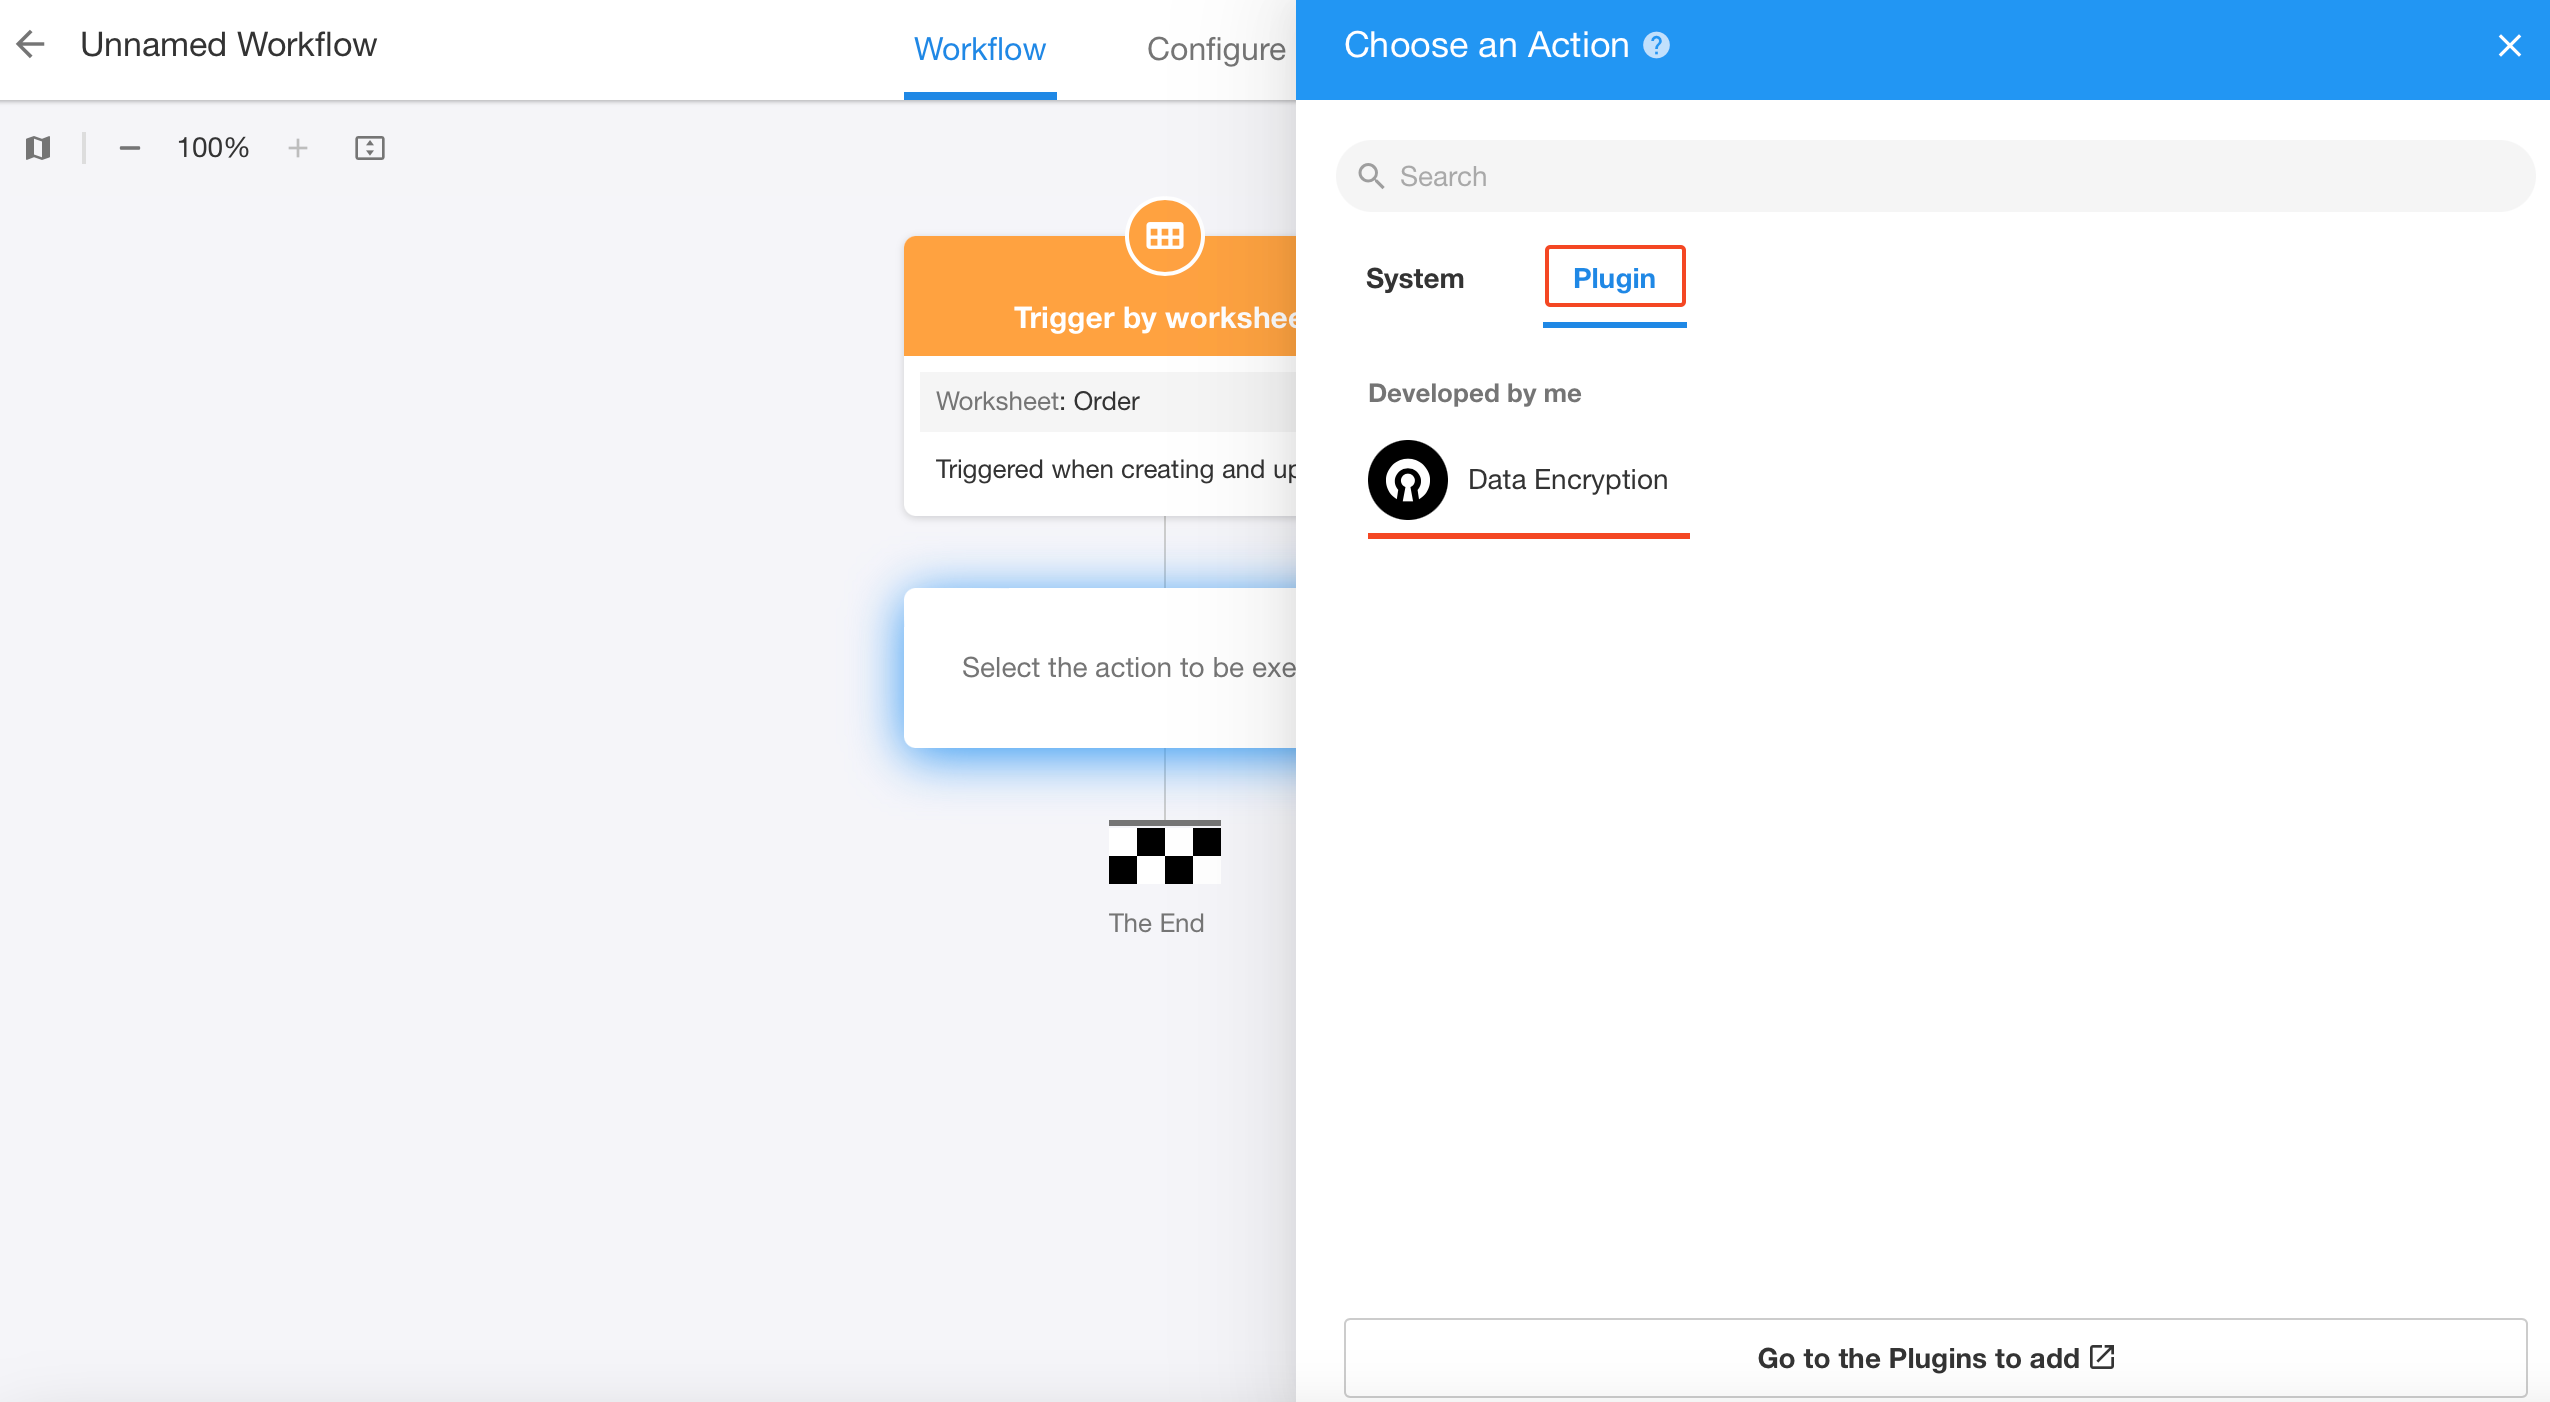
After publishing, the custom node will appear under the Plugin tab when adding workflow nodes. You can then use and test the node in your workflows.
Publish to Organization
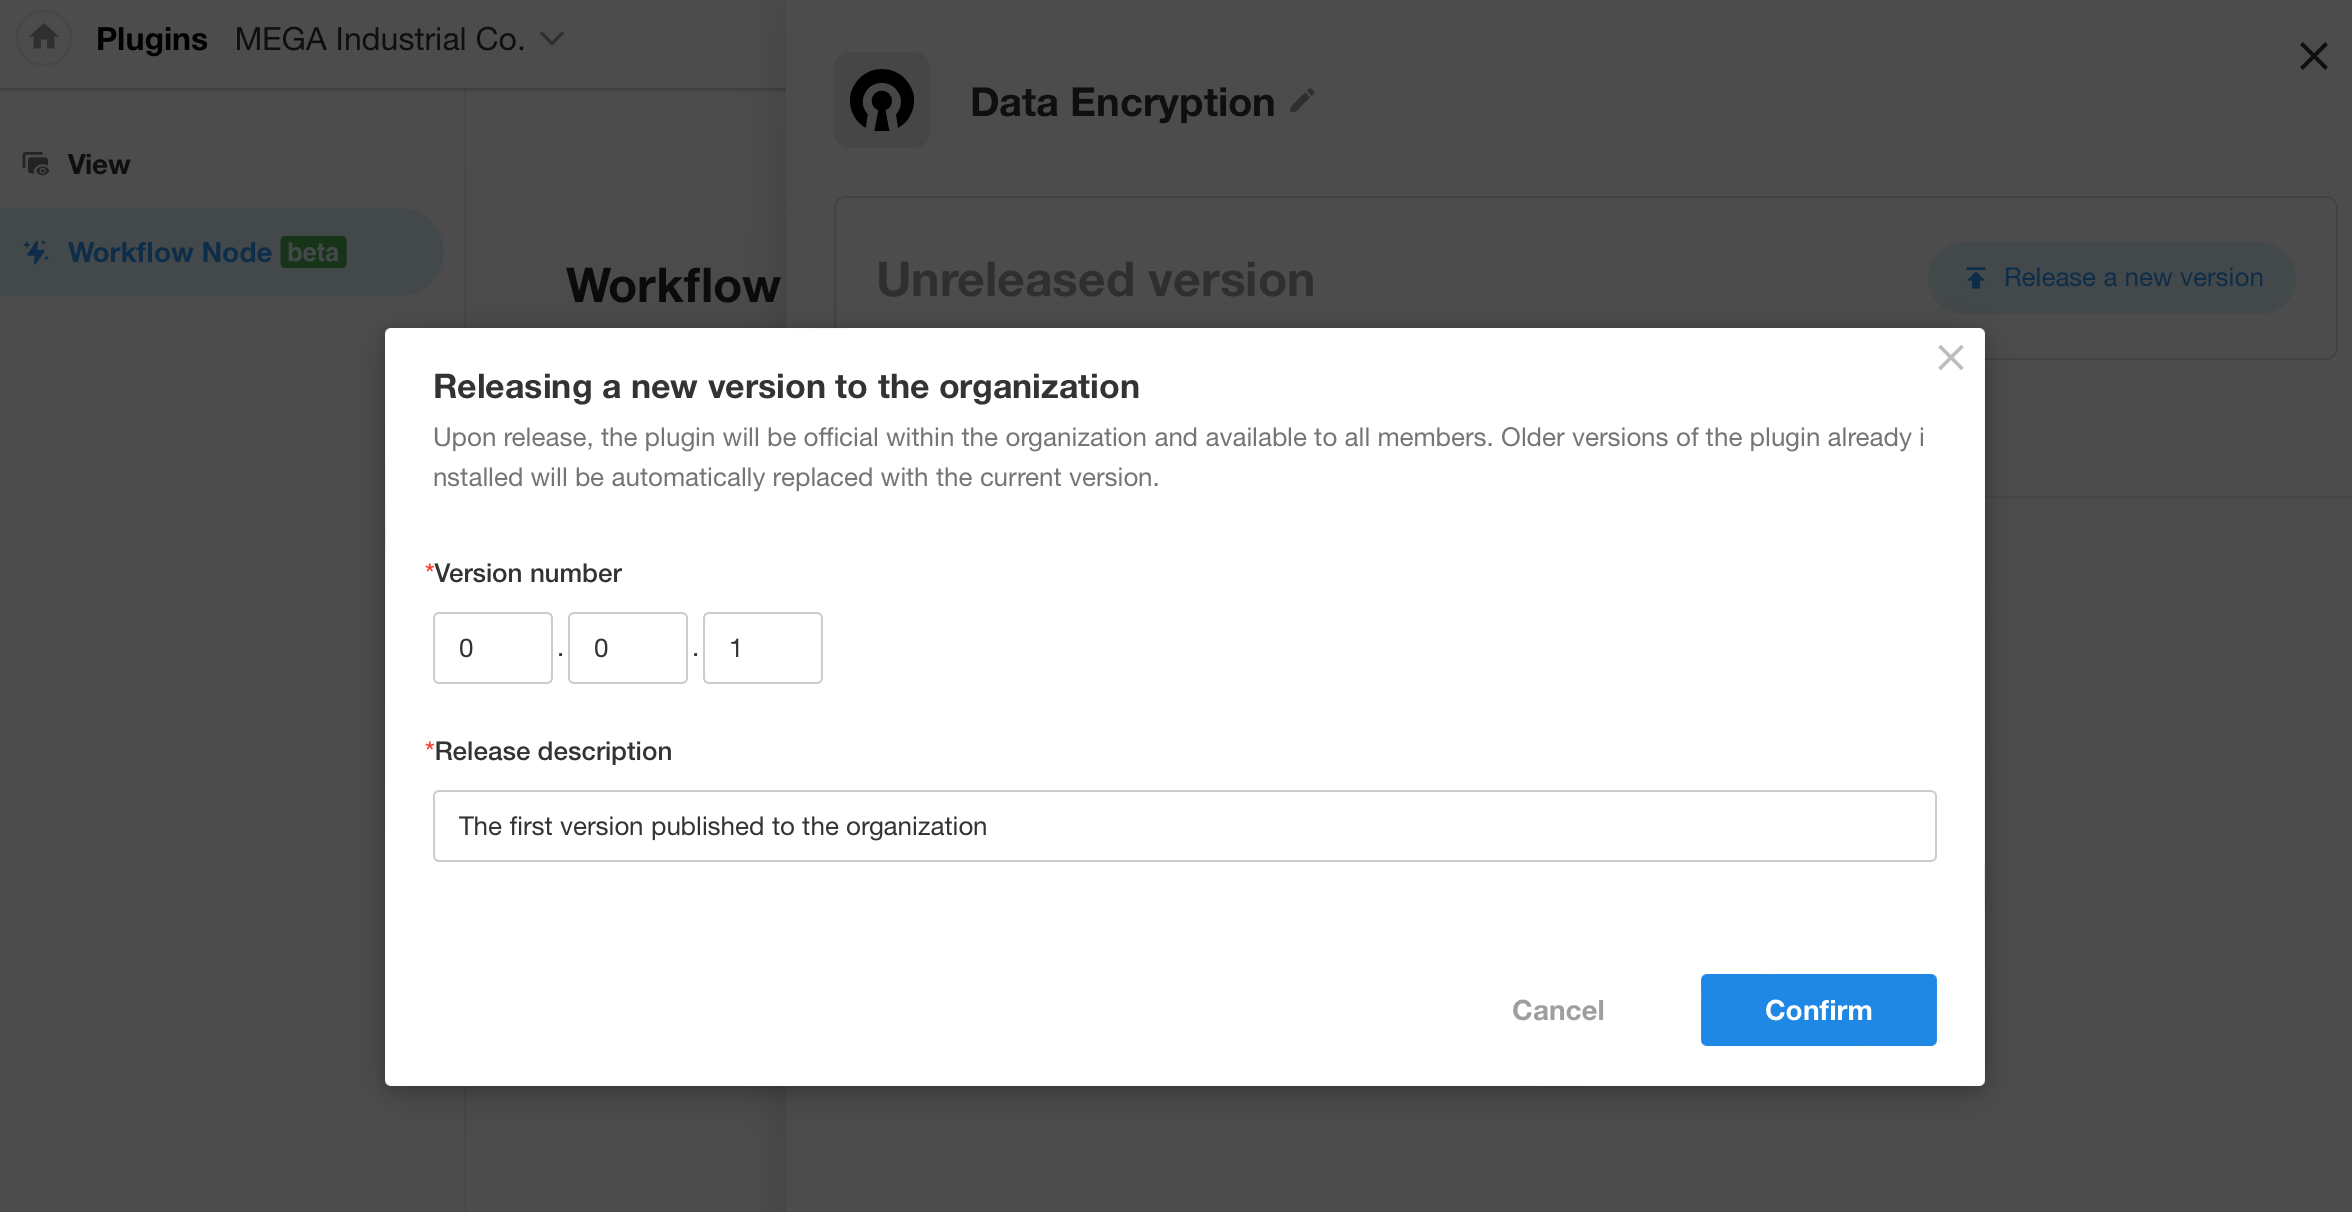
After testing the plugin and confirming that it works as expected, you can publish it to your organization from Plugin Center.
Once published, all users in the organization can use this custom node.
Manage Plugins
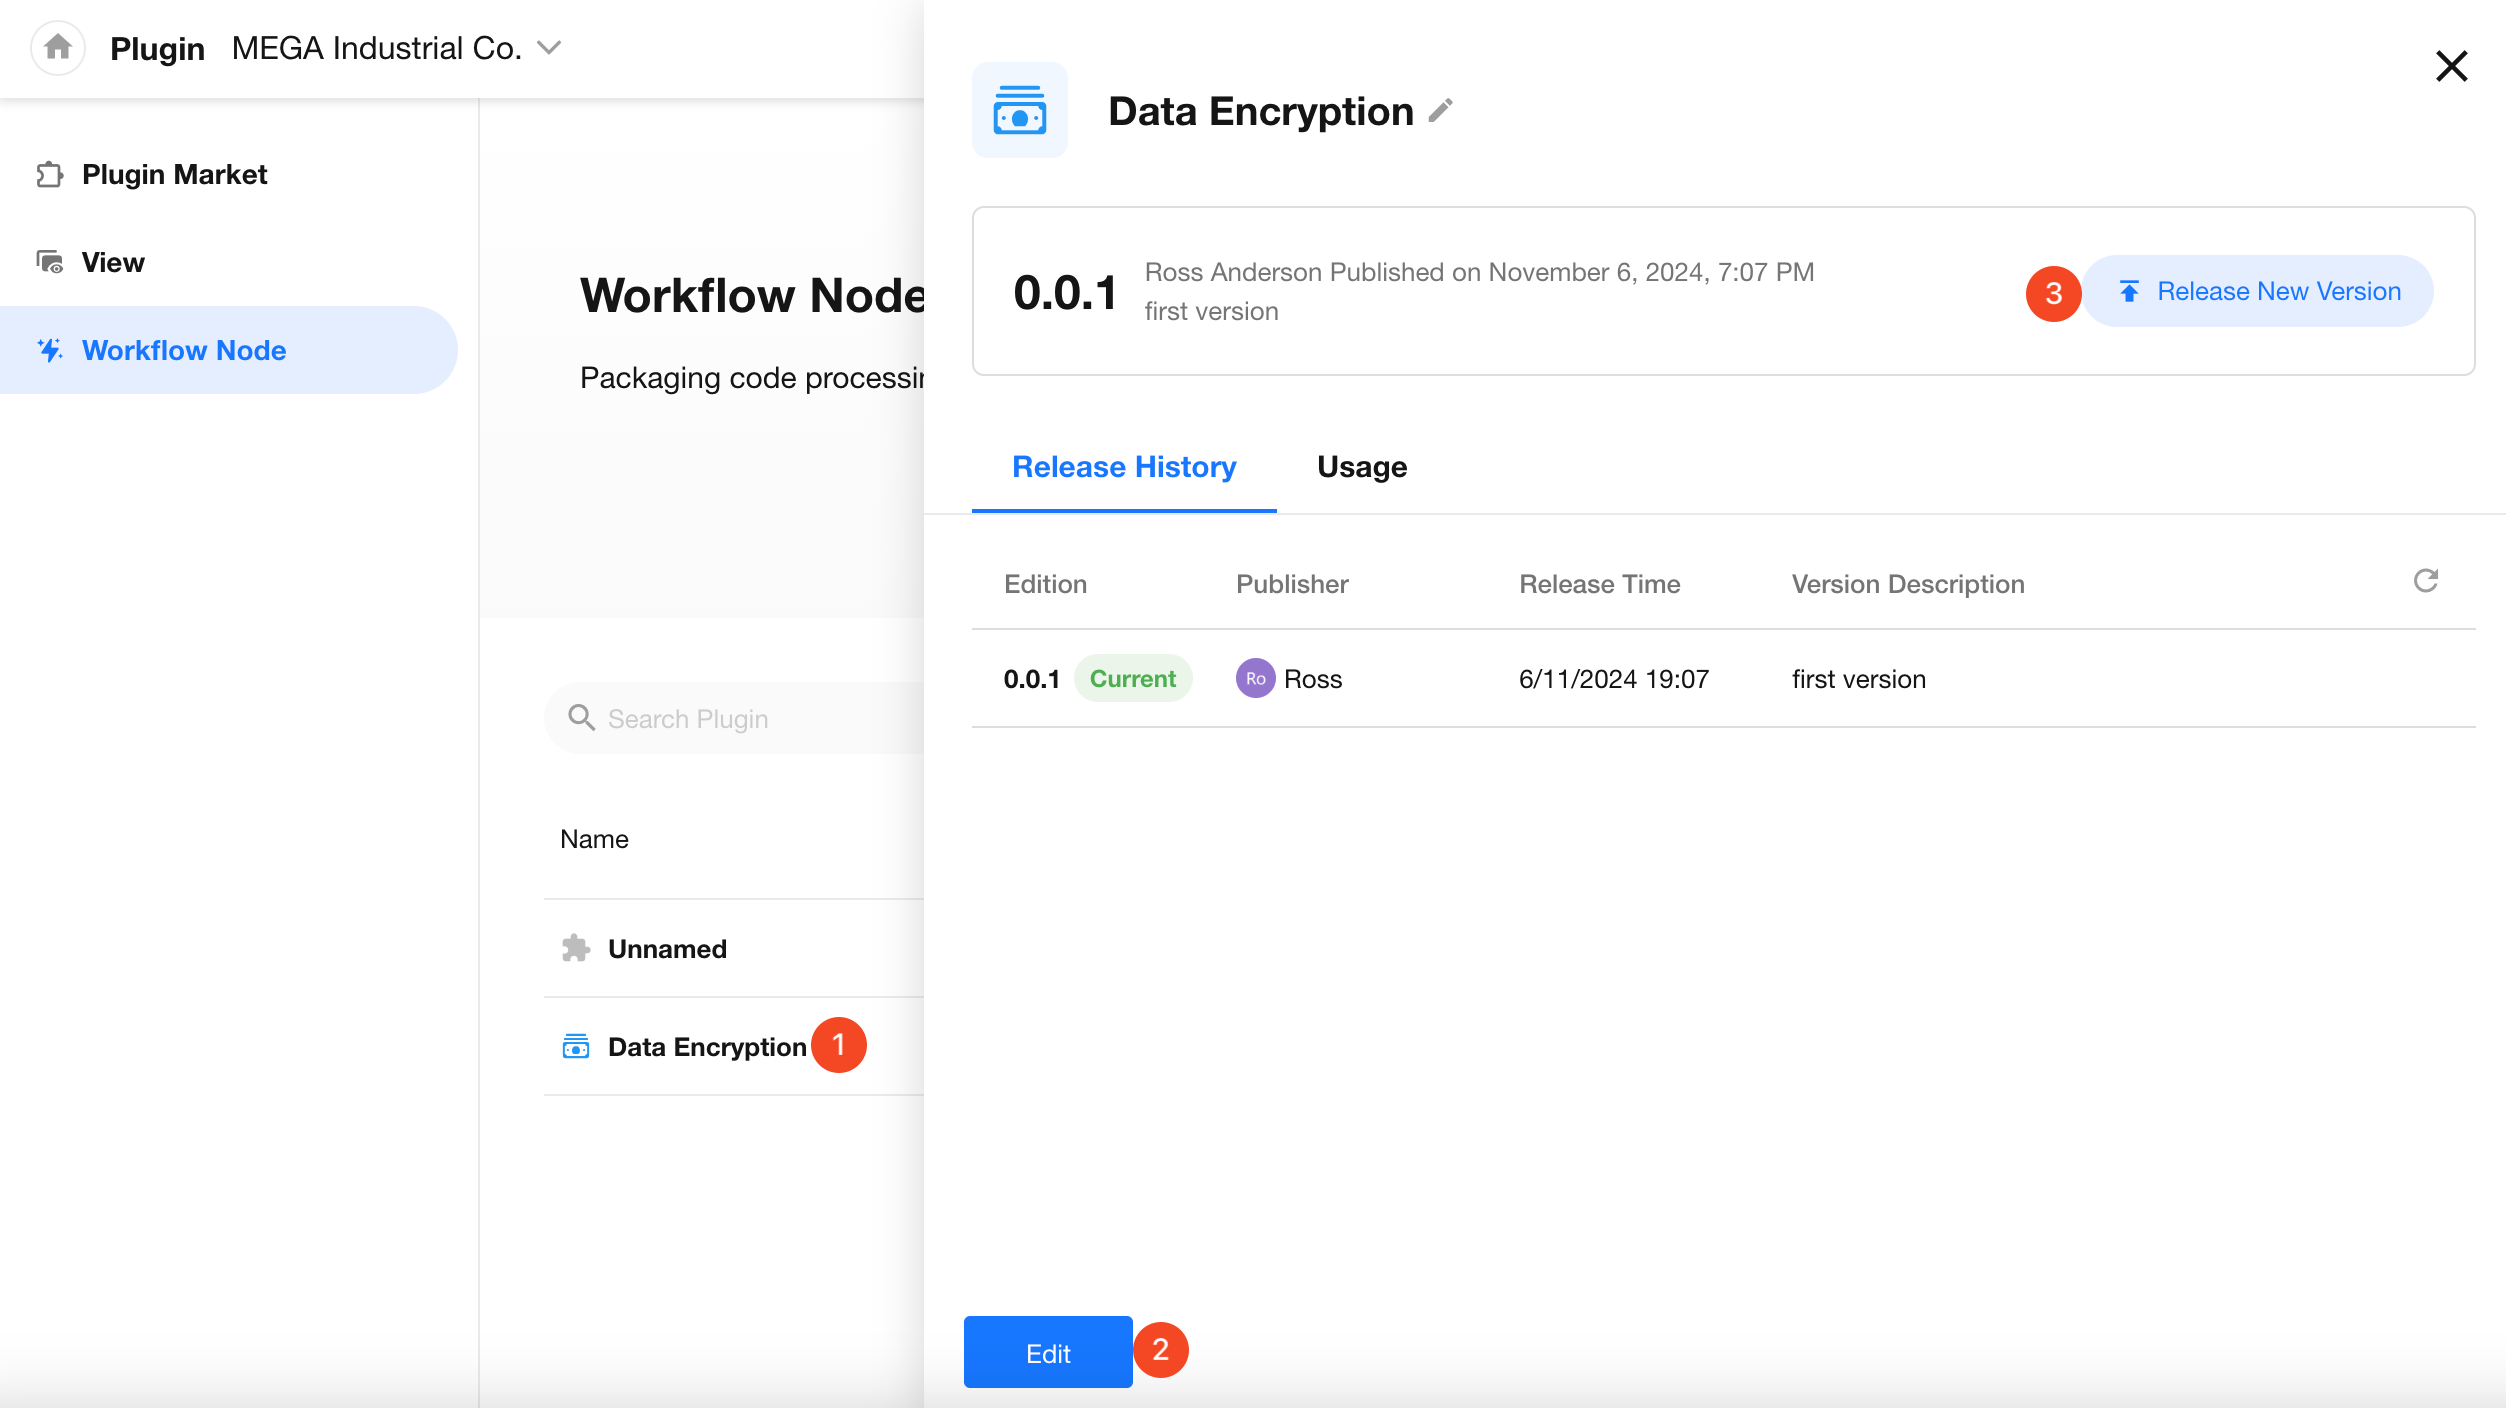
Plugins developed by yourself can be edited, deleted, and published as new versions.
In the plugin list, click the plugin name to modify basic information such as the name and icon. Click Edit at the bottom to reconfigure the data processing steps included in the plugin. After making changes, you can publish a new version.
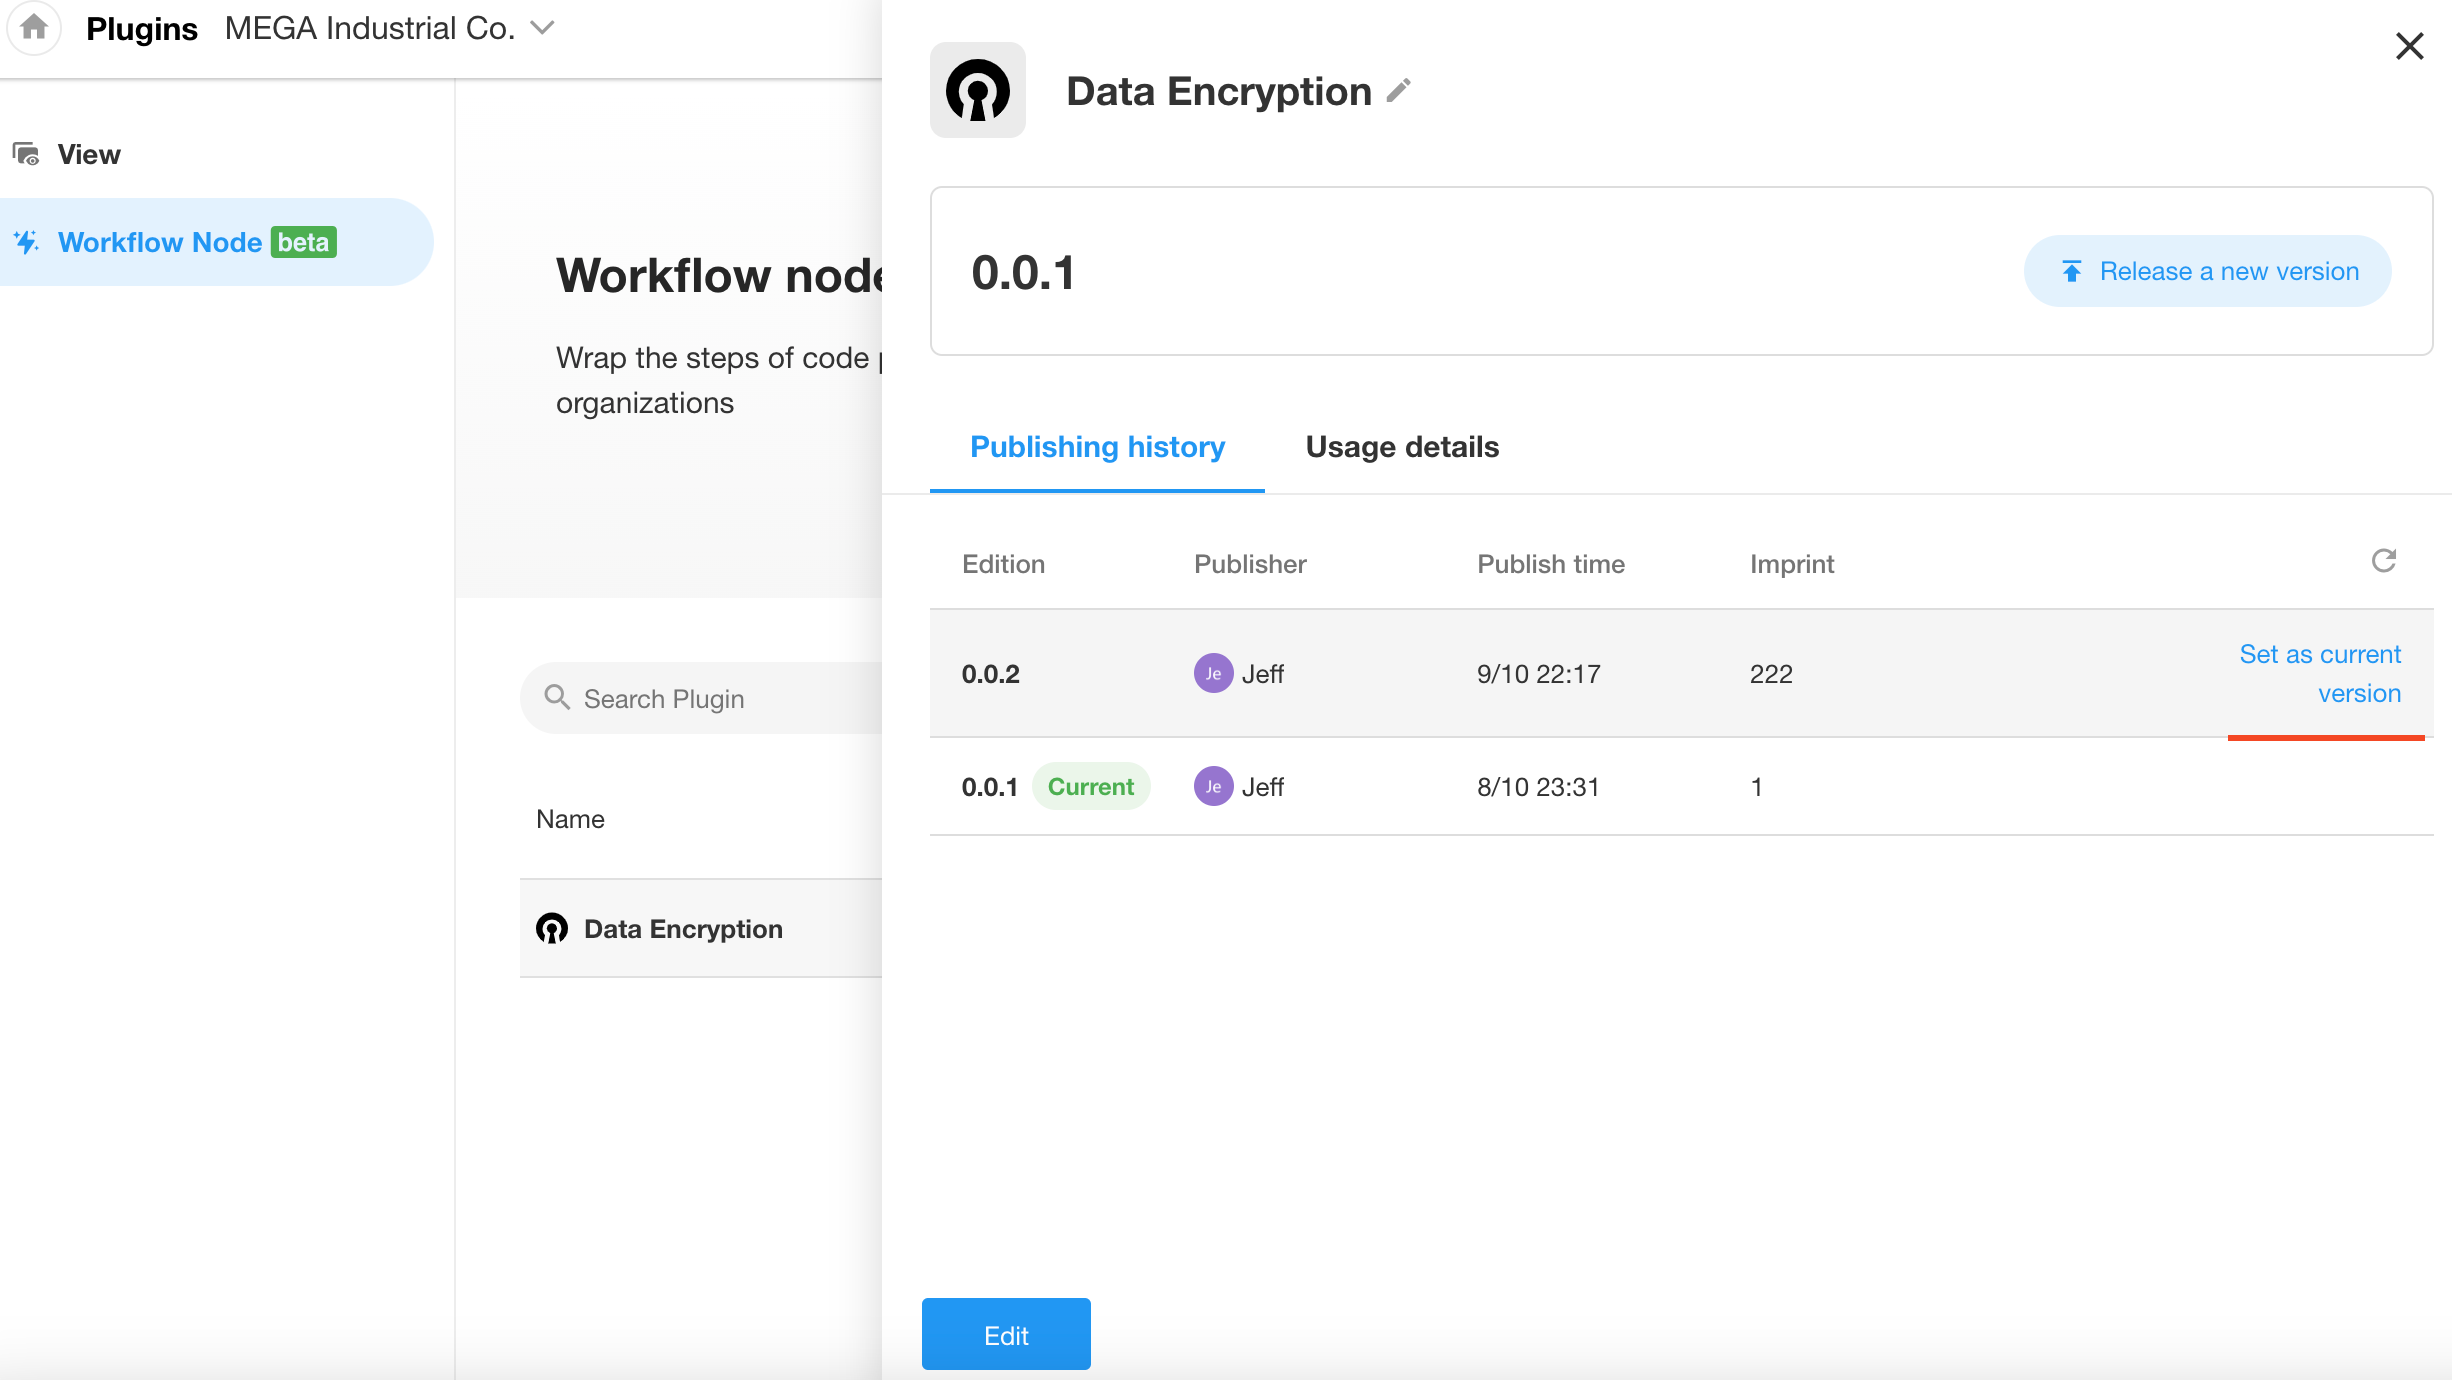
The latest version is not necessarily the publicly released version. You can select any version as the Current Version.
Was this document helpful?