Org Chart
The Org Chart displays the reporting hierarchy of all employees in the organization through a tree diagram. This structure is useful in the following scenarios:
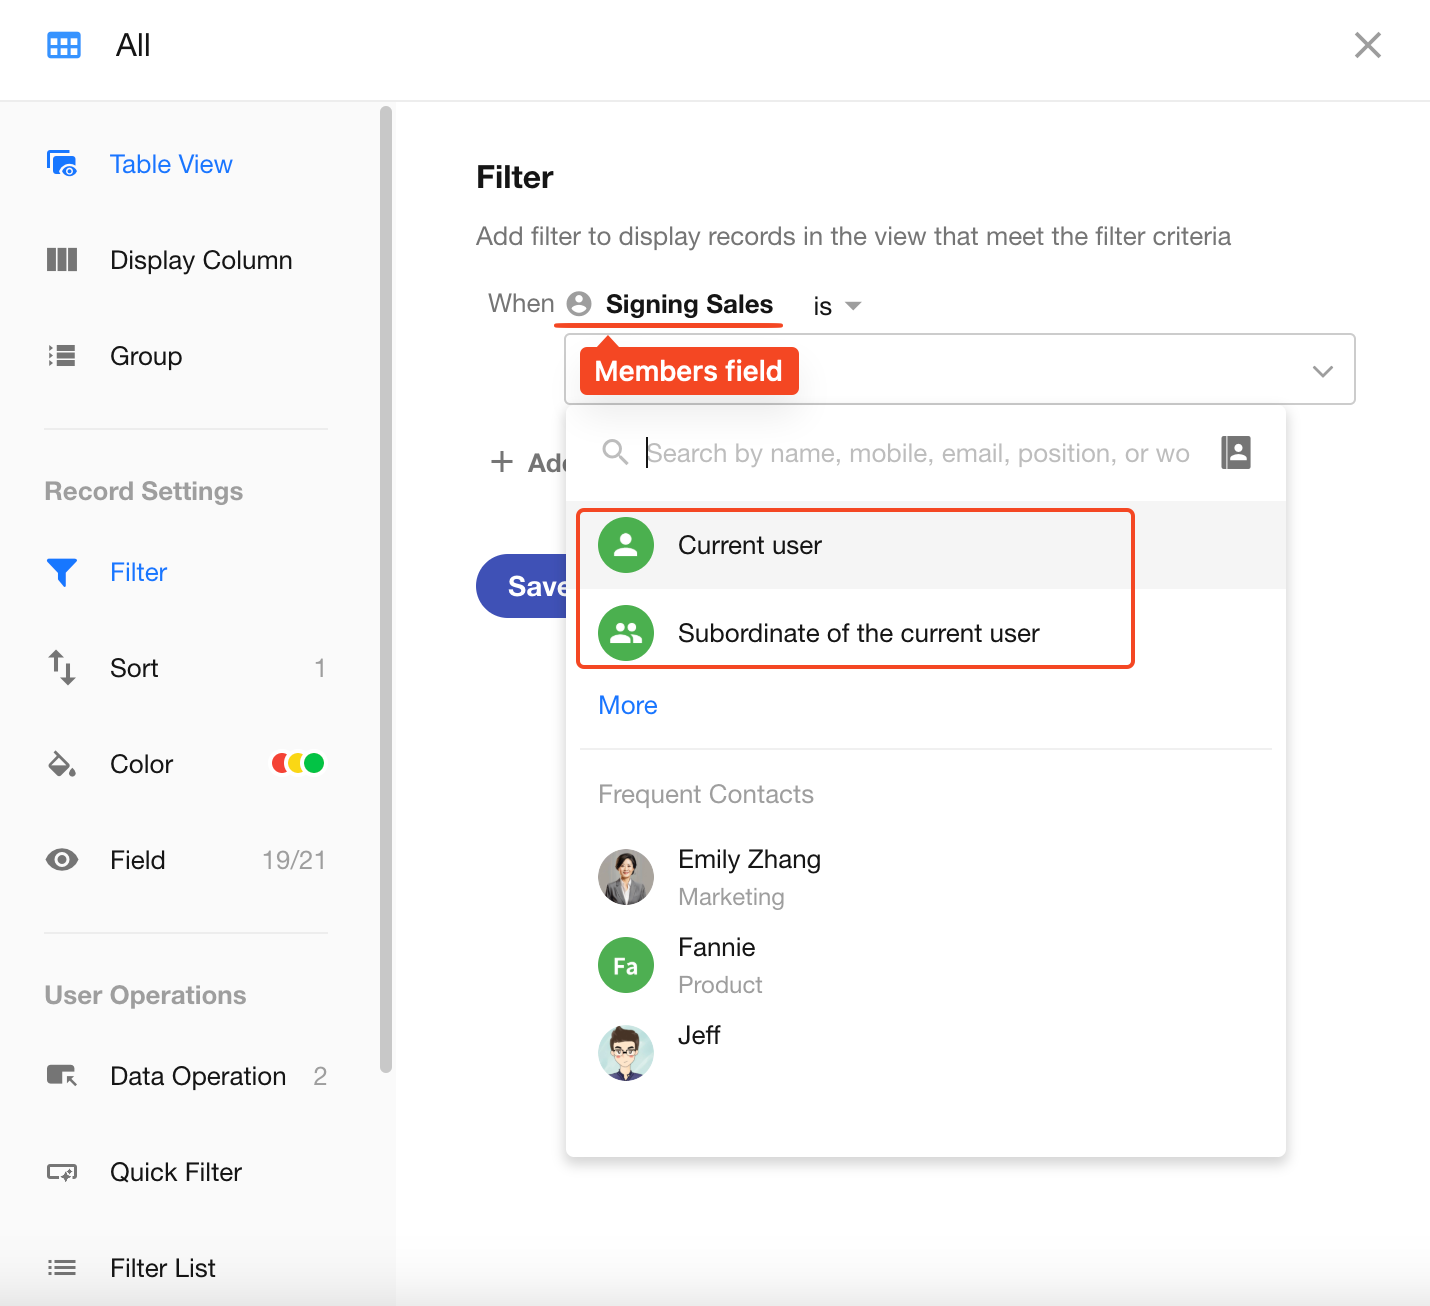
-
Displaying records related to subordinates when filtering by user in views
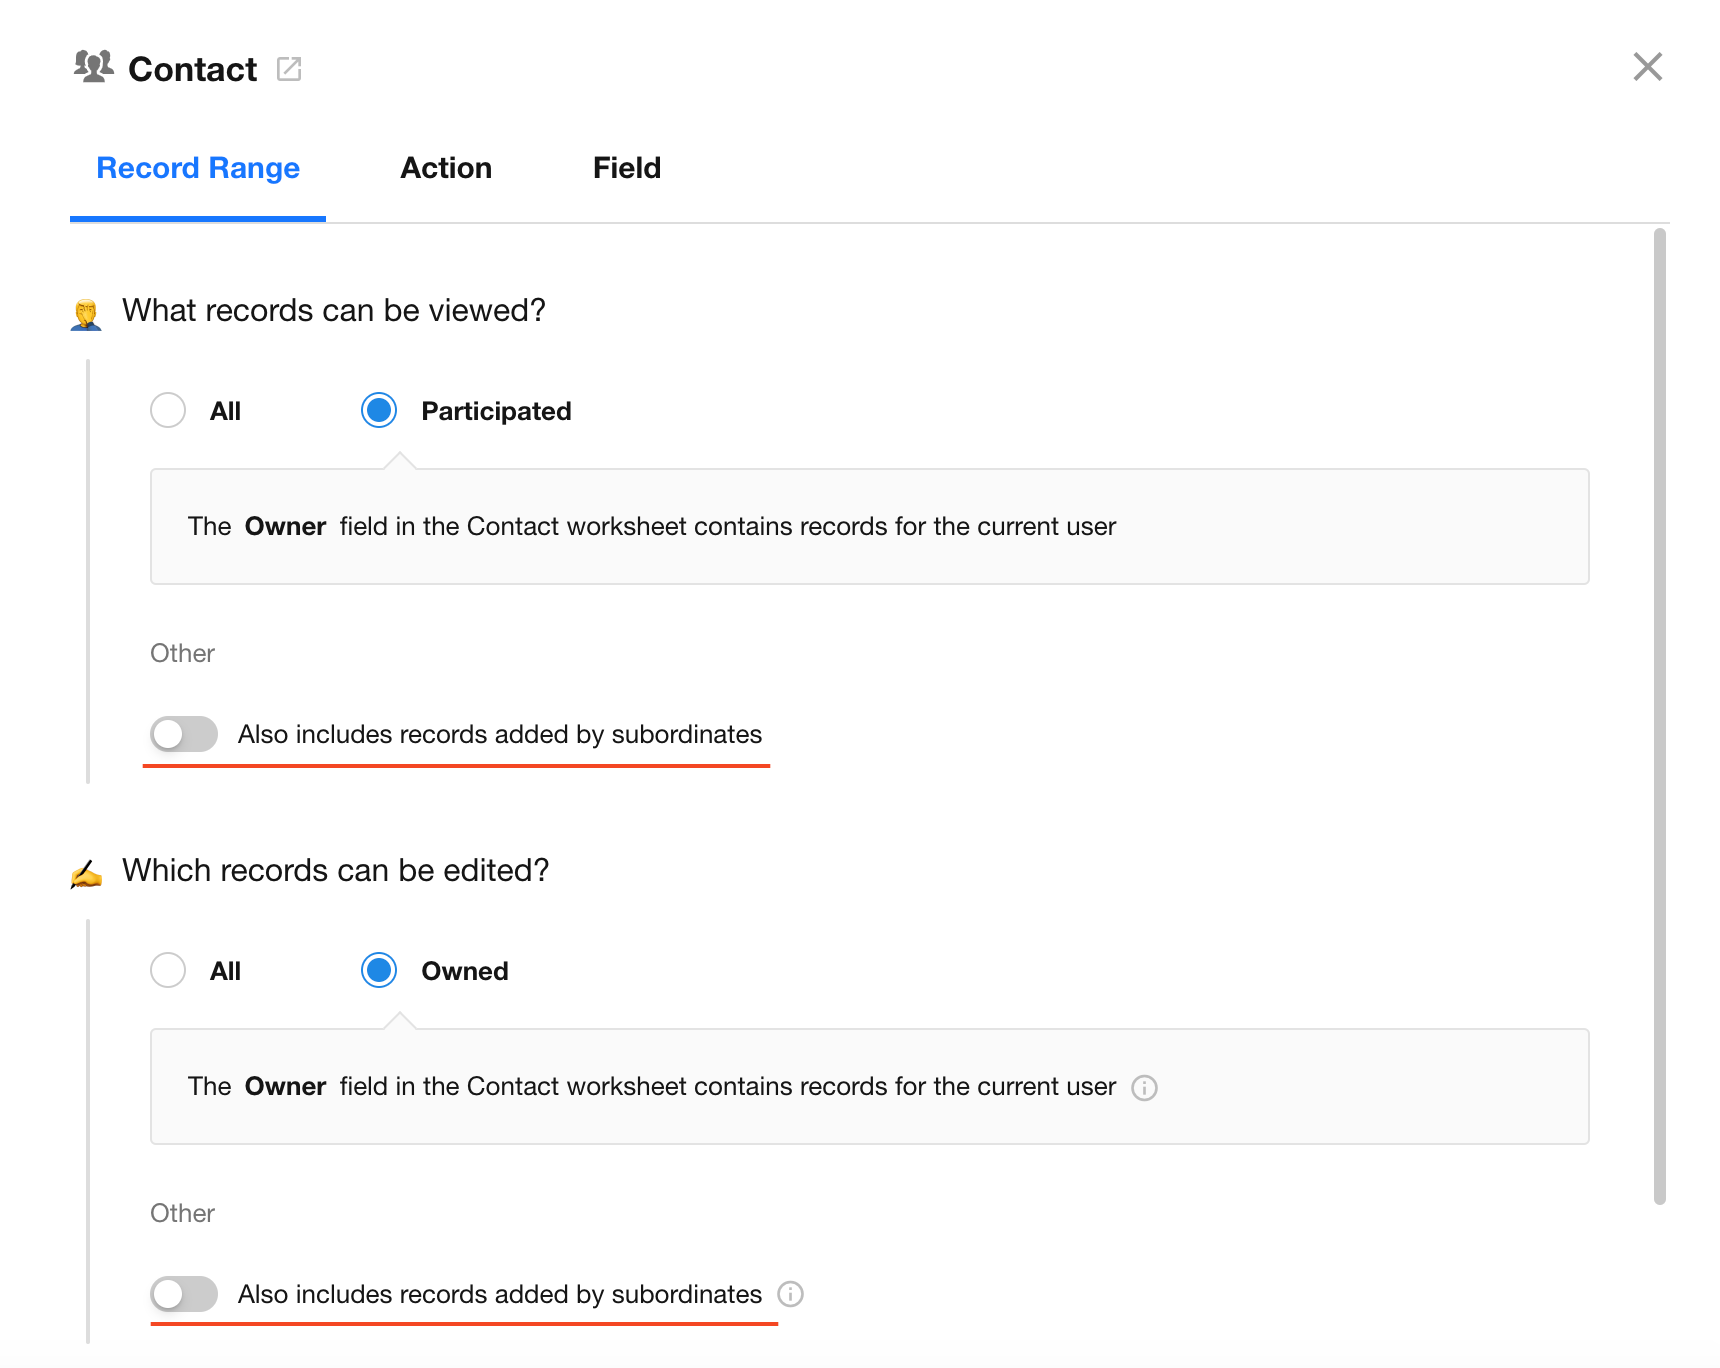
-
Granting access permissions to users for records related to their subordinates
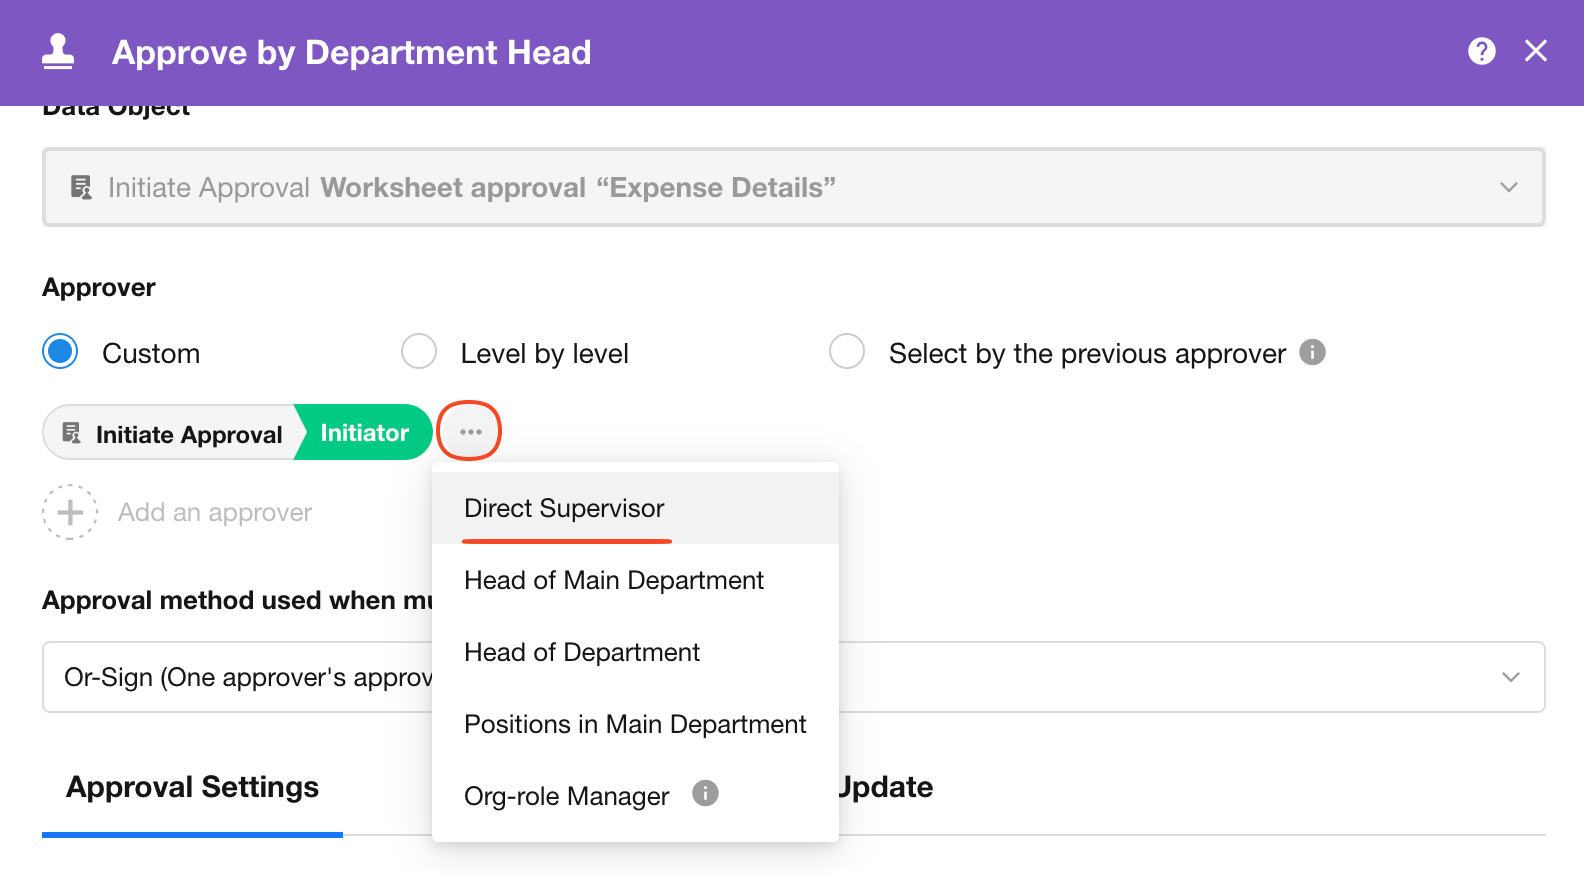
-
Used in workflow nodes such as Approval / Send Internal Notification / Fill In
1. Admin Operations
Accessing the Org Chart
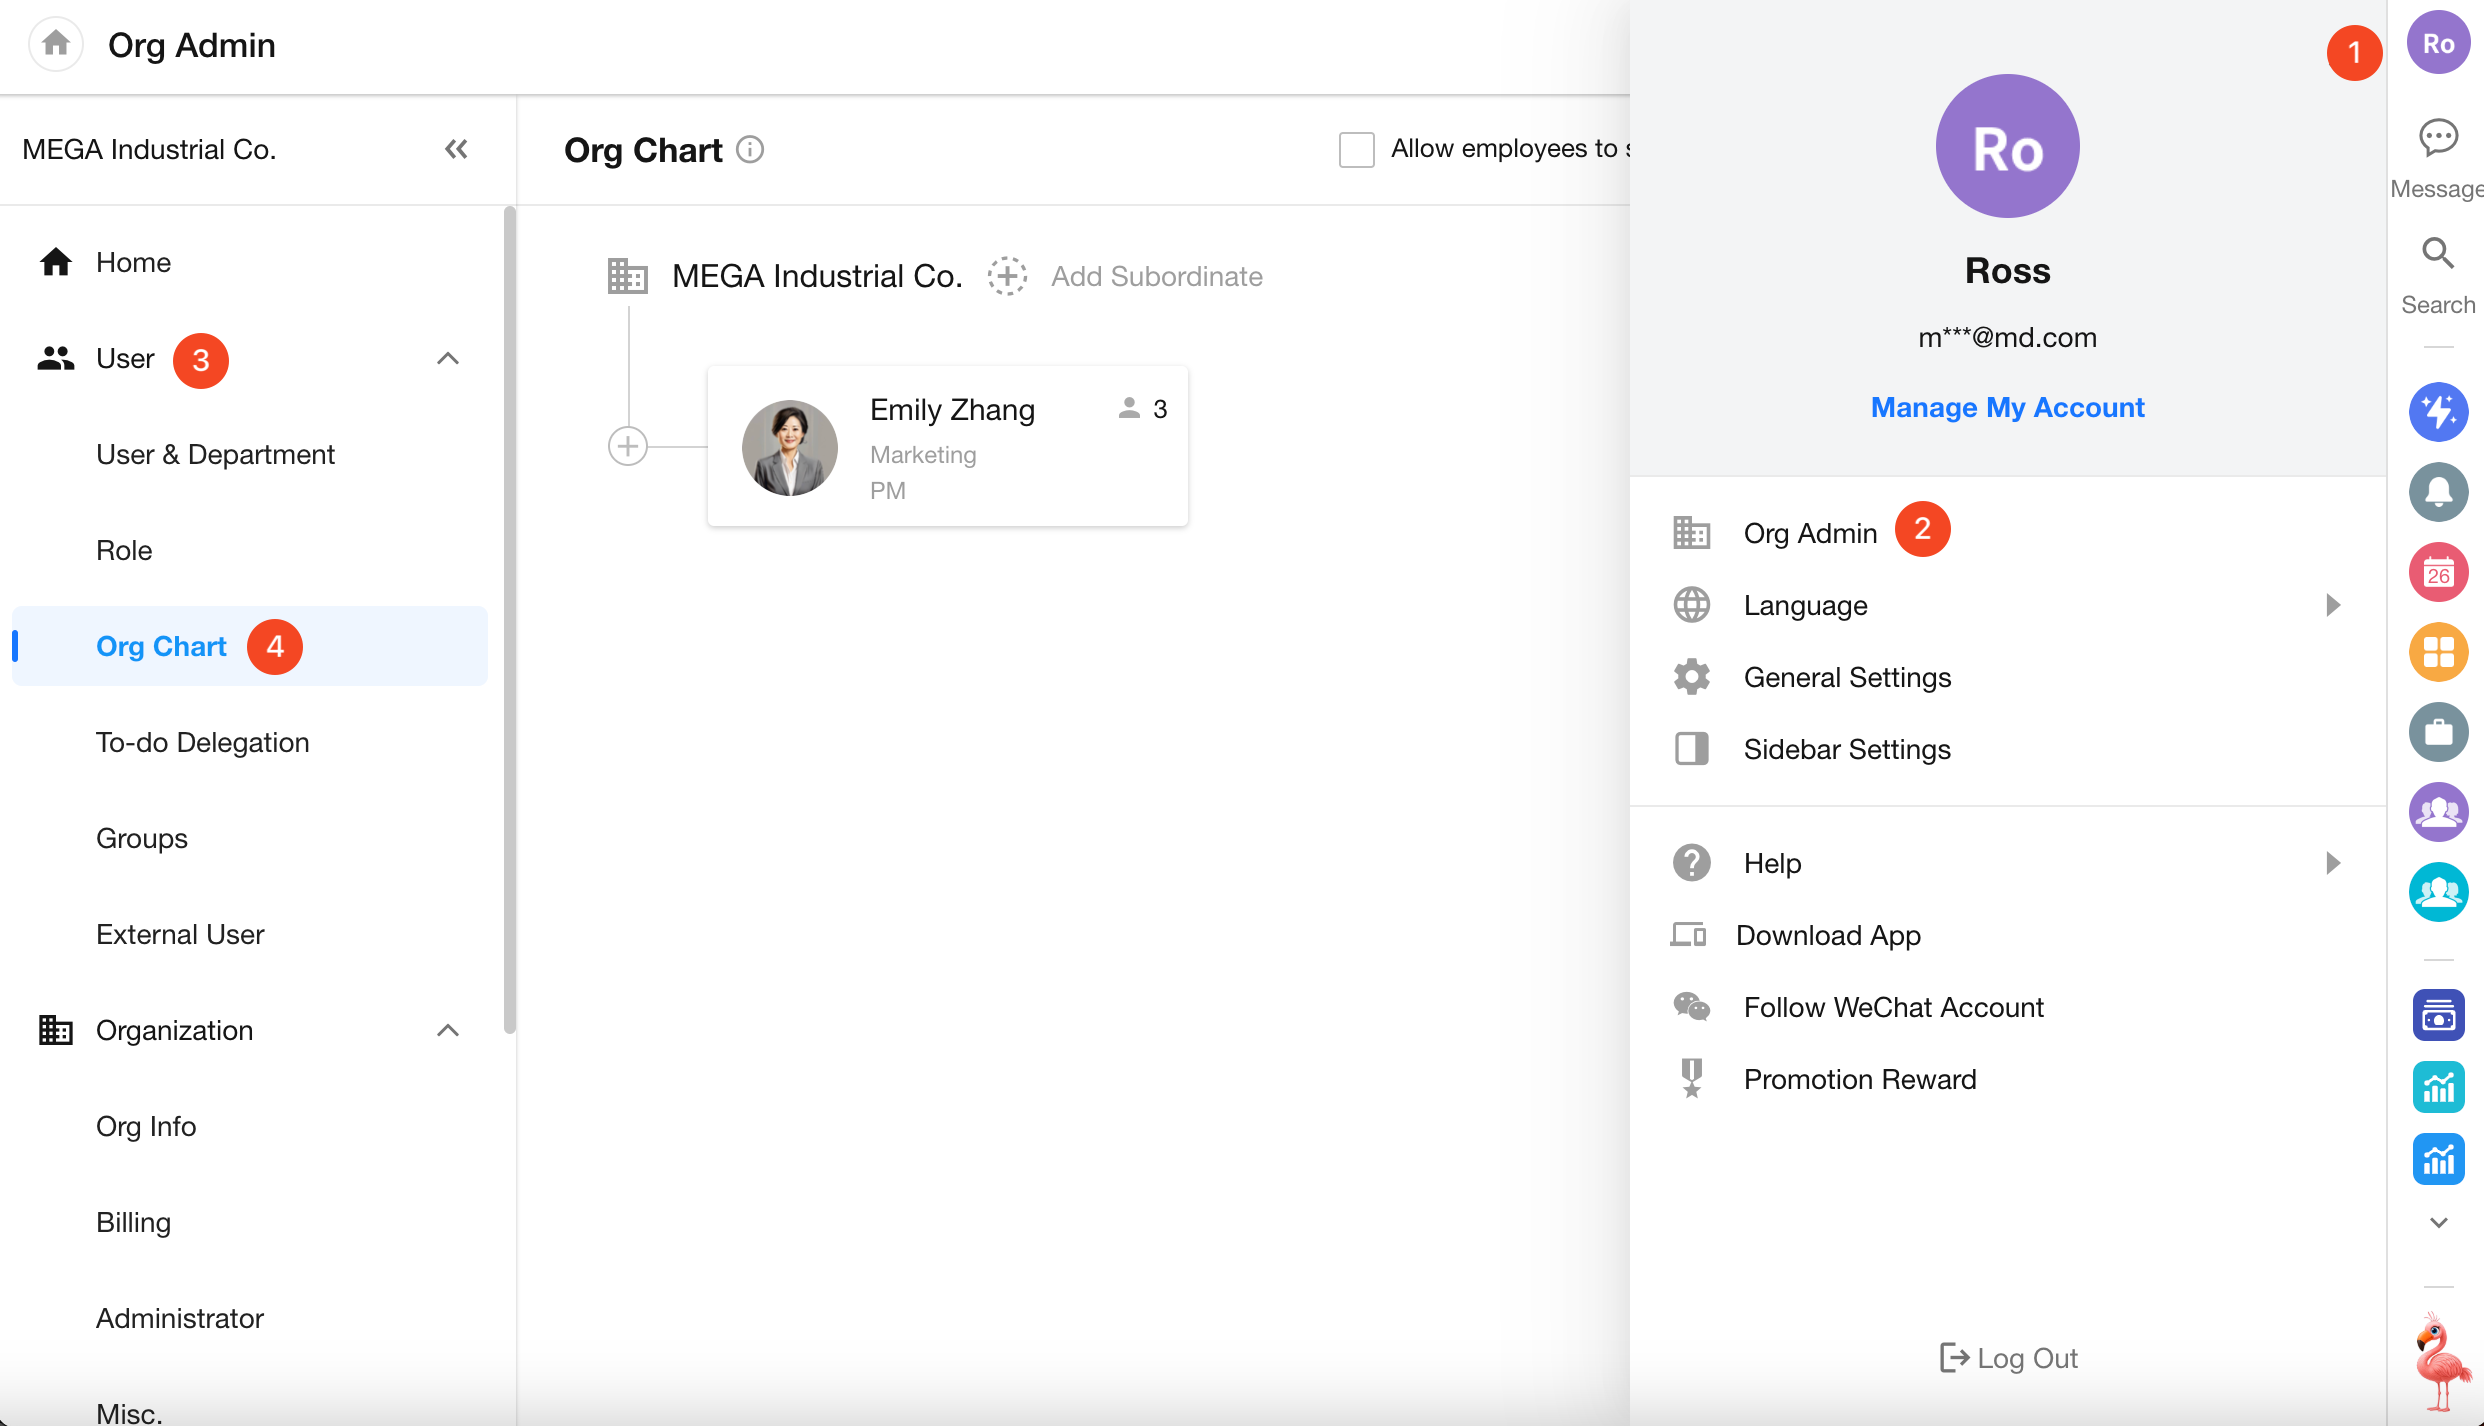
On PC, organization admins can click their avatar and go to [Org Admin] > [User] > [Org Chart]
1. Add Top-Level Executives
If this is your first time setting up the reporting structure, start by adding one or more top-level leaders (not necessarily unique). After setup, you can notify all members to add their subordinates.
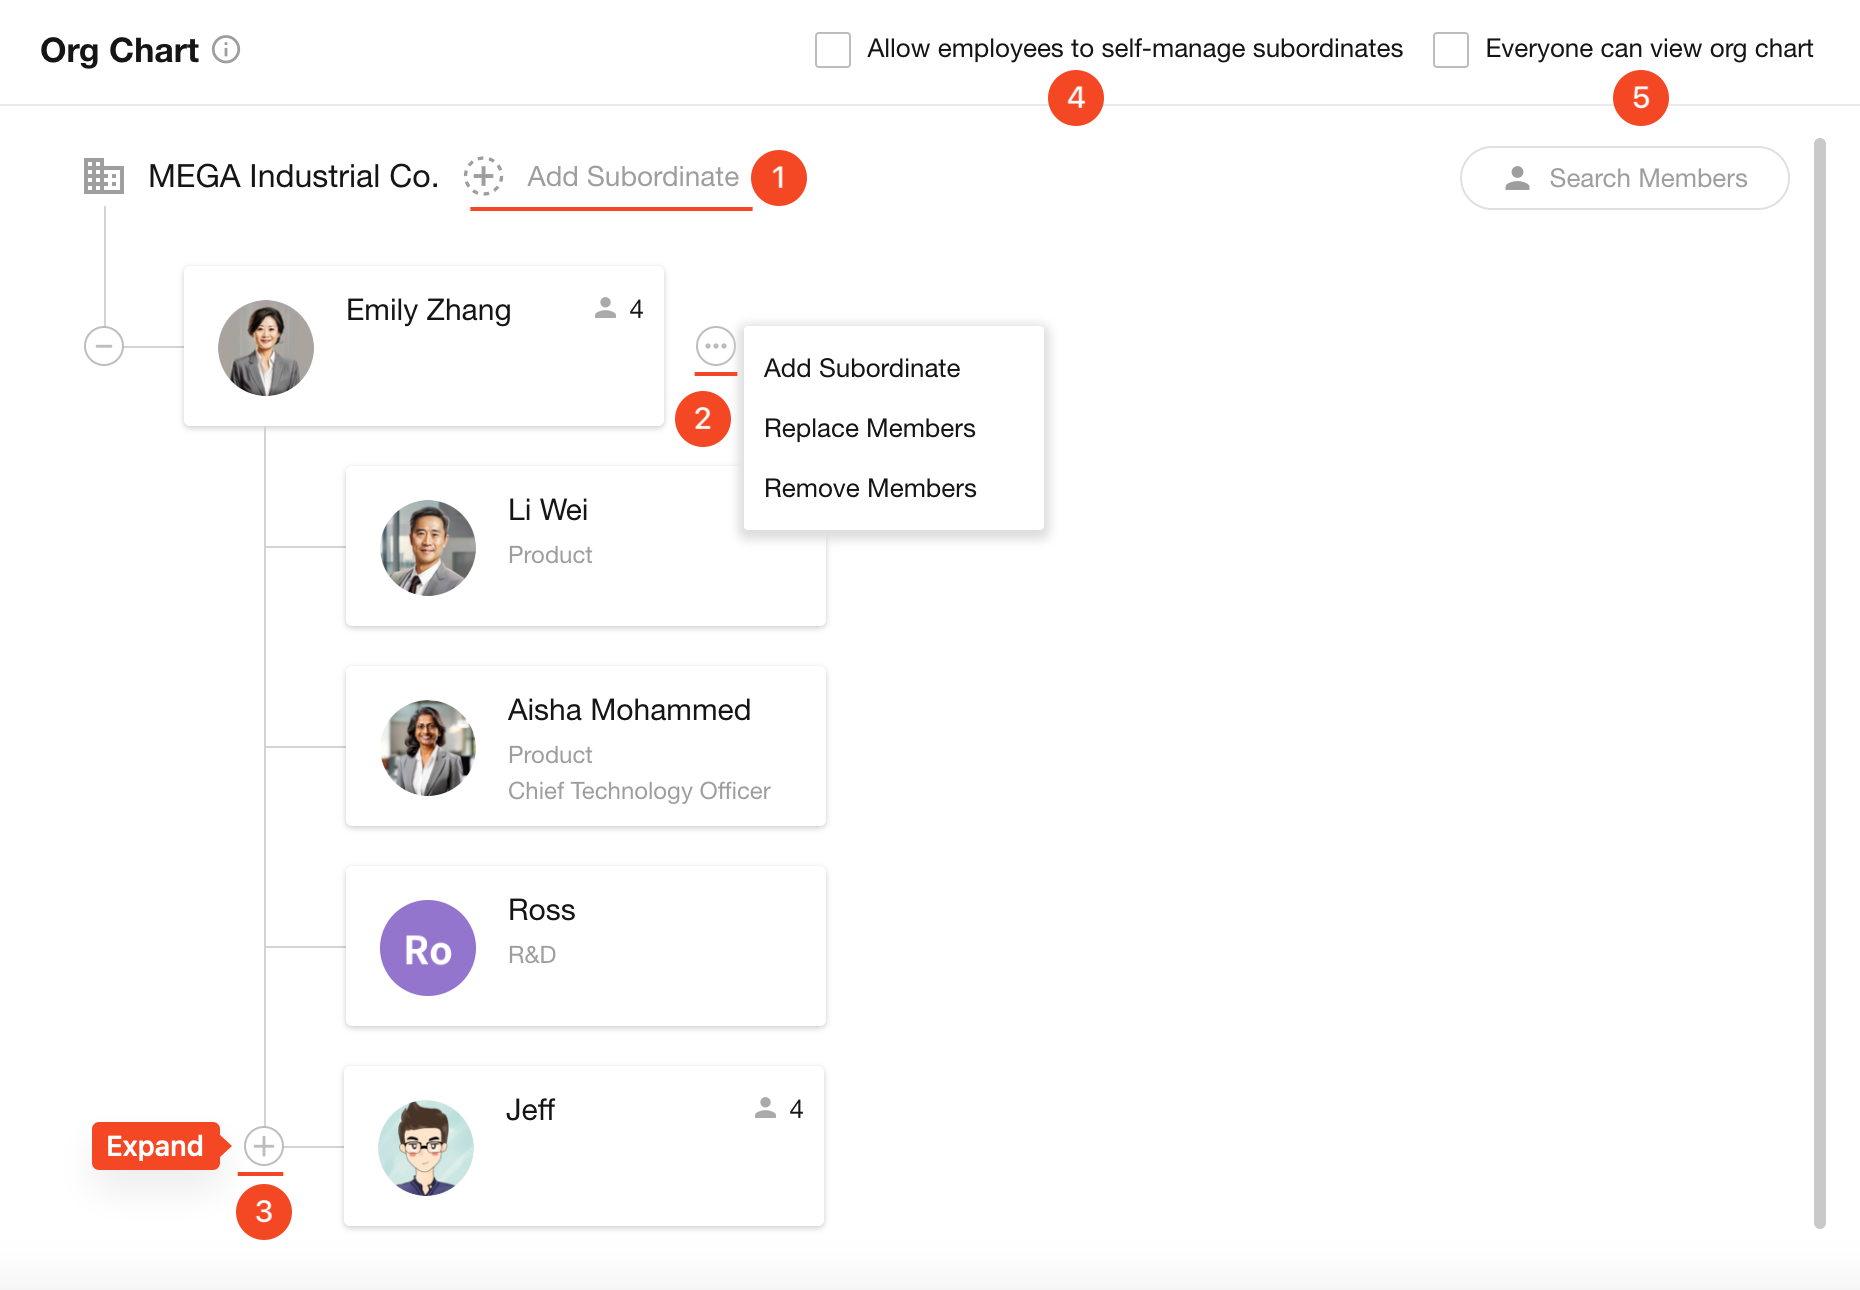
Click the [+ Add Subordinate] button next to the organization name.
In some companies (e.g., partnerships), partners may not follow a superior-subordinate structure. In such cases, you may add multiple top-level leaders.
2. Manage a Specific Member
You can perform the following actions on an individual employee:
- Add Subordinates
- Replace Member in the Current Node
- Remove Member
- Each member can have only one superior, but multiple subordinates.
- Removing a member only removes their reporting relationship with their superior; their relationships with subordinates remain intact; the member and their subordinates will no longer appear in the reporting tree. Once re-added, their previous subordinates will also reappear in the hierarchy.
3. Configure View or Management Permissions
-
Allow employees to self-manage subordinates:
If checked, members can add their own subordinates; otherwise, they can only view them. -
Everyone can view org chart:
If checked, members can view the entire organization’s structure.
If unchecked, they can only see their direct superior and subordinates.
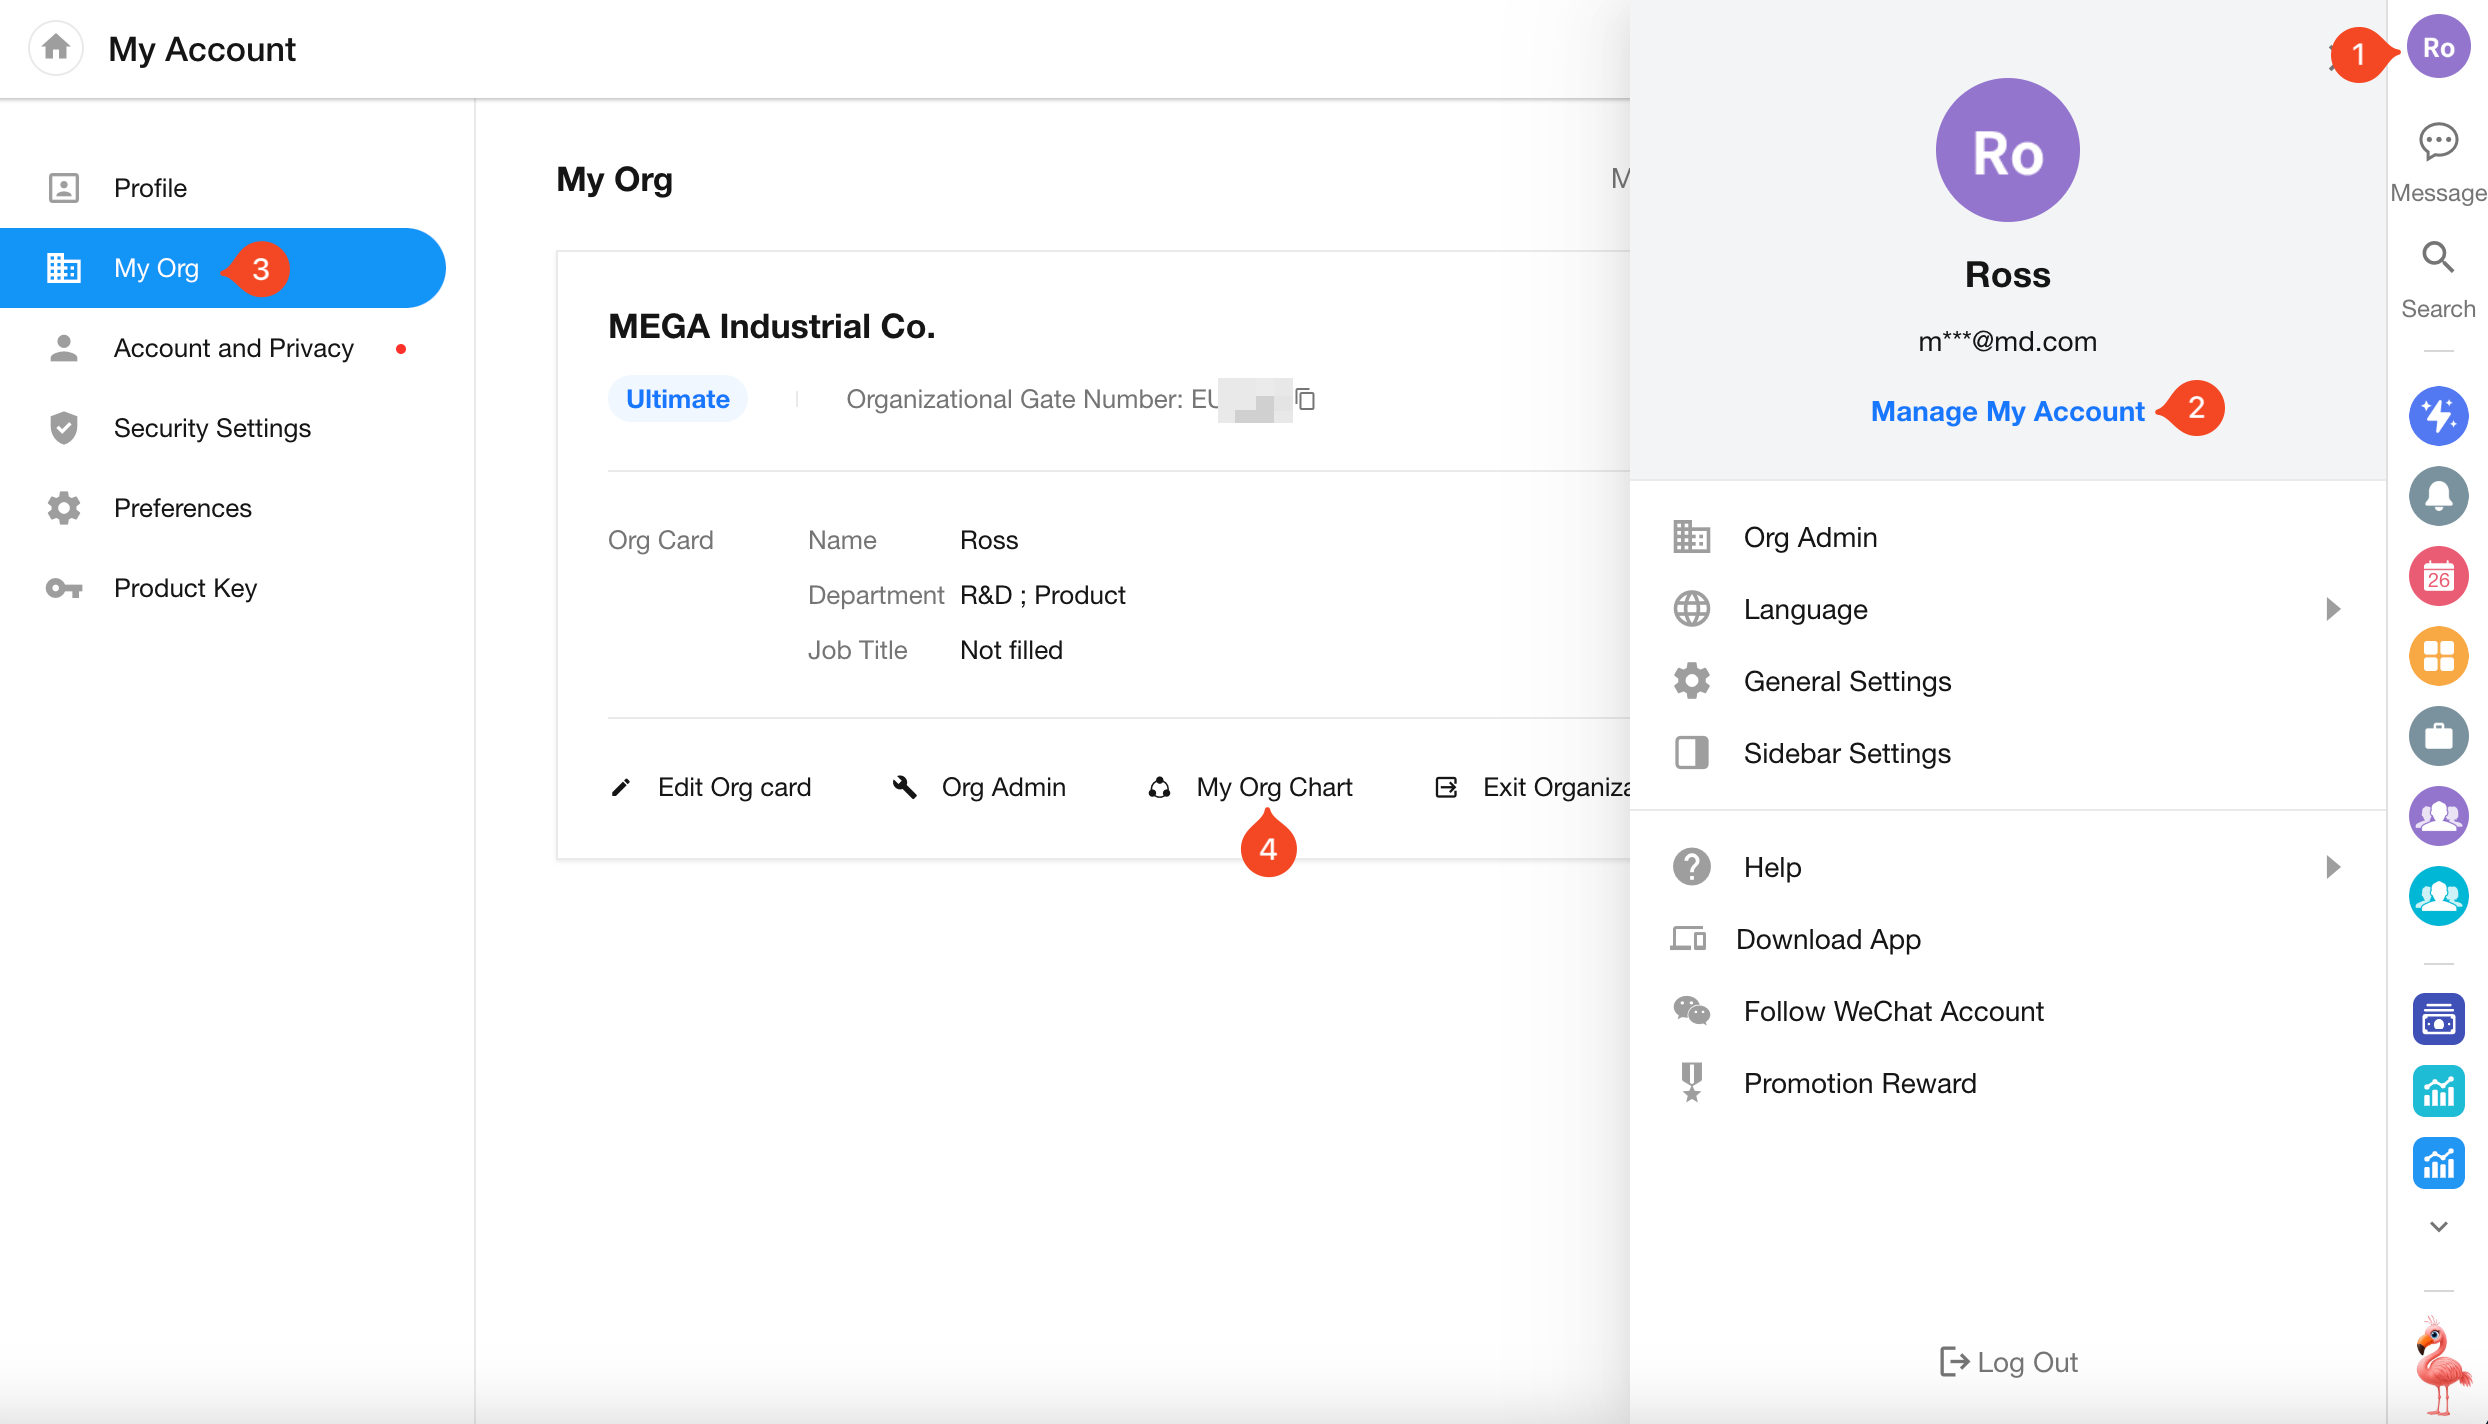
2. Adding Subordinates as a Regular User
Non-admin users can navigate to [Manage My Account] > [My Org] > [My Org Chart] to add their subordinates (cannot assign or modify their own superior).
Was this document helpful?