Departments and Job Titles
Departments and job titles are core organization attributes used across Contacts, apps, permissions, and workflows. For example, a department manager can be assigned as an approver, or members with a specific job title can be selected as notification recipients.
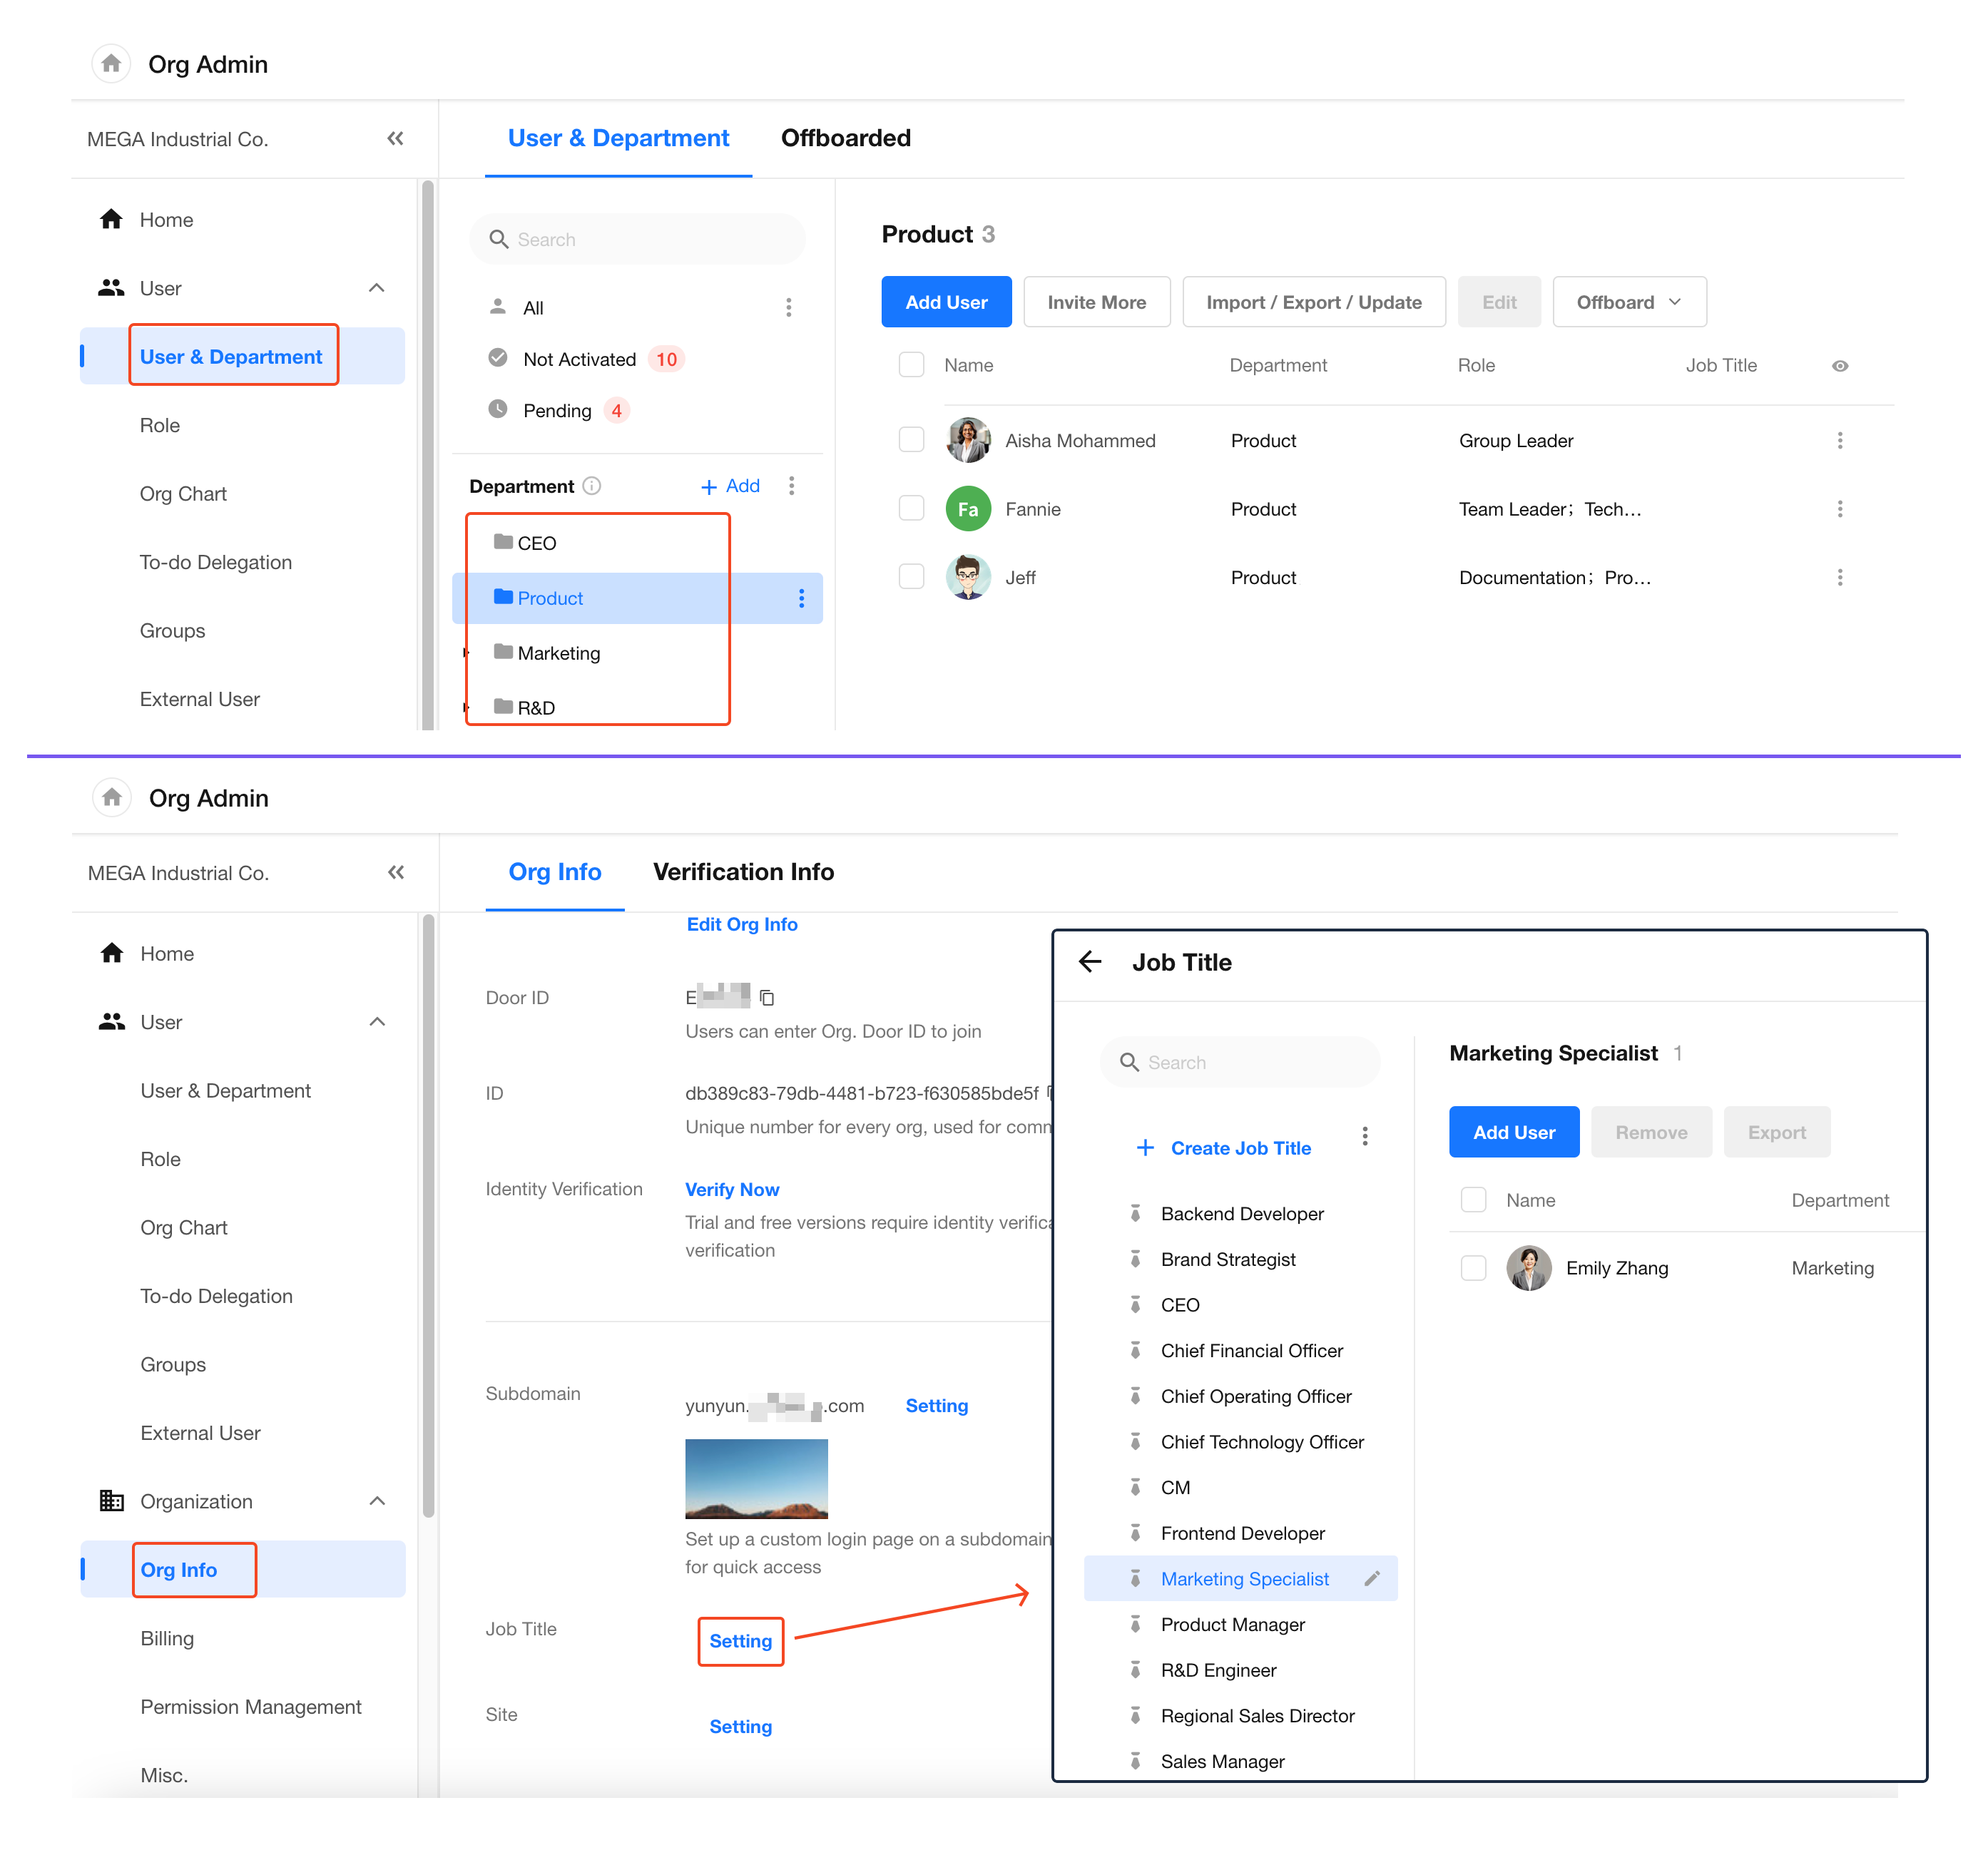
Departments are managed by organization administrators under User > User & Department in Organization Admin. Job titles are managed under Organization > Org Info > Job Title.
Manage Departments
Go to Org Admin > Use > User & Department.
Organization administrators can create, edit, disable, and delete departments; add subdepartments; adjust the department hierarchy and display order; assign department managers; and import or export department data.
Create and Edit Departments
In the department list, click Add to create a department and enter its name.
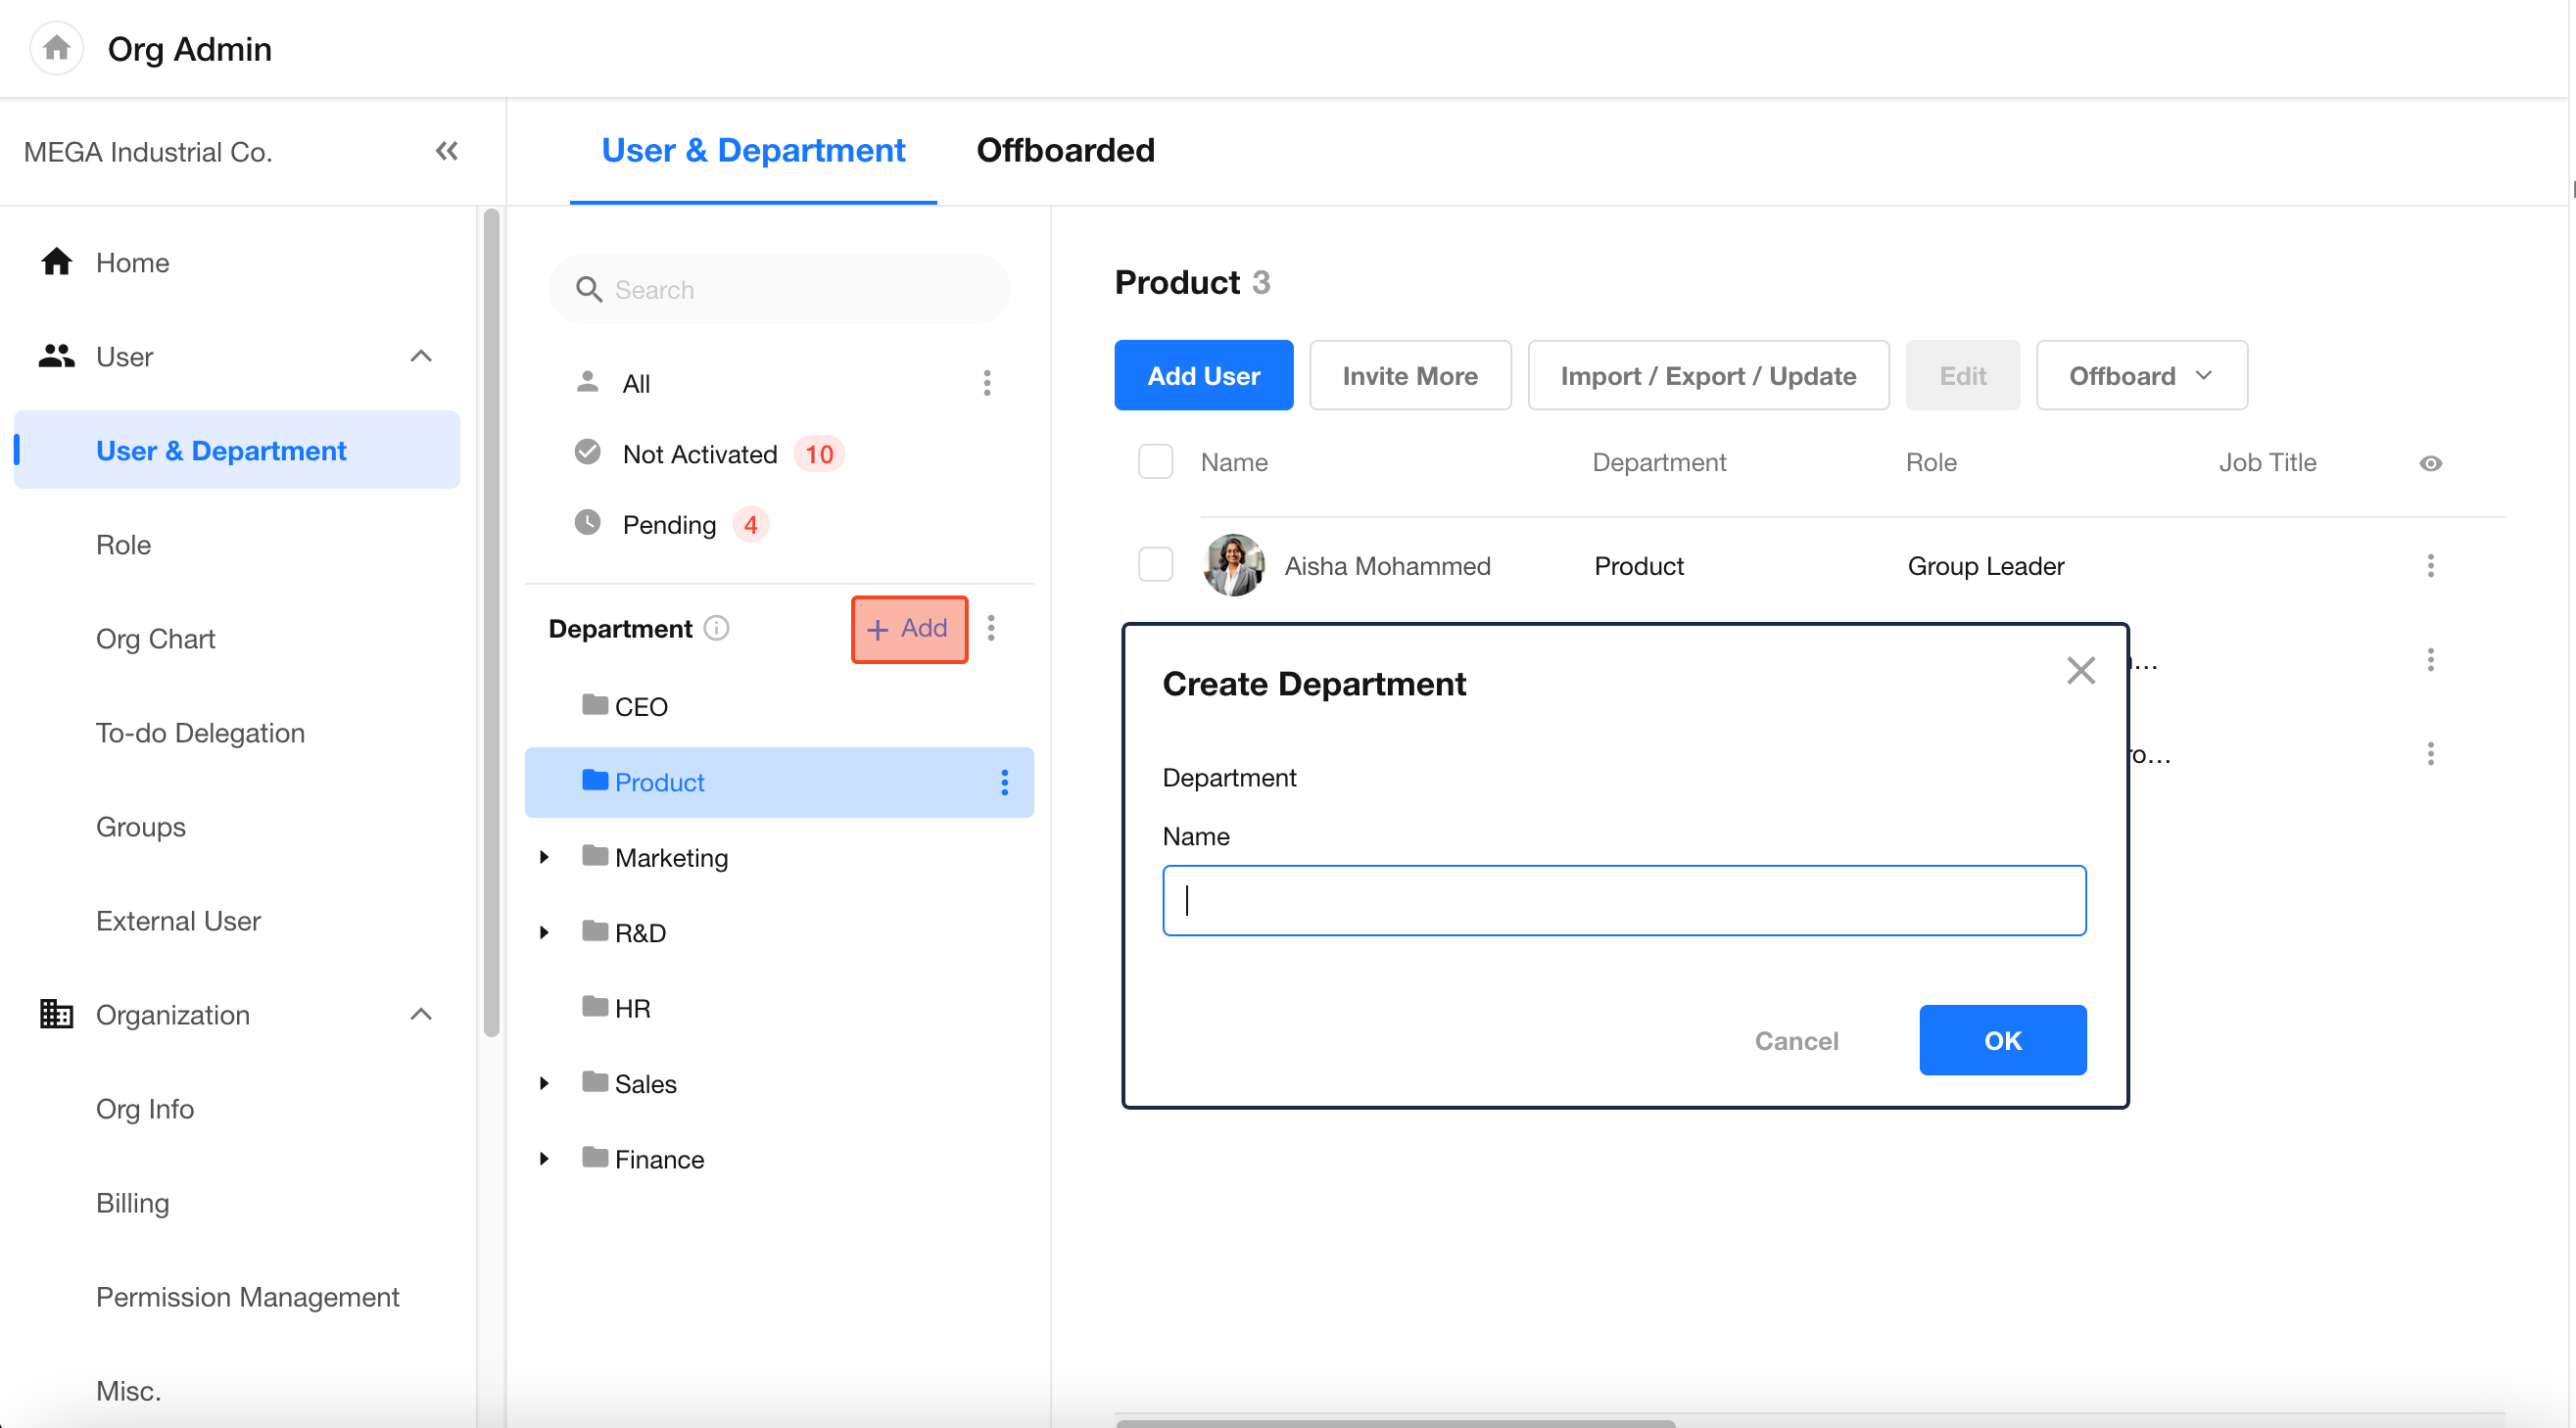
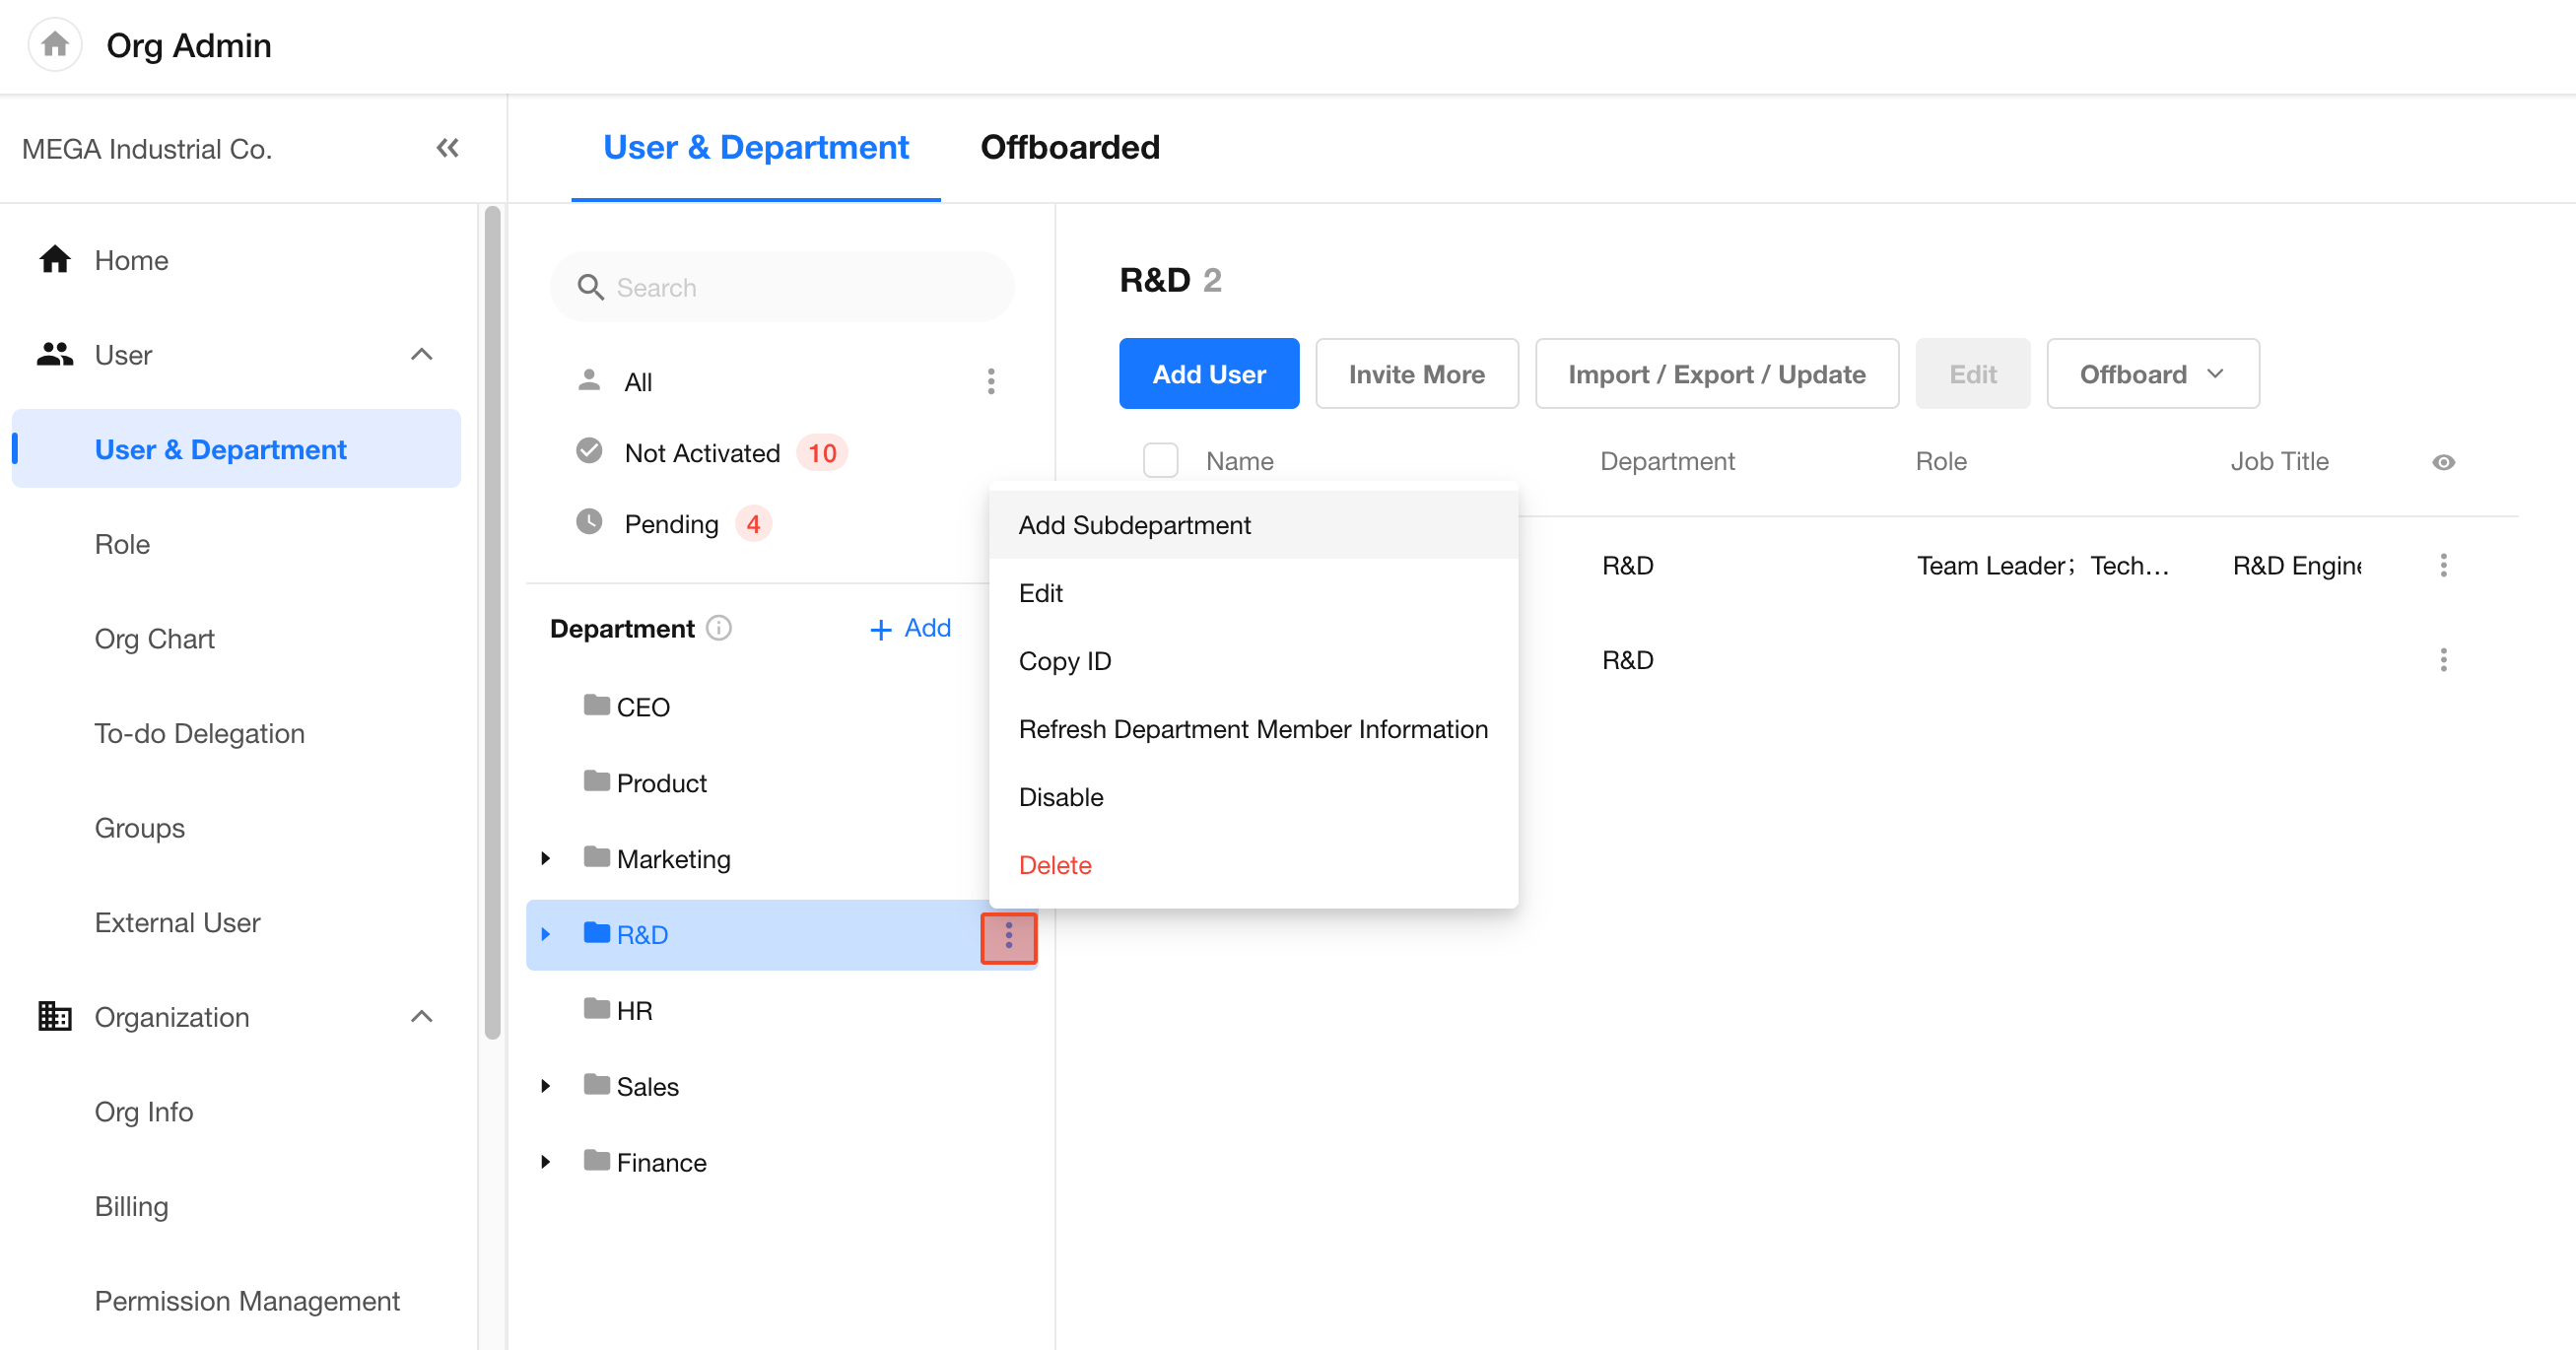
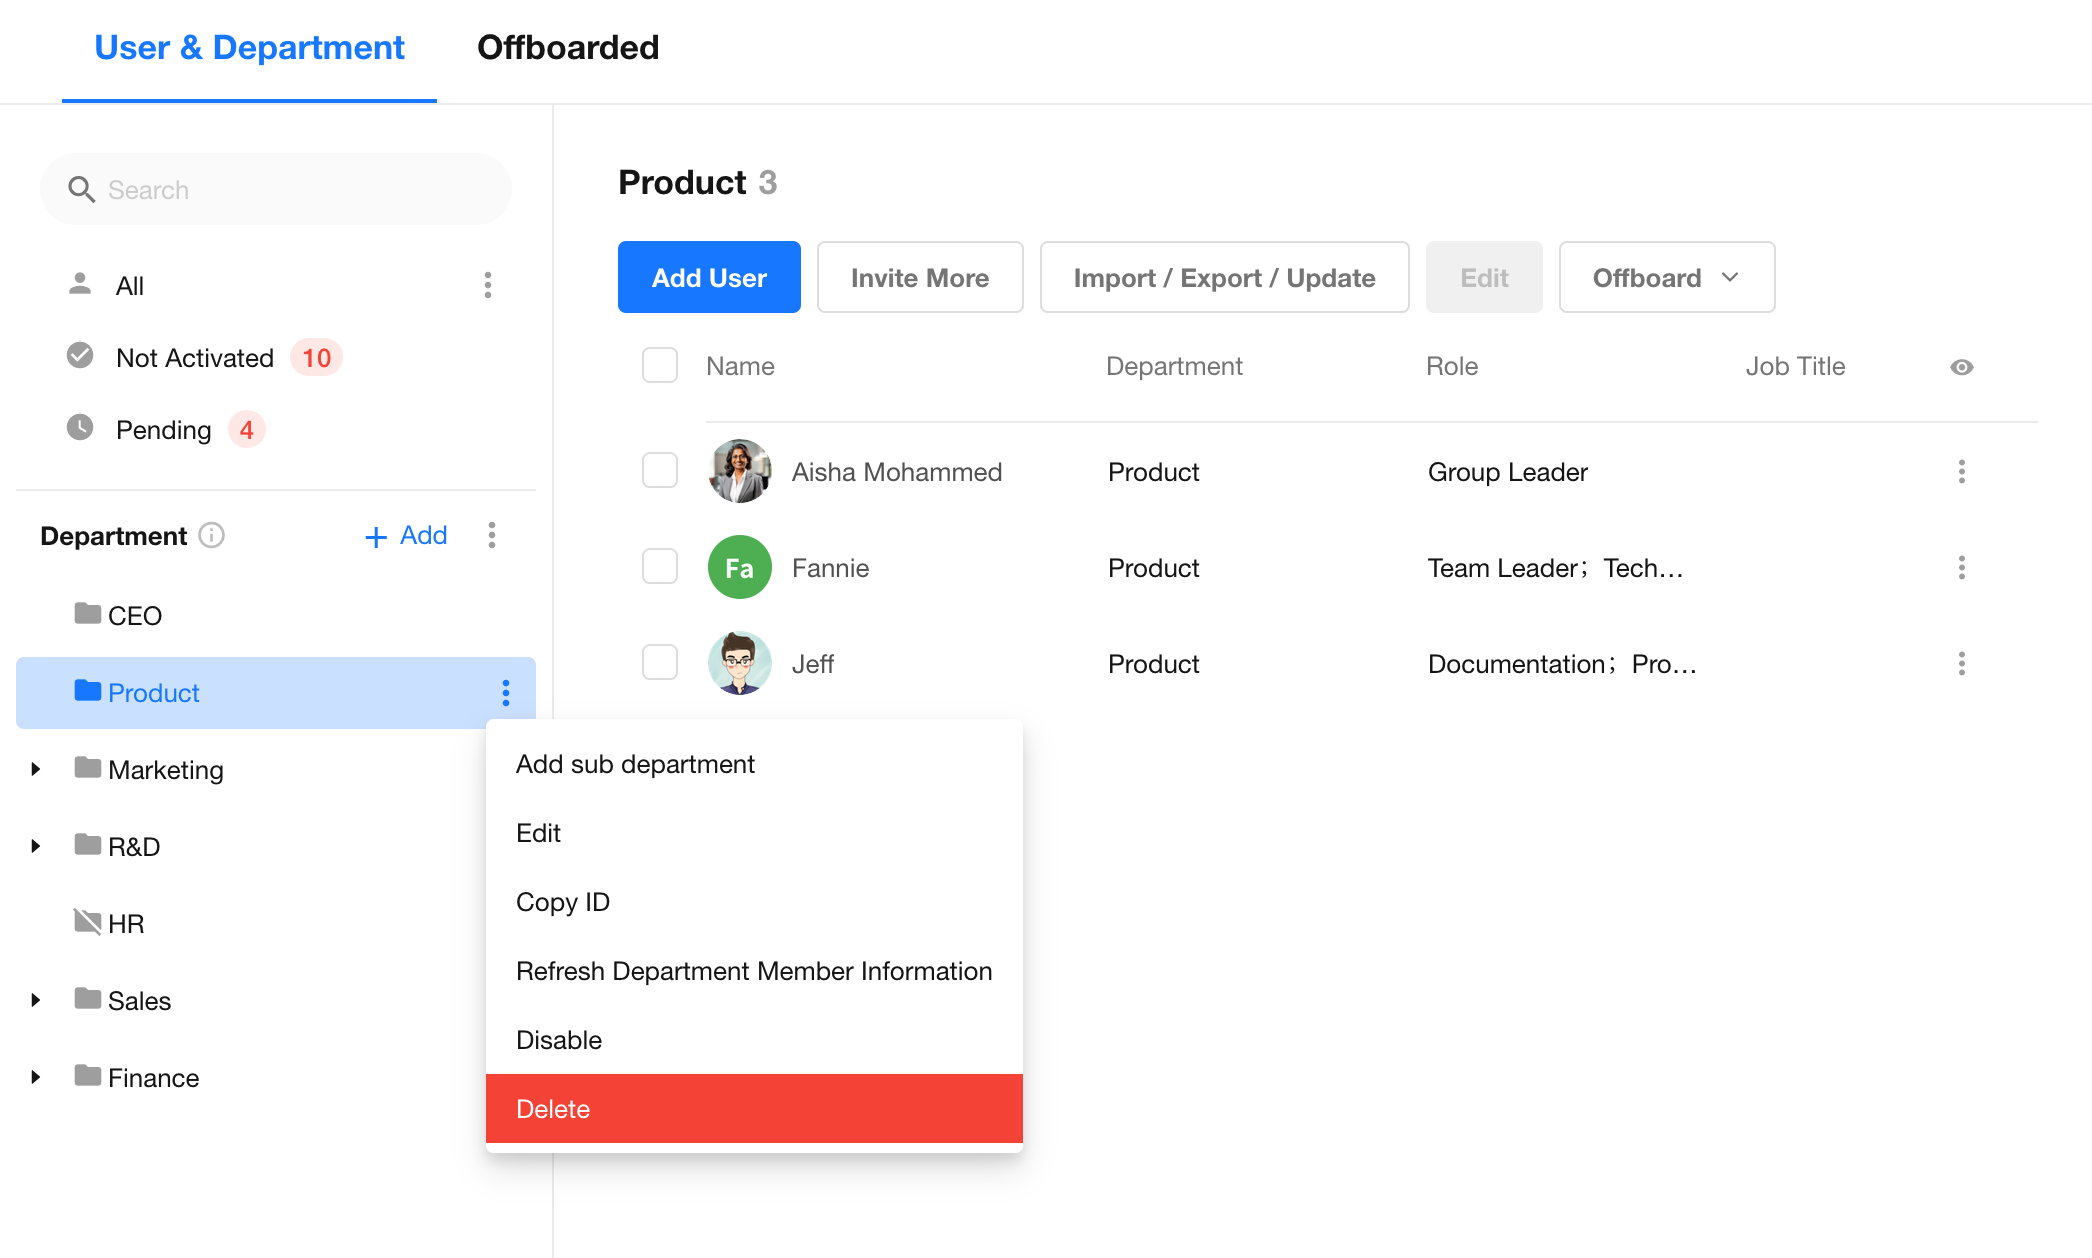
After a department is created, click the action button next to its name to:
- Add a subdepartment
- Edit the department
- Copy the department ID
- Refresh department member information
- Disable the department
- Delete the department
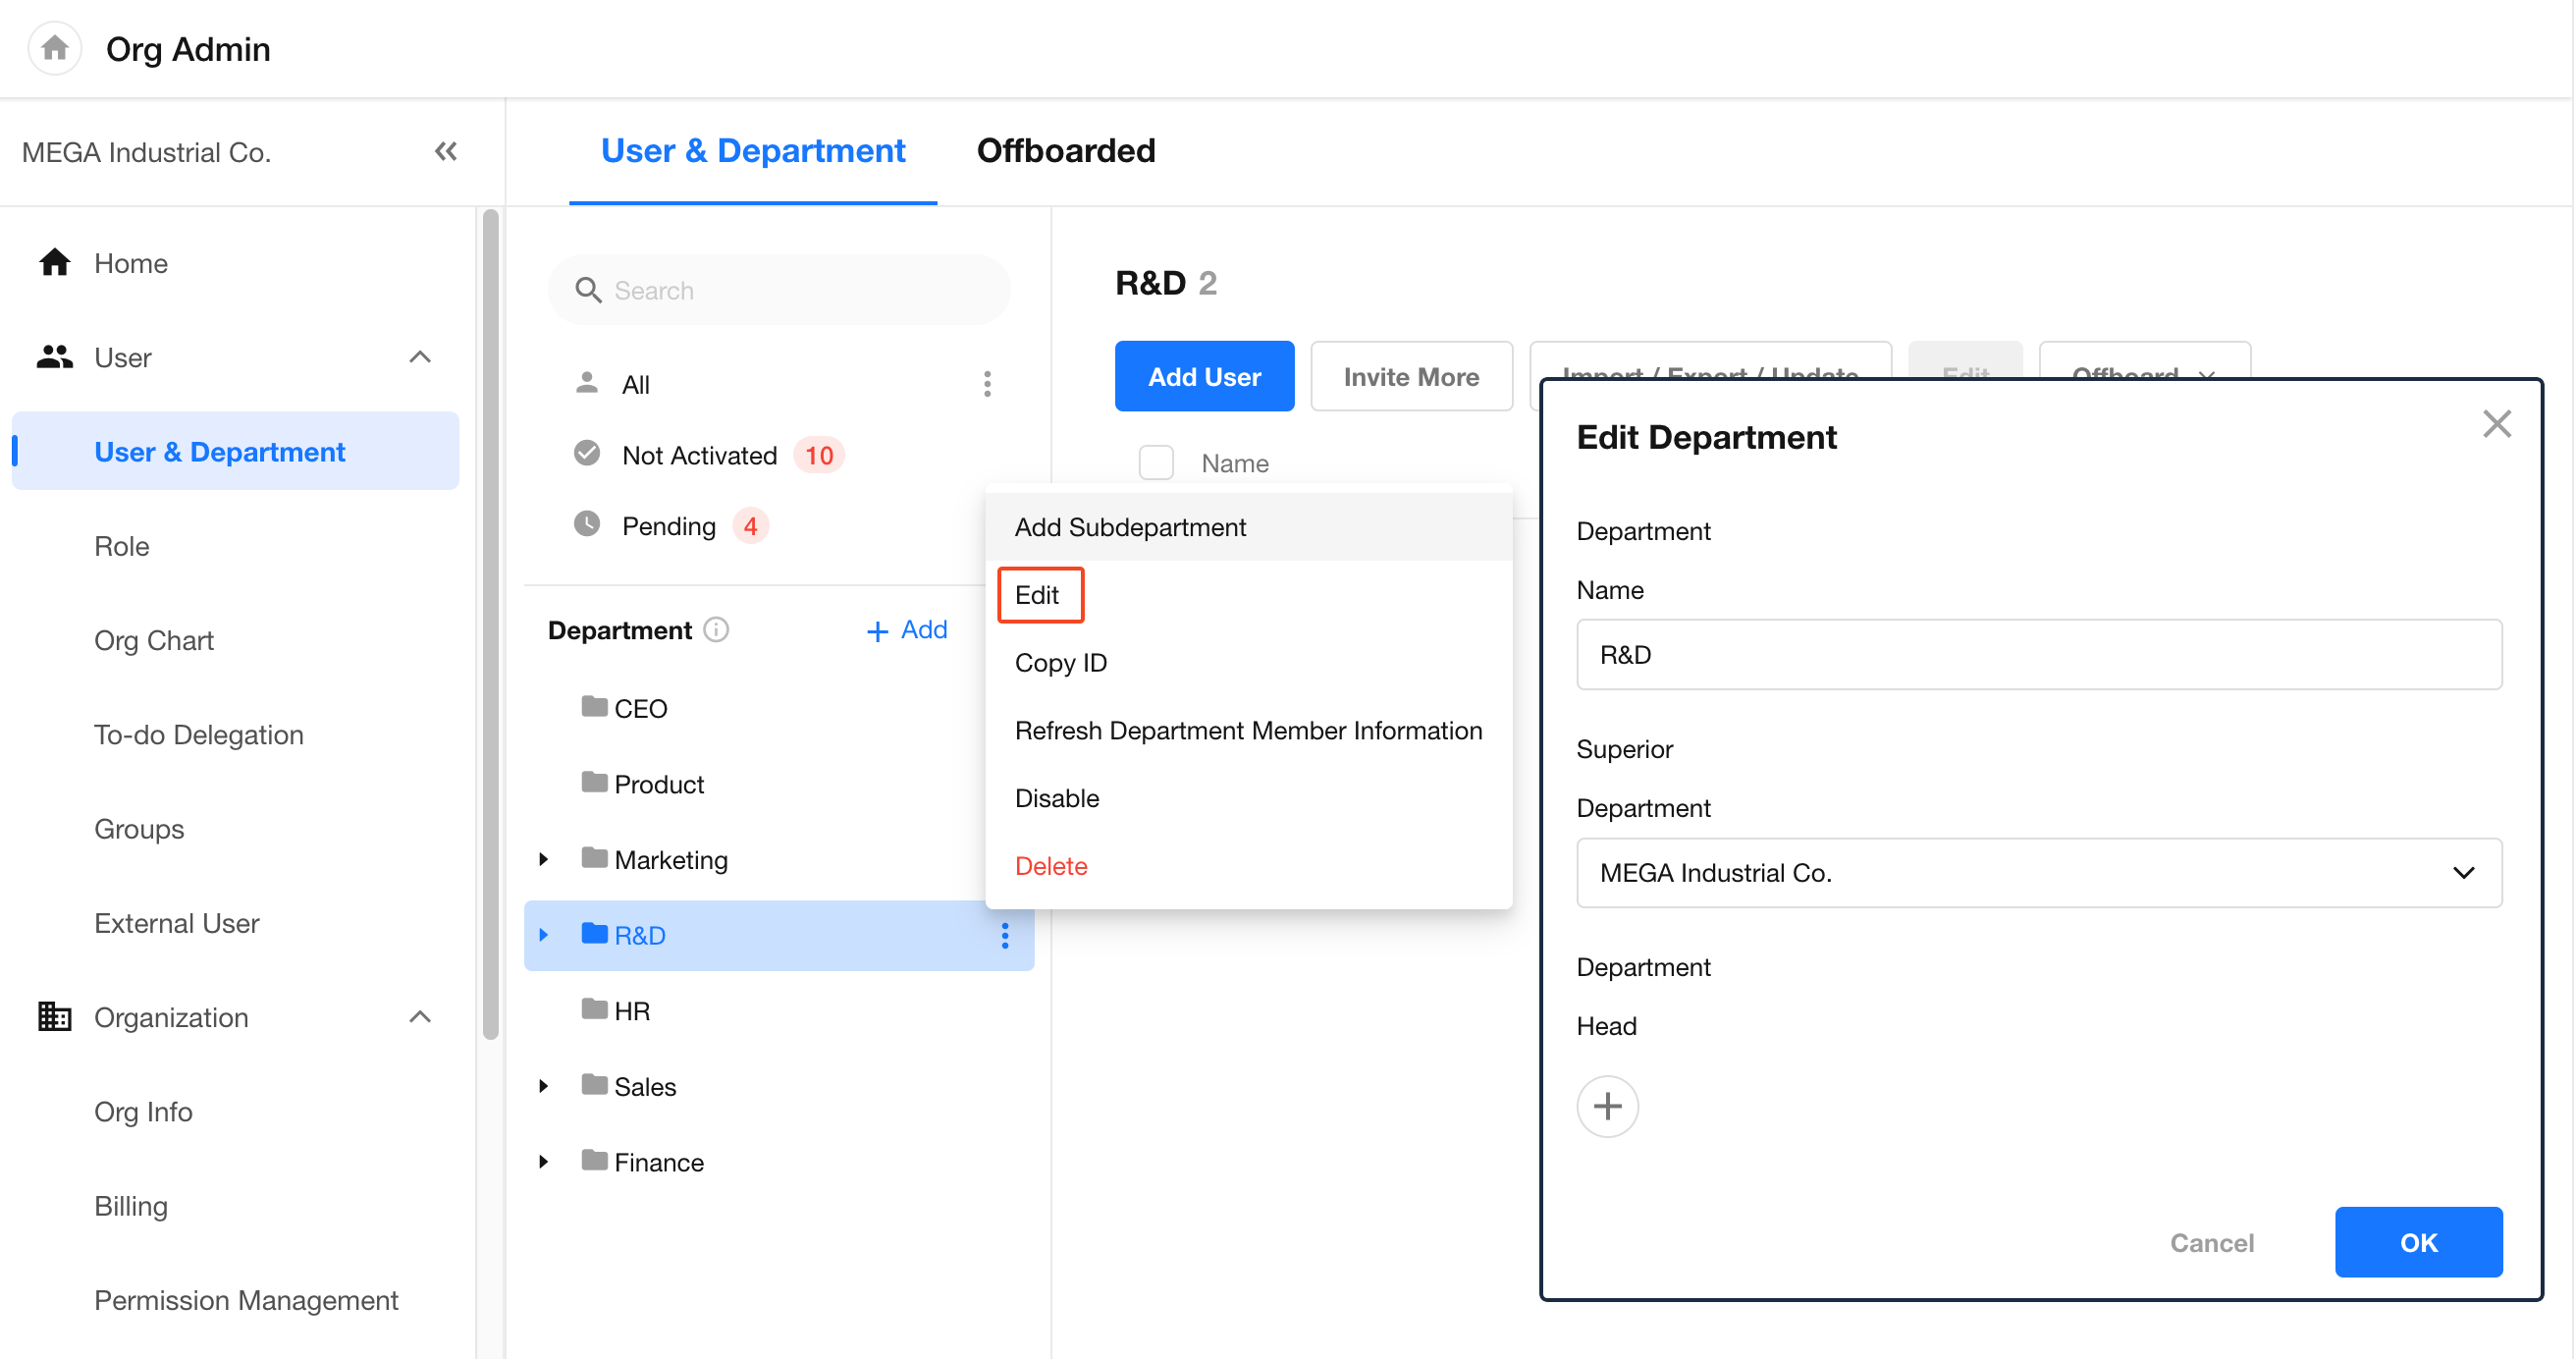
When editing a department, the department name, parent department, and department managers can be updated.
Department managers must be selected from members of the current department. Multiple department managers can be assigned.
Add Subdepartments and Adjust the Hierarchy
To add a subdepartment, click the action button next to the parent department and select Add Subdepartment.
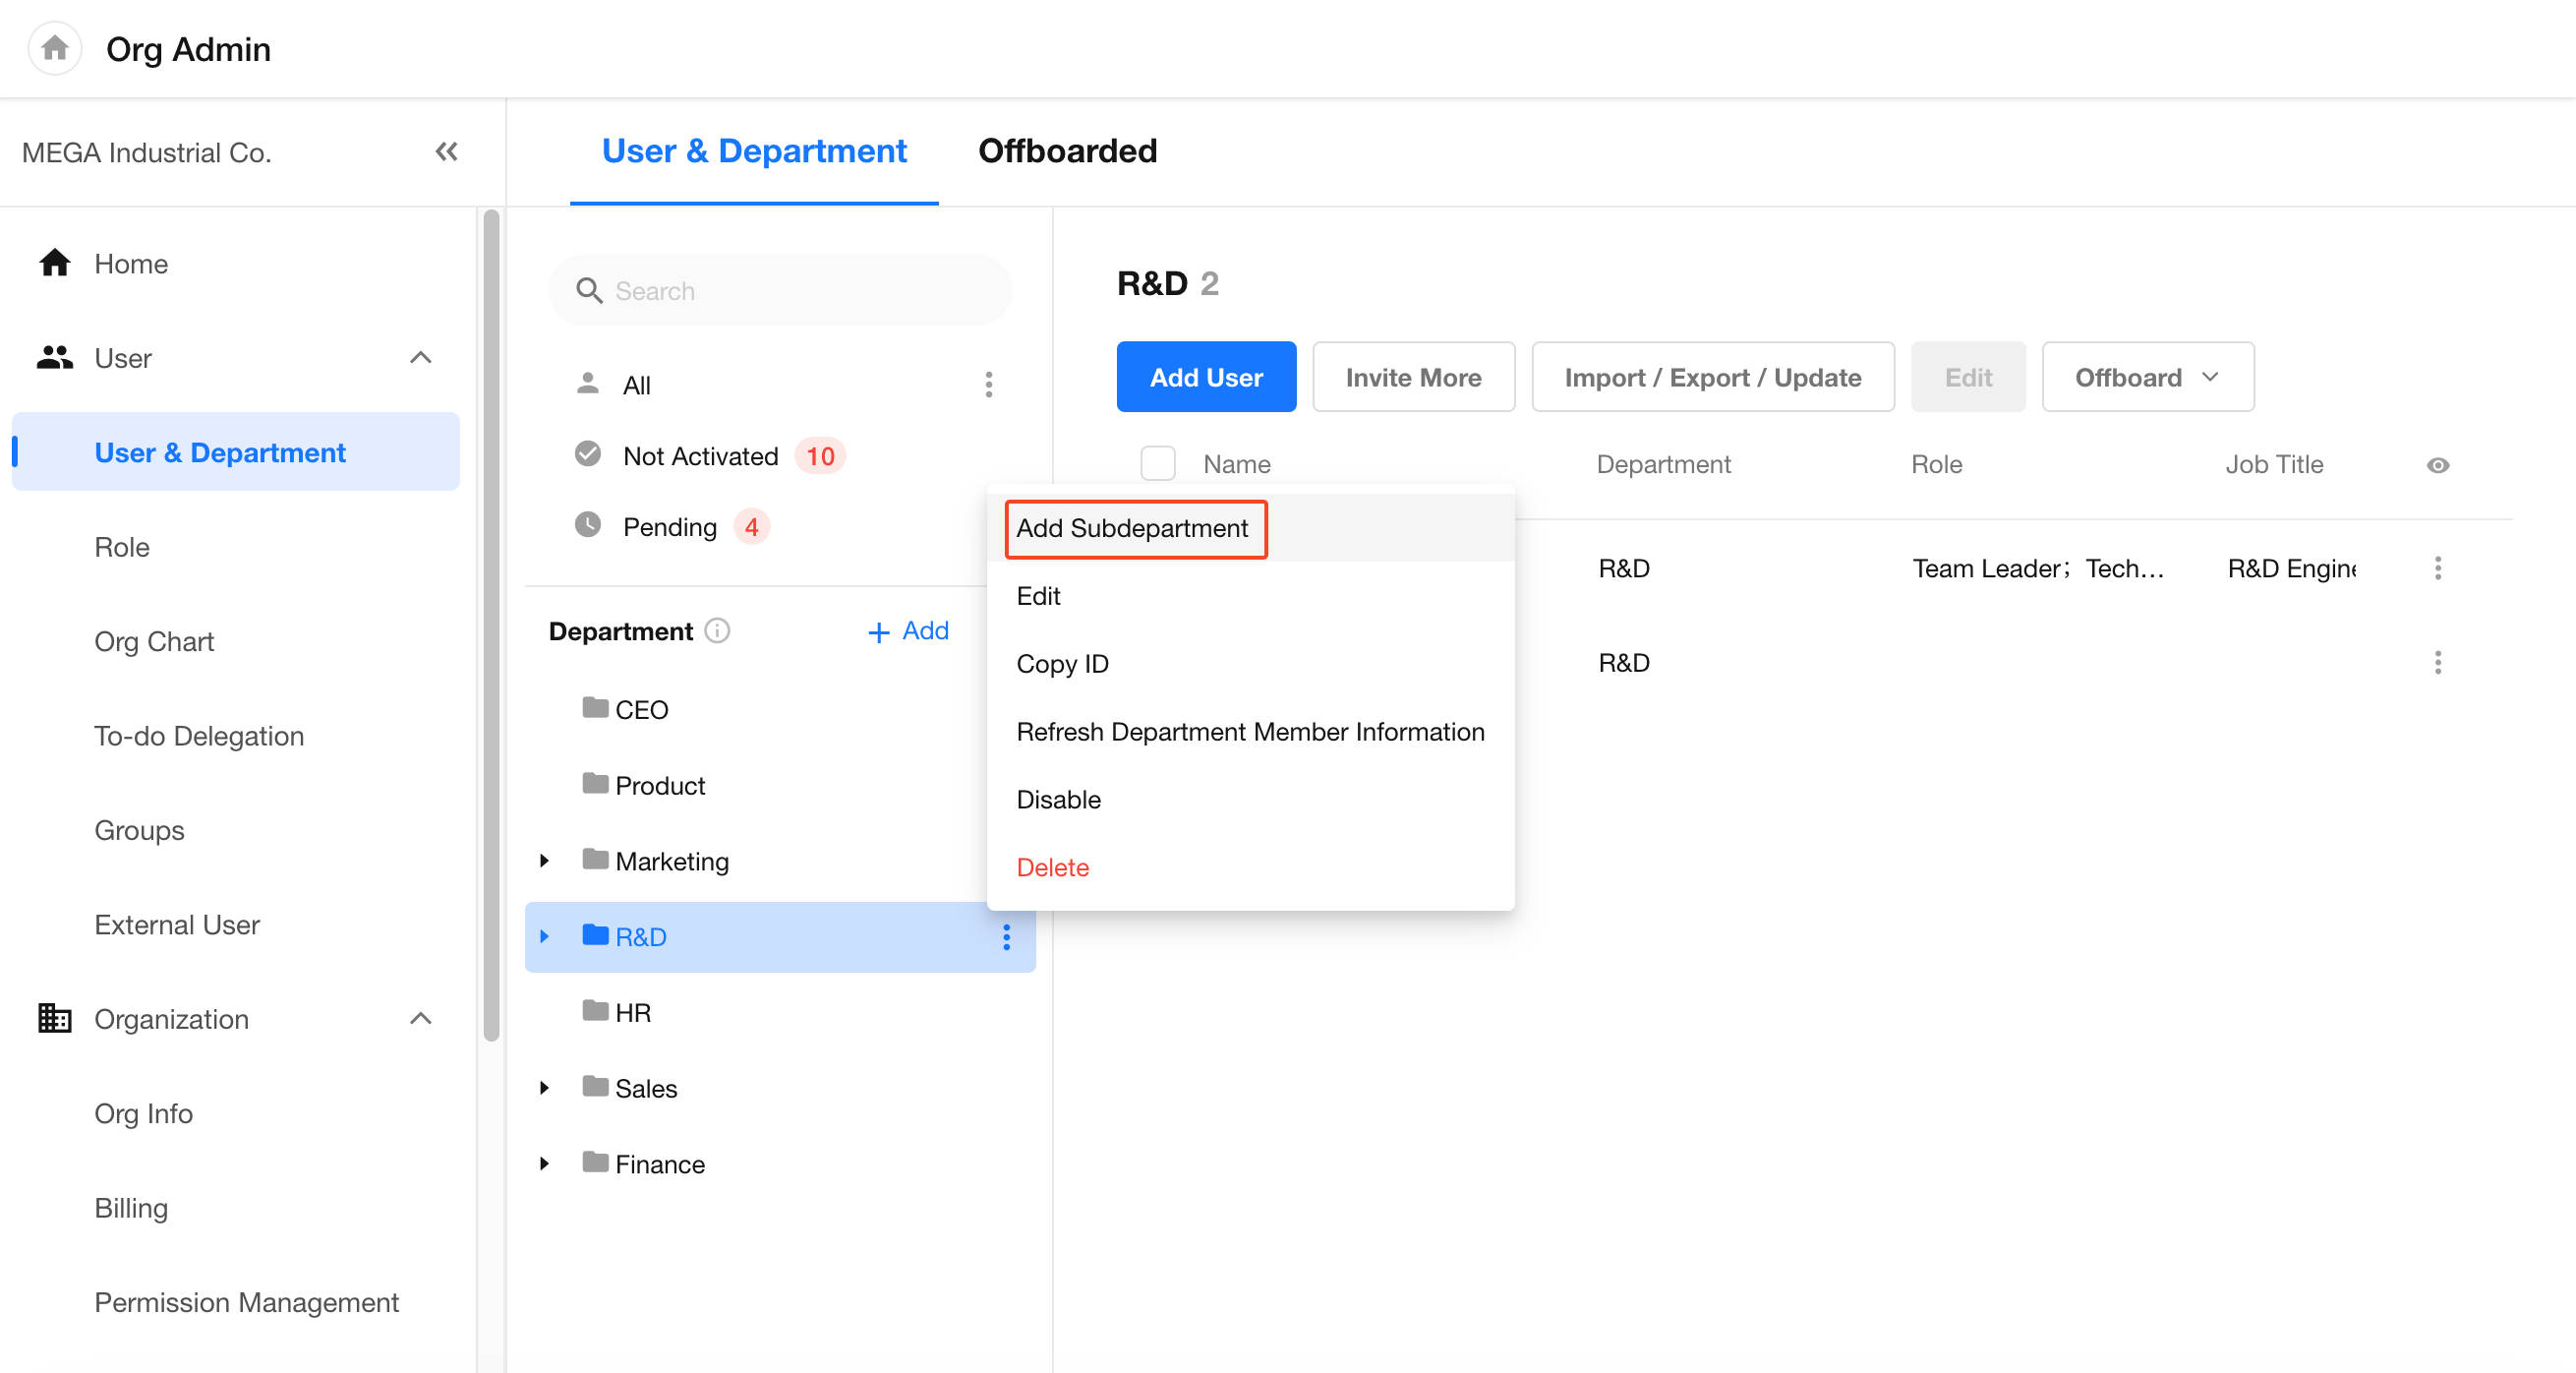
The department hierarchy can also be adjusted in either of the following ways:
- Edit a department and select a different parent department.
- Drag a department under another department.
Disable and Delete Departments
Disable a Department
Click the action button next to a department name to disable the department.
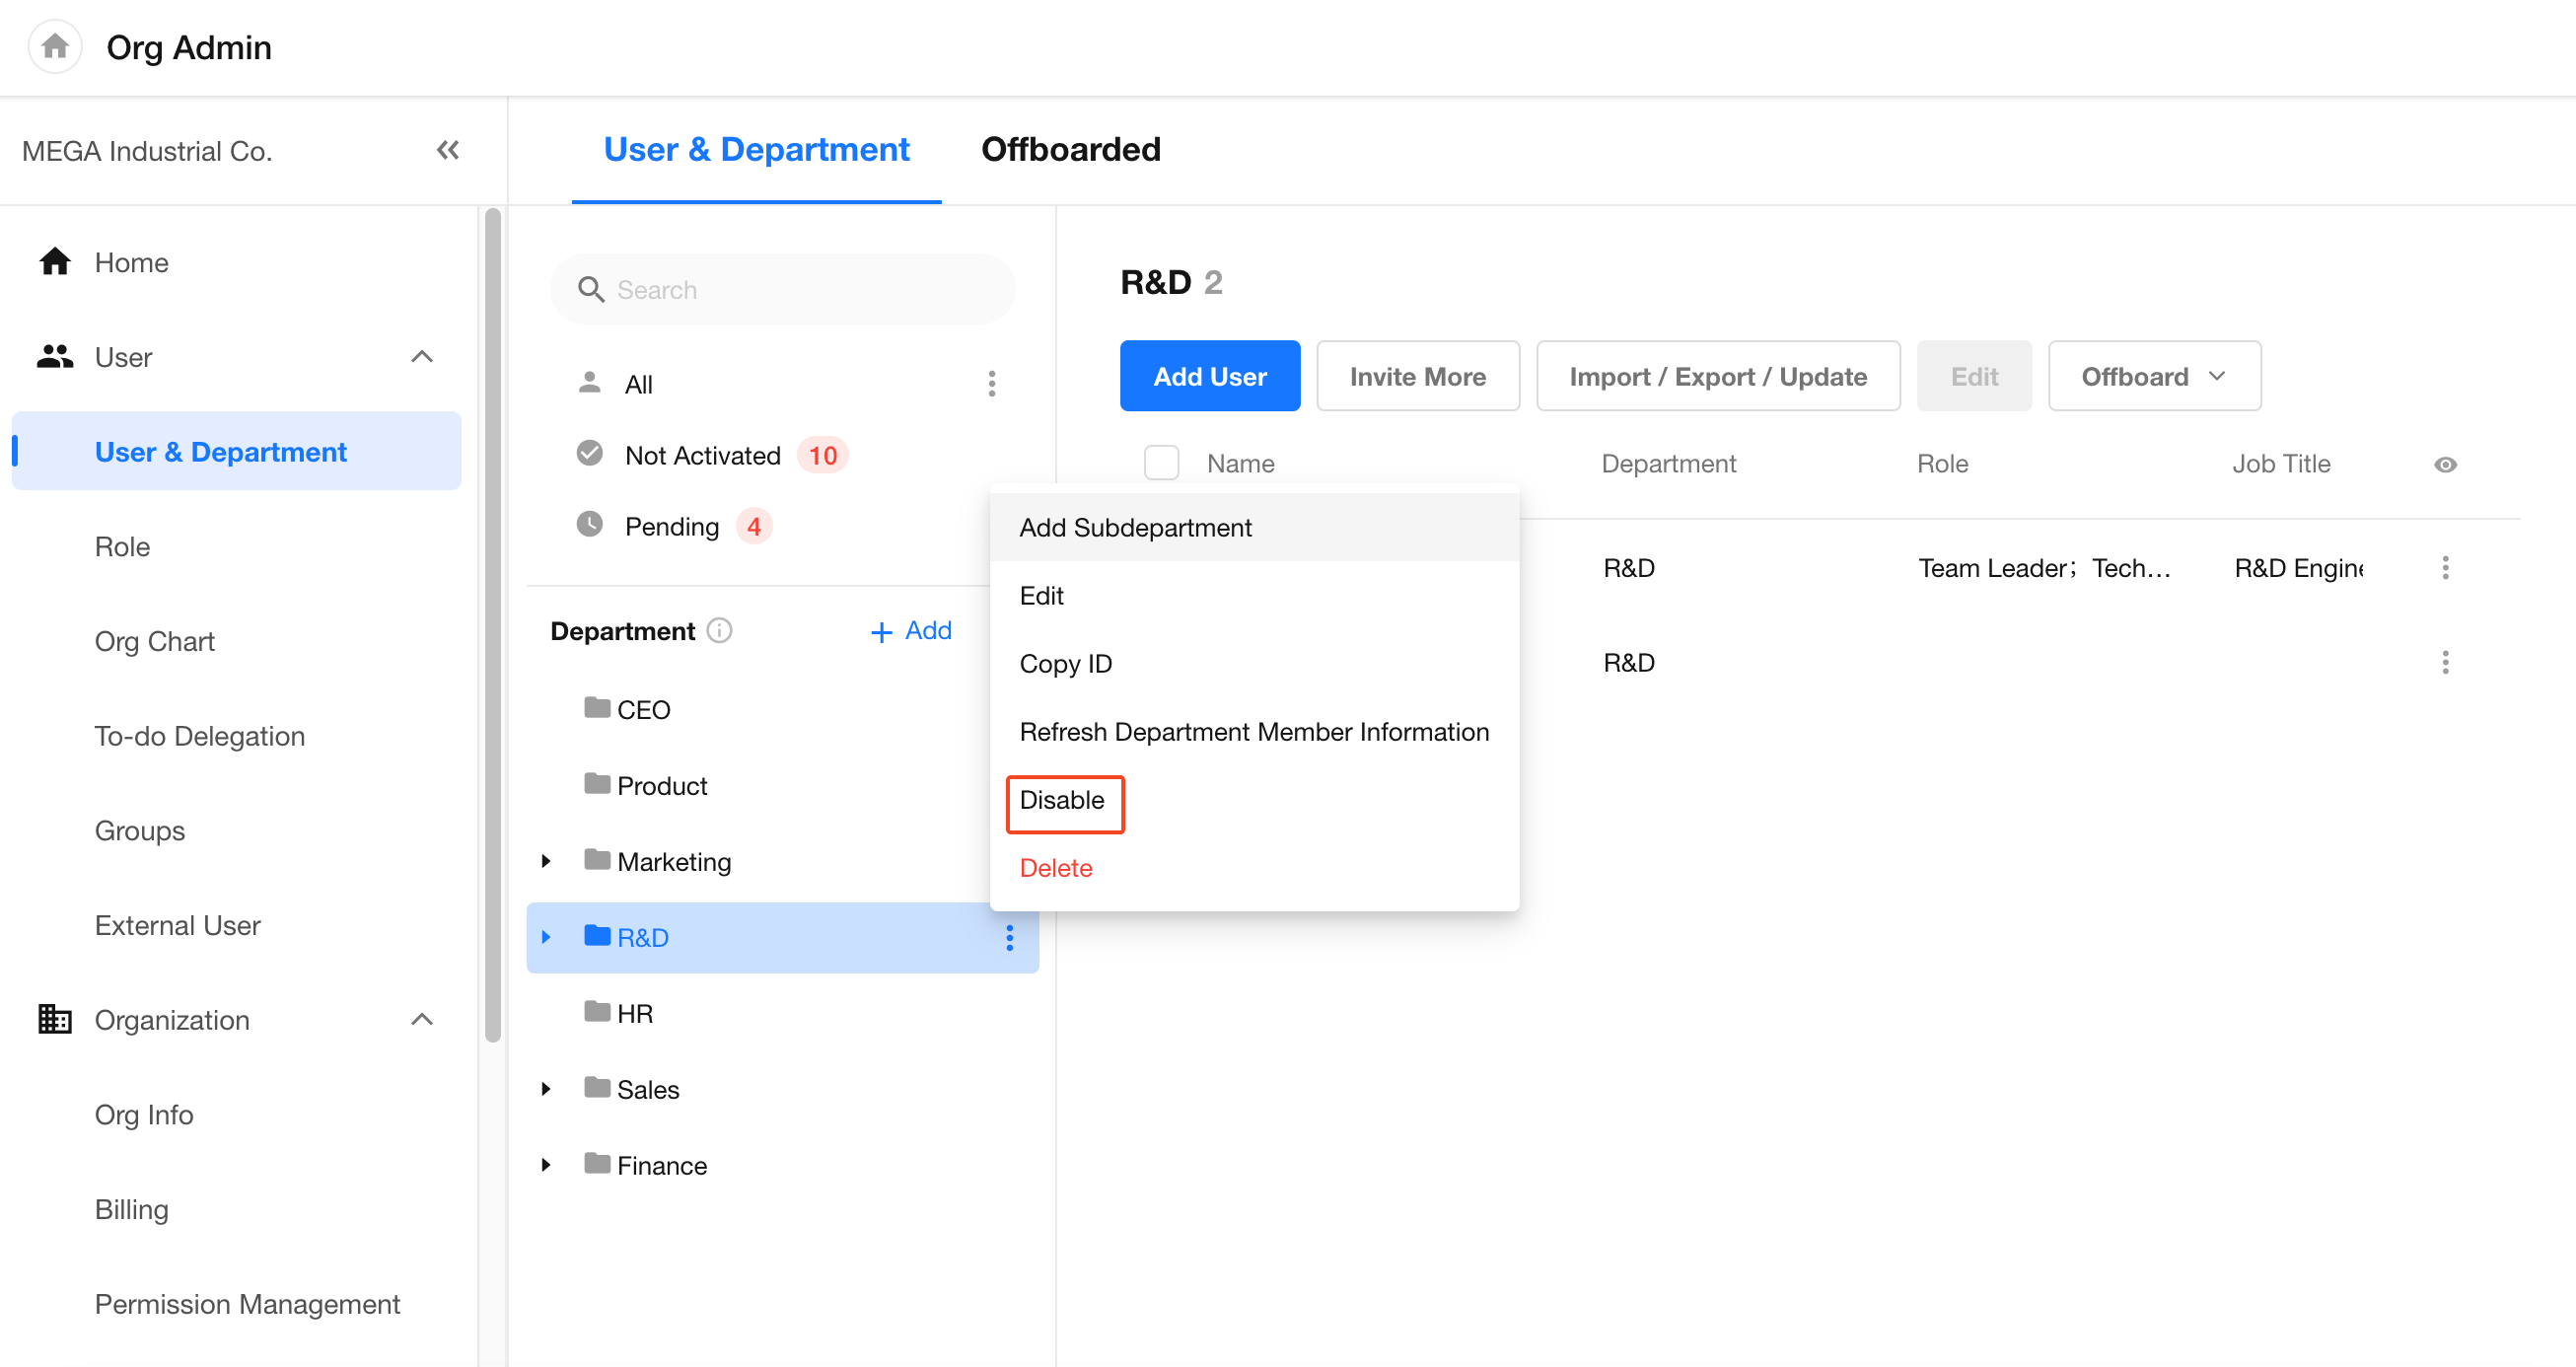
After a department is disabled:
-
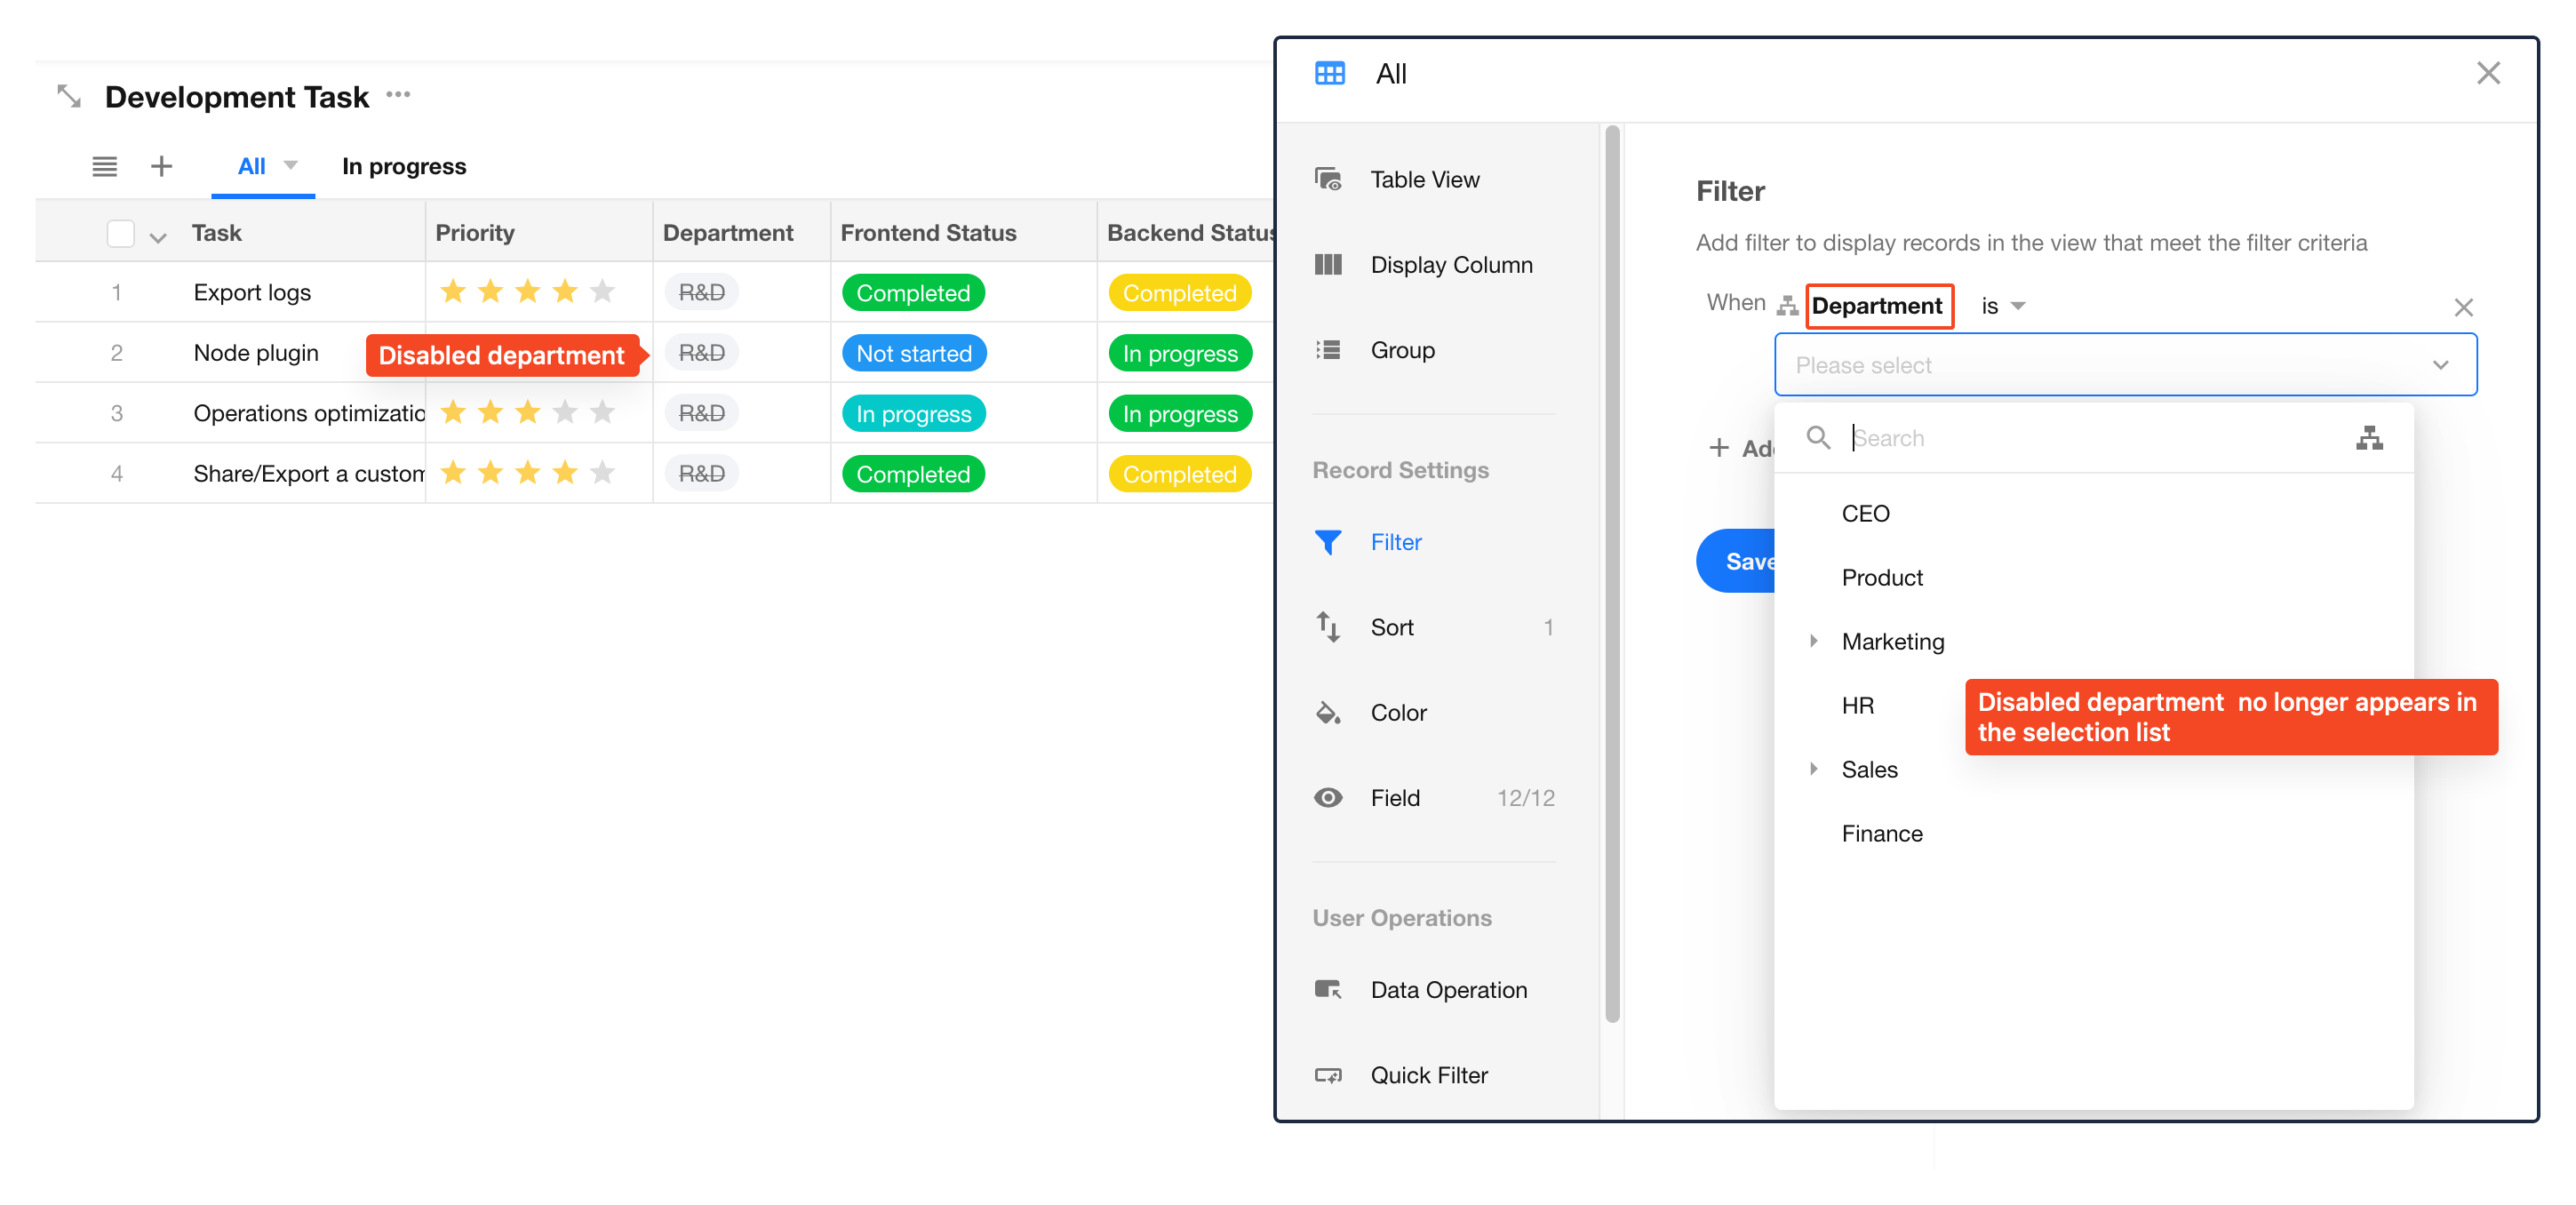
It no longer appears in Contacts or in member and department selection lists, such as department fields.
-
Existing records that reference the department are retained, with the department name displayed with a strikethrough.
-
Organization administrators can still view and manage the disabled department and its members from the department list.
-
Data synchronization and import are not affected. Members can still be synced or imported into the disabled department.
-
When the department list is exported, the department is marked as Disabled in the status column.
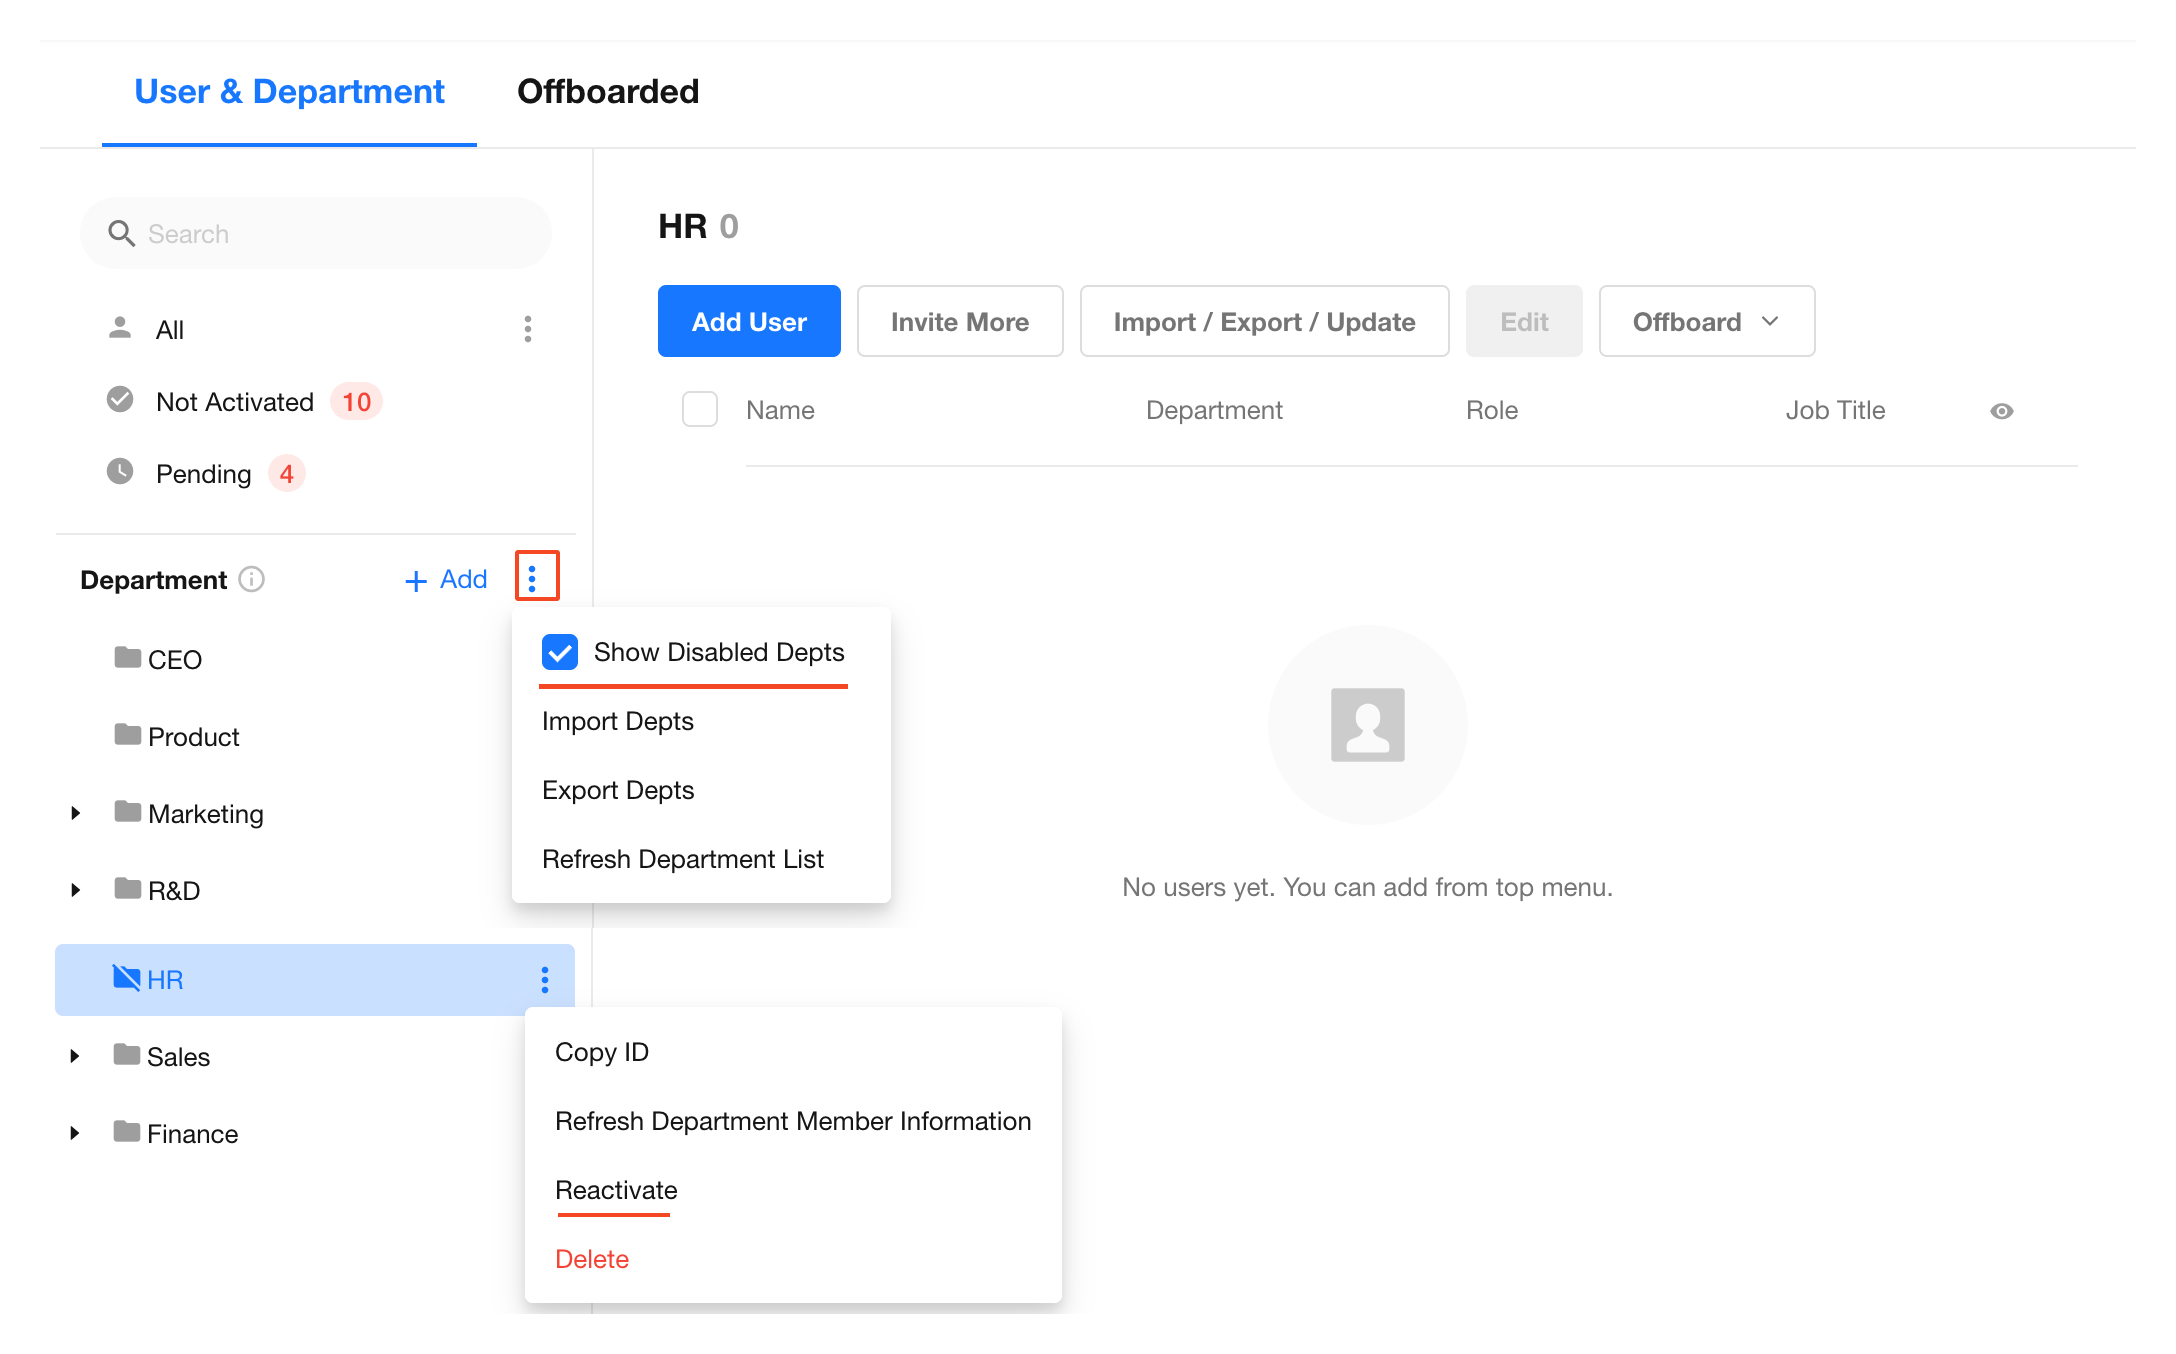
Organization administrators can choose whether disabled departments are shown in the department list and can re-enable them when needed.
Delete a Department
Click the action button next to a department name to delete the department. Before deleting it, move all members in the department to other departments.
If a department is already referenced by business data, such as worksheet records, it is recommended to disable the department instead of deleting it to avoid affecting historical data.
Pin and Reorder Department Members
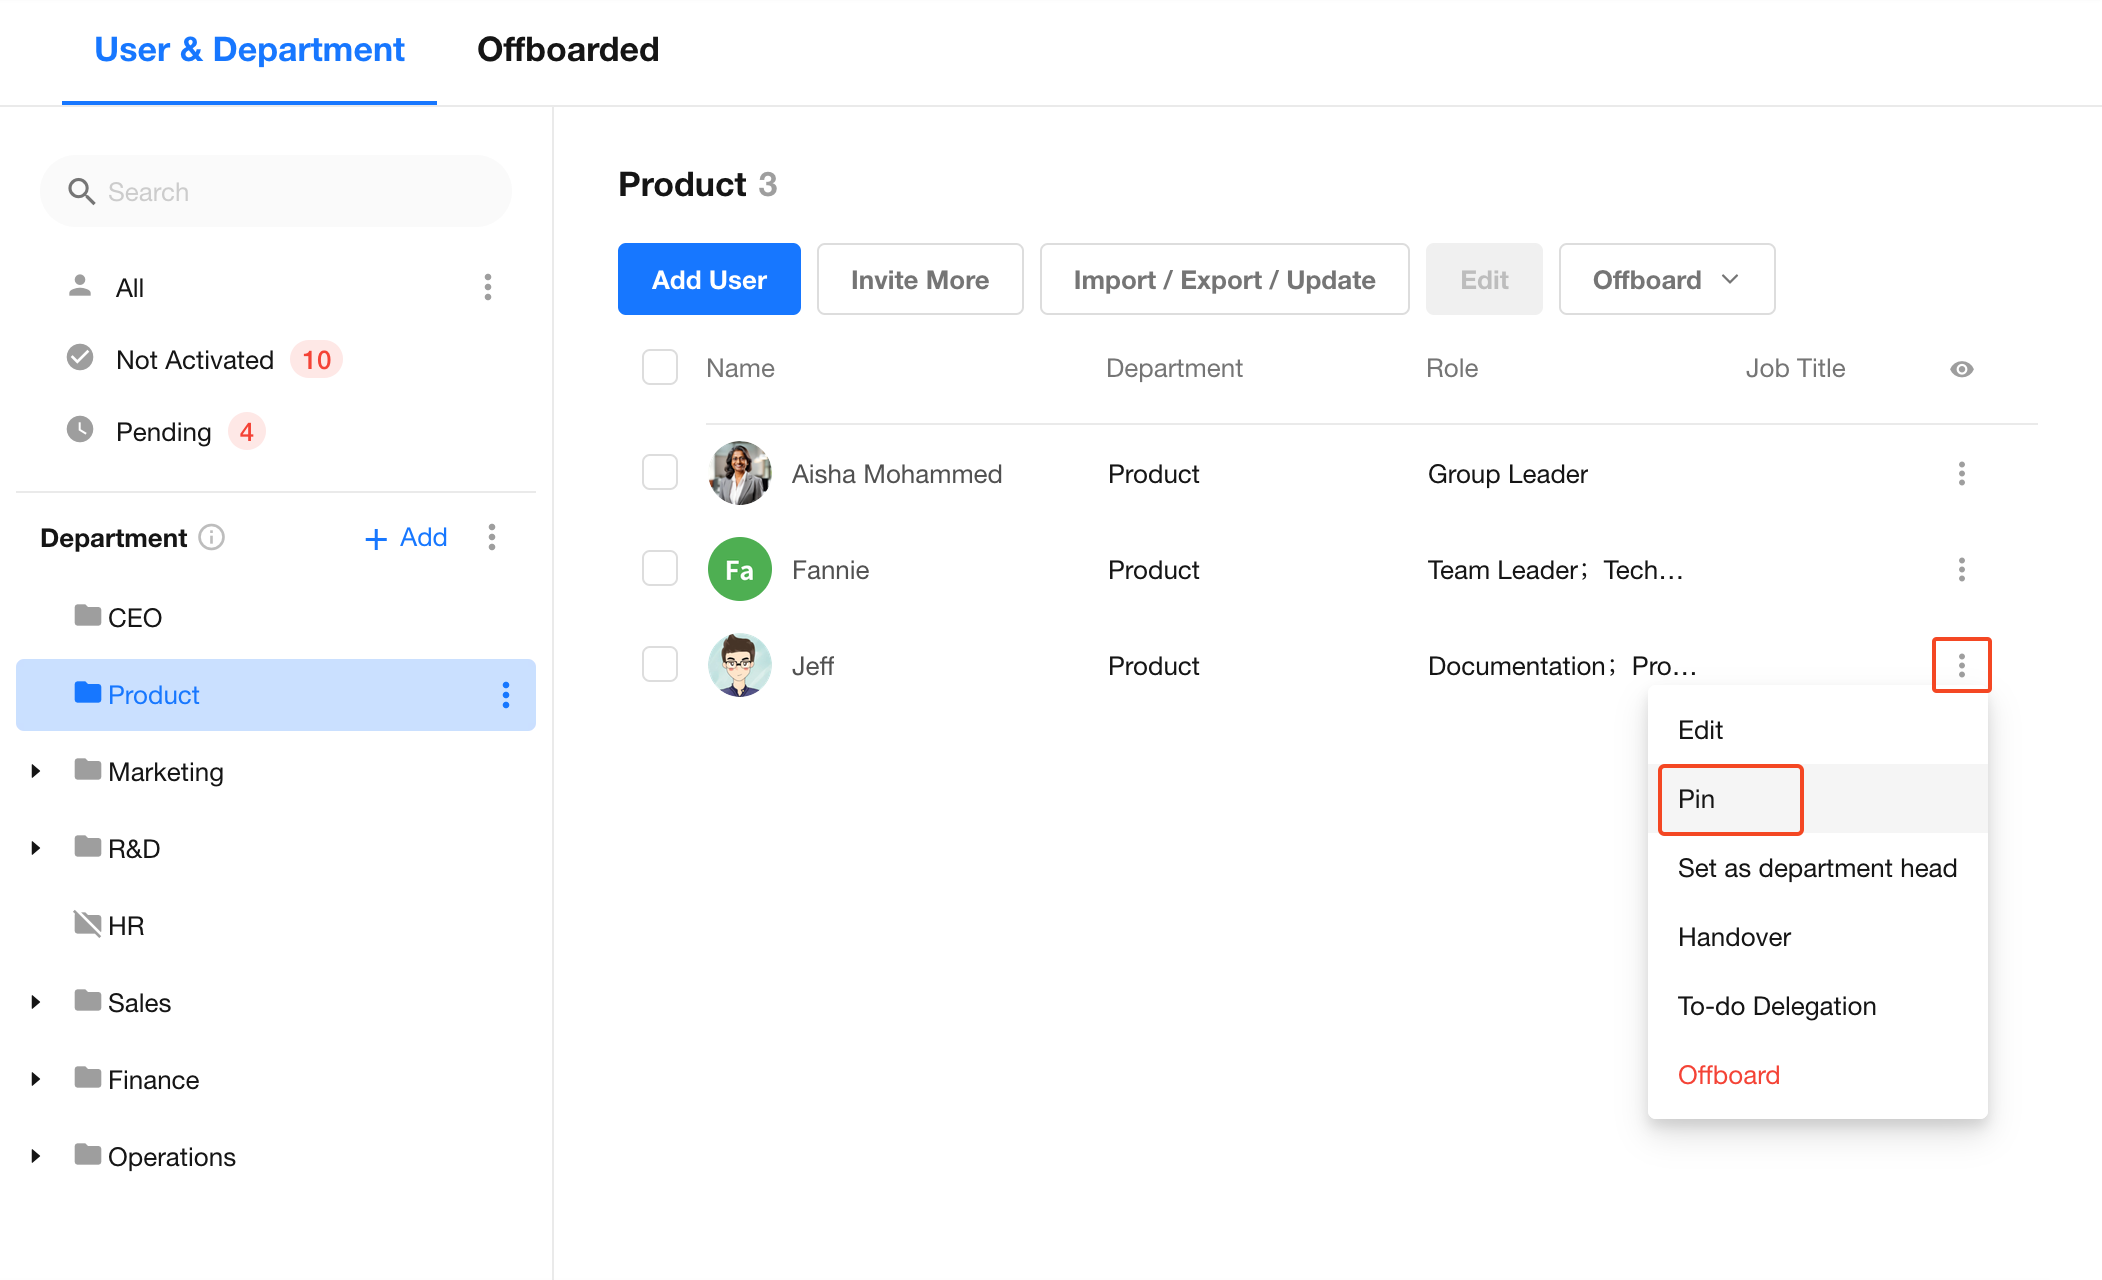
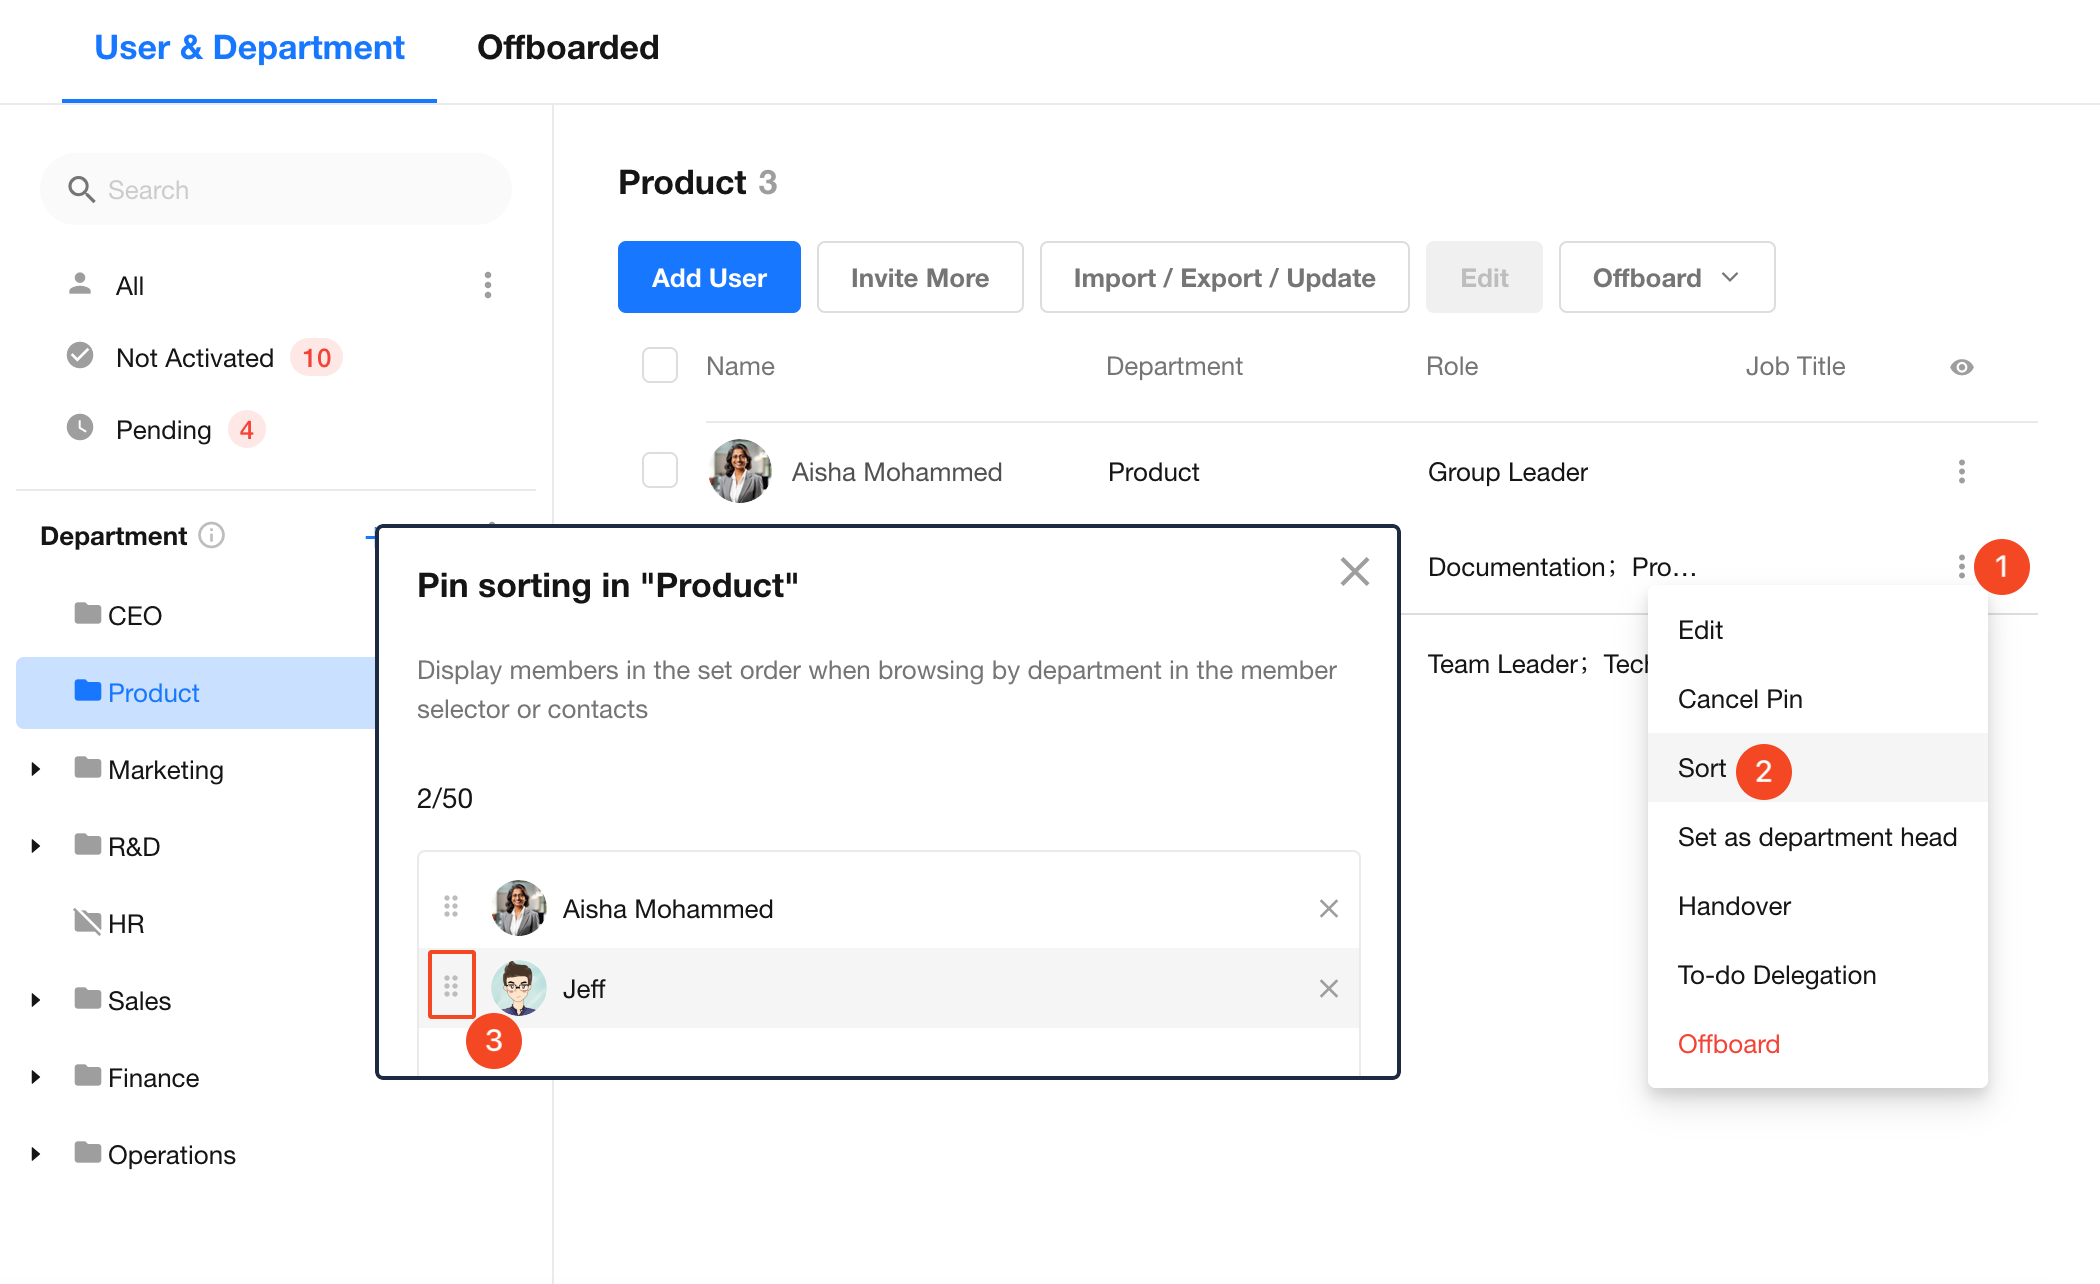
Department members can be pinned to the top of the member list, and pinned members can be reordered by dragging them. The same order is used when members are displayed by department in Contacts and member selection lists.
To display all members in a custom order, pin all members first, then drag them into the desired order.
Pin members:
Reorder pinned members:
Reorder Departments
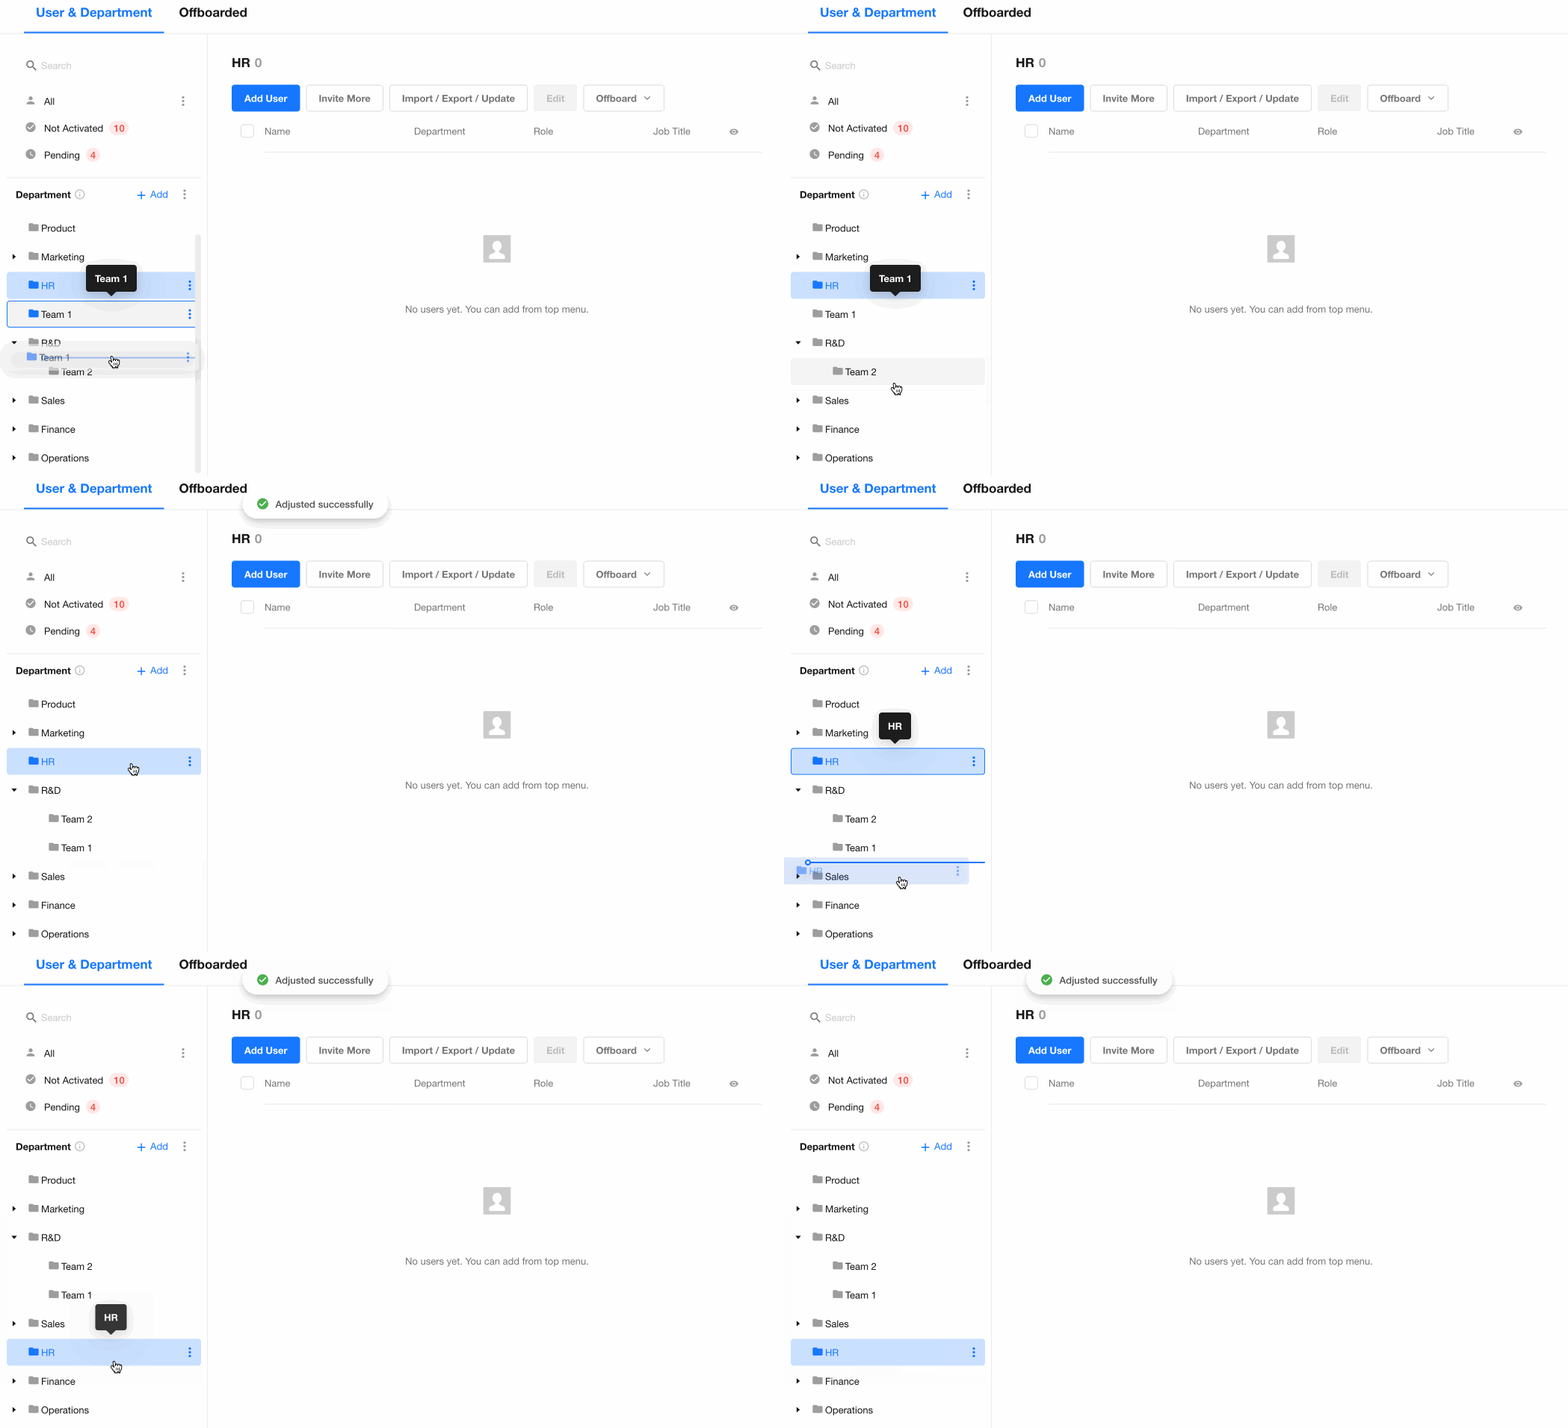
Drag a department up or down to change its display order among departments at the same level. Dragging it under another department also changes its position in the department hierarchy.
Import and Export Departments
In addition to creating departments manually, departments can be imported in bulk from Excel or exported.
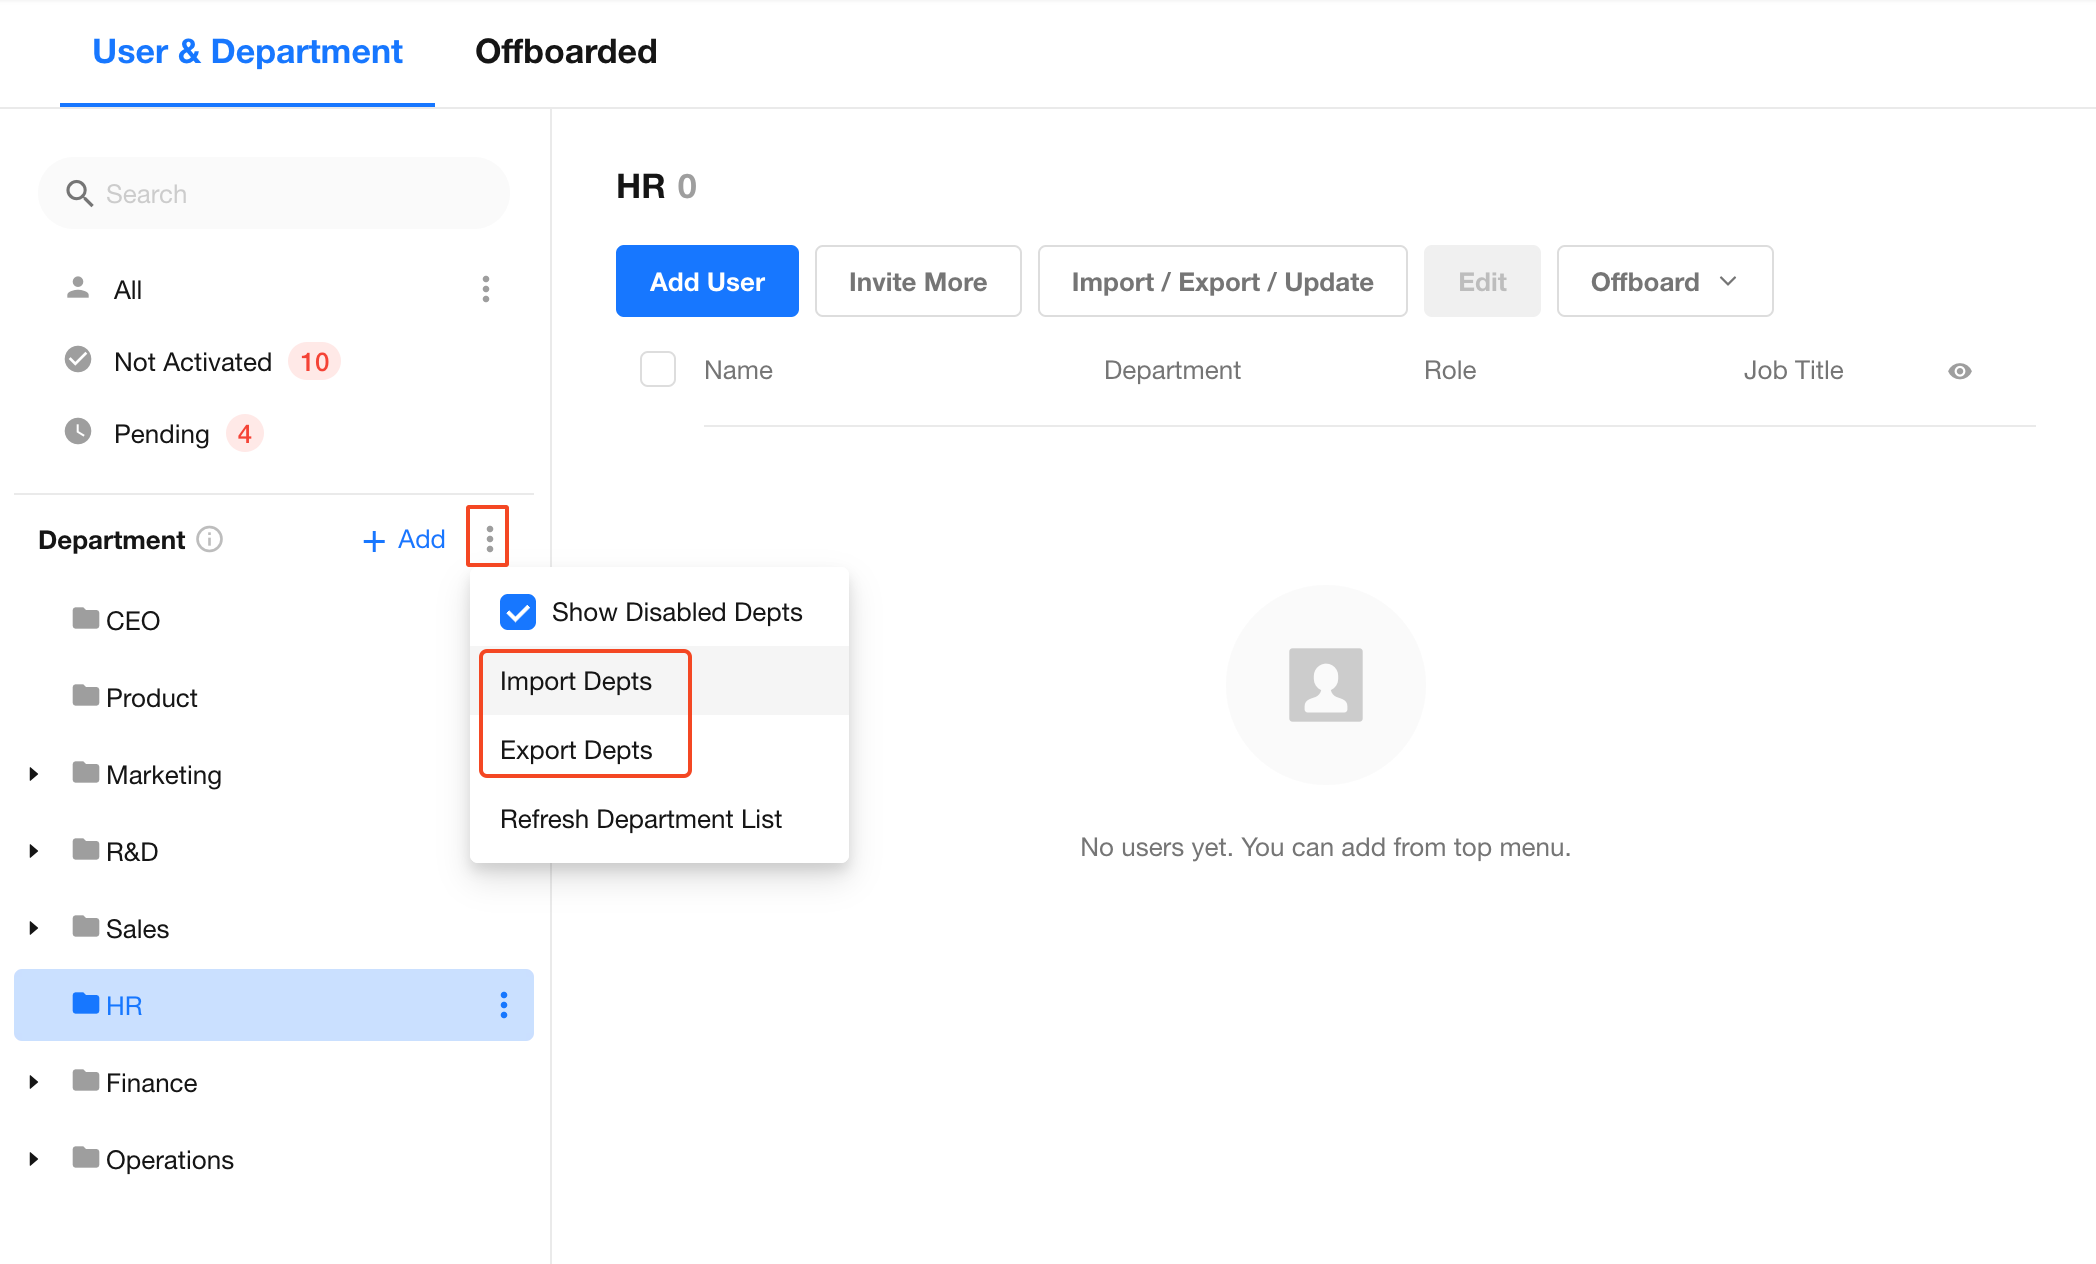
Go to Org Admin > User > User & Department, click More next to Department, and select Import Departments or Export Departments.
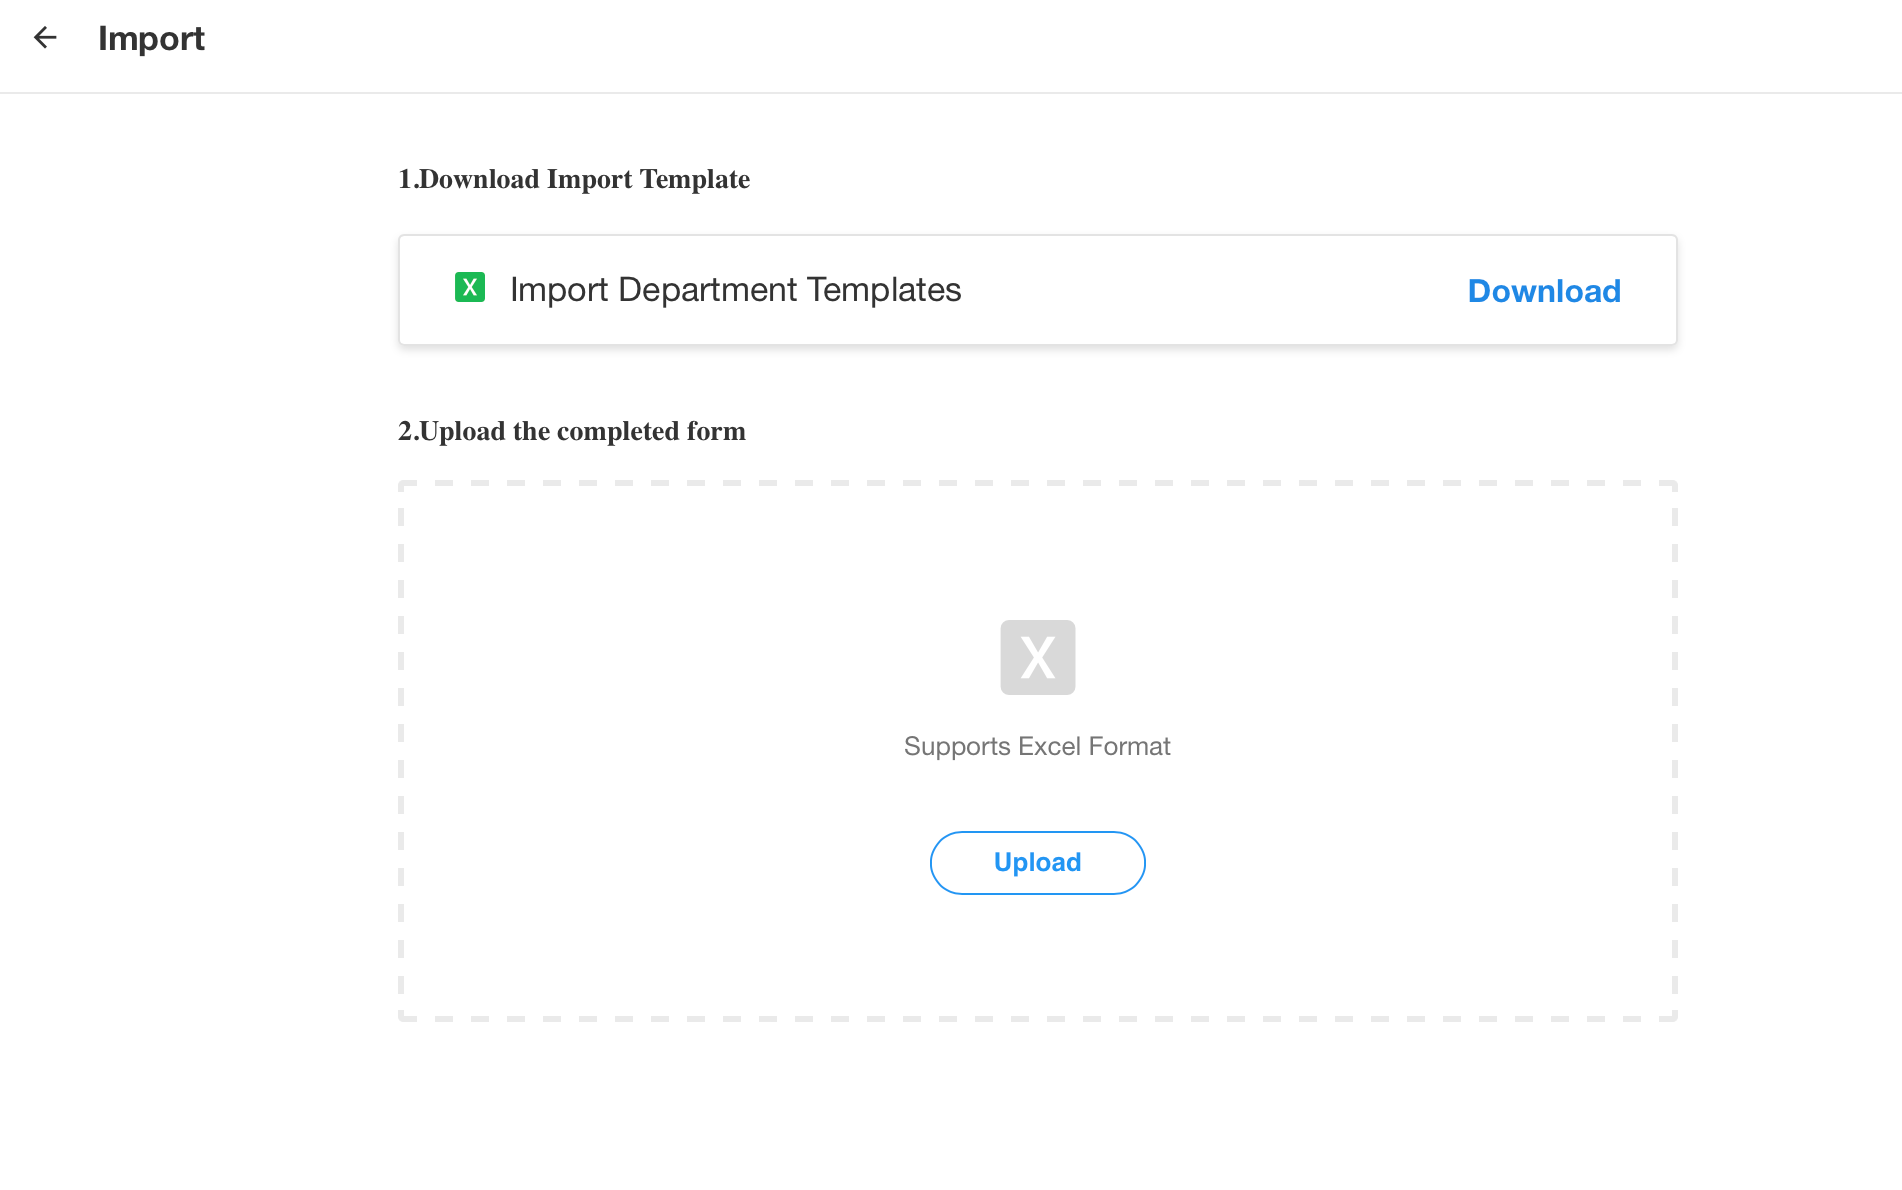
To import departments, first download the provided template. Enter and verify the department data, then upload the completed file.
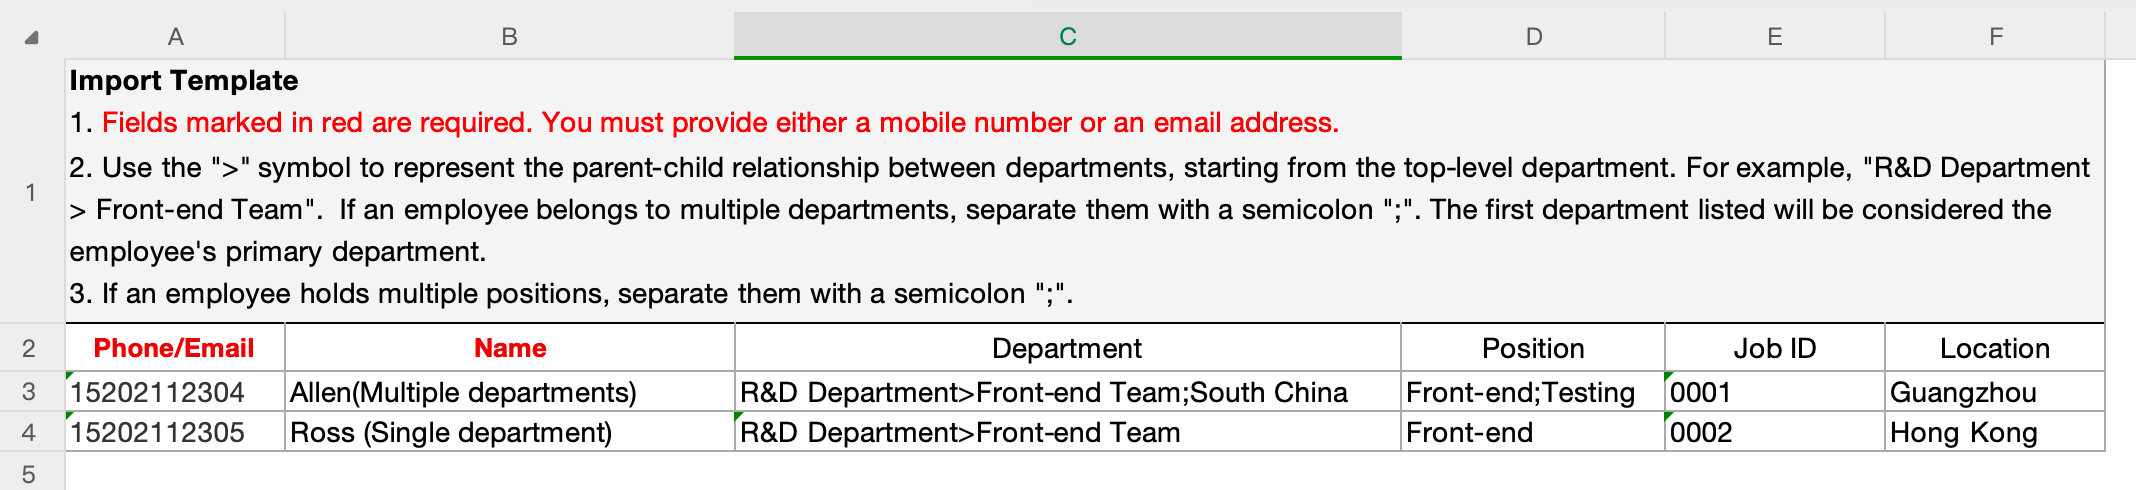
Import Template Requirements:
-
Excel column headers must start on row 2. It is recommended to download and use the provided template.
-
The department path represents the full hierarchy from the top-level department to the current department. Separate each level with a forward slash (
/). -
Parent departments specified in a department path must already exist. Otherwise, the import will fail.
-
If the department path is the same as the department name, the department has no parent department.
For example, suppose Sales is a top-level department with North Region and South Region as subdepartments, and North Region contains North Team 1 and North Team 2. The import file should be structured as follows:
Manage Job Titles
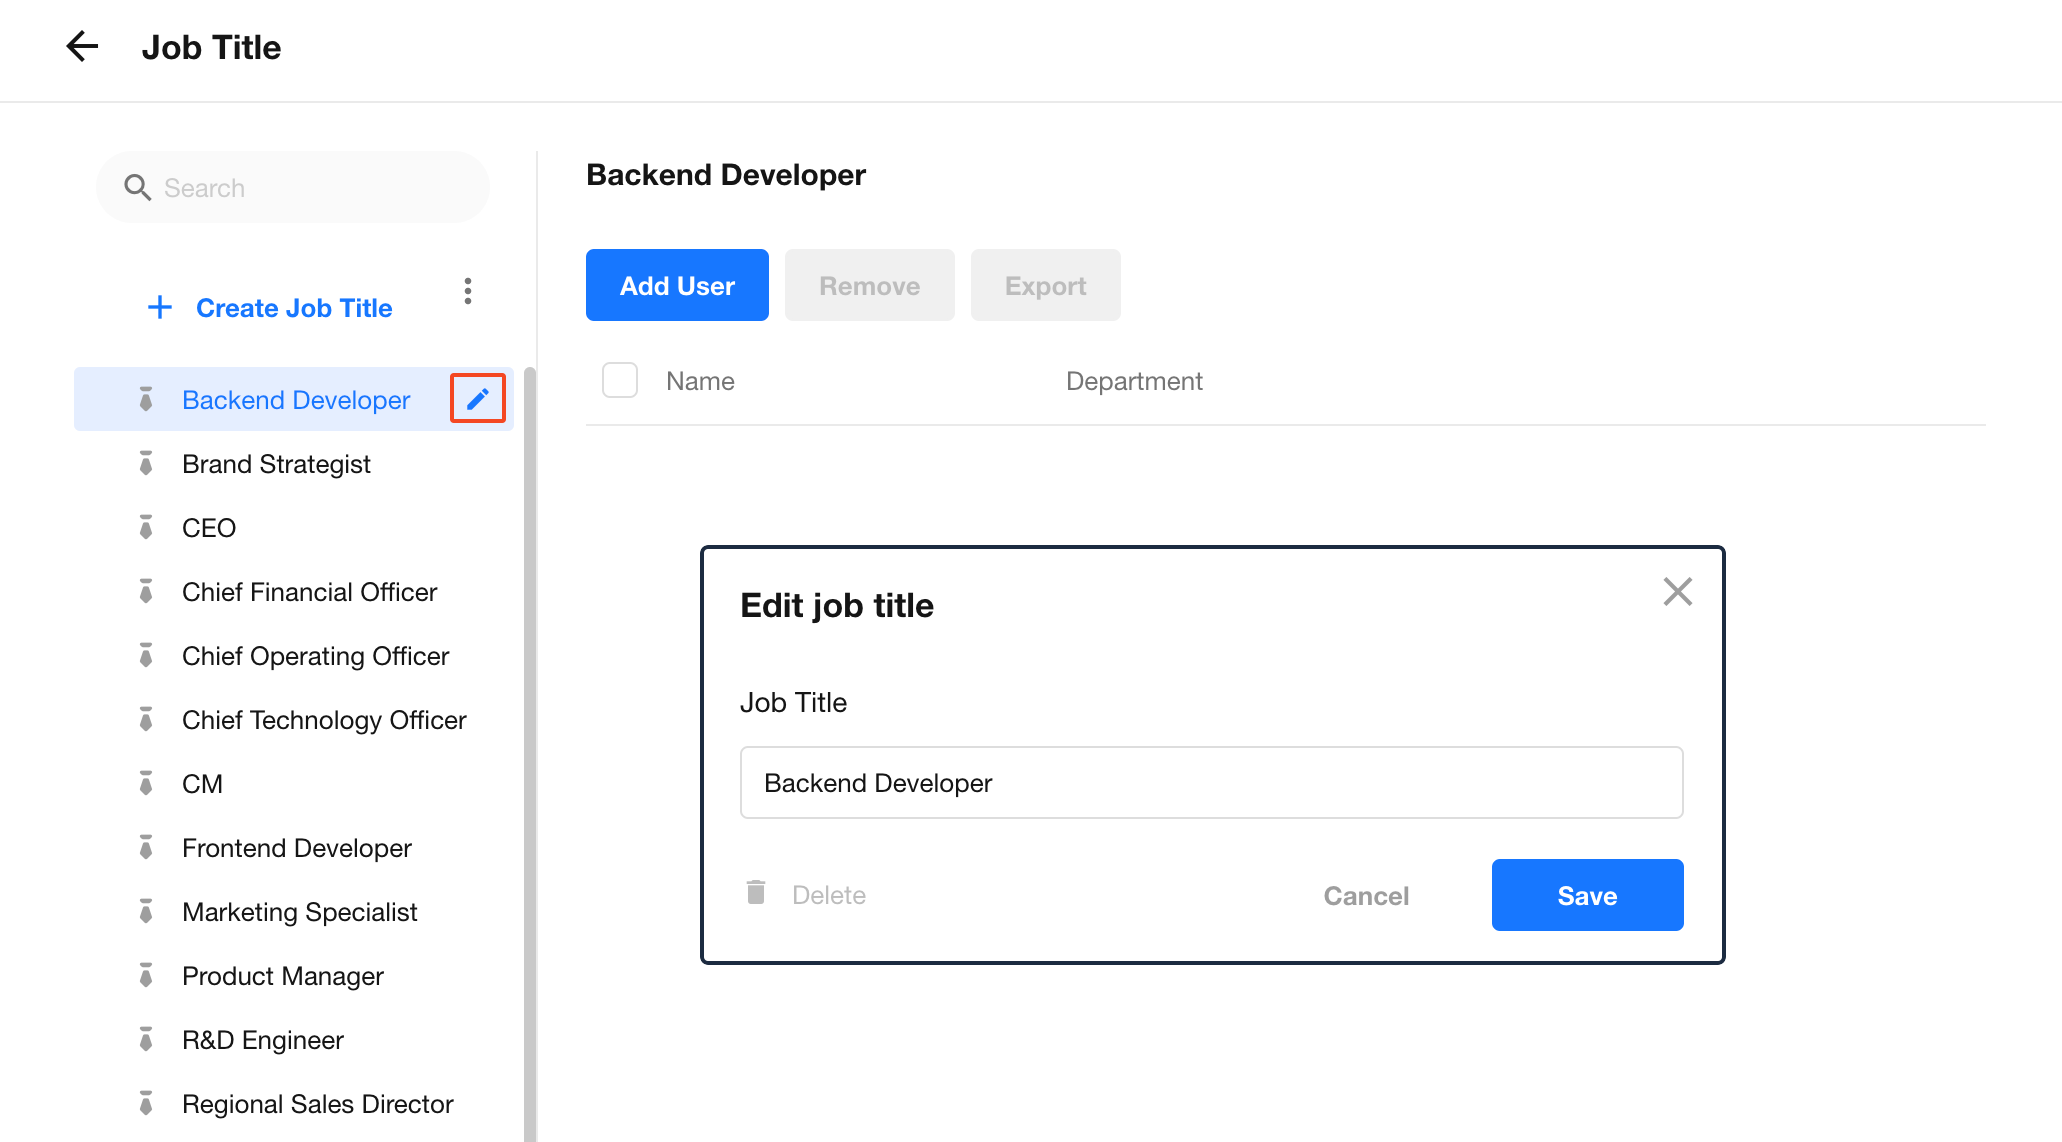
Go to Org Admin > Organization > Org Info, then click Setting under Job Title.
Organization administrators can create, edit, and delete job titles; manage members assigned to each job title; and import or export job title data.
Create, Edit, and Delete Job Titles
On the Job Titles page, click Create Job Title to add a new job title.
Select a job title to rename or delete it.
A job title cannot be deleted while members are assigned to it. Remove all members from the job title before deleting it.
Manage Job Title Members
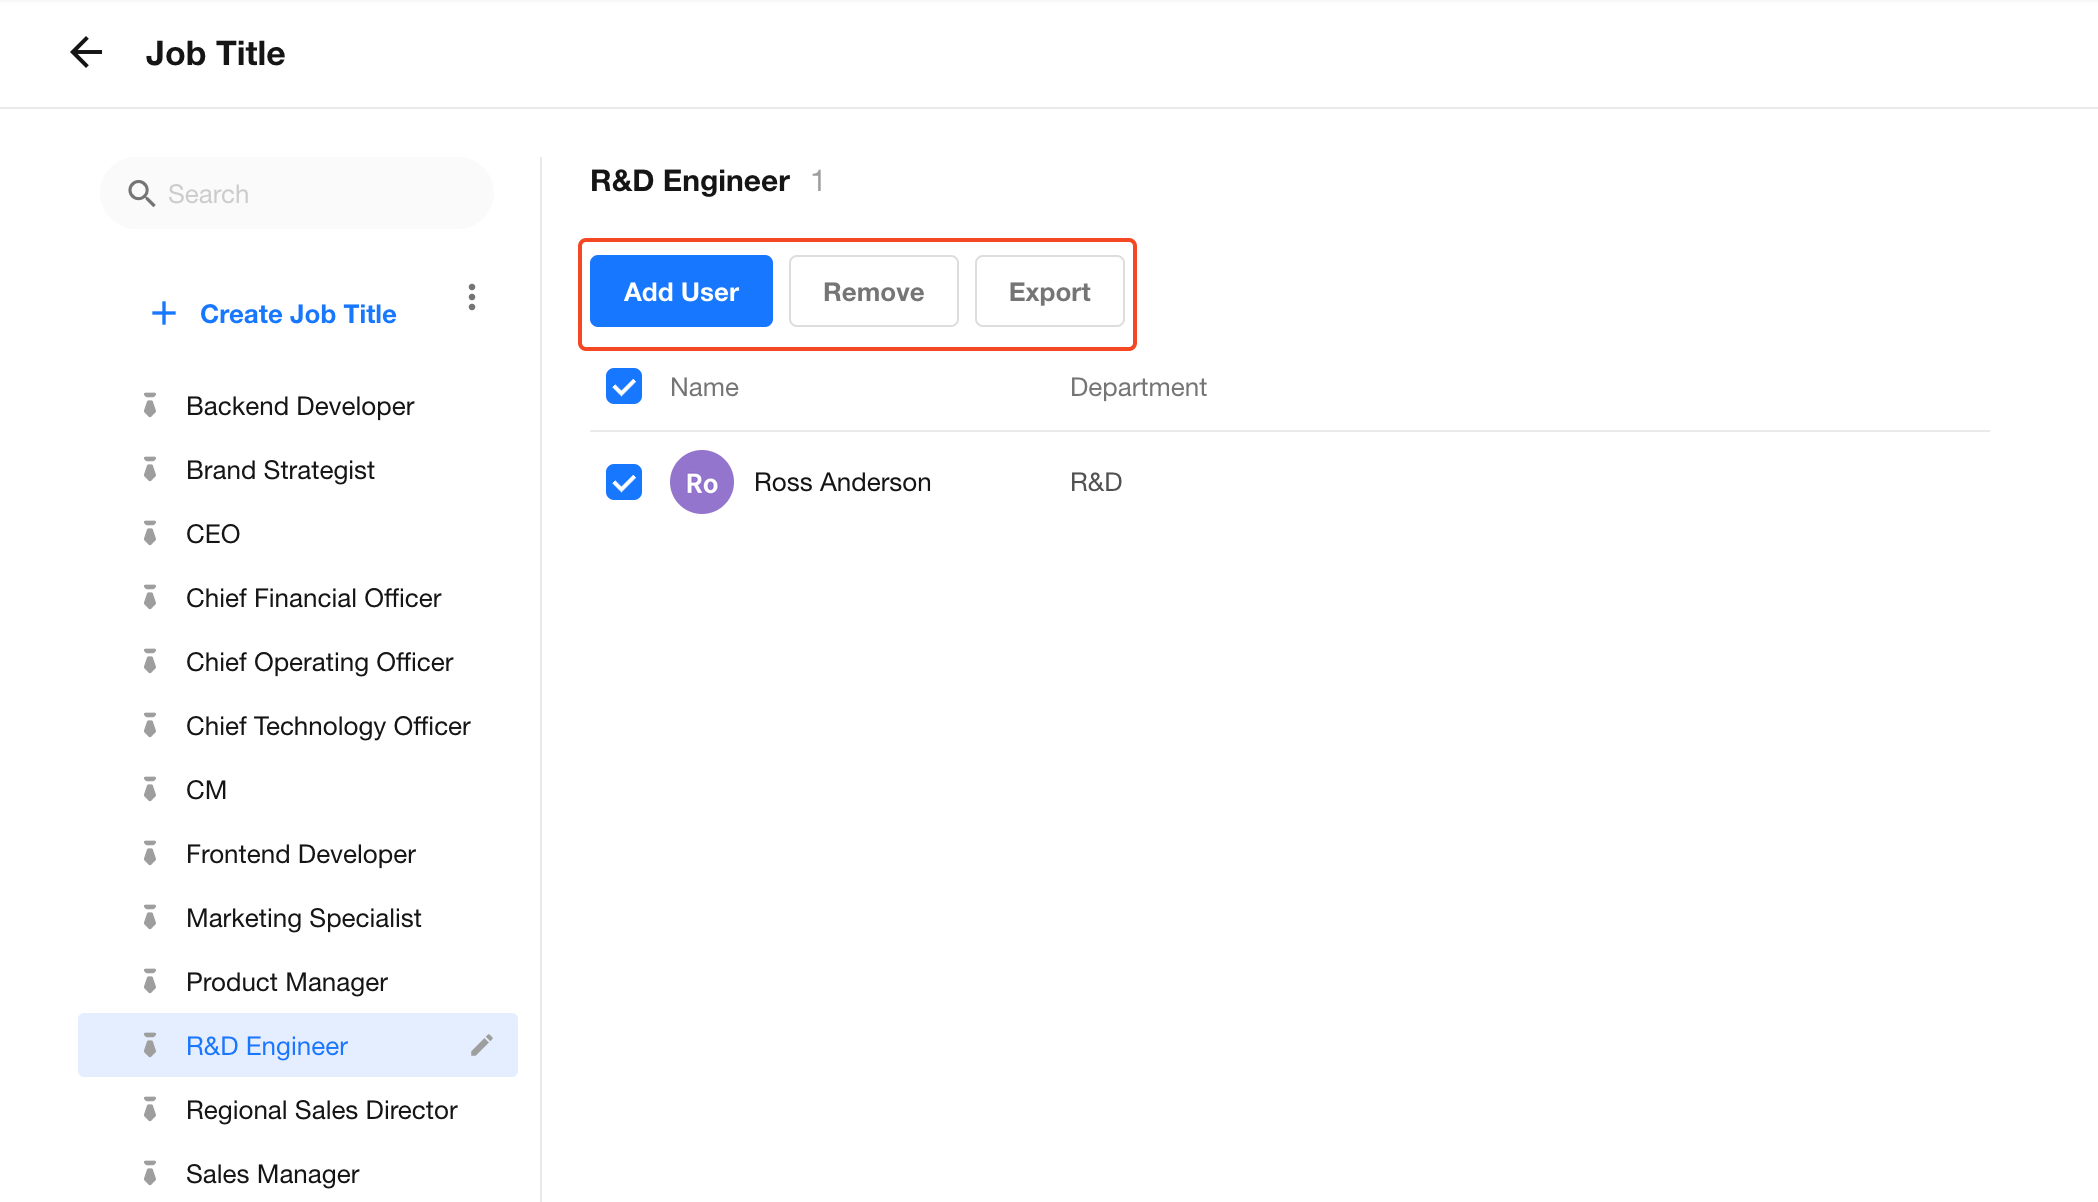
Select a job title to view its members and add, remove, or export members.
Add Members: Select a job title, click Add User, and select the members to assign to the job title.
Remove or Export Members: Select members assigned to the job title to remove them from the current job title or export their information.
Import and Export Job Titles
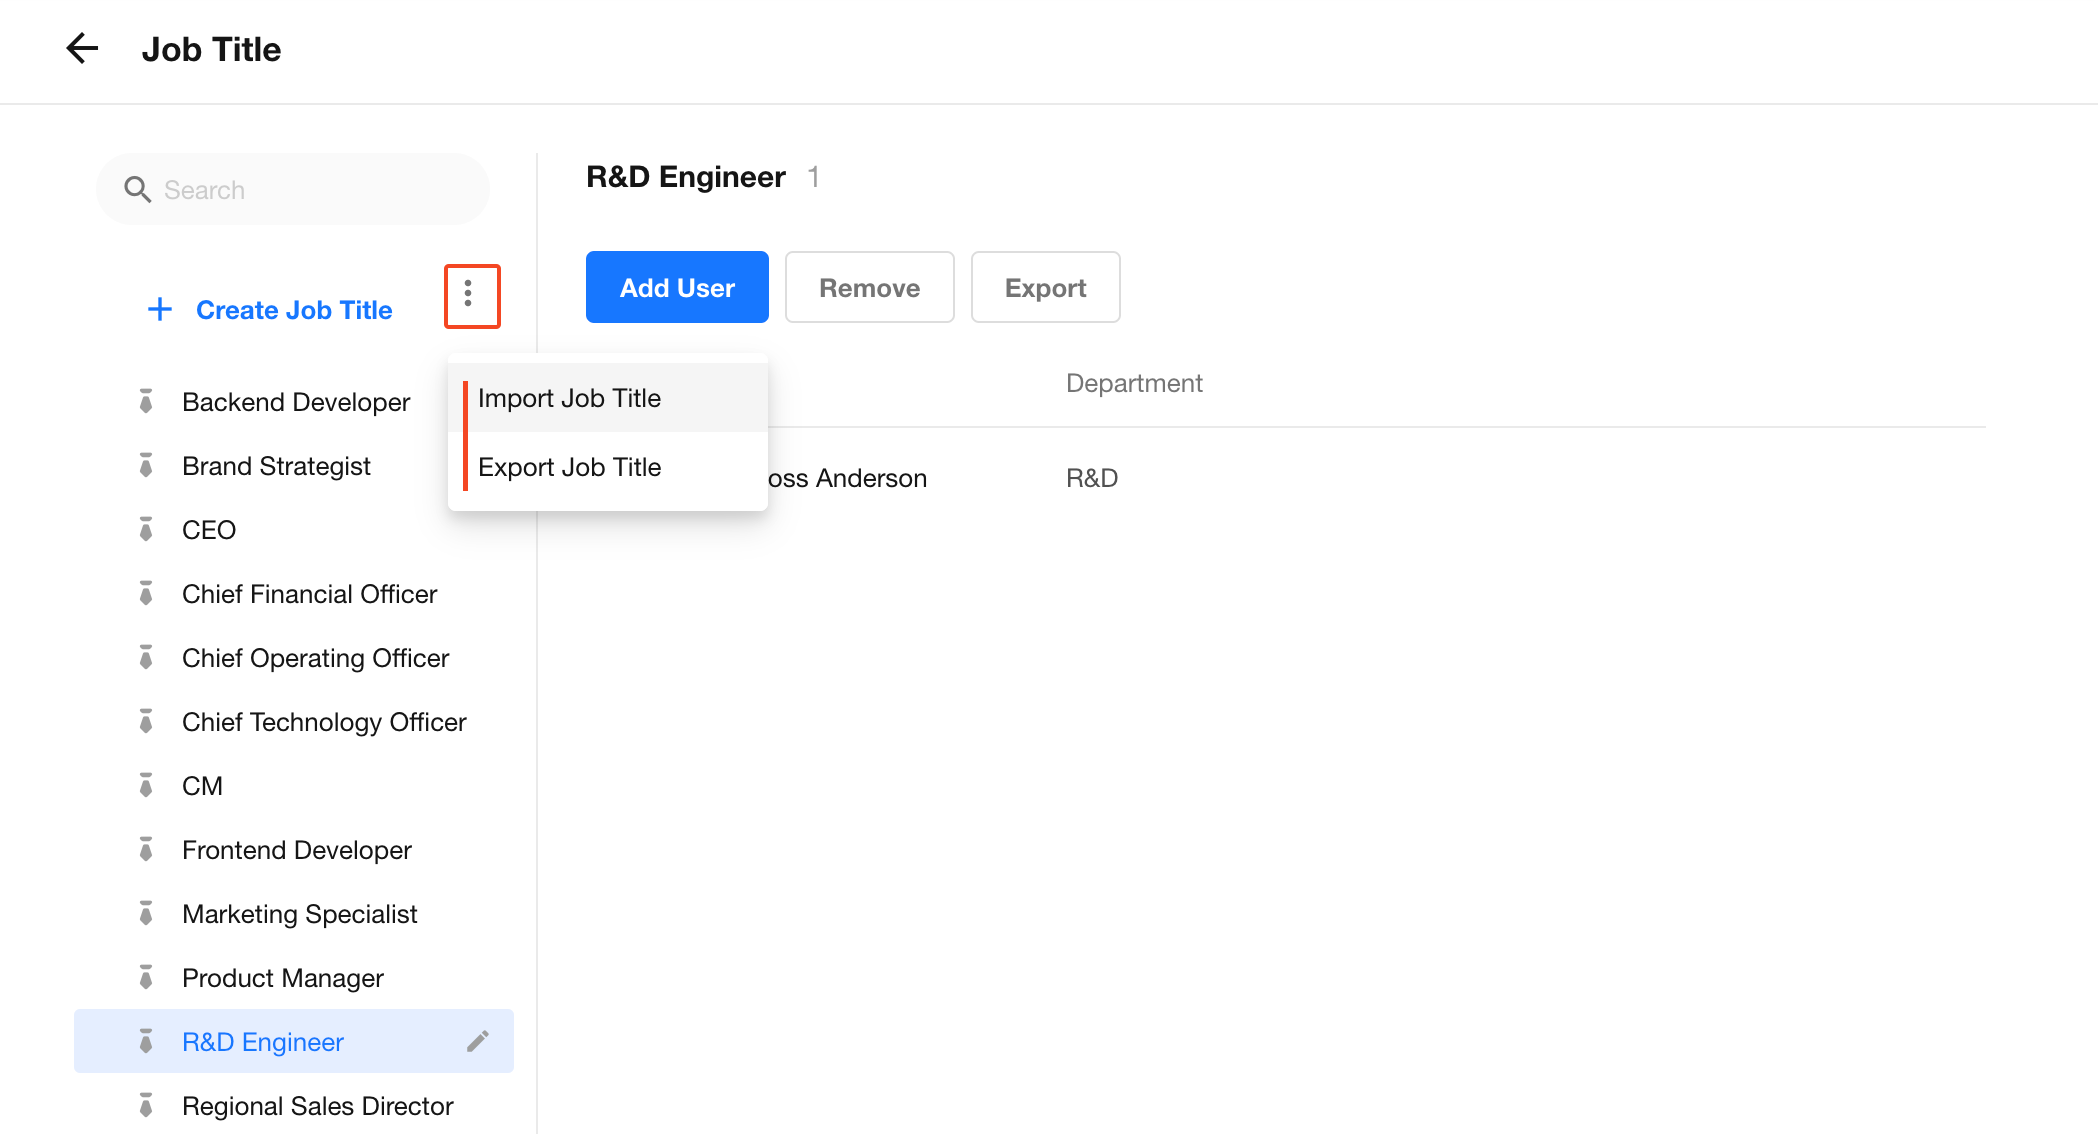
From the More menu in the upper-right corner of the job title list, select Import Job Title or Export Job Title.
To import job titles, first download the provided template. Enter and verify the job title data, then upload the completed file.
Import Template Requirements:
-
Excel column headers must start on row 2. It is recommended to download and use the provided template.
-
If a job title in the Excel file already exists in HAP, it cannot be imported. HAP identifies the rows containing duplicate entries. Remove or rename the duplicate job titles, then import the file again.
Was this document helpful?