Member Management
I. Invite new members
1. Invite from Contacts
Press shortcut E to open Contacts, click the "Add Contact" button to invite users to join the organization.
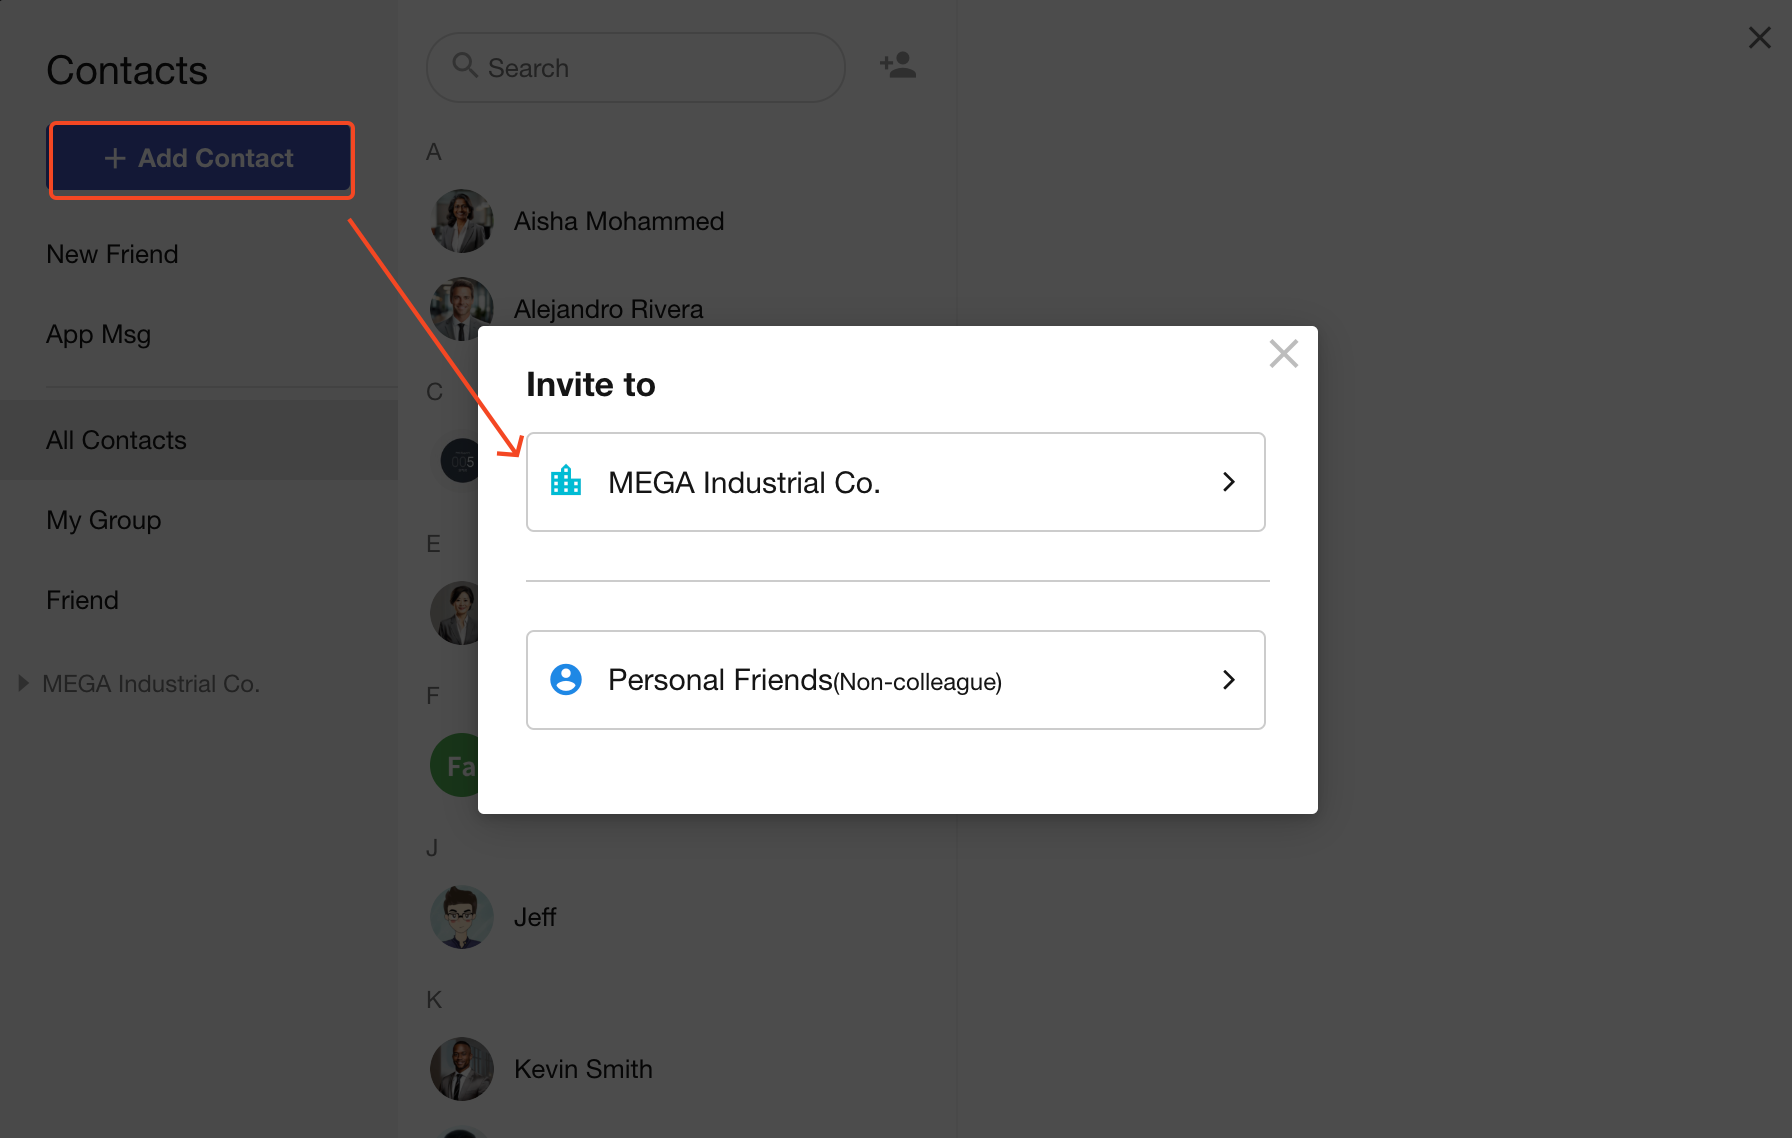
Three invitation methods:
-
Public invitation
-
Targeted invitation by mobile/email
-
Invite from Contacts
-
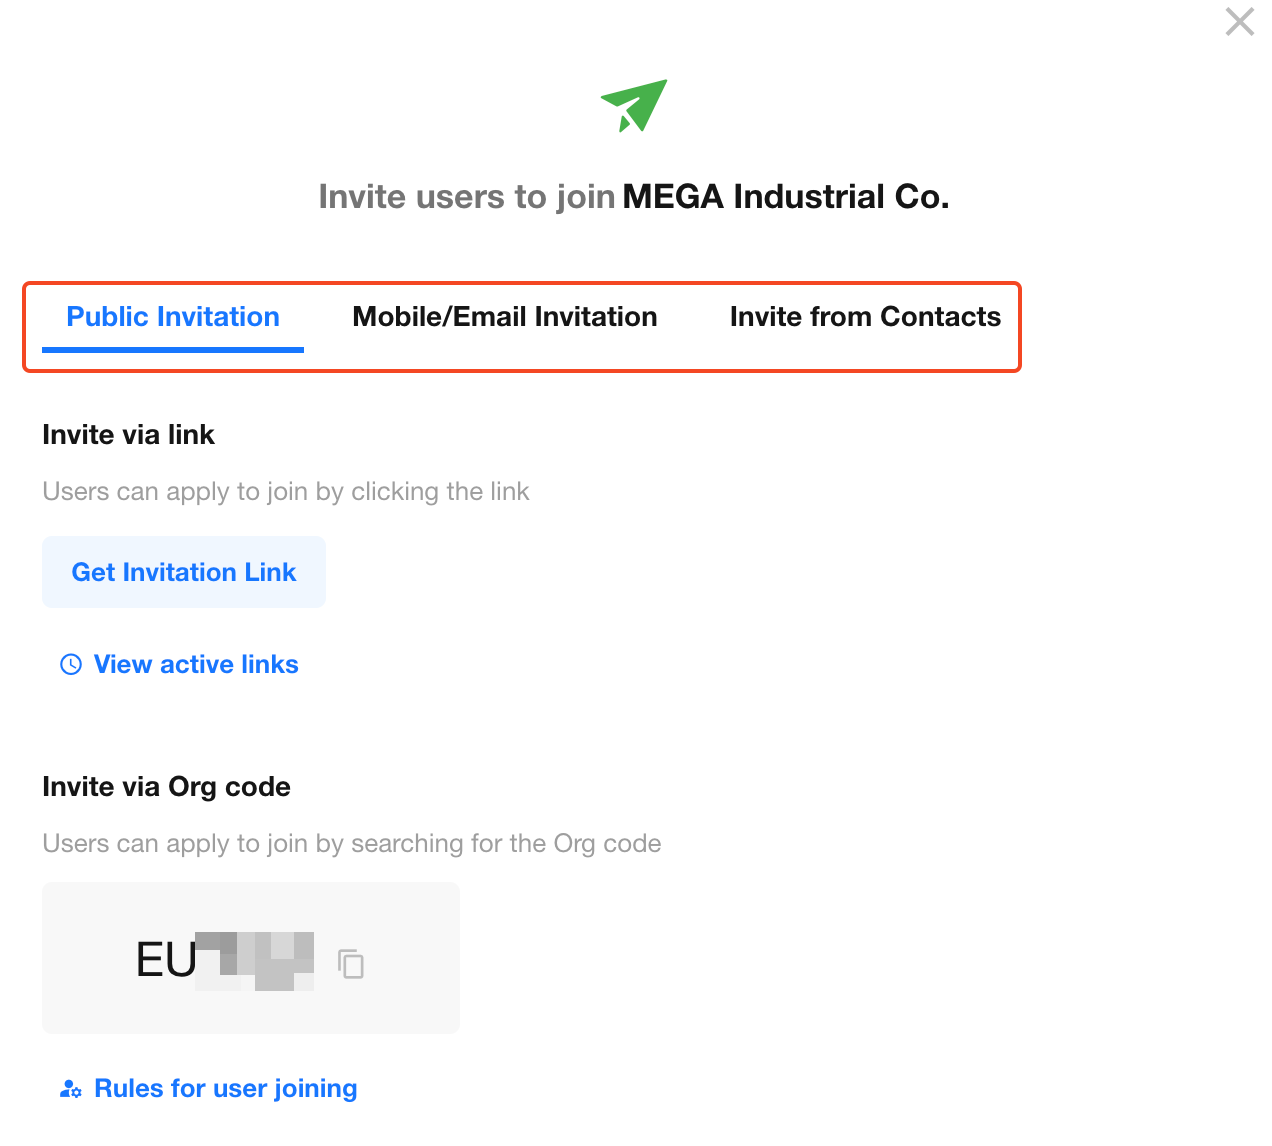
Public invitation
Share invitation links, QR codes, or organization ID publicly
Anyone obtaining these can join the organization
Requires organization administrator's approval
-
Targeted invitation by mobile/email
Enter mobile numbers or emails to invite specific users
Invitees receive SMS/email with registration link
-
Invite from Contacts
Invite existing contacts (not yet organization members) directly
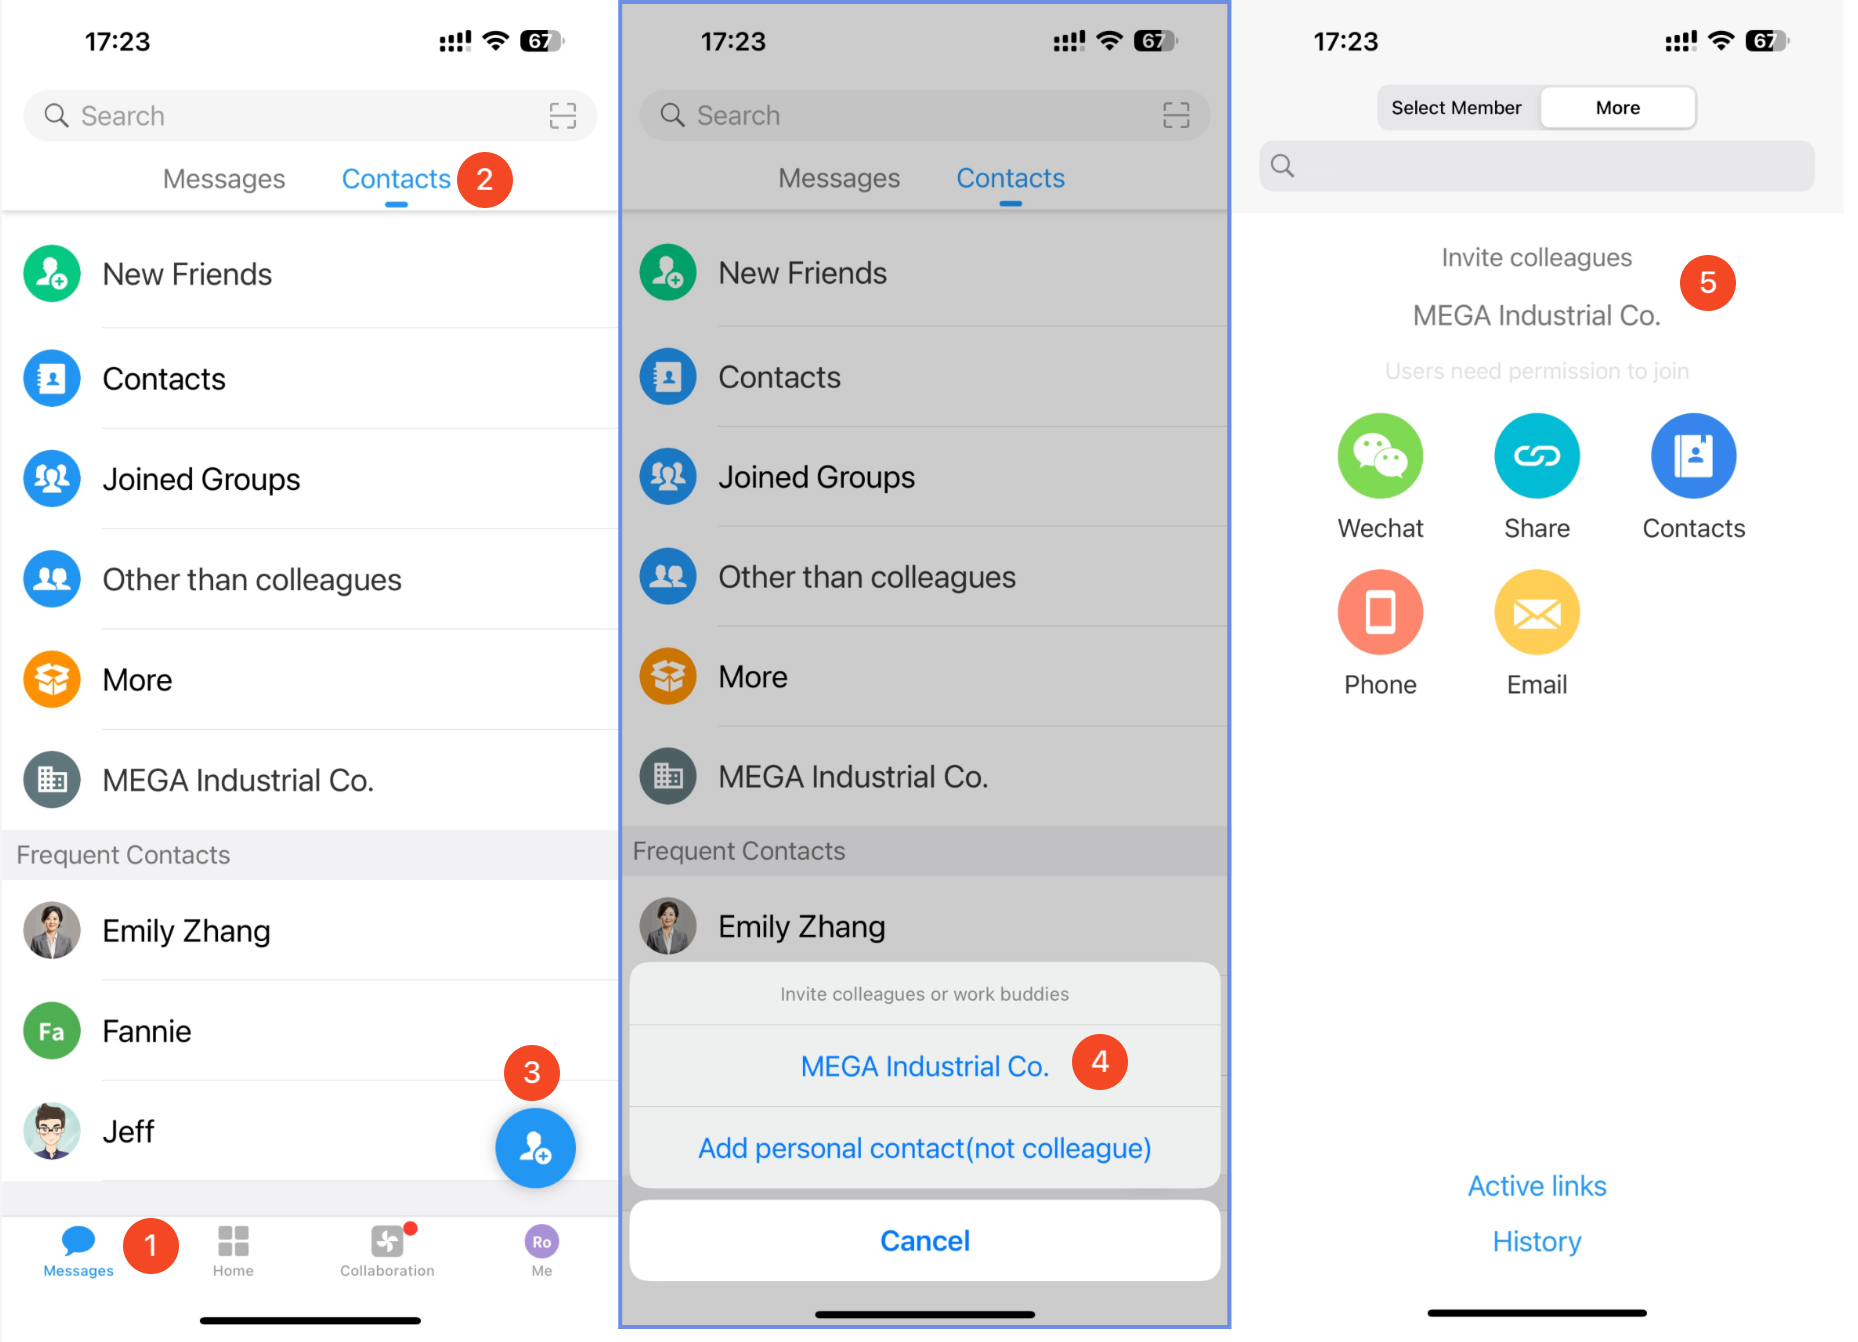
Invitation Path on Mobile App:
- Click [Messages] > [Contacts] > ["+" button]
- Select organization
- Choose invitation method
2. Invite single user
Organization administrators can:
-
Click their profile avatar
-
Navigate to [Org Admin] > [User & Department]
-
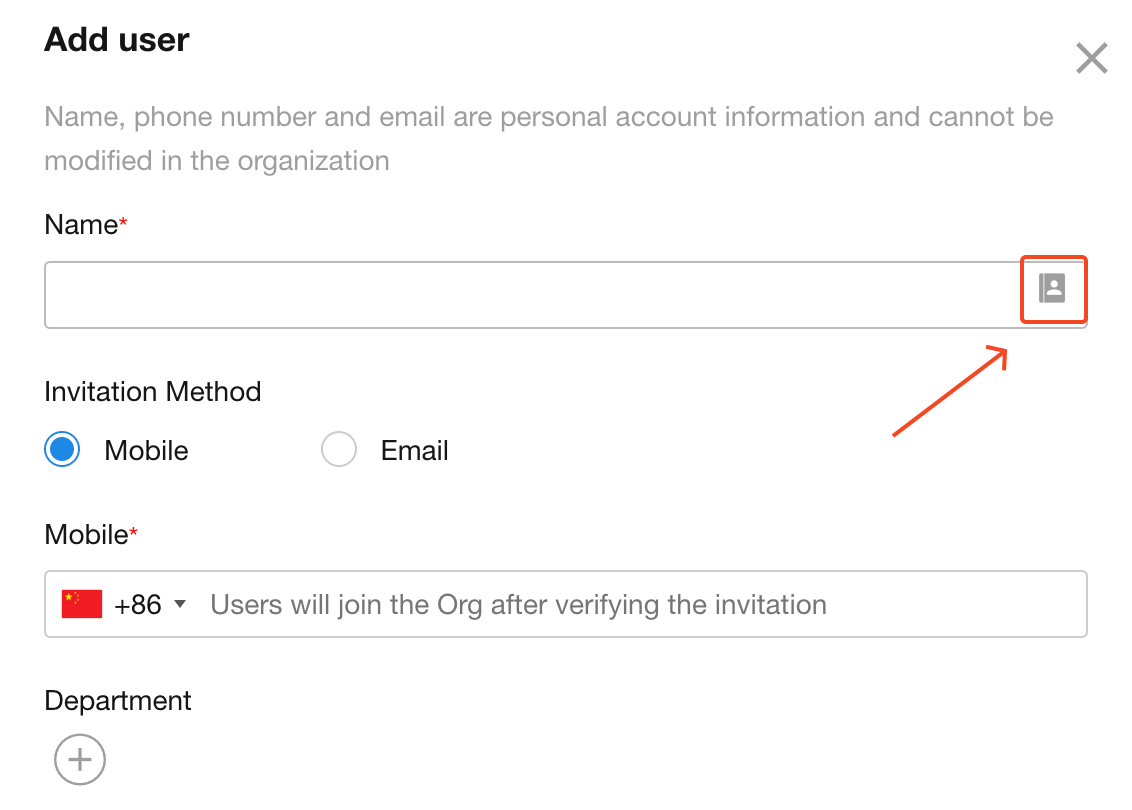
Click the "Add User" button to invite users
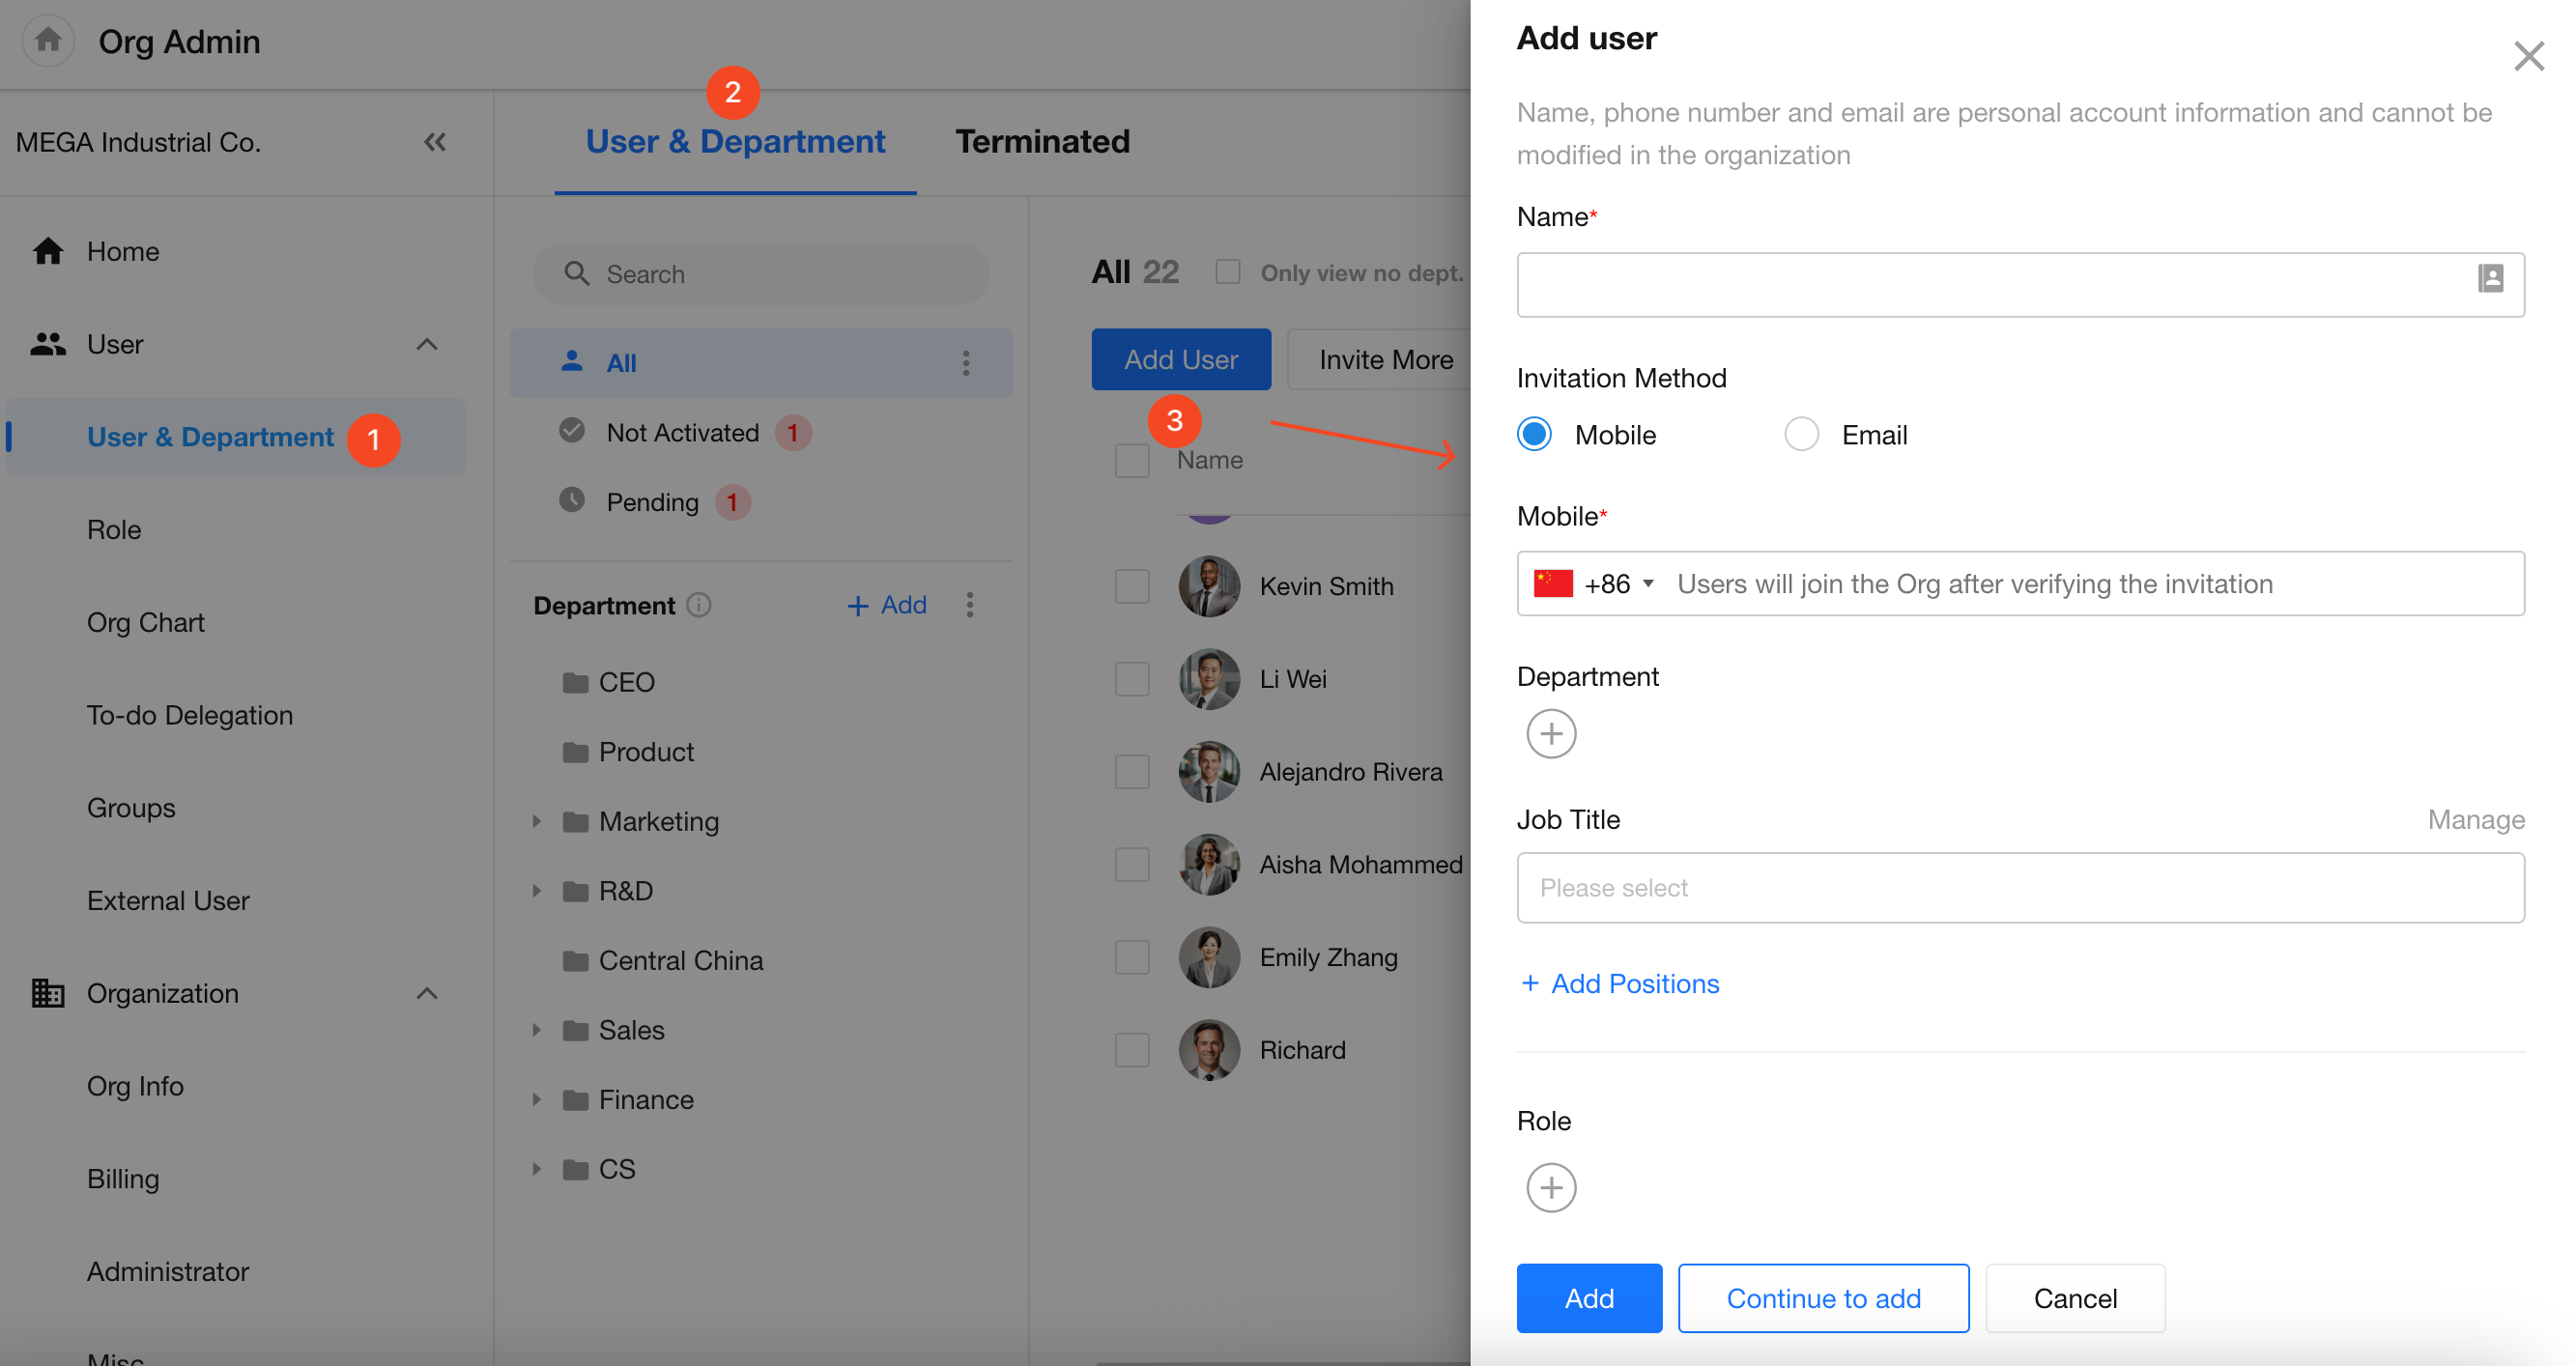
Enter the following information to send invitation links: name, email or mobile number, department, and position.
For pre-registered users not yet in the organization:
-
Invite directly from Contacts
-
No need to re-enter name/contact details
3. Bulk import users
Organization administrators can:
-
Click their profile avatar
-
Navigate to [Org Admin] > [User & Department]
-
Perform bulk member imports
Download the provided template, organize the data, and import directly. The system will automatically send batch invitation SMS or emails.
Import Limitations
For non-paying users, each IP and user can import up to 100 members per day.
There are no limits for paid users.
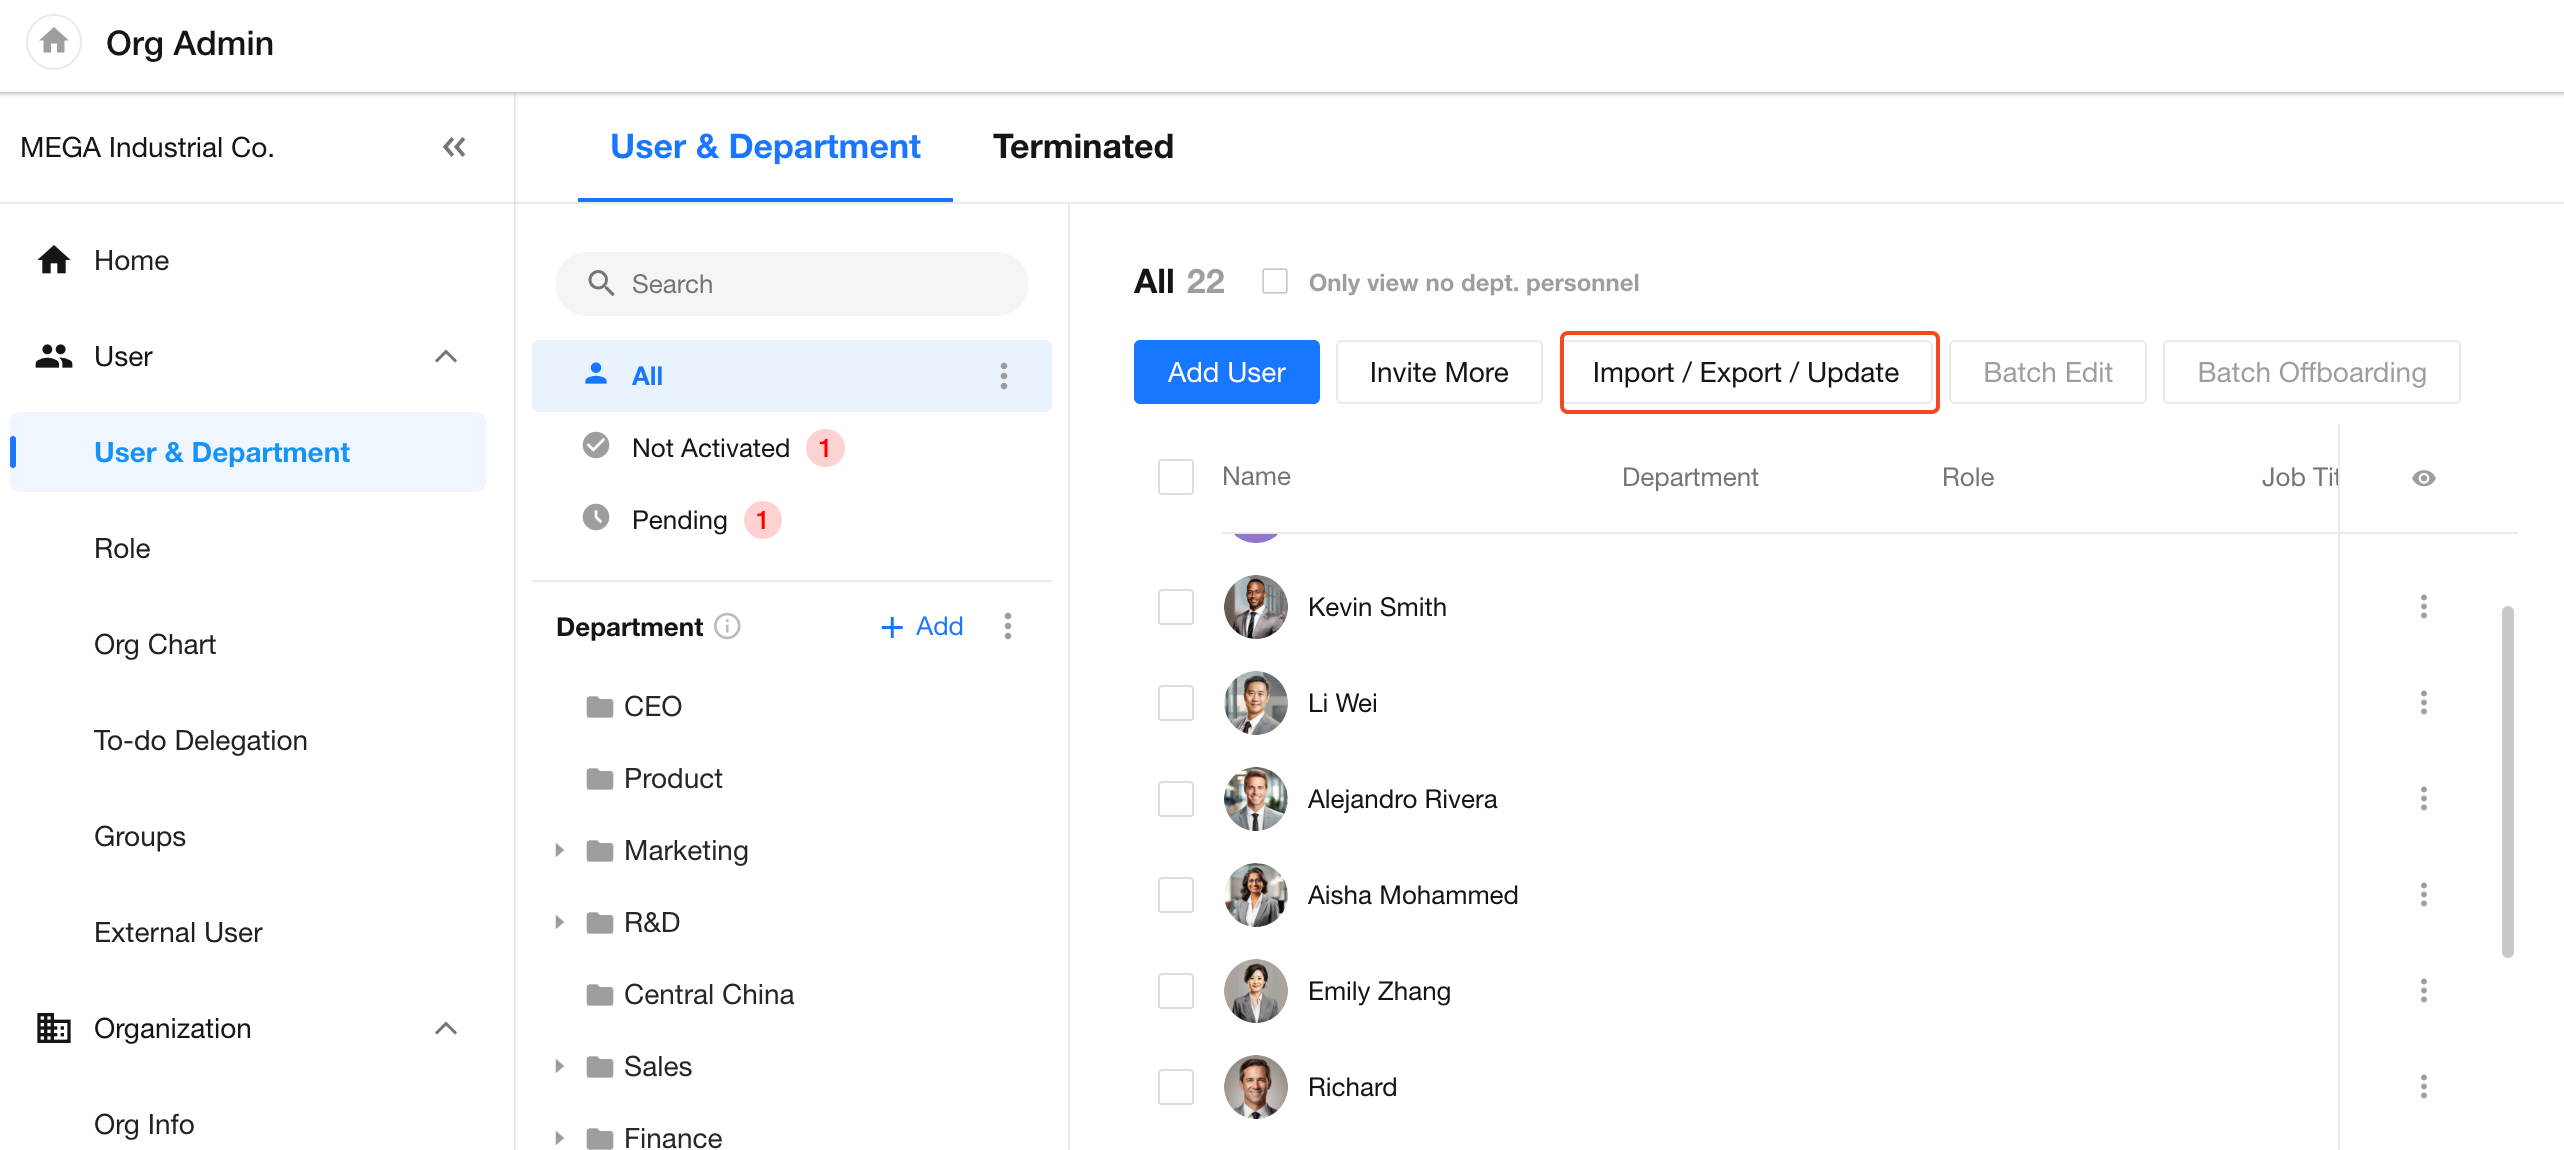
-
You can import the following fields: Telephoone / Email, Name, Department, Job title, Role, Employee ID, Work location, Work phone
-
If the imported departments, job titles, or roles do not yet exist, they will be automatically created during the import process.
-
You can import departments with hierarchy by using
>to separate levels.
Cancel/Resend Invitations
For users who have not completed registration, organization administrators can resend or cancel invitations in the "Not Activated" list.

II. Not Activated
Invited users who have not completed registration are in "Not Activated" status. They can join the organization by clicking the invitation link to complete registration.
Organization administrators can resend invitation SMS/emails or cancel invitations, with support for batch operations.
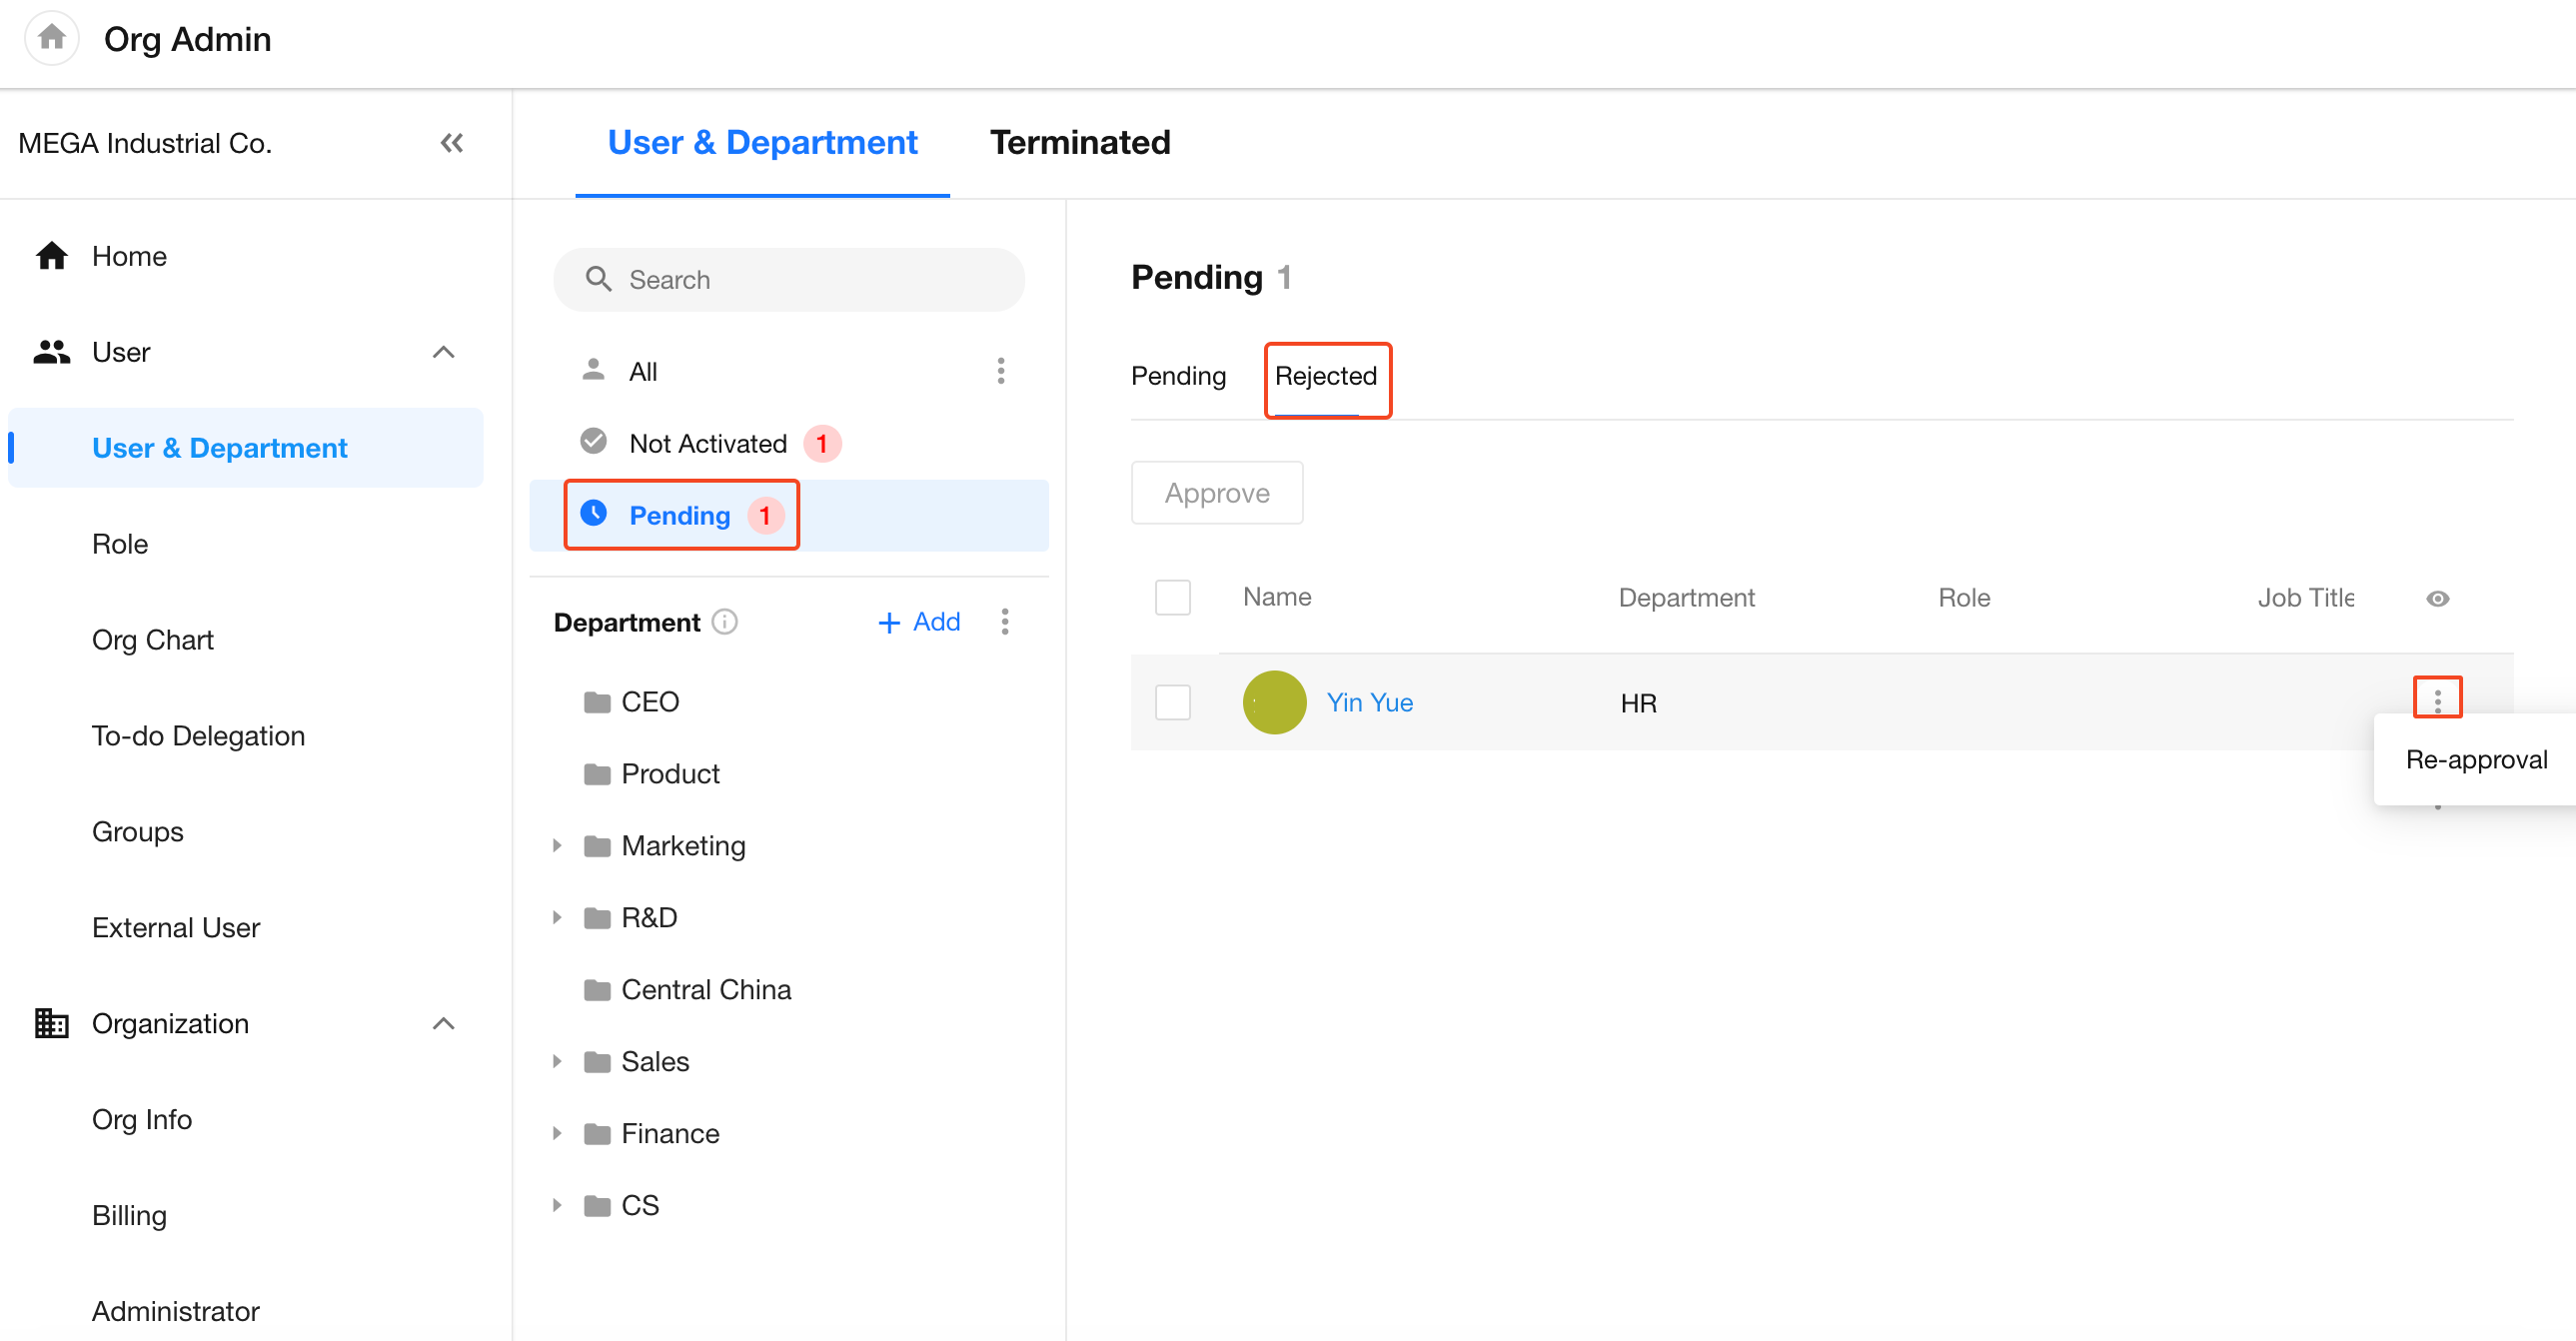
III. Pending
Users requesting to join the organization require administrator's approval before officially joining. Pending users are displayed in the "Pending" list.
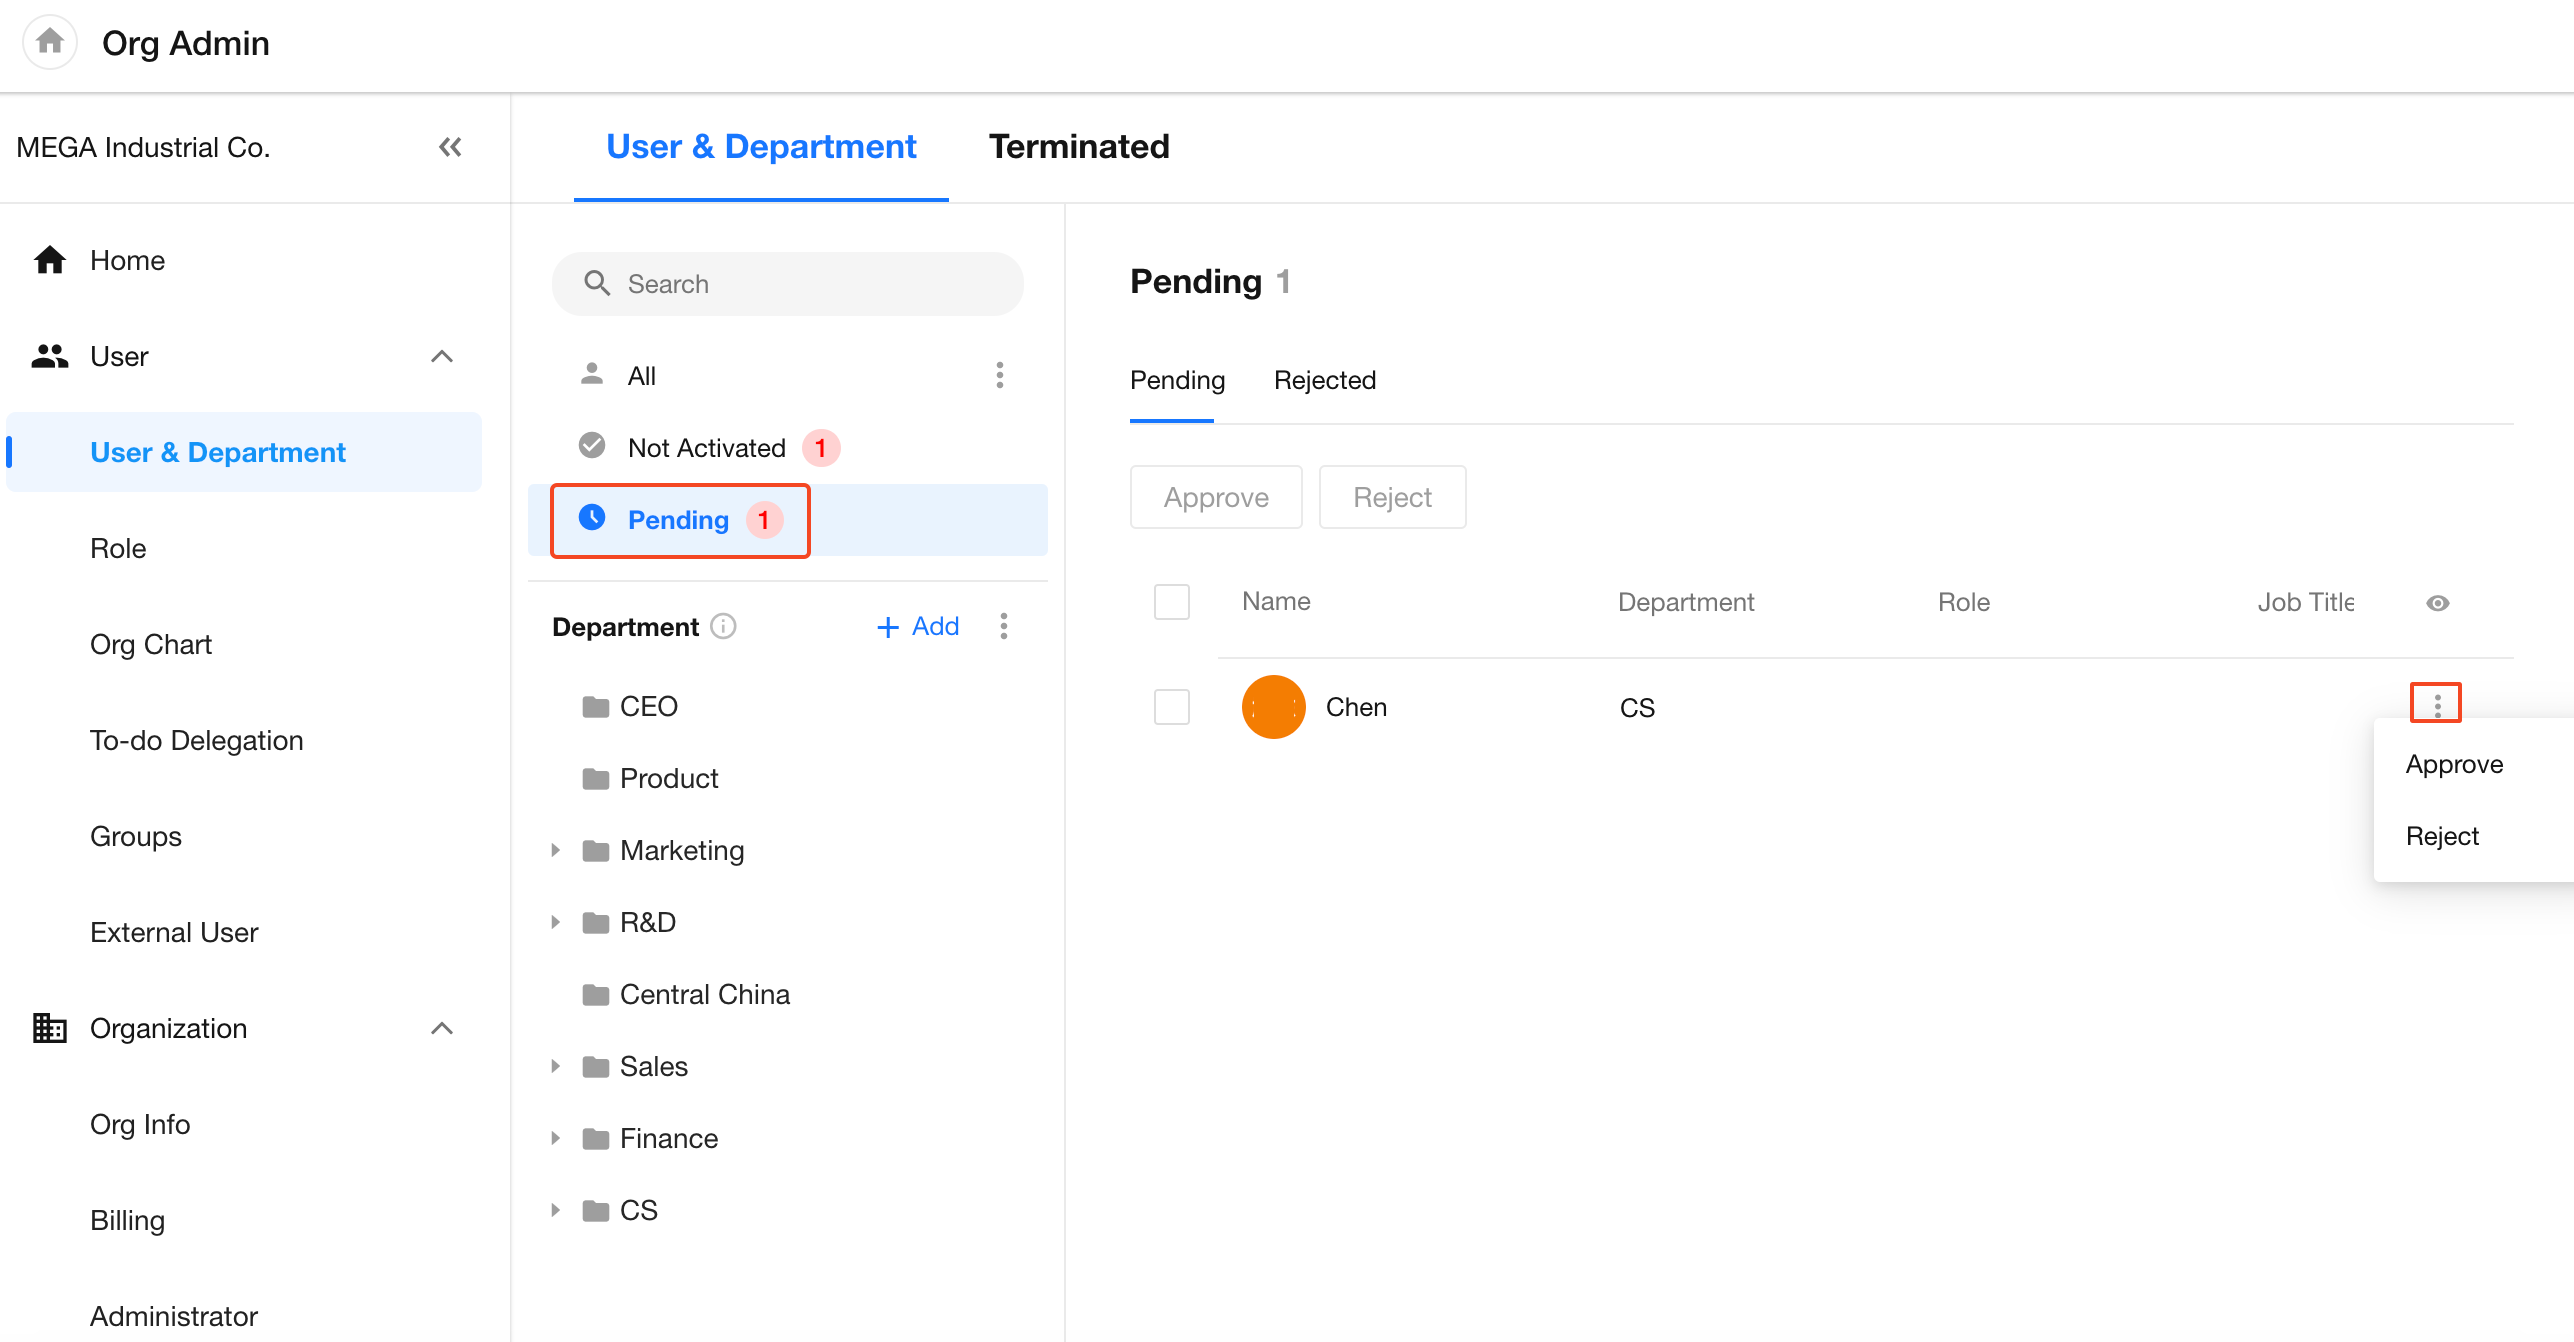
Users requiring approval
-
Those joining via invitation links or by searching organization code
-
Users not invited by account administrators or super administrators
Users not requiring approval
-
Users invited directly by organization account administrators or super administrators via phone/email
-
When "Enrollment approval" is disabled, users invited via phone/email by non-administrators
Access path: [Org Admin] > [User & Department] > [Invite More] > [Rules for User Joining]
Re-approve
Users rejected from joining appear in the "Rejected" list under "Pending". Administrators can re-review them.
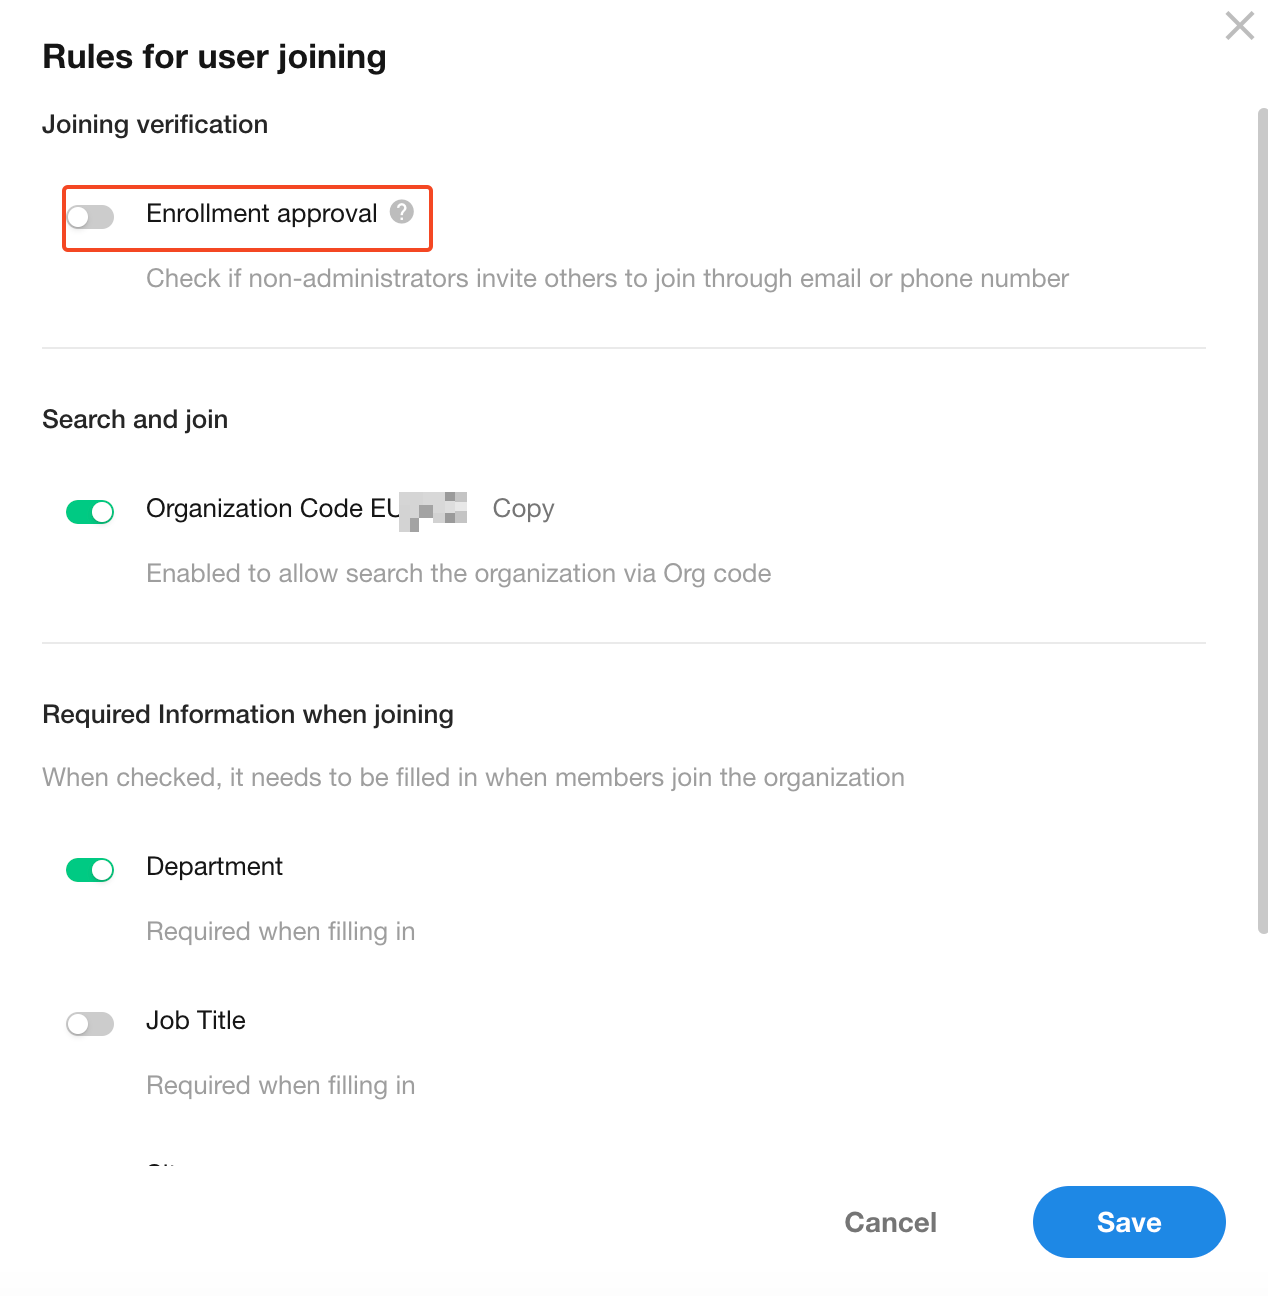
IV. Rules for user joining
Configure whether approval is required when non-administrators invite users via email/phone number, and specify required information fields for joining.
Access path: [Org Admin] > [User & Department] > [Invite More] > [Rules for User Joining]
V. Member Management
Member management typically includes editing basic organizational information such as department, position, role, employee ID, etc. (Name, phone number, and email are personal account information and can only be modified by the individual in their account settings).
1. Edit member information
In the "User & Department" section, locate the target member by department or search. Click the member's name or the "three-dot" button to edit their information.

Add multiple positions
Members can hold multiple positions across departments, which will be displayed on their profile page. When multiple positions are added, an "All Positions" field will appear.
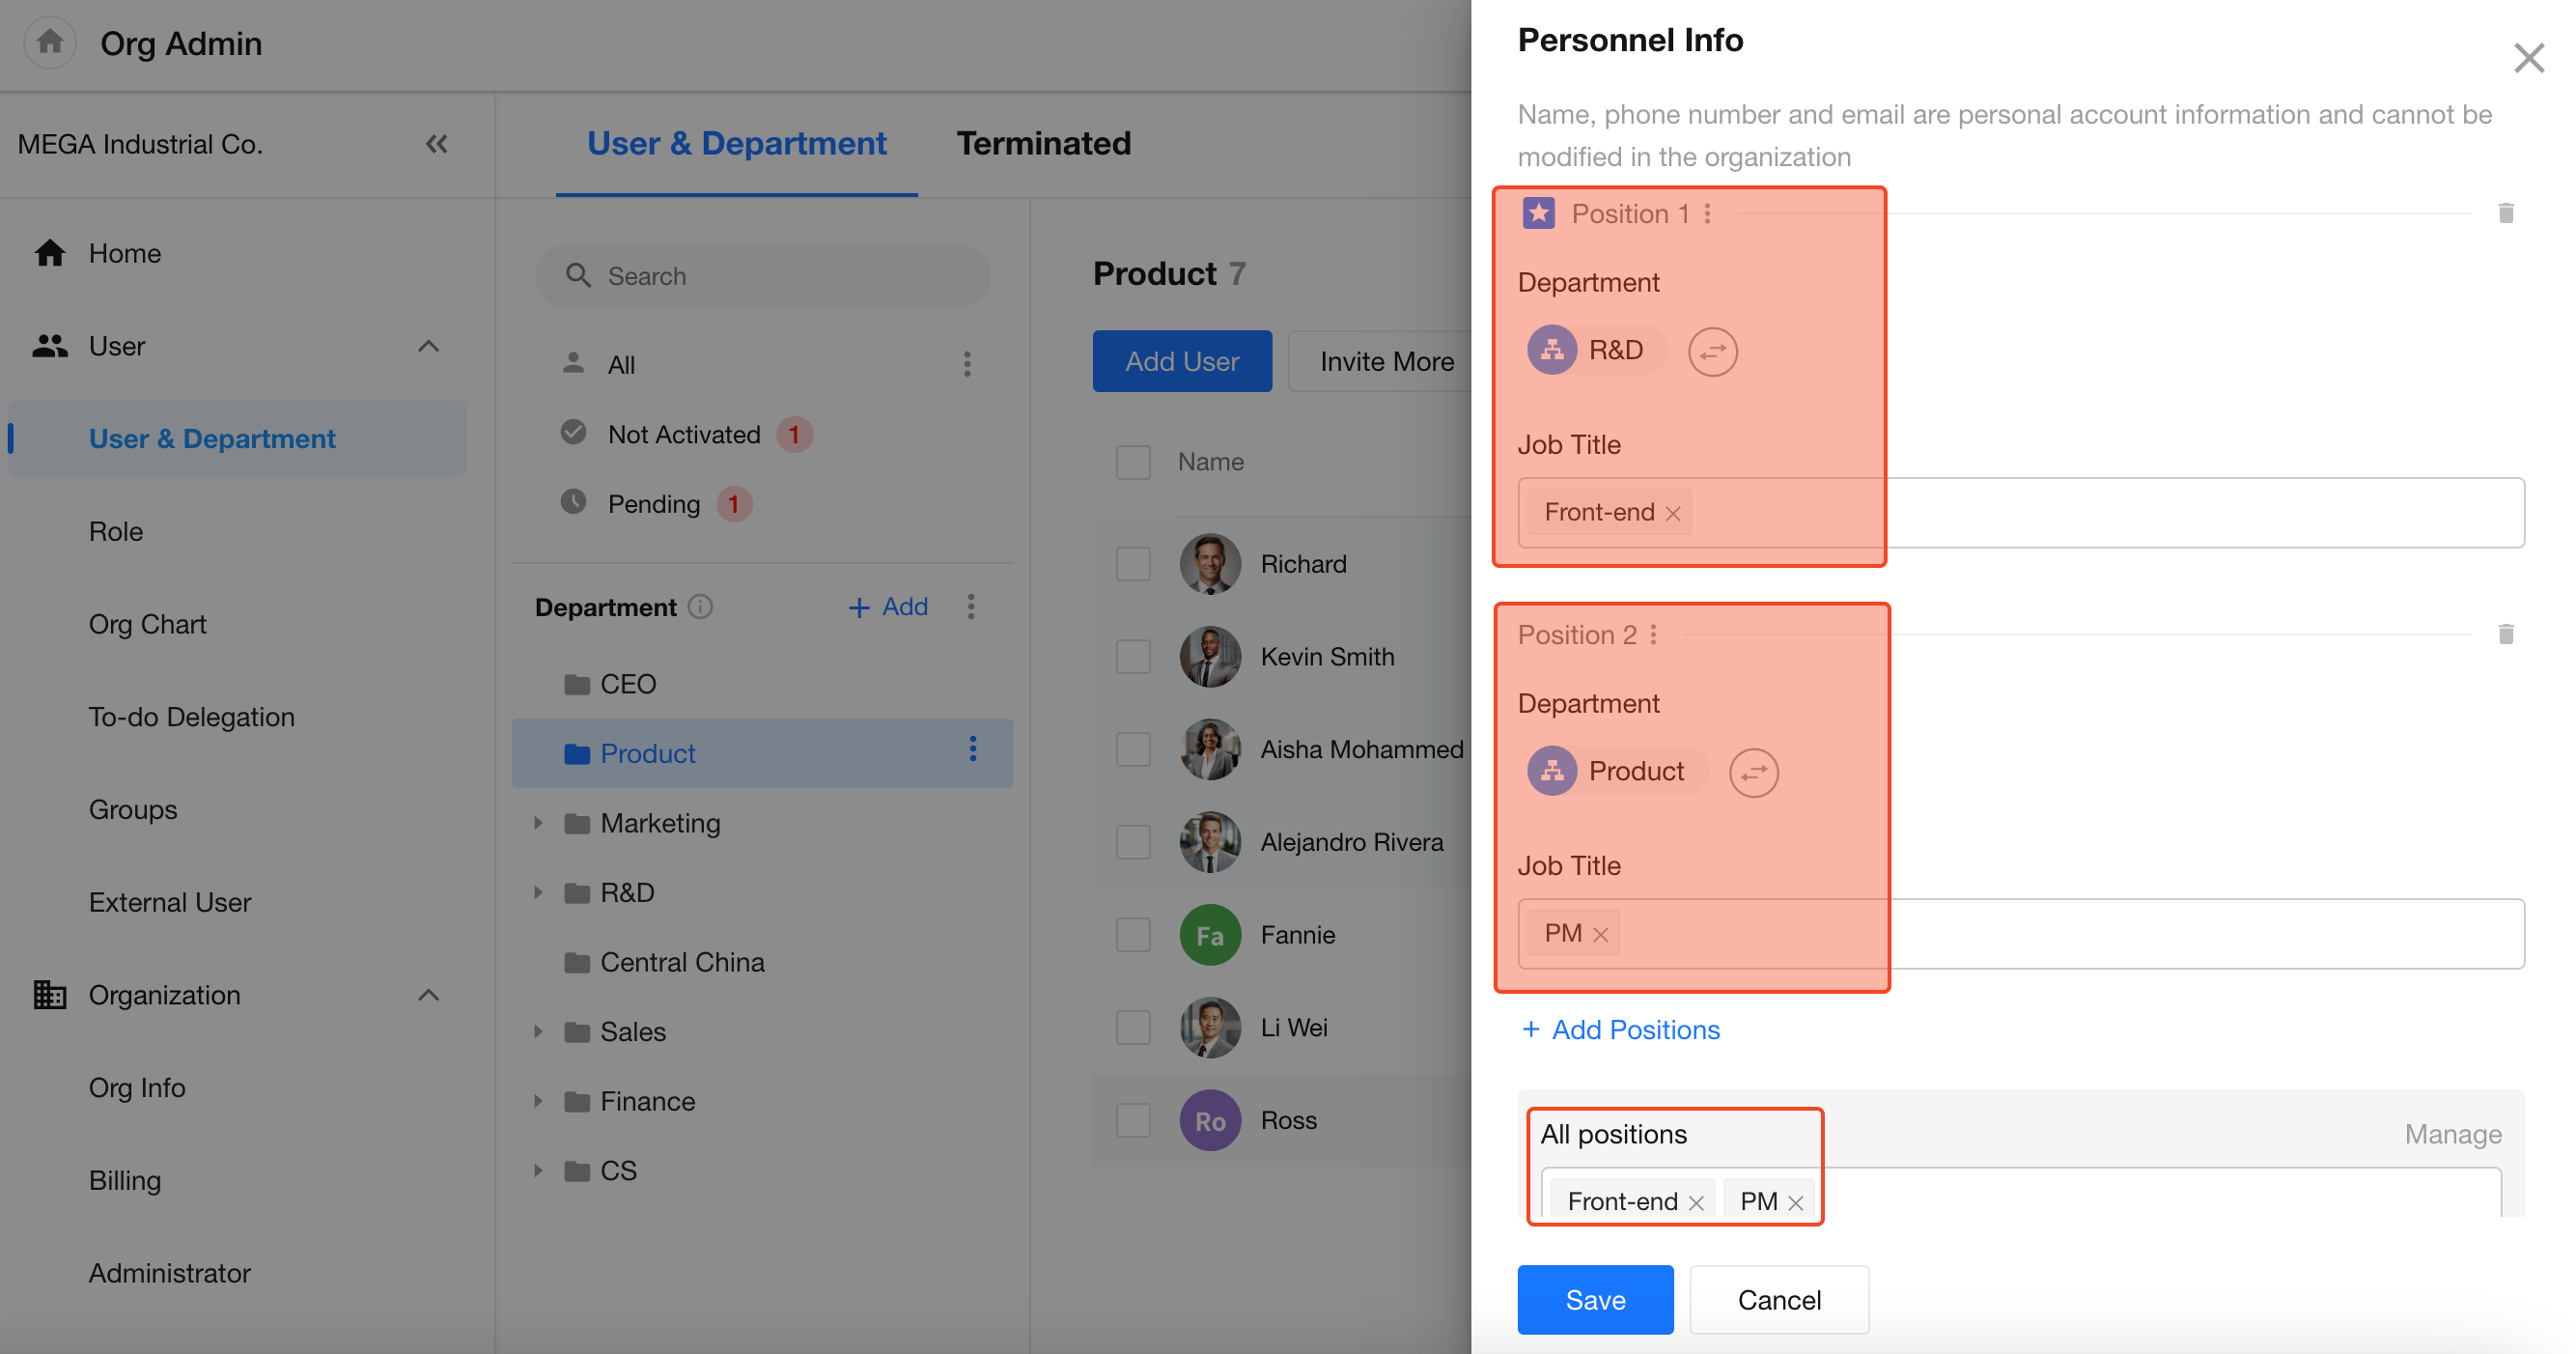
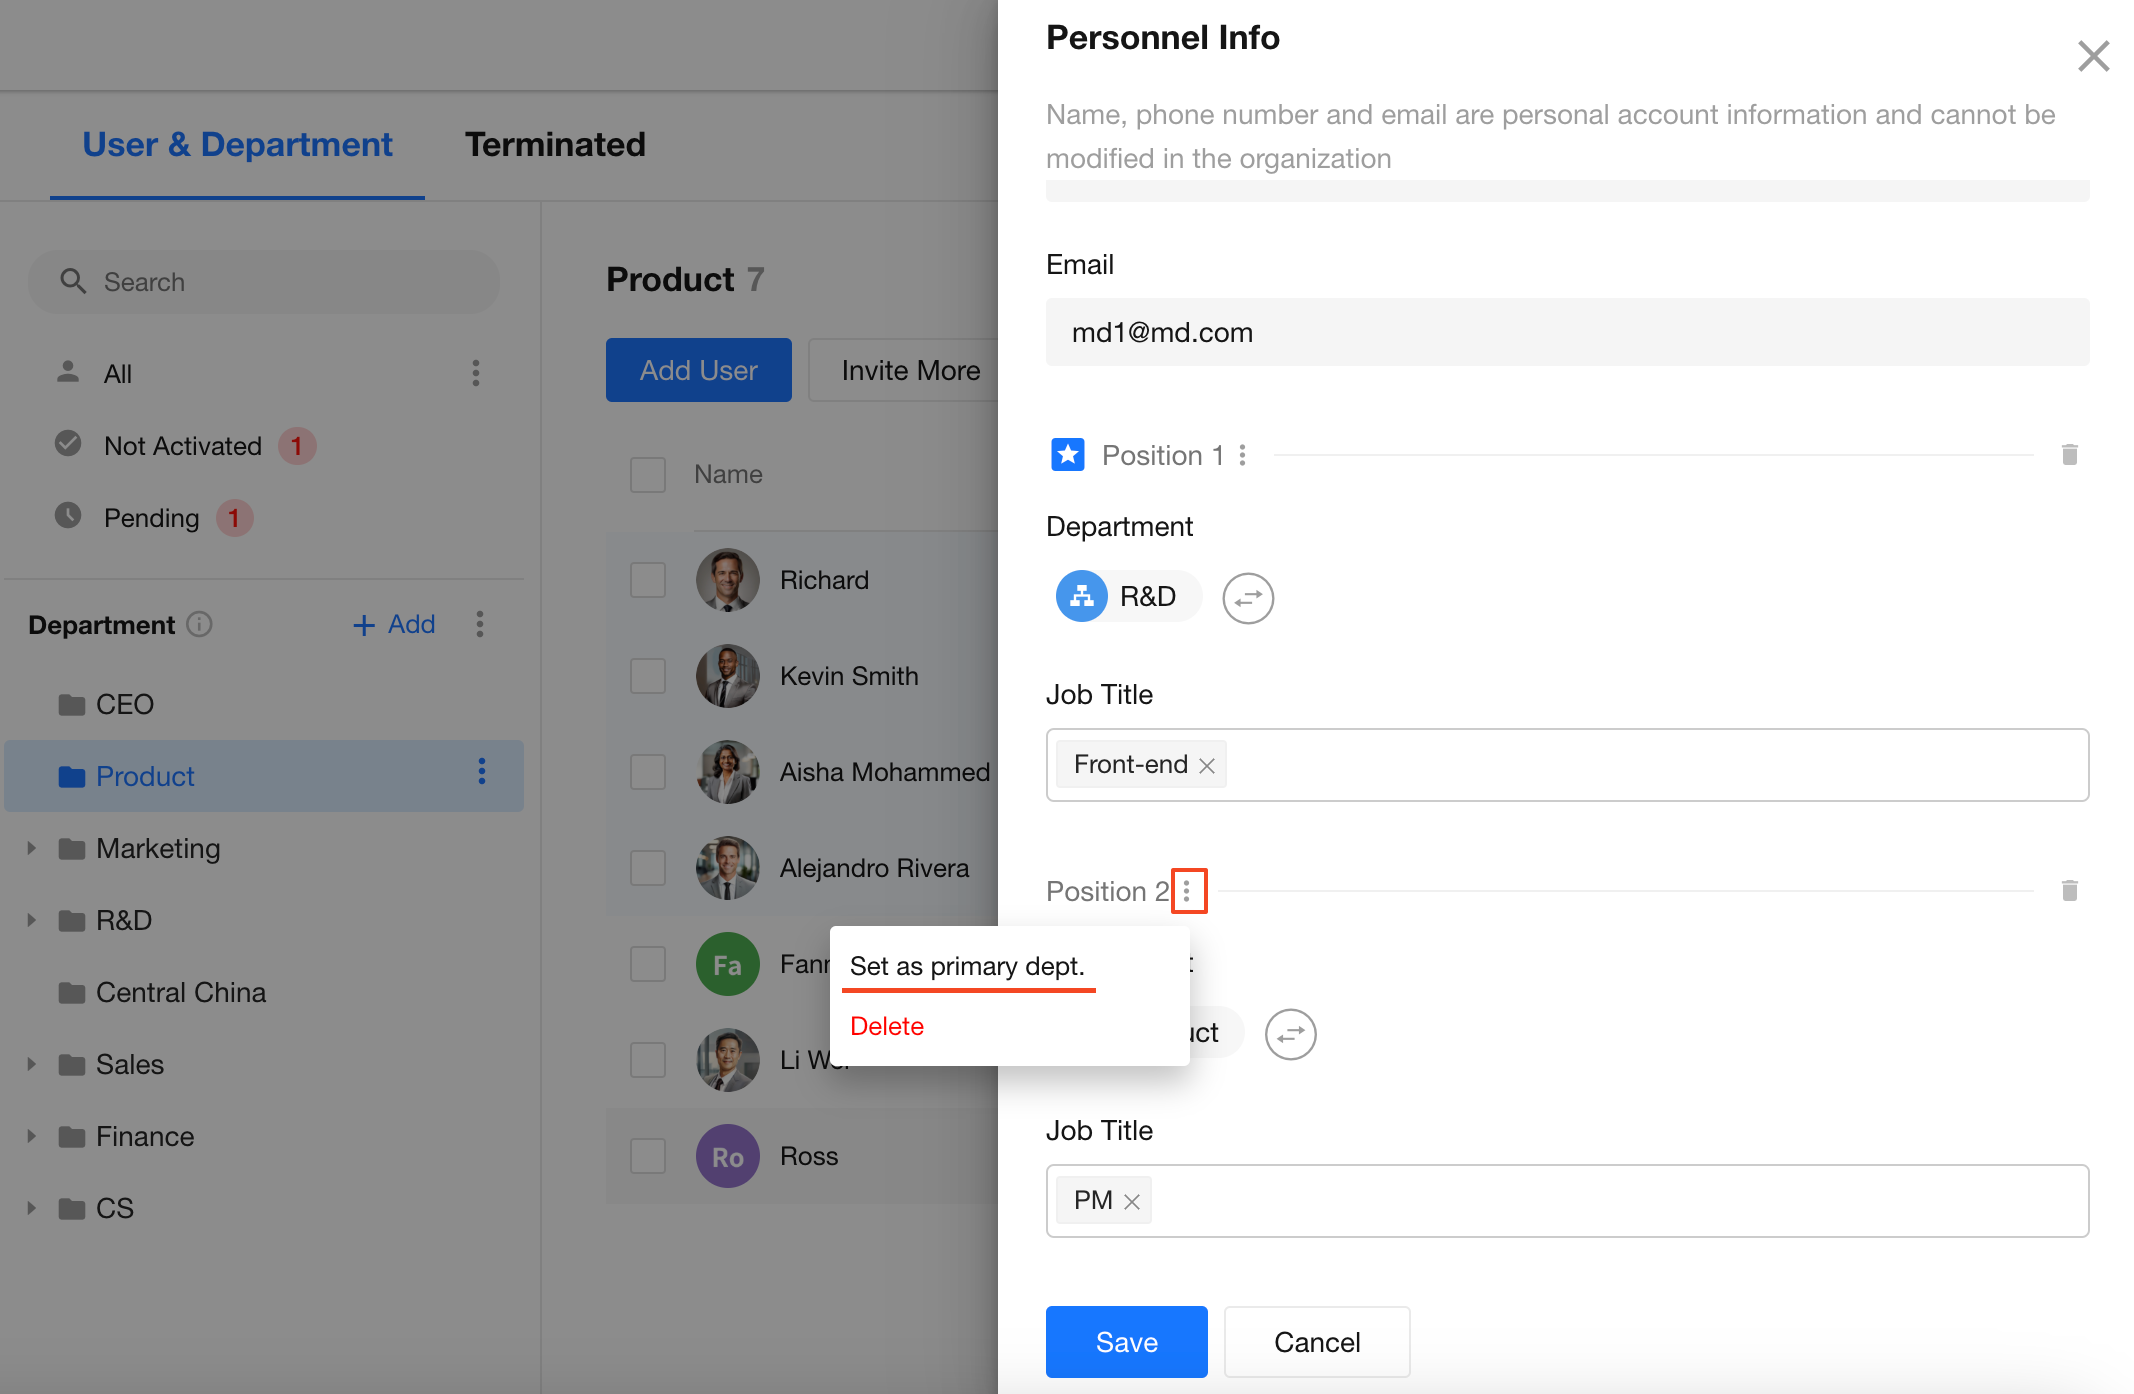
Primary department
A member may belong to multiple departments but must have one designated as "Primary Department".
The primary department appears first when displaying multiple departments.
It affects both profile card display and approval workflows:
-
Profile Card: Hovering over a member's avatar, on the profie card, it displays primary department only.
-
Approval: If you submit an expense report and the next approver in the workflow is set as department head, when you belong to multiple departments, this may require approval from each department head. Alternatively, it can be configured to only require approval from the primary department head.
To set a primary department:
Click the action button next to the department name and select "Set as Primary Department".

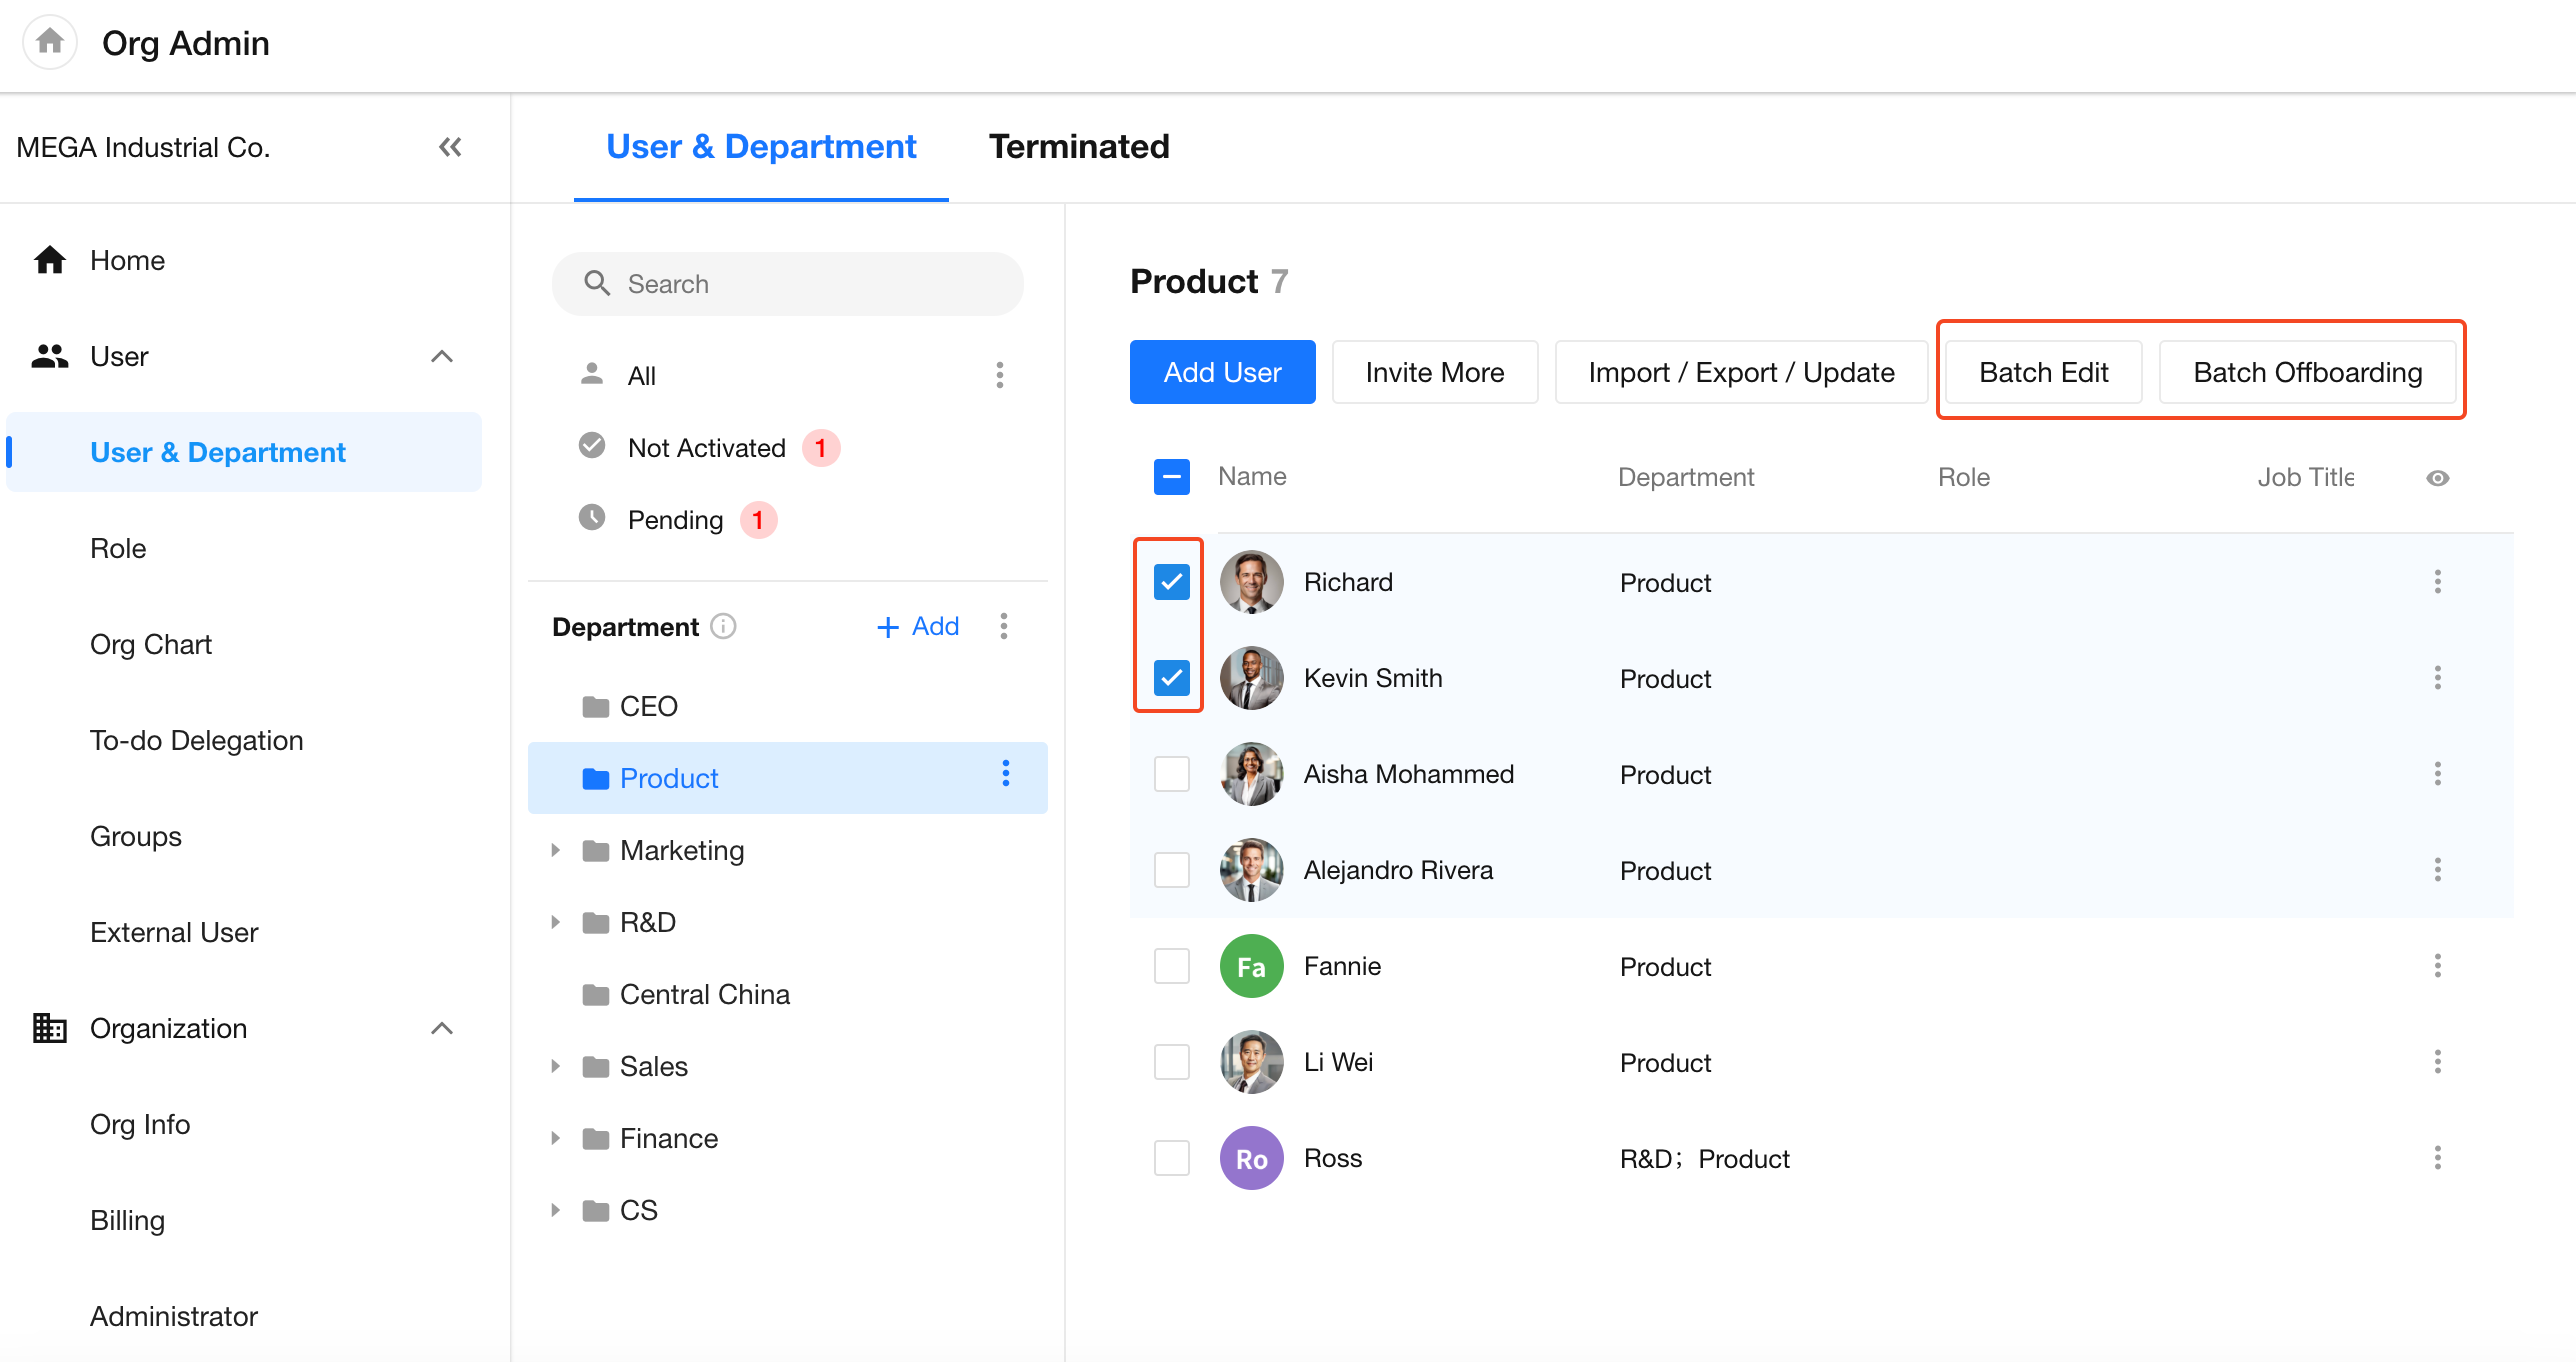
2. Batch edit
Organization administrators can select multiple or all members in the "User & Department" section to perform batch editing and batch resignation processing. Batch editing is limited to department, position, and work location fields.
3. Termination/Restore permissions
[View details about termination and restoring permissions]
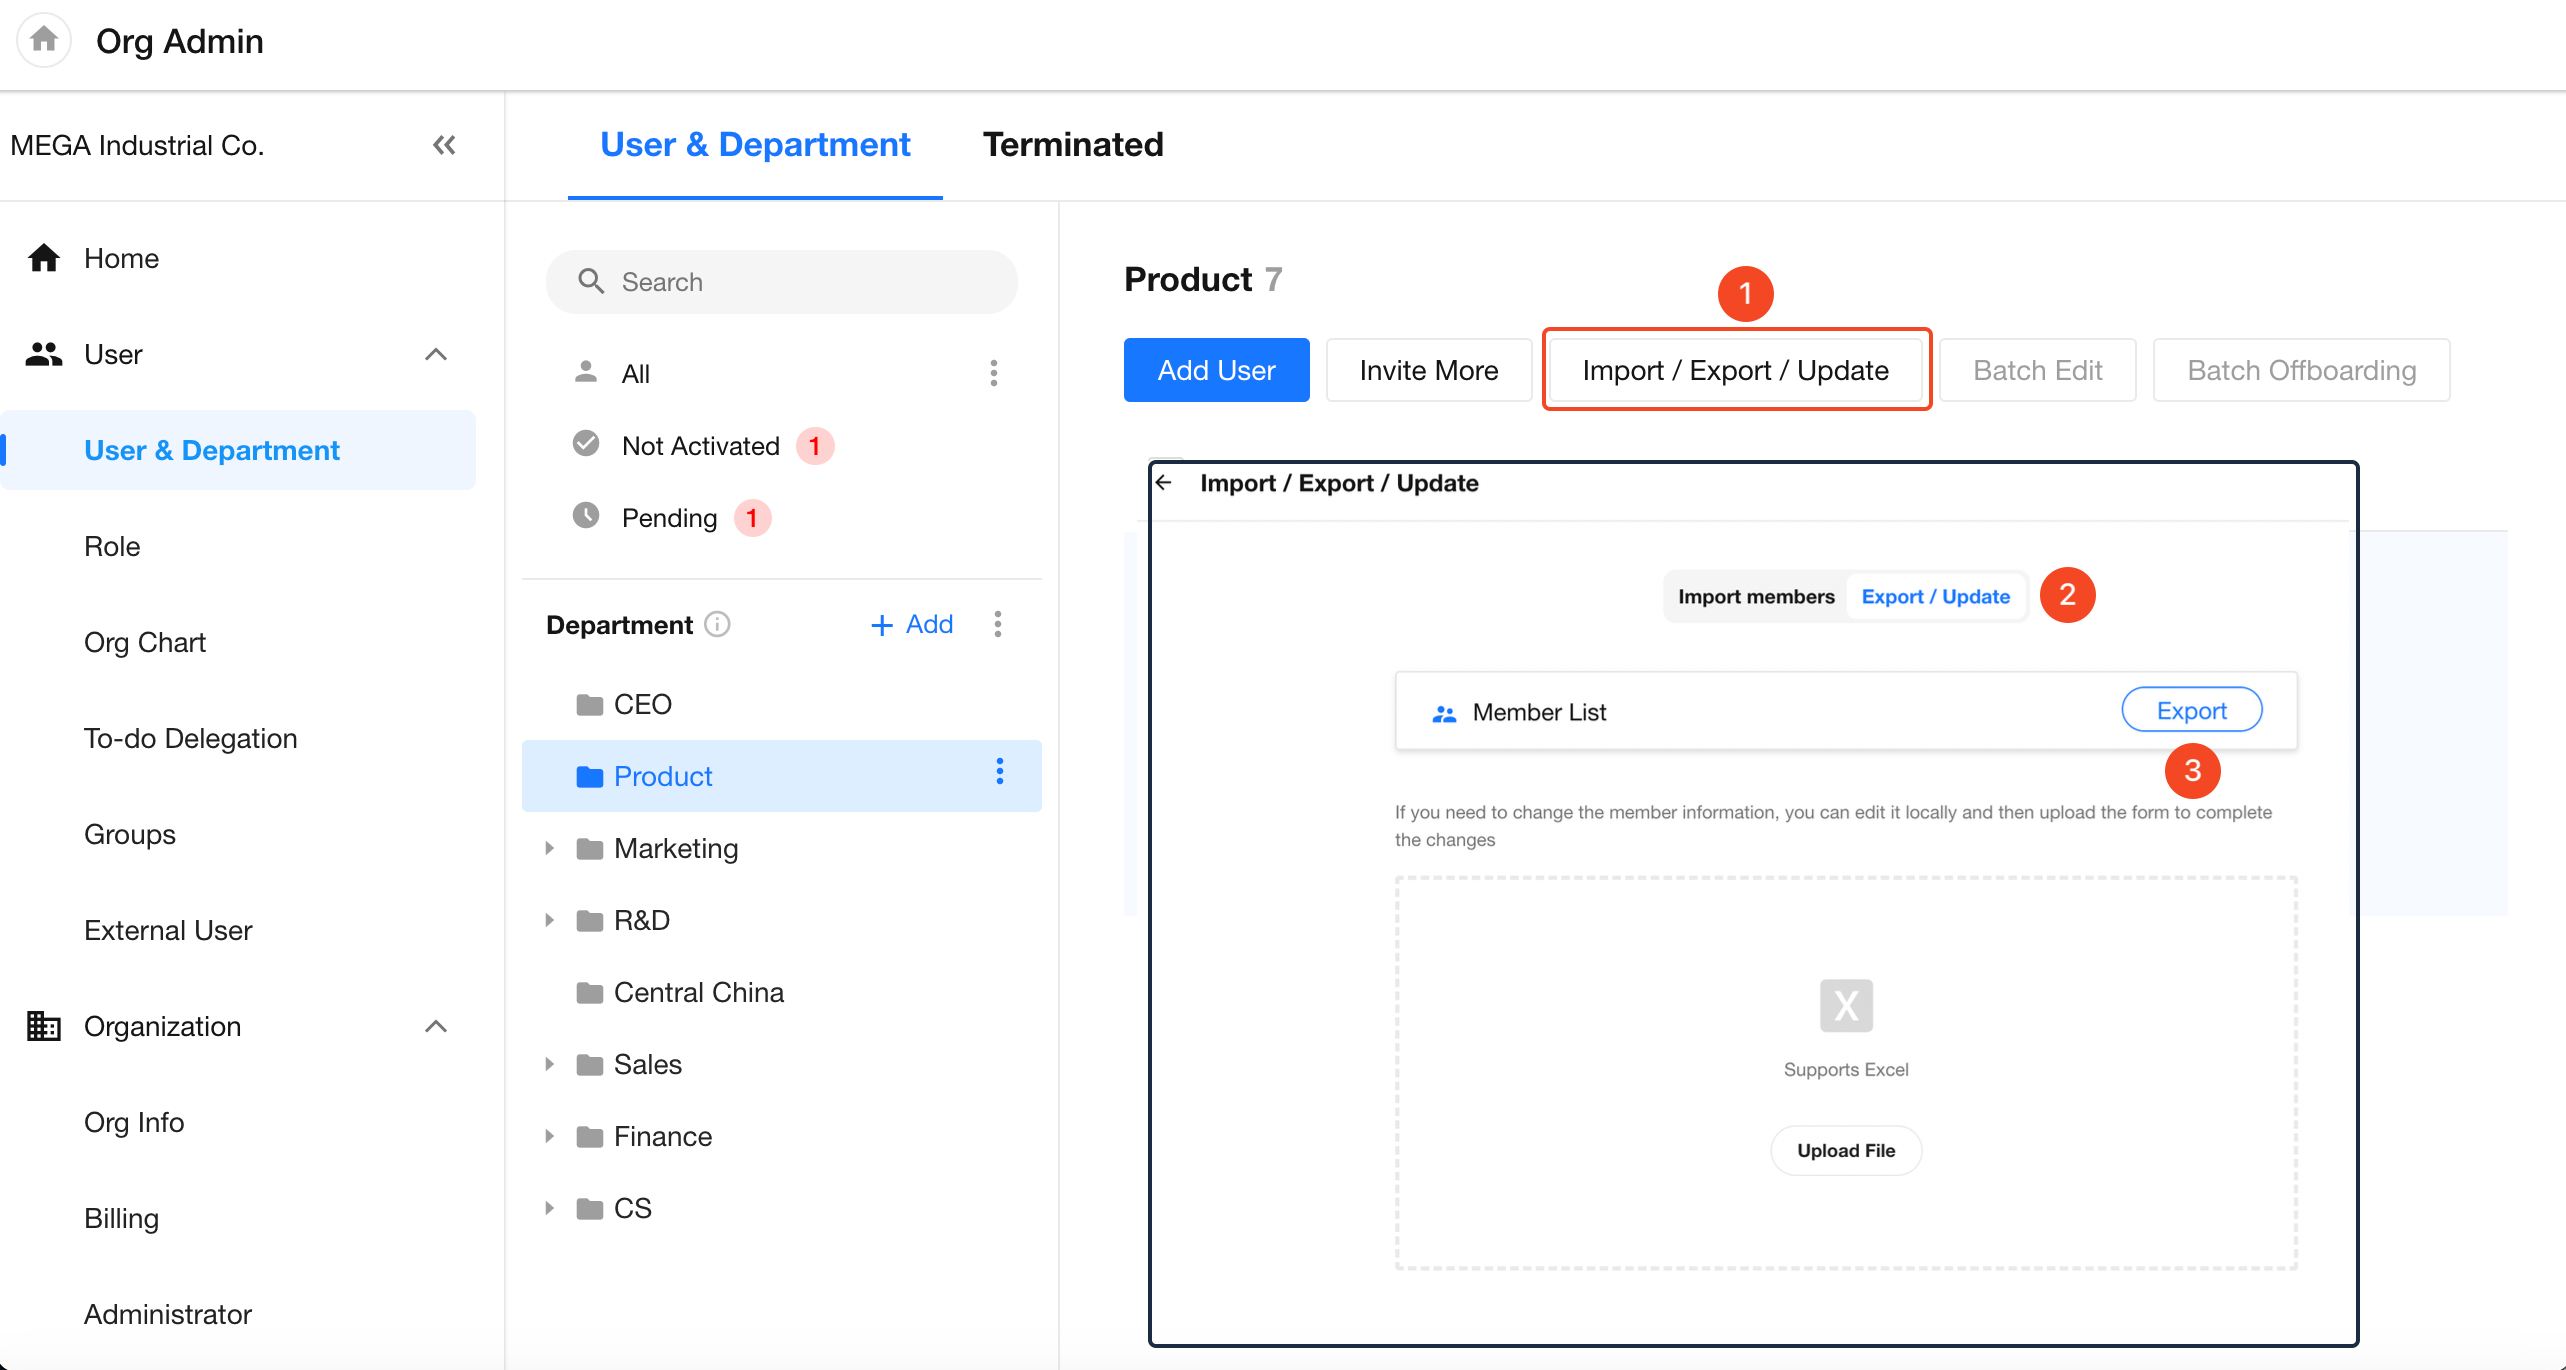
3. Export members
Supports exporting all members or members from specific departments.
Organization administrators can click [Import/Export/Update] > [Export/Update] in the "User & Department" section to select members for export.
Was this document helpful?