Task Overview
Task
1.1 Create Daily Tasks and Star High-Priority Items
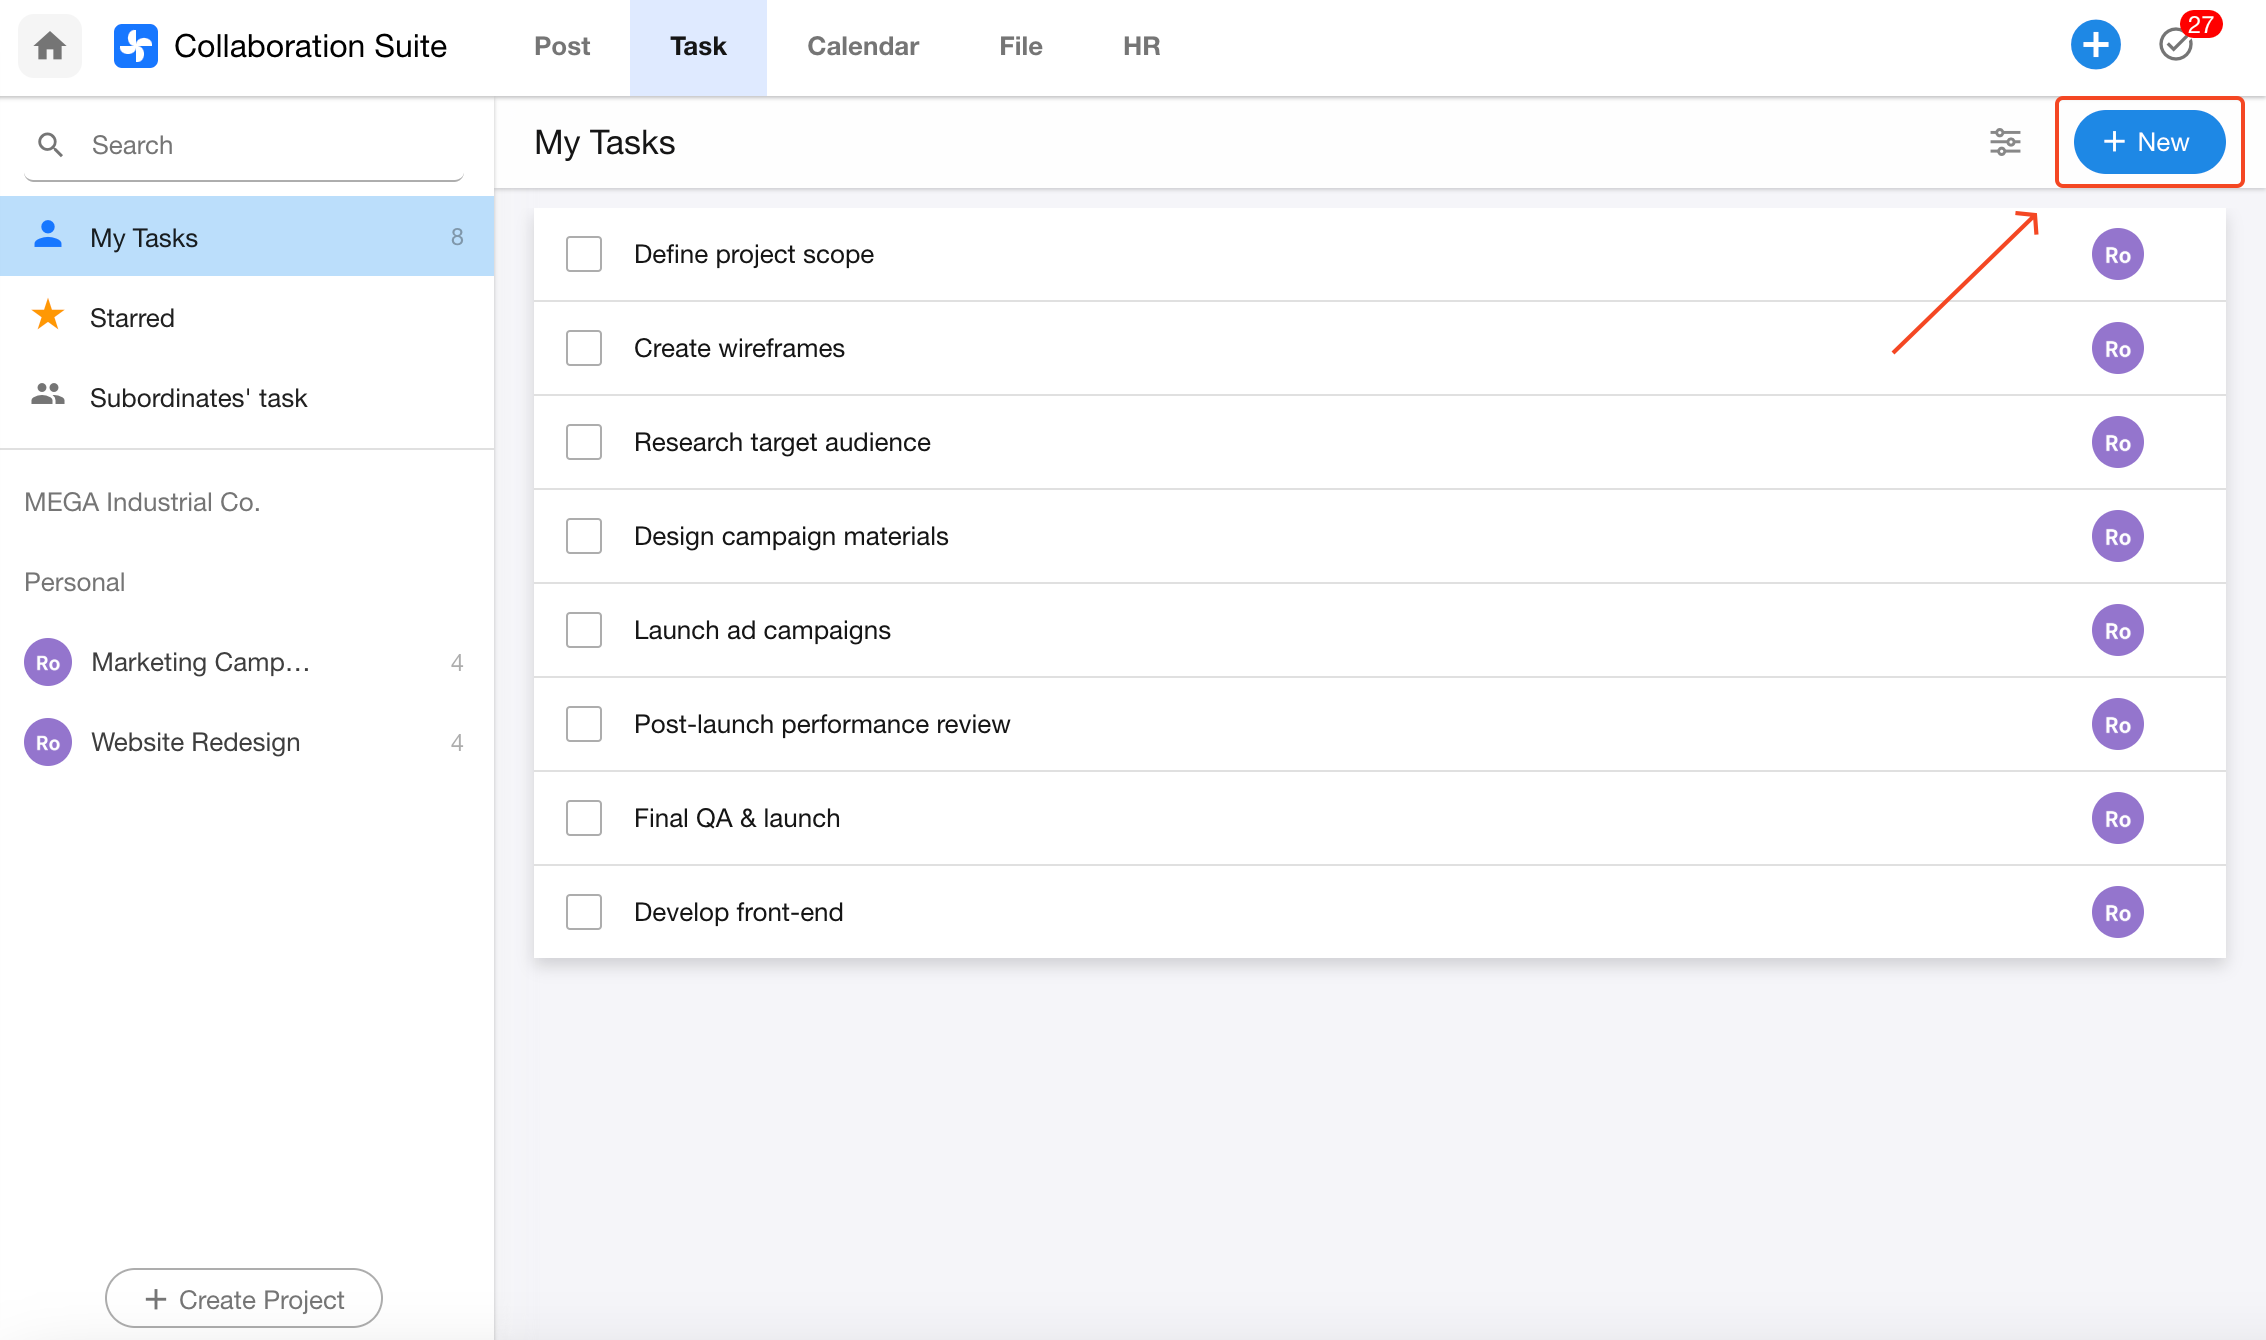
Create a Task
Click the New Task button to quickly create a task. Press Enter to confirm and instantly create the next one.
Add a Checklist
While viewing a task, click [More Actions] > [Add Checklist] in the top-right corner.
Star a Task
Starred tasks will appear at the top of your task list for easy access.
1.2 Create Subtasks
Create a Subtask
Open a task and click the Subtask button to add one.
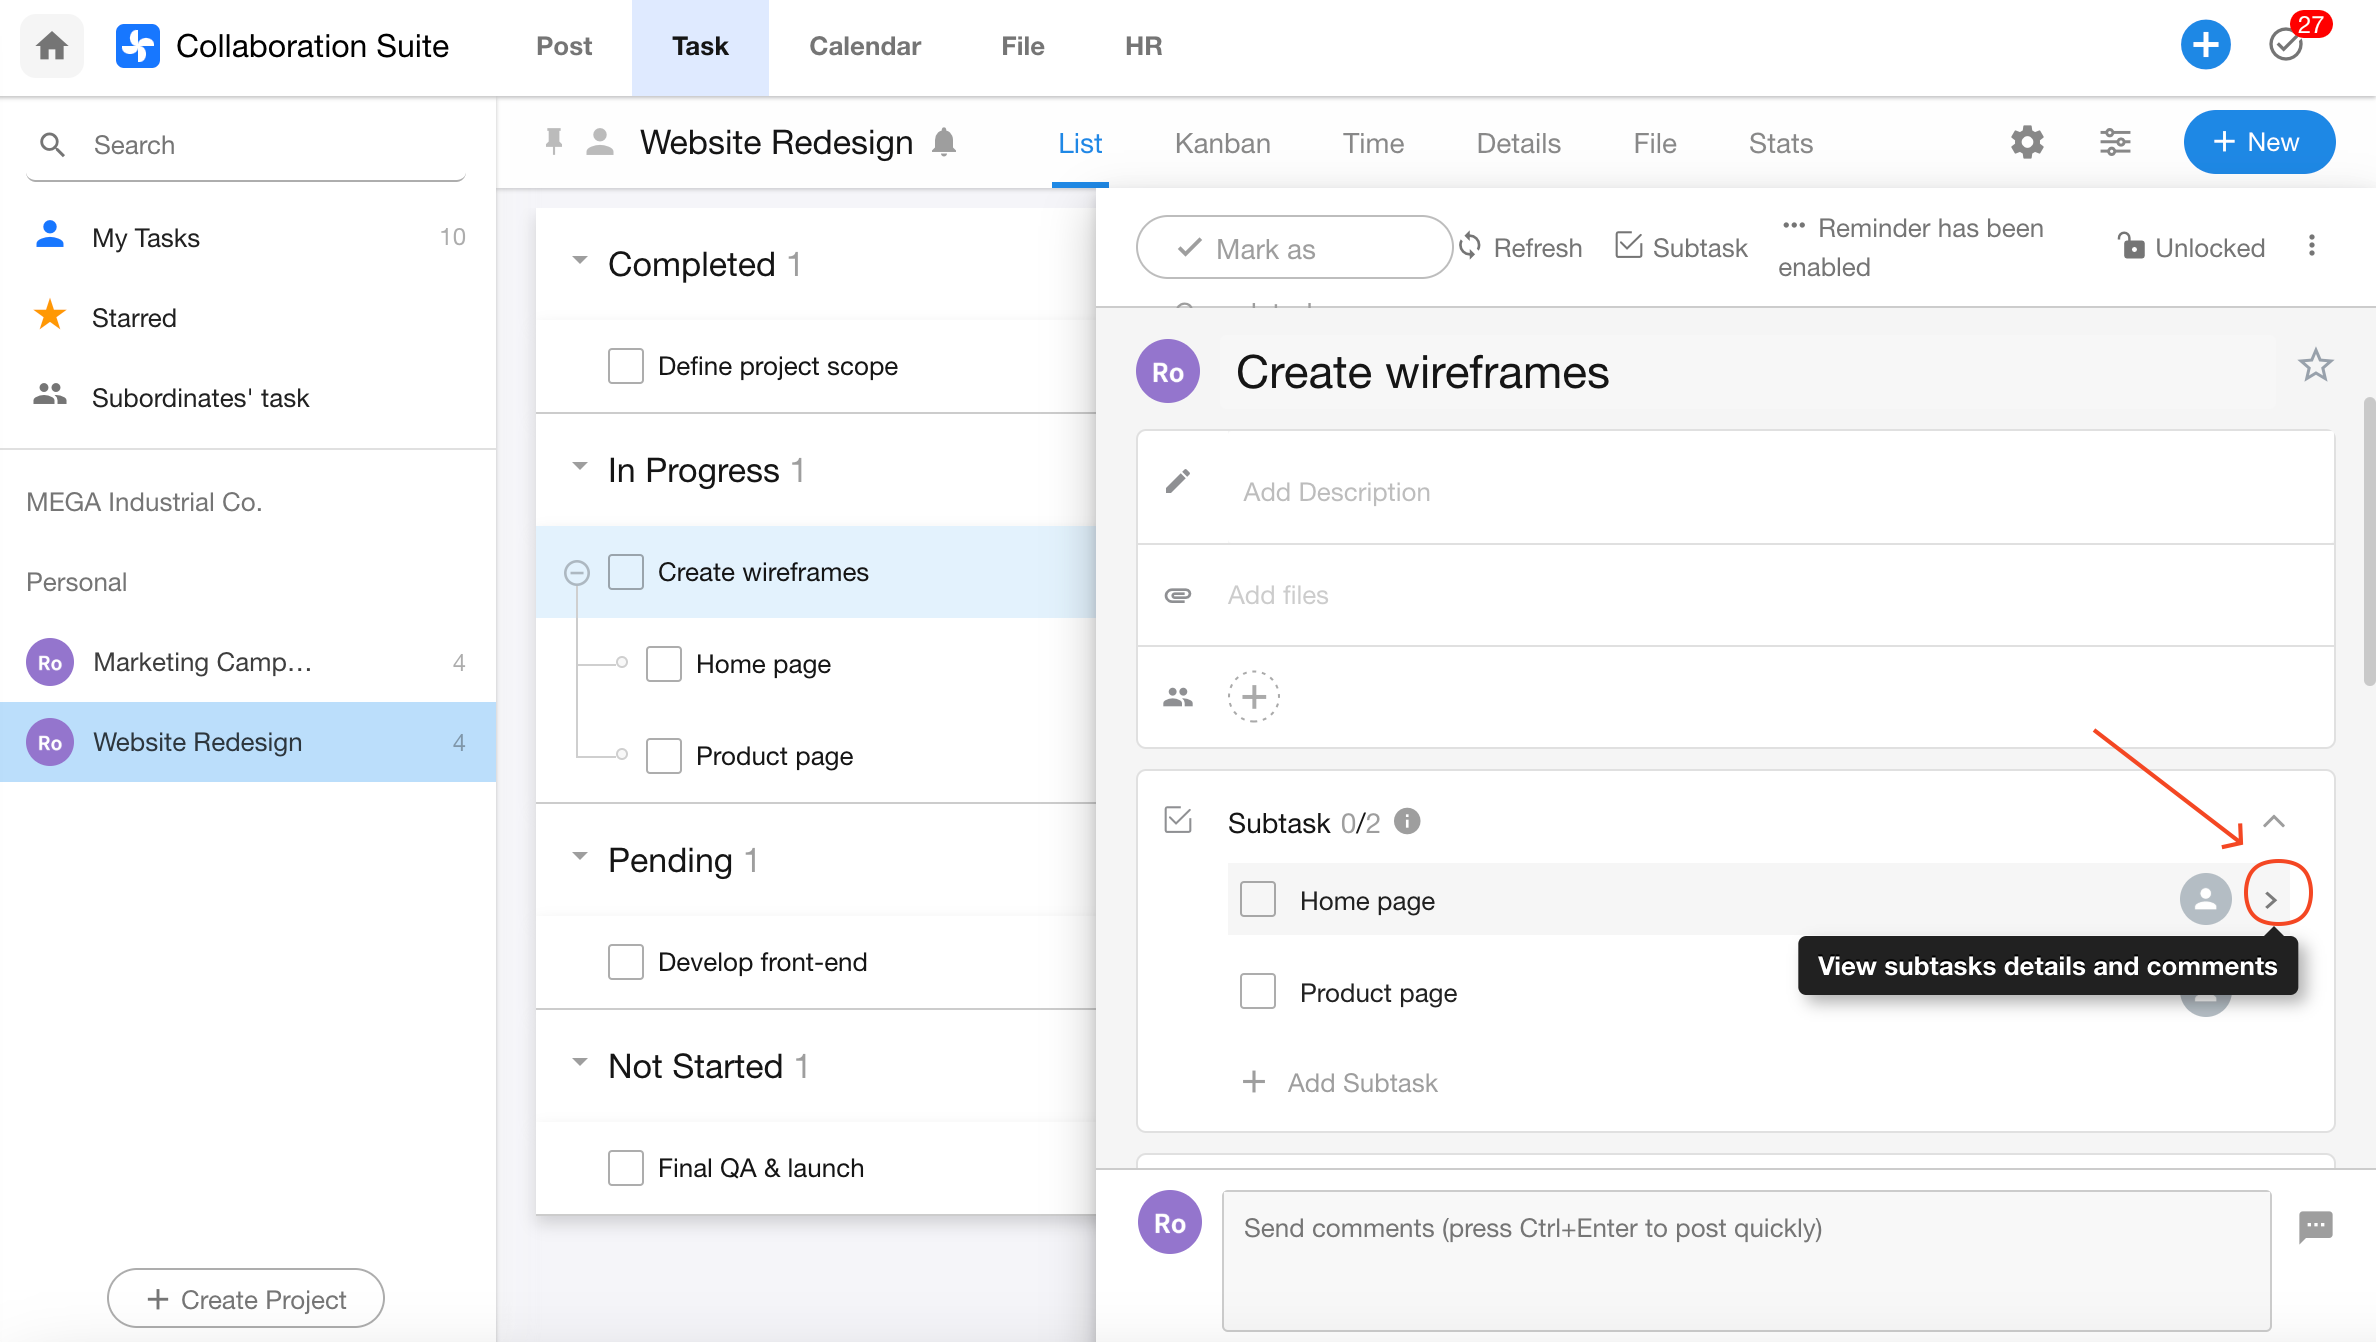
View Subtask Details
Click the > icon next to a subtask to open its detail page.
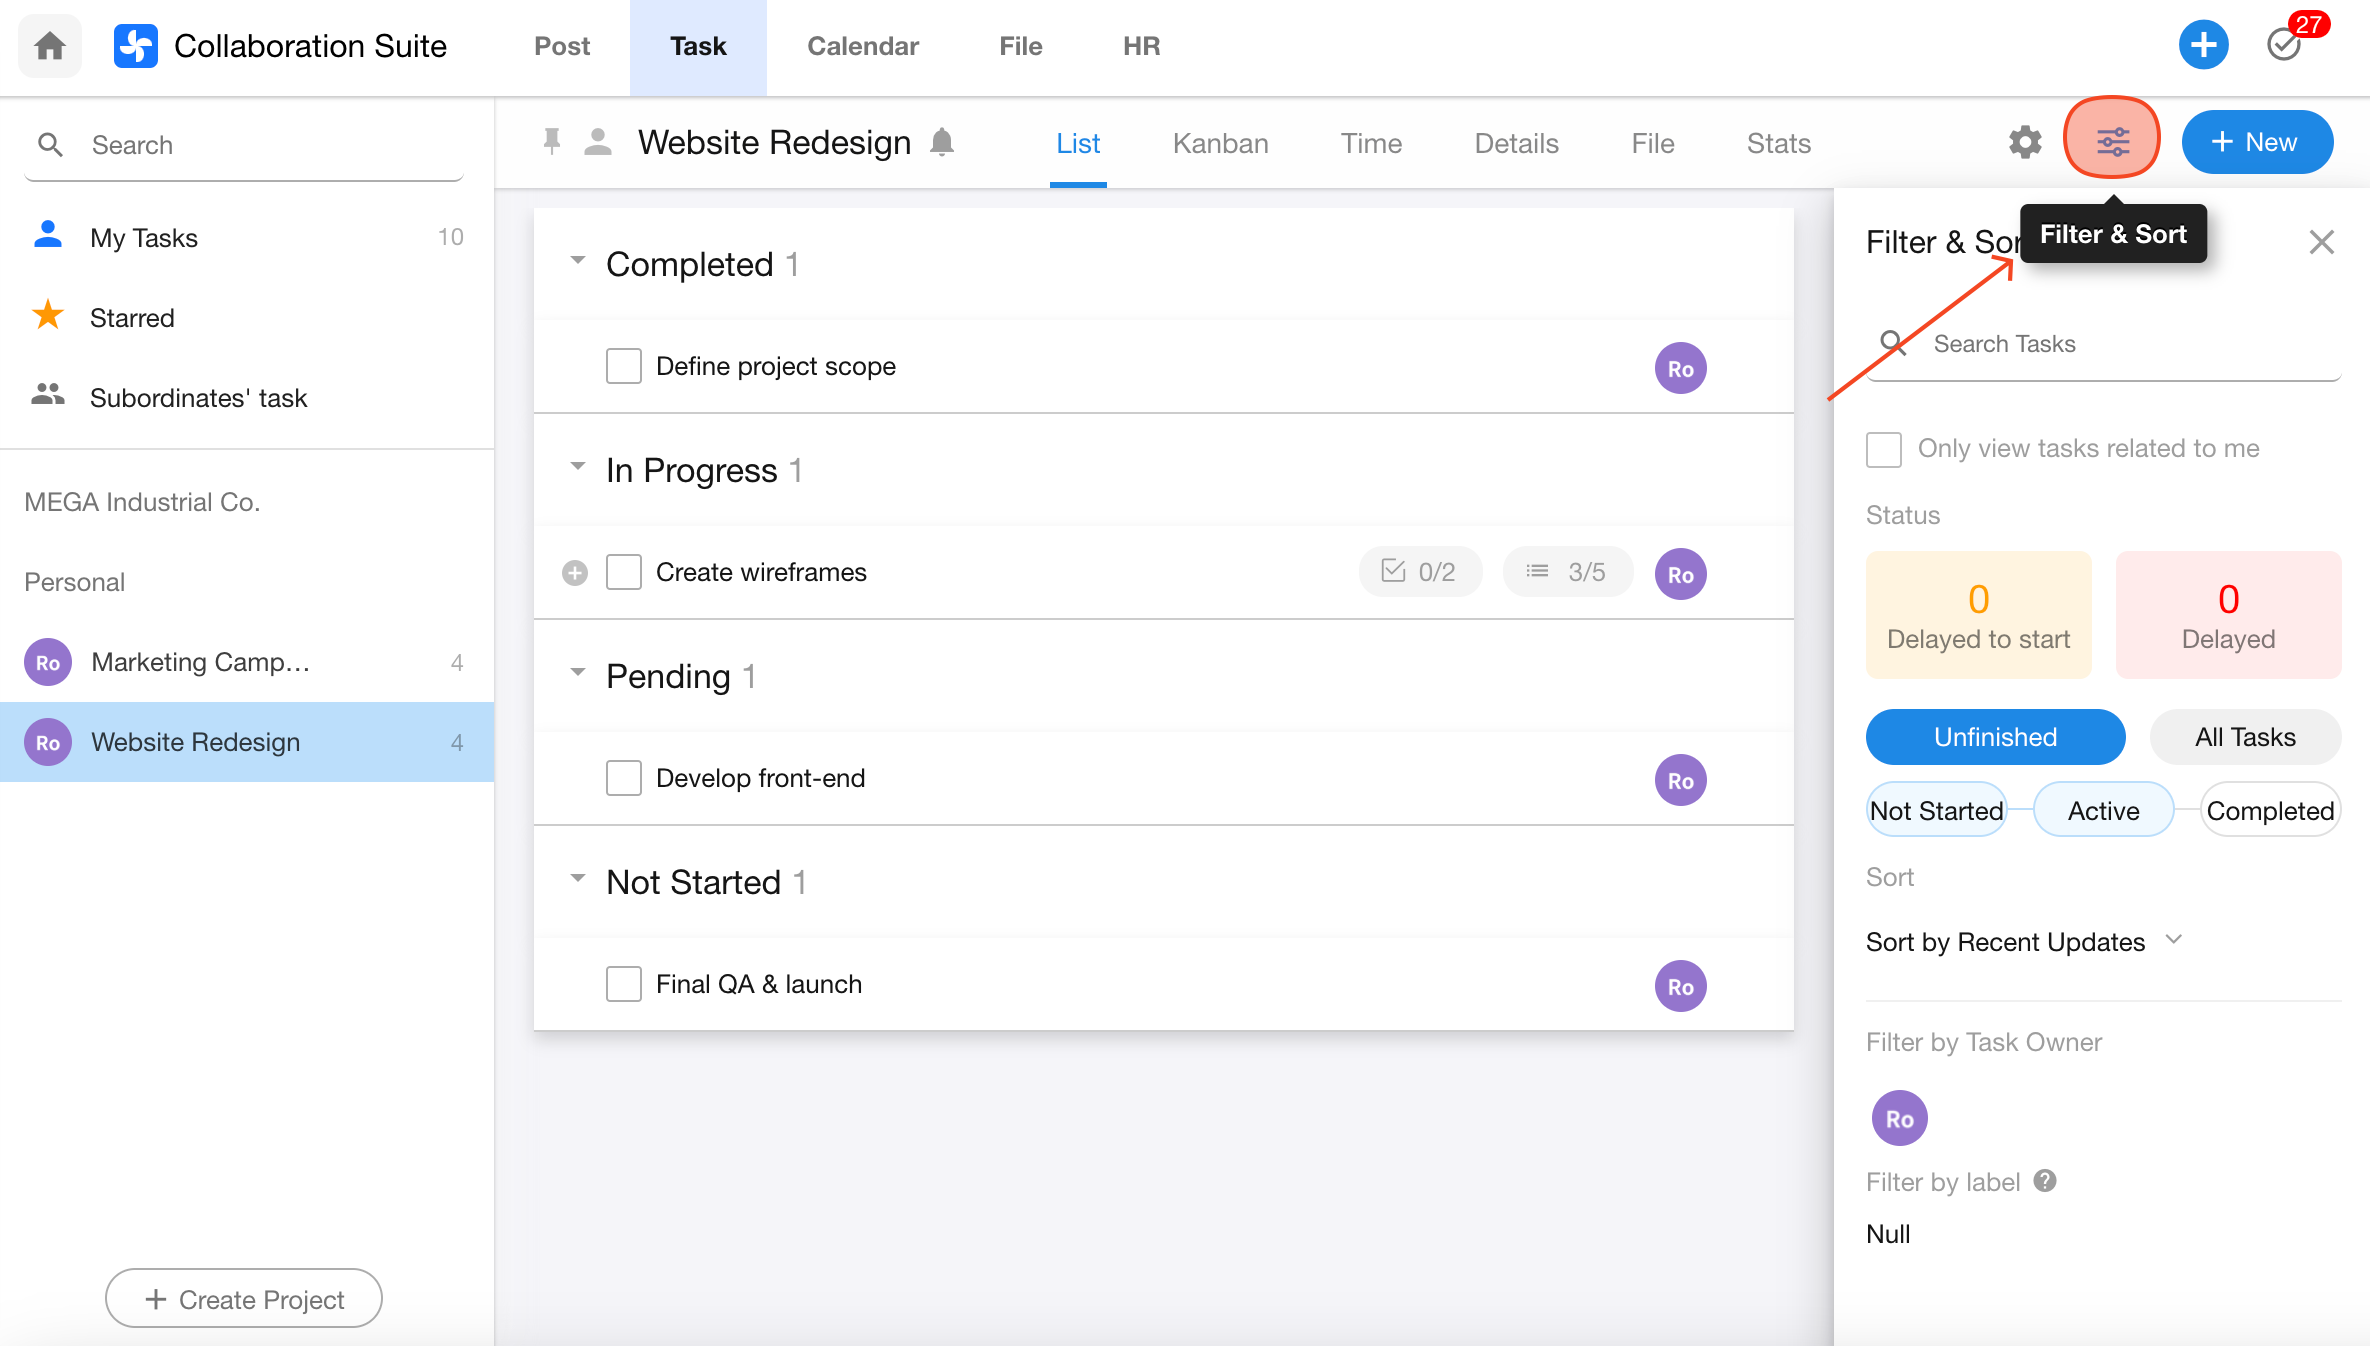
1.3 Filter Tasks
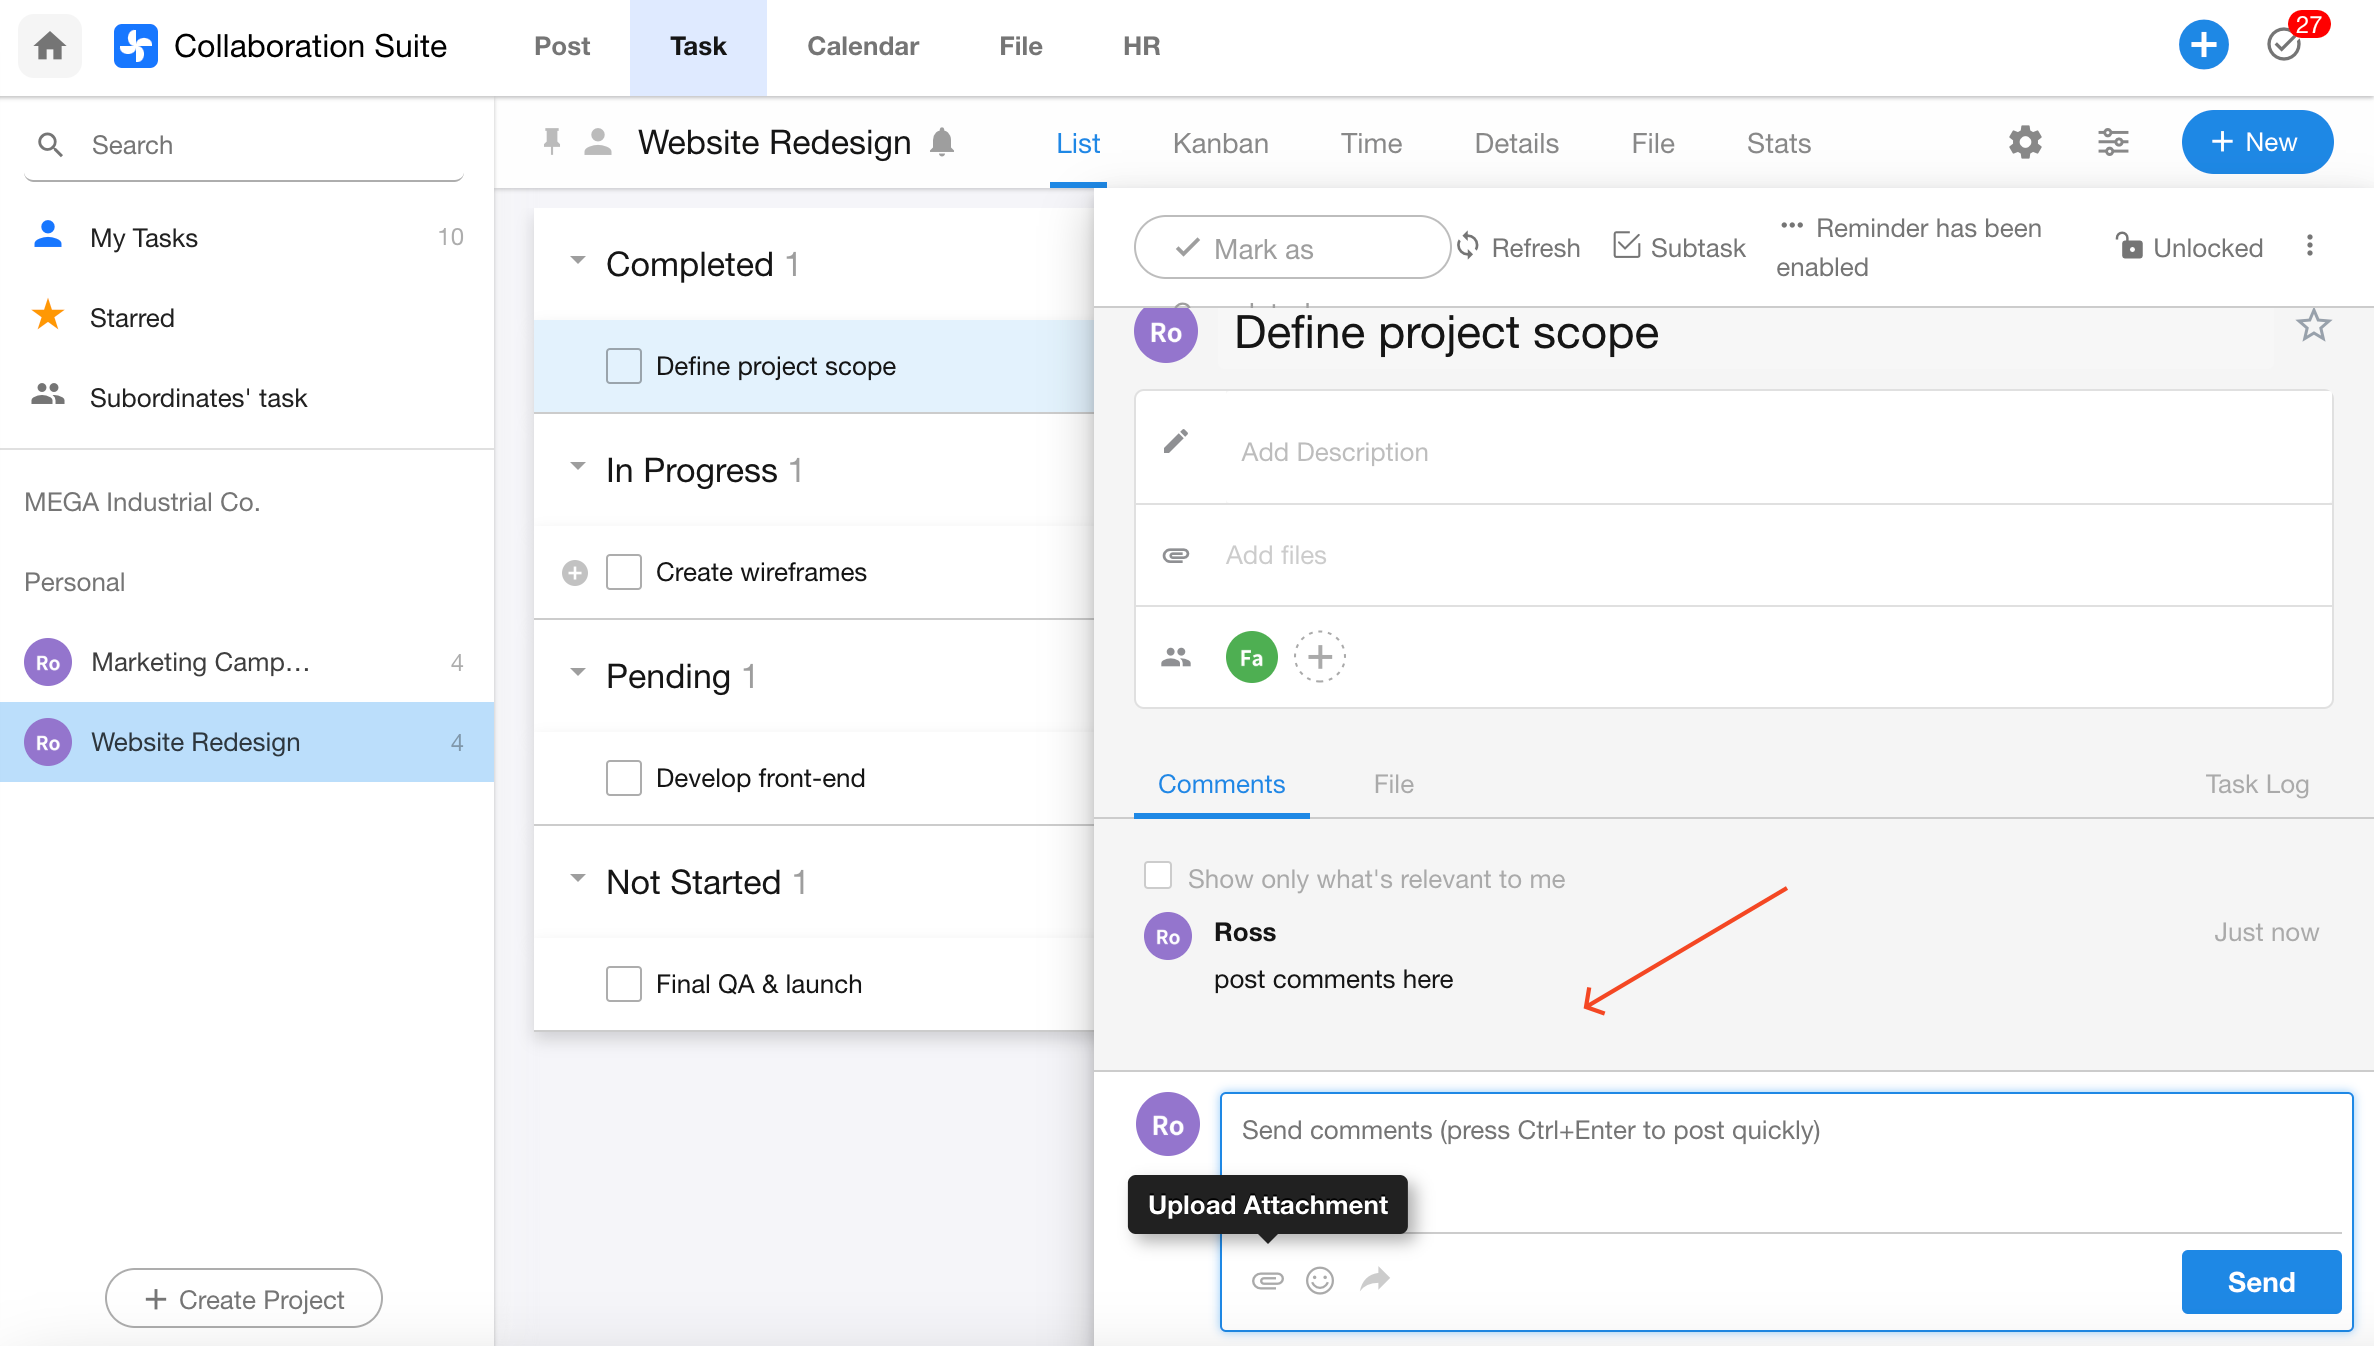
1.4 Comment on Tasks
Task participants can collaborate directly in the Comments section. Use @mention to notify specific team members.
You can upload files or images within comments. The built-in file preview supports a wide range of business document formats, making collaboration smoother.
Project
2.1 Create a Project to Manage Team Tasks
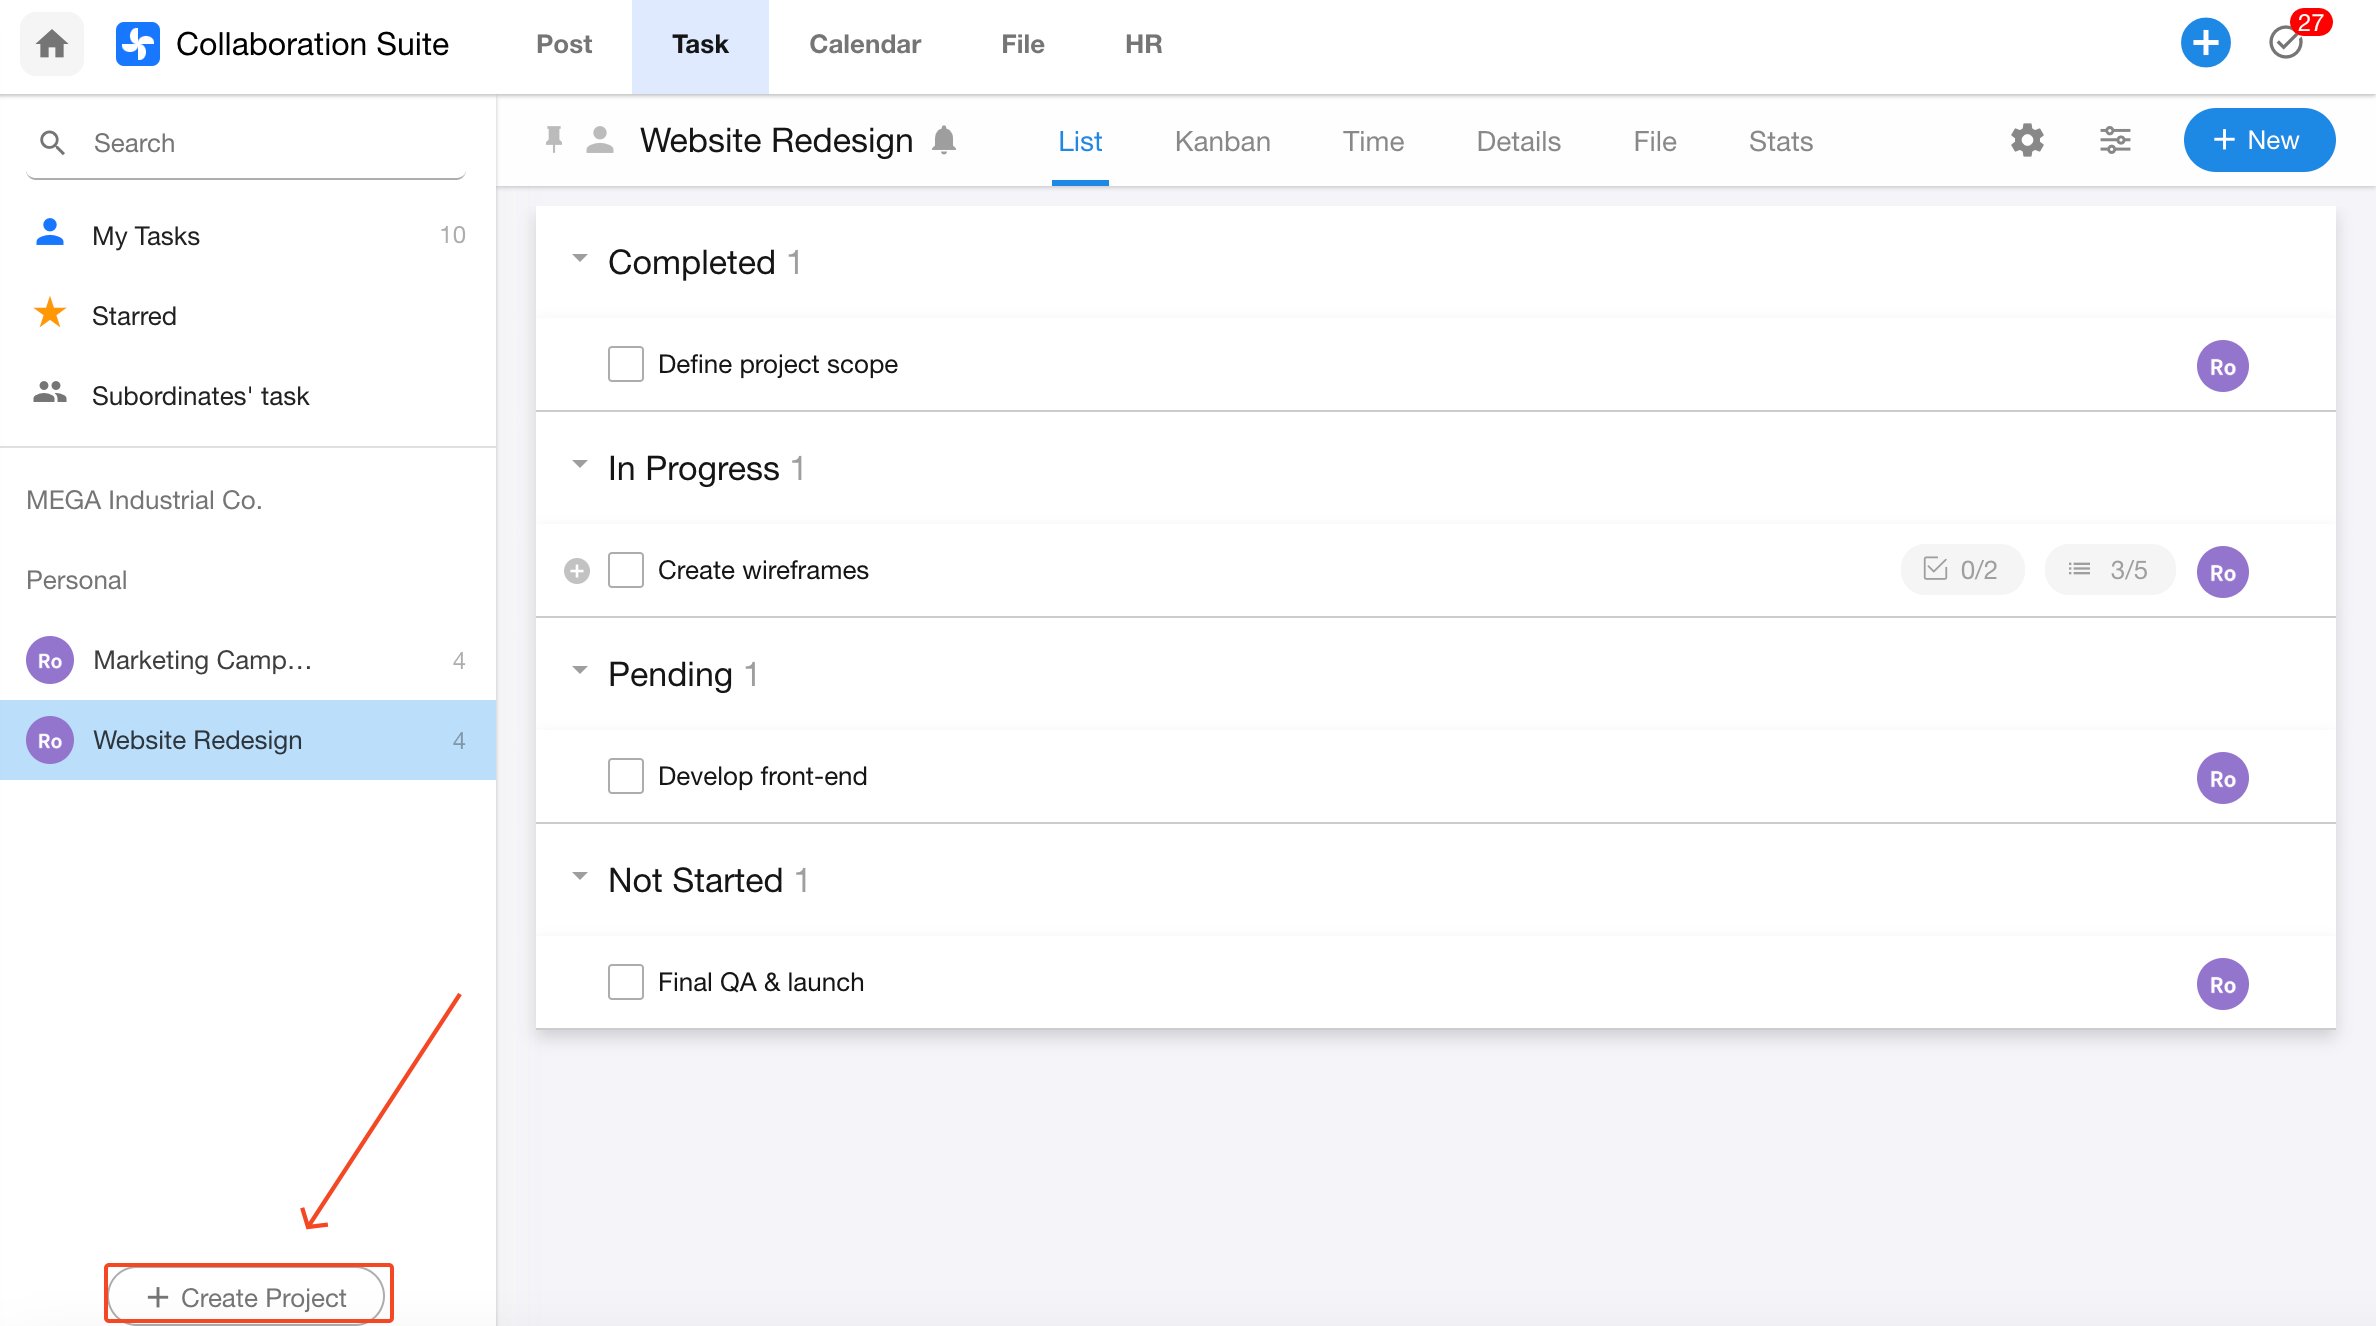
Create a Project
Click the Create Project button at the bottom of the left sidebar to create a new project. You can choose a blank template or a predefined template. Projects can be either Private or Public. Public projects must specify a sharing scope.
2.2 Add Project Members
Click the project name to go to the project details page, where you can assign permissions to project members.
There are three roles available: Project Owner, Project Admin, and Project Member, each with different permission levels.
- Project Owner: Full permissions over the project and all associated tasks.
- Project Admin: Can manage the project alongside the owner, but cannot delete or archive the project.
- Project Member: Can view, comment on, and create sub-tasks.
Projects can also be shared with specific groups.
Learn more about project roles and permissions

2.3 Public / Private Projects
If you want to share the project with people outside the member list, set the project to Public.
To share with specific groups only, set the project as Public and then select the desired groups.
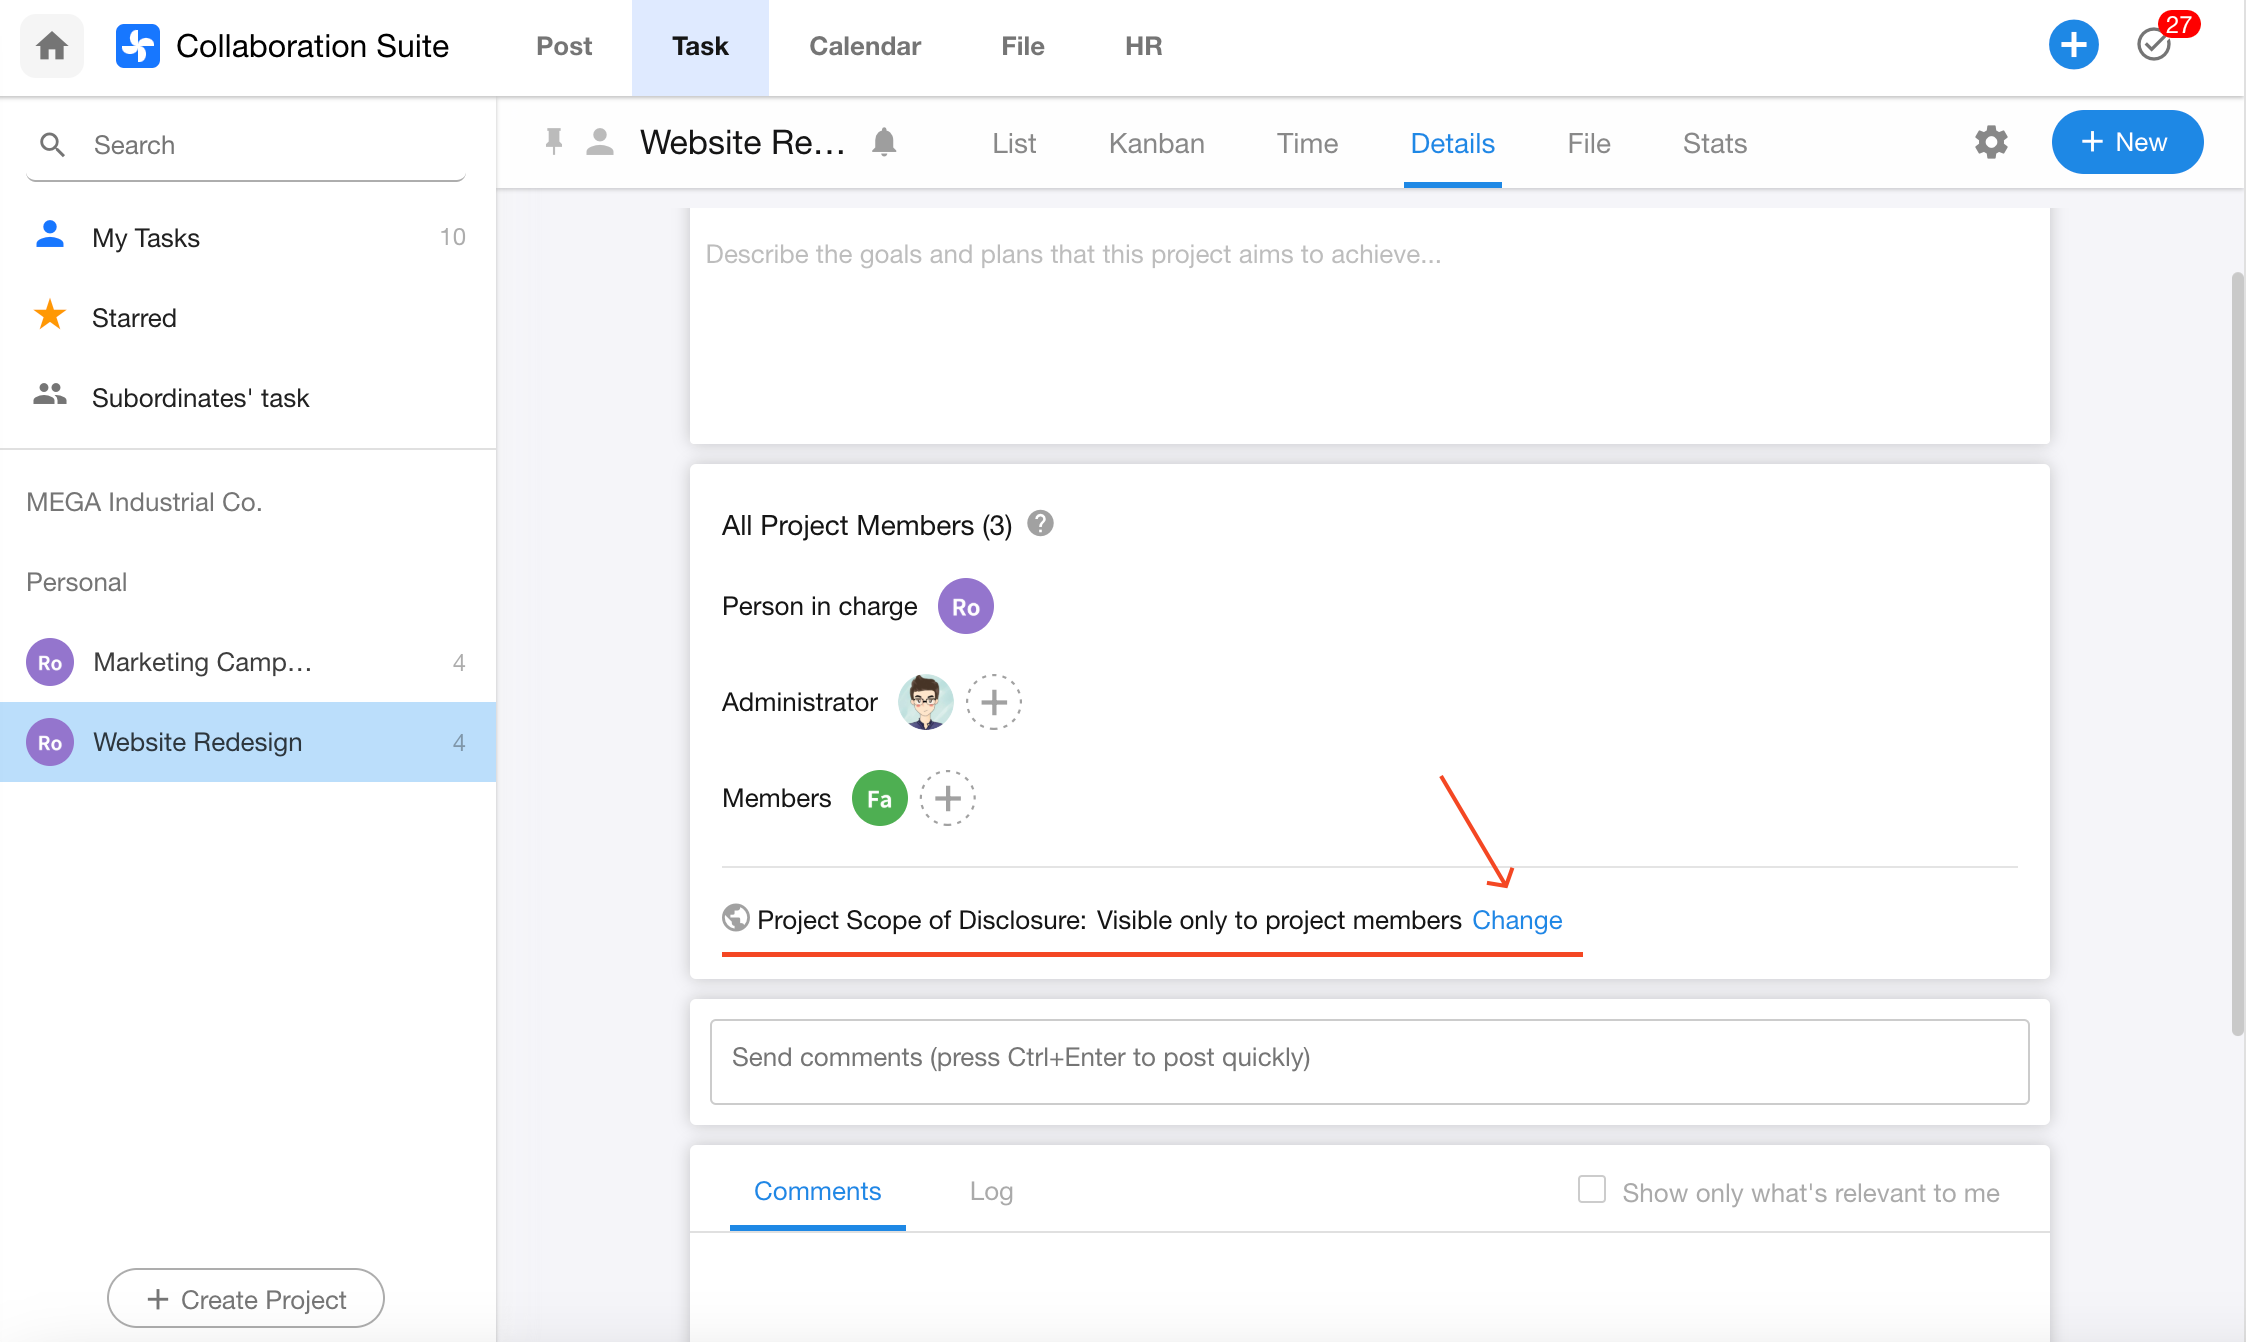
2.4 Set a Project Description
Add a description to explain the project’s goals and plans. You can also collaborate with project members and view the operation log directly within the project page.
2.5 Plan Projects in Kanban View
Switch to Kanban View
Use the top tab to switch to the Kanban view.
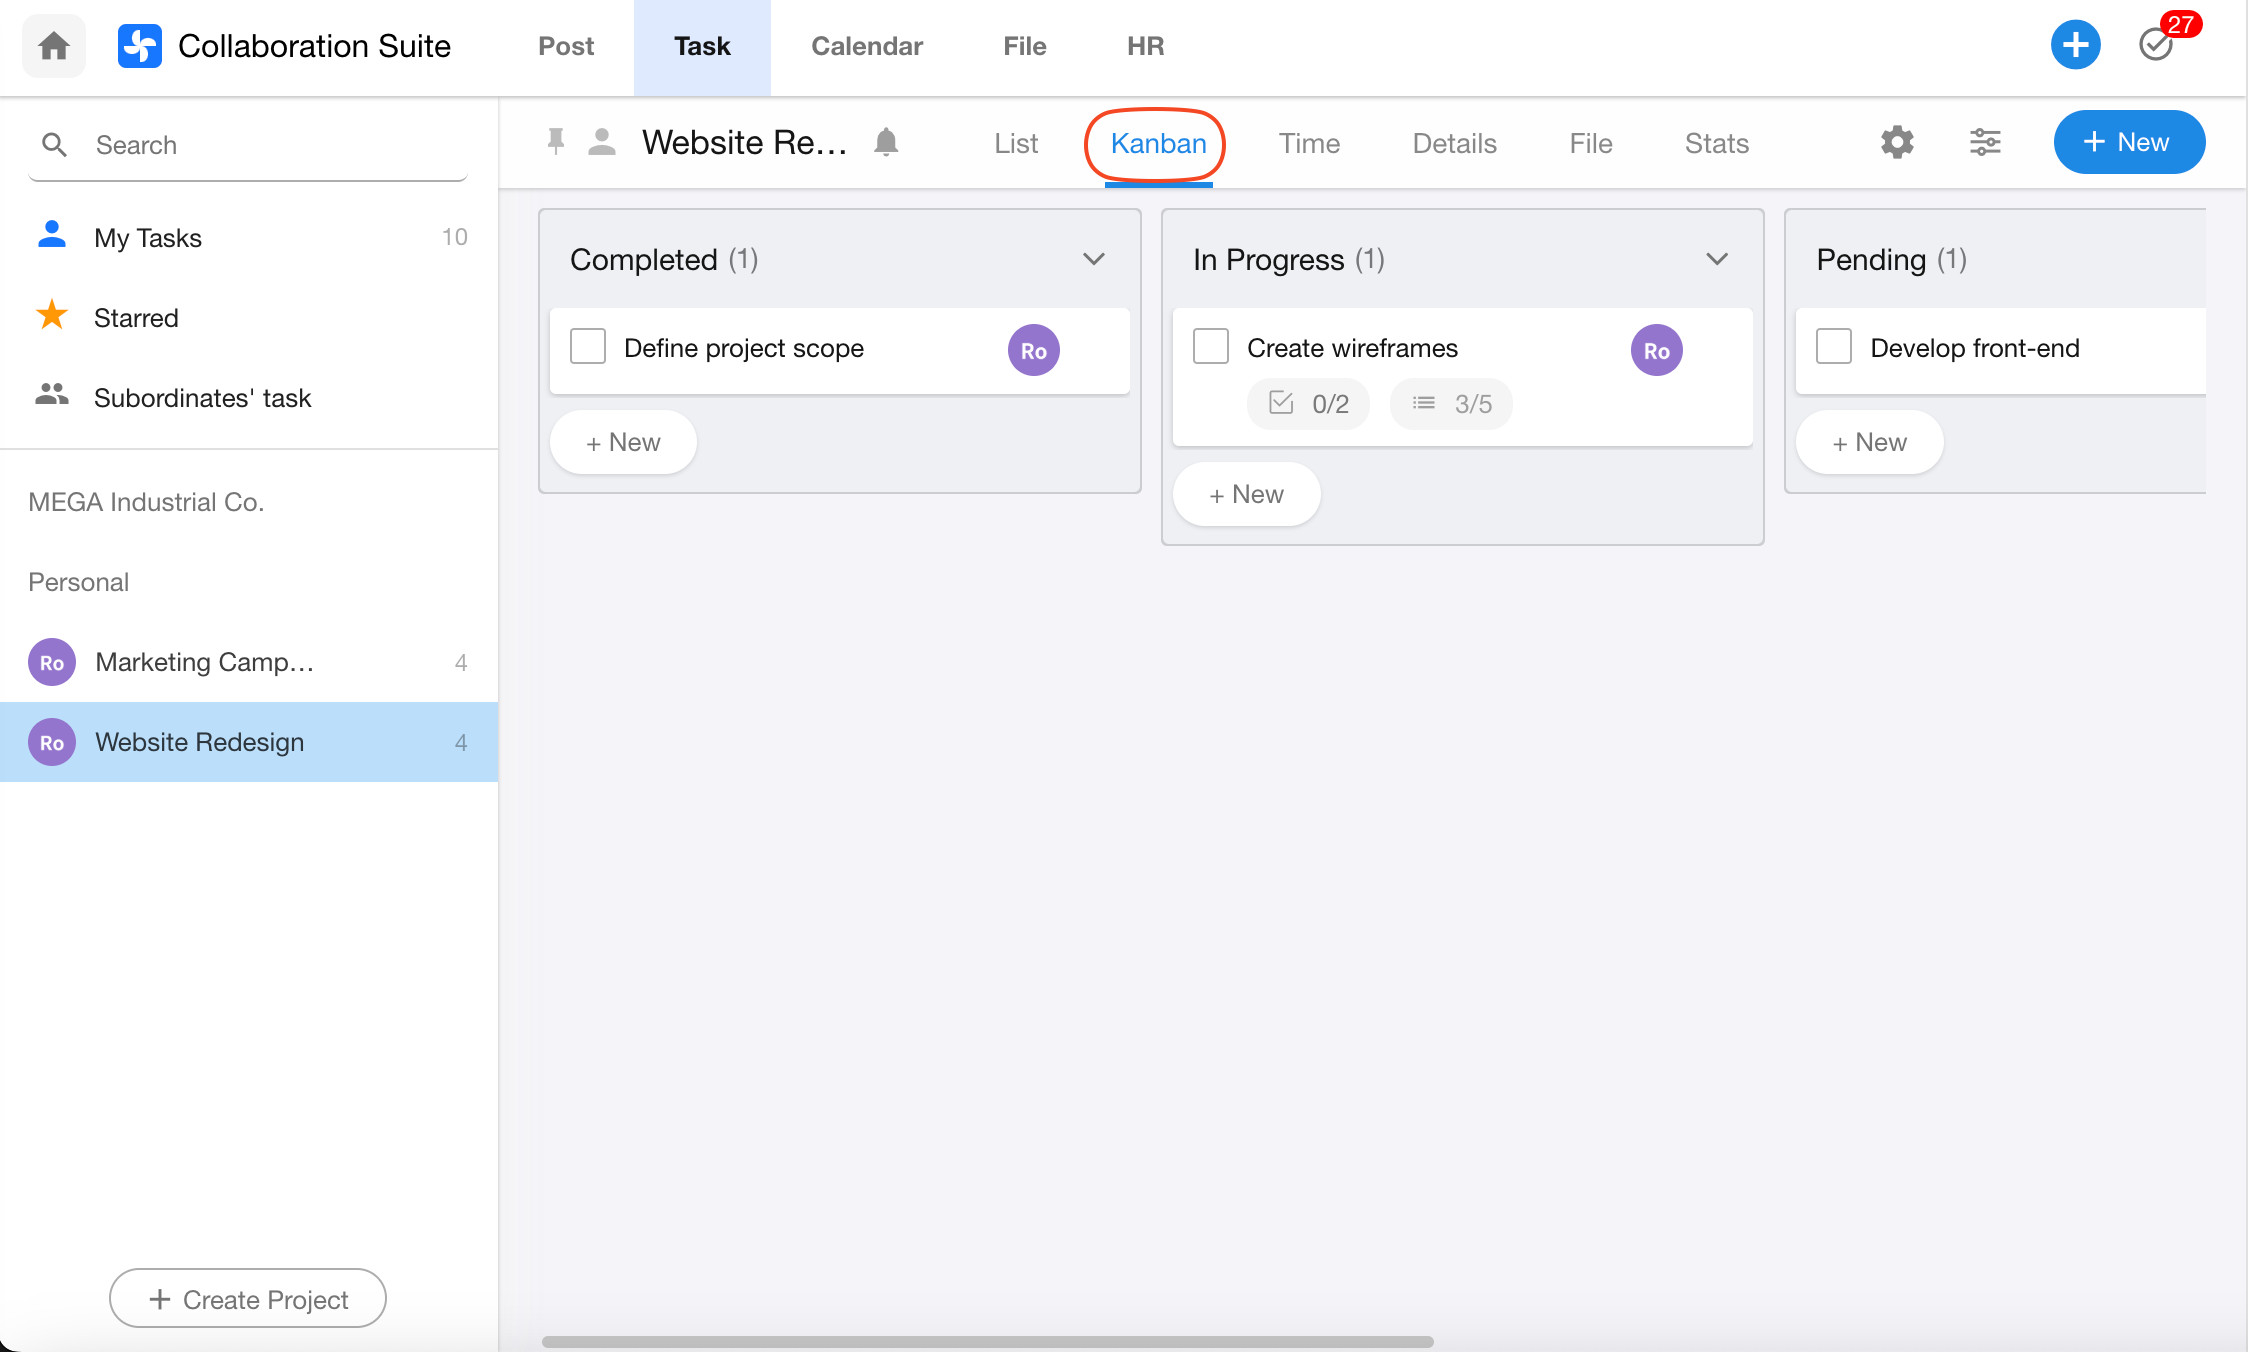
Create Kanban Boards
Click Create Dashboard to add a new stage board, or use the dropdown menu in an existing board to add a new one.
Click the board name to rename it, or use the dropdown to modify the board name.
Reorder Boards and Tasks
Drag the board to rearrange stages, or drag tasks between stages.
Set Default Task Owner for Each Board
You can assign a default owner for tasks under a specific stage.
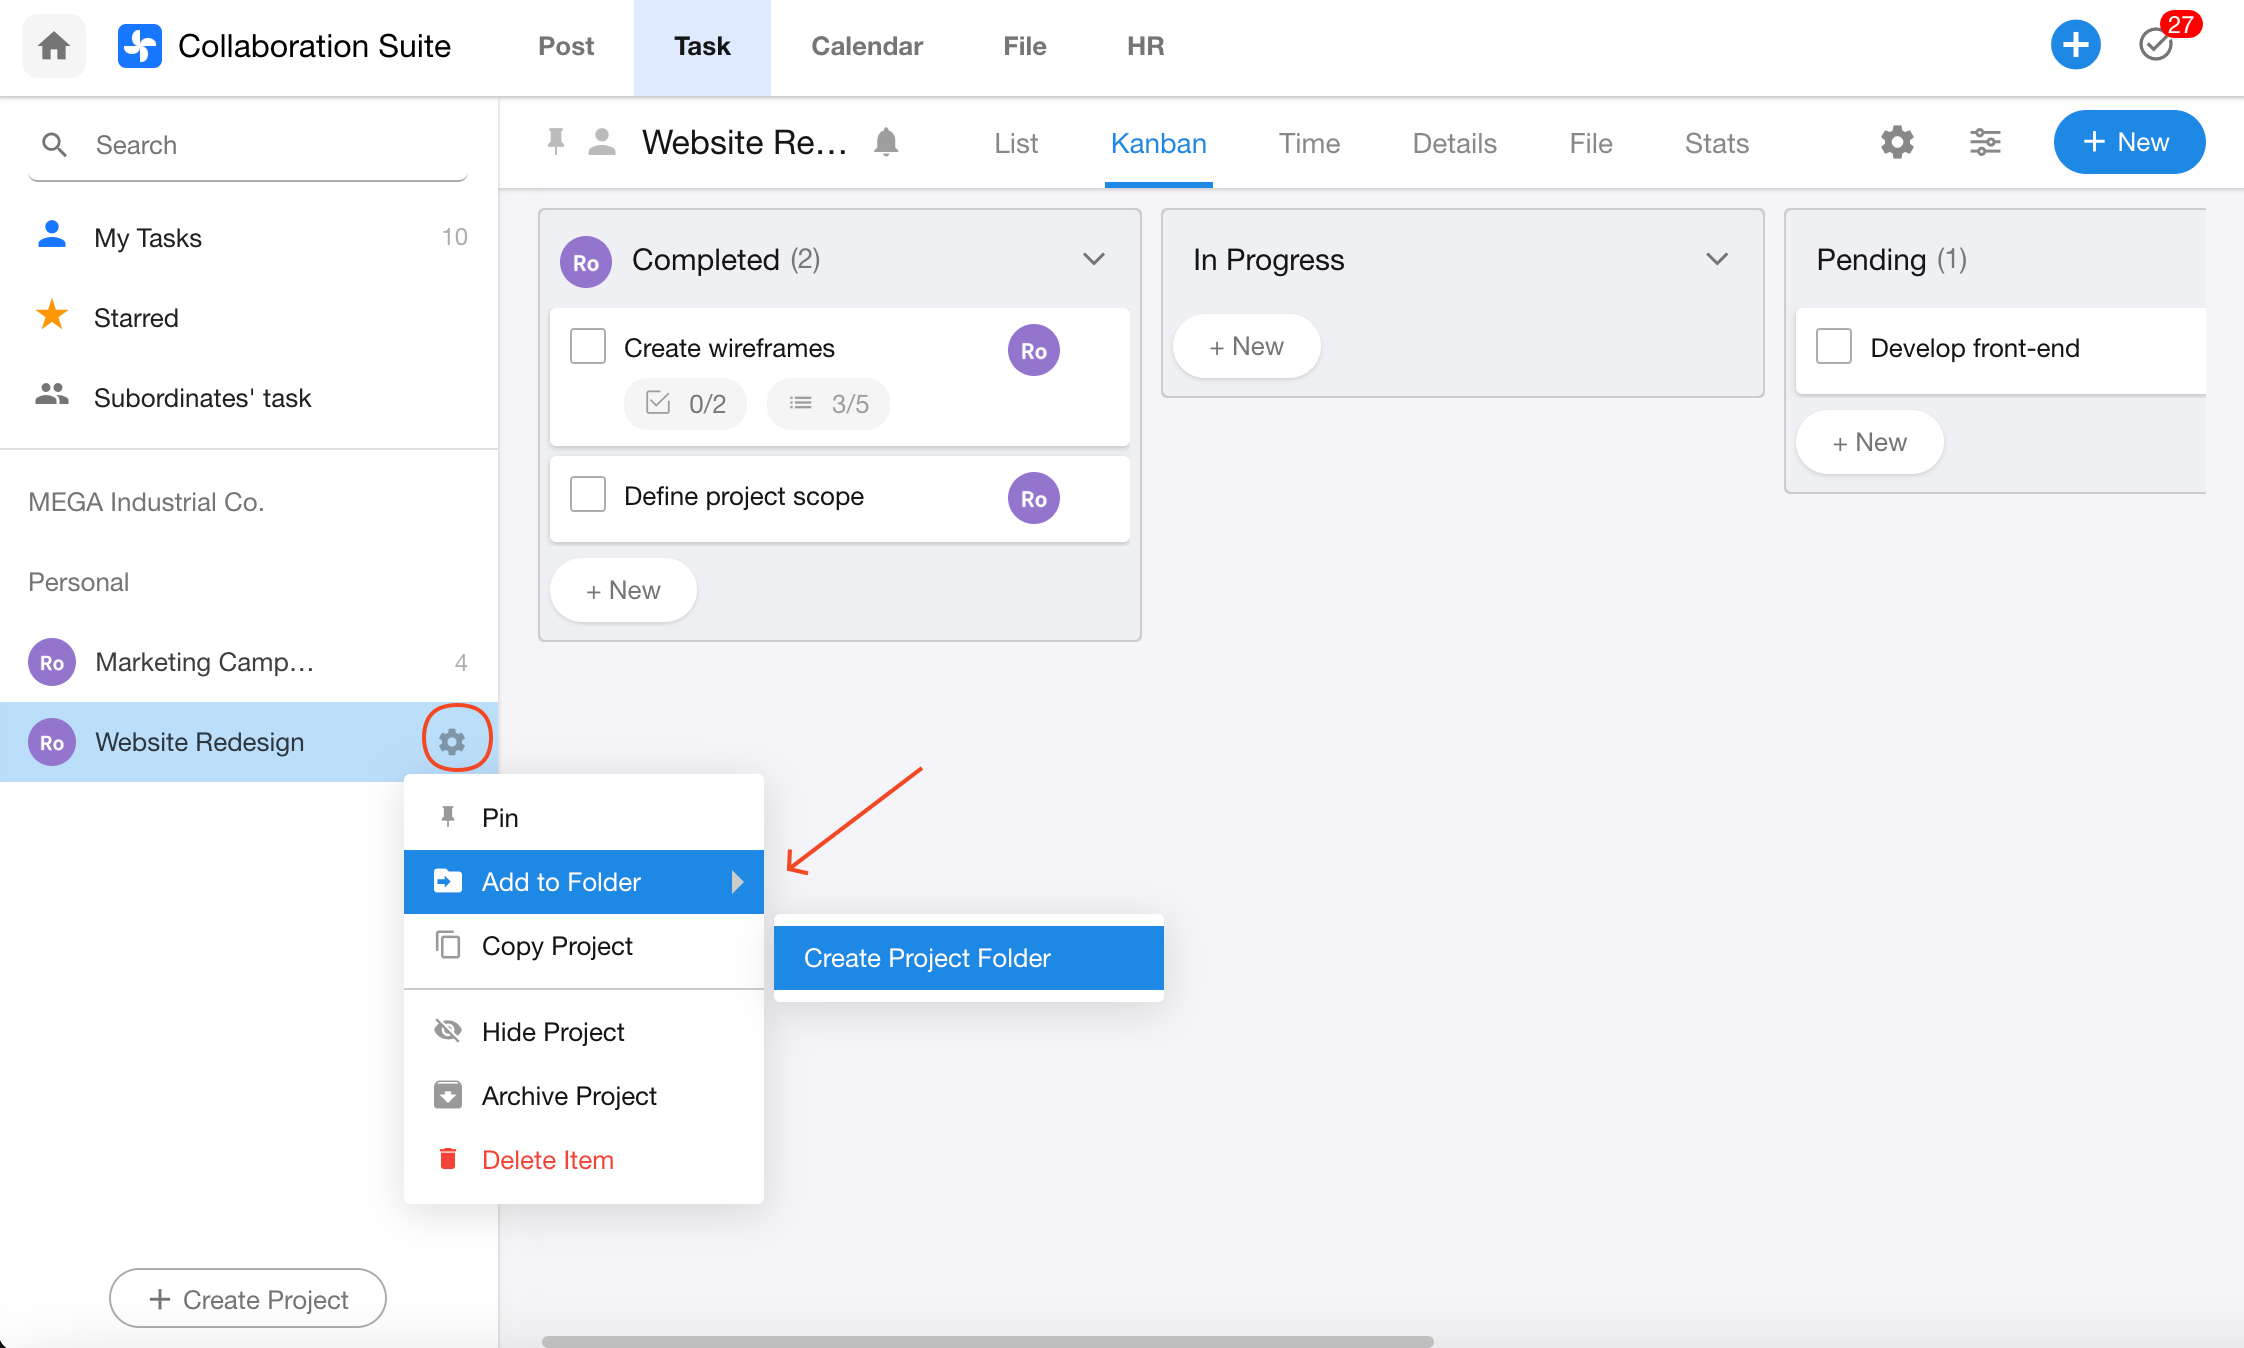
2.6 Organize Projects into Folders
Create folders to group related projects, keeping everything organized and easy to access.
Was this document helpful?