Operations on a Single Record
Data in a worksheet is composed of records. Operations on a single record include creating, modifying, deleting, locking, sharing, commenting, and printing ,etc.
If some features are unavailable during your operation, it may be because the application administrator disabled these function switches. Please contact the application administrator.
Add a New Record
Method 1: Add a Record in the Application
Click the “+” button in the top-right corner to create a new record.
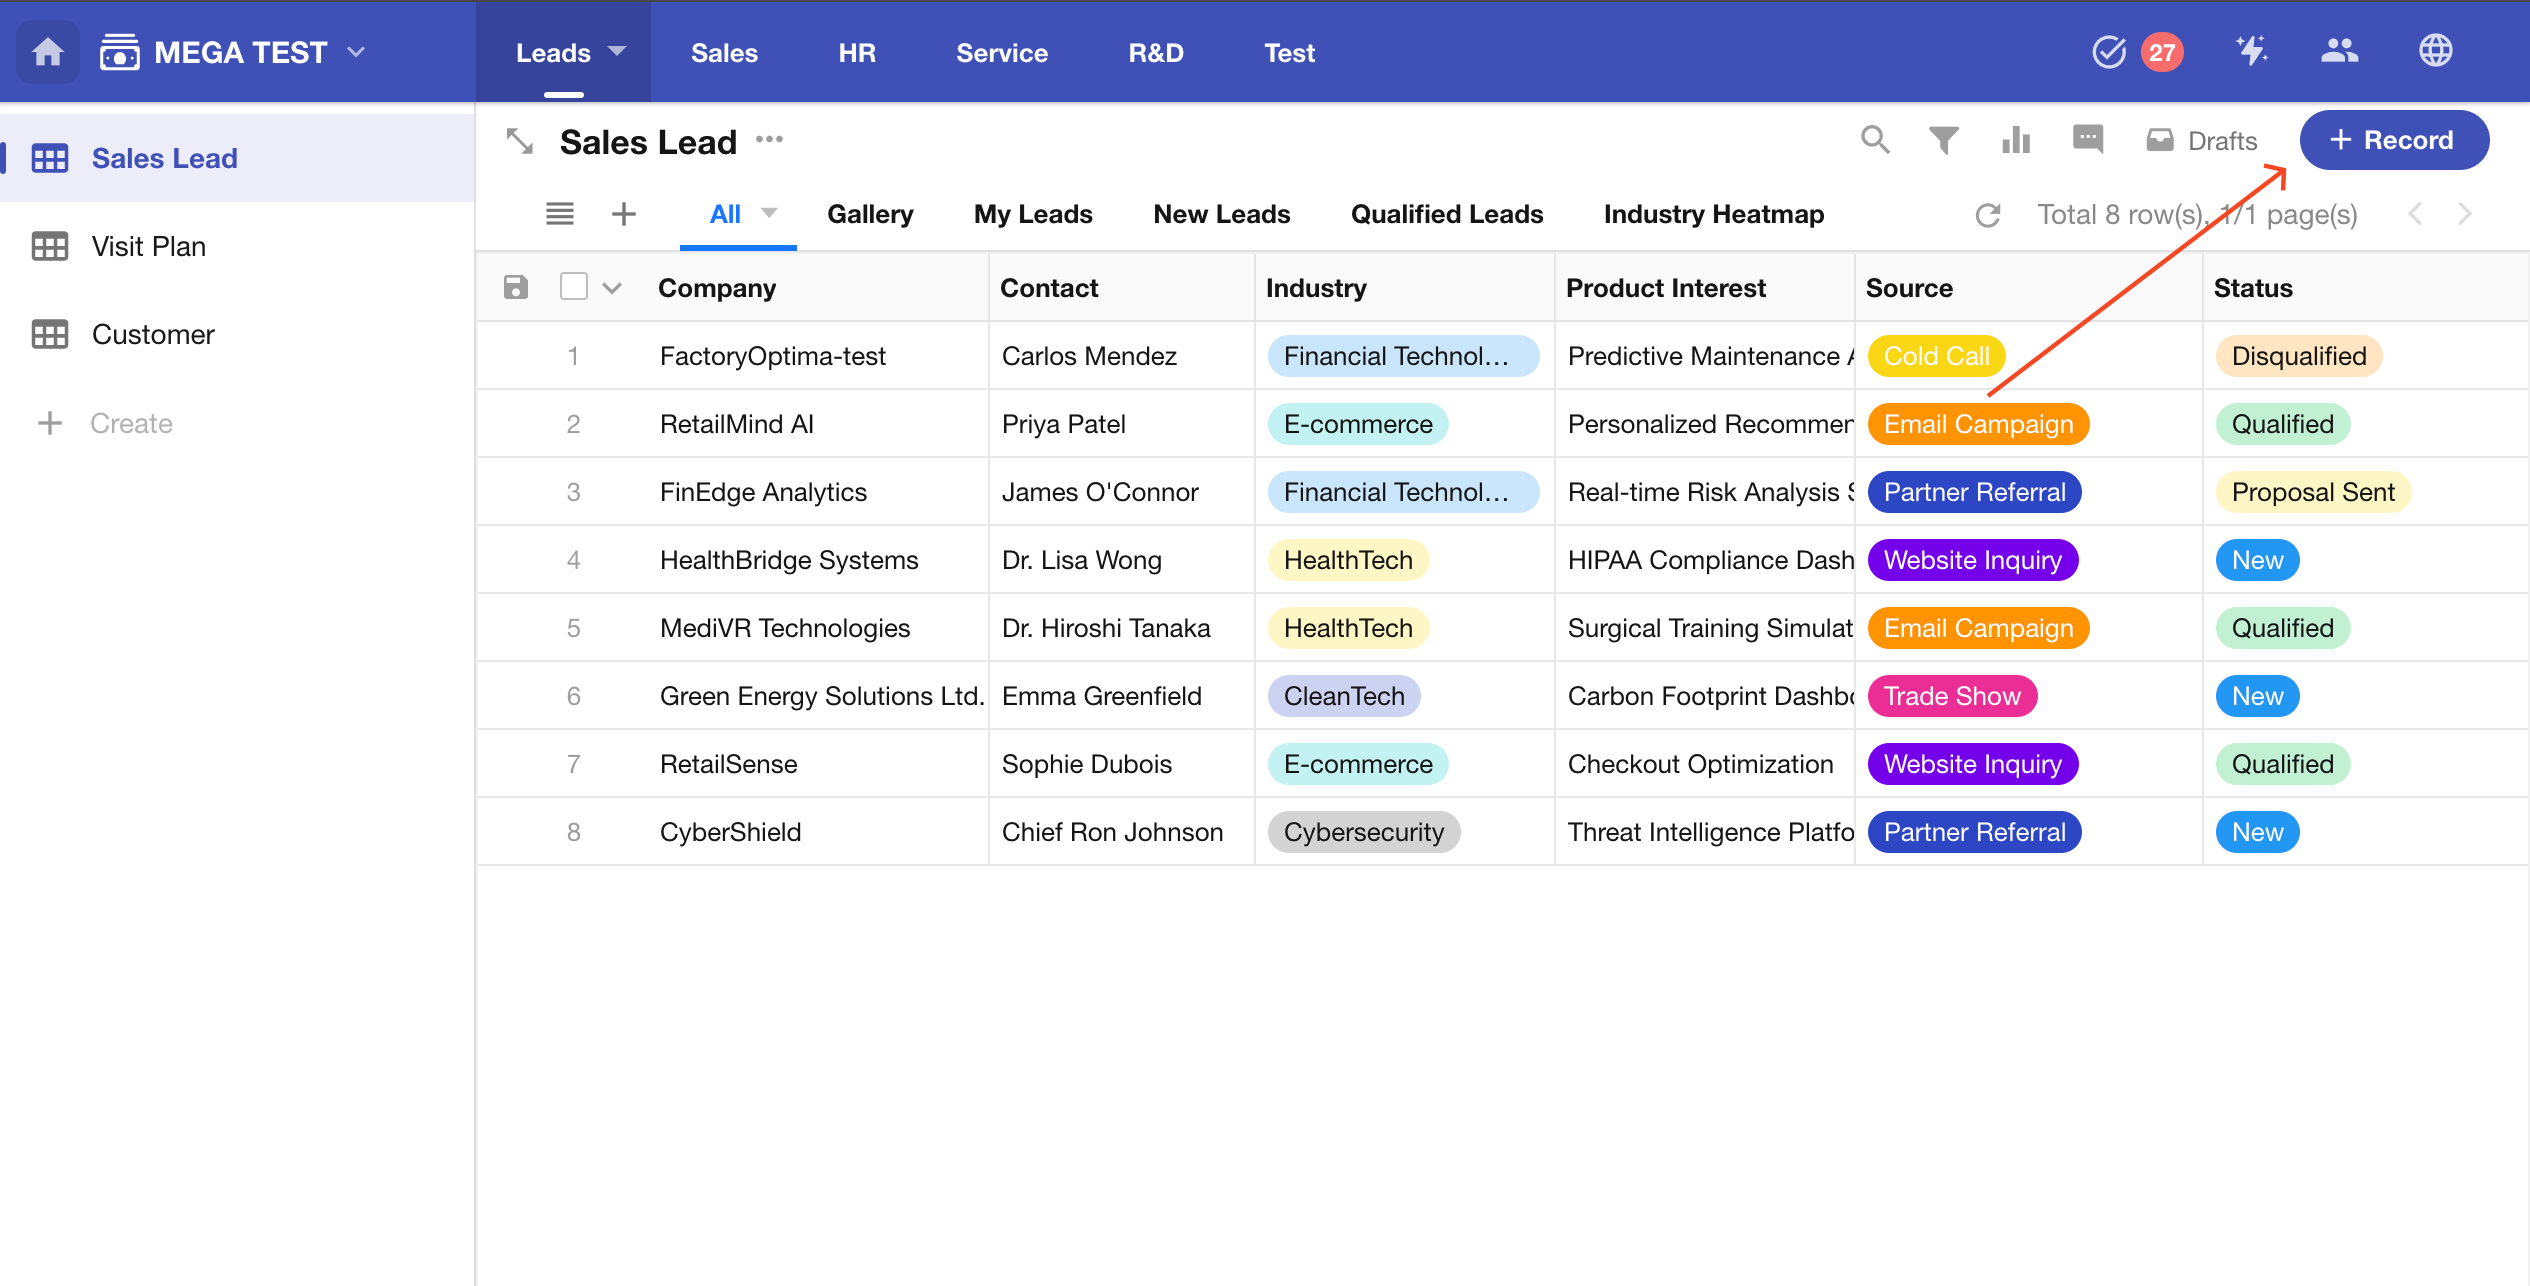
If you do not see the add record button on your interface, it means the application administrator has not granted you permission to add new records. Please contact the application administrator if needed.
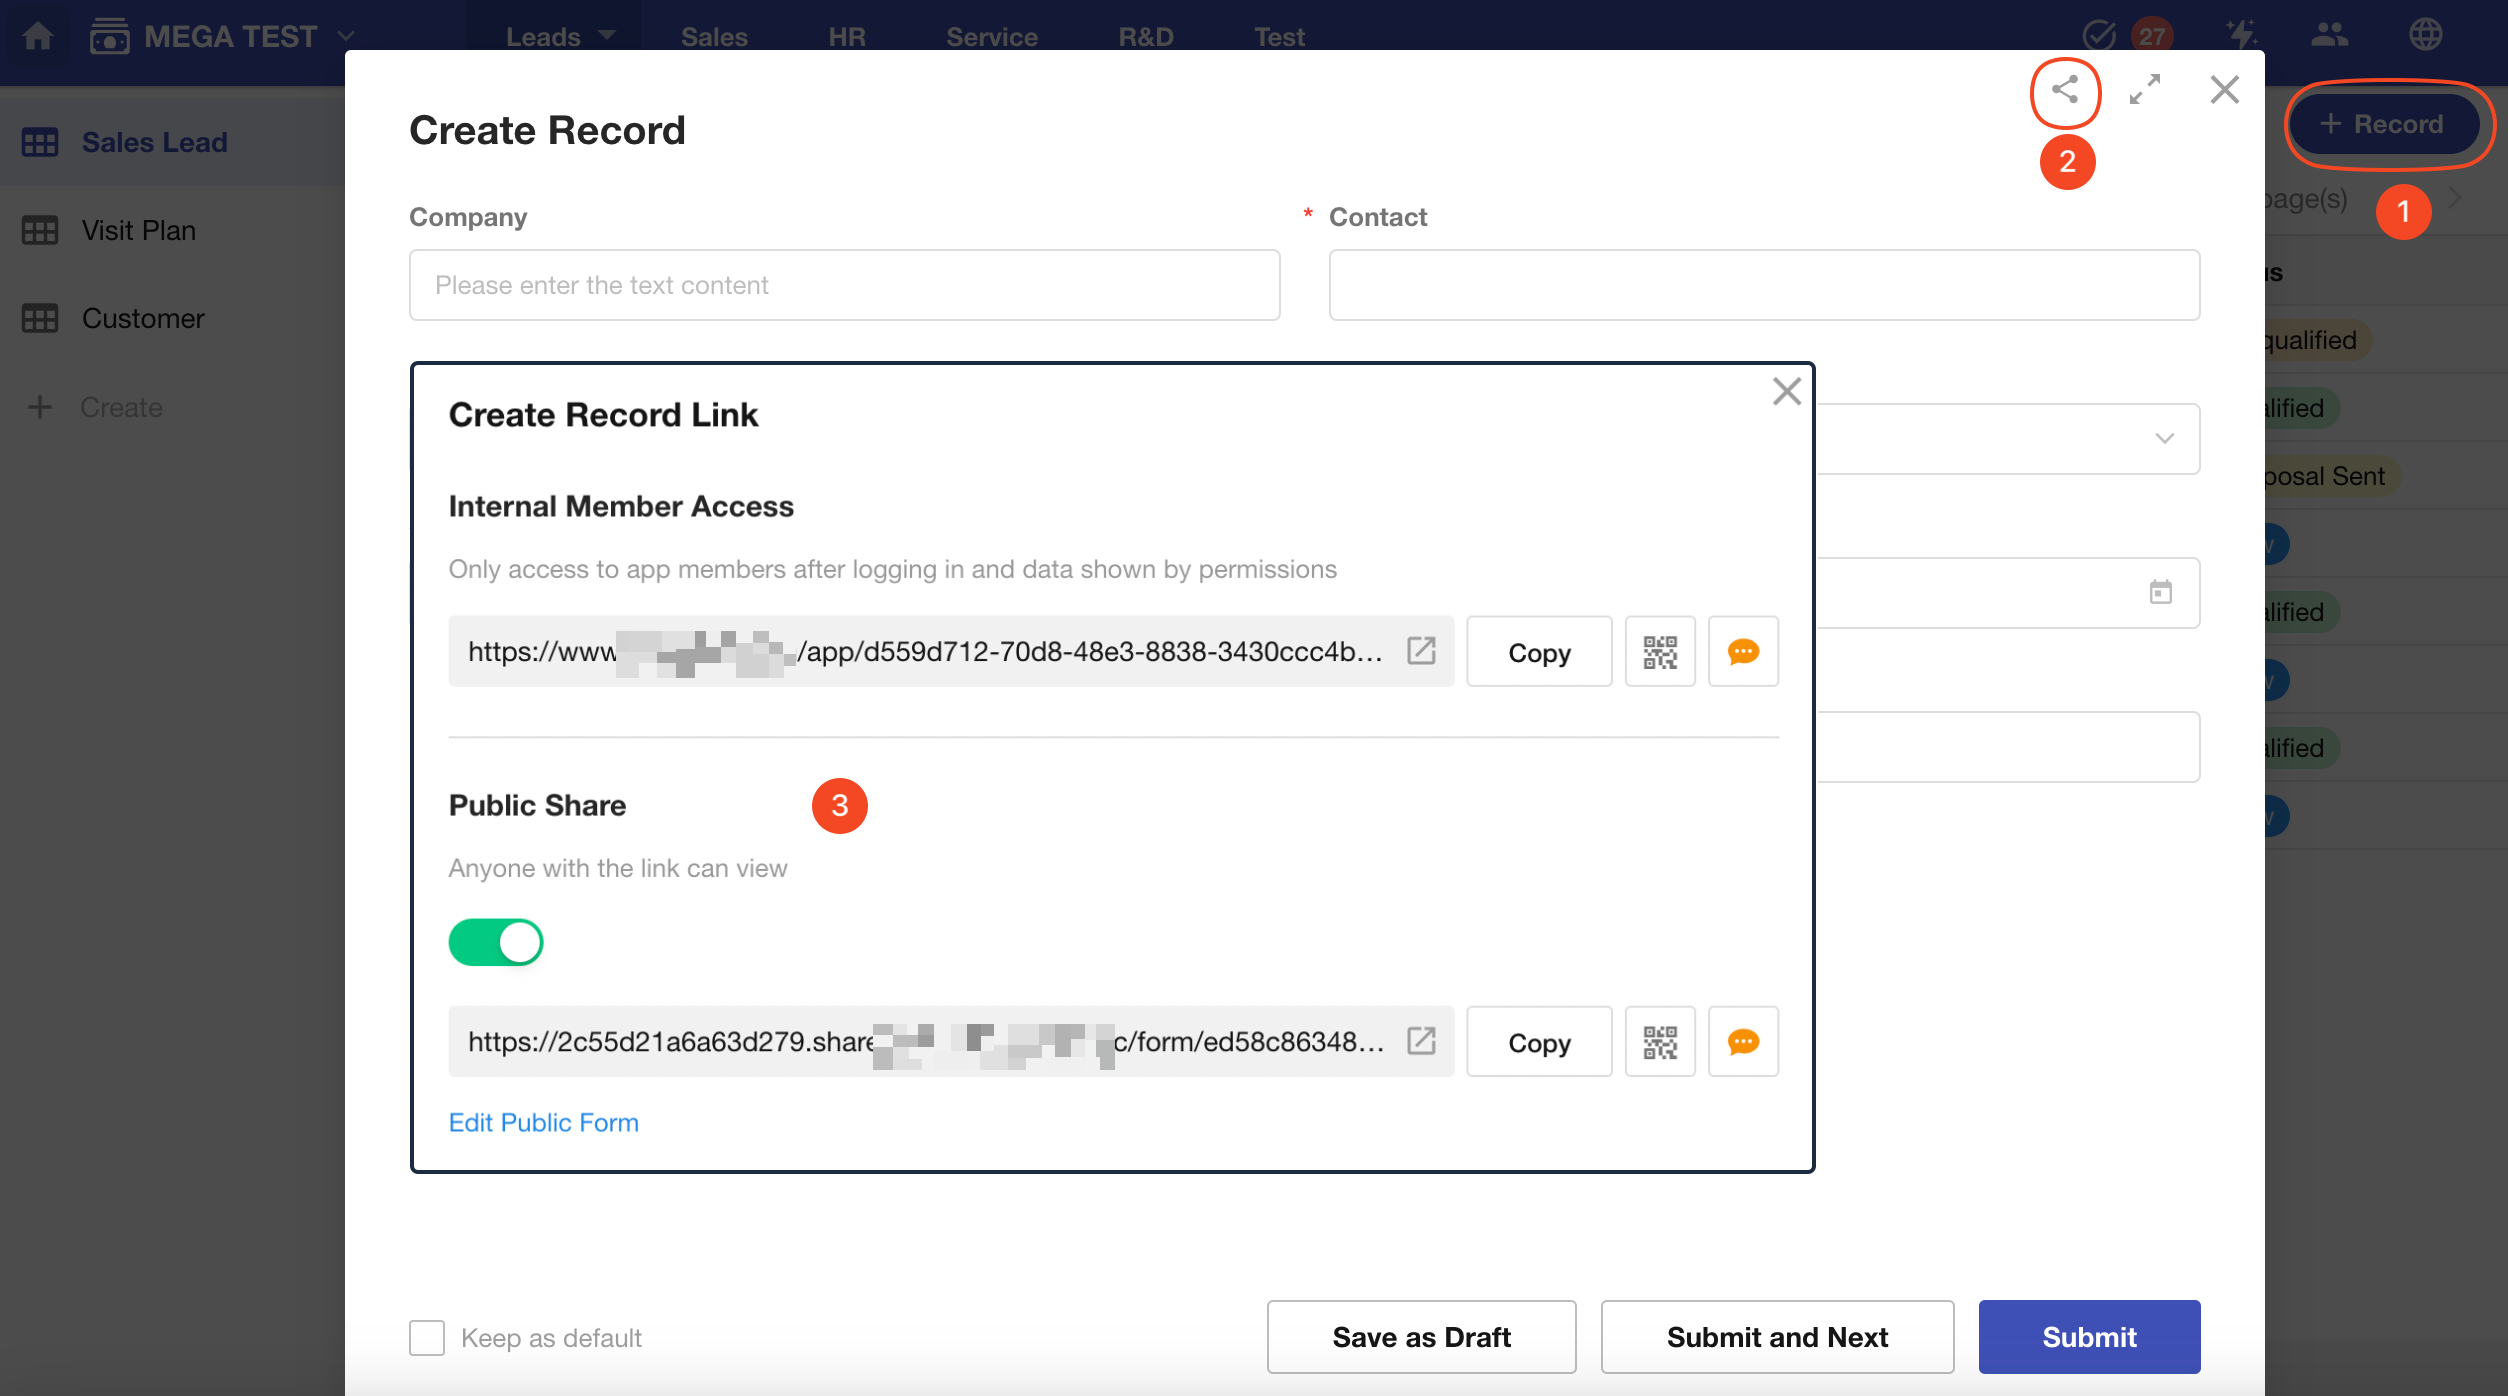
Method 2: Add a Record via QR Code
How to get the QR code or link:
-
Internal Members
Only application members can scan this code. When members scan the QR code in the app, they will directly open the page to create a record. If they open the link, they can directly add a new record after logging in.
For worksheets where records are frequently added, internal members can quickly access the record creation page by opening the saved link without entering the application.
-
Public Share
External users can directly add records via the link or QR code without needing to log in.
For more details, refer to Public Forms.
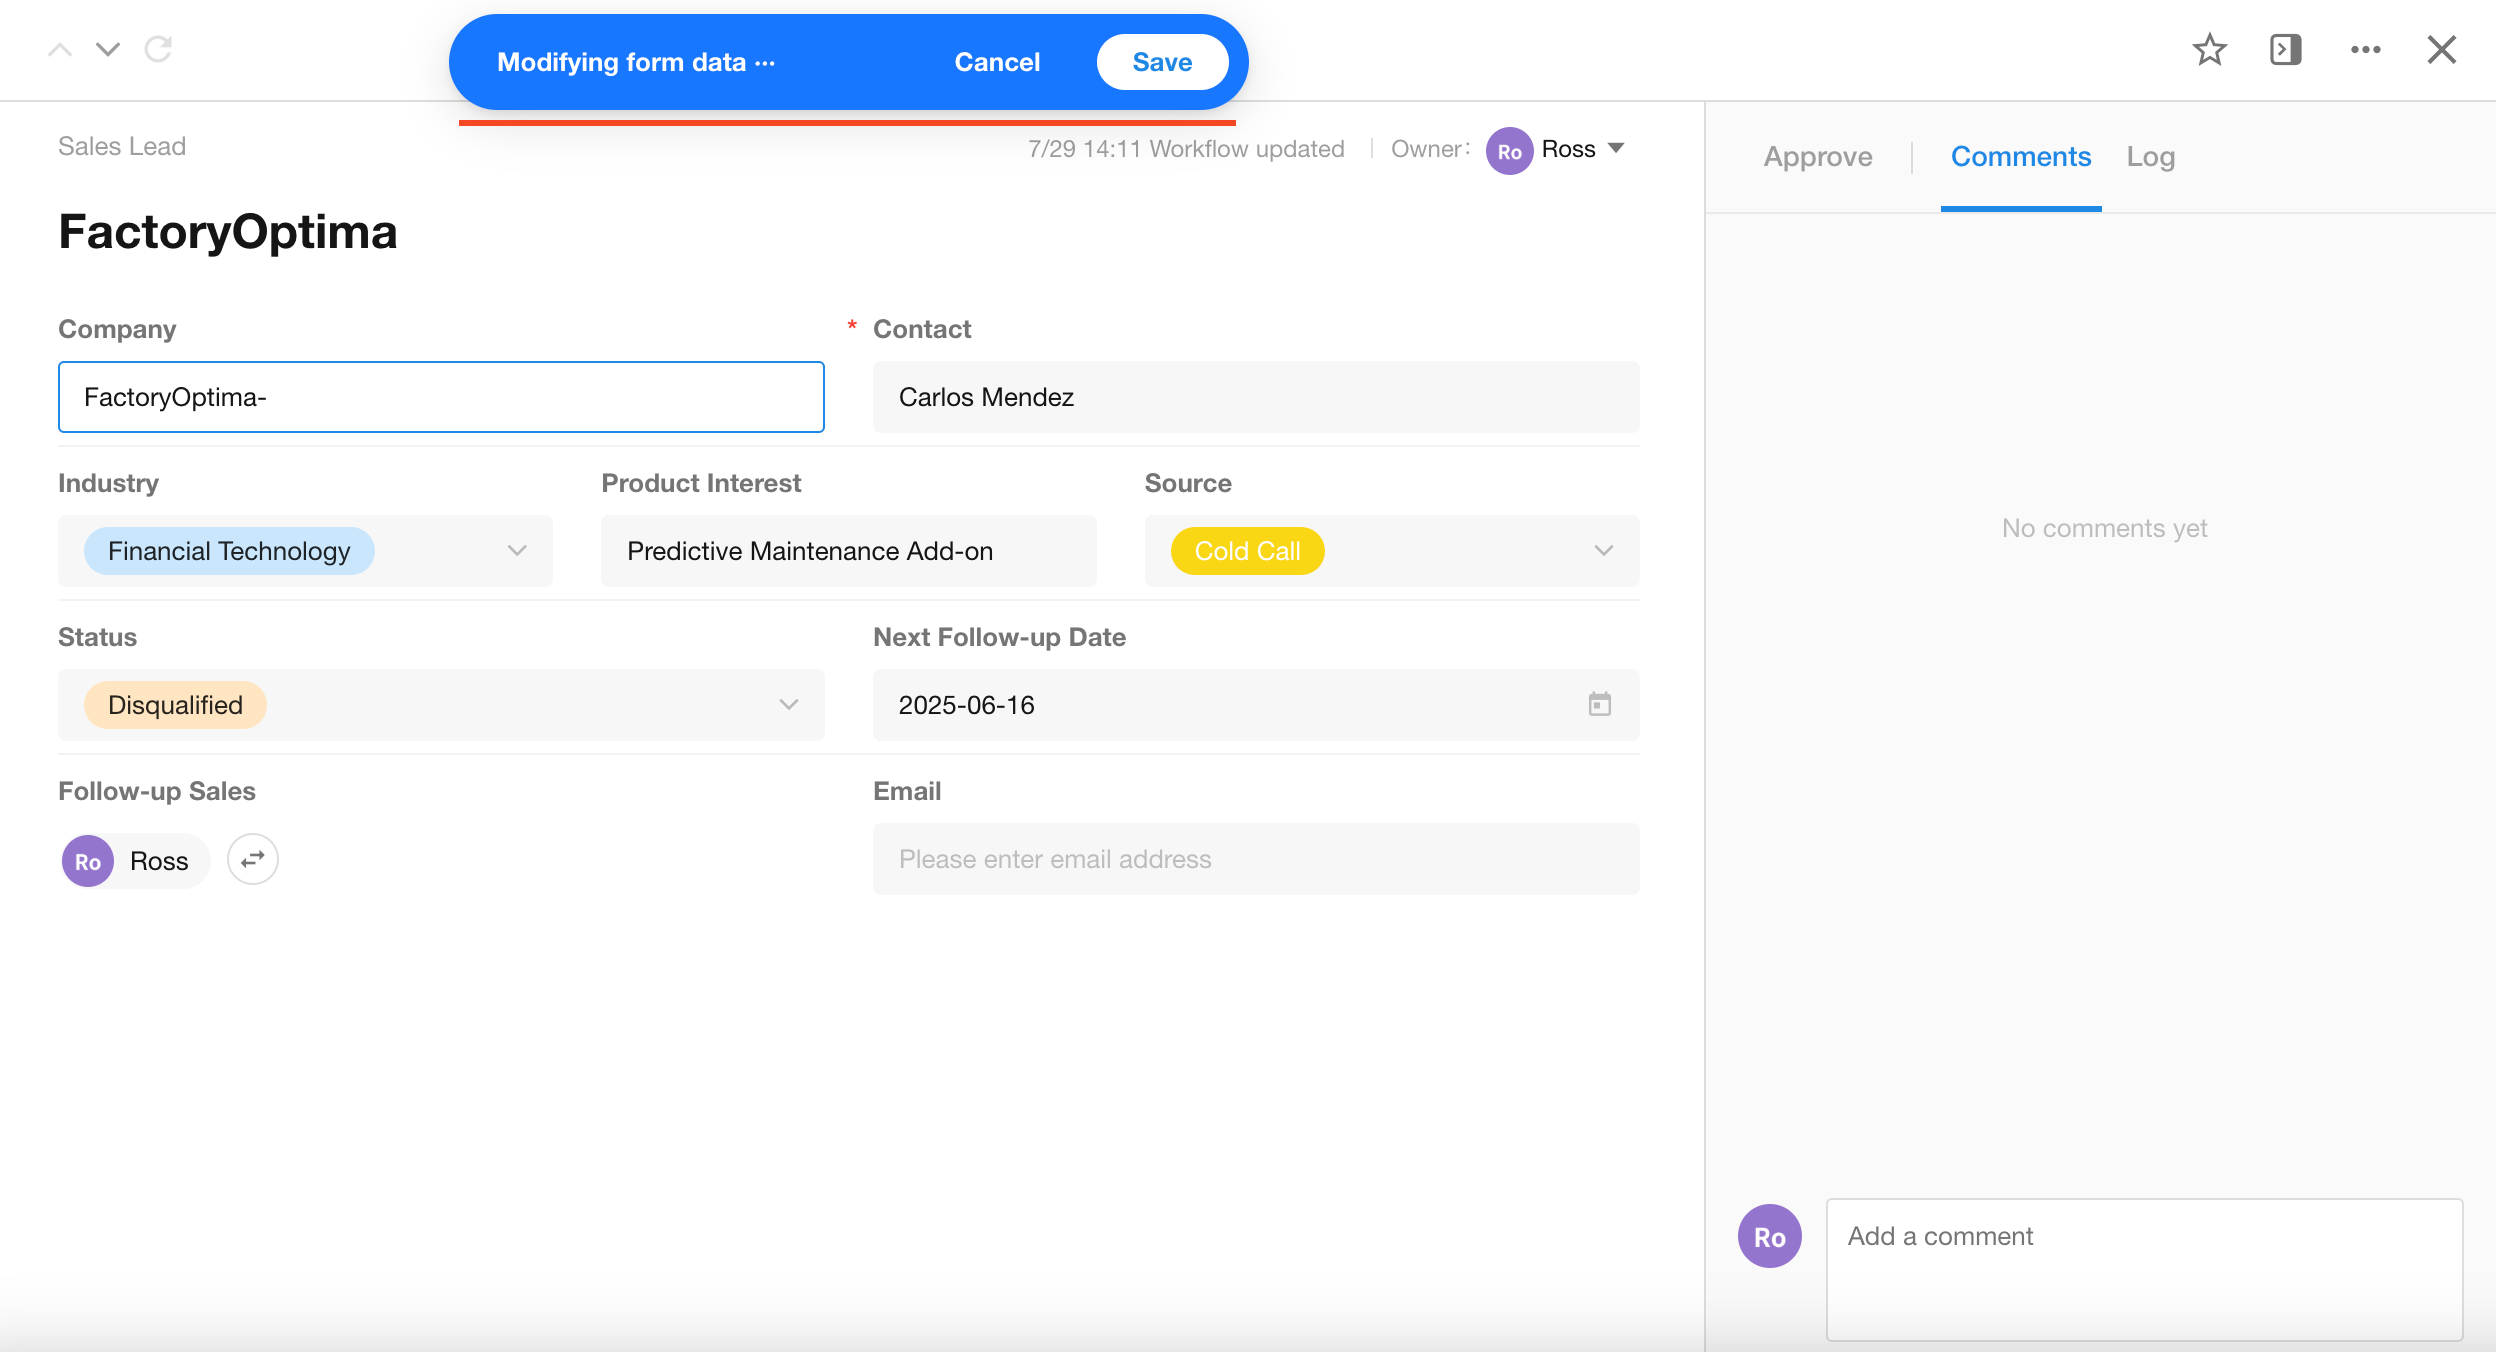
Modify a Record
Open the record's detail page and click on the field you want to modify.
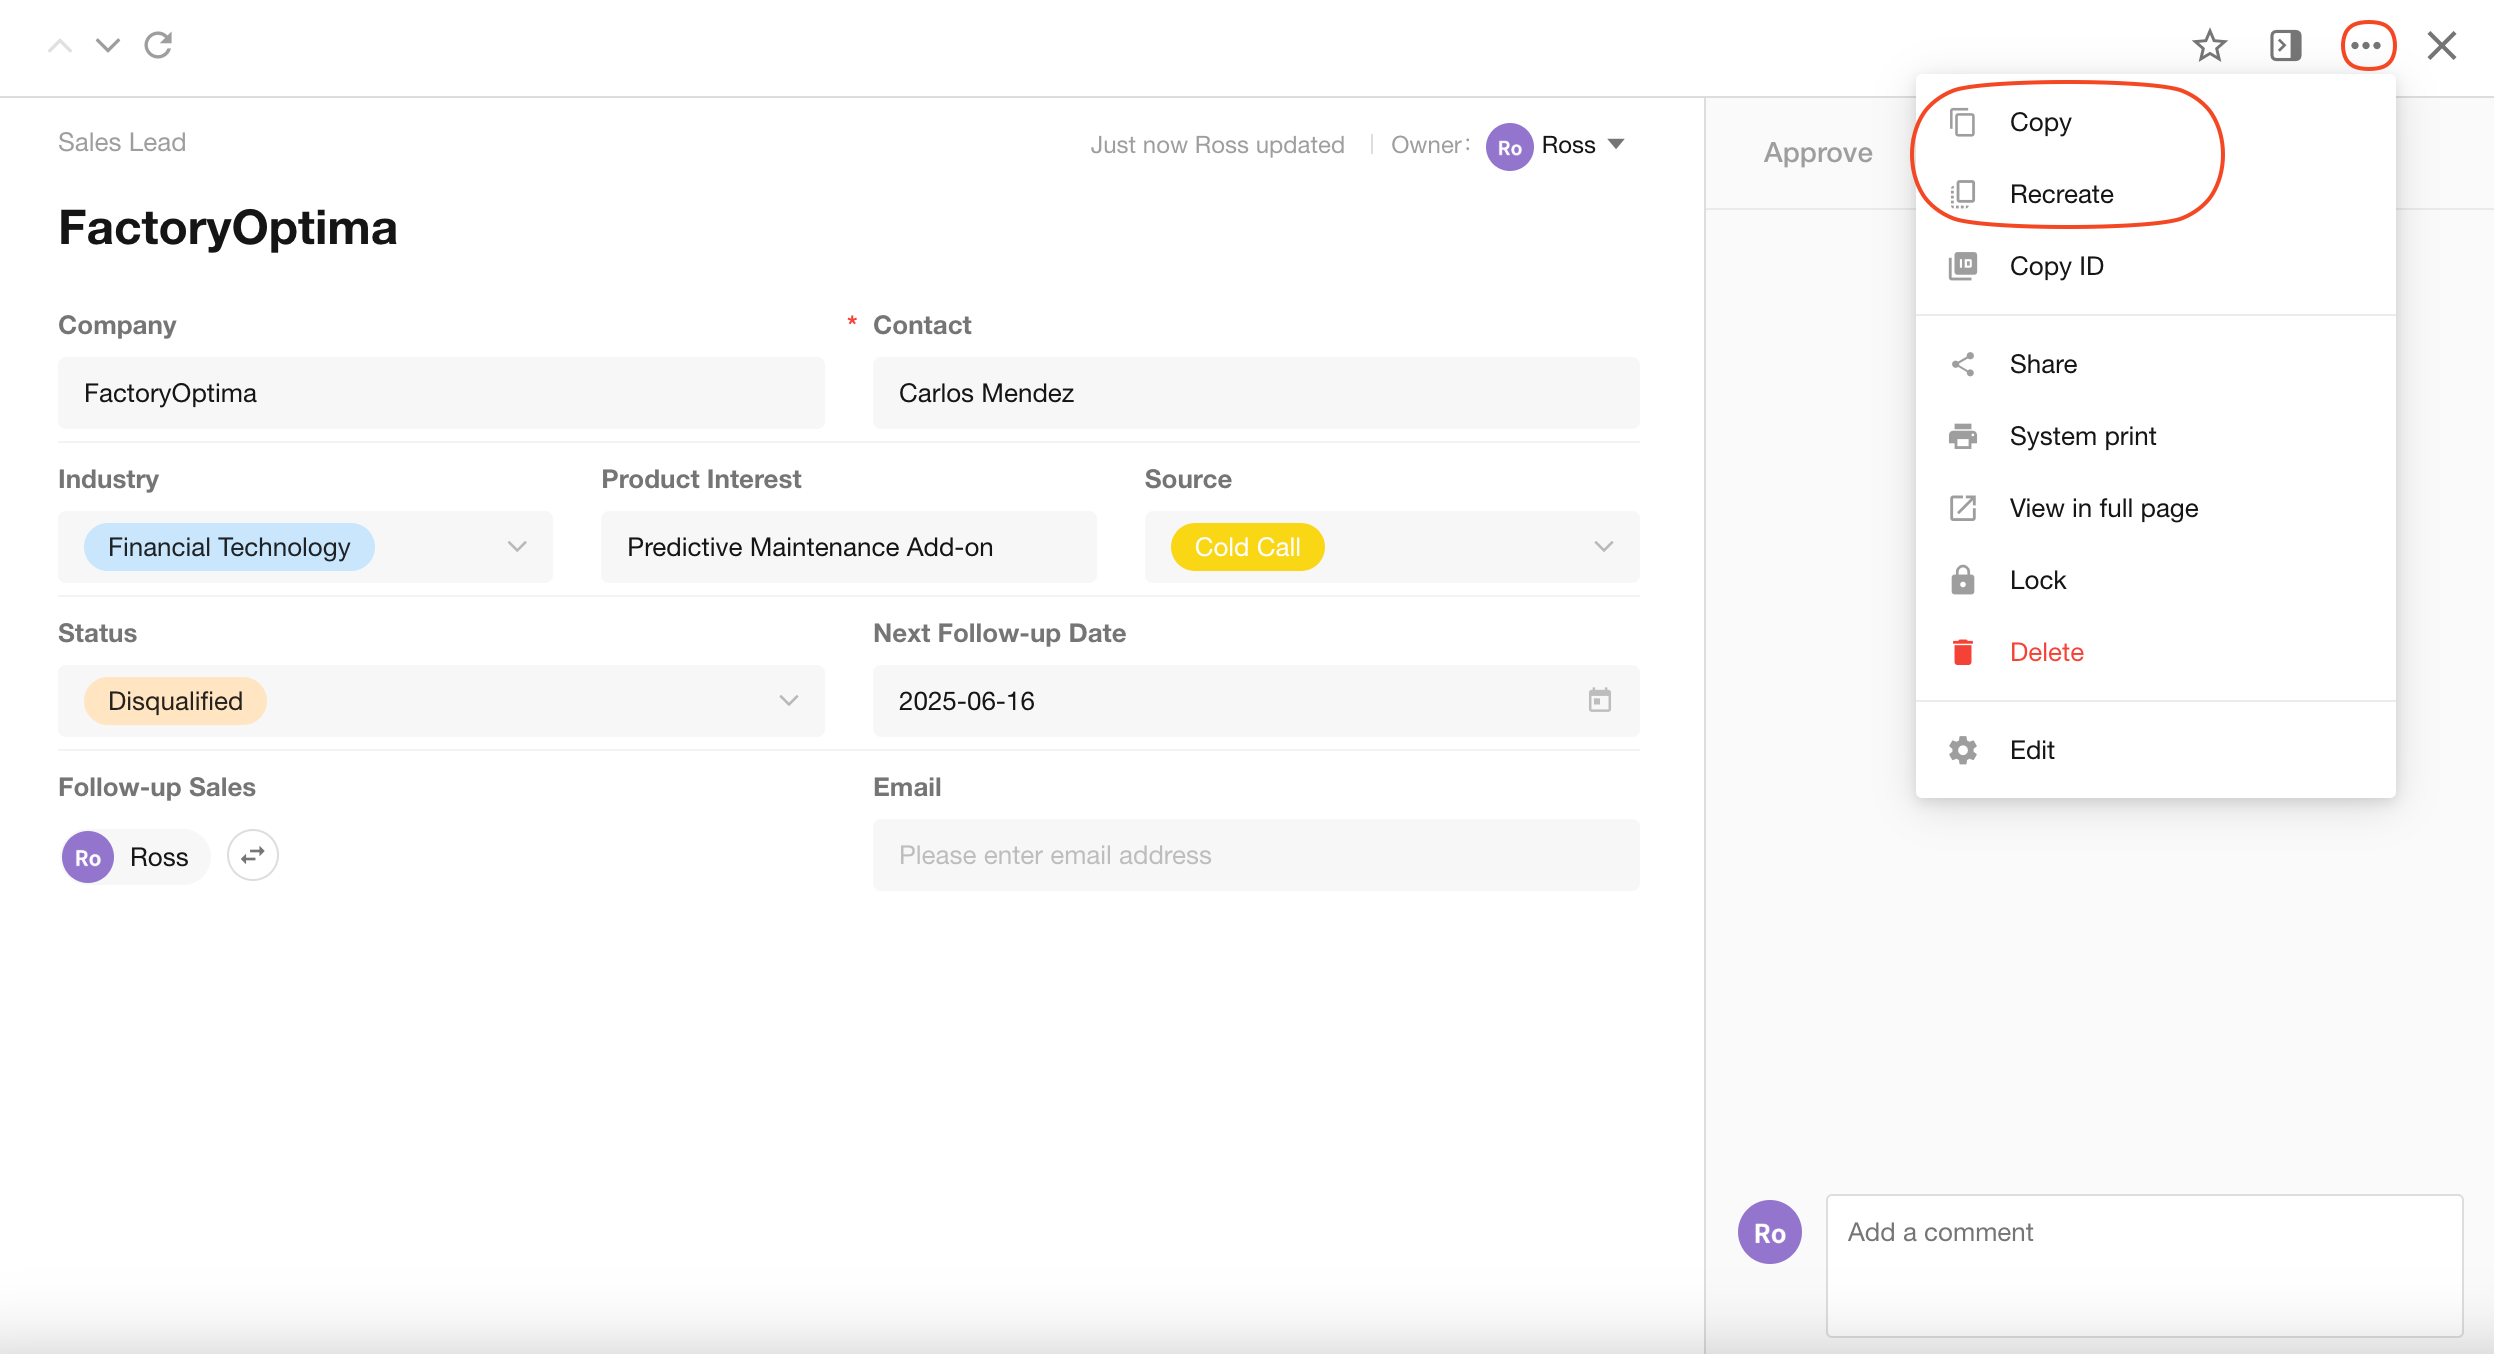
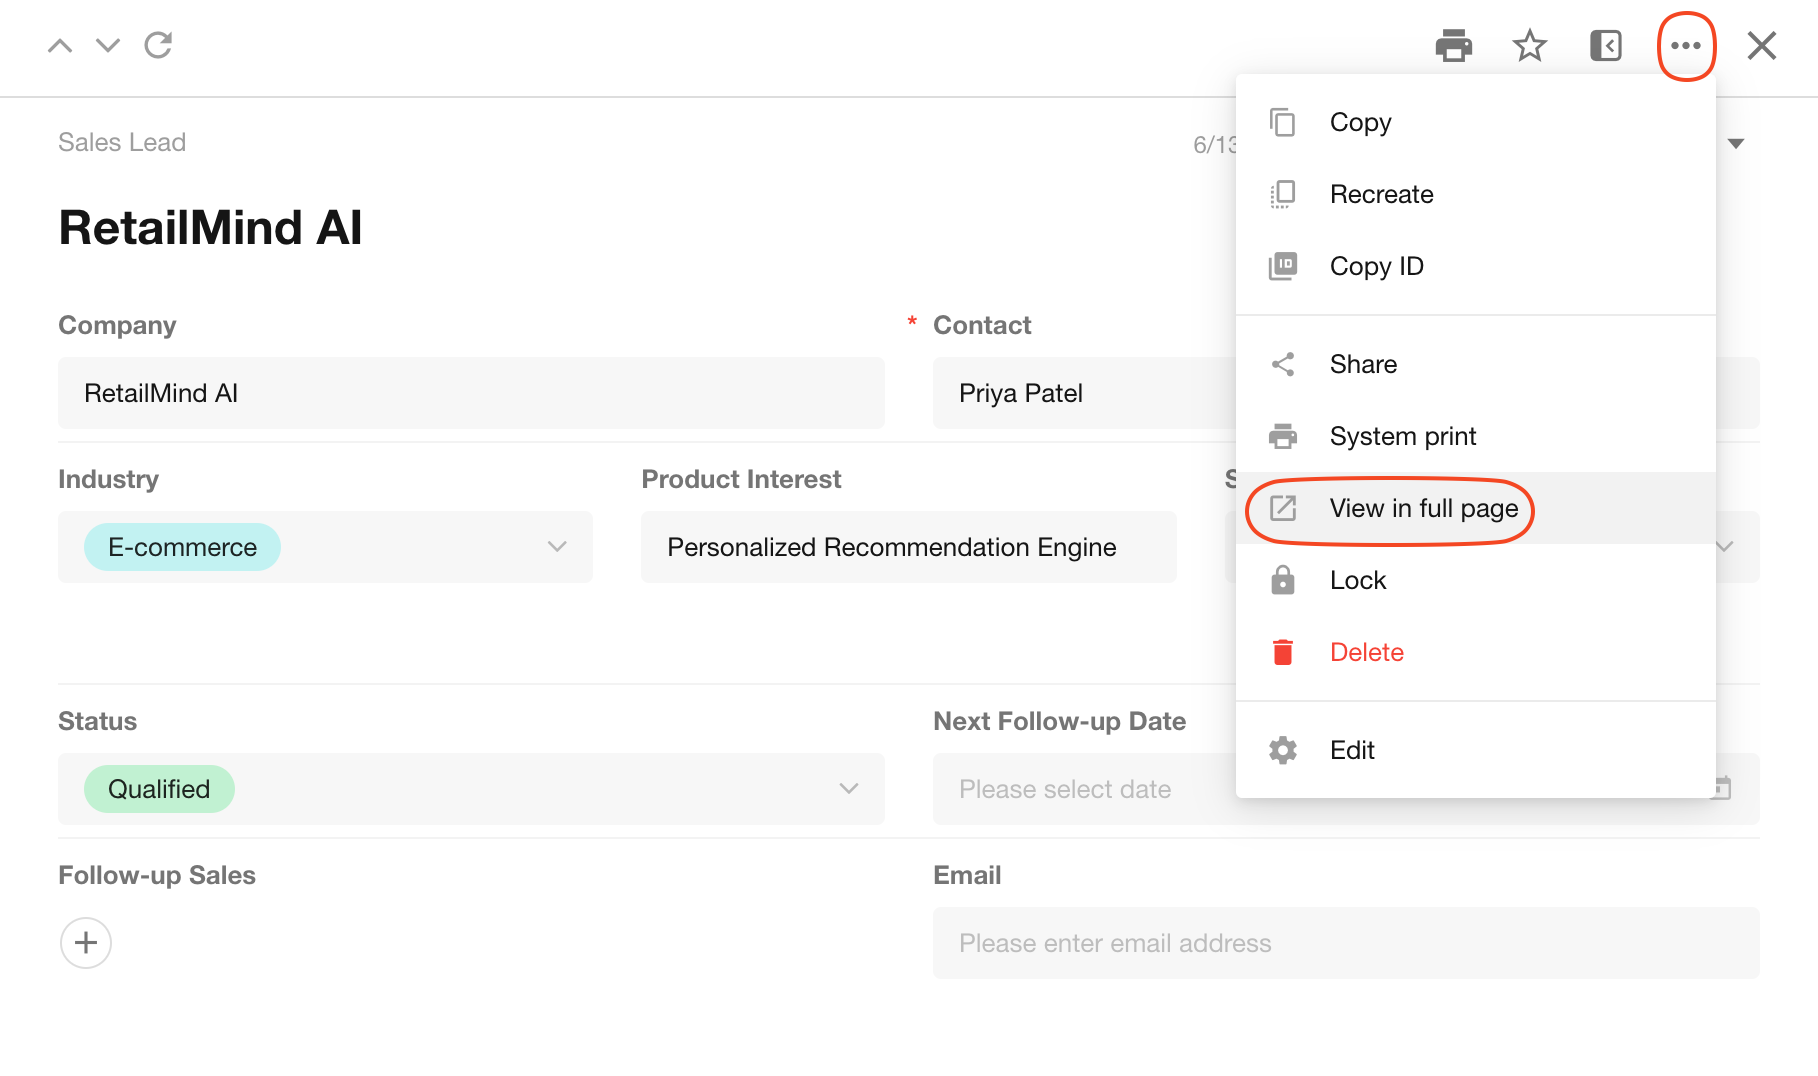
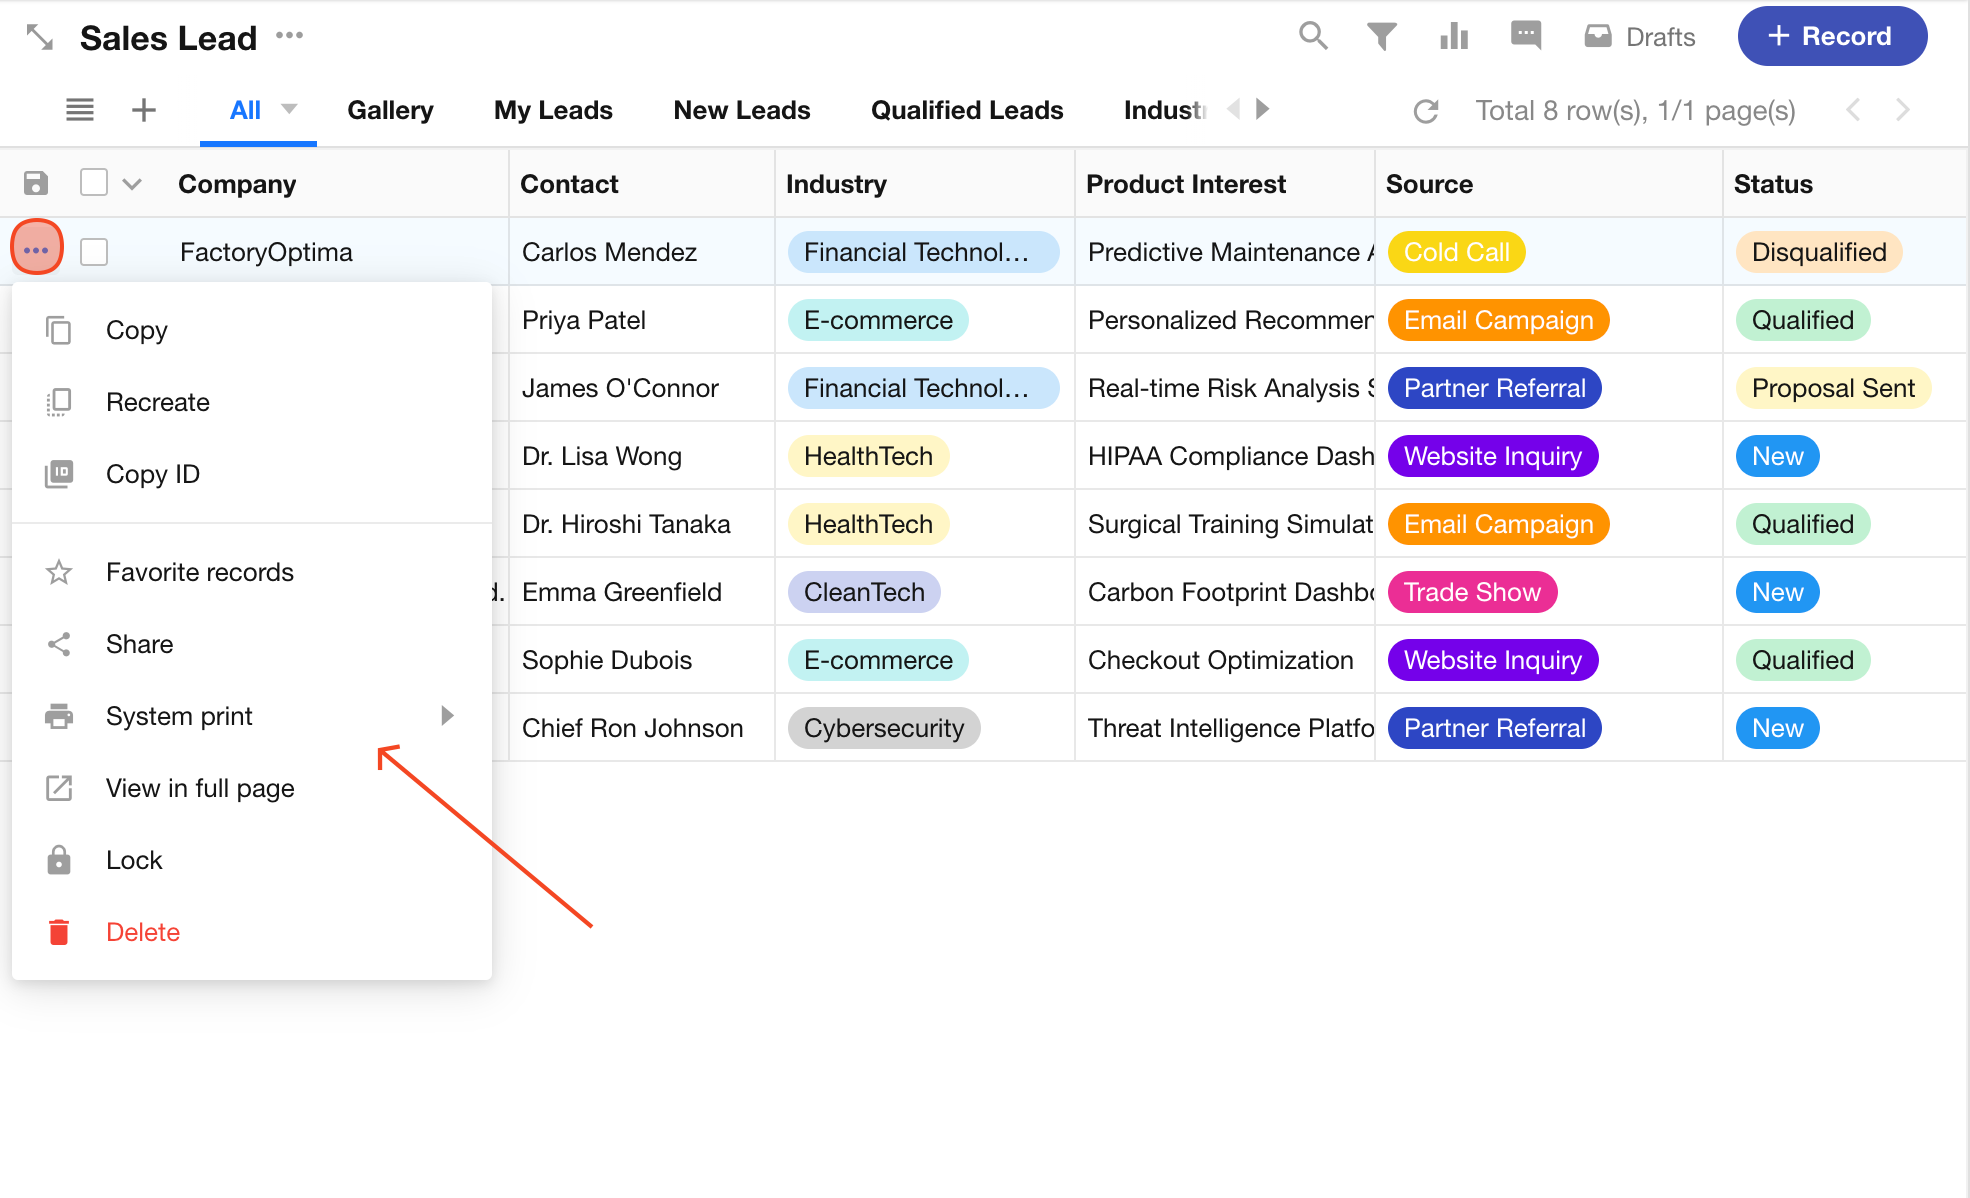
Copy/Recreate a Record
-
Copy a Record
Create a new record by copying the content of the current record’s fields.
-
Recreate a Record
After clicking “Recreate”, a new record creation page will open with the fields automatically filled with the content of the previous record. If not submitted, it will not be saved.
-
Copy all field values.
-
Copy up to 200 subform records.
-
Copy up to 5 related records (card/dropdown) in the subform.
-
Copy up to 5 related records (card/dropdown).
-
Related records in list mode are not copied.
-
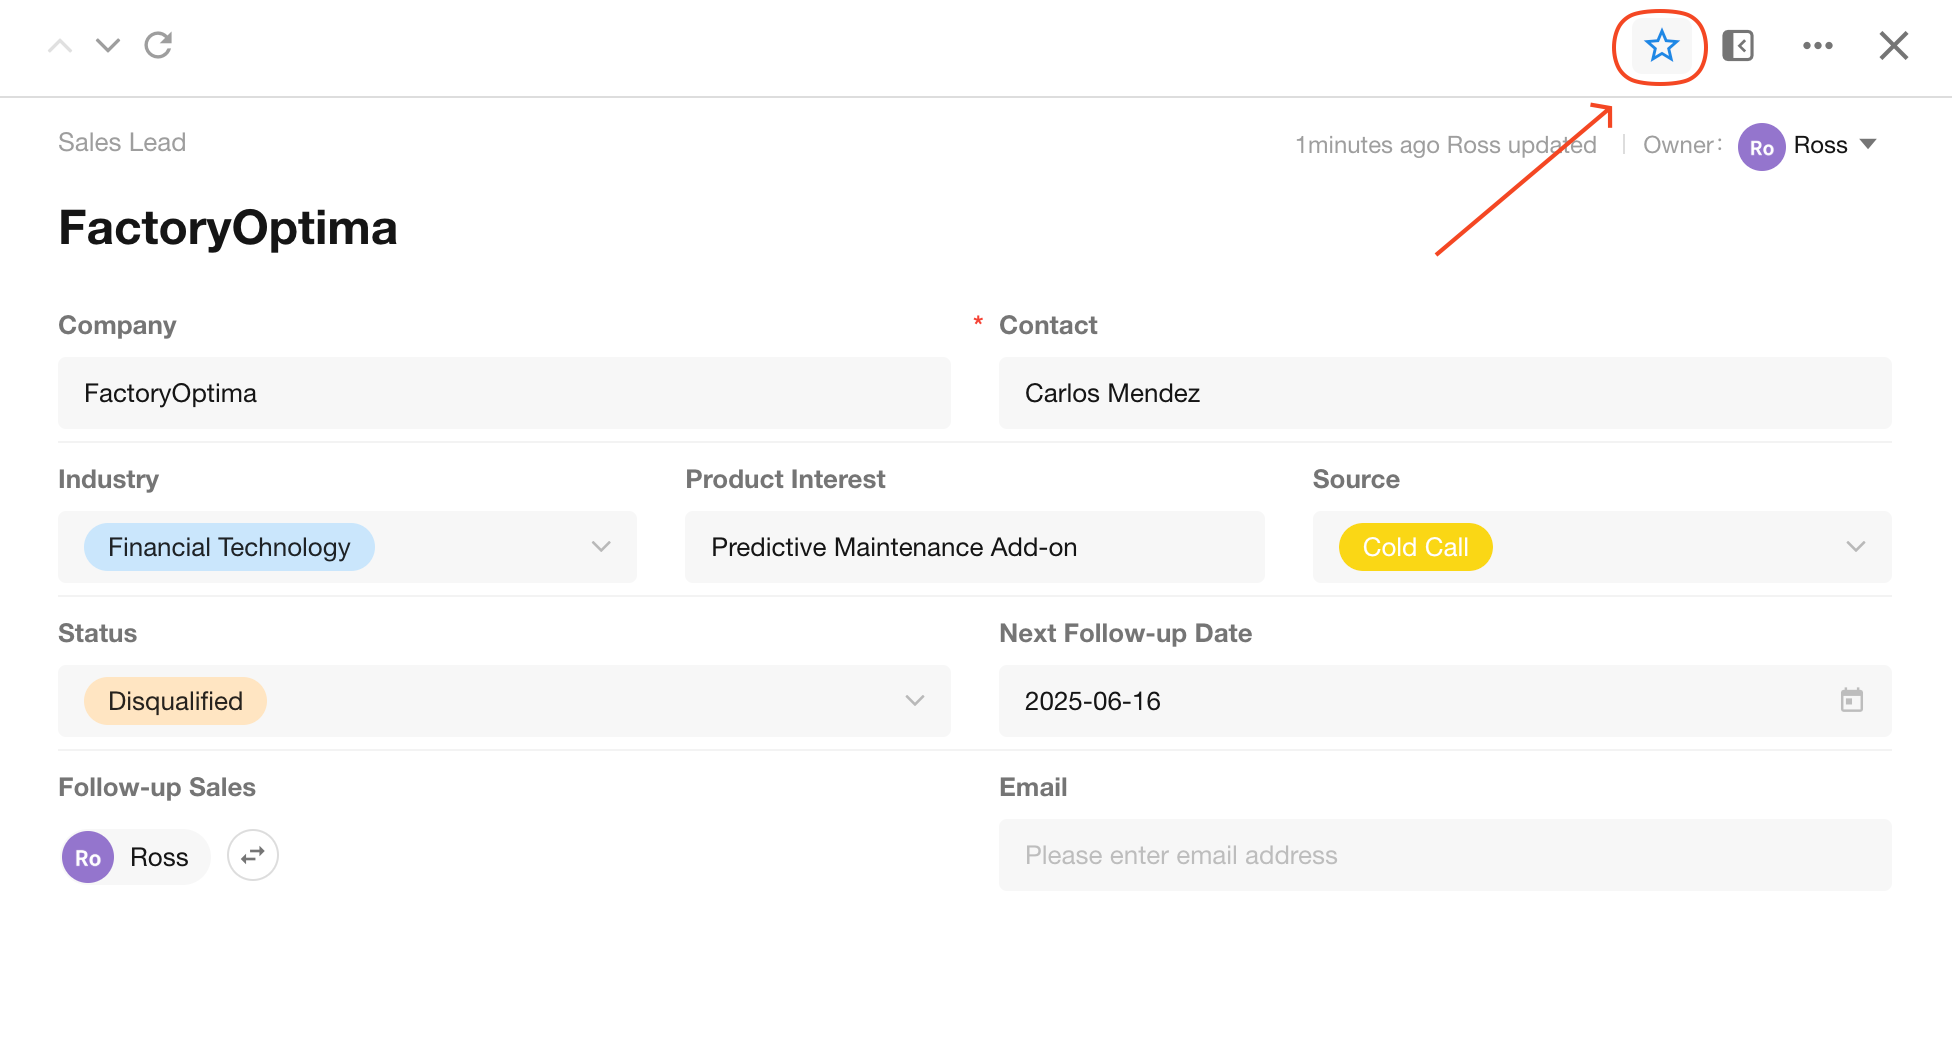
Favorite a Record
Once added to favorites, the record can be quickly accessed from the "Favorite Records" section on the homepage. Click again to remove it from favorites.
Lock a Record
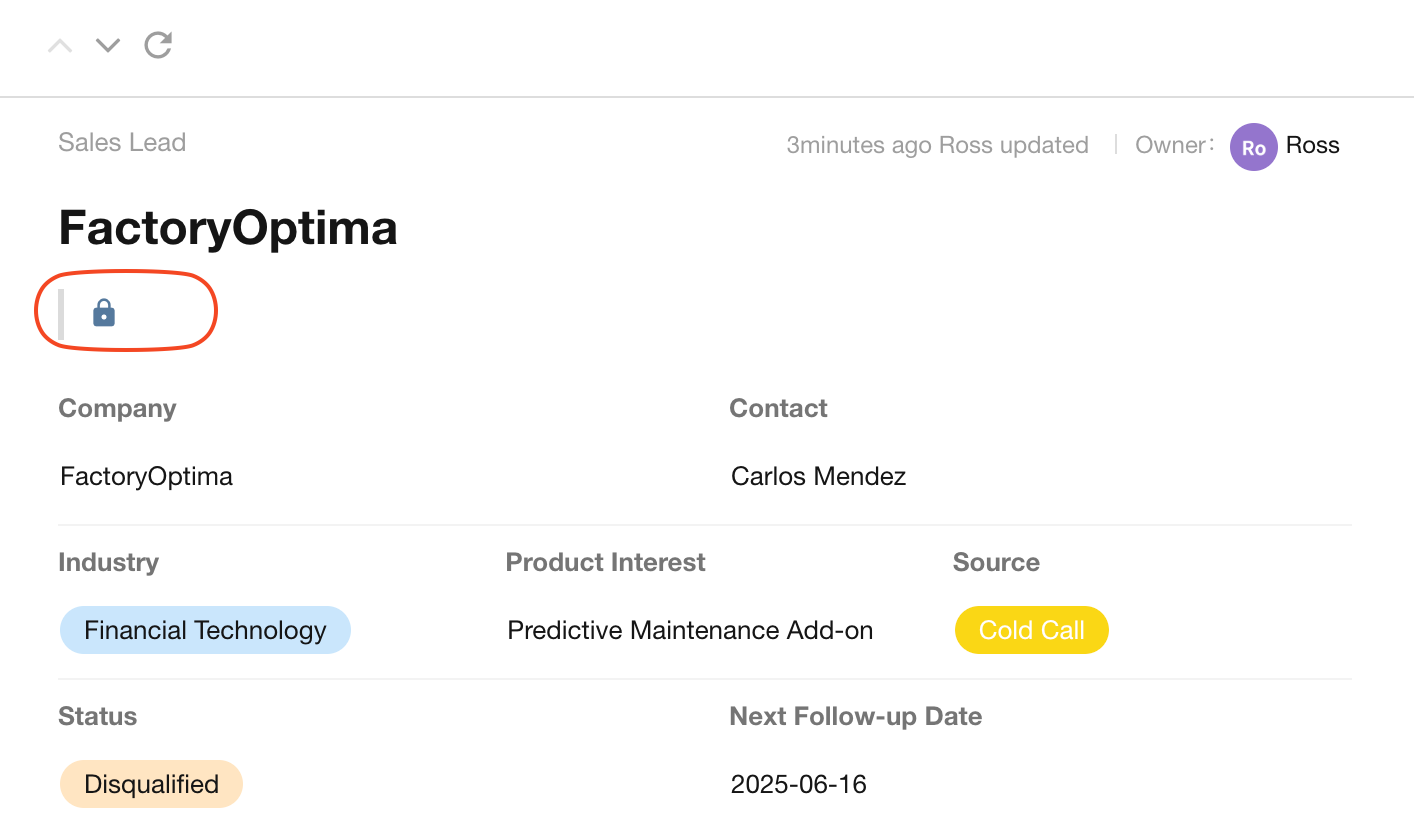
Application administrators can lock and unlock records from the record operations toolbar. Locked records cannot be modified or deleted.
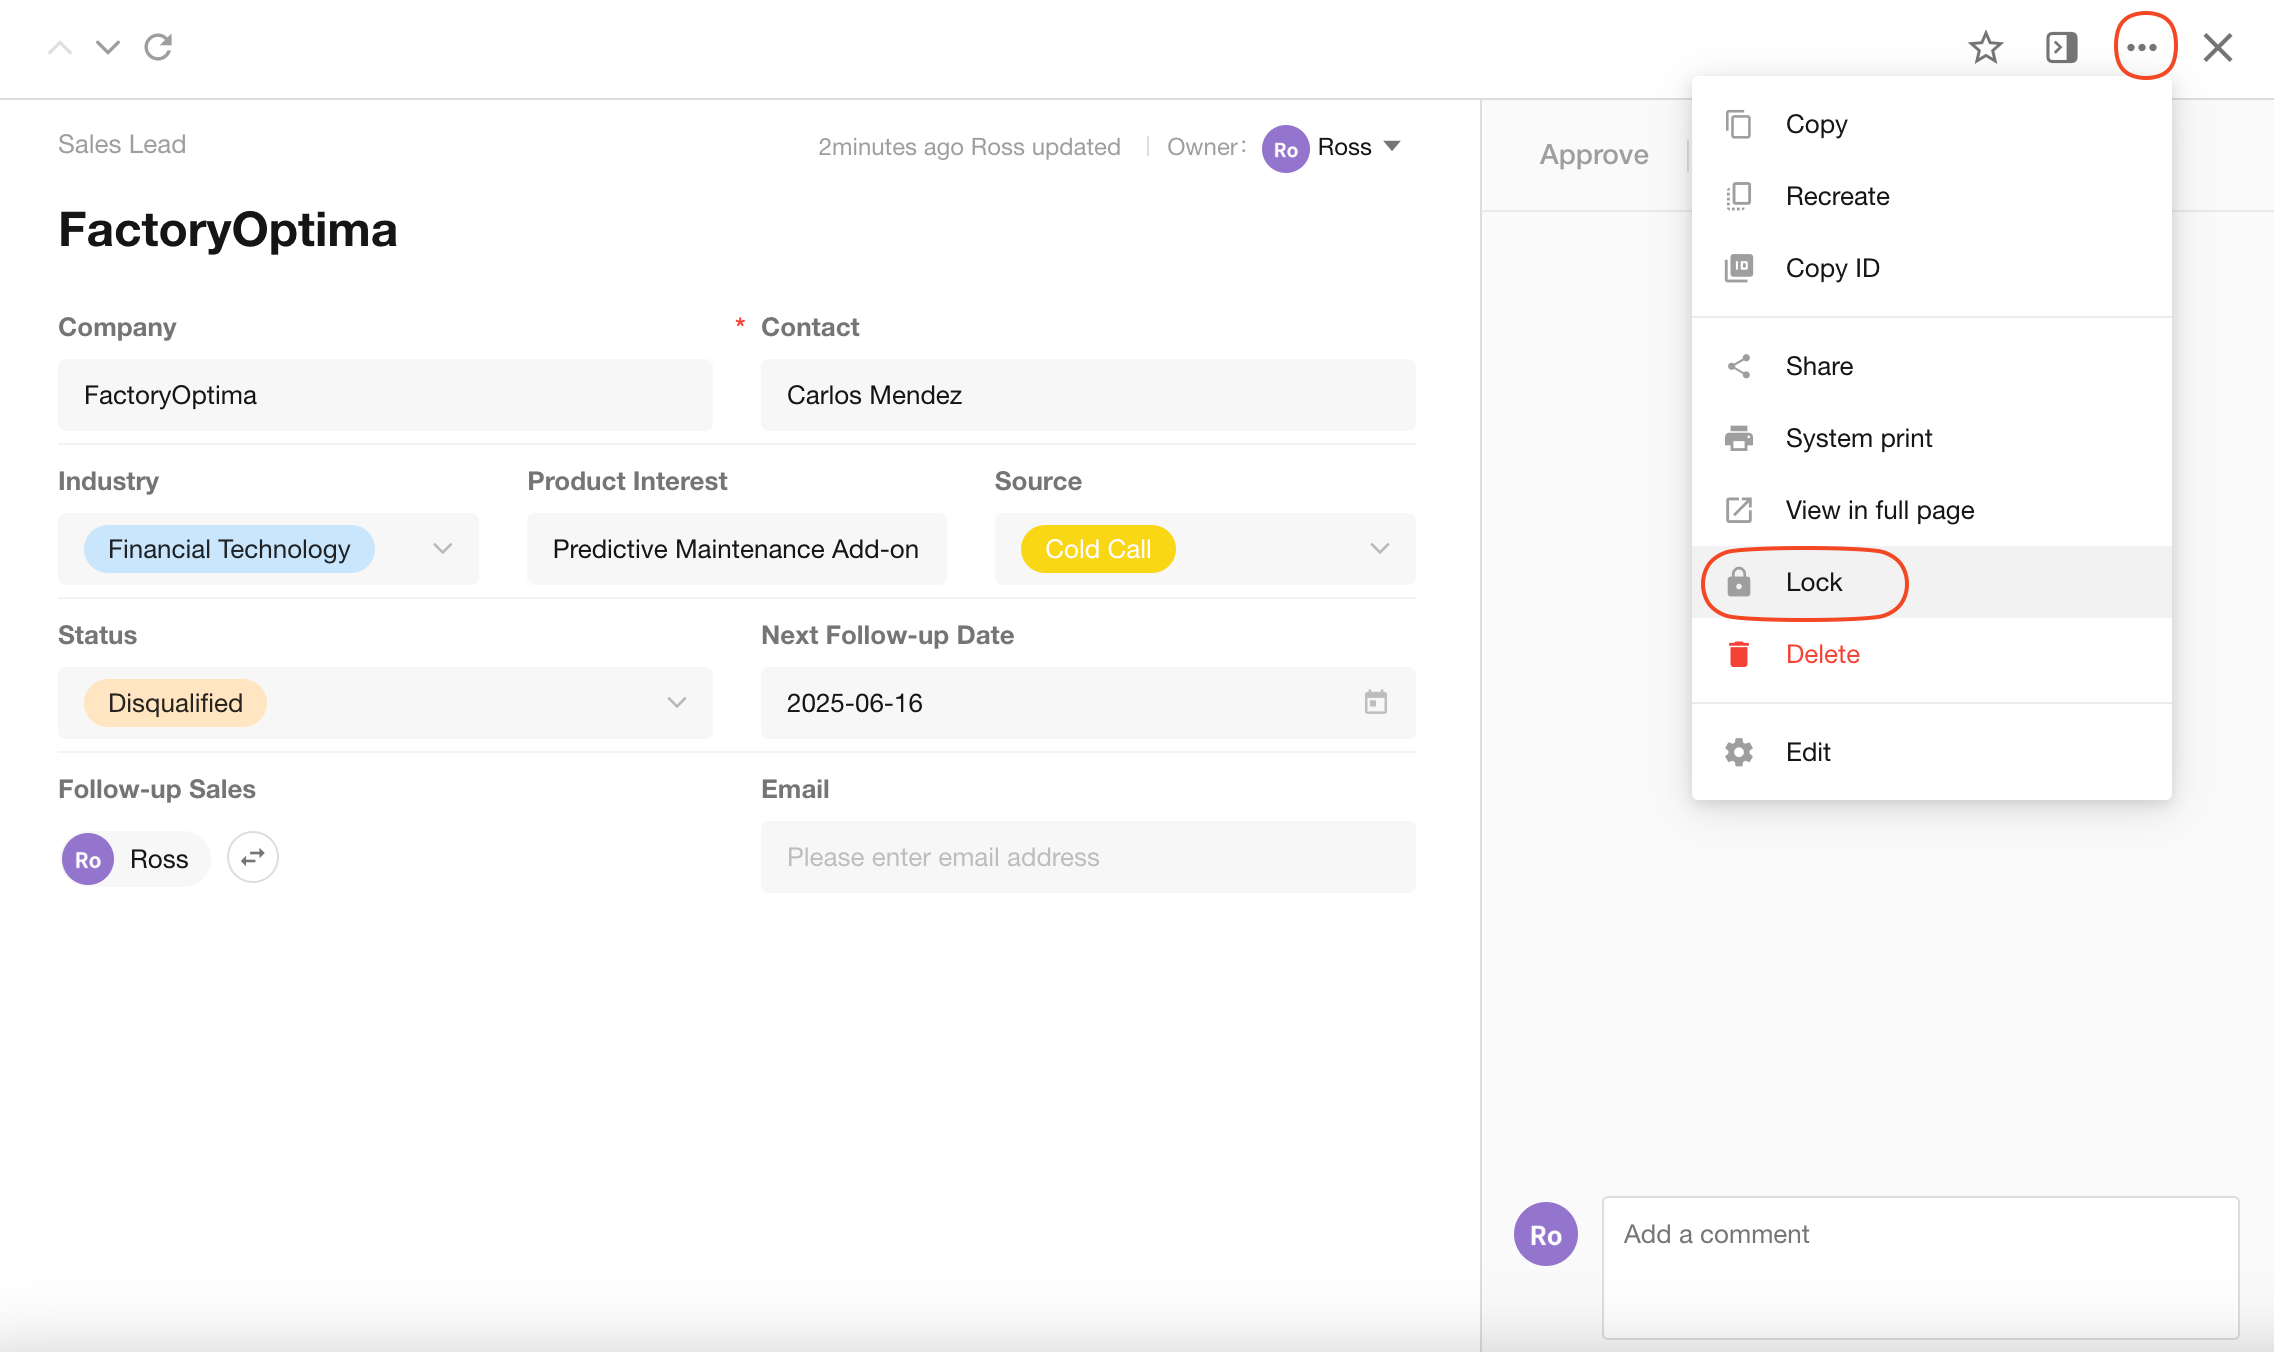
After locking, the lock status and description will appear on the record’s detail page.
Other ways to lock records:
-
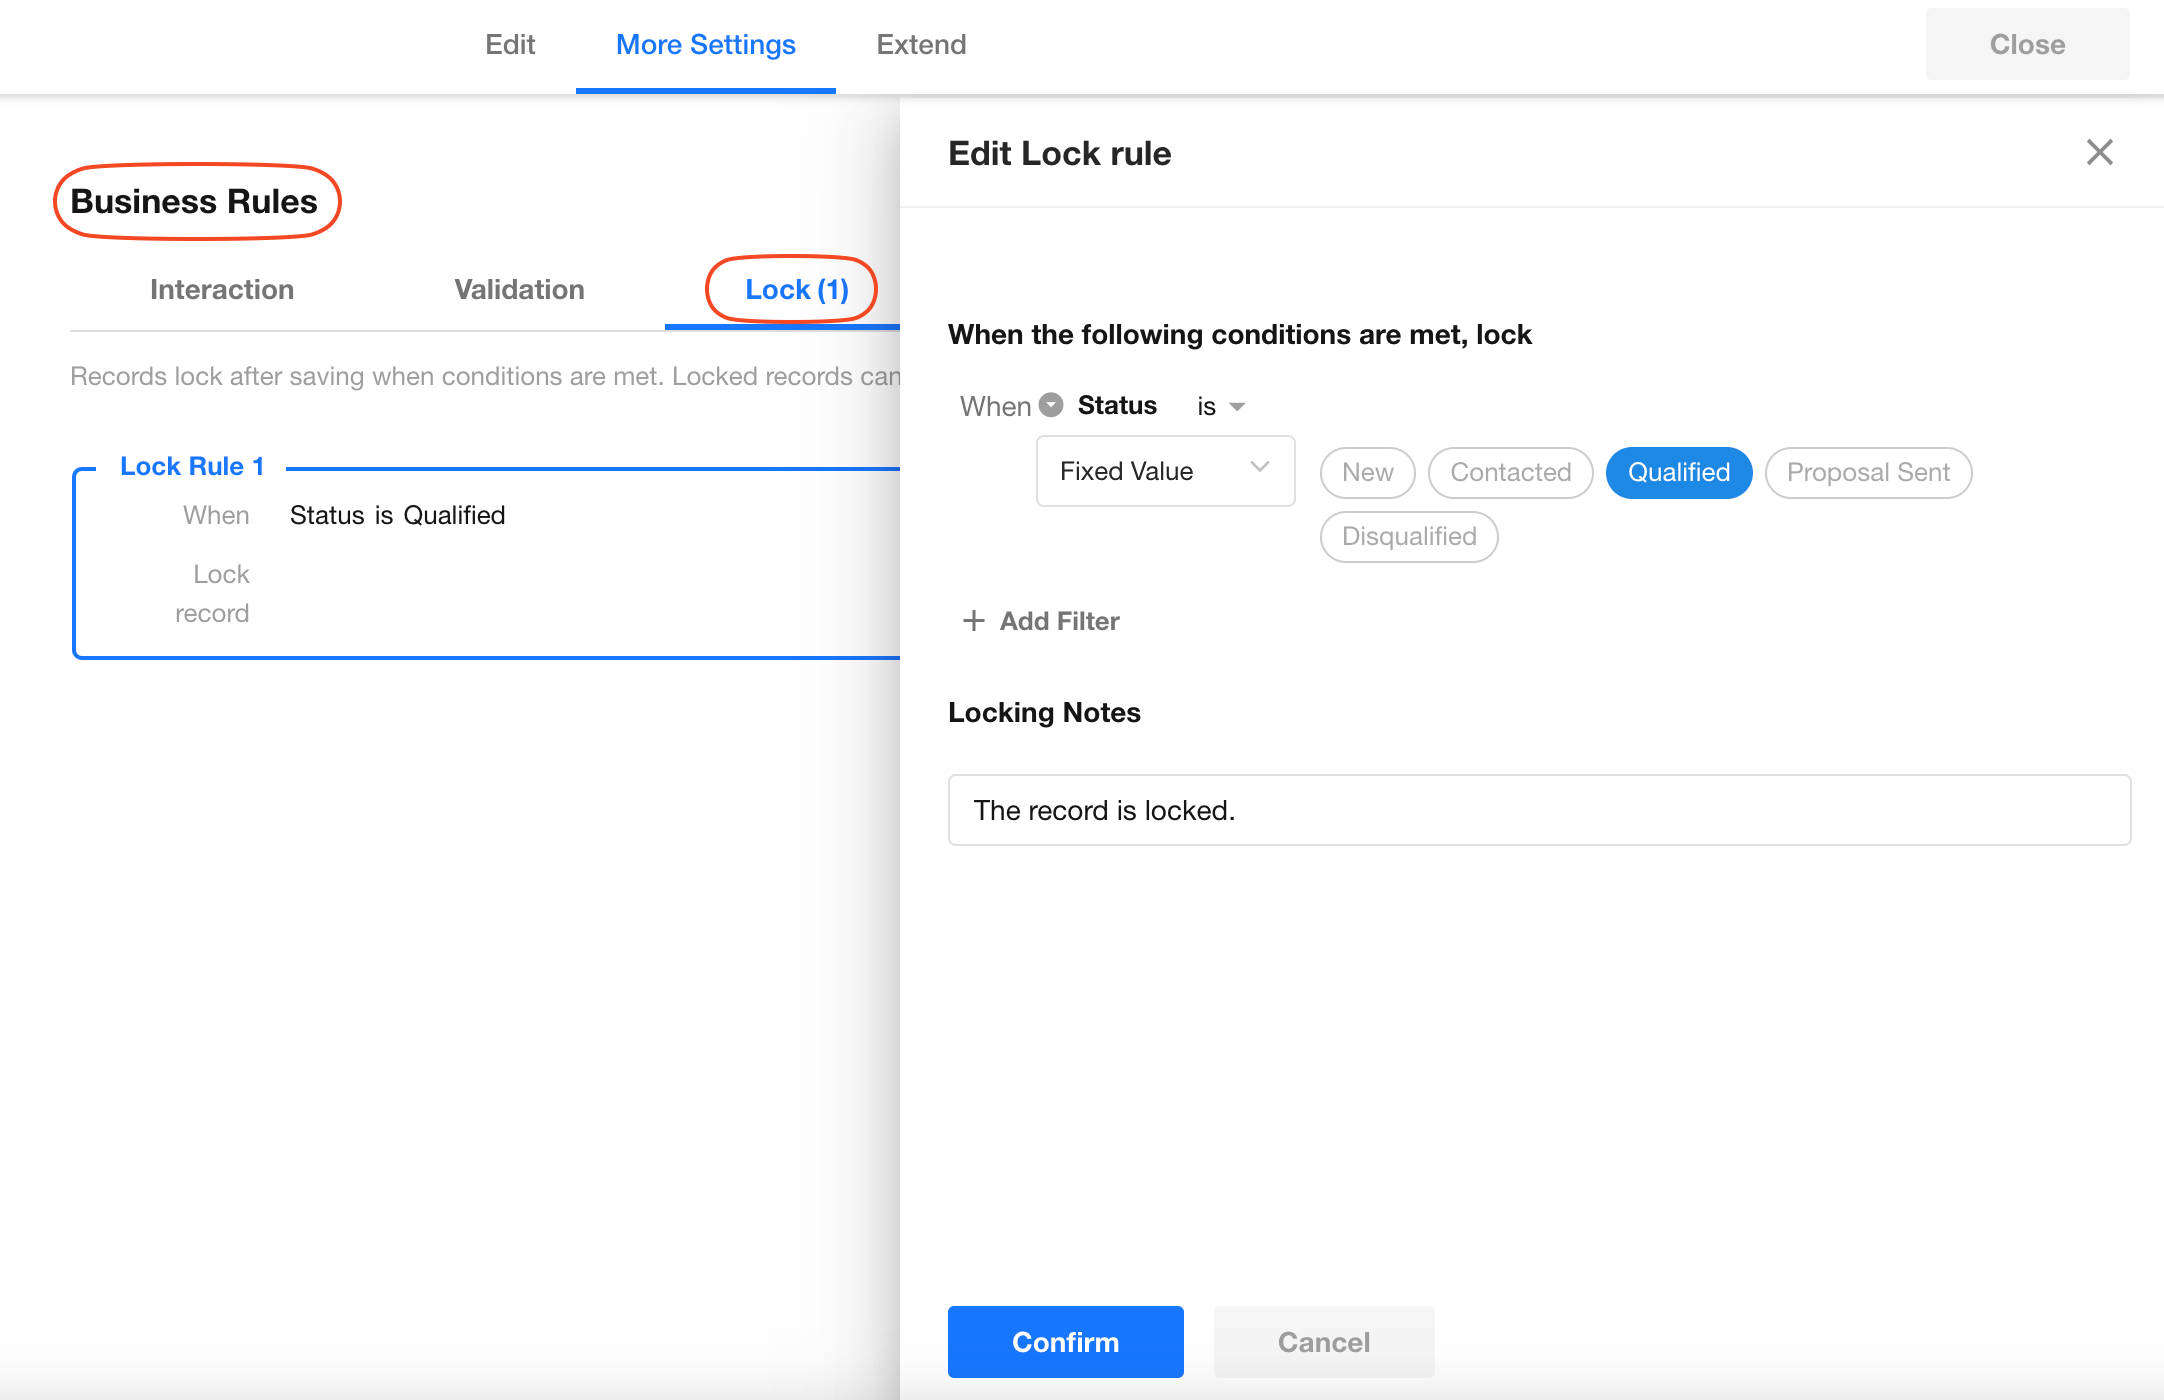
Lock records via business rules
Both application administrators and regular members can lock records by triggering business rules. Only application administrators can unlock records.
-
Bulk lock records
Application administrators can select multiple records and click the "More" button at the top-right of the page to lock or unlock records. A maximum of 1,000 records can be operated on at once.
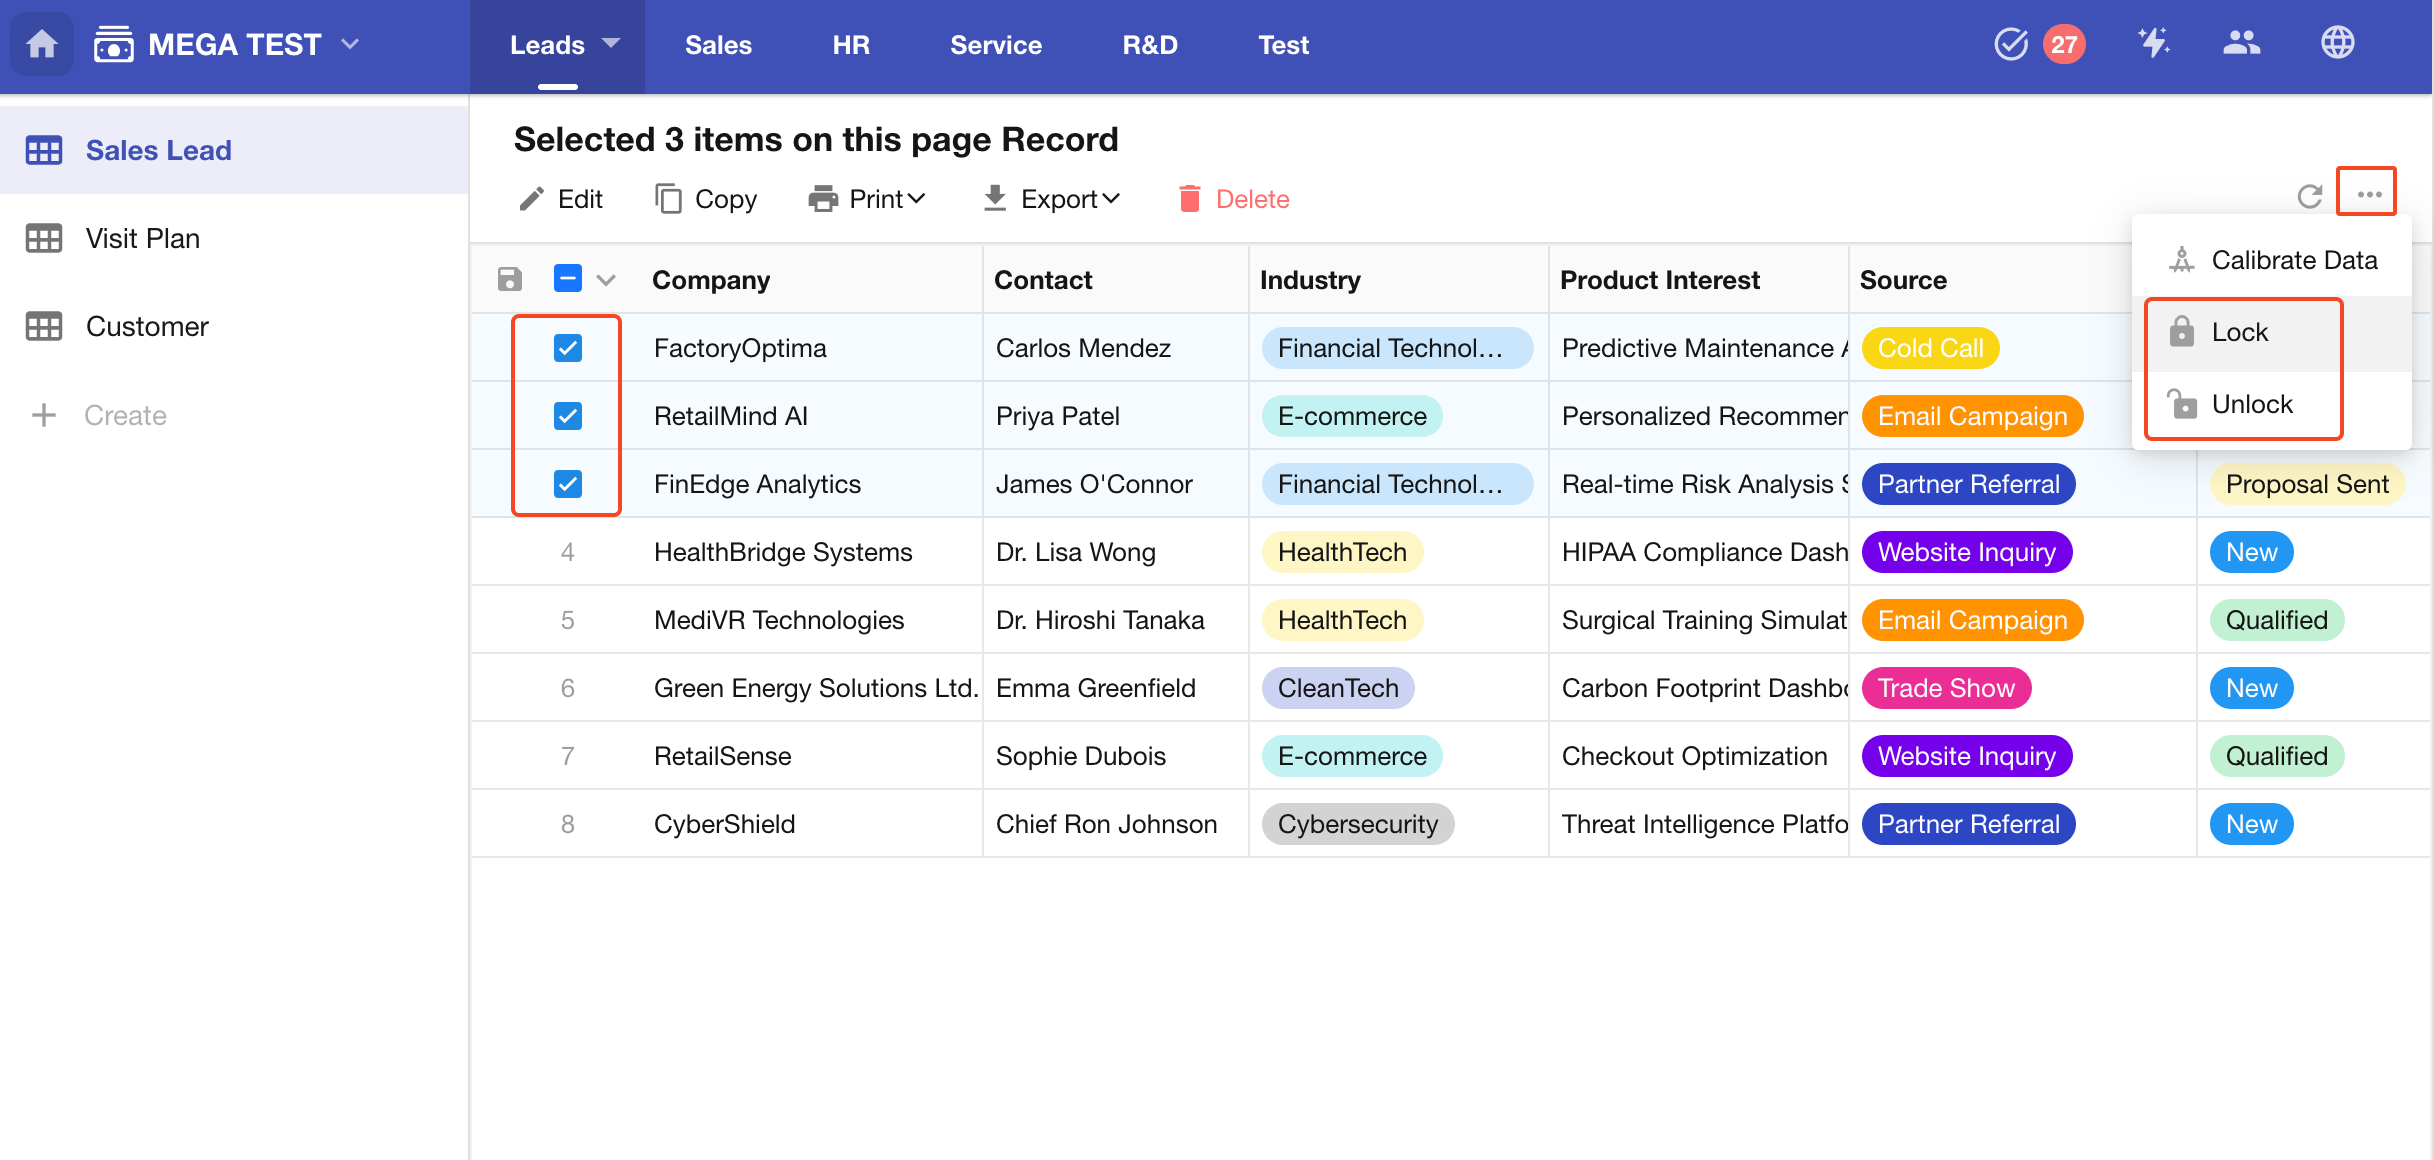
- Records cannot be filtered by lock status.
- Locked records cannot be deleted or modified by any means.
Delete/Restore a Record
Delete a Record
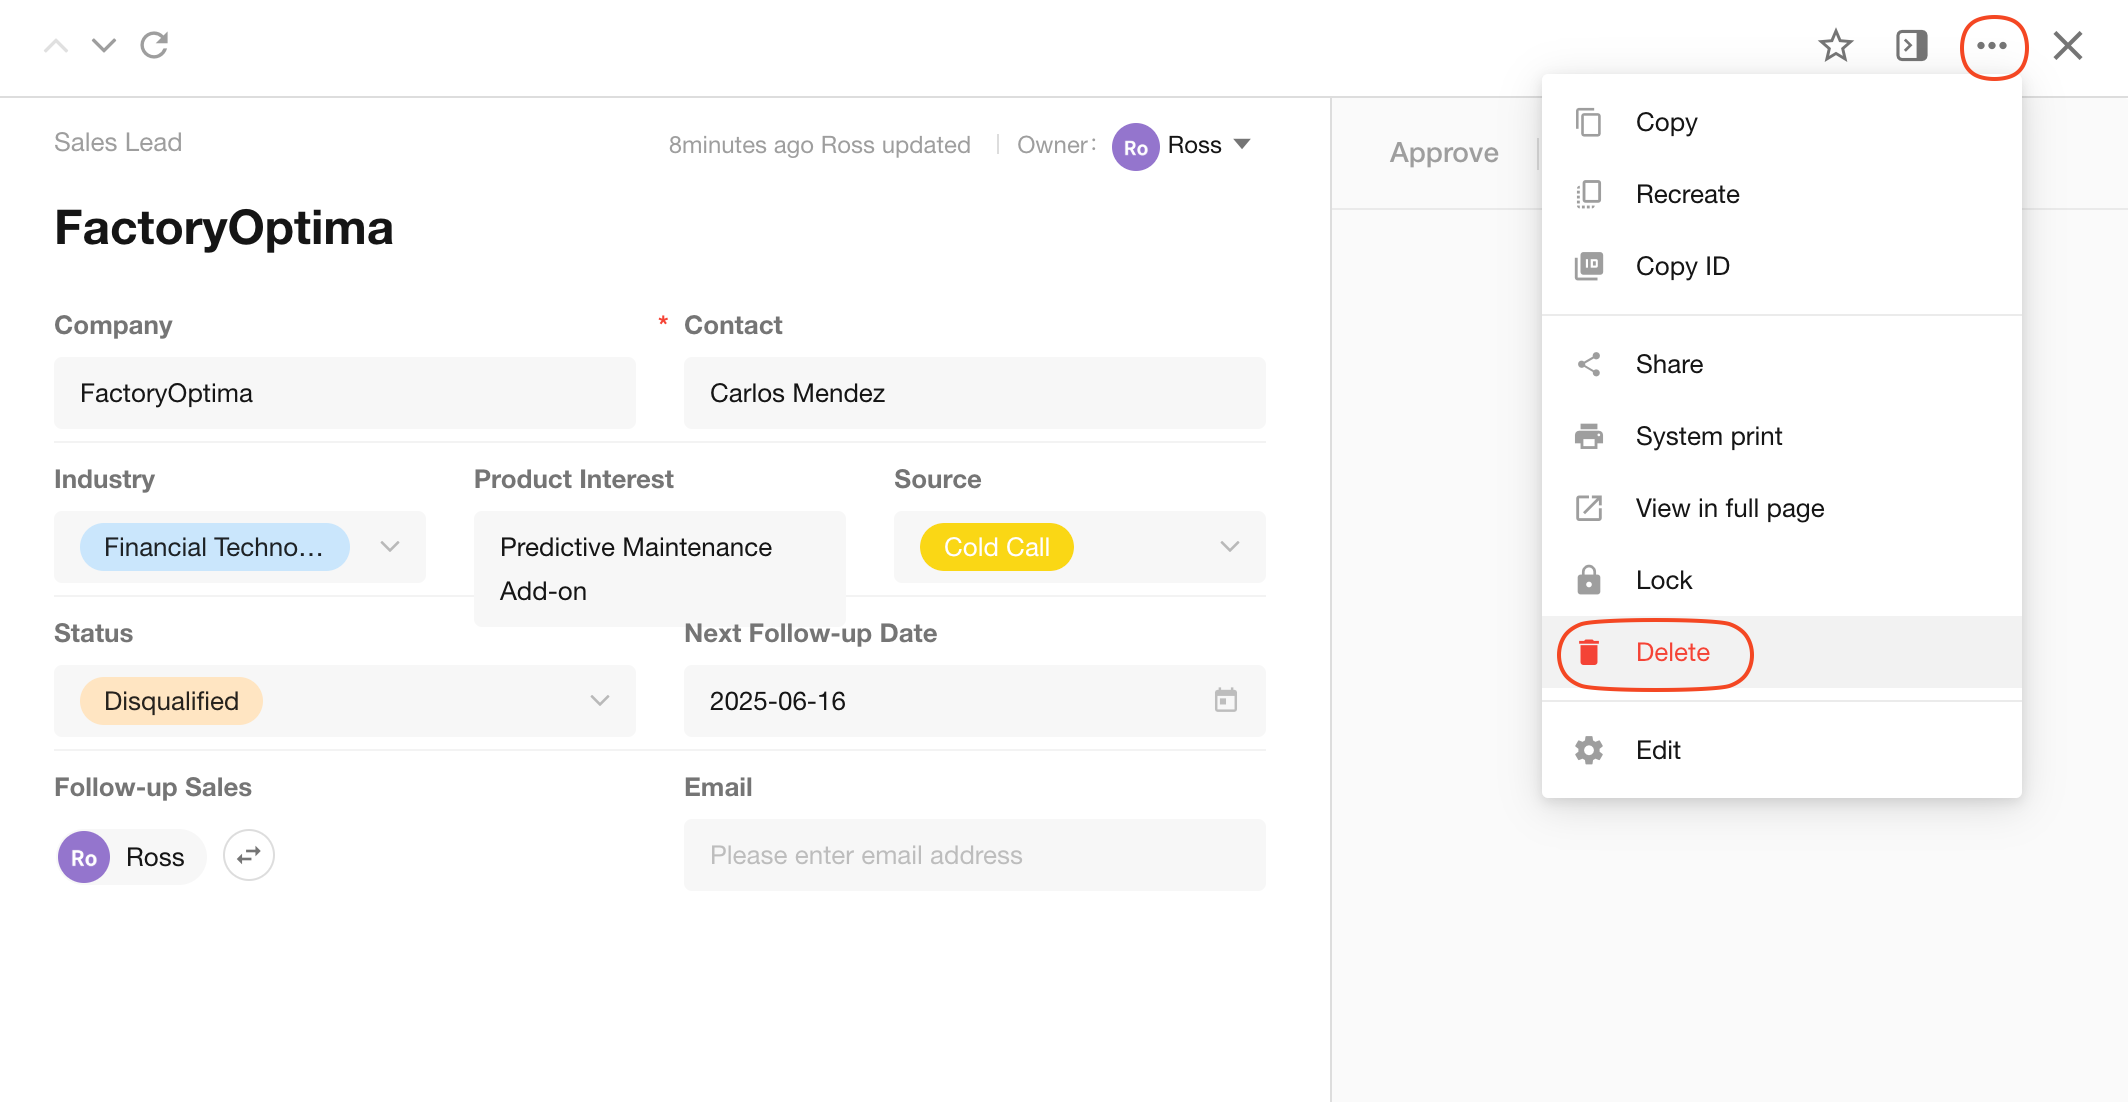
Delete records in bulk or clear worksheet data.
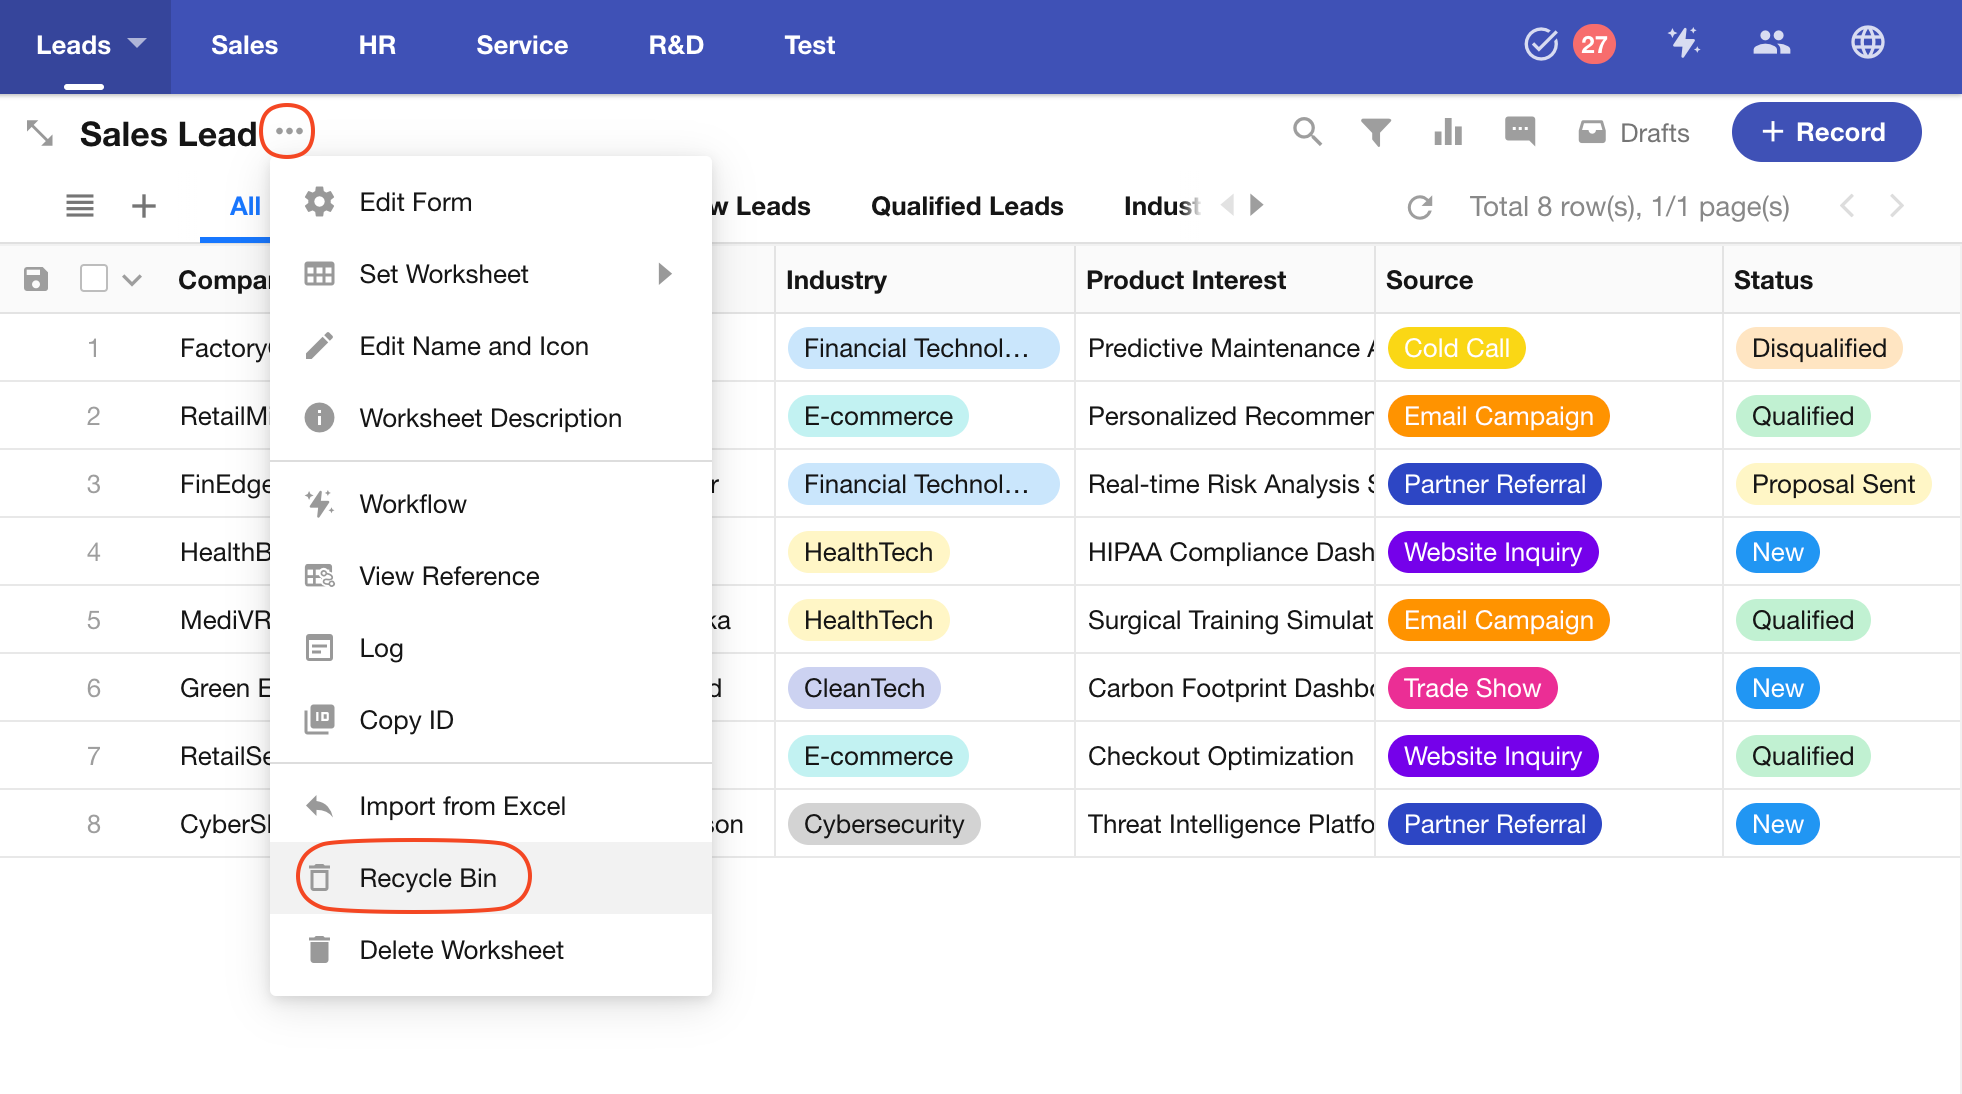
Restore a Record
Deleted records are moved to the recycle bin in the worksheet and can be restored from there.
To permanently delete a record, it must be completely deleted from the recycle bin. Once permanently deleted, the record cannot be restored.
-
Non-application administrators can restore records they have deleted.
-
Only application administrators can permanently delete records.
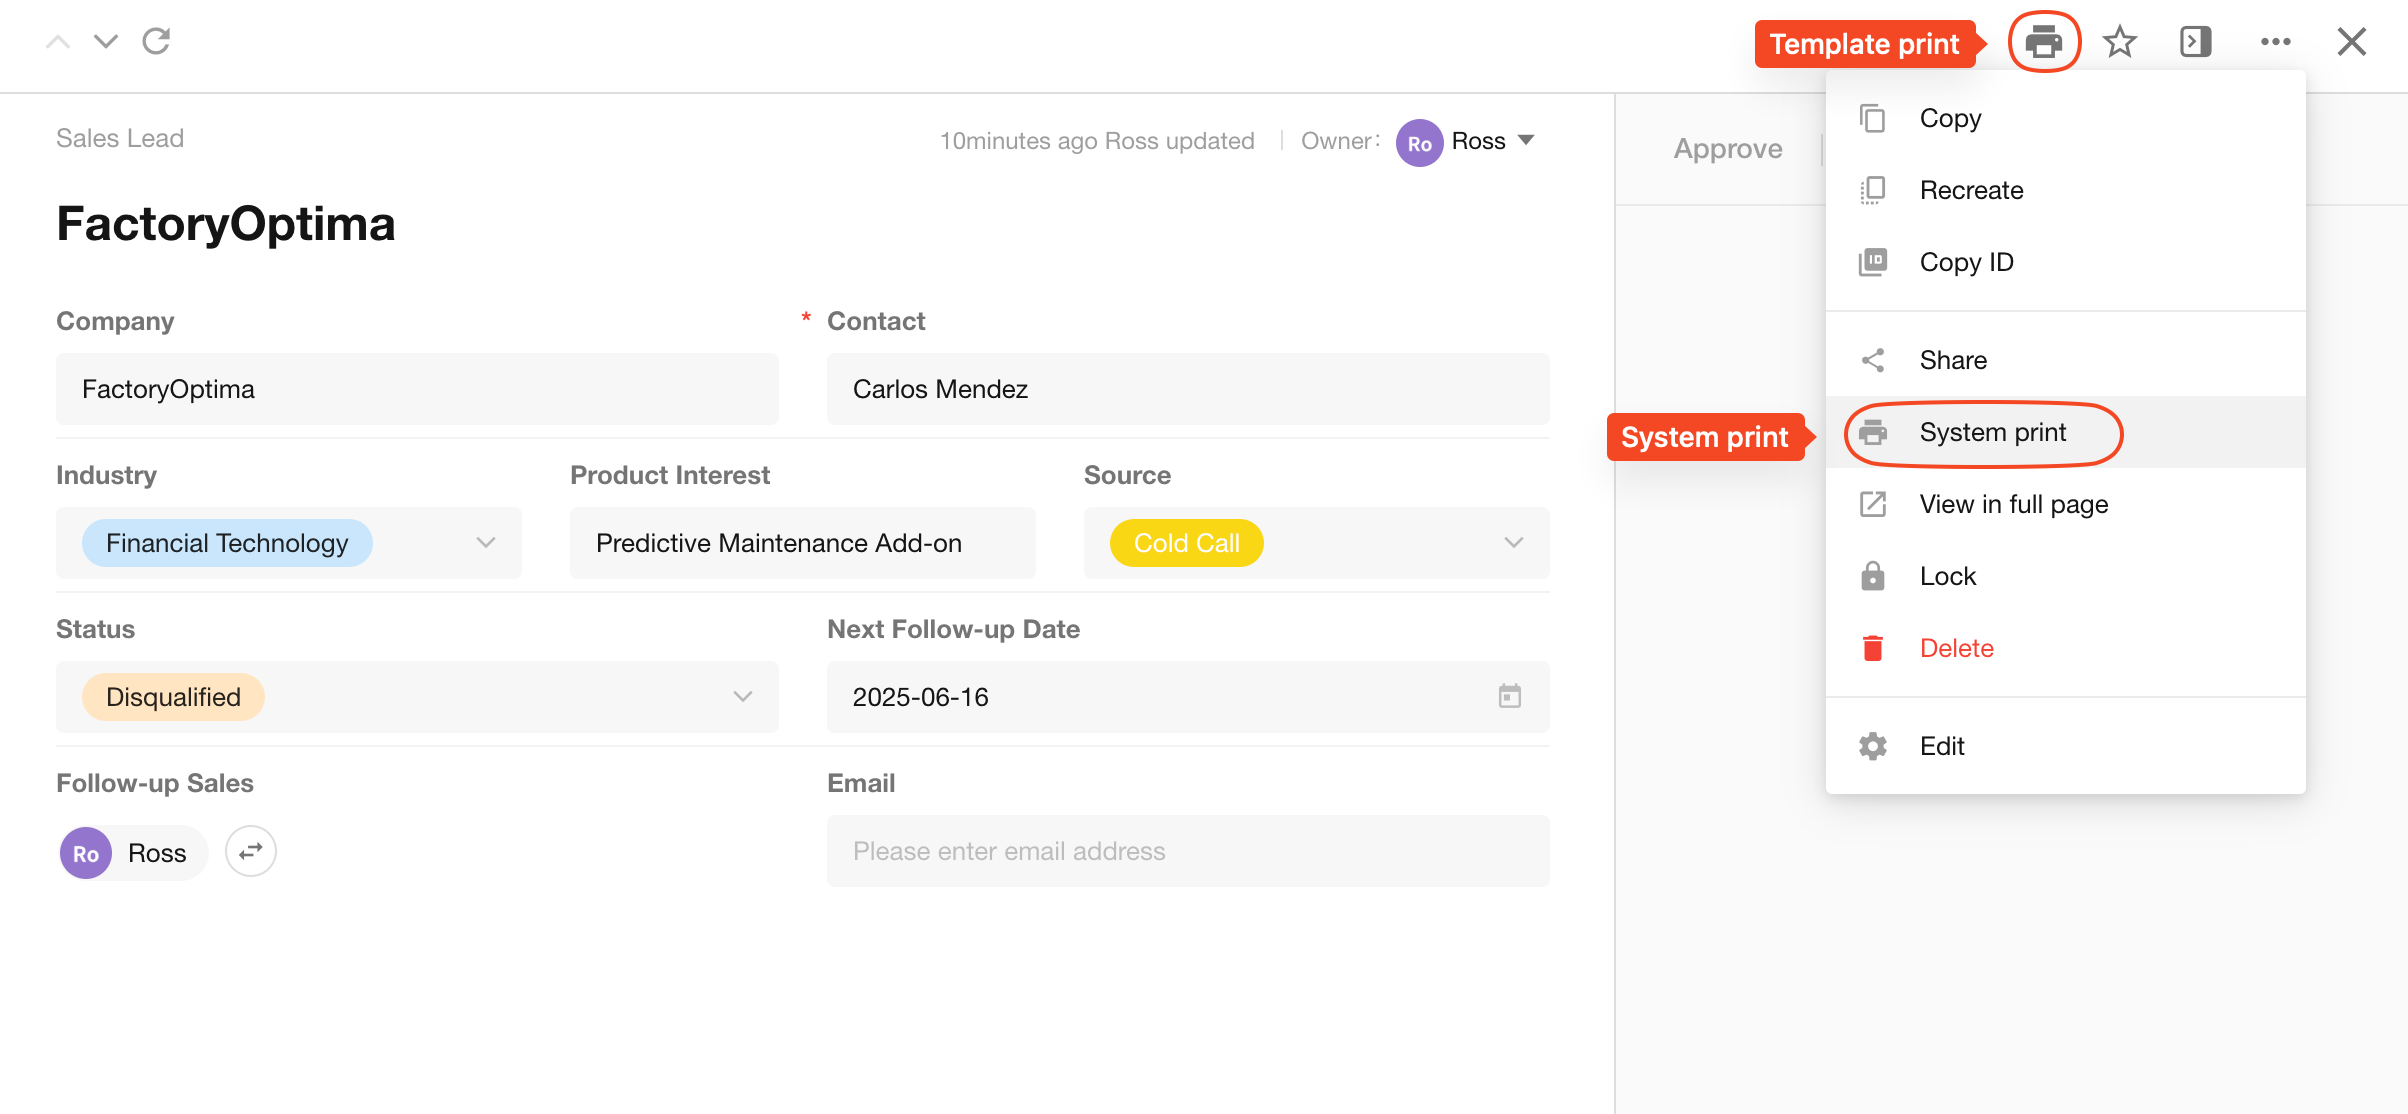
Print a Record
When printing a record, you can use the system’s default print or upload a Word/Excel print template, or save the system’s print configuration as a template to quickly print according to the template by clicking the print icon in the operation toolbar.
If no print template is configured, the template-print icon will not appear in the operation toolbar, and only system printing will be available.
Share a Record
Click the “Share” button to enable public sharing of the record, then share the link or QR code with users.
- Shared link expiration and password verification
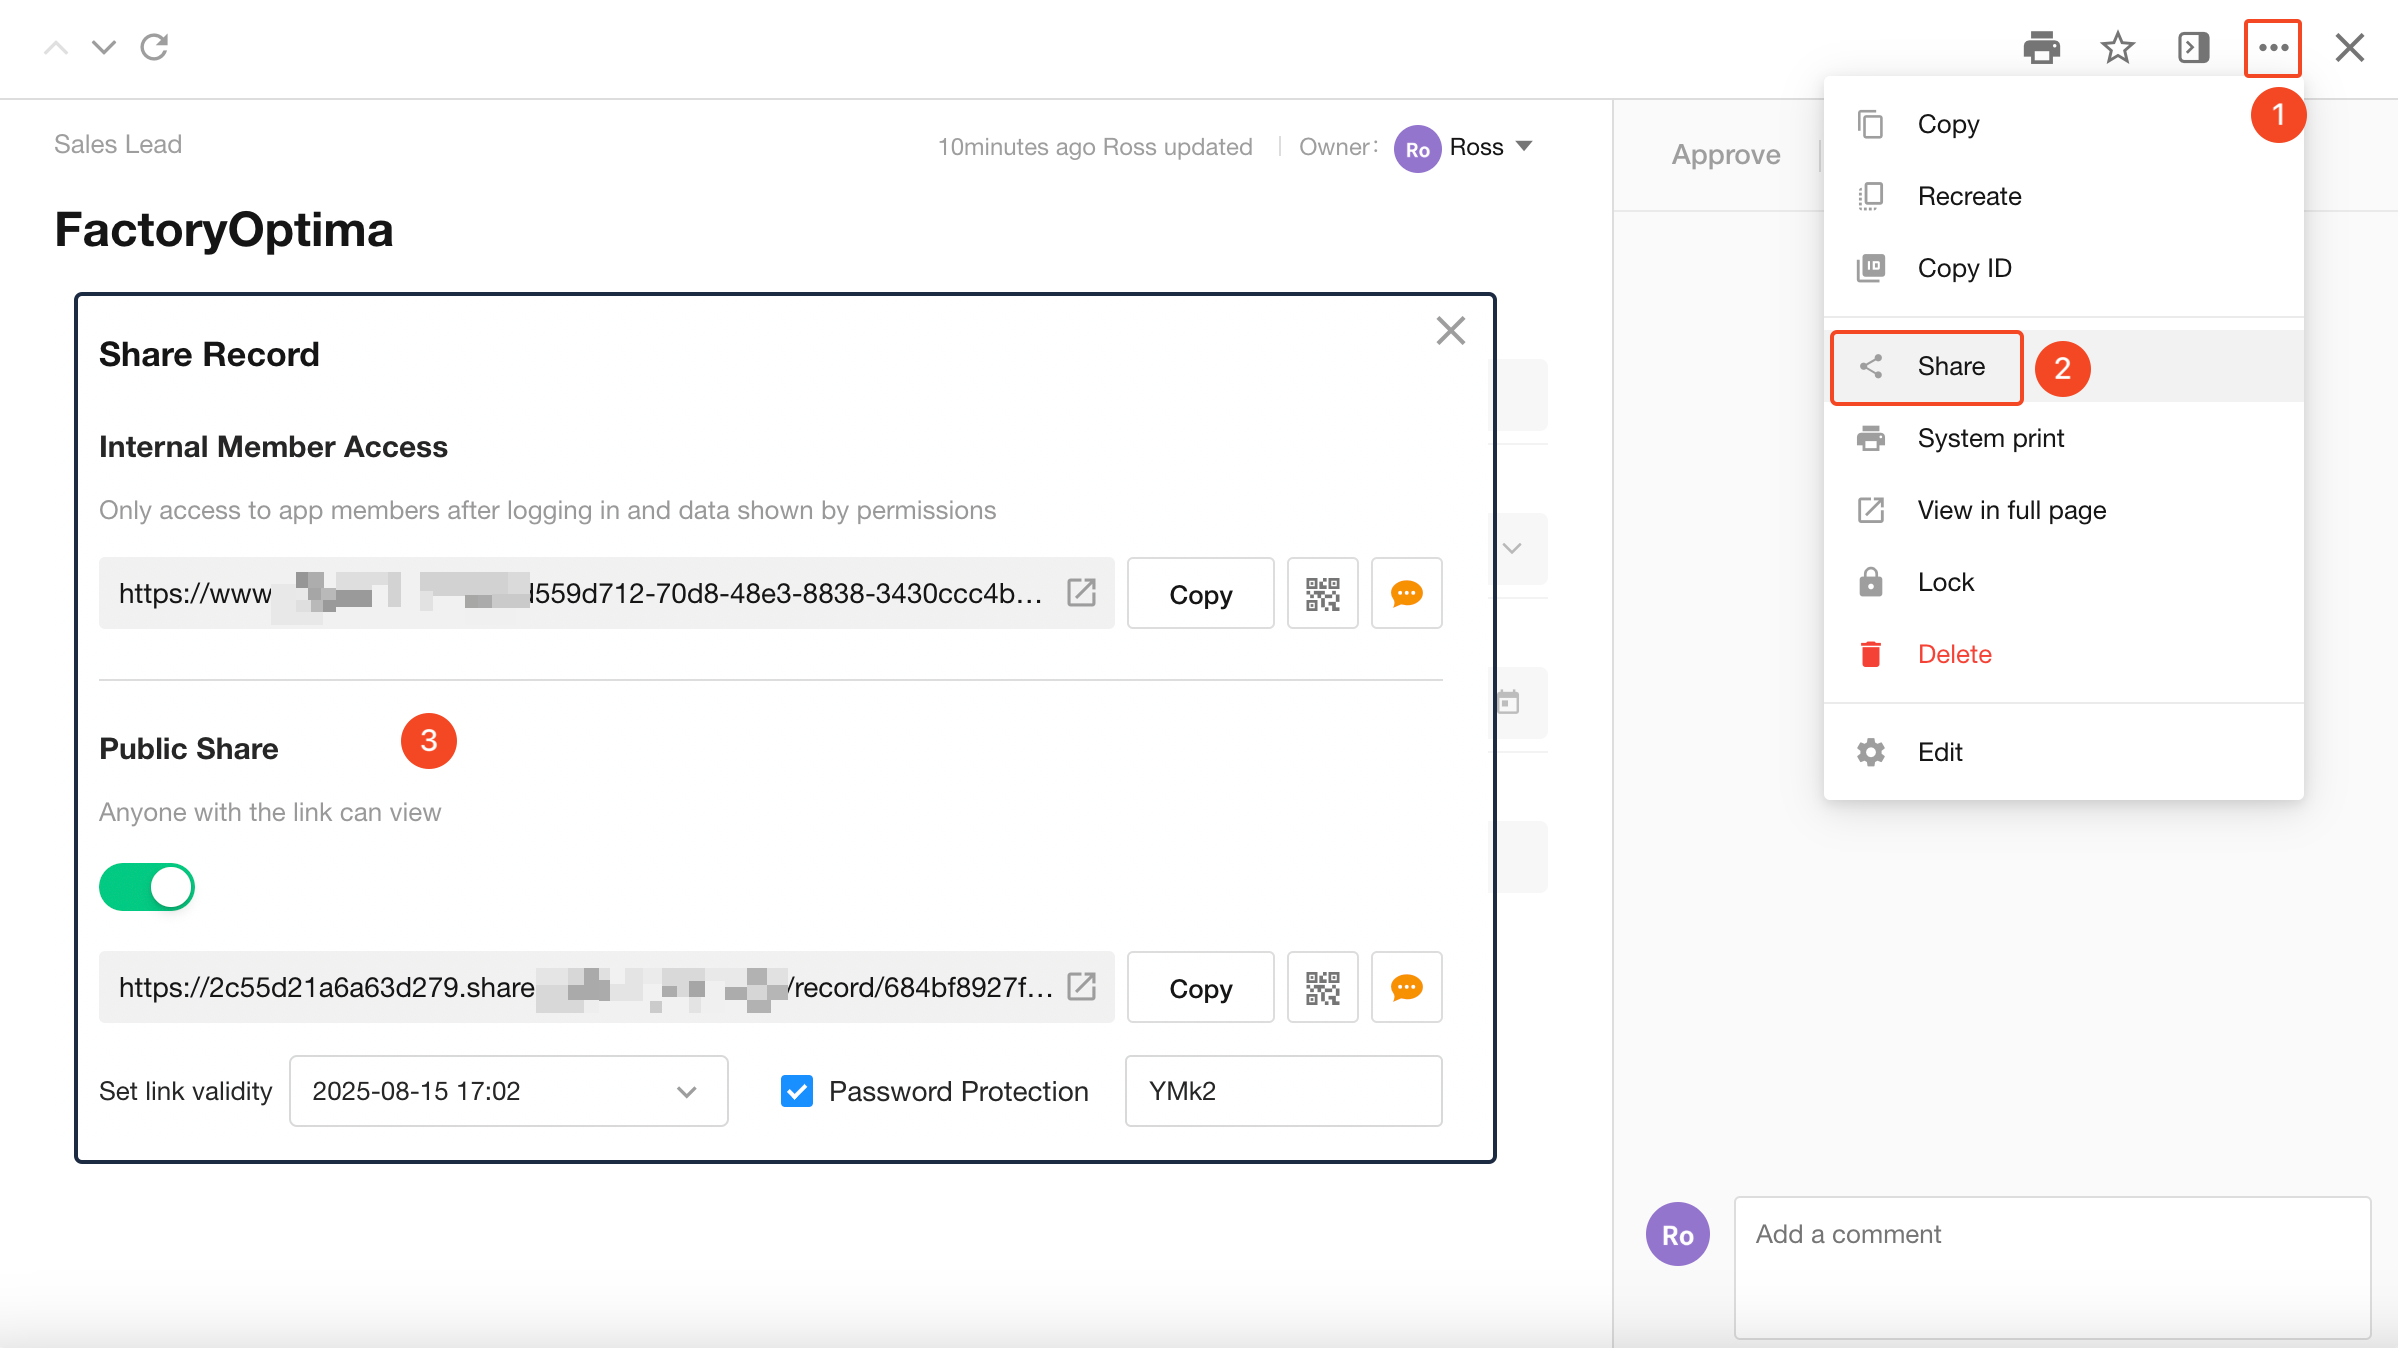
View a Record via Shared Link
Users cannot edit the record when viewing a shared record. They will see the fields as shared by the person.
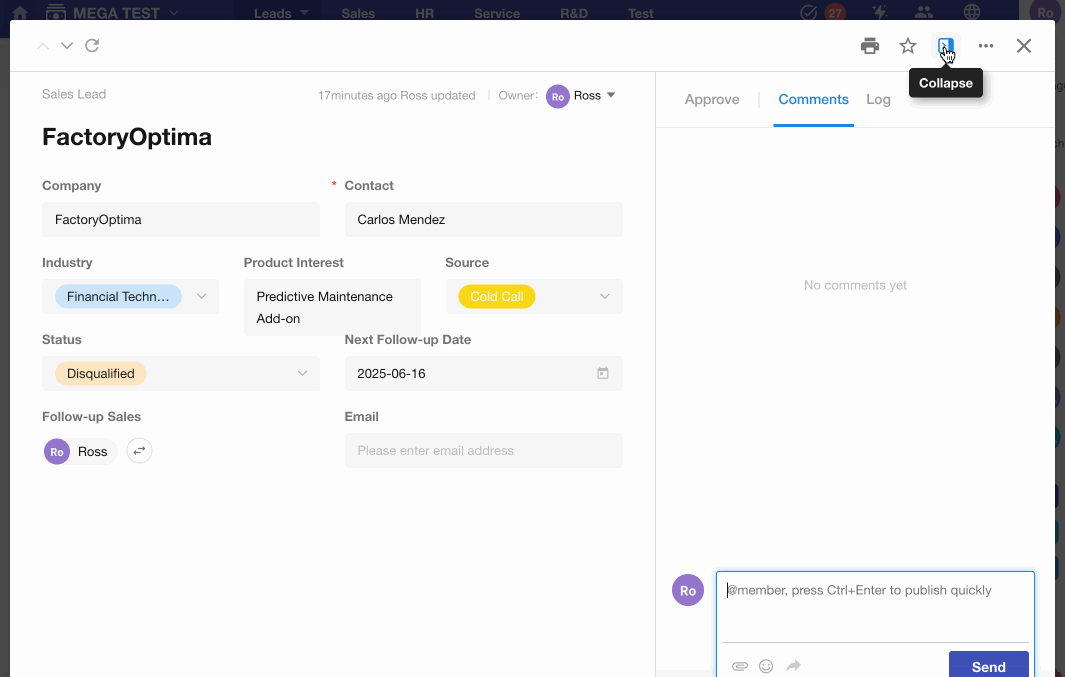
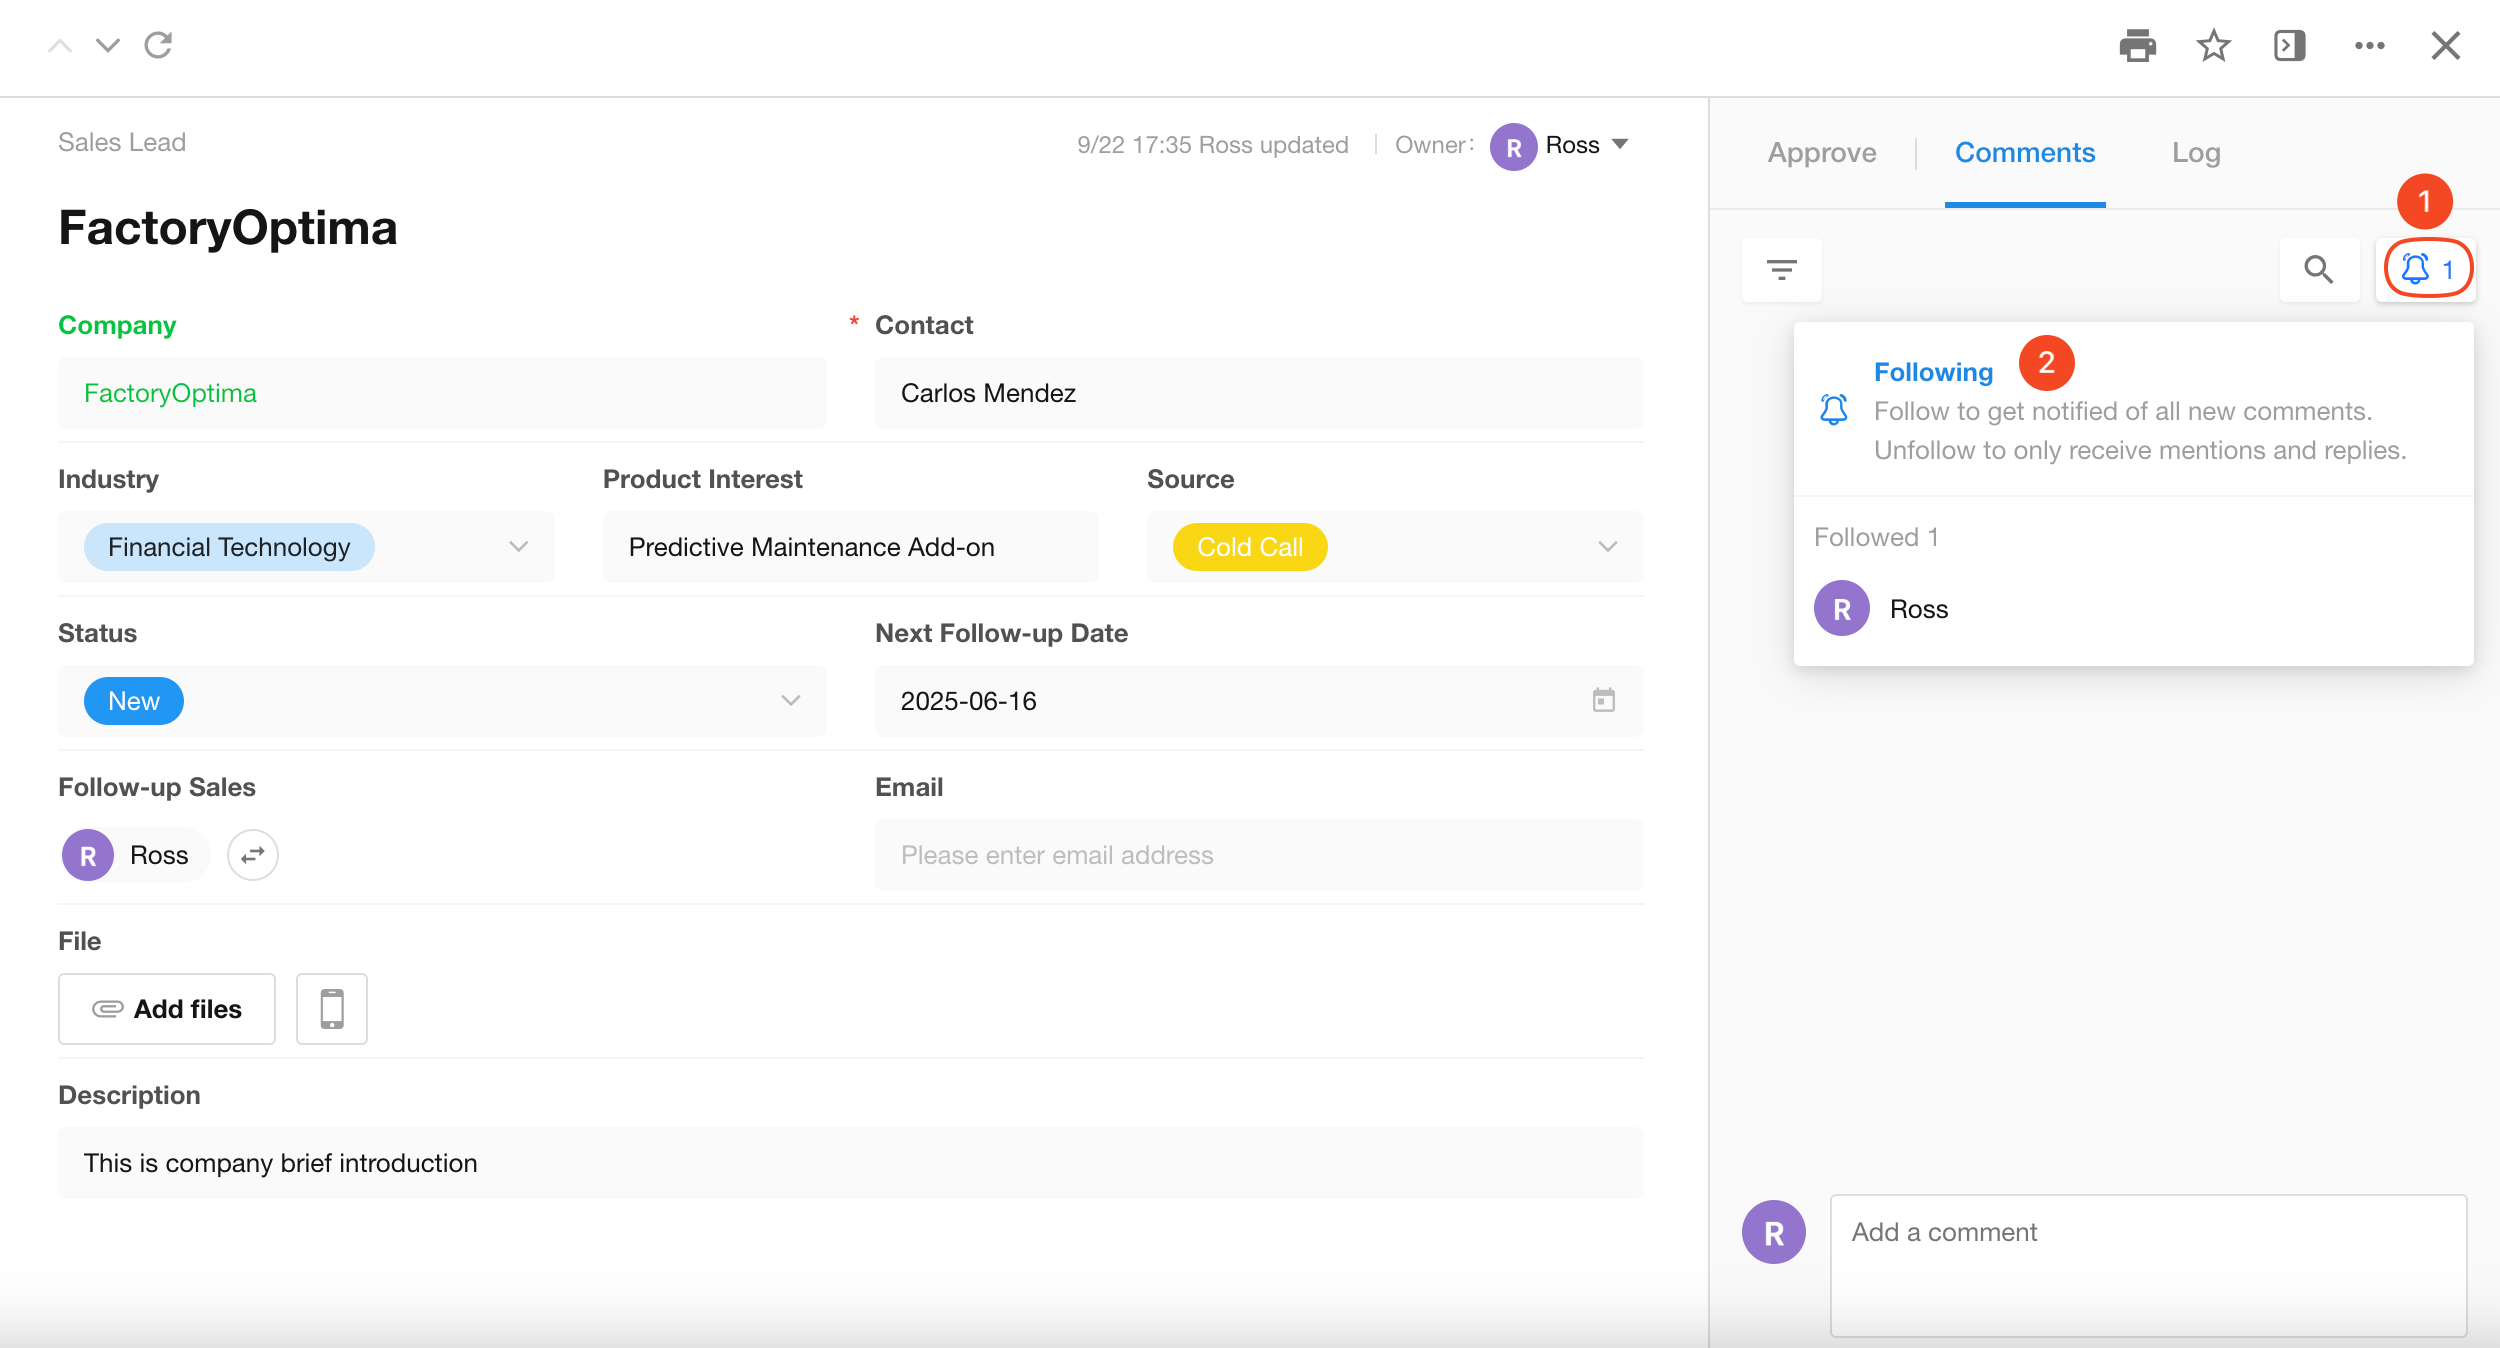
Expand/Collapse Comments
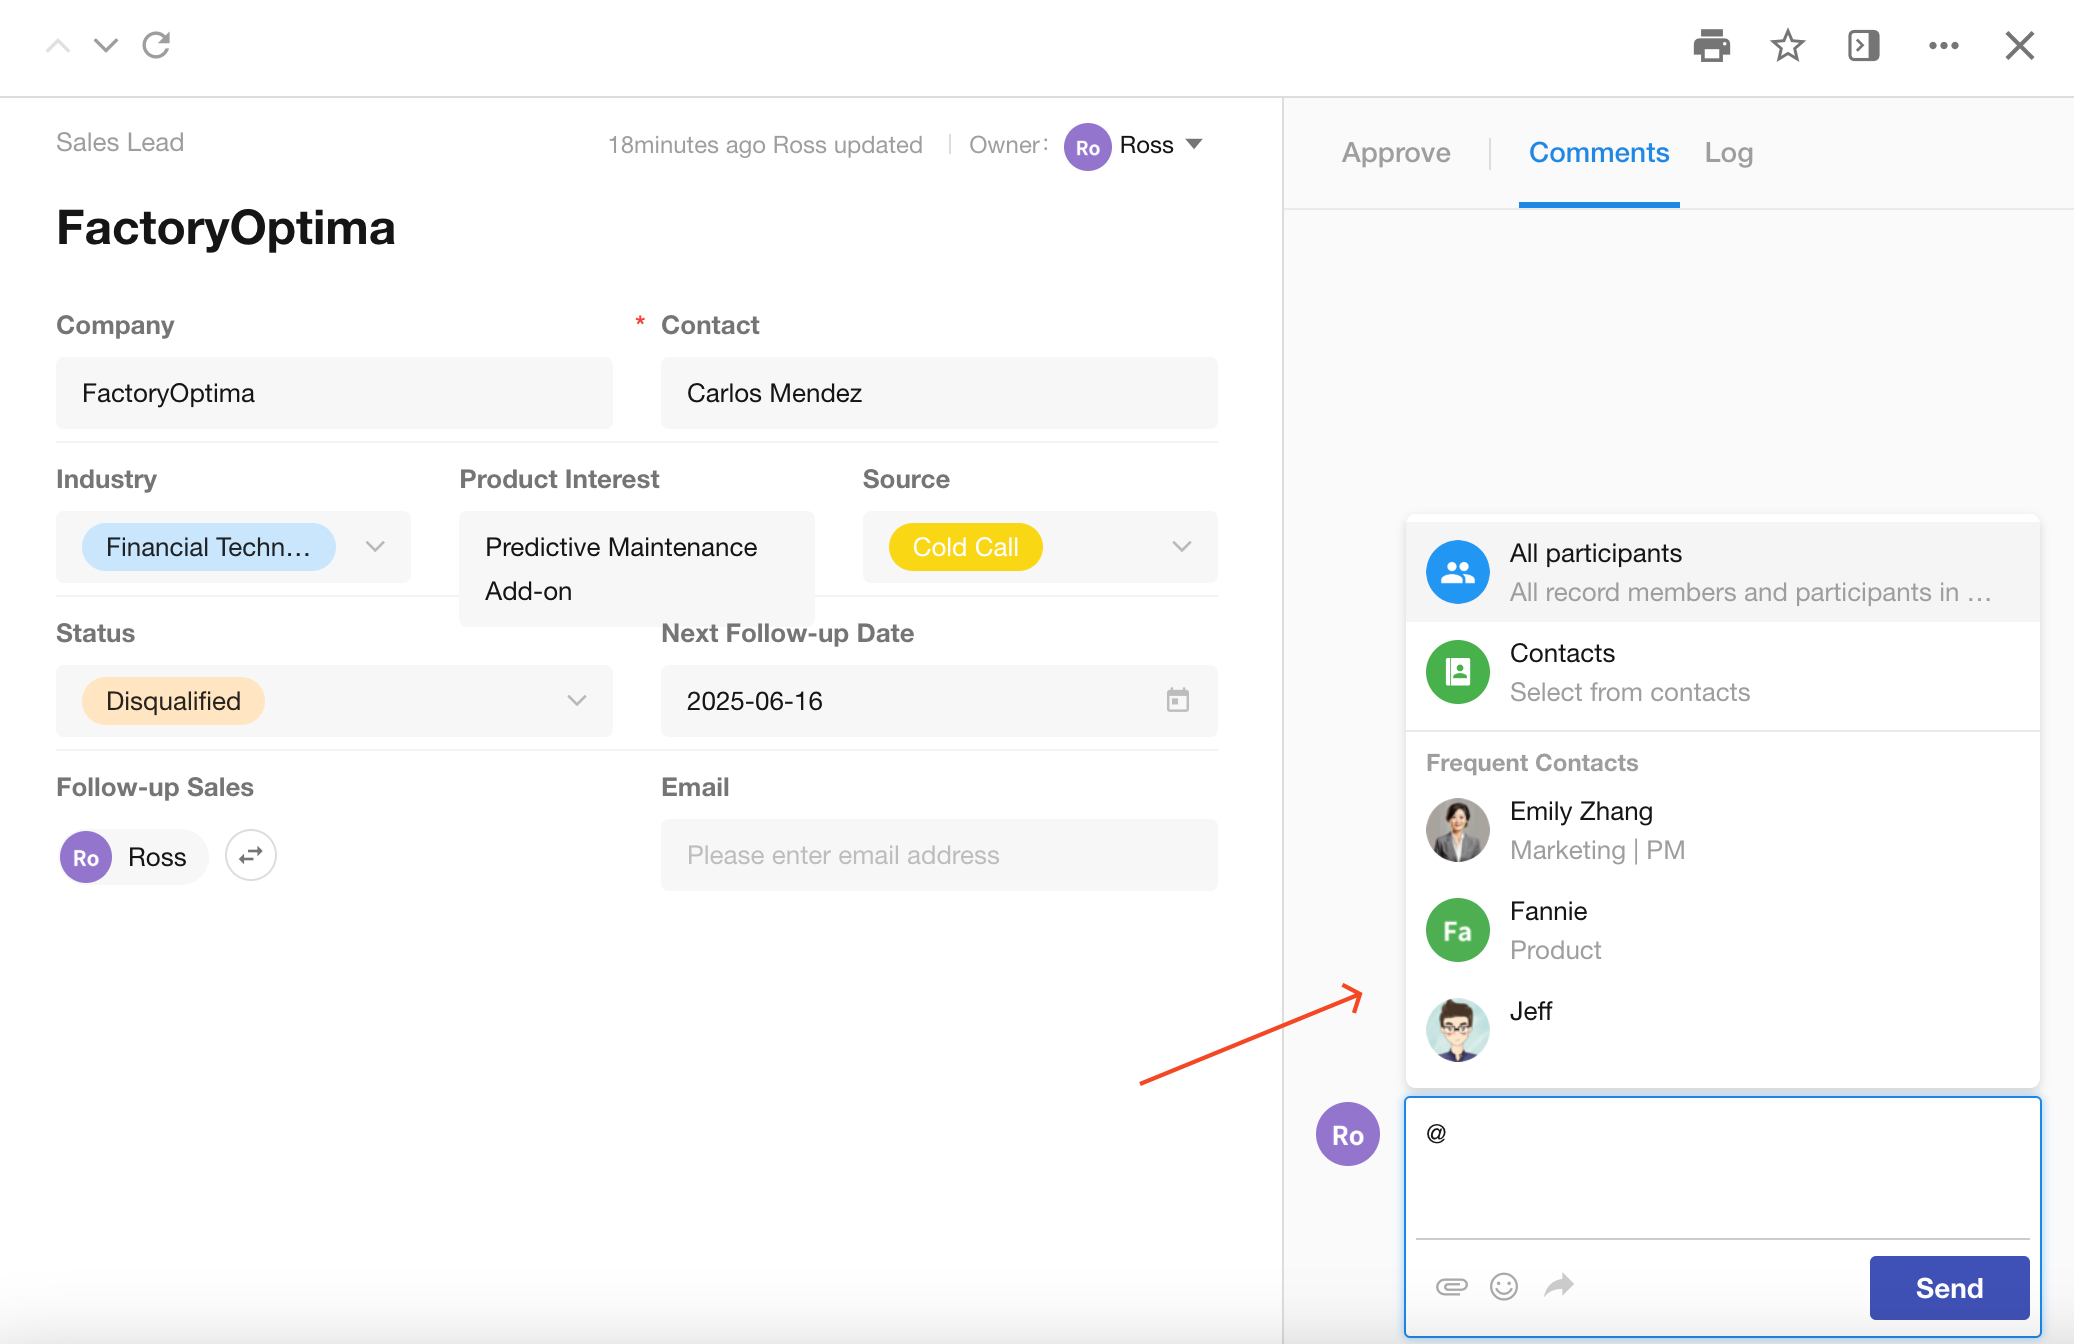
Comments a Record
Users can comment on a record. By mentioning a specific person or mentioning all members of the record, relevant personnel will receive a notification. When replying to another’s comment, the user will also receive a notification.
Follow Discussion
After following a record’s discussion, you will receive notification messages when new comments are posted — even if you are not mentioned with @ or directly replied to.
To follow a discussion, click the bell icon in the Discussion section of the record details page. Click again to unfollow.
-
After following a record, notifications for new discussions can be pushed to third-party platforms.
-
Members who have permission to view the record in the worksheet can follow the discussion. Users who only have access via @mentions will not be able to follow the discussion.
-
Once followed, you can view the full list of followers for the record's discussion.
-
Only internal organization members can follow discussions. External users are not supported for this feature.
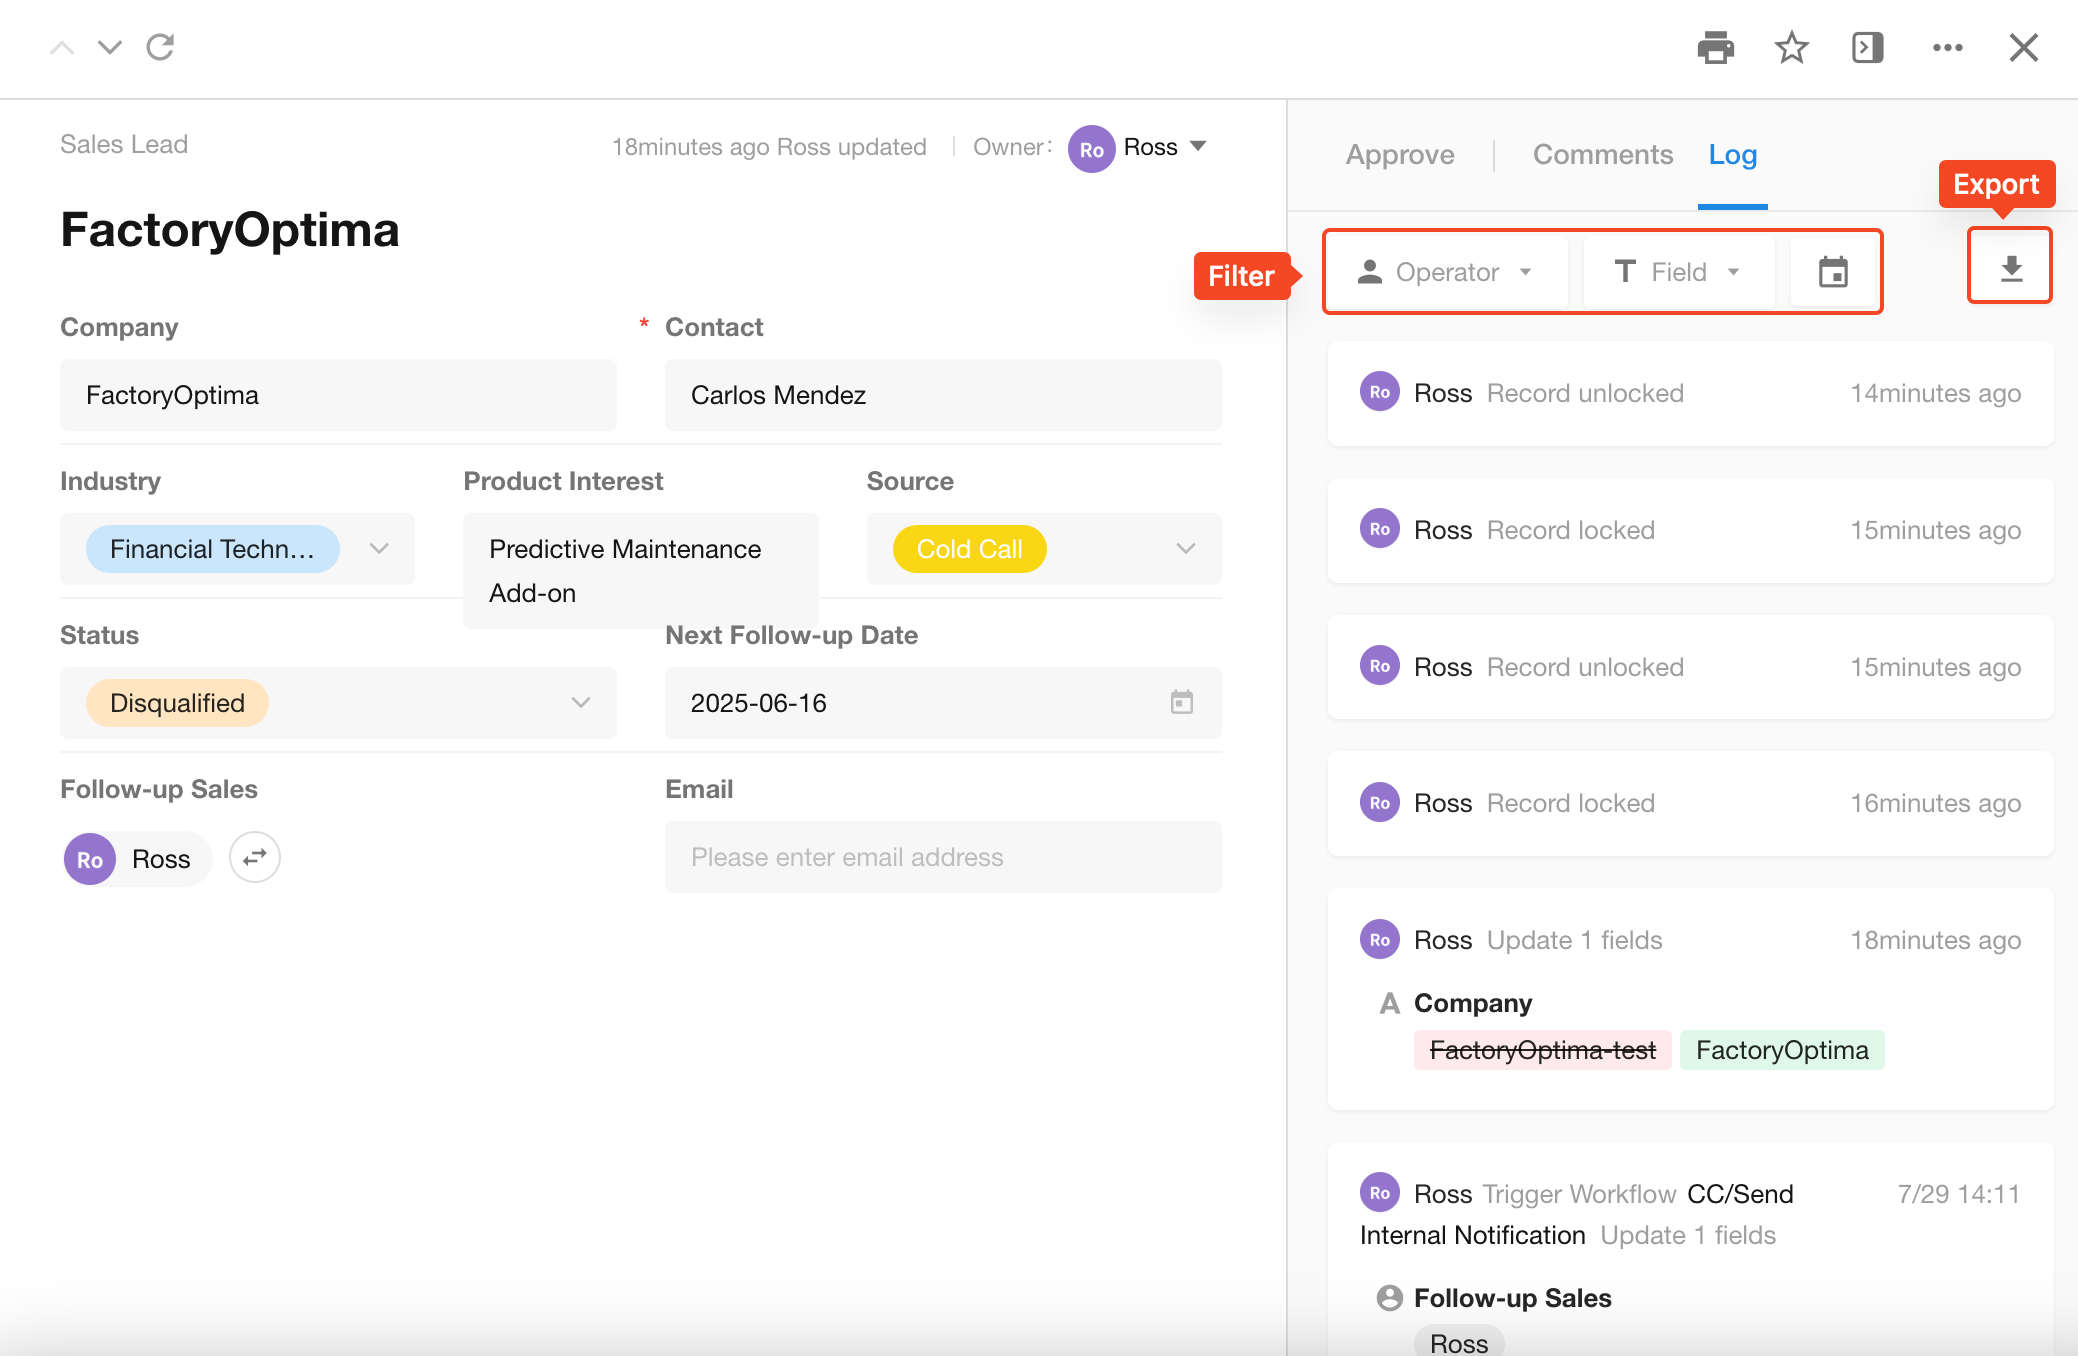
Operation Log
Every operation on a record is logged, such as who created the record, who modified it, what changes were made, what the record was before the modification, and what it is after. The record logs can be exported.
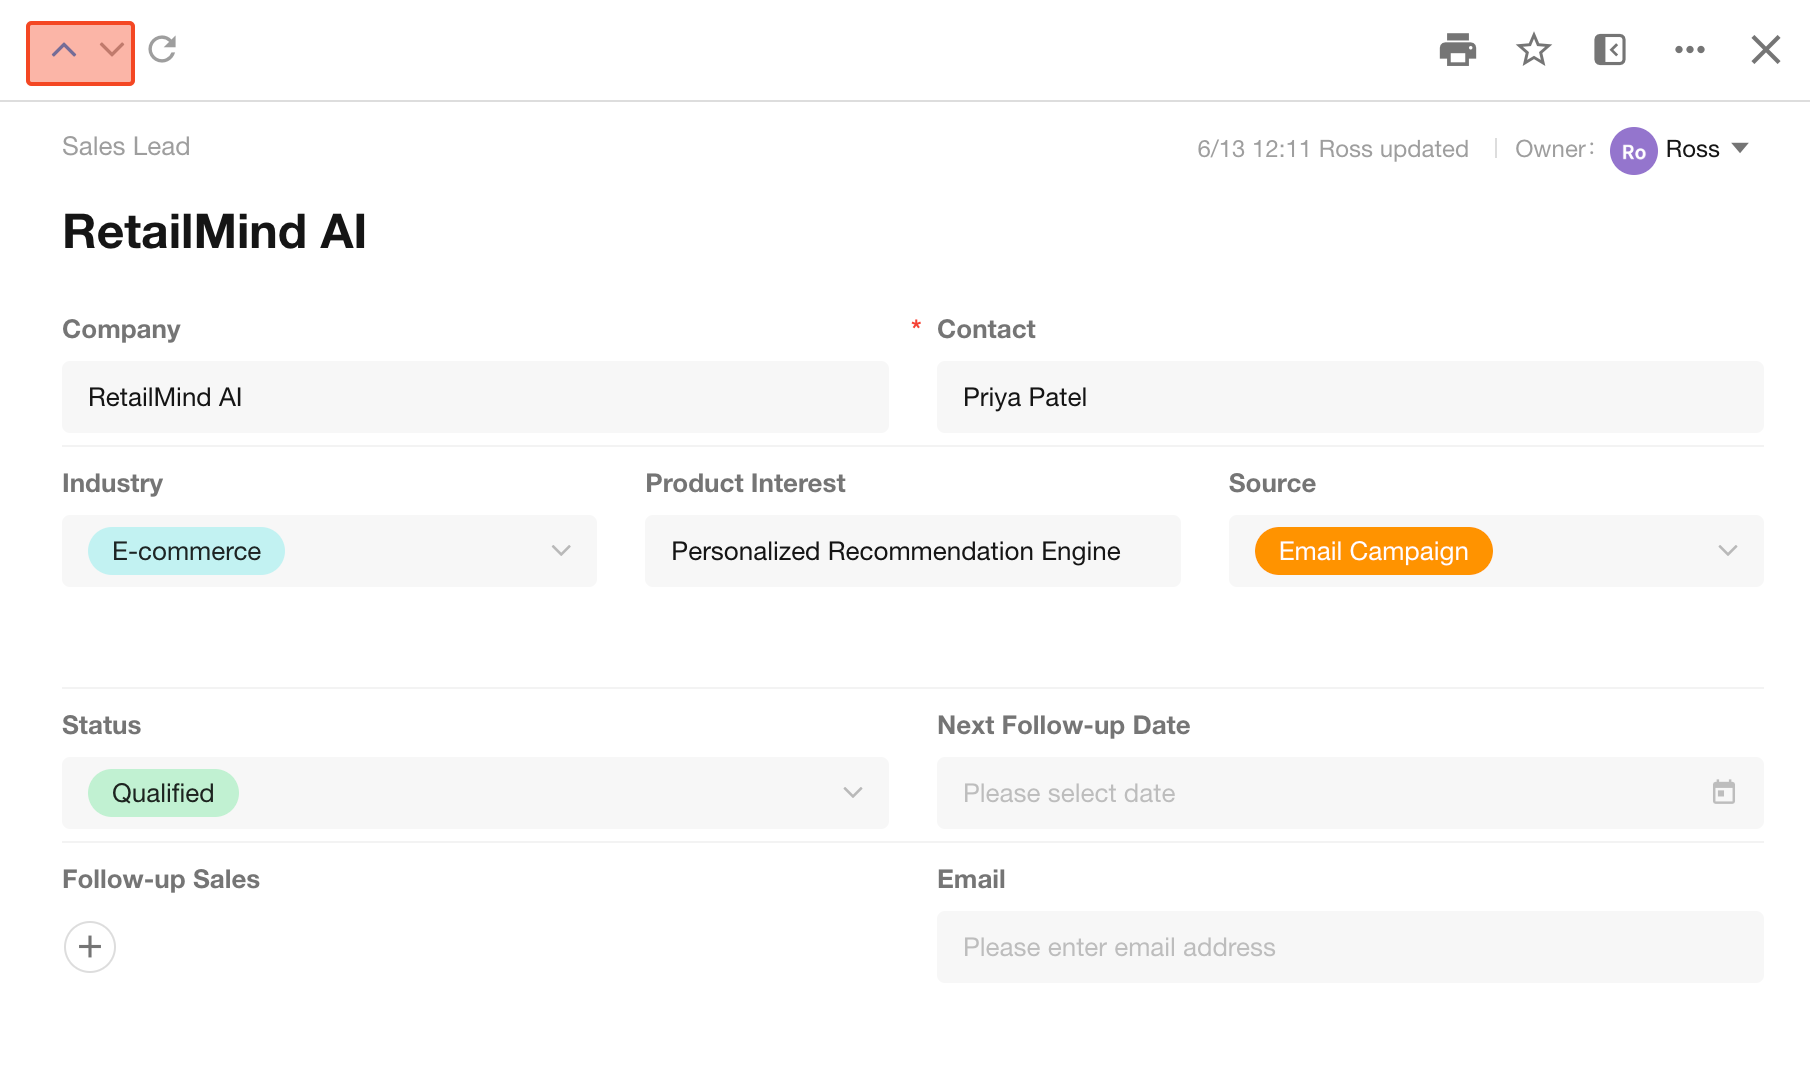
Quick Switch Between Records
Click the Next and Previous buttons to switch to the previous or next record.
Open Record Details Page
Each record has a corresponding URL, which can be used to open the record directly. Click here for more details.
Quickly Navigate Fields with Tab Key
Users can press the Tab key to jump to the next editable field.
Read-only fields are not supported.
Navigation Order:
Fields are navigated top to bottom, left to right, based on their layout within the form.
Field Types Supported by Tab Key Navigation:
| Field Type | Tab Key Navigation | Supports Enter Key to Open Options |
|---|---|---|
| Text | ✅ | |
| Telephone | ✅ | |
| Number | ✅ | |
| Currency | ✅ | |
| Single-select (dropdown) | ✅ | ✅ |
| Single-select (tile) | ✅ | |
| Multi-select (dropdown) | ✅ | ✅ |
| Multi-select (tile) | ✅ | |
| ✅ | ||
| Date / Date & Time | ✅ | ✅ |
| ID Nmuber | ✅ | |
| Region/City | ✅ | ✅ |
| Members (single-select) | ✅ | ✅ |
| Members (multi-select) | ✅ | ✅ |
| Department | ✅ | ✅ |
| Check Item | ✅ | ✅ |
| File | ✅ | ✅ |
| Relationship (sigle record/multiple records) | ✅ | ✅ |
| Subform | ✅ | ✅ |
| Cascading | ✅ | ✅ |
| Free Link | ✅ | ✅ |
| Level | ✅ | ✅ |
| Rich Text | ✅ | |
| Signature | ✅ | ✅ |
| Positioning | ✅ | ✅ |
Shortcut Operations
In the view, hover over a record to display shortcut operation buttons. Shortcut operations include adding to favorites, copying, recreating, deleting, printing, locking, sharing, and more.
Was this document helpful?