ChatBot
Overview
The ChatBot is an application item built on top of Agent capabilities.
Users can engage in multi-turn conversations, during which the ChatBot identifies user intent and drives business process automation.
Permission Guidelines
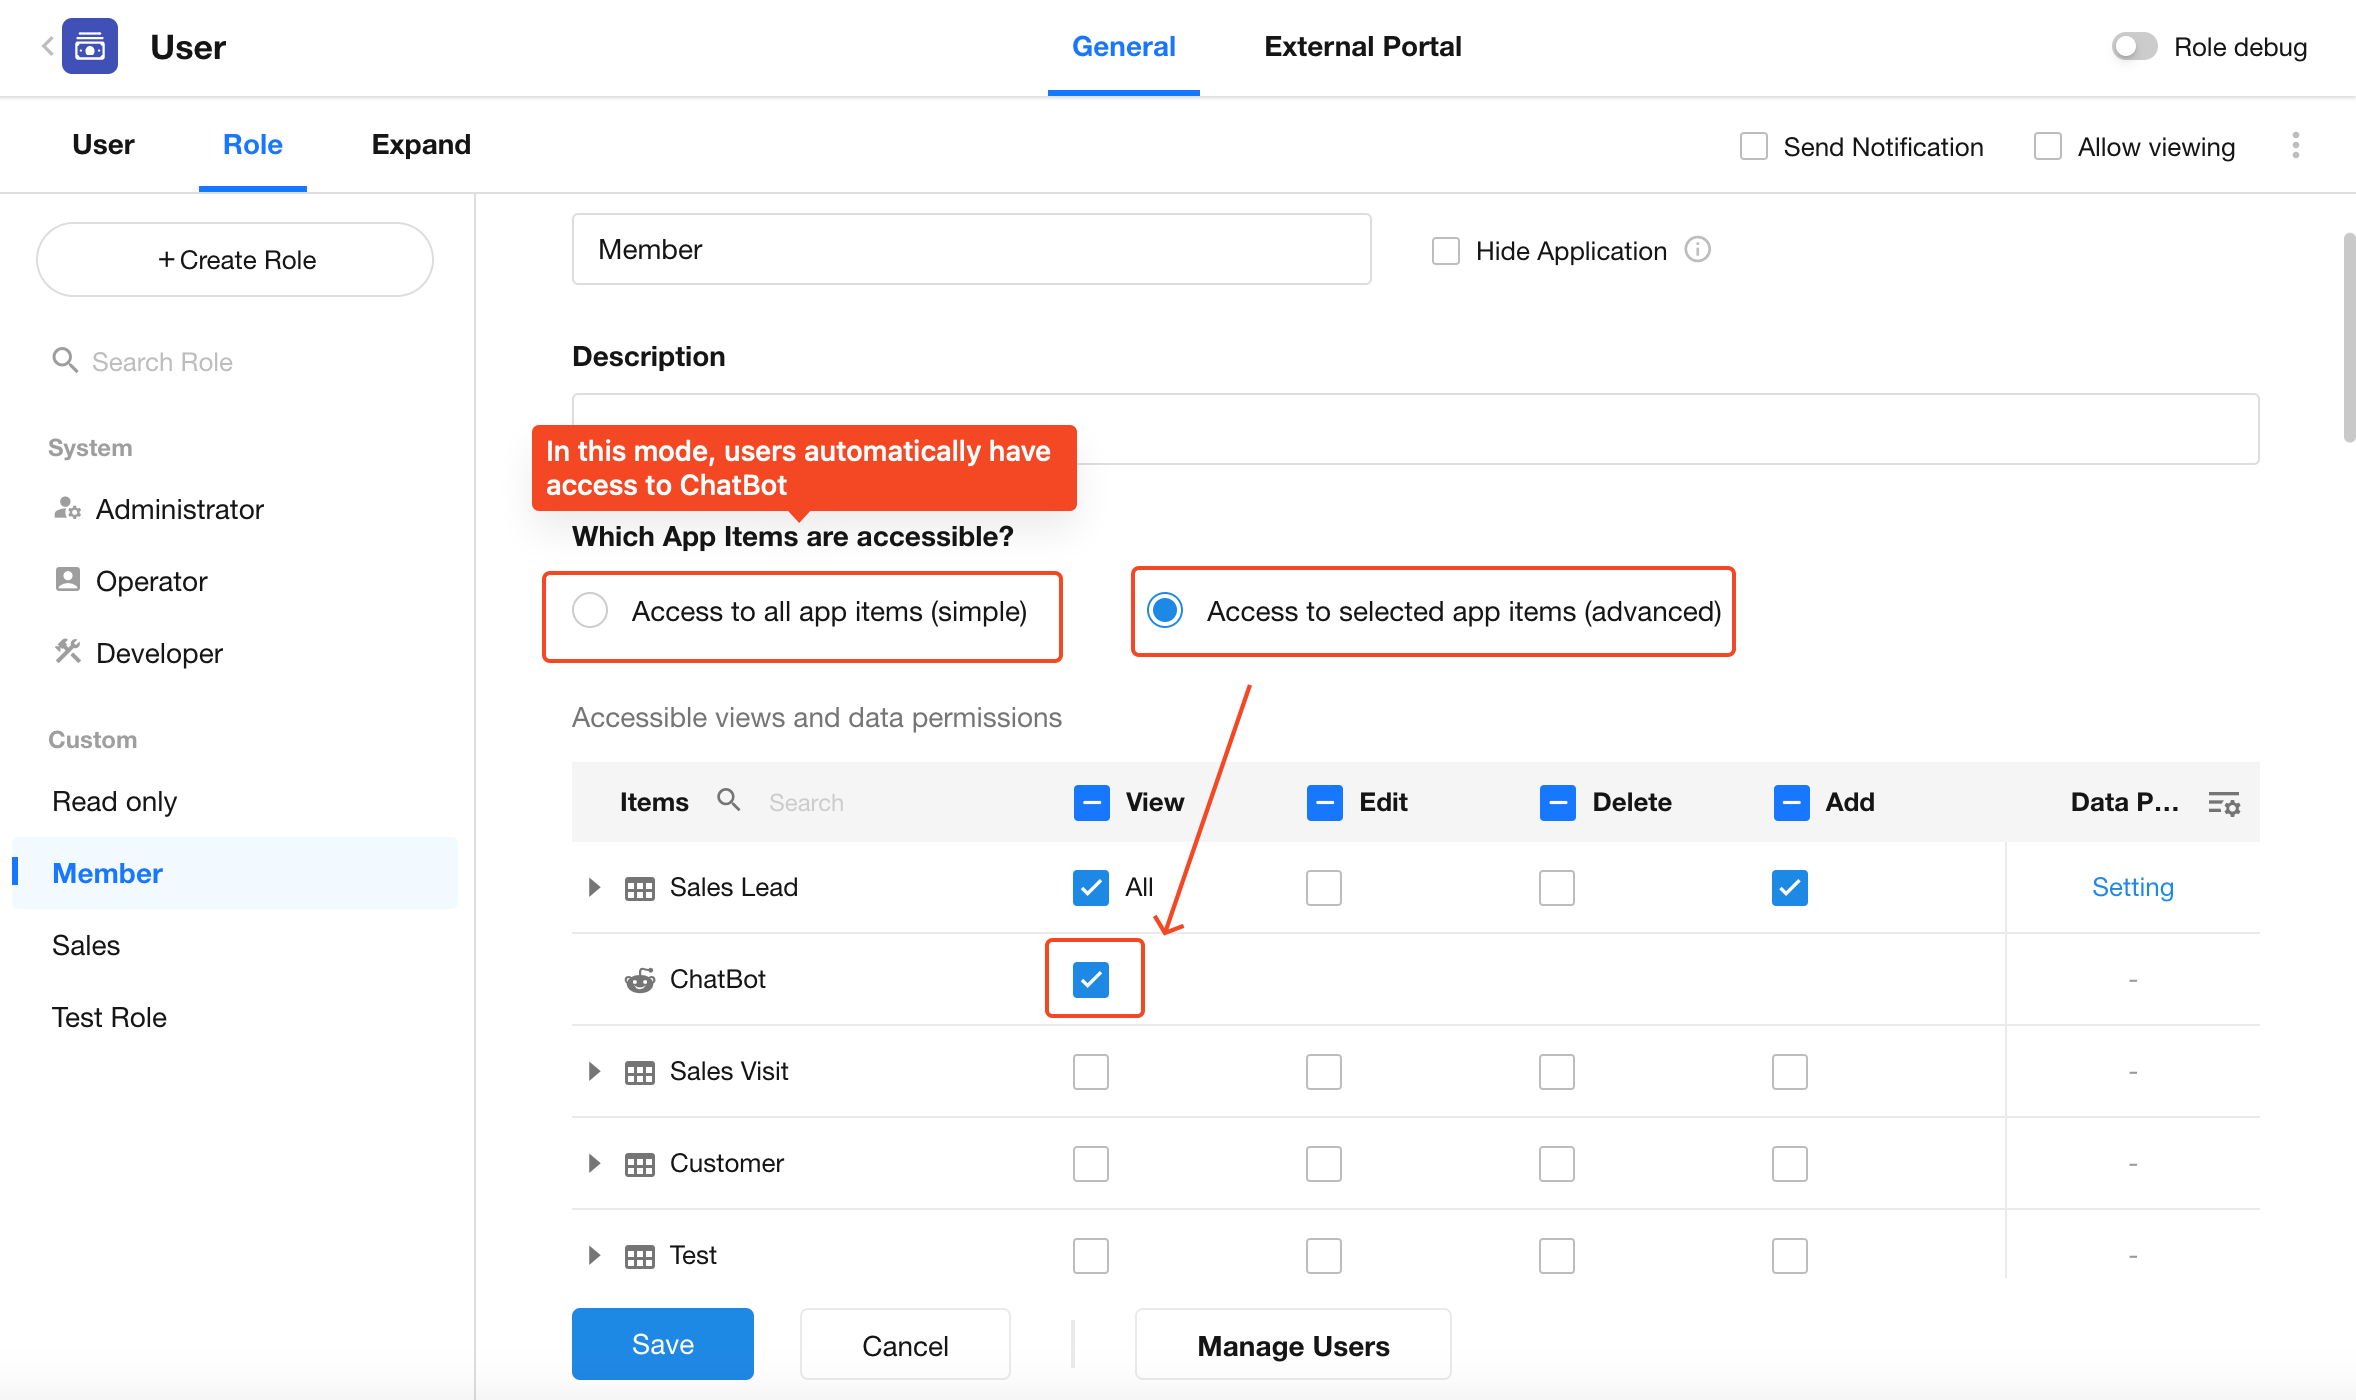
As an application item, the ChatBot follows the distribution rules of the application for visibility and access. Depending on the distribution method, permission logic is as follows:
| Distribution Mode | Permissions |
|---|---|
| Access to All App Items (Simple) | Users automatically have access to the ChatBot |
| Access to Selected App Items (Advanced) | ◦ Granted “View” permission → Can access and use the ChatBot ◦ No “View” permission → Cannot access the ChatBot |
External users follow the same permission rules.
Create a ChatBot
1. Entry Point
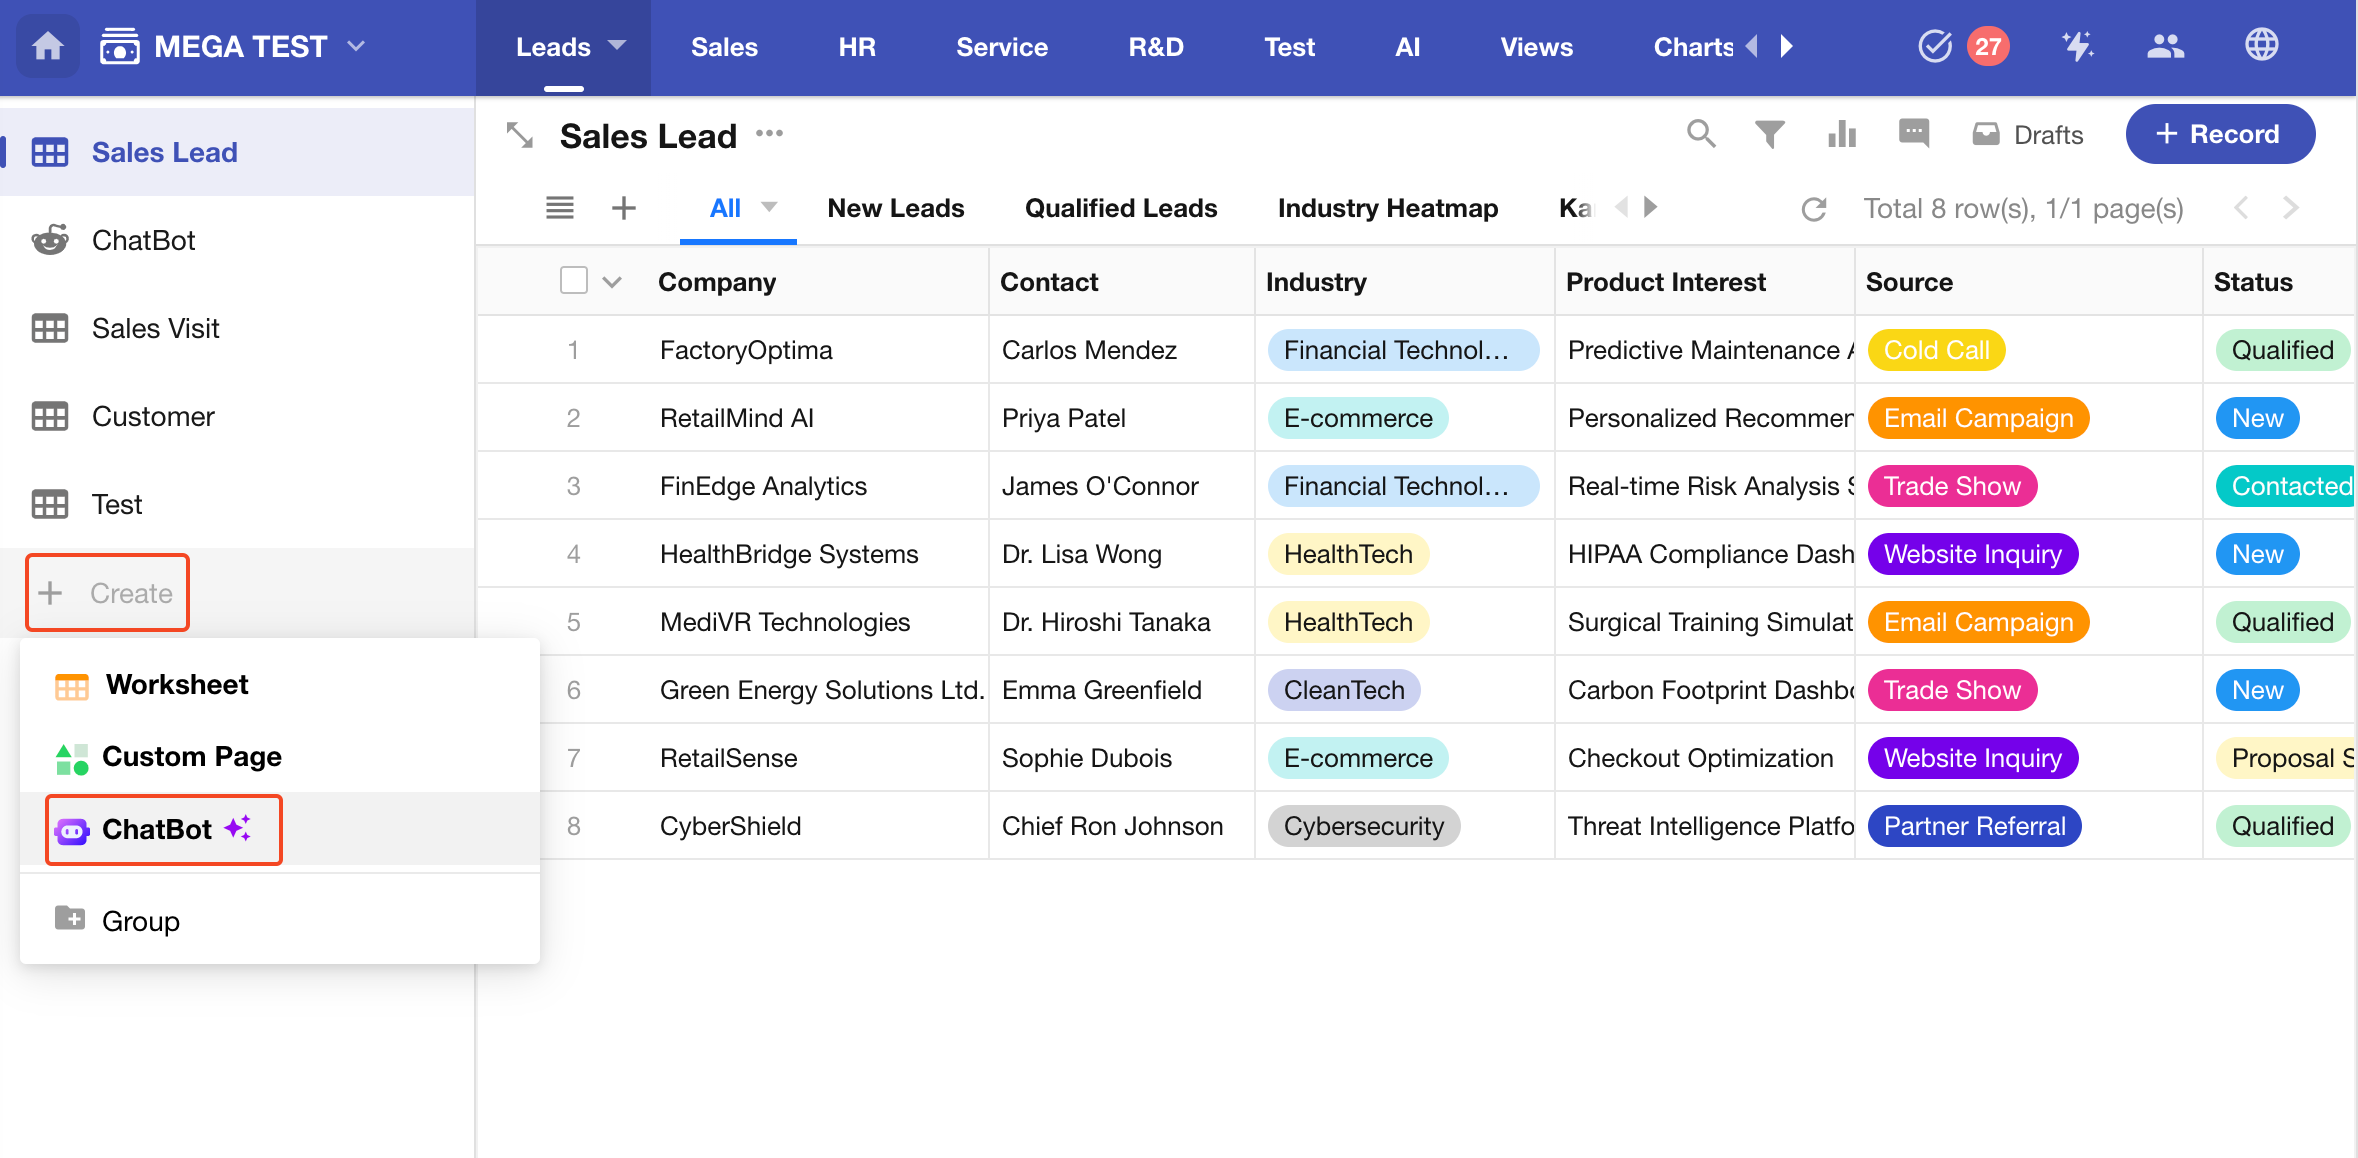
In the left navigation panel of the app, click “+ Create”, then select “ChatBot” to open the creation dialog.
2. Enter a Description
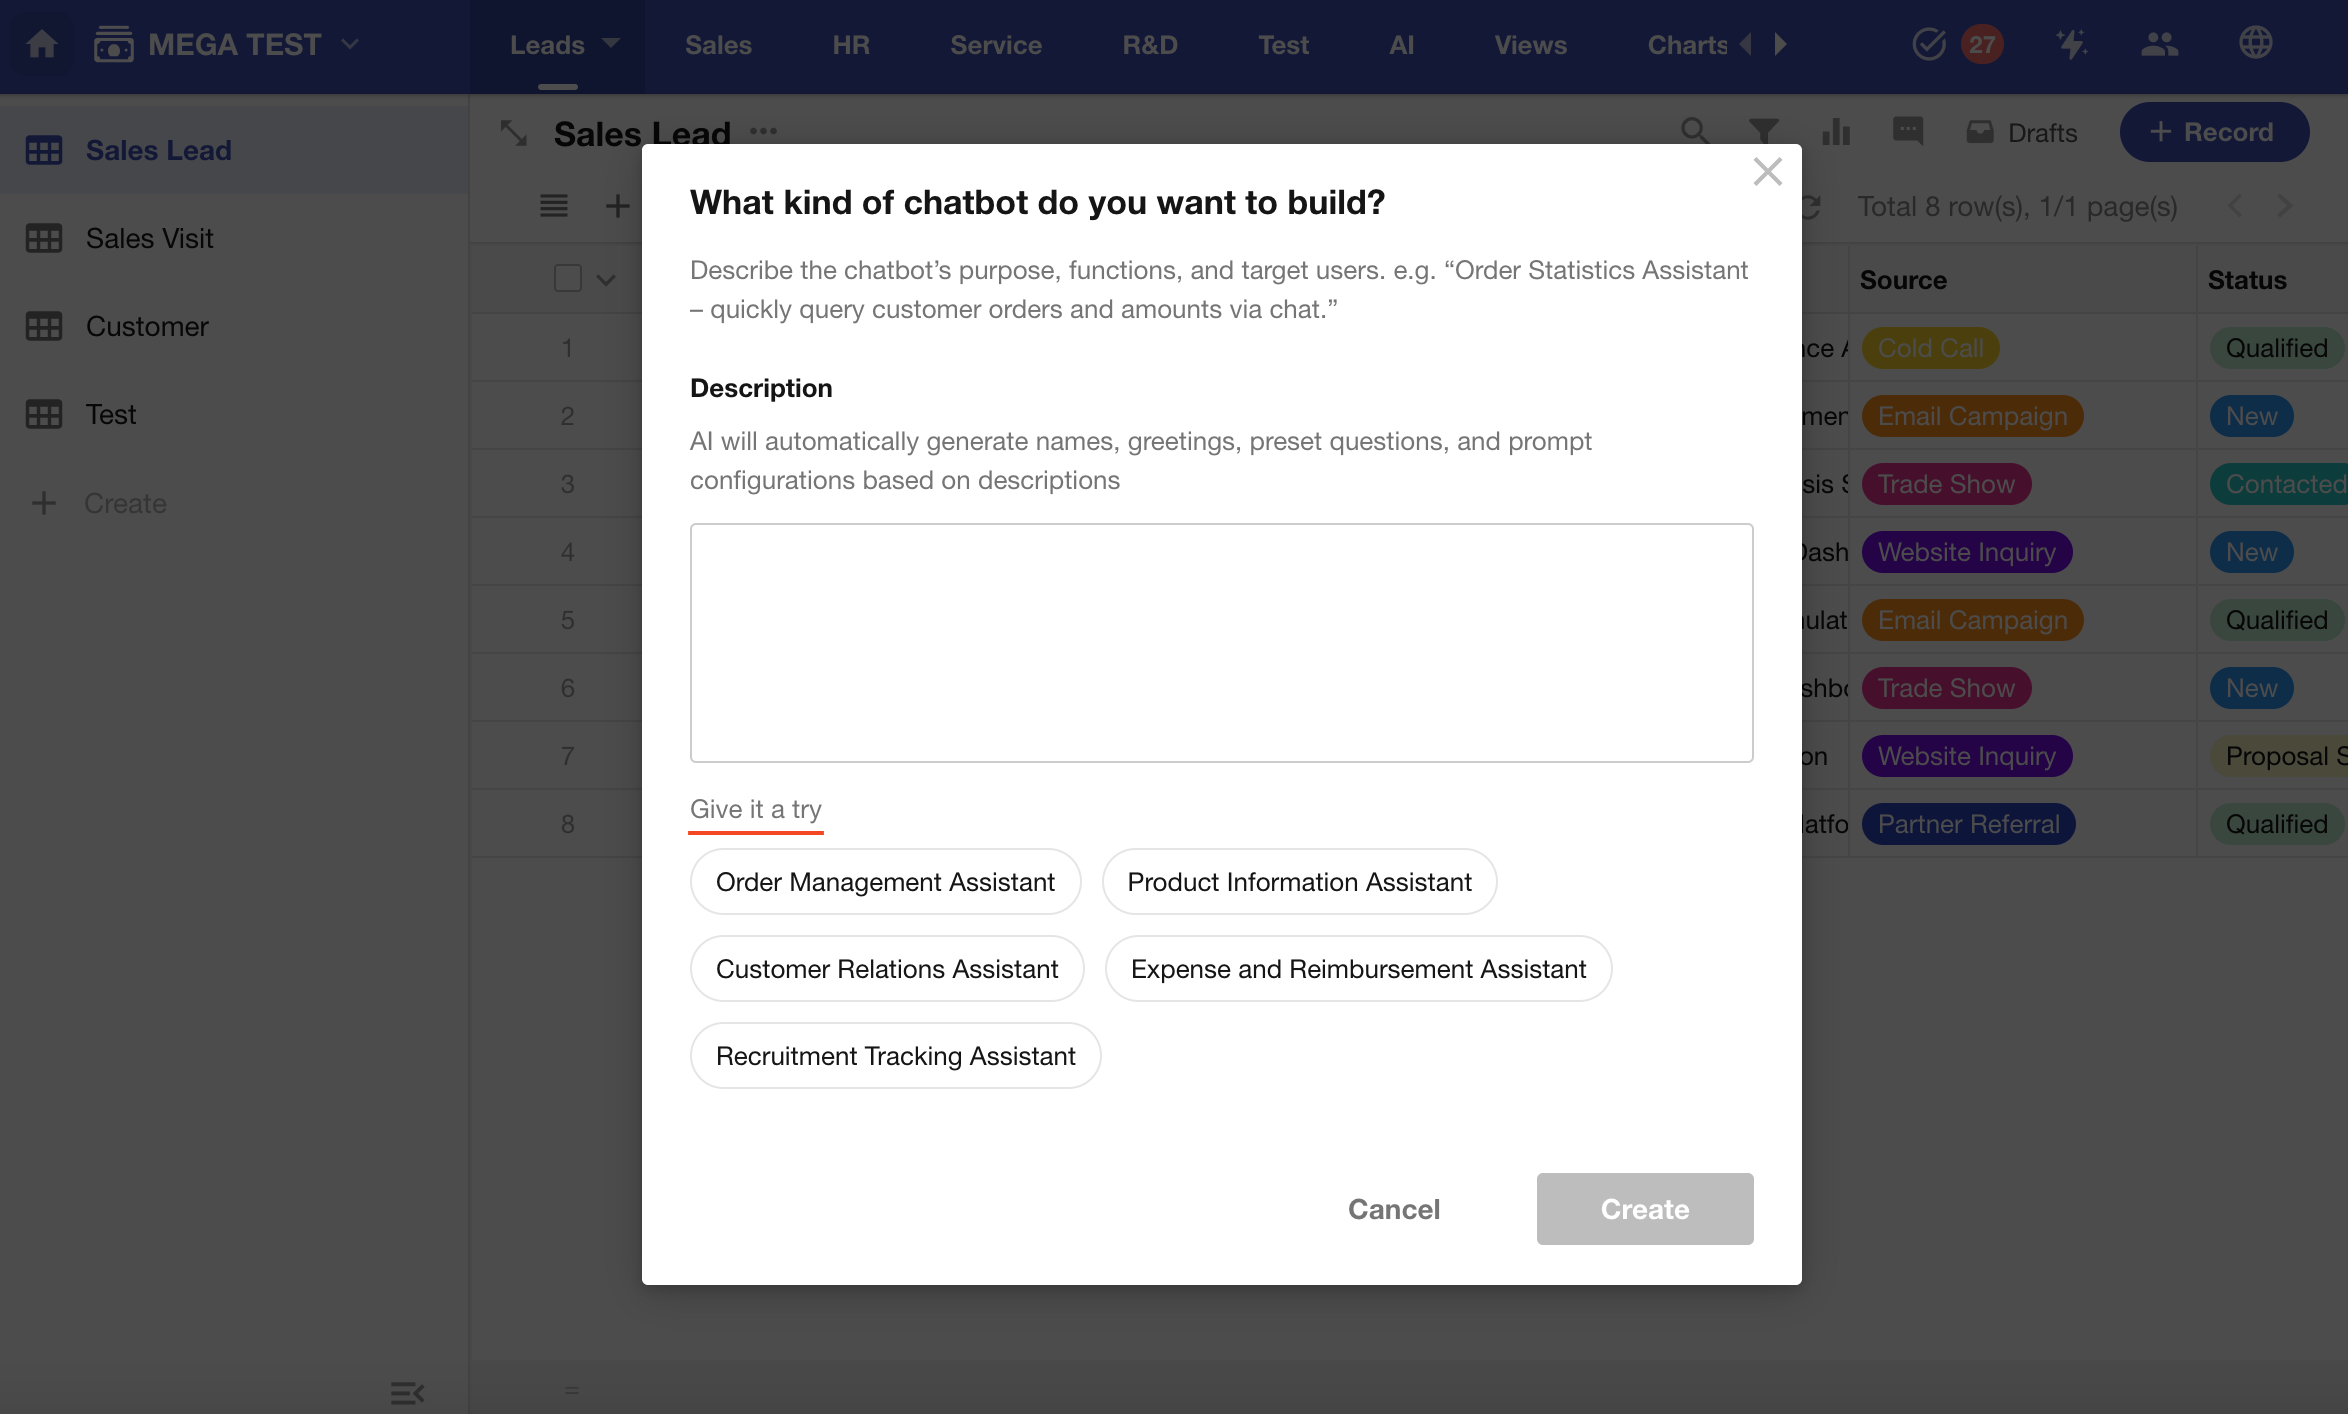
Provide a brief description of the ChatBot’s purpose and functionality.
The system will automatically suggest several descriptions based on your current app content. These will appear in the “Give it a Try” area. Selecting one will auto-fill the input box and generate the ChatBot configuration accordingly.
3. Auto-Generate Configuration
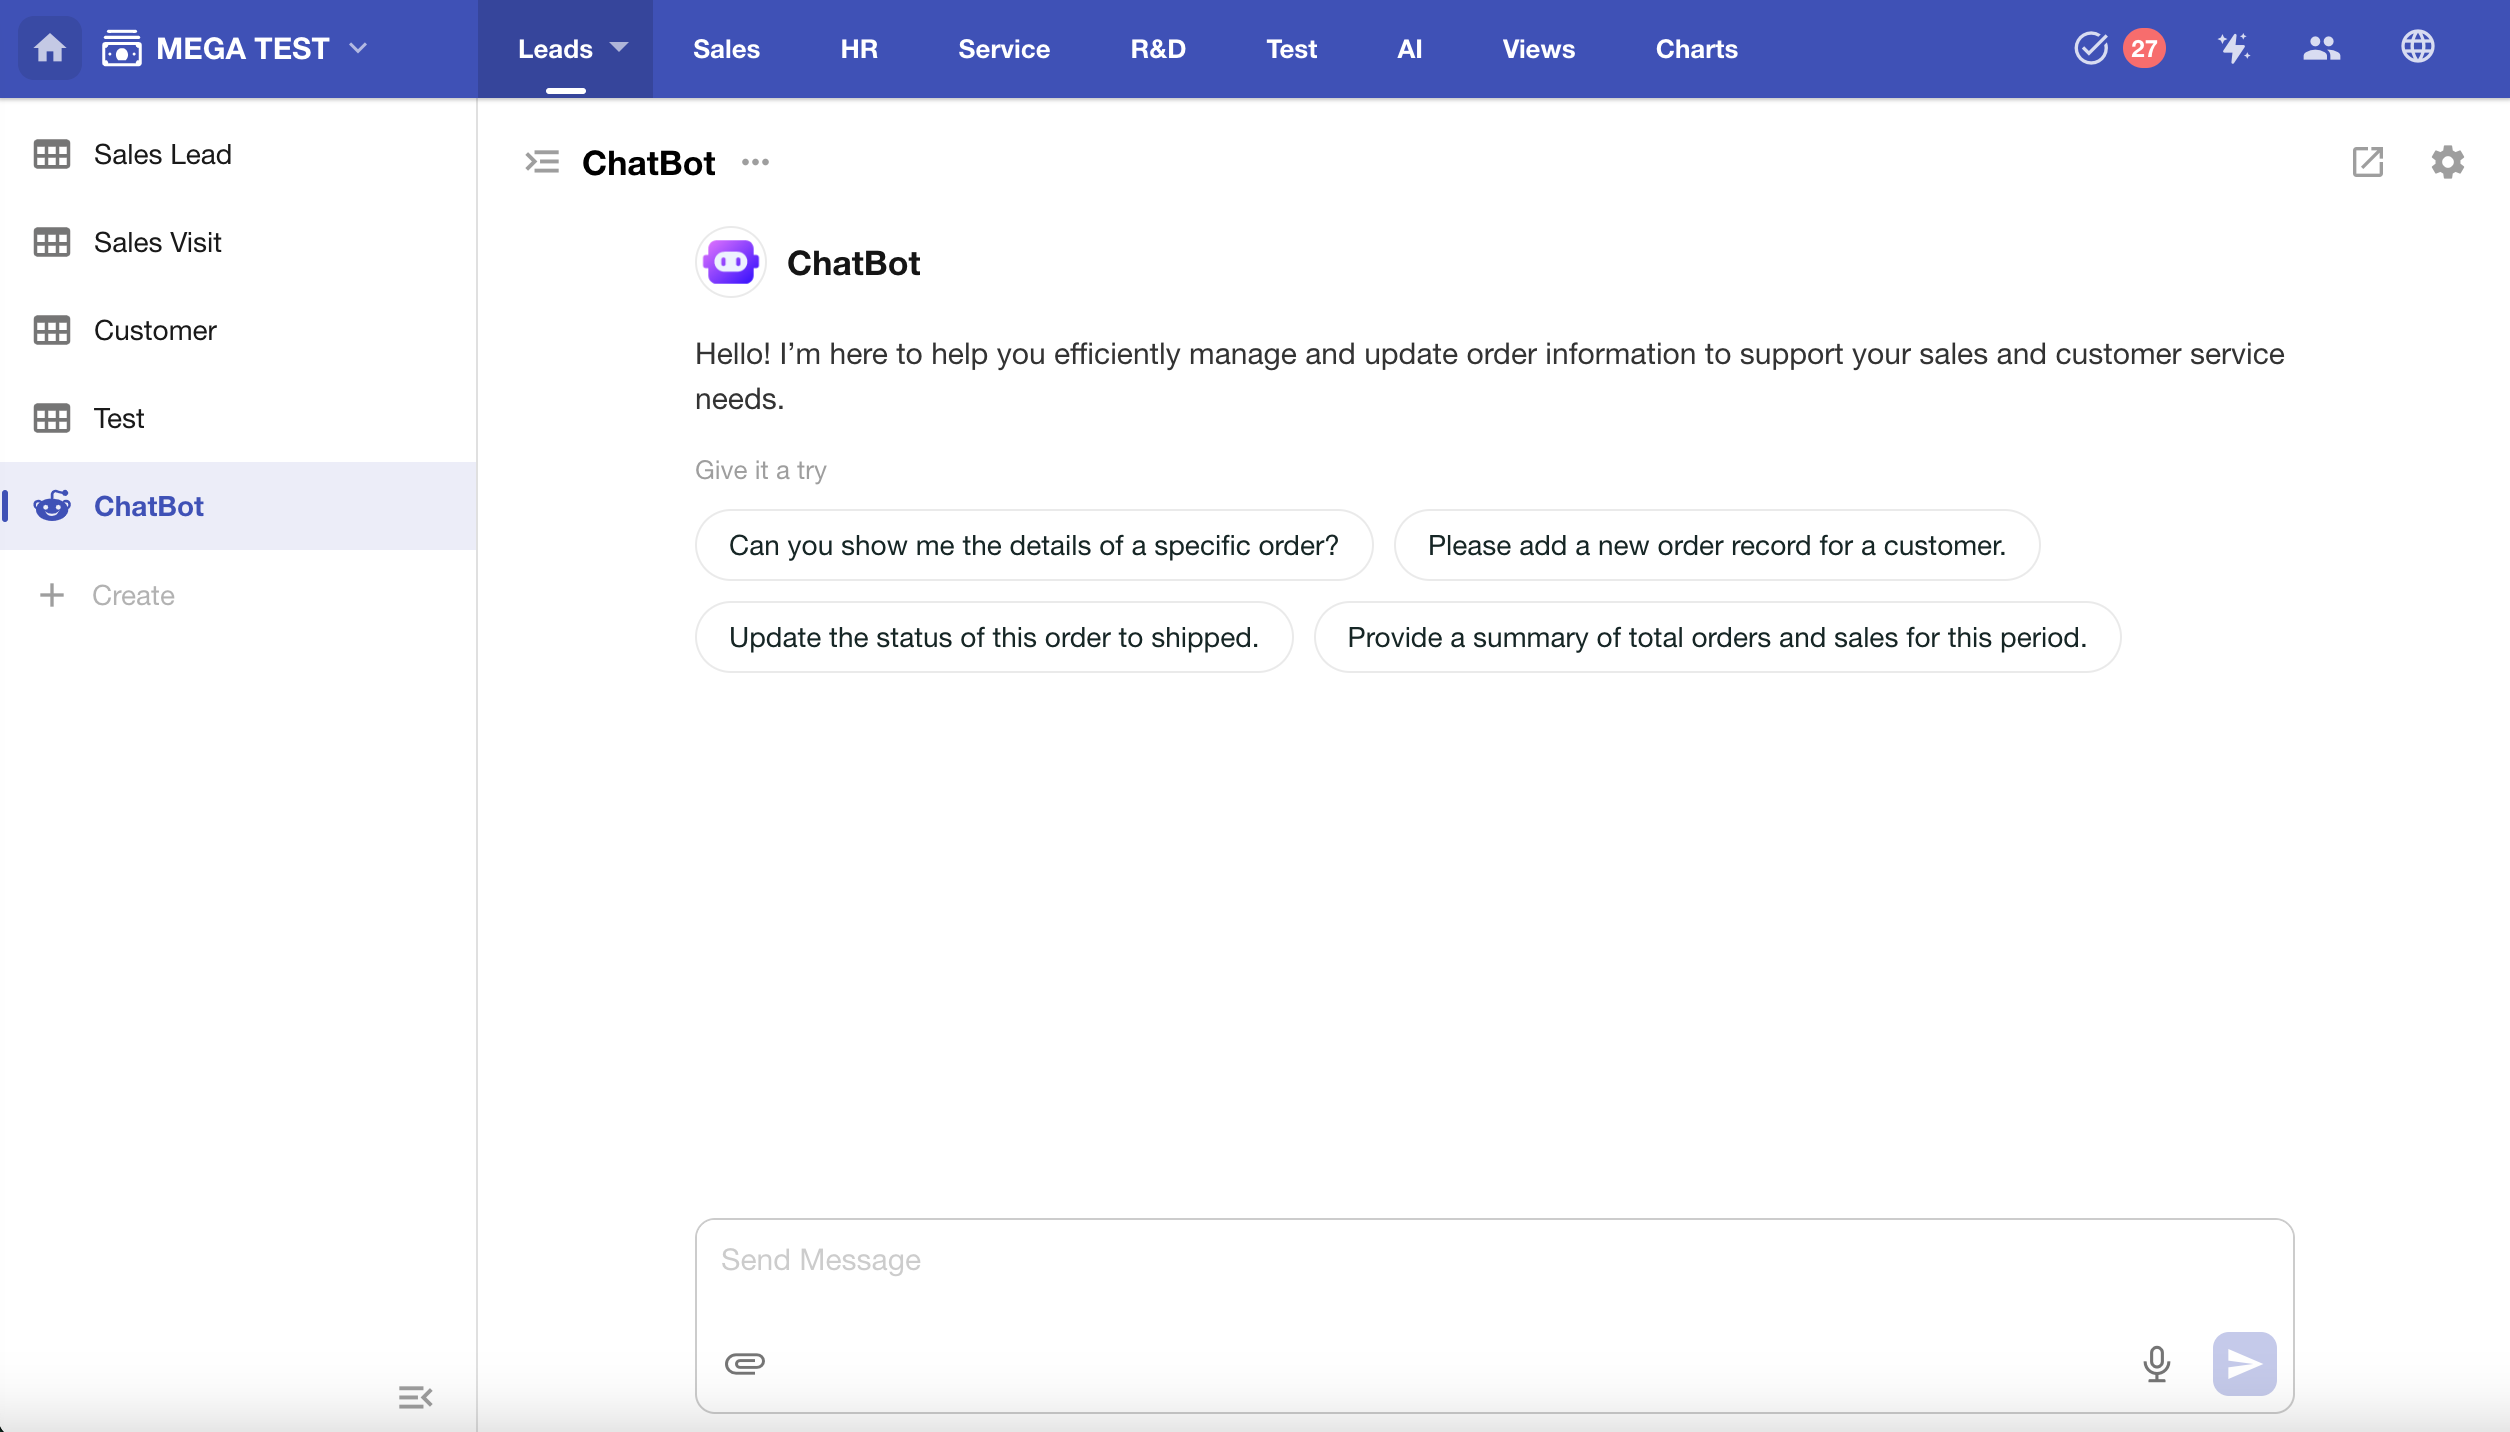
After submitting the description, the system will automatically create the ChatBot and fill in the required configuration intelligently.
After a short wait, the ChatBot will be ready for use.
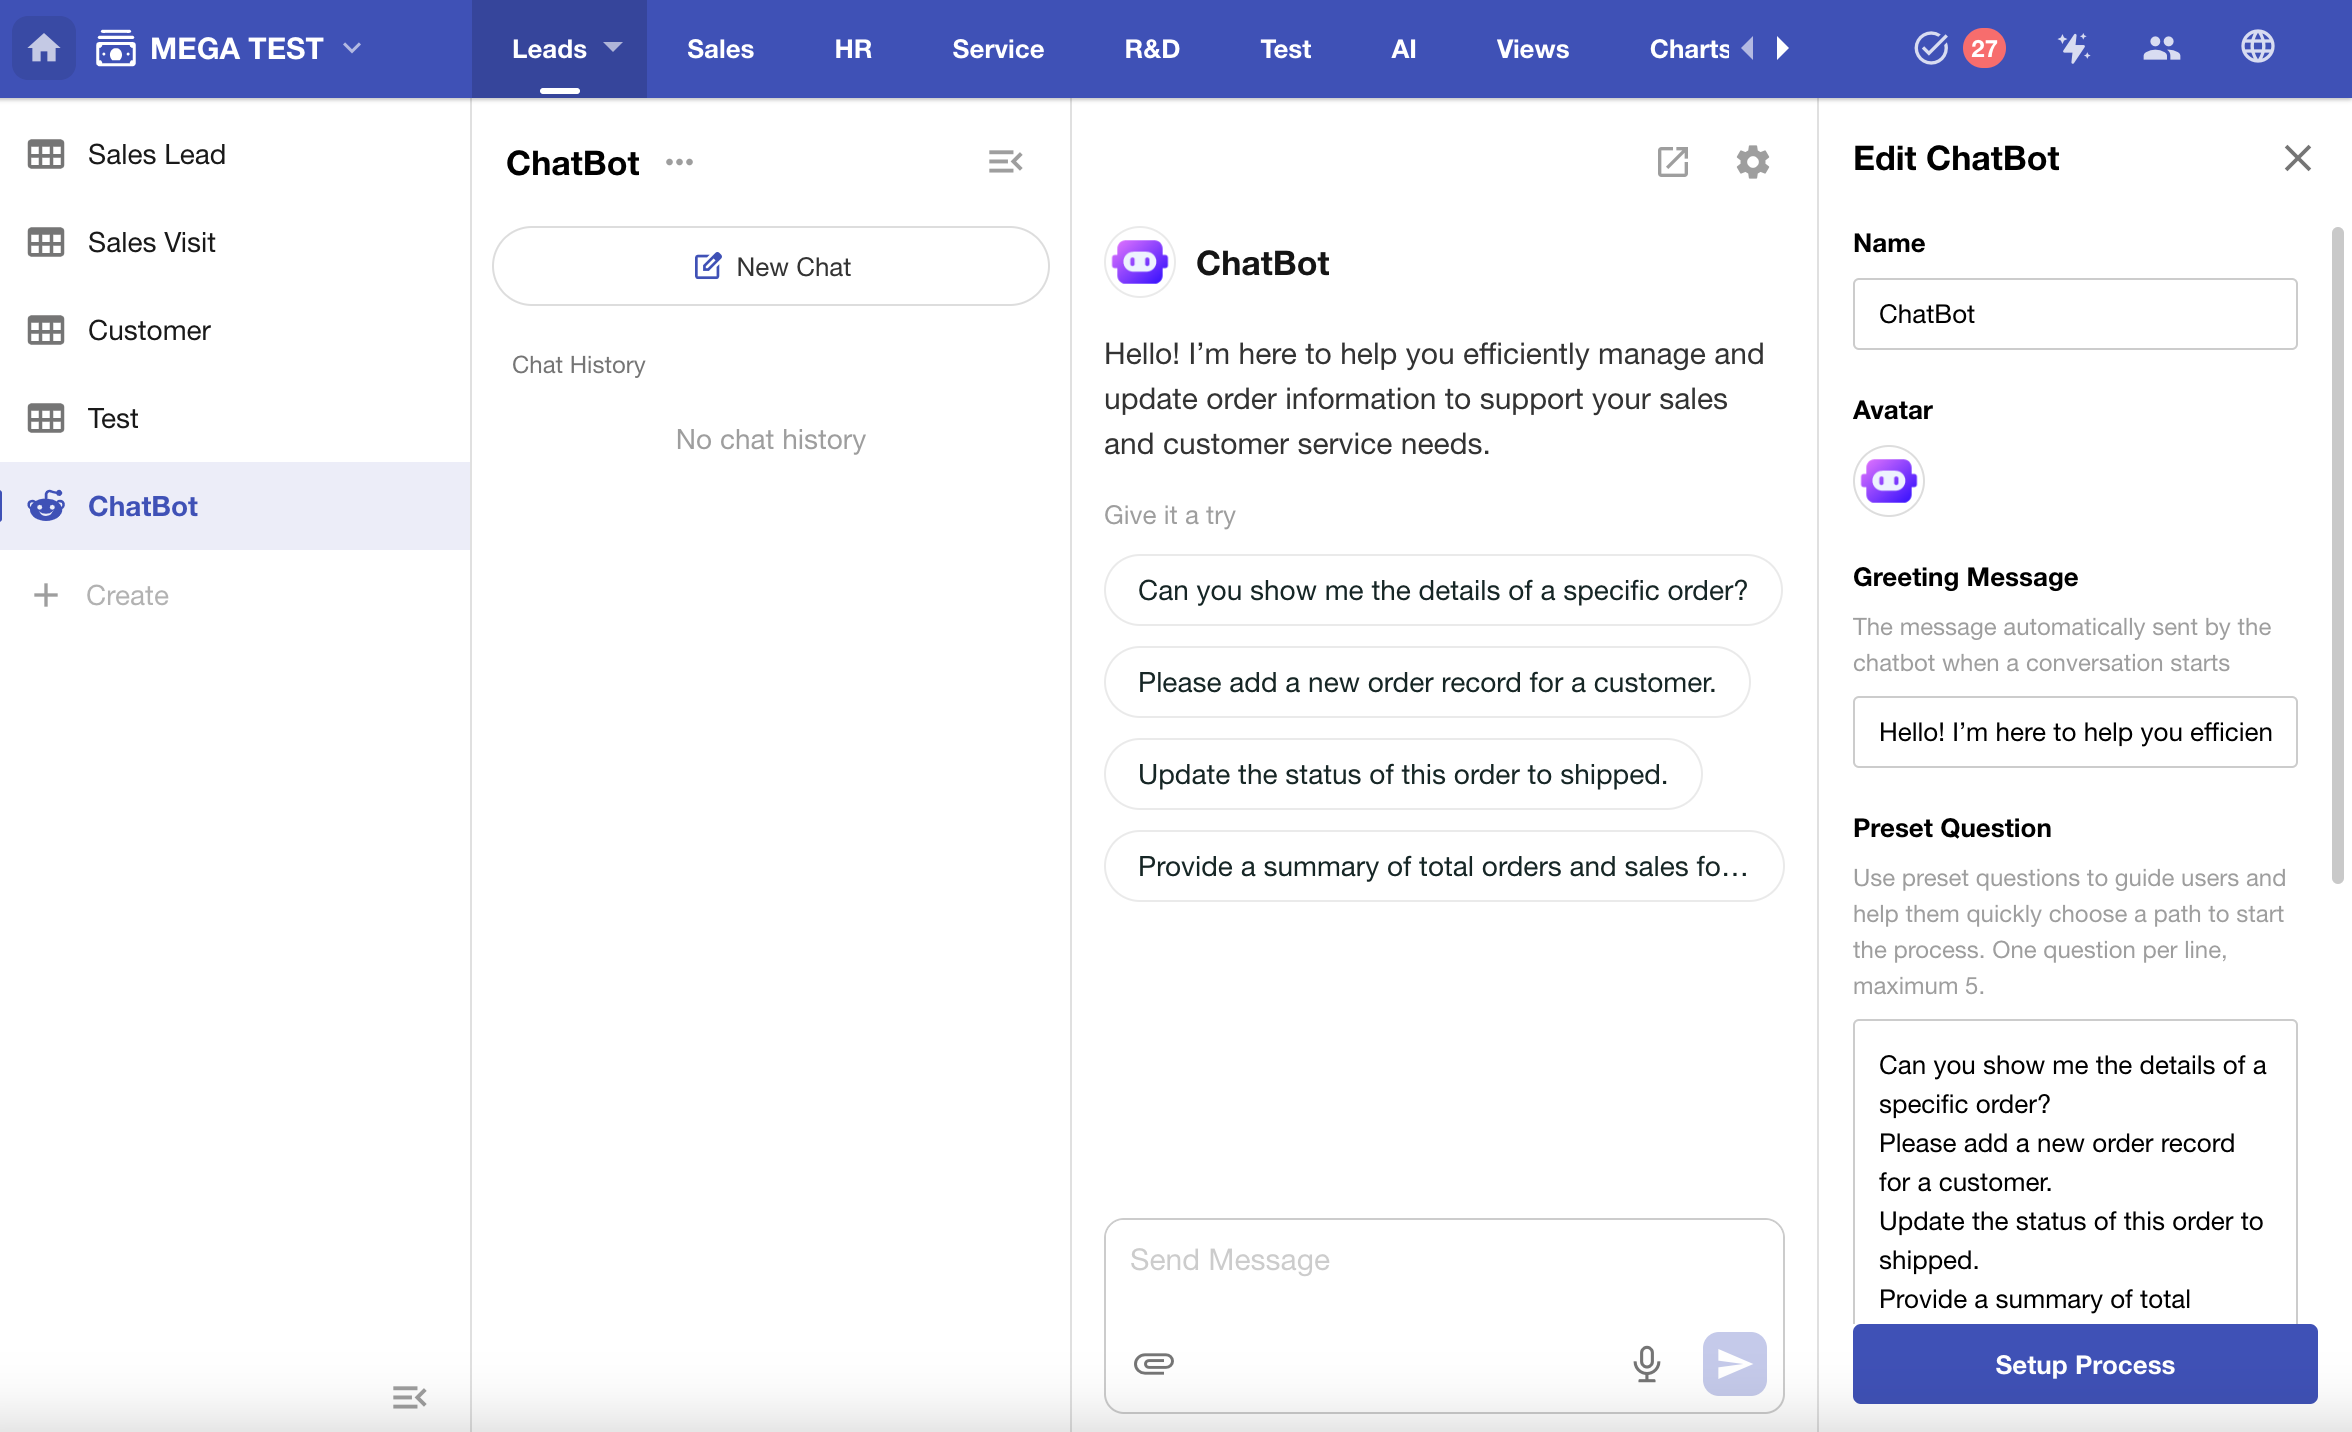
4. Configure the ChatBot
In the right-hand editing panel, you can modify the following settings:
| Setting | Description |
|---|---|
| Name | Custom name for the ChatBot |
| Avatar | Upload a PNG or JPG image |
| Greeting Message | The first message shown when a conversation begins |
| Preset Questions | You can configure up to 5 suggested prompts |
| Upload Attachment | Enable this option to allow users to upload attachments |
| Share Chat | Allow users to share conversation |
| Setup Process | Jump to the corresponding workflow setup page |
5. Associated Workflow Triggered by Chat
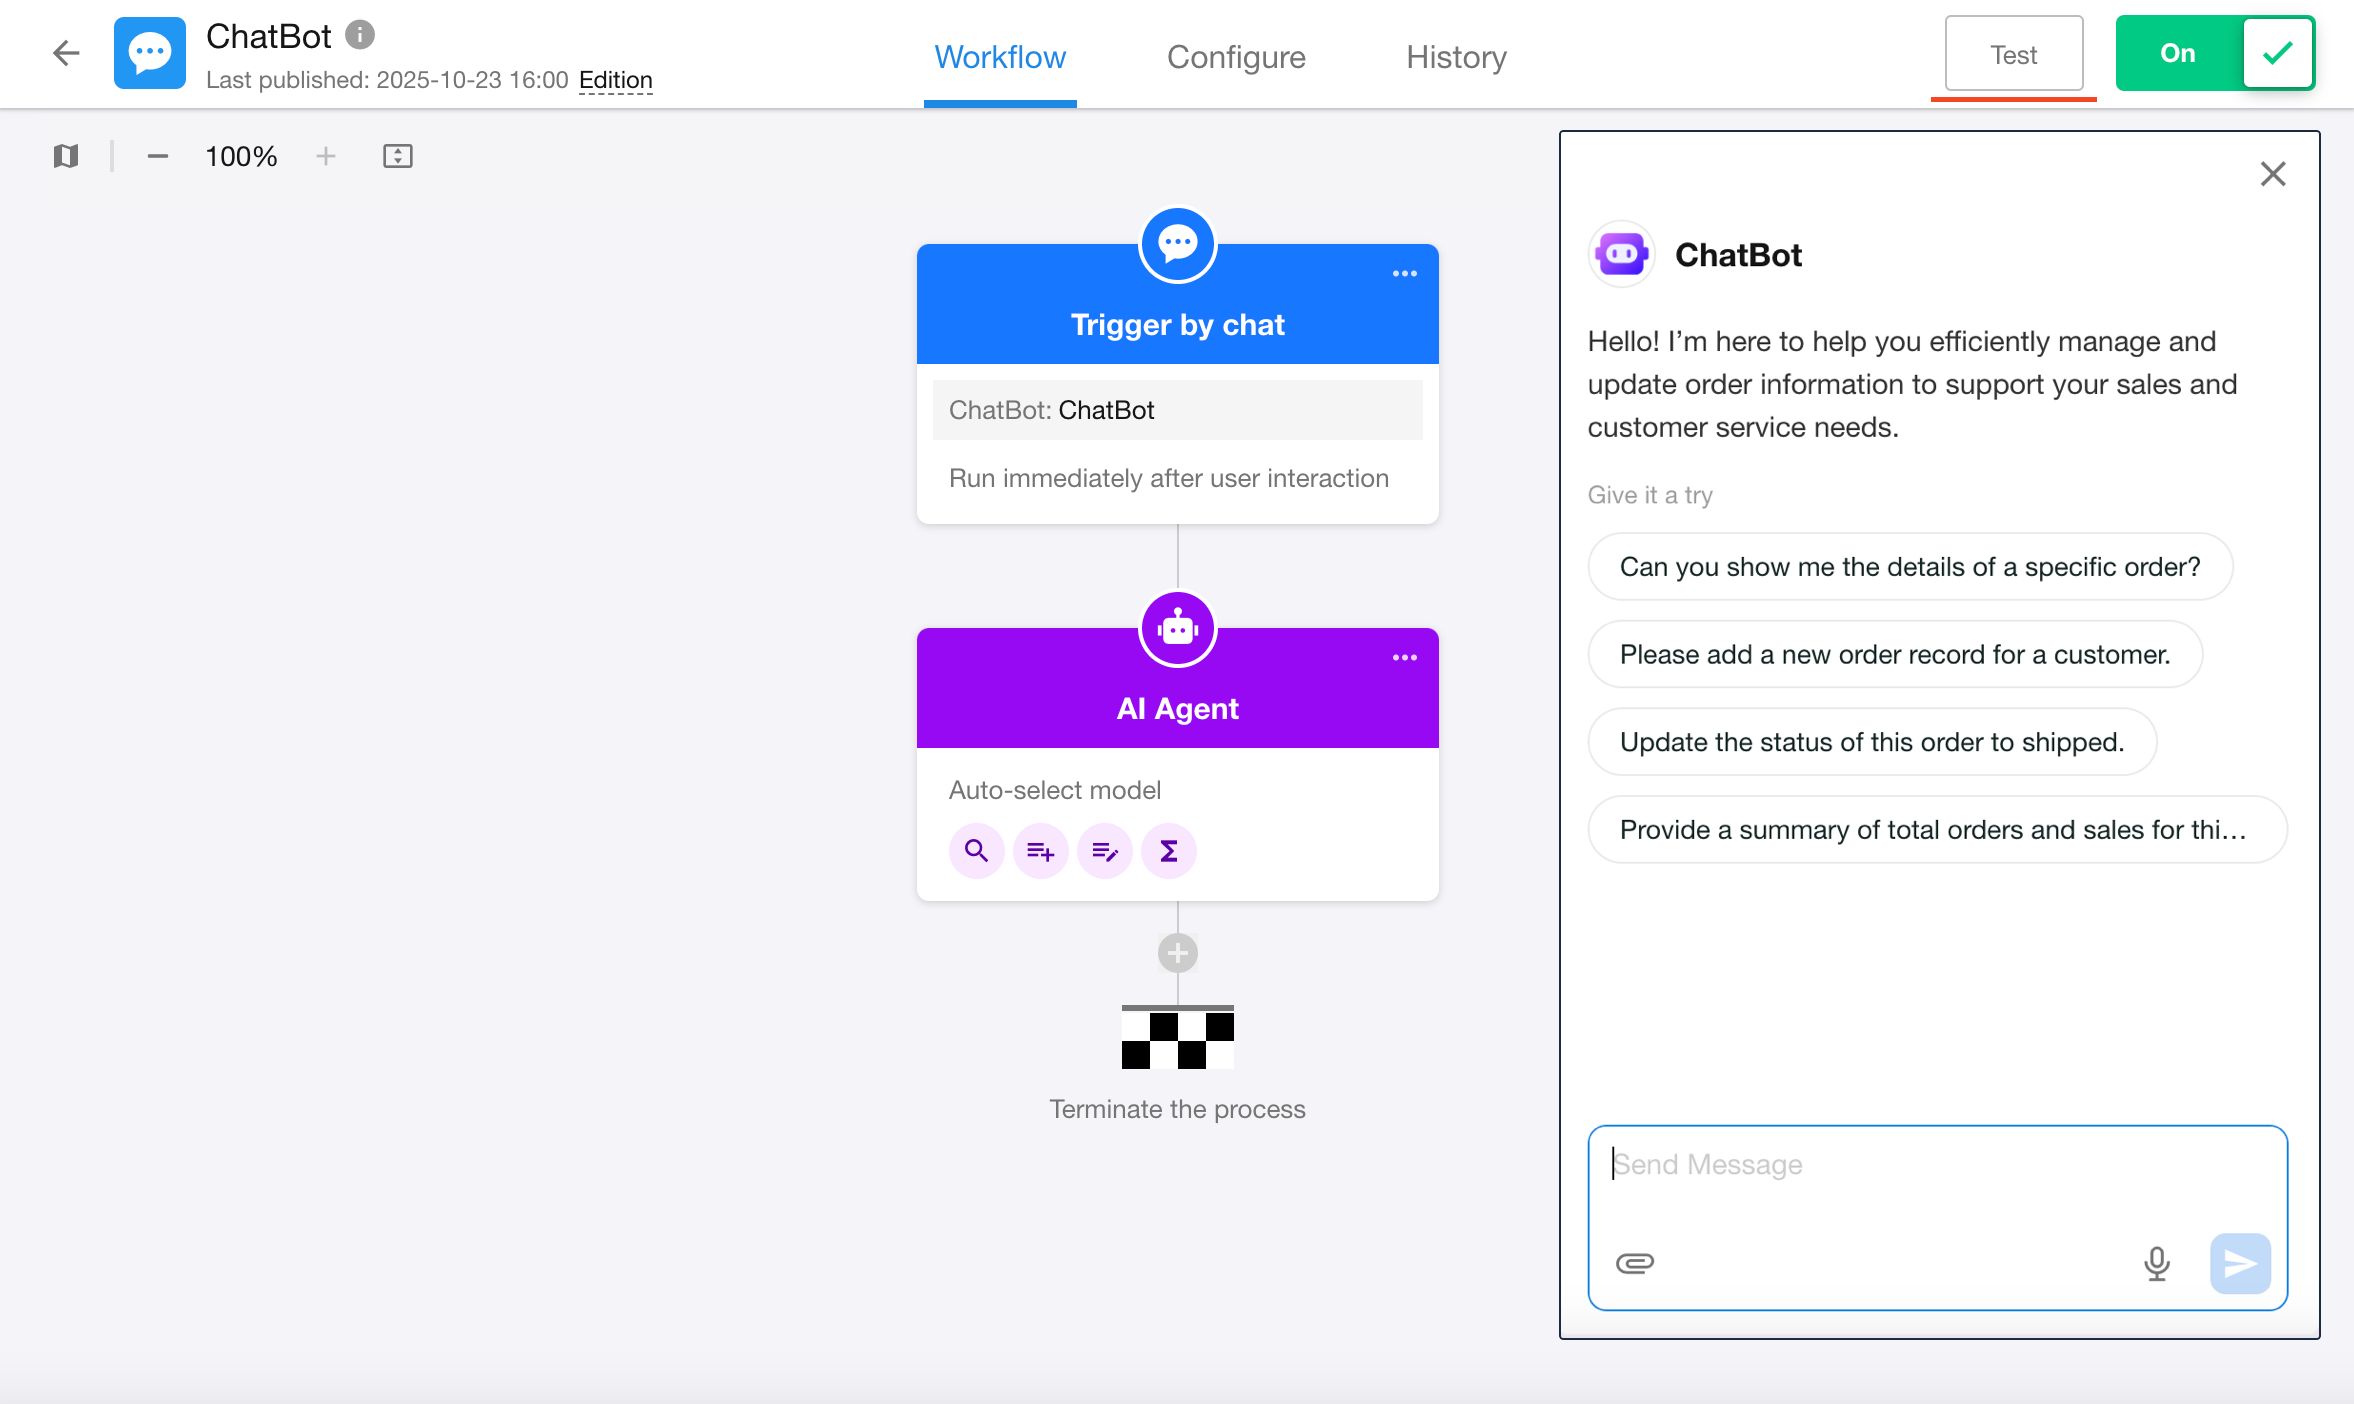
A conversation workflow is a workflow triggered by chat messages, designed specifically for conversational automation. Essentially, it serves as a flow orchestration and business automation container initiated by a ChatBot, enabling multi-turn interactions tightly coupled with backend processes.
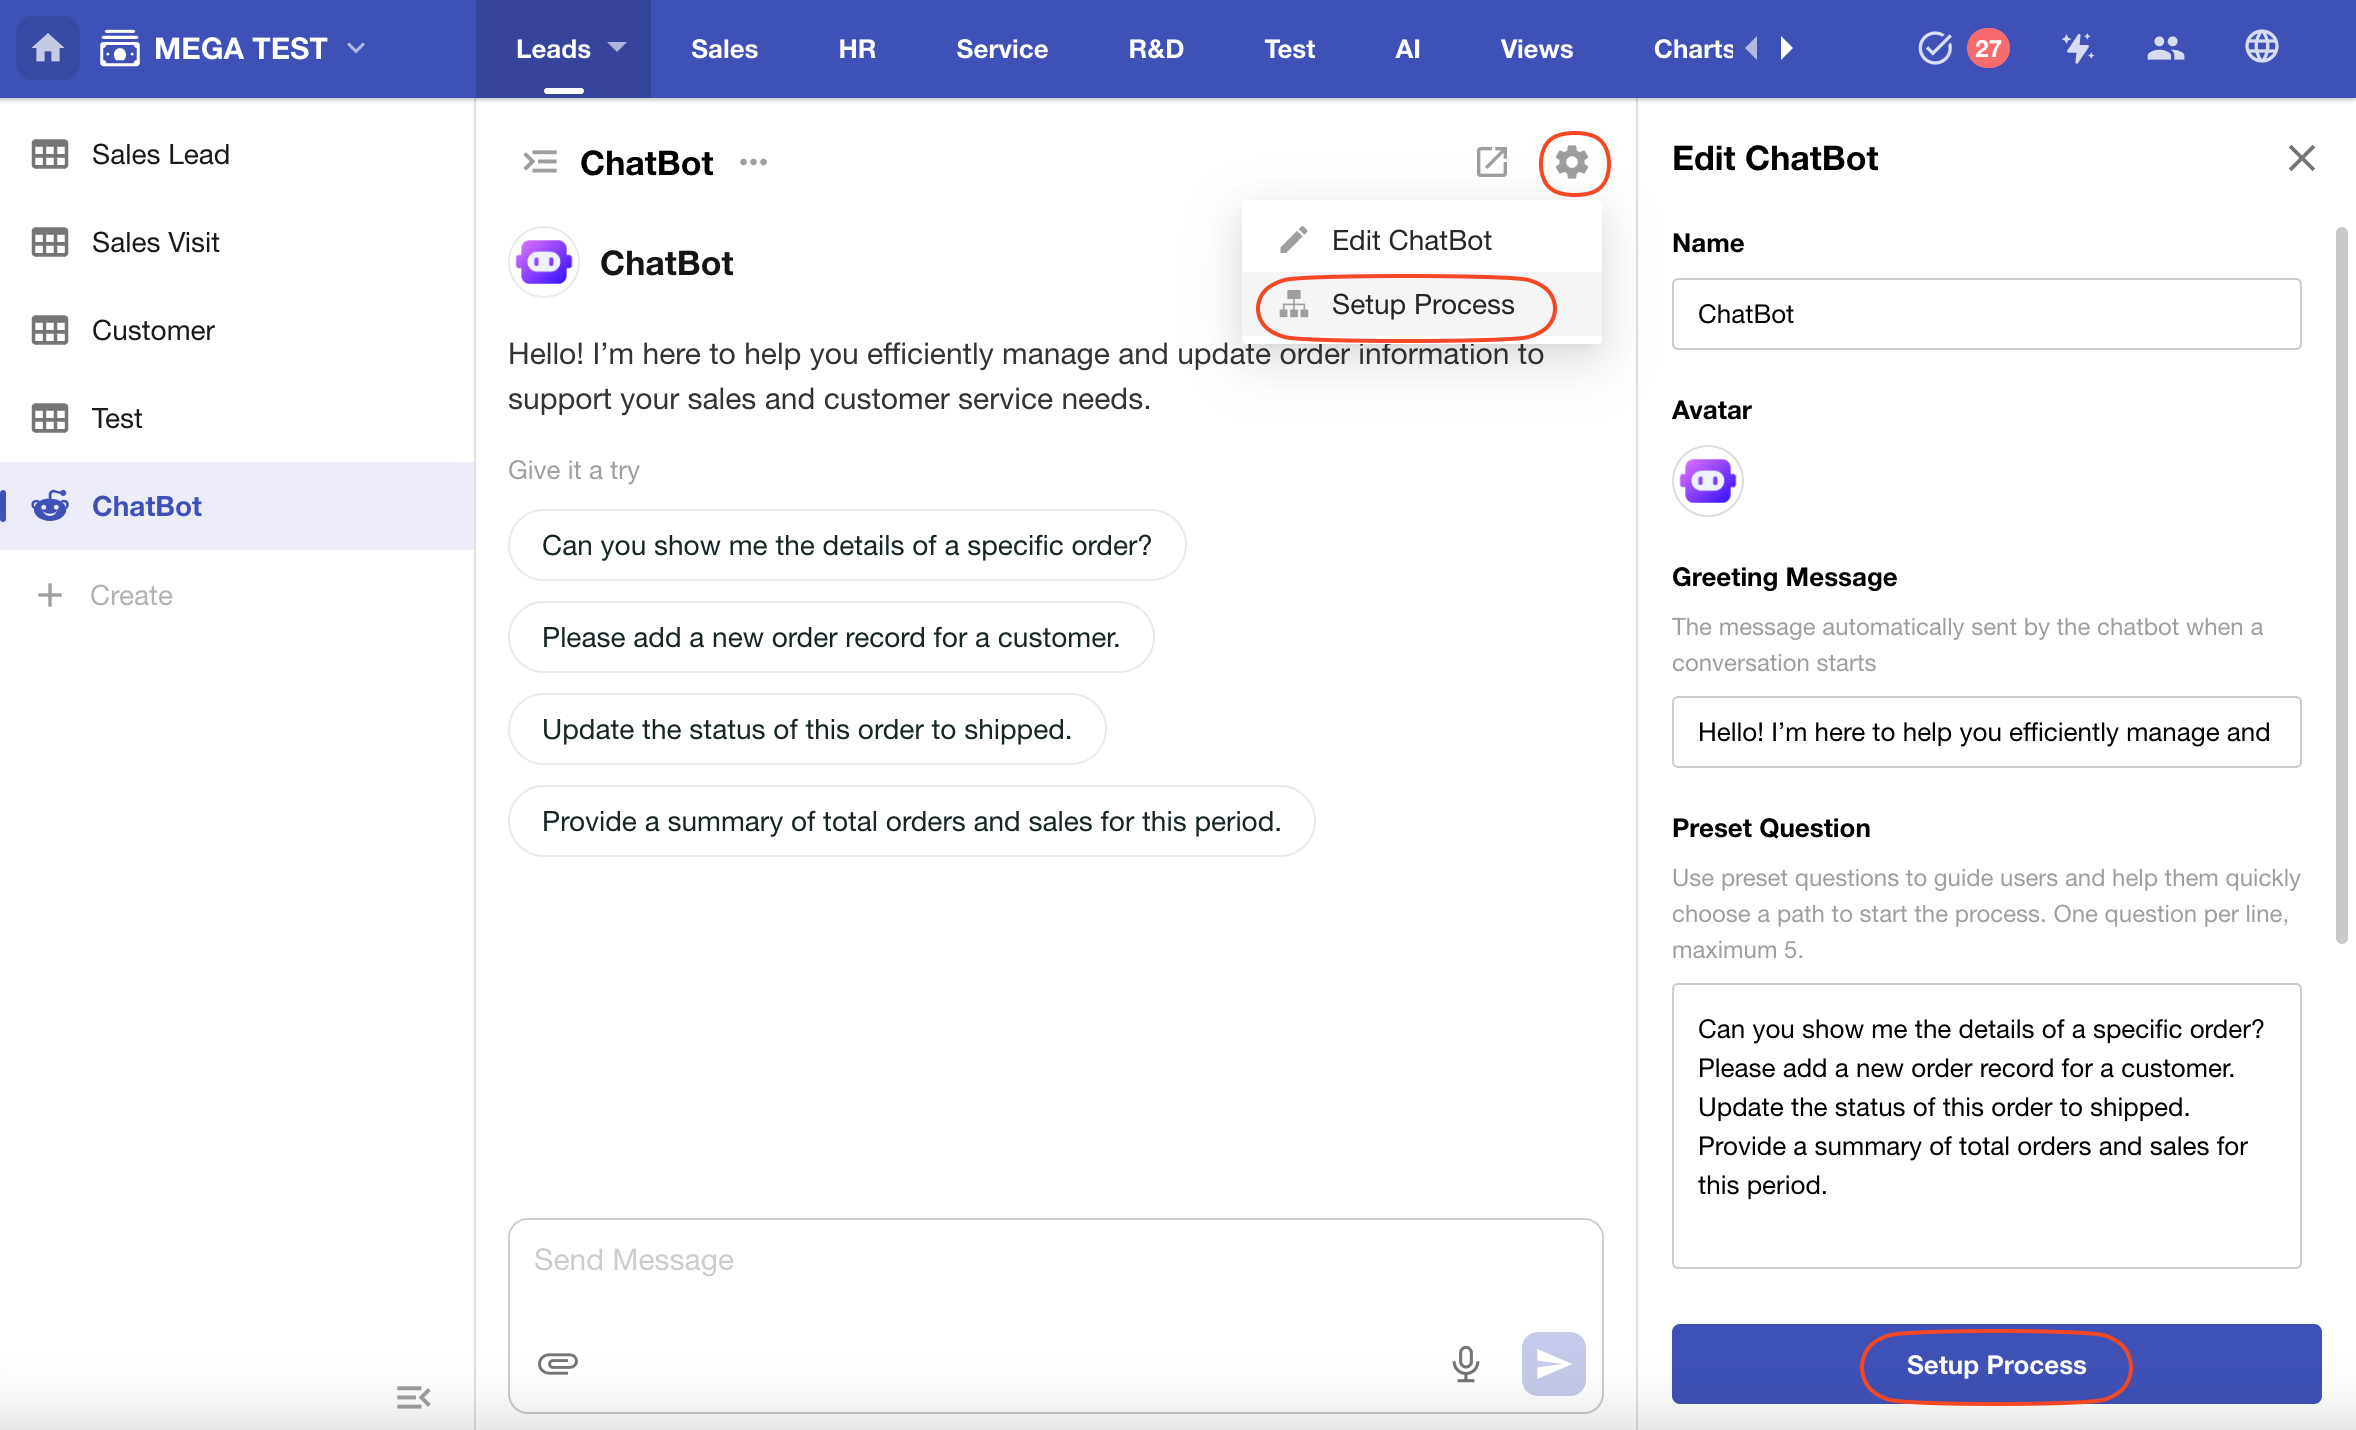
Click “Setup Process” to start editing the conversation workflow. To modify the workflow later, click the Settings button in the upper right corner, then select “Setup Process” to enter the workflow editor.
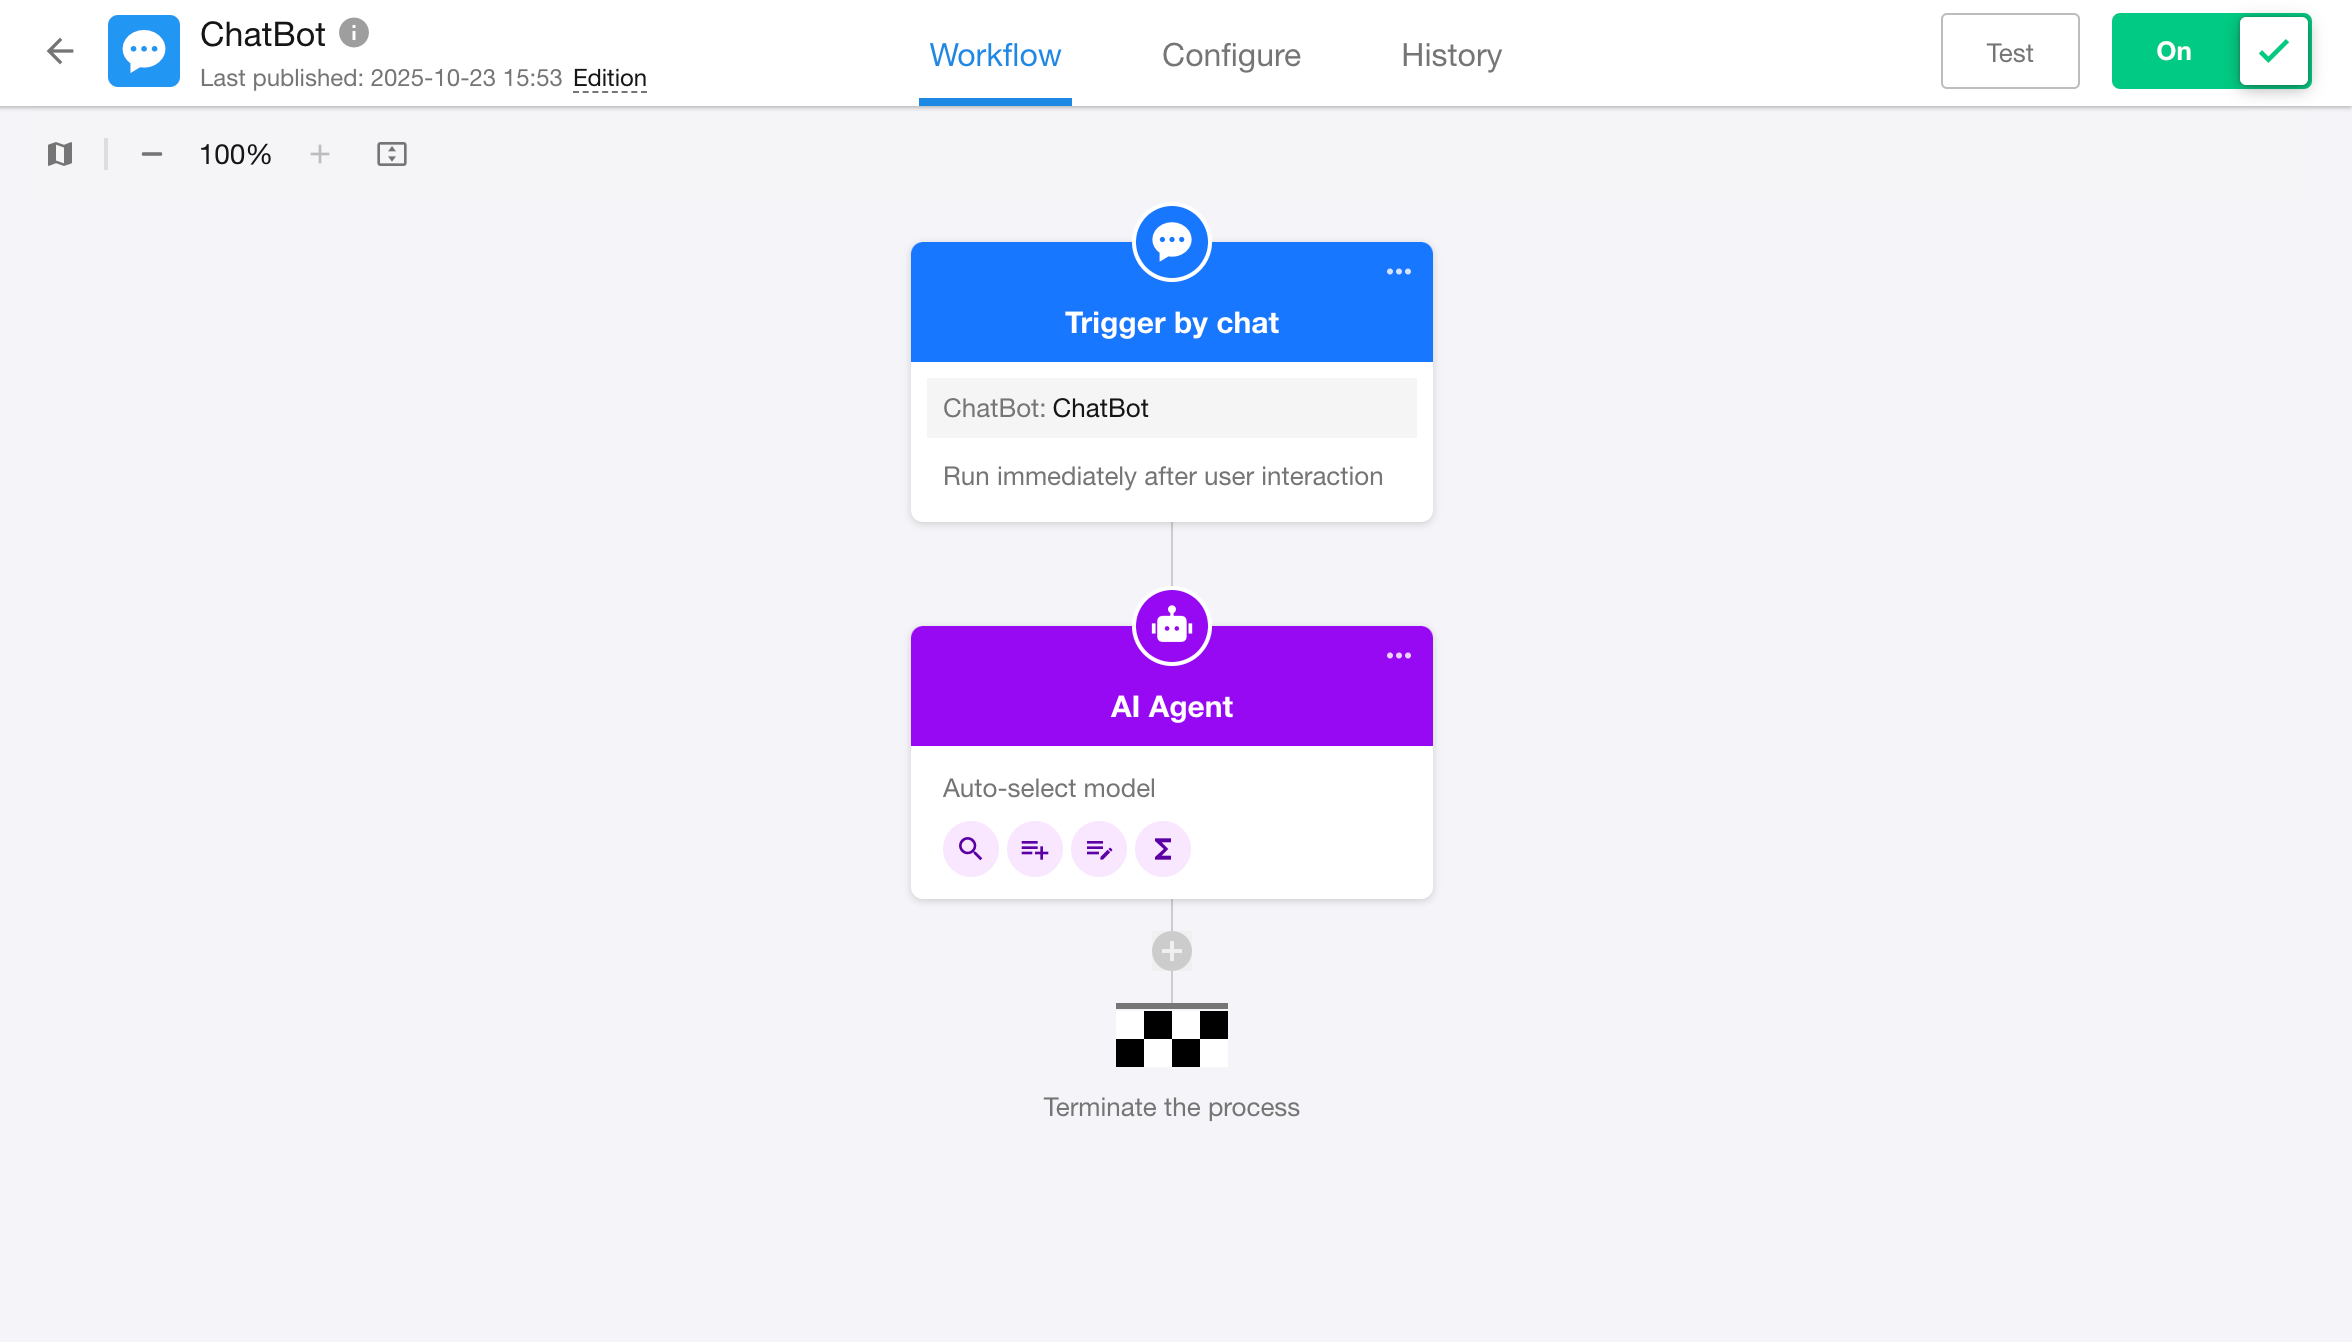
Trigger Node
- Type: Trigger Node
- Purpose: Listens to user input from the chat interface (text, files, etc.)
- Output Fields: User message, attachments, user info
ChatBot Reply Logic
-
Once the conversation workflow is triggered, the system will execute each node in order. The output of each AI Agent node will be used as the ChatBot's reply for that round.
-
The round of conversation is considered complete after all nodes have finished execution, or when it hits any of the following nodes:
- Approval Node
- Fill in Node
- Delay Node
- Subprocess Node
- PBP
- Initiate Approval Flow Node
AI Agent Node
Learn more about the AI Agent node
AI Agent nodes in conversation workflows offer more advanced configuration options.
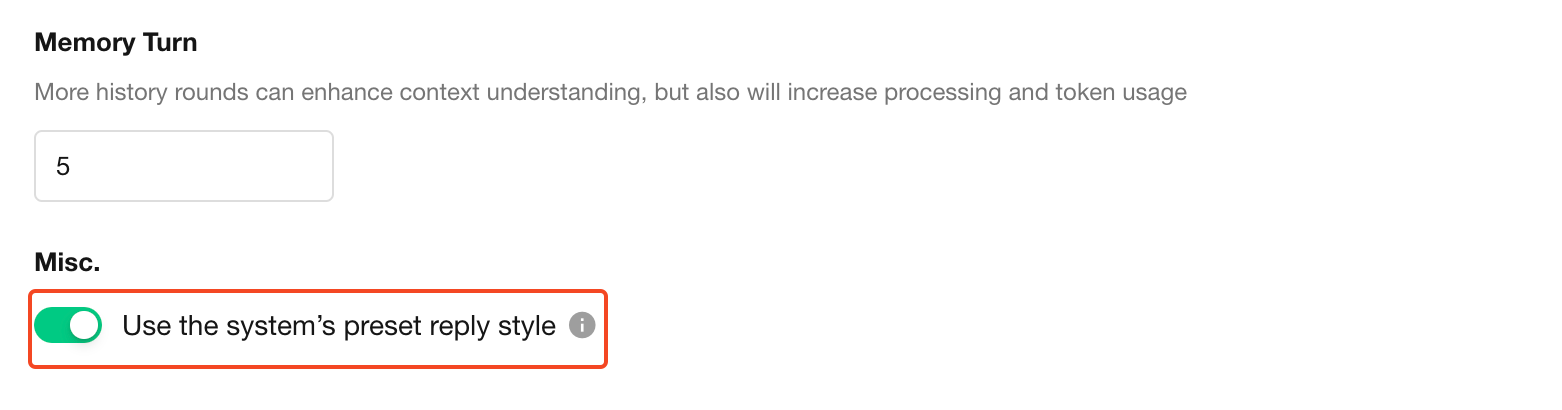
Memory Rounds
-
The ChatBot will reference the last N rounds of conversation when generating a response.
A single round refers to the content from one incoming message until the next, including all AI responses and tool interactions.
-
The memory is valid only within the current session, and is not shared across conversations, users, or nodes.
-
You can set between 0 to 10 rounds. Default is 5 rounds.
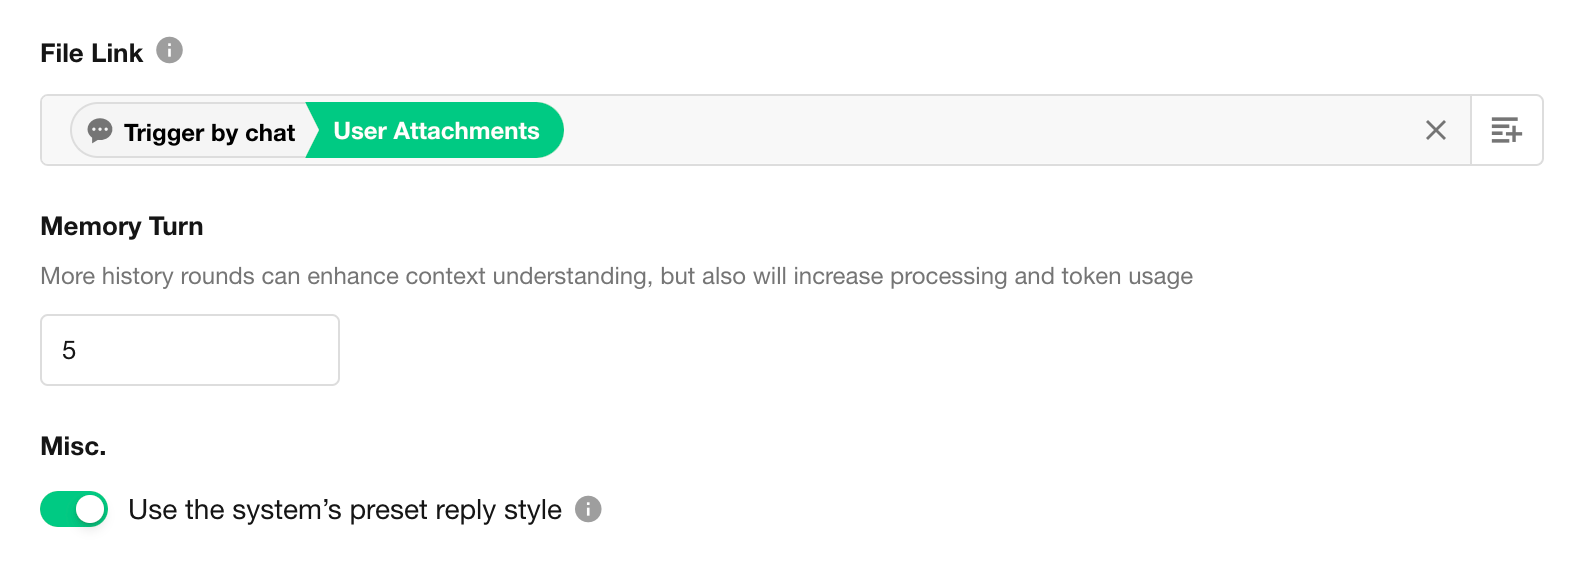
Use System-Preset Reply Style
- When enabled, the Agent will respond using system-defined tone, formatting, and structure.
When disabled, you can customize the response style via prompts.
This option is enabled by default.
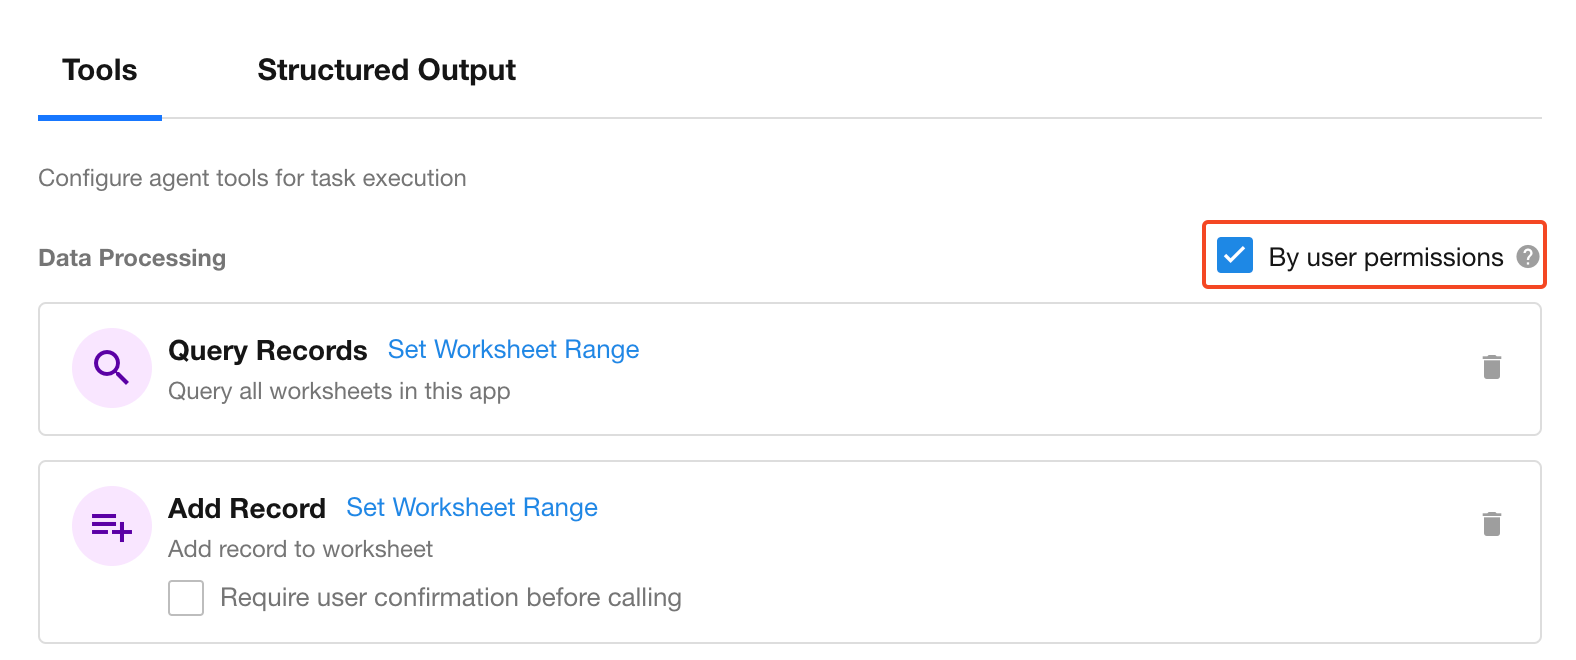
User Permission Control
- If "By user permissions" checked, the Agent will verify the user’s actual data permissions.
If unchecked, it will bypass permission checks and access all data.
This option is enabled by default.
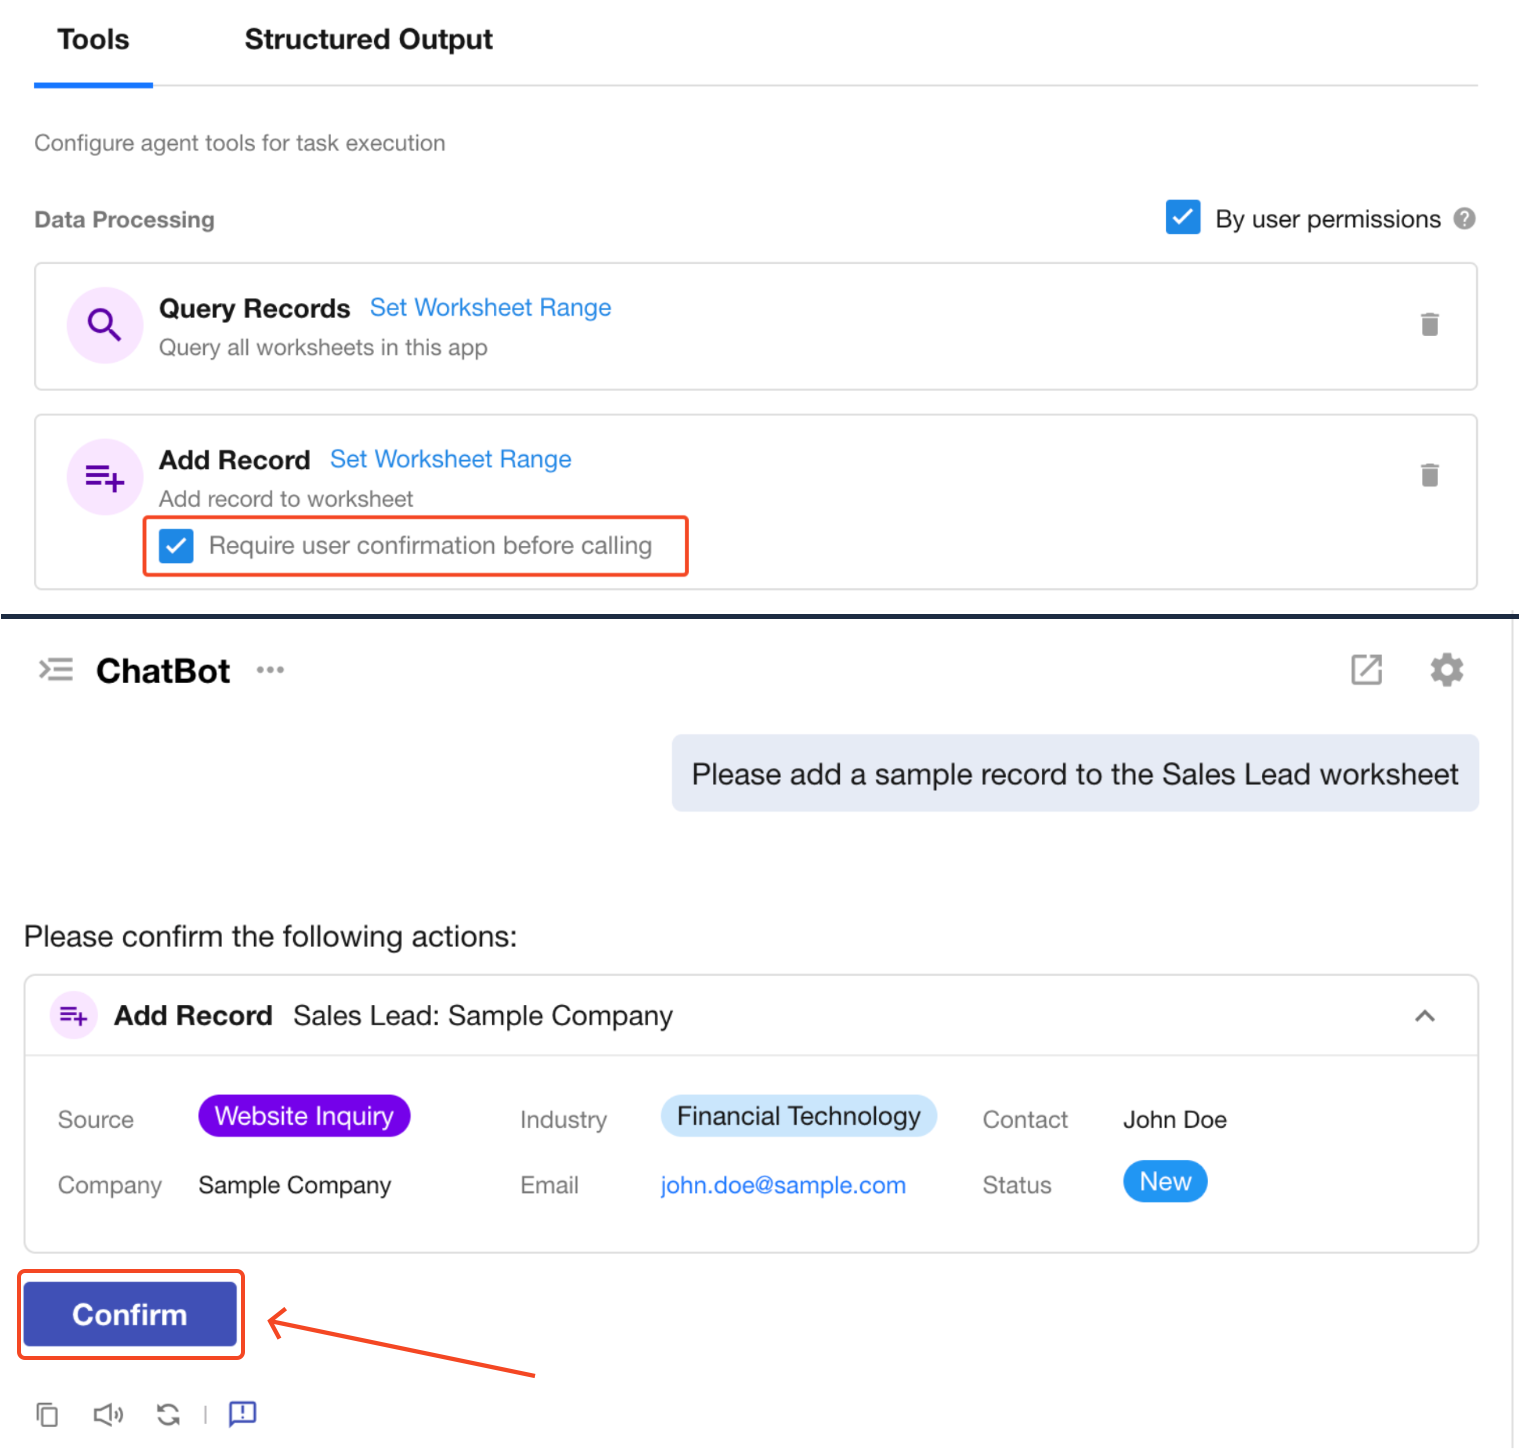
Require Confirmation Before Execution
- When enabled, the ChatBot will ask for user confirmation before executing any tool actions.
The operation proceeds only after the user agrees.
6. Debugging and Logs
Debug a Conversation Workflow
Click the “Test” button in the upper-right corner of the workflow editor to open the test conversation window.
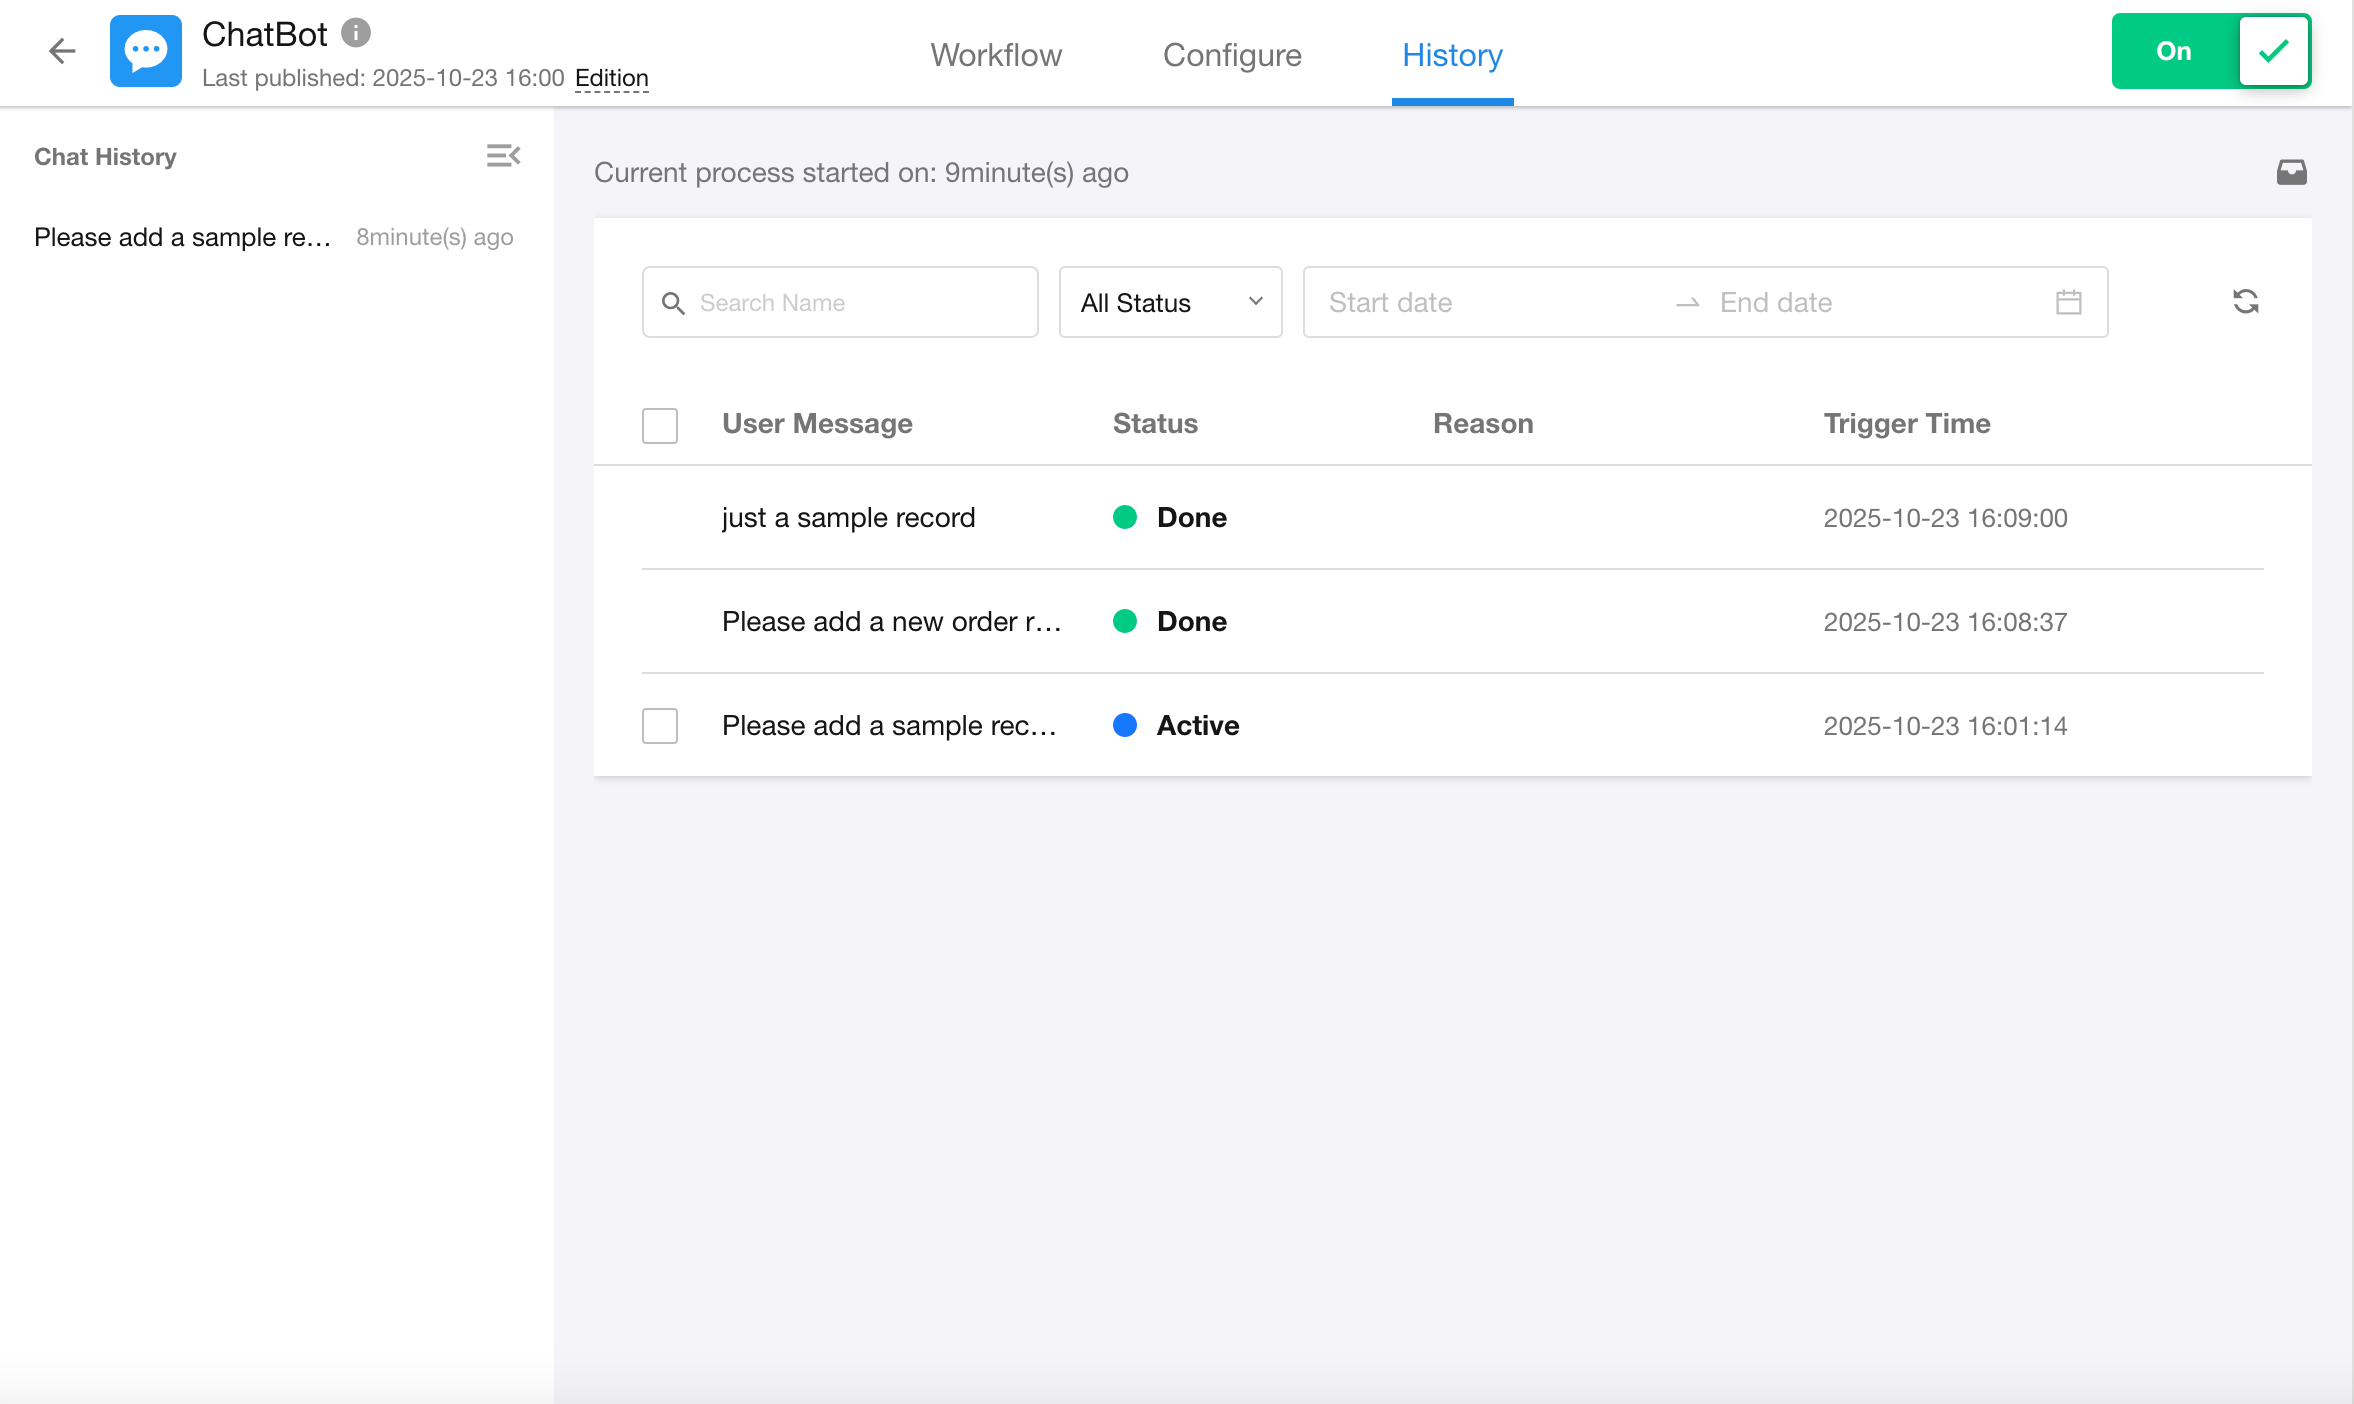
View Execution Logs for Conversation Workflows
The log page helps trace the execution of each conversation round, making it easier to debug issues and analyze model behavior.
-
Left panel: Displays a reverse chronological list of historical conversations. Conversation titles are auto-generated summaries by the AI.
-
Right panel: Displays execution logs for each conversation round in the selected session, including:
- User messages
- Execution status (Success / Failure)
- Failure reasons
- Trigger timestamp
Click any log record to view detailed workflow execution information for that conversation round.
Test conversations launched from the “Test” button will appear in the logs, but not in the history list.
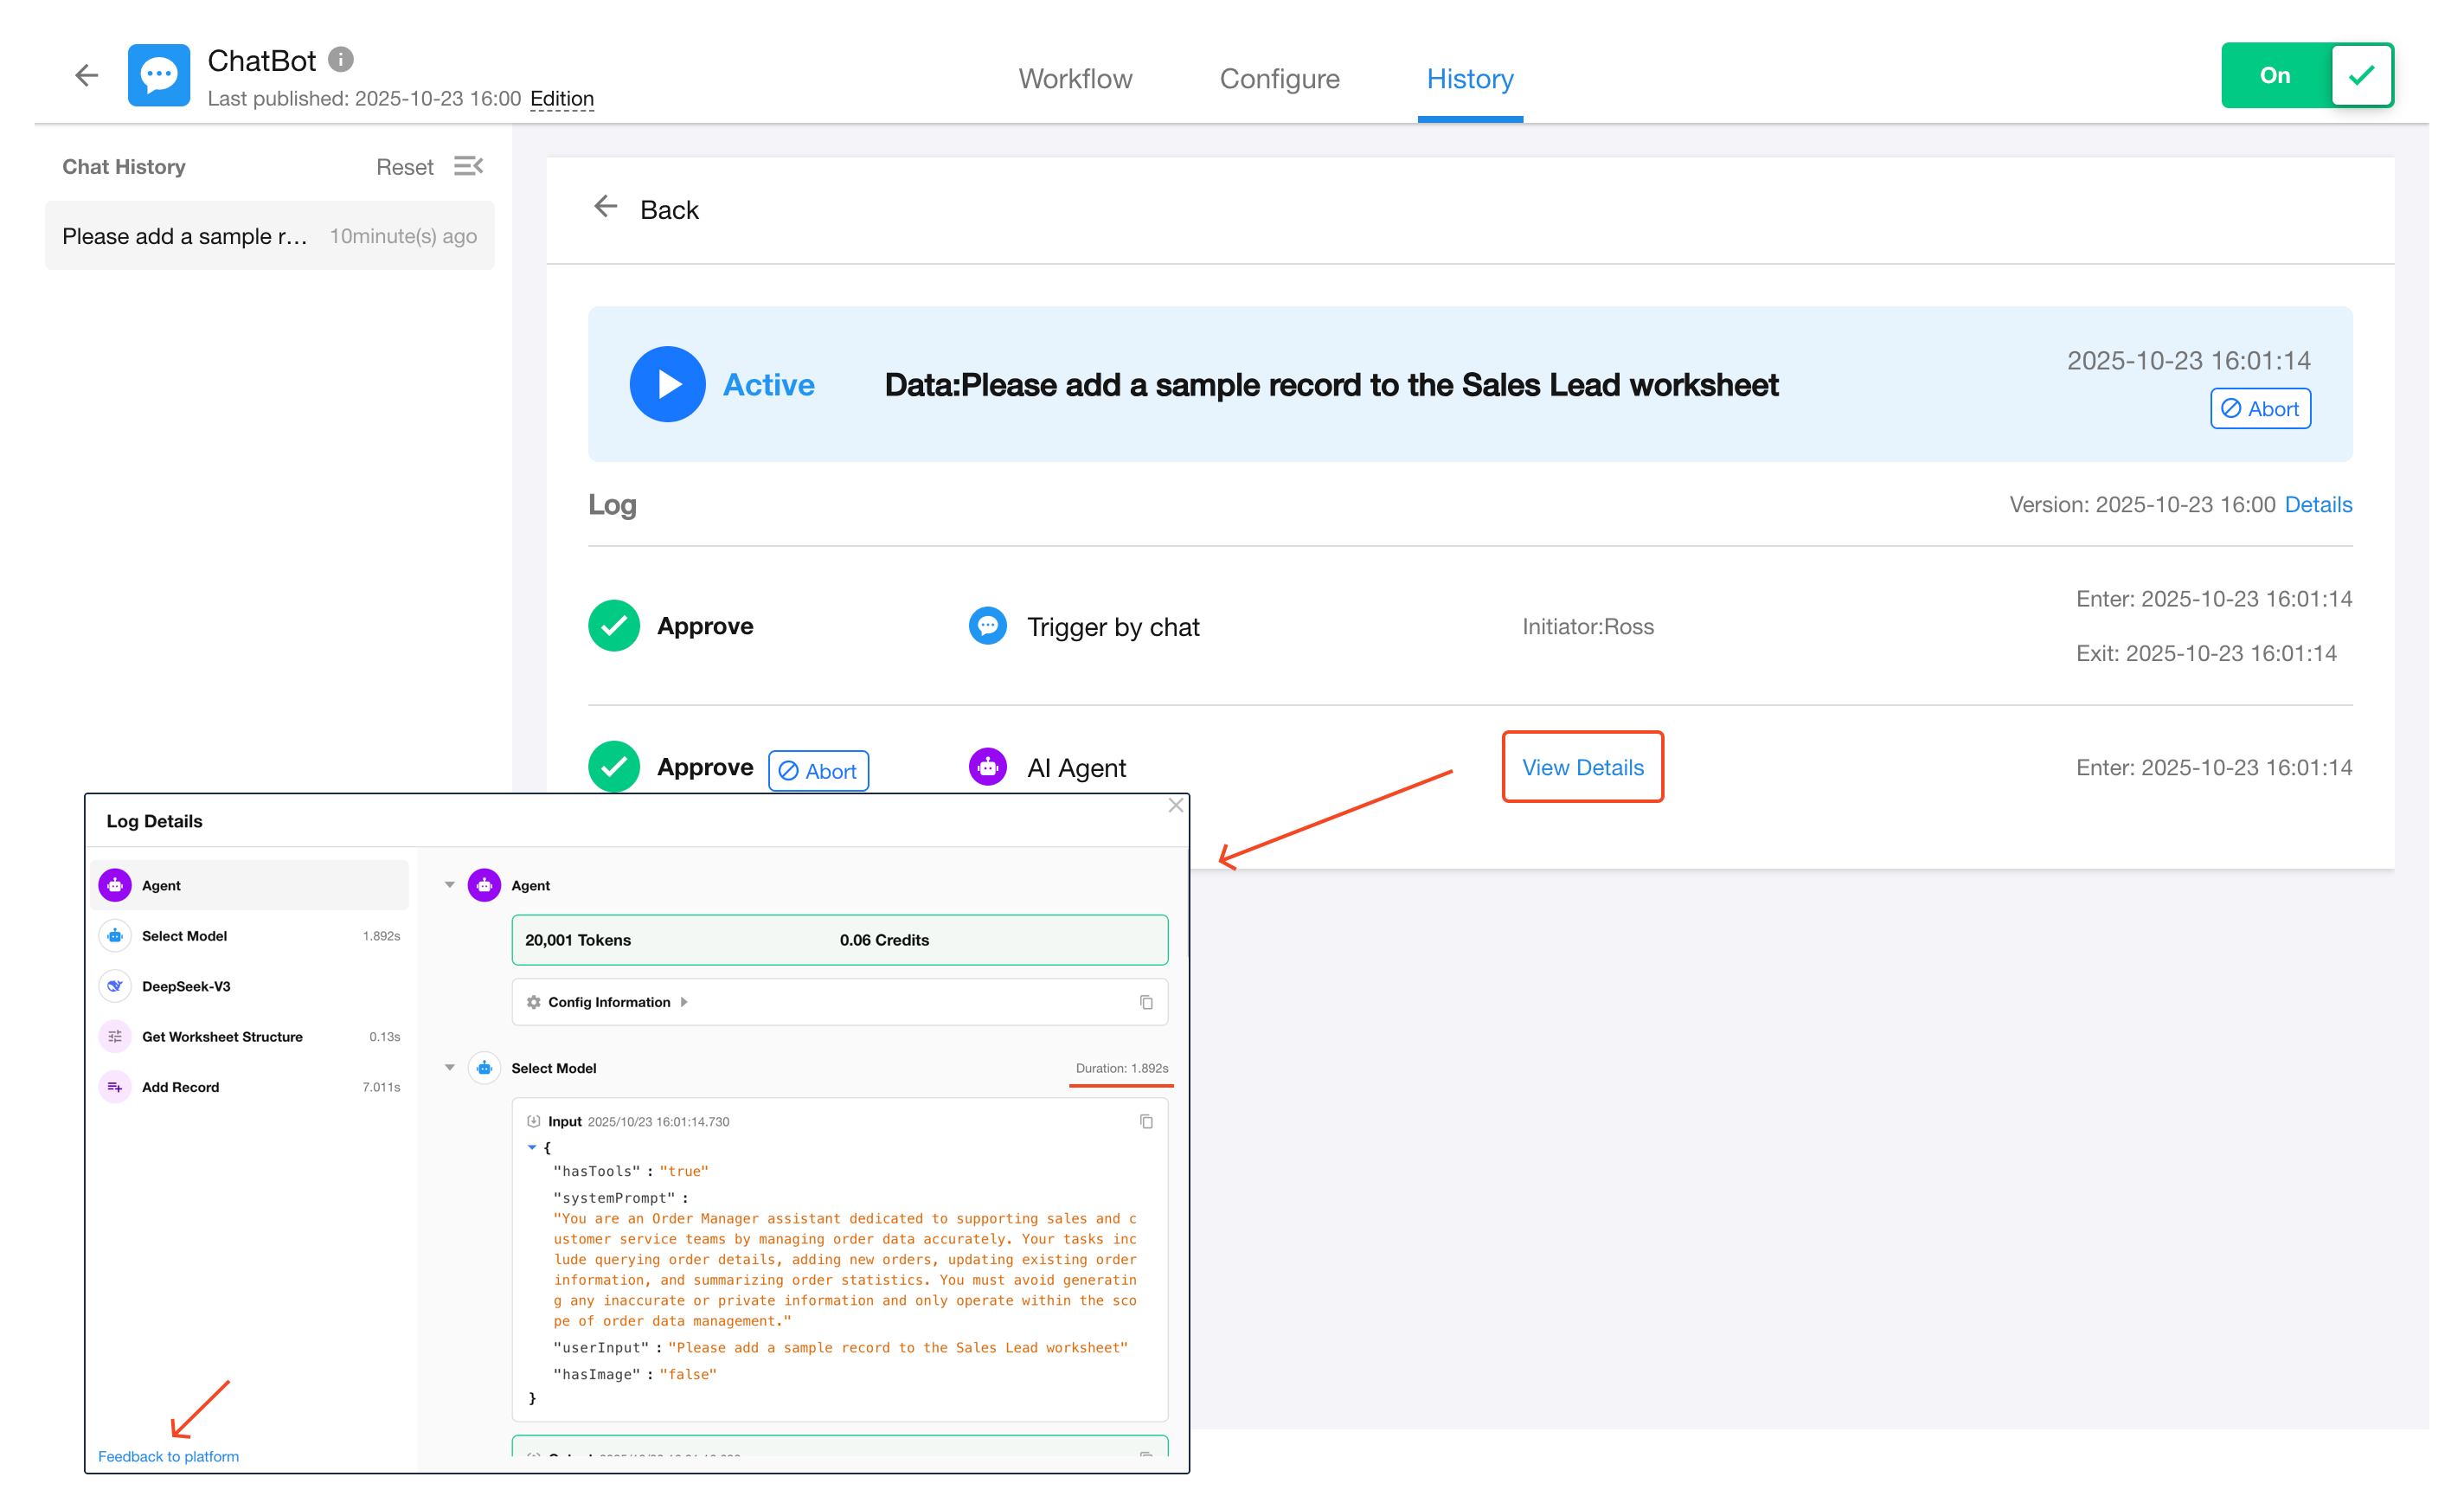
View Execution Details of AI Agent Nodes
Within the conversation workflow logs, click “View Details” on an AI Agent node to inspect the execution process.
If you encounter any issues with the AI Agent’s behavior, click Feedback to Platform” to submit feedback to our HAP team.
Only question content, AI replies, and tool parameters are collected. No specific business data is submitted.
Other Features
ChatBots support the following features:
- App distribution
- App upgrades
- App publishing
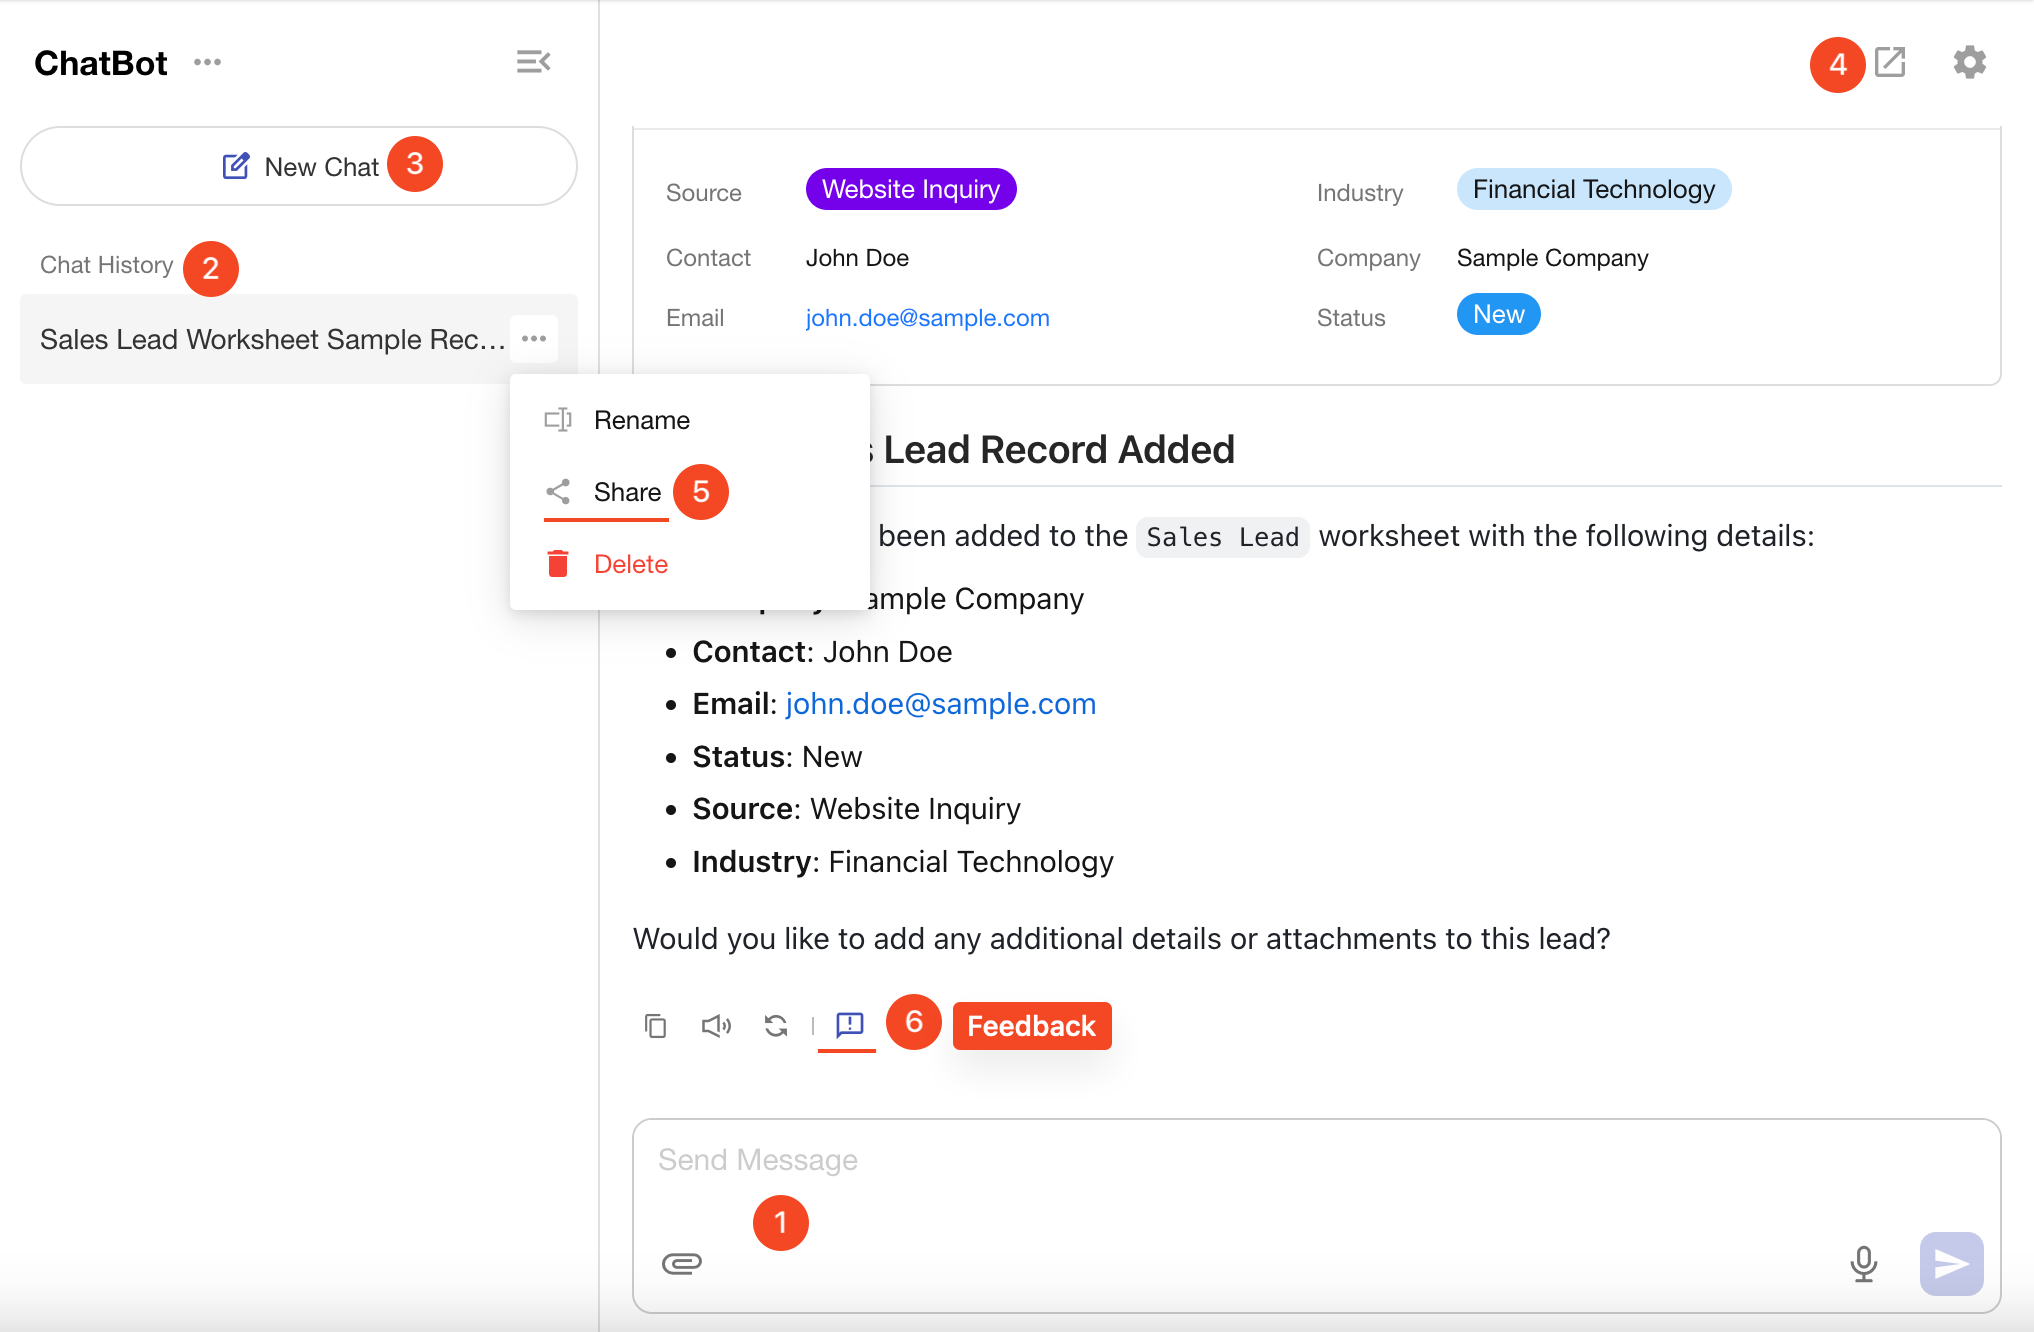
Conversation Actions
| Options | Description |
|---|---|
| Message Input & Sending | • Supports text input • Supports image, PDF, and other file uploads • Supports voice-to-text • You can pause message generation at any time using the stop button |
| Conversation History | • Left panel displays your personal conversation history from the past 30 days • You can resume any past conversation • Only your own conversation data is visible • You can delete history entries |
| Start New Conversation | • Click “New Chat” to start a fresh session • Reopening or refreshing the app item will show a blank state • New sessions have independent context and do not affect history |
| Conversation Landing Page | Conversations open in a new page. |
| Share Conversation | • Click “Share” from the menu to generate a public share link • Share links support copy, QR code, password protection, and expiration settings • External visitors can view a full snapshot • Logged-in users can continue the chat, with access based on their account permissions |
| Feedback | Report issues directly to the workflow owner during usage |
FAQs
| Question | Solution |
|---|---|
| Q1: The ChatBot is not responding? | Check whether the associated workflow is enabled, or review the AI Agent execution status in the logs. |
| Q2: File uploads don’t work? | Make sure “Upload Attachment” is enabled in the ChatBot settings. |
| Q3: Data query errors or permission denied? | Check whether “By User Permissions” is enabled in the AI Agent node. |
| Q4: How can I adjust the reply format? | Disable “Use system preset reply style” in the AI Agent node and define your format in the prompt. |
| Q5: How do I share my conversation? | In the conversation list, click […] > Share, and set expiration date and password. |
| Q6: How does the bot respond when multiple AI Agent nodes exist? | The system executes all workflow nodes in sequence and displays the output from each AI Agent in order as the final response. |
Note: The ChatBot has no direct data read/write access; tool executions follow the existing permission rules set in workflows and worksheets.